Commit 8c391c53caf for woocommerce
commit 8c391c53caf0ed6977e027debc970ff02c670e23
Author: Seghir Nadir <nadir.seghir@gmail.com>
Date: Tue Sep 8 13:22:18 2026 +0200
Remove archived Blocks release testing documentation (#68463)
* Remove archived Blocks release testing documentation
* Add changelog entries for archived Blocks docs removal
* Remove trailing blank line from changelog entry
diff --git a/plugins/woocommerce/changelog/remove-old-blocks-release-testing b/plugins/woocommerce/changelog/remove-old-blocks-release-testing
new file mode 100644
index 00000000000..d3bcca1e564
--- /dev/null
+++ b/plugins/woocommerce/changelog/remove-old-blocks-release-testing
@@ -0,0 +1,3 @@
+Significance: patch
+Type: dev
+Comment: Remove archived Blocks release testing documentation and its index links.
diff --git a/plugins/woocommerce/client/blocks/changelog/remove-old-blocks-release-testing b/plugins/woocommerce/client/blocks/changelog/remove-old-blocks-release-testing
new file mode 100644
index 00000000000..d3bcca1e564
--- /dev/null
+++ b/plugins/woocommerce/client/blocks/changelog/remove-old-blocks-release-testing
@@ -0,0 +1,3 @@
+Significance: patch
+Type: dev
+Comment: Remove archived Blocks release testing documentation and its index links.
diff --git a/plugins/woocommerce/client/blocks/docs/README.md b/plugins/woocommerce/client/blocks/docs/README.md
index 5c872015e65..aaea2a03114 100644
--- a/plugins/woocommerce/client/blocks/docs/README.md
+++ b/plugins/woocommerce/client/blocks/docs/README.md
@@ -66,7 +66,6 @@ The WooCommerce Blocks Handbook provides documentation for designers and develop
- [Taxes](internal-developers/testing/cart-checkout/taxes.md)
- [Coupons](internal-developers/testing/cart-checkout/coupons.md)
- [Compatibility](internal-developers/testing/cart-checkout/compatibility.md)
- - [Releases](internal-developers/testing/releases/README.md)
- [Translations](internal-developers/translations/README.md)
- [Translation basics](internal-developers/translations/translation-basics.md)
- [Translations in PHP files](internal-developers/translations/translations-in-PHP-files.md)
diff --git a/plugins/woocommerce/client/blocks/docs/internal-developers/testing/README.md b/plugins/woocommerce/client/blocks/docs/internal-developers/testing/README.md
index 4d9df233f88..09cd4bf3316 100644
--- a/plugins/woocommerce/client/blocks/docs/internal-developers/testing/README.md
+++ b/plugins/woocommerce/client/blocks/docs/internal-developers/testing/README.md
@@ -7,4 +7,3 @@ This folder contains documentation around manual testing of WooCommerce Blocks.
| [When to employ end to end testing](when-to-employ-e2e-testing.md) | This doc explains when End to End tests should be used and when unit tests will suffice. |
| [Smoke Testing](smoke-testing.md) | This doc explains how to smoke test key Blocks functionality. |
| [Cart and Checkout Testing](cart-checkout/README.md) | Various testing flows for Cart and Checkout Blocks |
-| [Releases](releases/README.md) | We document all testing flows for releases in this folder |
diff --git a/plugins/woocommerce/client/blocks/docs/internal-developers/testing/releases/1000.md b/plugins/woocommerce/client/blocks/docs/internal-developers/testing/releases/1000.md
deleted file mode 100644
index 436a8d28344..00000000000
--- a/plugins/woocommerce/client/blocks/docs/internal-developers/testing/releases/1000.md
+++ /dev/null
@@ -1,295 +0,0 @@
-# Testing notes and ZIP for release 10.0.0
-
-Zip file for testing: [woocommerce-gutenberg-products-block.zip](https://github.com/woocommerce/woocommerce-blocks/files/11190253/woocommerce-gutenberg-products-block.zip)
-
-## WooCommerce Core
-
-### Prevent error when entering postcode for countries without specific validation rules [(8987)](https://github.com/woocommerce/woocommerce-blocks/pull/8987)
-
-1. Ensure the shipping calculator is enabled on the Cart block.
-2. Add an item to your cart and go to the Cart block.
-3. Use the shipping calculator to enter an address, choose Albania as your country. Ensure you can enter a postcode with no errors.
-4. Add an item to your cart and go to the Checkout block. Ensure there are no errors on the shipping fields.
-5. Enter Afghanistan as your shipping country. Ensure the form does not error.
-6. Enter any value into the postcode field, ensure you can type it in without any issues.
-7. Place the order and verify it works.
-
-### Stop displaying decimals in Filter by Price ([8975](https://github.com/woocommerce/woocommerce-blocks/pull/8975))
-
-1. Edit Product Catalog template in Editor
-2. Add Filter by Price and Products block
-3. Save
-4. **Expected:** Filter by Price displays ONLY whole numbers, skipping decimals in both Editor and Frontend
-5. **Expected:** Smoke test the inputs and sliders - check that input and slider values are synchronized
-6. Change Filter by Price "PRICE RANGE SELECTOR" setting from "Editable" to "Text" and repeat the above
-7. Verify that other prices (e.g. in Products block) display full price with decimals. Remember the number of decimals may depend on the currency, but for the majority of currencies, you should see two minor units, e.g. $19.99.
-
-### No shipping: Convert error notice to warning notice ([8969](https://github.com/woocommerce/woocommerce-blocks/pull/8969))
-
-1. WooCommerce > Settings > Shipping
-2. Create a shipping zone for the UK with flat rate
-3. Remove all rates from "everywhere else"
-4. Go to checkout and enter a non-UK address
-5. See the notice in the shipping options section
-
-### Checkout Block: Avoid using editor buttons in the post content to prevent inheriting global styles ([8957](https://github.com/woocommerce/woocommerce-blocks/pull/8957))
-
-#### Express payments
-
-1. With no express payment methods setup
-2. Edit the checkout page
-5. You should not see an express payment method placeholder at the top of the checkout
-6. Enable an express payment method such as Stripe
-7. Edit the checkout page. You should see the express payment block now
-
-#### Payment methods
-
-1. With some payment methods setup e.g. BACS
-2. Edit the checkout page
-3. Confirm payment method block displays normally
-4. Go to WooCommerce > Settings > Payments
-5. Disable all payment methods
-6. Edit the checkout page
-7. Confirm a notice is shown in place of the block
-8. Click on the notice.
-9. Open the block inspector
-10. See the notice telling you to configure payment methods
-
-#### Terms and conditions
-
-1. Ensure your Privacy Policy and Terms and conditions pages are published. If you don't have either of these pages, create them, and ensure they are published. (It is not important what is in the content of the pages, they can be blank.)
-2. Go to Settings > privacy and unset the privacy page
-3. Go to WooCommerce > Settings > Advanced and ensure a terms page has been configured
-4. Edit the checkout page
-5. Focus on the terms and conditions block
-6. Open the block inspector. See the notice telling you to configure pages.
-7. Go to Settings > privacy and set the privacy page to a valid published page
-8. Edit the checkout page
-9. Focus on the terms and conditions block
-10. There should be no notice if both pages are configured
-11. Edit the block content and remove one of the links to either the privacy page or the terms page
-12. The inspector should show a notice to restore default content
-
-### Remove isExperimentalBuild Checks in Classic Template Block ([8902](https://github.com/woocommerce/woocommerce-blocks/pull/8902))
-
-#### Prerequisites
-
-WordPress: >=6.1
-Make sure `Single Product` template customizations are reset to the default state:
-
-1. Go to (`/wp-admin/site-editor.php?postType=wp_template`)
-2. Click three dots next to the template and click `Clear customizations`
-
-#### Steps
-
-1. Enter the `Single Product` template.
-2. Check that the placeholder description says "This block serves as a placeholder for your WooCommerce Single Product Block. We recommend upgrading to the Single Products block for more features to edit your products visually. Don't worry, you can always revert back.".
-3. Click the `Upgrade to Blockified Single Product Template` button.
-4. See new templates work in the Site Editor and on the front end.
-5. Ensure there are no side-effects to this change and everything functions as-expected.
-
-### Product Image Gallery: Prevent image placeholder from going outside its wrapper ([8901](https://github.com/woocommerce/woocommerce-blocks/pull/8901))
-
-1. Log in to your WordPress dashboard;
-2. Go to Appearance > Themes, and select a block theme (for example: Twenty-twenty three);
-3. Go to Appearance > Site Editor (Beta);
-4. Go to Templates > Single Product;
-5. Click the Edit button;
-6. Click on the "+" icon to add a new block and search for "Product Image Gallery" block in the search bar;
-7. Click on the "Product Image Gallery" block, and add it to the editor;
-8. Resize the window and make sure that the placeholder image adjusts itself to the block wrapping it
-
-### Set Cart and Checkout blocks to be wide aligned by default ([8899](https://github.com/woocommerce/woocommerce-blocks/pull/8899))
-
-1. Activate the Twenty Twenty-Three theme
-2. Create a new page and insert the Cart block.
-3. Ensure it renders in a two-column layout, with the cart items on the left and the order totals on the right.
-4. Select the Cart block (you may need to do this from the block list, because you might select inner blocks) and change the alignment to "none".
-5. Ensure this changes the layout to a single column.
-6. Save the page, go to the front-end and add a product to your Cart.
-7. View the page you just saved on the front-end. Ensure the alignment is set correctly and you see the correct width.
-8. Go back to the page editor and delete the Cart block. Repeat these steps for the Checkout block.
-
-### Add "Collection from..." in Checkout sidebar when selecting local pickup ([8305](https://github.com/woocommerce/woocommerce-blocks/pull/8305))
-
-1. Enable the built-in local pickup method (WooCommerce -> Settings -> Shipping -> Local pickup) and add two locations. Please ensure you set a different address for both of these locations.
-2. Enable some different regular shipping methods (flat rate, free) for your zone too.
-3. Add at least two items to your cart and go to the Checkout page.
-4. For the `Shipping Method` option, select "Shipping"
-5. Fill in your address and ensure the rates you set up in step 2 are shown. Select one.
-6. In the Checkout sidebar, ensure you see the correct rate, and your entered address.
-7. Return to the `Shipping Method` option, select "Local pickup"
-8. Check the sidebar and ensure the sidebar shows local pickup, and shows the address for the pickup location you have chosen.
-9. Change the location and ensure the sidebar updates.
-
-### Product Rating: Normalize the height of icons and the add review link ([8399](https://github.com/woocommerce/woocommerce-blocks/pull/8399))
-
-1. Add a new page and the **Products** block.
-2. Add the **Product Rating** block.
-3. Make sure you have a product that doesn't have any ratings and one that does have at least one.
-4. Notice that now the product element below the Rating displays _in line_.
-
-### Add additionalCartCheckoutInnerBlockTypes filter to enable additional blocks in the Cart/Checkout blocks. ([8650](https://github.com/woocommerce/woocommerce-blocks/pull/8650))
-
-1. Add the Cart block to a page in the editor. Click into a few inner blocks and ensure the 'core/paragraph', 'core/image', 'core/separator' blocks are available for each.
-2. Repeat for the Checkout block.
-3. Ensure the Cart and Checkout blocks work correctly on the front end by placing an order.
-
-### Feature Branch: Updated Shopper Notices ([8659](https://github.com/woocommerce/woocommerce-blocks/pull/8659))
-
-These test cases show how to trigger the new notices during certain activities.
-
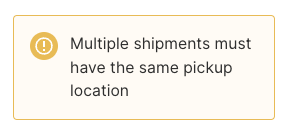
-#### Multiple packages notice
-
-1. Enable “Multiple Packages for WooCommerce” extension.
-2. Go to WooCommerce > Settings > Multiple packages
-3. Select "group by" product, then save changes.
-4. Add several items to your cart.
-5. Go to the cart page and choose “local pickup”
-6. See the “Multiple shipments must have the same pickup location” notice
-
-
-
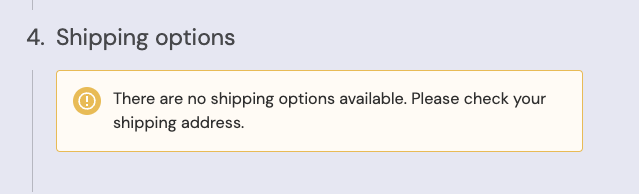
-#### No Shipping Options
-
-1. Turn off multiple packages and disable all shipping rates
-2. Go to checkout
-3. See “There are no shipping options available. Please check your shipping address.” In the shipping options section.
-
-
-
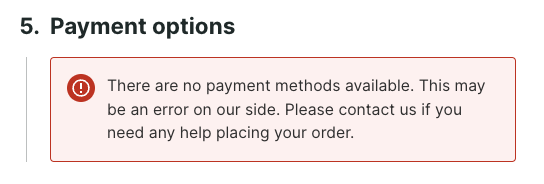
-#### No Payment Methods and top level errors
-
-1. Go to payment settings
-2. Toggle off all payment methods
-3. Go to checkout
-4. See payment options section for the notice.
-5. Try to place an order
-6. See notice at the head of the checkout
-
-
-
-
-
-#### Coupon form snackbars
-
-1. Go to the cart page
-2. Apply a valid coupon. See snackbar. Snackbar should vanish on its own after 10000ms.
-3. Remove the coupon. See snackbar. Snackbar should vanish on its own after 10000ms.
-
-
-
-
-### Add Product Reviews block ([8857](https://github.com/woocommerce/woocommerce-blocks/pull/8857))
-
-1. Have a product with at least one review.
-2. Go to Appearance > Editor > Single Product Template.
-3. Make sure the “Product Reviews” block appears in the inserter and add it.
-4. Make sure a placeholder appears in the editor and save.
-5. Go to the front end and make sure that the reviews are correctly shown.
-
-### Fix duplicated Shipping method Block on the front-end ([8861](https://github.com/woocommerce/woocommerce-blocks/pull/8861))
-
-1. Go to `WooCommerce -> Settings -> Shipping -> Local pickup`. Enable Local Pickup
-2. Add a Pickup location under `Pickup locations -> Add pickup location`, and click on `Save changes`
-3. Add a product to the cart.
-4. Go to the Checkout Block page. Ensure you have a non-duplicated "Shipping method" section
- <img width="400" alt="image" src="https://user-images.githubusercontent.com/14235870/227878457-515b1981-093d-411a-81e4-c8b22748b43f.png">
-5. Edit the default description of the "Shipping method" Block in the editor. Ensure it contains a special character (e.g., `., !`)
-6. Go to the Checkout Block page. Ensure you still have a non-duplicated "Shipping method" section
-
-<img width="400" alt="image" src="https://user-images.githubusercontent.com/14235870/227878739-6b56c5e7-0cd0-4003-ad1a-6030c8e61408.png">
-
-### Show Cart and Checkout blocks in Style Book ([8888](https://github.com/woocommerce/woocommerce-blocks/pull/8888))
-
-1. Ensure that a block theme is installed, e.g. [TT3](https://wordpress.org/themes/twentytwentythree/) and install [Gutenberg v15.1.0](https://github.com/WordPress/gutenberg/releases/download/v15.1.0/gutenberg.zip)
-2. Go to `WP Admin » Appearance » Editor`.
-3. Select a template (e.g. Templates > Single Product) then click the blue `Edit` button and then click the `Styles` icon in the upper-right corner.
- <img width="273" alt="Screenshot 2023-02-21 at 13 23 00" src="https://user-images.githubusercontent.com/3323310/220263914-44b7013d-c98a-4008-b3ab-a00330d73d22.png">
-4. Click on the `Open Style Book` icon (the one that looks like an eye)
- <img width="282" alt="Screenshot 2023-02-21 at 13 23 24" src="https://user-images.githubusercontent.com/3323310/220263978-e0f6e679-a3b4-43be-93a0-c8521b9dea9a.png">
-5. Verify that both the Cart and the Checkout blocks are visible.
-
-Kindly note that the Cart and the Checkout blocks will not appear in the blocks sidebar, as they do not support Global Styles yet:
-<img width="279" alt="Screenshot 2023-02-21 at 13 24 58" src="https://user-images.githubusercontent.com/3323310/220264263-3ce8a9f2-8302-4b0c-9e3b-6851453ca573.png">
-
-#### Testing previews
-
-Ensure gutenberg plugin is active.
-
-1. Create a new page
-2. Click the plus (top left) to open the block inserter
-3. Find the cart/checkout blocks. Hover over them to see the preview.
-4. Preview should render—no crashing of the editor.
-
-
-
-## Feature Plugin
-
-### Product SKU: Adds support for color, typography, and spacing ([8913](https://github.com/woocommerce/woocommerce-blocks/pull/8913))
-
-#### Test using blocks sidebar
-
-1. Create a new page or post
-2. Add the "Products" block to your post.
-3. Add Product SKU block as an inner block if not included already
-4. Select the Product SKU block and open the block settings in the right sidebar.
-5. Customize the block using the new styling options available:
- - Change the text color, background color, font family, font size, font appearance, line height, letter spacing, text decoration, letter case, margin, and padding under the appropriate settings sections.
-6. Verify that the styling changes are immediately visible and applied correctly within the editor itself.
-7. Save the post, then view it on the front-end to ensure the styling changes are visible and applied correctly.
-
-#### Test using Global Styles
-
-1. Open the Global Styles sidebar by clicking the "Styles" button at the top right corner of the editor.
-
-[Video link](https://user-images.githubusercontent.com/16707866/228781997-24a9a29f-4be7-46d4-b1b3-41520692d86d.mov)
-
-2. In the Global Styles sidebar, locate the "Product SKU" block.
-3. Customize the block using the new styling options available under the "Product SKU" block in the Global Styles sidebar:
- - Change the text color, background color, font family, font size, font appearance, line height, letter spacing, text decoration, letter case, margin, and padding under the appropriate settings sections.
-4. Verify that these applied correctly within editor & on frontend:
- - Create a new post
- - Add Products block
- - Add Product SKU block as an inner block if not included already
- - Check the Product SKU block in both the editor and on the front-end to ensure that the changes made through the Global styles UI are accurately applied:
- - In the editor, inspect Product SKU block & ensure it matches the values set in the Global styles UI.
- - Save the post & publish it. On frontend, inspect Product SKU block & ensure it matches the values set in the Global styles UI.
-
-**Also, verify the changes in All Products block, which also uses Product SKU block.**
-
-### Product Price: support for background color, line height, font family, letter spacing, and padding ([8906](https://github.com/woocommerce/woocommerce-blocks/pull/8906))
-
-#### Test using blocks sidebar
-
-1. Create a new page or post
-2. Add the "Products" block to your post.
-3. Select the Product Price block and open the block settings in the right sidebar.
-4. Customize the block using the new styling options available:
- - Change the background color under the "Color" settings.
- - Adjust the line height, font family, and letter spacing under the "Typography" settings.
- - Modify the padding under the "Dimensions" settings.
-5. Verify that the styling changes are immediately visible and applied correctly within the editor itself.
-6. Save the post, then view it on the front-end to ensure the styling changes are visible and applied correctly.
-
-#### Test using blocks sidebar
-
-1. Open the Global Styles sidebar by clicking the "Styles" button at the top right corner of the editor.
-
-[Video link](https://user-images.githubusercontent.com/16707866/228781997-24a9a29f-4be7-46d4-b1b3-41520692d86d.mov)
-
-2. In the Global Styles sidebar, locate the "Product Price" block.
-3. Customize the block using the new styling options available under the "Product Price" block in the Global Styles sidebar:
- - Change the background color under the "Colors" settings.
- - Adjust the line height, font family, and letter spacing under the "Typography" settings.
- - Modify the padding under the "Layout" settings.
-4. Verify that these applied correctly within editor & on frontend:
- 1. Create a new post
- 2. Add Products block
- 3. Add Product Price block as an inner block if not included already
- 4. Check the Product Price block in both the editor and on the front-end to ensure that the changes made through the Global styles UI are accurately applied:
- - In the editor, inspect Product Price block & ensure it matches the value set in the Global styles UI.
- - Save the post & publish it. On frontend, inspect Product Price block & ensure it matches the value set in the Global styles UI.
-
-**Also, verify these in `all products` block, which also uses Product Price block.**
-
diff --git a/plugins/woocommerce/client/blocks/docs/internal-developers/testing/releases/1001.md b/plugins/woocommerce/client/blocks/docs/internal-developers/testing/releases/1001.md
deleted file mode 100644
index 143f035d8e6..00000000000
--- a/plugins/woocommerce/client/blocks/docs/internal-developers/testing/releases/1001.md
+++ /dev/null
@@ -1,33 +0,0 @@
-# Testing notes and ZIP for release 10.0.1
-
-Zip file for testing: [woocommerce-gutenberg-products-block.zip](https://github.com/woocommerce/woocommerce-blocks/files/11260936/woocommerce-gutenberg-products-block.zip)
-
-## WooCommerce Core
-
-### Single Product Compatibility Layer: add support for custom HTML Blocks. [(9075)](https://github.com/woocommerce/woocommerce-blocks/pull/9075)
-
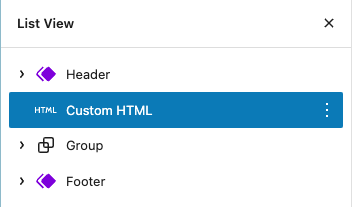
-1. Go to Appearance > Editor and in the Single Product template before upgrading to the blockified version, add a HTML Block _outside_ of the Group block as shown in the screenshot below with the contents `<h2>HTML Block here</h2>` (or similar)
-2. Save and view this block on the frontend.
-3. Return to the template, upgrade it to the blockified version
-4. Save and view on the frontend. Be sure that the HTML is visible on the page.
-
-
-
-### Blockfied Single Product Template: Add support for template for specific product. [(9069)](https://github.com/woocommerce/woocommerce-blocks/pull/9069)
-
-1. Go to Appearance > Editor > Templates > Add new (plus icon) > Single Item: Product > Select a product with multiples images
-2. Go into your newly created template, and upgrade Classic template placeholder to the Blockified version of the template.
-3. Save the template and visit the product on the frontend.
-4. Check that gallery thumbnails work.
-
-| Before | After |
-|--------|--------|
-|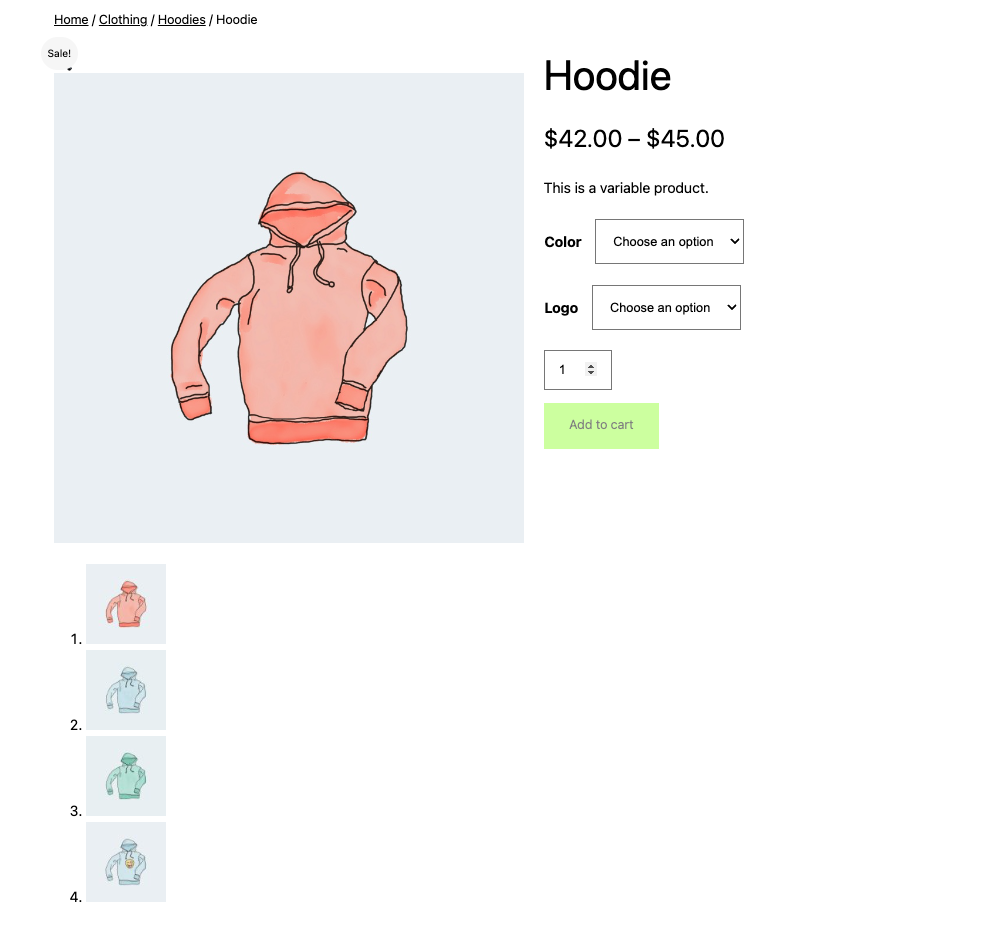|<img width="1194" alt="image" src="https://user-images.githubusercontent.com/4463174/232467549-35a54ad7-e90a-4263-aa5d-afff83838407.png">|
-
-### Product Price Block: remove ProductSelector support. [(8980)](https://github.com/woocommerce/woocommerce-blocks/pull/8980)
-
-1. Create a post or page.
-2. Insert the All Products block.
-3. Edit the layout of the All Products block.
-4. Check the Product Price inner block doesn't show the product selector.
-
diff --git a/plugins/woocommerce/client/blocks/docs/internal-developers/testing/releases/1002.md b/plugins/woocommerce/client/blocks/docs/internal-developers/testing/releases/1002.md
deleted file mode 100644
index dae40cf3e34..00000000000
--- a/plugins/woocommerce/client/blocks/docs/internal-developers/testing/releases/1002.md
+++ /dev/null
@@ -1,12 +0,0 @@
-# Testing notes and ZIP for release 10.0.2
-
-Zip file for testing: [woocommerce-gutenberg-products-block.zip](https://github.com/woocommerce/woocommerce-blocks/files/11269797/woocommerce-gutenberg-products-block.zip)
-
-## WooCommerce Core
-
-### Fix broken post/page editor screens in WordPress versions earlier than 6.2. [(9090)](https://github.com/woocommerce/woocommerce-blocks/pull/9090)
-
-1. Make sure your environment is WordPress 6.1.1
-2. Ensure the Post, Page and Site editors load without issues.
-3. Go to Appearance > Editor > Templates > Single Product and add the Product Image Gallery block somewhere on the page.
-4. Without reloading the page, edit the Single template (or any other template unrelated to WooCommerce). Verify you can't add the Product Image Gallery block.
diff --git a/plugins/woocommerce/client/blocks/docs/internal-developers/testing/releases/1003.md b/plugins/woocommerce/client/blocks/docs/internal-developers/testing/releases/1003.md
deleted file mode 100644
index d4fb0742cbf..00000000000
--- a/plugins/woocommerce/client/blocks/docs/internal-developers/testing/releases/1003.md
+++ /dev/null
@@ -1,16 +0,0 @@
-# Testing notes and ZIP for release 10.0.3
-
-Zip file for testing: [woocommerce-gutenberg-products-block.zip](https://github.com/woocommerce/woocommerce-blocks/files/11288213/woocommerce-gutenberg-products-block.zip)
-
-## WooCommerce Core
-
-### Fix image editor in Featured Product/Category blocks on WP 6.2. [(9142)](https://github.com/woocommerce/woocommerce-blocks/pull/9142)
-
-0. With WP 6.2:
-1. Create a post and add the Featured Category block.
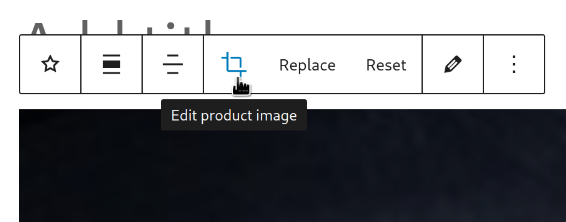
-2. Click on the button to edit the image (note: this button is only available if the category has an image, if you don't have any categories with images, go to `wp-admin` > Products > Categories and edit a category to add an image):
-
-3. Make some changes (rotate, zoom, change aspect ratio, etc.) and apply them.
-4. Verify the changes are applied and there are no errors in the browser devtools console (you can open it with <kbd>F12</kbd>).
-5. Repeat all the steps above with the Featured Product block.
-6. Repeat all steps above with WP 6.1 (you can use [WP Downgrade](https://wordpress.org/plugins/wp-downgrade/)).
diff --git a/plugins/woocommerce/client/blocks/docs/internal-developers/testing/releases/1004.md b/plugins/woocommerce/client/blocks/docs/internal-developers/testing/releases/1004.md
deleted file mode 100644
index f6a341d3122..00000000000
--- a/plugins/woocommerce/client/blocks/docs/internal-developers/testing/releases/1004.md
+++ /dev/null
@@ -1,46 +0,0 @@
-# Testing notes and ZIP for release 10.0.4
-
-Zip file for testing: [woocommerce-gutenberg-products-block.zip](https://github.com/woocommerce/woocommerce-blocks/files/11398343/woocommerce-gutenberg-products-block.zip)
-
-## WooCommerce Core
-
-### Check that the customized fallback template is archive-product before saving. [(9330)](https://github.com/woocommerce/woocommerce-blocks/pull/9330)
-
-1. Go to Appearance > Site Editor and make sure no templates have any customizations
-2. Make changes to Product Category and save.
-3. Check these are reflected on the frontend.
-4. Repeat step 2
-5. Check these are reflected on the frontend, and also in the templates list check this has not created an additional template as previously demonstrated in the linked issue.
-6. Now clear all customizations again
-7. Customize the Product Catalog template and save
-8. Check these are reflected on the frontend for the product archive page, and all taxonomy pages (Category/Tags etc)
-9. In the Site Editor make some customizations to the Product Category page and save.
-10. Make sure these are reflected on the frontend, and also in the templates list check this has not created an additional template as previously demonstrated in the linked issue.
-11. Make sure that the Product Catalog changes are still as intended and are reflected on the product archive page, and all taxonomy pages _except_ Product Category (since we have now created its own customized version in Step 9)
-
-### Fix: Edit Mini Cart template part URL [(9348)](https://github.com/woocommerce/woocommerce-blocks/pull/9348)
-
-1. Go to Appearance > Site Editor > Template Parts > Header
-2. Add the Mini Cart block to the header. In the settings panel see the link "Edit Mini Basket template part".
-3. Clicking this link should take you to the correct URL.
-
-### Use 'enqueue_block_assets' action when is available [(9332)](https://github.com/woocommerce/woocommerce-blocks/pull/9332)
-
-#### Pre-requisites
-
-- Make sure to have some other plugins installed and activated (for example: Stripe)
-
-#### Testing on the Site Editor
-
-1. Be sure that you have the Gutenberg trunk installed.
-2. Open the Site Editor, and open the Single Product Template.
-3. See that the placeholder image is loaded.
-4. Disable the Gutenberg plugin.
-5. Open the Site Editor, and open the Single Product Template.
-6. See that the placeholder image is loaded.
-
-#### Testing on the frontend
-
-1. With the Stripe plugin activated, go to your store;
-2. Add a product to the cart;
-3. Check if you are able to finish an order without errors;
diff --git a/plugins/woocommerce/client/blocks/docs/internal-developers/testing/releases/1005.md b/plugins/woocommerce/client/blocks/docs/internal-developers/testing/releases/1005.md
deleted file mode 100644
index a130aebb2af..00000000000
--- a/plugins/woocommerce/client/blocks/docs/internal-developers/testing/releases/1005.md
+++ /dev/null
@@ -1,18 +0,0 @@
-# Testing notes and ZIP for release 10.0.5
-
-Zip file for testing: [woocommerce-gutenberg-products-block.zip](https://github.com/woocommerce/woocommerce-blocks/files/11555954/woocommerce-gutenberg-products-block.zip)
-
-## WooCommerce Core
-
-### Fix Mini-Cart block conflict with Page Optimize and Product Bundles. [(9586)](https://github.com/woocommerce/woocommerce-blocks/pull/9586)
-
-1. Make sure you have WC core 7.7.
-2. Enable a block theme.
-3. Add the Mini-Cart block to the header of your store.
-4. Install the Page Optimize and Product Bundles plugins (no need to change anything in their configuration).
-5. Go to a page in the frontend that doesn't have any blocks besides the Mini-Cart you added to the header.
-6. Open the Mini-Cart and verify there is no JS error:
-
-Before | After
---- | ---
- | 
diff --git a/plugins/woocommerce/client/blocks/docs/internal-developers/testing/releases/1006.md b/plugins/woocommerce/client/blocks/docs/internal-developers/testing/releases/1006.md
deleted file mode 100644
index f2df3c37728..00000000000
--- a/plugins/woocommerce/client/blocks/docs/internal-developers/testing/releases/1006.md
+++ /dev/null
@@ -1,24 +0,0 @@
-# Testing notes and ZIP for release 10.0.6
-
-Zip file for testing: [woocommerce-gutenberg-products-block.zip](https://github.com/woocommerce/woocommerce-blocks/files/11604483/woocommerce-gutenberg-products-block.zip)
-
-## WooCommerce Core
-
-### Fix Mini-Cart block check to see whether a script has already been enqueued. [(9649)](https://github.com/woocommerce/woocommerce-blocks/pull/9649)
-
-0. Make sure you have WC core 7.7.1.
-1. Enable a block theme.
-2. Add the Mini-Cart block to the header of your store.
-3. Go to the frontend and open the Mini-Cart drawer. Verify it opens.
-4. Install the Page Optimize and Product Bundles plugins (no need to change anything in their configuration).
-5. Go to a page in the frontend that doesn't have any blocks besides the Mini-Cart you added to the header.
-6. Open the Mini-Cart drawer and verify it opens without JS errors.
-
-### Partially uplift #9251 to 10.0.x. [(9652)](https://github.com/woocommerce/woocommerce-blocks/pull/9652)
-
-1. Enable a block theme.
-2. Add the Mini-Cart block to the header of your store.
-3. Go to Appearance > Editor > Template Parts > Mini-Cart.
-4. Modify the text and background colors of _Mini Cart View Cart Button_ and _Mini Cart Proceed to Checkout Button_.
-5. Save the template part and reload the page. Verify the colors persisted.
-6. Go to the frontend, open the Mini-Cart drawer and verify the colors are applied correctly there too.
diff --git a/plugins/woocommerce/client/blocks/docs/internal-developers/testing/releases/1010.md b/plugins/woocommerce/client/blocks/docs/internal-developers/testing/releases/1010.md
deleted file mode 100644
index 8e45091f871..00000000000
--- a/plugins/woocommerce/client/blocks/docs/internal-developers/testing/releases/1010.md
+++ /dev/null
@@ -1,347 +0,0 @@
-# Testing notes and ZIP for release 10.1.0
-
-Zip file for testing: [woocommerce-gutenberg-products-block.zip](https://github.com/woocommerce/woocommerce-blocks/files/11325682/woocommerce-gutenberg-products-block.zip)
-
-## WooCommerce Core
-
-### [Patterns]: Add new Featured Products 2 columns pattern ([#9072](https://github.com/woocommerce/woocommerce-blocks/pull/9072))
-
-1. Create a new page or post
-2. Make sure the `Featured products 2 columns` pattern appears under the WooCommerce category dropdown.
-3. Insert in and make sure it shows as expected on the design.
-
-### [Patterns] Add new Testimonials: 3 columns pattern ([#9159](https://github.com/woocommerce/woocommerce-blocks/pull/9159))
-
-1. Create a new page or post
-2. Make sure the `Testimonials 3 columns` pattern appears under the WooCommerce category dropdown.
-3. Insert in and make sure it shows as expected on the design.
-
-### Reinstate "Hide shipping costs until an address is entered" but disable it when using local pickup ([#8964](https://github.com/woocommerce/woocommerce-blocks/pull/8964))
-
-1. Ensure you have some shipping rates set up in your store.
-2. Disable WC Blocks local pickup (WooCommerce -> Shipping -> Local pickup).
-3. Go to WooCommerce -> Shipping -> Shipping options, ensure you see the option "Hide shipping costs until an address is entered" with no additional text.
-4. Check this box.
-5. In an incognito window, add an item to your cart.
-6. Go to the Cart block. Ensure you don't see any shipping rates shown.
-7. Go to the Checkout block, ensure the shipping rate selector says "Shipping options will be displayed here after entering your full shipping address."
-8. Enable WC Blocks local pickup and add a location (WooCommerce -> Shipping -> Local pickup)
-9. Go to WooCommerce -> Shipping -> Shipping options, ensure you see the option "Hide shipping costs until an address is entered (Not available when using WooCommerce Blocks Local Pickup)" exactly as written.
-10. Enter your address and ensure shipping rates show up.
-11. Ensure this option is disabled, and turned off, ensure you cannot activate it by clicking the checkbox.
-12. Close the incognito window from earlier and open a new one. Add an item to your cart.
-13. Go to the Cart block. Ensure rates show up in the sidebar.
-14. Go to the Checkout block, ensure the method selector (Shipping / Local Pickup) shows.
-15. Ensure shipping rates show up when the "Shipping" method has been selected, even when no address is entered.
-16. Place two orders, one using local pickup, the other using regular shipping.
-17. Ensure these both appear correctly in the confirmation email and in the orders dashboard.
-
-### Add theme-level global styles to Cart and Checkout block ([#8809](https://github.com/woocommerce/woocommerce-blocks/pull/8809))
-
-1. Install and activate a block theme, e.g. [Twenty Twenty-Three](https://wordpress.org/themes/twentytwentythree/).
-2. Create a test page with the Checkout block.
-3. Create a test page with the Cart block.
-4. Go to `WP Admin` » `Appearance` » `Editor.`
-5. Open the Styles sidebar.
-6. Adjust all `Typography ` and `Color` settings.
-7. Go to the Checkout block page editor.
-8. Confirm Global styles are applied successfully.
-9. Go to the Cart block page editor.
-10. Confirm Global styles are applied successfully.
-11. Navigate to Cart and Checkout block page on the front-end.
-12. Confirm Global styles are applied successfully.
-
-### Fix filter by stock status dropdown ordering ([#9127](https://github.com/woocommerce/woocommerce-blocks/pull/9127))
-
-1. Make sure you have at least one product with the stock status: "In stock", "Out of Stock" and/or "On backorder"
-2. In the Editor add:
-
-* Filter by Stock block - set it to Dropdown and Multiple
-* Products block
-
-3. In the frontend apply stock status filters: "In stock", "Out of Stock" and/or "On backorder"
-4. Refresh the page if it hasn't refreshed itself
-5. Expected: The order of the options stays the same before the refresh and after the refresh
-
-### fix/8129: remove rounding the caused issue with UI ([#9118](https://github.com/woocommerce/woocommerce-blocks/pull/9118))
-
-1. Use a wide screen (min. 1500px wide). Issue occurs on a smaller screens as well, but the position difference is smaller than the thumb radius, hence the glitch is "covered" by the thumb.
-2. Create a new page
-3. Add a Filter by Price block
-4. Save and see go to frontend
-5. Move the thumbs slowly
-6. Expected: Thumb is in synced position with the slider
-
-### add cursor:pointer to checkbox and radio fields ([#9102](https://github.com/woocommerce/woocommerce-blocks/pull/9102))
-
-1. Add multiple shipping methods and enable multiple payment methods so that multiple radio input fields are shown on the Checkout page.
-2. Add the Checkout block to the checkout page.
-3. In the fix branch, observe all the radio/checkbox input fields on the Checkout page, hover over them and their associated labels and observe that the mouse cursor shows as a pointer.
-4. Observe in the trunk branch, the cursor was shown as a mouse pointer instead.
-
-### fix/8651: Use body background color as the Cart block sticky footer background color ([#9103](https://github.com/woocommerce/woocommerce-blocks/pull/9103))
-
-1. Set your theme to a dark style (ie TT3 with Pilgrimage styling).
-2. Go to the Cart block page on mobile.
-3. Verify the sticky footer background (available on a mobile view) match the body background color.
-
-### decodeEntities for display in checkout TextInput ([#9117](https://github.com/woocommerce/woocommerce-blocks/pull/9117))
-
-1. Add a product to the cart.
-2. Go to the checkout.
-3. Place the order with the following address:
-
-```text
-Address : Stationsplein 151
-Country/Region : Nederland
-Postal code : 5211 BP
-City : 's-Hertogenbosch
-```
-
-4. Place another order.
-5. Verify that the prefilled city name appears with the entities decoded as in the after picture.
-
-### fix/8946: replace ToggleGroupControl with ToggleControl ([#9098](https://github.com/woocommerce/woocommerce-blocks/pull/9098))
-
-1. Go to widgets > add the Mini cart block and enable "Open cart in drawer".
-2. Add any product to cart from the shop page.
-3. Observe and verify that the drawer opens up.
-4. Now disable "Open cart in drawer", repeat step (2) and verify that the drawer doesn't open up.
-5. Verify this behaviour is consistent between trunk and the fix branch.
-
-| Before | After |
-| ------ | ----- |
-| <img width="281" alt="Screenshot 2023-04-19 at 4 03 59 PM" src="https://user-images.githubusercontent.com/17757960/233048887-2a5e2f17-c36a-43f3-b1c4-f4913a685ede.png">|<img width="281" alt="Screenshot 2023-04-19 at 4 03 27 PM" src="https://user-images.githubusercontent.com/17757960/233048778-e74b9550-4672-4113-9042-e6e6d394cd09.png">|
-
-### fix/8363: Match editor "Place Order" button UI with frontend ([#9094](https://github.com/woocommerce/woocommerce-blocks/pull/9094))
-
-1. Create a page or post;
-2. Add the Checkout block to it;
-3. On the editor, edit the Checkout block and make sure the "Place Order" UI match with the front-end Place Order button UI.
-
-### Fix - "Order received" page does not display the payment method information. ([#9092](https://github.com/woocommerce/woocommerce-blocks/pull/9092))
-
-1. Install the WooCommerce Block plugin on a WordPress site.
-2. Create a product and add it to the site's shopping cart.
-3. Proceed to checkout using the "Checkout" Block, which can be added to a page using the "WooCommerce" block category.
-4. Complete the checkout process and confirm the order.
-5. On the "Order received" page, observe that the payment method information is available.
-6. Also check payment method on New Order Email, Order Listing page in wp-admin
-
-### Get product by ID if there's more products returned from useStoreProducts ([#9079](https://github.com/woocommerce/woocommerce-blocks/pull/9079))
-
-1. Go to Editor
-2. Add All Products and Products blocks
-3. Smoke test them, so that they display a correct data in the Editor and Frontend
-4. During testing disable the "Inherit query from template" option for Products block and when disabled change the Advanced filters and make sure products are still loaded properly
-
-### Product SKU: fix product SKU when added in the product meta block ([#8966](https://github.com/woocommerce/woocommerce-blocks/pull/8966))
-
-1. Go to Appearance > Editor > Template > Single Product.
-2. Remove the Product SKU block inside the Product Meta block.
-3. Add the Product SKU block again.
-4. Be sure that it is visible on the editor
-5. On the frontend, visit a product with a defined SKU and ensure the block is visible.
-
-### Pass proper data to On Sale badge when used in the scope of Product Image ([#9021](https://github.com/woocommerce/woocommerce-blocks/pull/9021))
-
-1. Go to Editor
-2. Add a Products block
-3. Add "On Sale badge" block to the Products
-4. **Expected:** There's no regression, so "Sale" badge appears in both places: Product Image and On Sale Badge
-5. Save and go to frontend
-6. Confirm they appear on the frontend as well
-
-### Product Stock indicator: Add support for background color, margin, padding & various typography controls ([#8954](https://github.com/woocommerce/woocommerce-blocks/pull/8954))
-
-#### Test using blocks sidebar
-
-1. Create a new page or post
-2. Add the "Products" block to your post.
-3. Add Product Stock Indicator block as an inner block if not included already
-4. Select the Product Stock Indicator block and open the block settings in the right sidebar.
-5. Customize the block using the new styling options available:
-
- 5.1. Change the text color, background color, font family, font size, font appearance, line height, letter spacing, text decoration, letter case, margin, and padding under the appropriate settings sections.
-6. Verify that the styling changes are immediately visible and correctly applied within the editor.
-7. Save the post, then view it on the front end to ensure the styling changes are visible and applied correctly.
-
-#### Test using Global Styles
-
-1. Open the Global Styles sidebar by clicking the "Styles" button at the top right corner of the editor.
-
-2. In the Global Styles sidebar, locate the "Product Stock Indicator" block.
-3. Customize the block using the new styling options available under the "Product Stock Indicator" block in the Global Styles sidebar:
-
- 3.1. Change the text color, background color, font family, font size, font appearance, line height, letter spacing, text decoration, letter case, margin, and padding under the appropriate settings sections.
-4. Verify that these applied correctly within editor & on frontend:
-
- 4.1. Create a new post
-
- 4.2. Add Products block
-
- 4.3. Add Product Stock Indicator block as an inner block if not included already
-
- 4.4. Check the Product Stock Indicator block in both the editor and on the front-end to ensure that the changes made through the Global styles UI are accurately applied:
-
- 4.4.1. In the editor, inspect Product Stock Indicator block & ensure it matches the values set in the Global styles UI.
-
- 4.4.2. Save the post & publish it. On frontend, inspect Product Stock Indicator block & ensure it matches the values set in the Global styles UI.
-
-> Also, verify the changes in All Products block, which also uses Product Stock Indicator block.
-
-### Use consistent and semantically correct HTML elements in the Cart and Checkout blocks ([#9065](https://github.com/woocommerce/woocommerce-blocks/pull/9065))
-
-1. Create a test page and add the Cart block.
-2. Within the post editor, verify that the `CART TOTALS` element, with the CSS class `.wc-block-cart__totals-title`, is using a `<span>` instead of an `<h2>`.
-3. Create another test page and add the Checkout block.
-4. Within the post editor, verify that the `Order summary` element, with the CSS class `.wc-block-components-order-summary`, is using a `<div>` instead of an `<h2>`.
-5. Go to the frontend and add a product to the cart.
-6. On the page with the Cart block, verify that the `CART TOTALS` element, with the CSS class `.wc-block-cart__totals-title`, is using a `<span>` instead of an `<h2>`.
-7. On the page with the Checkout block, verify that the `Order summary` element, with the CSS class `.wc-block-components-order-summary`, is using a `<div>` instead of an `<h2>`.
-
-### Mini Cart: Remove excessive margin under cart items ([#9051](https://github.com/woocommerce/woocommerce-blocks/pull/9051))
-
-1. With a block theme, add the Mini Cart block to the header of your page (via Appearance > Editor).
-2. In the frontend, open the Mini Cart drawer.
-3. Verify the margin between cart items has been reduced (see screenshots).
-4. Create a page with the Cart block and verify there are no visual regressions regarding the margins between cart items.
-
-| Before | After |
-| ------ | ----- |
-| 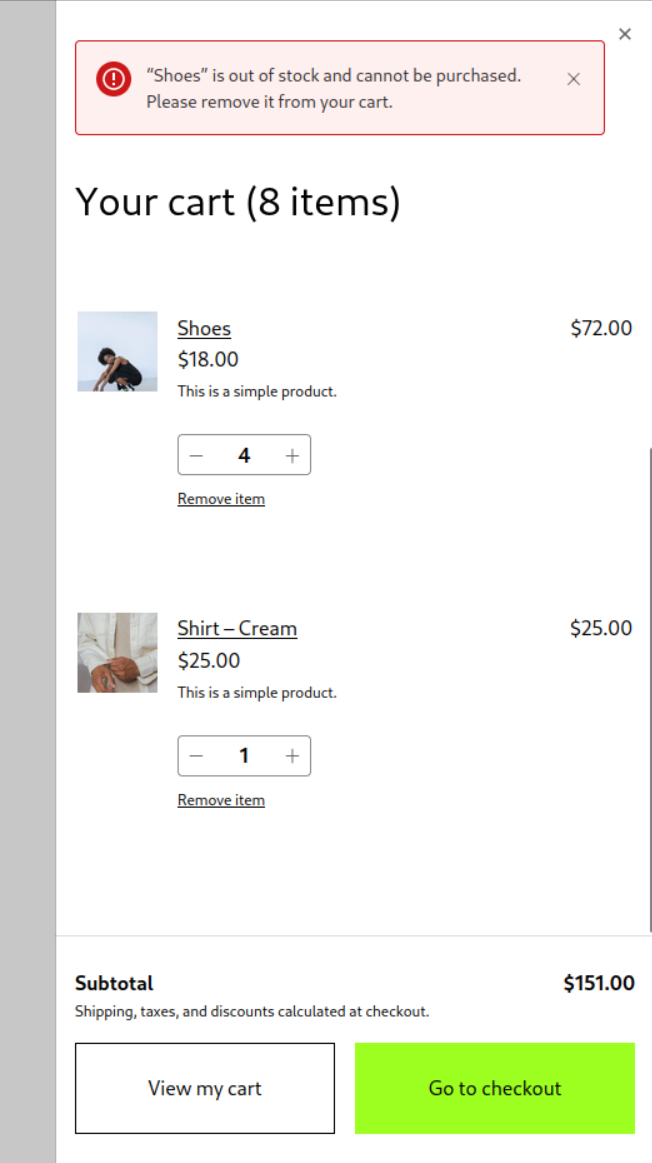 | 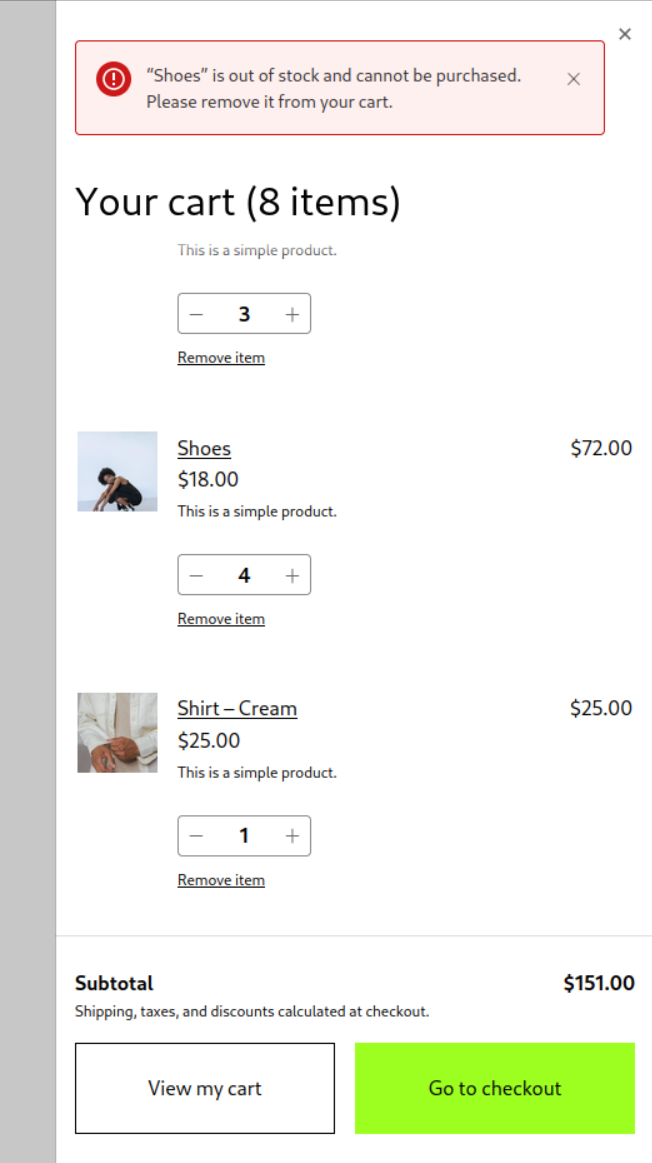 |
-
-### Fix Mini Cart drawer not opening in RTL locales ([#9066](https://github.com/woocommerce/woocommerce-blocks/pull/9066))
-
-1. With a block theme, add the Mini Cart block to the header of your site.
-2. In, wp-admin, go to Settings > General and change your store language to a RTL locale, like Arabic (`العربية`).
-3. In the frontend, click on the Mini Cart button to open the drawer.
-4. Verify the drawer is opened correctly from the left side of the screen.
-
-### Fix JS error visible in the editor caused by Mini Cart Contents buttons ([#9039](https://github.com/woocommerce/woocommerce-blocks/pull/9039))
-
-1. Open the _Console_ of the browser devtools (<kbd>F12</kbd>).
-2. In the WP admin, go to Appearance > Editor > Template Parts > Mini Cart.
-3. Make some edits to the Mini Cart.
-4. Verify there is no JS error making reference to `EditableButton`.
-
-_Image of the error that **shouldn't** be visible:_
-
-<img src="https://user-images.githubusercontent.com/3616980/232009798-cb759e30-cae5-4a81-9aa6-4a060b497886.png" alt="" width="447" />
-
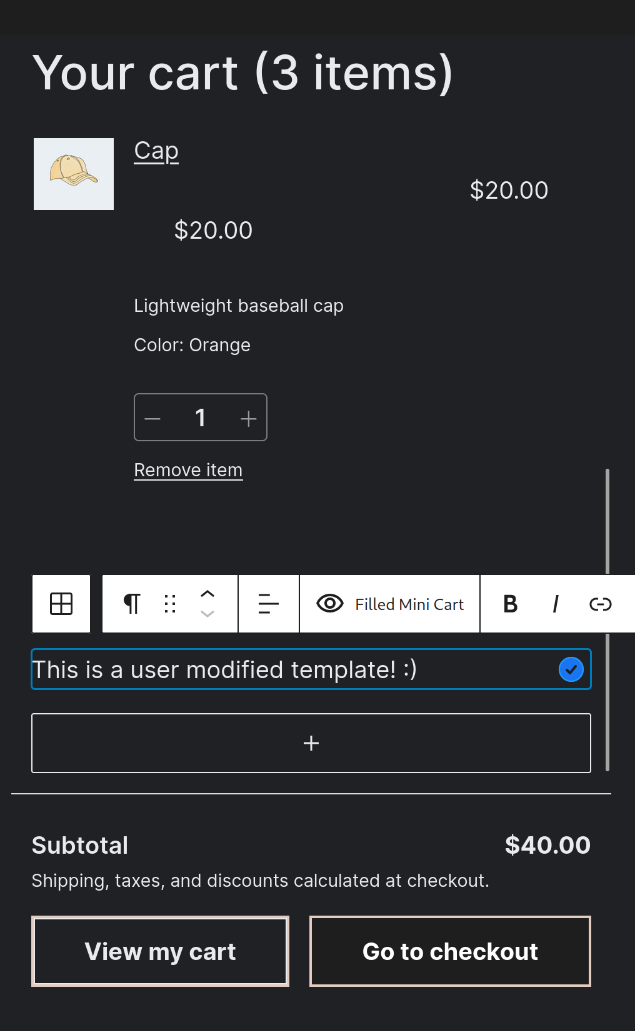
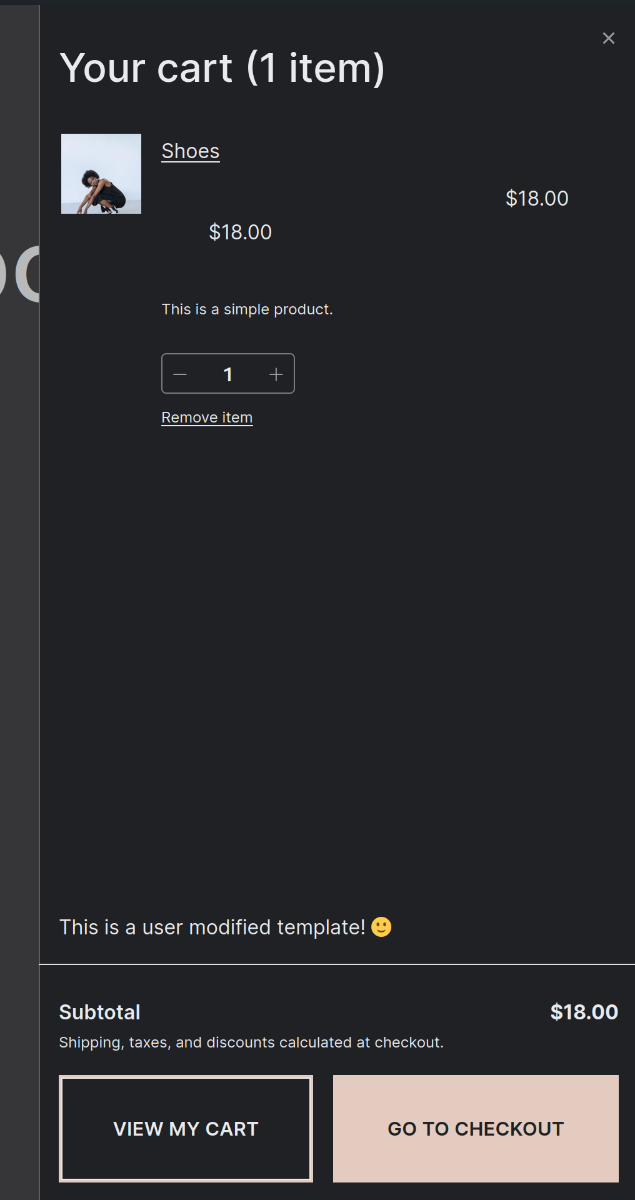
-### Mini Cart template part: give user customized template priority over theme template ([#9005](https://github.com/woocommerce/woocommerce-blocks/pull/9005))
-
-0. With [TT3](https://github.com/WordPress/twentytwentythree/), add the Mini Cart block to your store header via Appearance > Editor.
-1. Also in Appearance > Editor, make some edits to the Mini Cart template part and save it.
-2. Verify the edits are visible in the frontend when you open the Mini Cart drawer.
-3. Now, let's imagine TT3 releases an update which introduces a custom Mini Cart template part. To do so, install this ZIP as a theme (it's TT3 with a `parts/mini-cart.html` file): [twentytwentythree.zip](https://github.com/woocommerce/woocommerce-blocks/files/11200877/twentytwentythree.zip).
-4. Verify that going to Appearance > Editor > Template Parts > Mini Cart shows the template you modified in step 1 (instead of the theme template).
-5. Verify that in the frontend the Mini Cart drawer shows the template you modified in step 1 (instead of the theme template).
-
-In other words, given that you created a custom template in step 1, you should never see the template from the theme.
-
-Editor | Frontend
---- | ---
- | 
-
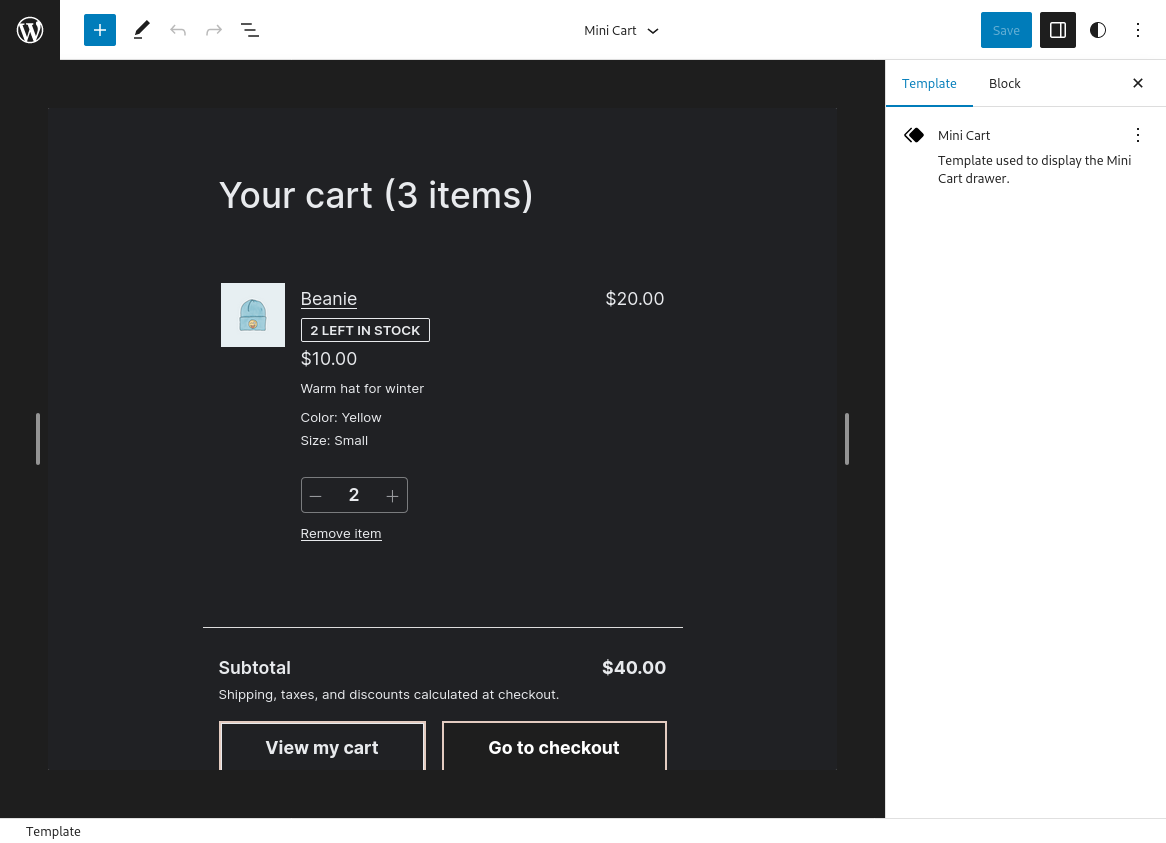
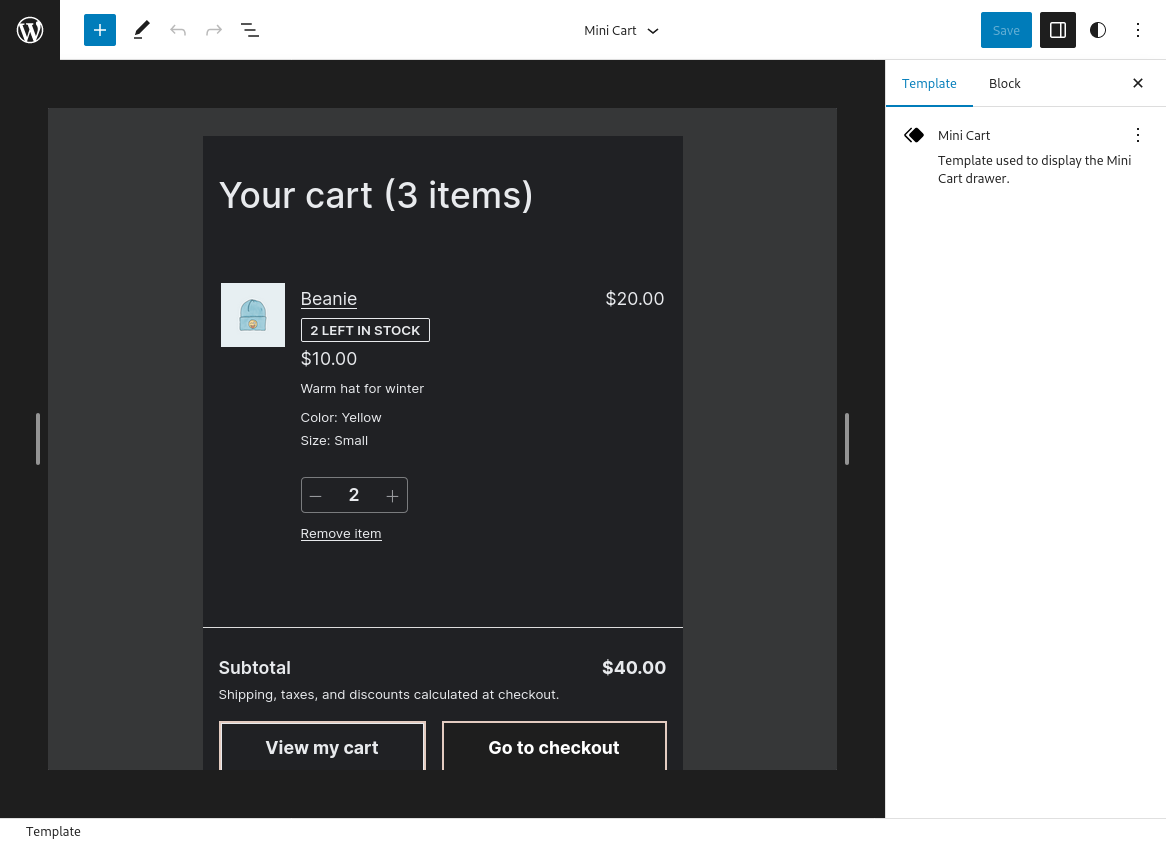
-### Display Mini Cart overlay in template part editor ([#9014](https://github.com/woocommerce/woocommerce-blocks/pull/9014))
-
-1. Go to Appearance > Editor > Template Parts > Mini Cart.
-2. Verify the Mini Cart template part is surrounded by space with a dimmed background (like the frontend overlay).
-
-Before | After
---- | ---
- | 
-
-### [Mini cart] Make the title customizable ([#8905](https://github.com/woocommerce/woocommerce-blocks/pull/8905))
-
-_**Use Case 1**_
-
-1. With the previous version of the plugin (or `trunk` branch), go to the Site Editor and clear the customizations (if any) on the `Mini Cart` template.
-3. Add any customization (for example, change the colors of any button).
-4. Update the plugin to this PR version (or go to this branch `6259/customize-mini-cart-title`).
-5. Go to the frontend, open the `Mini Cart`, and check the title is still visible.
-6. Go to the editor and make some customizations to the title. Save.
-7. Check the customizations are applied in the editor and in the frontend.
-
-_**Use Case 2**_
-
-1. Go to the Site Editor and clear the customizations (if any) on the `Mini Cart` template.
-2. Enter the `Mini Cart` template (wp-admin/site-editor.php?postId=woocommerce%2Fwoocommerce%2F%2Fmini-cart&postType=wp_template_part&canvas=edit).
-3. Click on the `Mini Cart` title and make sure the `Mini Cart Title` block has two inner blocks: `Mini Cart Title Label` and `Mini Cart Title Items Counter`.
-
-<img width="335" alt="Screenshot 2023-03-30 at 09 27 07" src="https://user-images.githubusercontent.com/186112/228761302-f3970777-effc-483f-addf-dbb9c917acf9.png">
-
-5. Select the `Mini Cart Title Label` and add some customizations on the settings sidebar (colors, typography).
-6. Select the `Mini Cart Title Items Counter` and add some customizations on the settings sidebar (colors, typography).
-7. Check the customizations are applied in the editor and in the frontend.
-
-### Customer Account block: Fix padding for the block in the Editor ([#9009](https://github.com/woocommerce/woocommerce-blocks/pull/9009))
-
-1. Log in to your WordPress dashboard;
-2. Go to Appearance > Themes, and select a block theme (for example: Twenty-twenty three);
-3. Go to Appearance > Site Editor;
-4. Click the Edit button;
-5. Click on the "+" icon to add a new block and search for "Customer Account" block in the search bar;
-6. Click on the "Customer Account" block to add it to your page or post;
-7. On the right side, click on the dropdown menu inside the Icon Options section;
-8. Select the "Icon-only" option;
-9. Check that the Customer Account block is displayed as an Icon and that it has some spacing around the icon
-
-| Before | After |
-| ------ | ----- |
-| 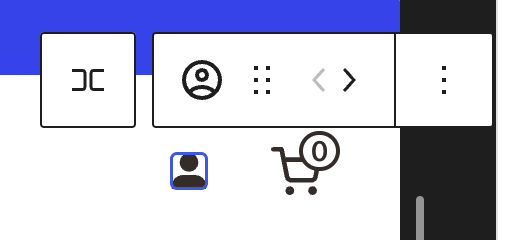 | 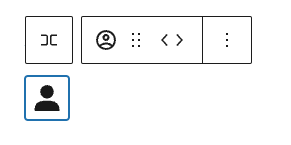 |
-
-### Filter data count mismatch > Create the get_attribute_and_meta_counts method ([#8599](https://github.com/woocommerce/woocommerce-blocks/pull/8599))
-
-1. With a block theme such as twenty-twenty-three enabled, head over to Edit Site > Templates > Product Catalog > Edit
-2. Add the Products (Beta) block
-3. Add the Filter by attribute block
-4. Save and head over to your shop page
-5. Ensure the filter is properly rendered, and when filtering the products, the counts always match the displayed results
-6. Test all 7 combinations of filters as described and demonstrated in the description of this PR, ensure all of them work as expected.
-
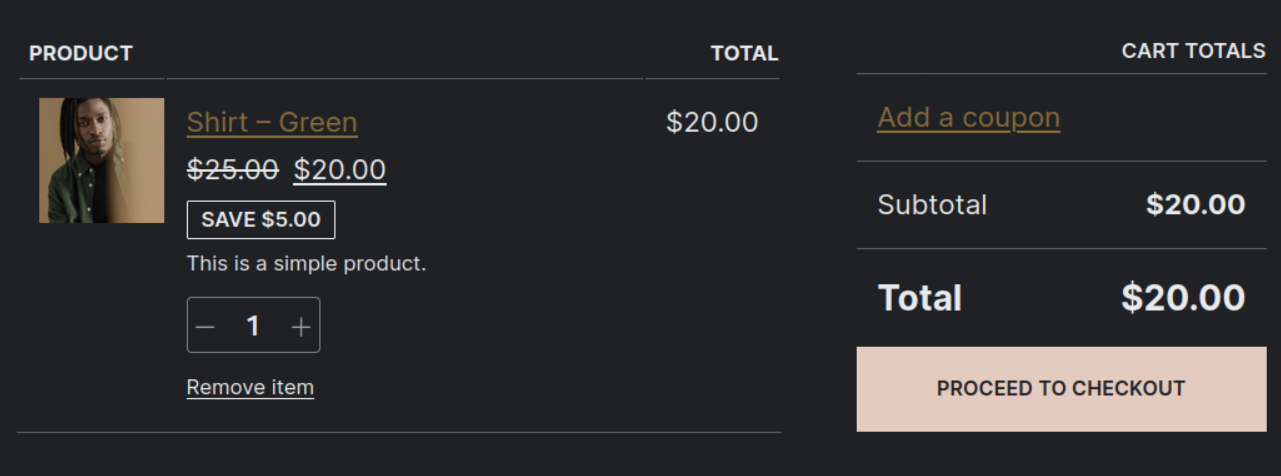
-### Create specific stylesheet for CartLineItemsTable component ([#8967](https://github.com/woocommerce/woocommerce-blocks/pull/8967))
-
-0. Add the Mini Cart block to the header of your store (via Appearance > Editor).
-1. Add a product to your cart.
-2. Open the Mini Cart drawer and verify there are no styling regressions and the list of items looks correctly.
-3. Open a page with the Cart block and verify there are no styling regressions and the list of items looks correctly.
-
-Mini Cart | Cart
---- | ---
-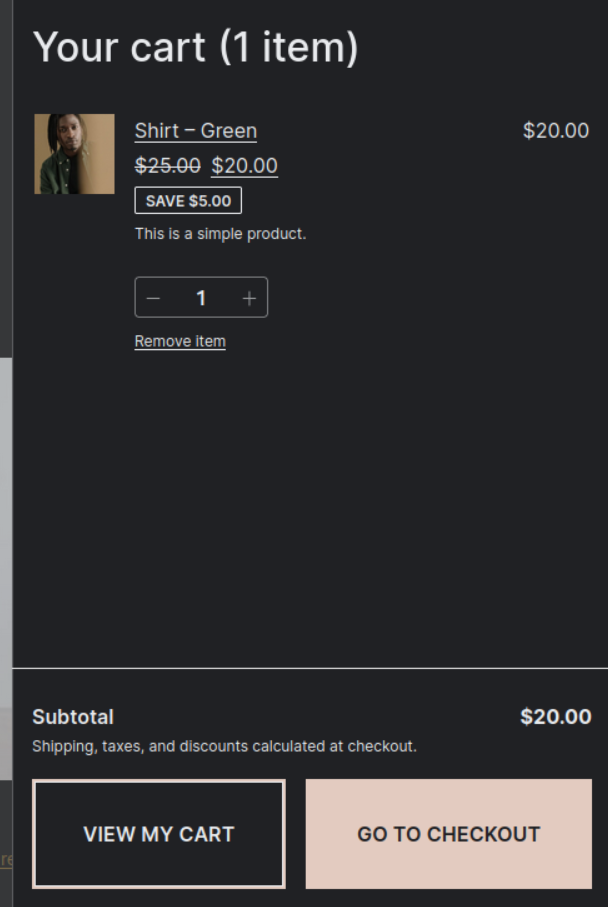 | 
-
-### Mini Cart block: fix slide in animation ([#9195](https://github.com/woocommerce/woocommerce-blocks/pull/9195))
-
-1. Add Mini Cart to the Header.
-2. Go to the frontend.
-3. Add some products to cart.
-4. Open Mini Cart.
-5. Verify the Mini Cart slides in and animation finishes when the Mini Cart covers viewport.
-6. Repeat steps 4 and 5 with a narrow view simulating mobile (<kbd>F12</kbd> and then <kbd>Ctrl</kbd>+<kbd>Shift</kbd>+<kbd>M</kbd> in Firefox & Chrome).
-7. (Only do this step if you are testing WC Blocks feature plugin) Go to Appearance > Editor > Template parts > Mini Cart and select the Mini Cart Contents block. Set it to a different width than its default and repeat steps 4-6.
-8. Switch to a RTL language like Arabic (from Settings > General) and repeat steps 4-7.
-
-## Feature plugin
-
-### Mini cart: allow changing the drawer width ([#8930](https://github.com/woocommerce/woocommerce-blocks/pull/8930))
-
-1. Go to the `Editor`, open the `Header` template, and insert the `Mini Cart` block.
-2. Go to the `Editor > Template parts` and open the `Mini Cart` template.
-3. Open the `List View` and click on the `Mini Cart Contents` block.
-4. In the settings sidebar you should see a new `Dimensions` section with a width selector.
-<img width="292" alt="Screenshot 2023-04-04 at 09 55 09" src="https://user-images.githubusercontent.com/186112/229725817-a5ab4f9d-edaa-4894-9d5b-031e2caaf5f0.png">
-5. Change the width, see the changes are visible on the editor, and save.
-6. Go to the front-end and check the changes are also reflected there.
-
-### Set minimum width for the Mini Cart Contents block ([#9196](https://github.com/woocommerce/woocommerce-blocks/pull/9196))
-
-1. Go to Appearance > Editor > Template Parts > Mini Cart.
-3. Select the Mini Cart Contents block (you can use the List View to find it).
-4. In the sidebar, set a custom width lower than 300px.
-5. Verify when you move the focus somewhere else, it's set to 300px.
-6. Remove the value from the custom width input.
-7. Verify it gets reset to the default (480px).
-8. Try setting an allowed value (ie: 350px, 500px, etc.).
-9. Verify the value persists.
diff --git a/plugins/woocommerce/client/blocks/docs/internal-developers/testing/releases/1020.md b/plugins/woocommerce/client/blocks/docs/internal-developers/testing/releases/1020.md
deleted file mode 100644
index 5bf57482e29..00000000000
--- a/plugins/woocommerce/client/blocks/docs/internal-developers/testing/releases/1020.md
+++ /dev/null
@@ -1,364 +0,0 @@
-# Testing notes and ZIP for release 10.2.0
-
-Zip file for testing: [woocommerce-gutenberg-products-block.zip](https://github.com/woocommerce/woocommerce-blocks/files/11450388/woocommerce-gutenberg-products-block.zip)
-
-## WooCommerce Core
-
-### Add shop by price pattern ([#9373](https://github.com/woocommerce/woocommerce-blocks/pull/9373))
-
-1. Create a page and use the block inserter->patterns->WooCommerce and to insert the Shop by Price pattern.
-2. Check that the preview shows up nicely and add the pattern to the page.
-3. Update/save and check the frontend and ensure it is displaying nicely per design.
-
-
-
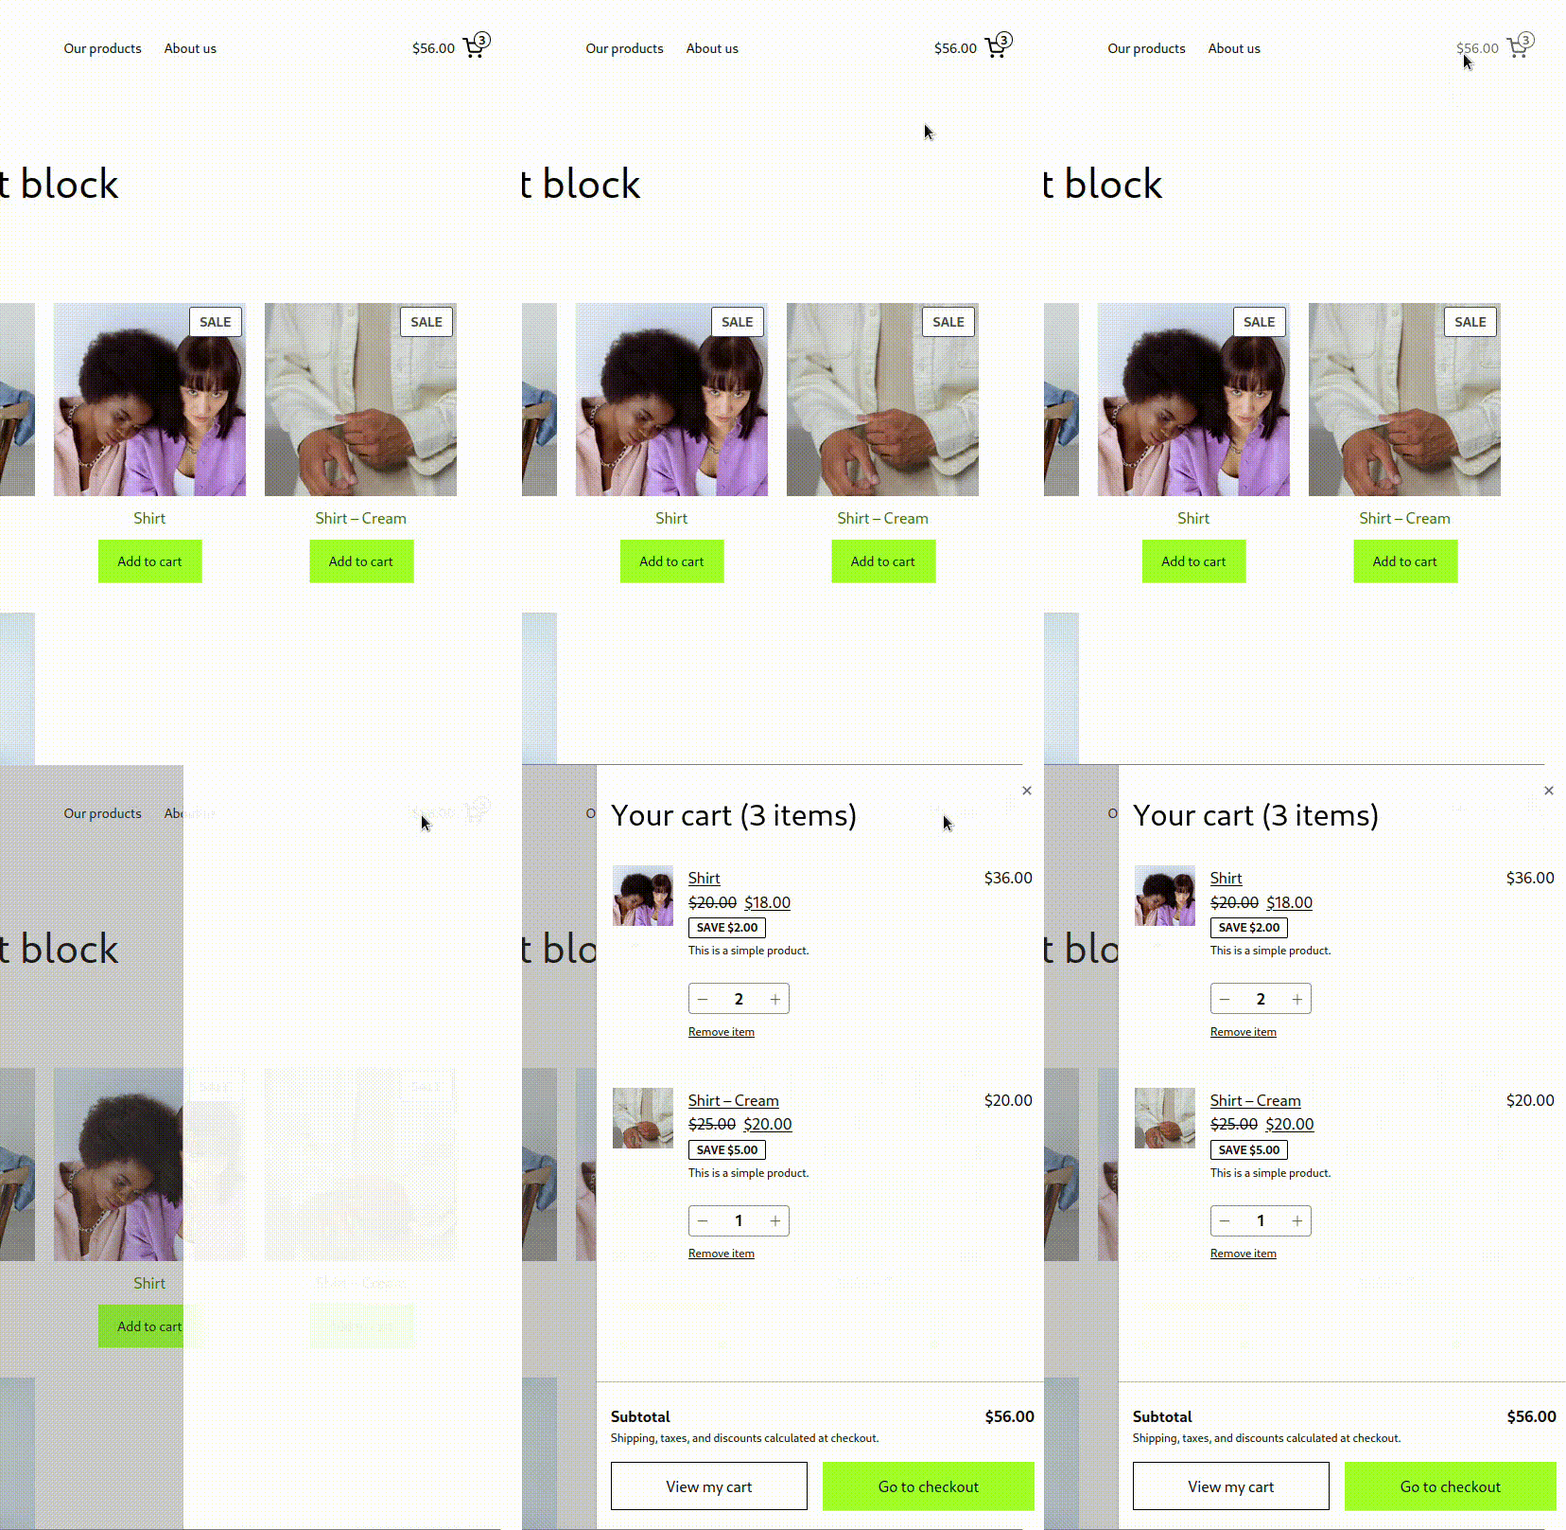
-### Mini Cart drawer: print width in PHP [#9329](https://github.com/woocommerce/woocommerce-blocks/pull/9329)
-
-1. Add the Mini Cart block to the header of your site (via Appearance > Editor).
-2. In the frontend, open the Mini Cart drawer clicking on the button.
-3. Verify the drawer is opened instantly. Until now, there might be a small delay if the shopper clicked the button very quickly right after the page was loaded and the network was slow.
-
-Before | After
---- | ---
-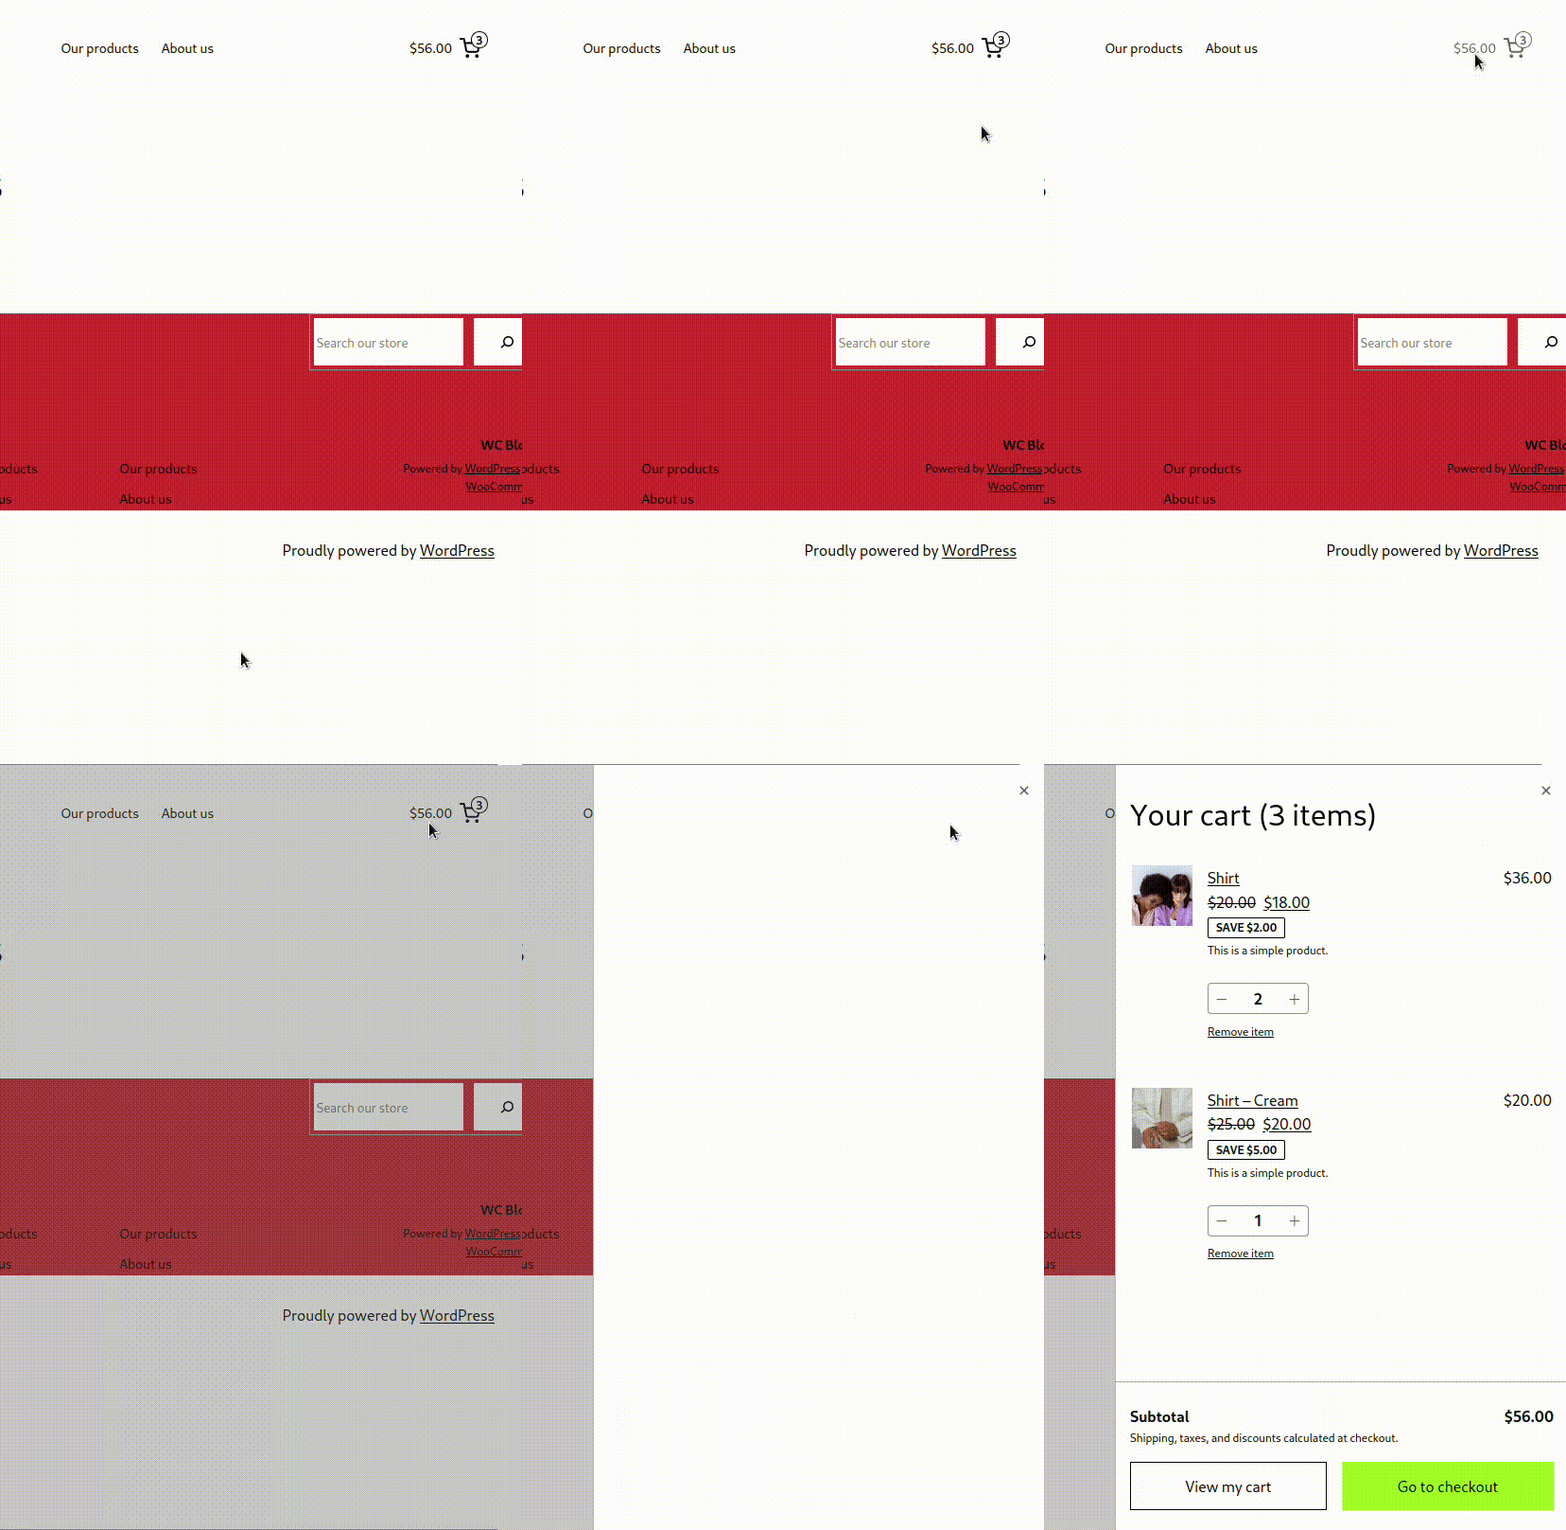 | 
-
-### Convert to use WP core blocks [#9340](https://github.com/woocommerce/woocommerce-blocks/pull/9340)
-
-1. Create a page and use the block inserter->patterns->WooCommerce and to insert the Featured Category Triple pattern.
-2. Check that the preview shows up nicely and add the pattern to the page.
-3. Update/save and check the frontend and ensure it is displaying nicely per design.
-
-
-
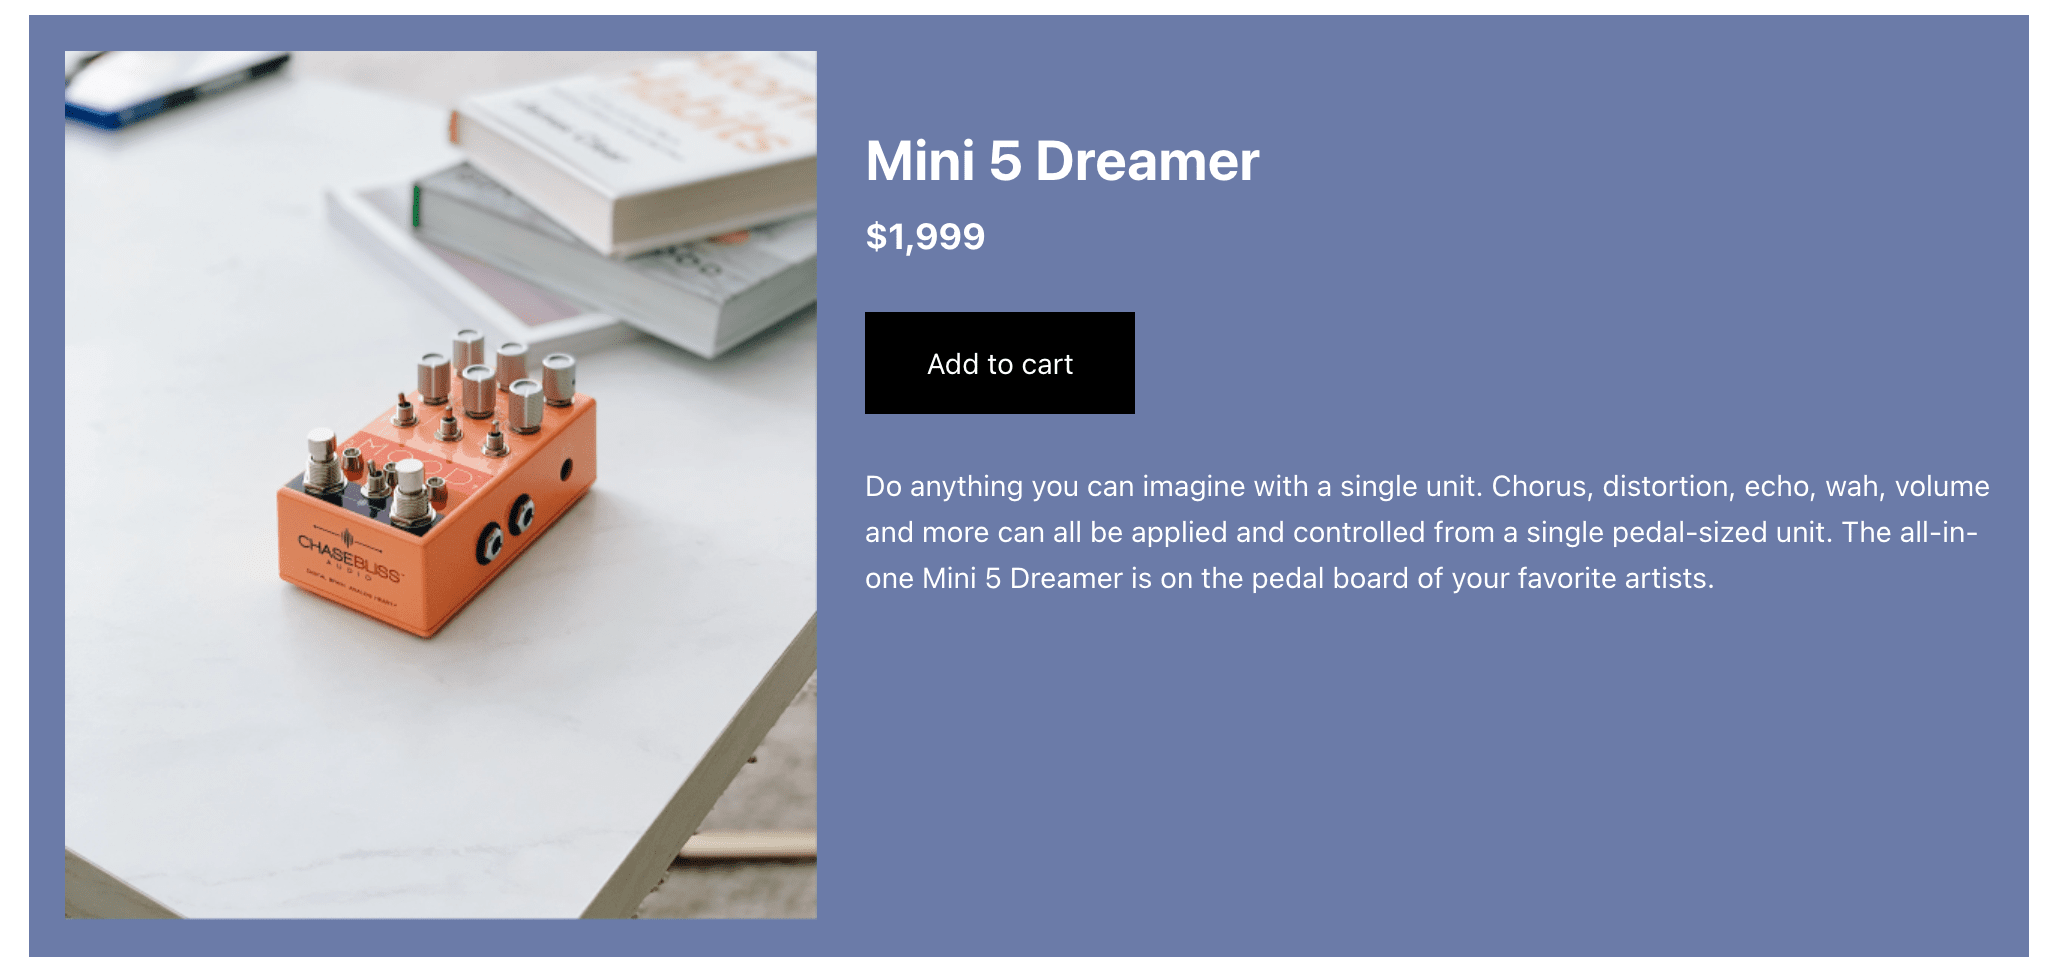
-### Add product hero pattern [#9181](https://github.com/woocommerce/woocommerce-blocks/pull/9181)
-
-1. Create a page/post and use the block inserter->patterns->WooCommerce->Product Hero | Wide
-2. Update/save and ensure the design is close to the suggested design seen below.
-
-
-
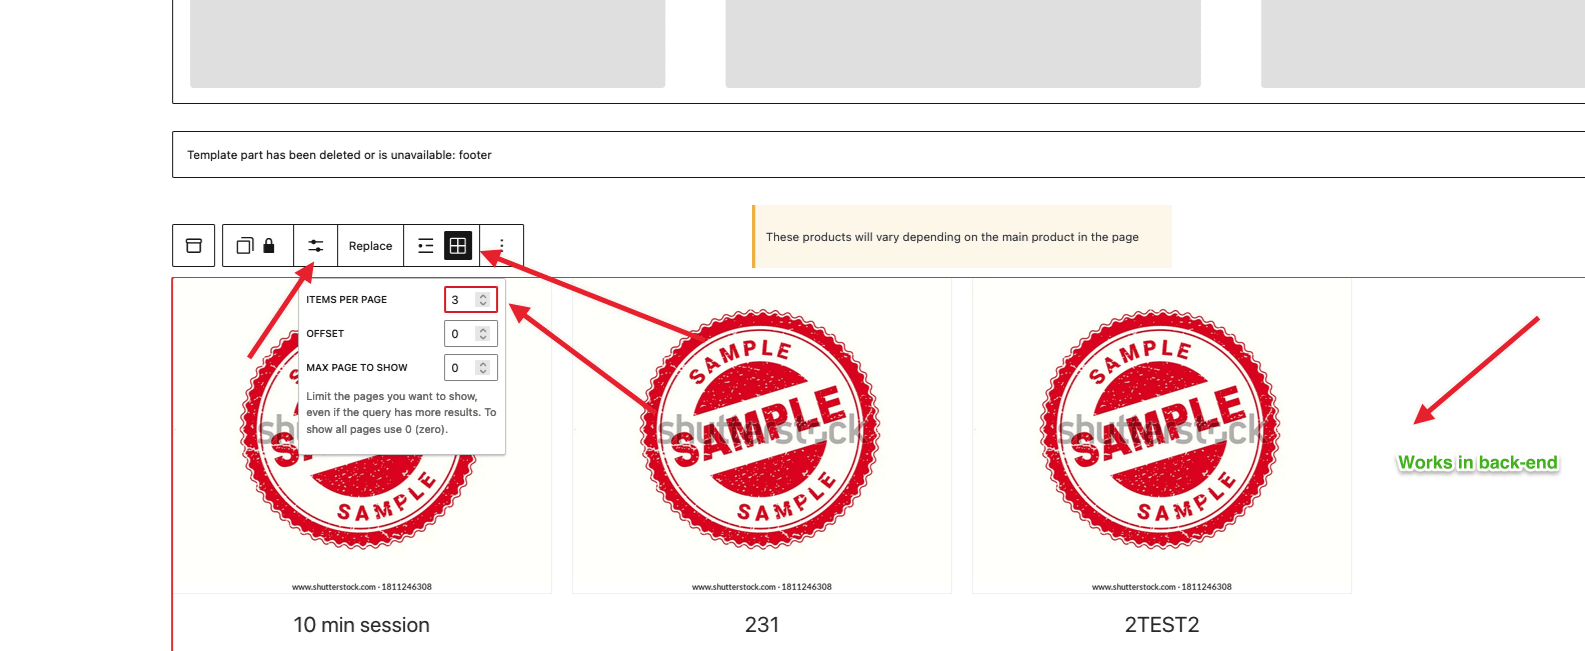
-### Single Product Template - Related Products: fix items per page option [#9286](https://github.com/woocommerce/woocommerce-blocks/pull/9286)
-
-1. Edit the Single Product Template.
-2. Click on the button `Upgrade to Blockified Single Product template`.
-3. Focus the `Related Products Controls` block.
-4. Change the option `Items per Page`, for example put 1. (check the image below)
-5. Save the template.
-6. Visit a Product and be sure that the Related Products block shows the number of products that you selected before. (if you select a high number, there is the risk that there will be displayed fewer products. It is not a bug, but it means that aren't so many related products).
-
-
-
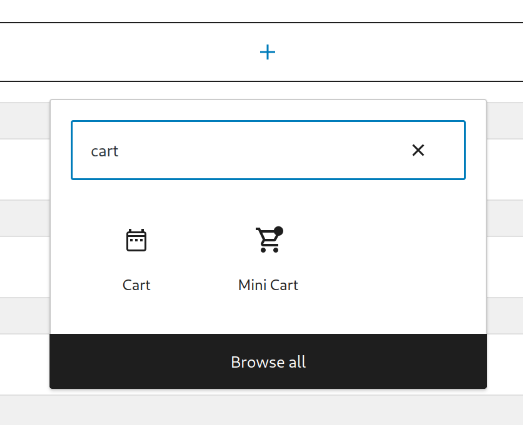
-### Remove duplicated code in BlockTypesController.php [#9283](https://github.com/woocommerce/woocommerce-blocks/pull/9283)
-
-1. Change your theme to a classic theme (ie: Storefront).
-2. Go to Appearance > Widgets.
-3. Verify the All Products, Cart and Checkout block don't appear in the inserter.
-
-(Note: there is _Cart_ widget which _is_ available in the inserter, you can distinguish it from the block because it doesn't have a trolley icon)
-
-
-
-### Fix Product Price styles leaking into the Mini Cart, Cart and Checkout blocks [#9276](https://github.com/woocommerce/woocommerce-blocks/pull/9276)
-
-#### Product Price styles don't leak into the Mini Cart block
-
-1. Go to Appearance > Editor > Template Parts > Mini Cart.
-2. Open the Styles sidebar > Blocks > Product Price.
-3. Set some margin and color to the Product Price.
-4. Verify that the new styles aren't applied to the product prices shown in the Mini Cart.
-5. Go to the frontend and open the Mini Cart drawer.
-6. Verify again that the styles you set in step 3 don't affect the product prices shown in the Mini Cart drawer.
-
-#### Product Price styles are still applied to the Single Product template
-
-1. Go to Appearance > Editor > Templates > Single Product. Add the Product Price block somewhere in the template.
-2. Open the Styles sidebar > Blocks > Product Price.
-3. Set some margin and color to the Product Price.
-4. Verify that the Product Price block has the margin and color you set.
-7. Open the single product page in the frontend.
-8. Verify that the Product Price block has the margin and color you set.
-
-#### Product Price styles are still applied to the Products and All Products blocks
-
-1. Go to Appearance > Editor > Templates > Product Catalog. Add the Products and All Products blocks somewhere in the template.
-2. Open the Styles sidebar > Blocks > Product Price.
-3. Set some margin and color to the Product Price.
-4. Verify that the Product Price inner blocks have the margin and color you set.
-7. Open the Shop page in the frontend.
-8. Verify that the Product Price inner blocks have the margin and color you set.
-
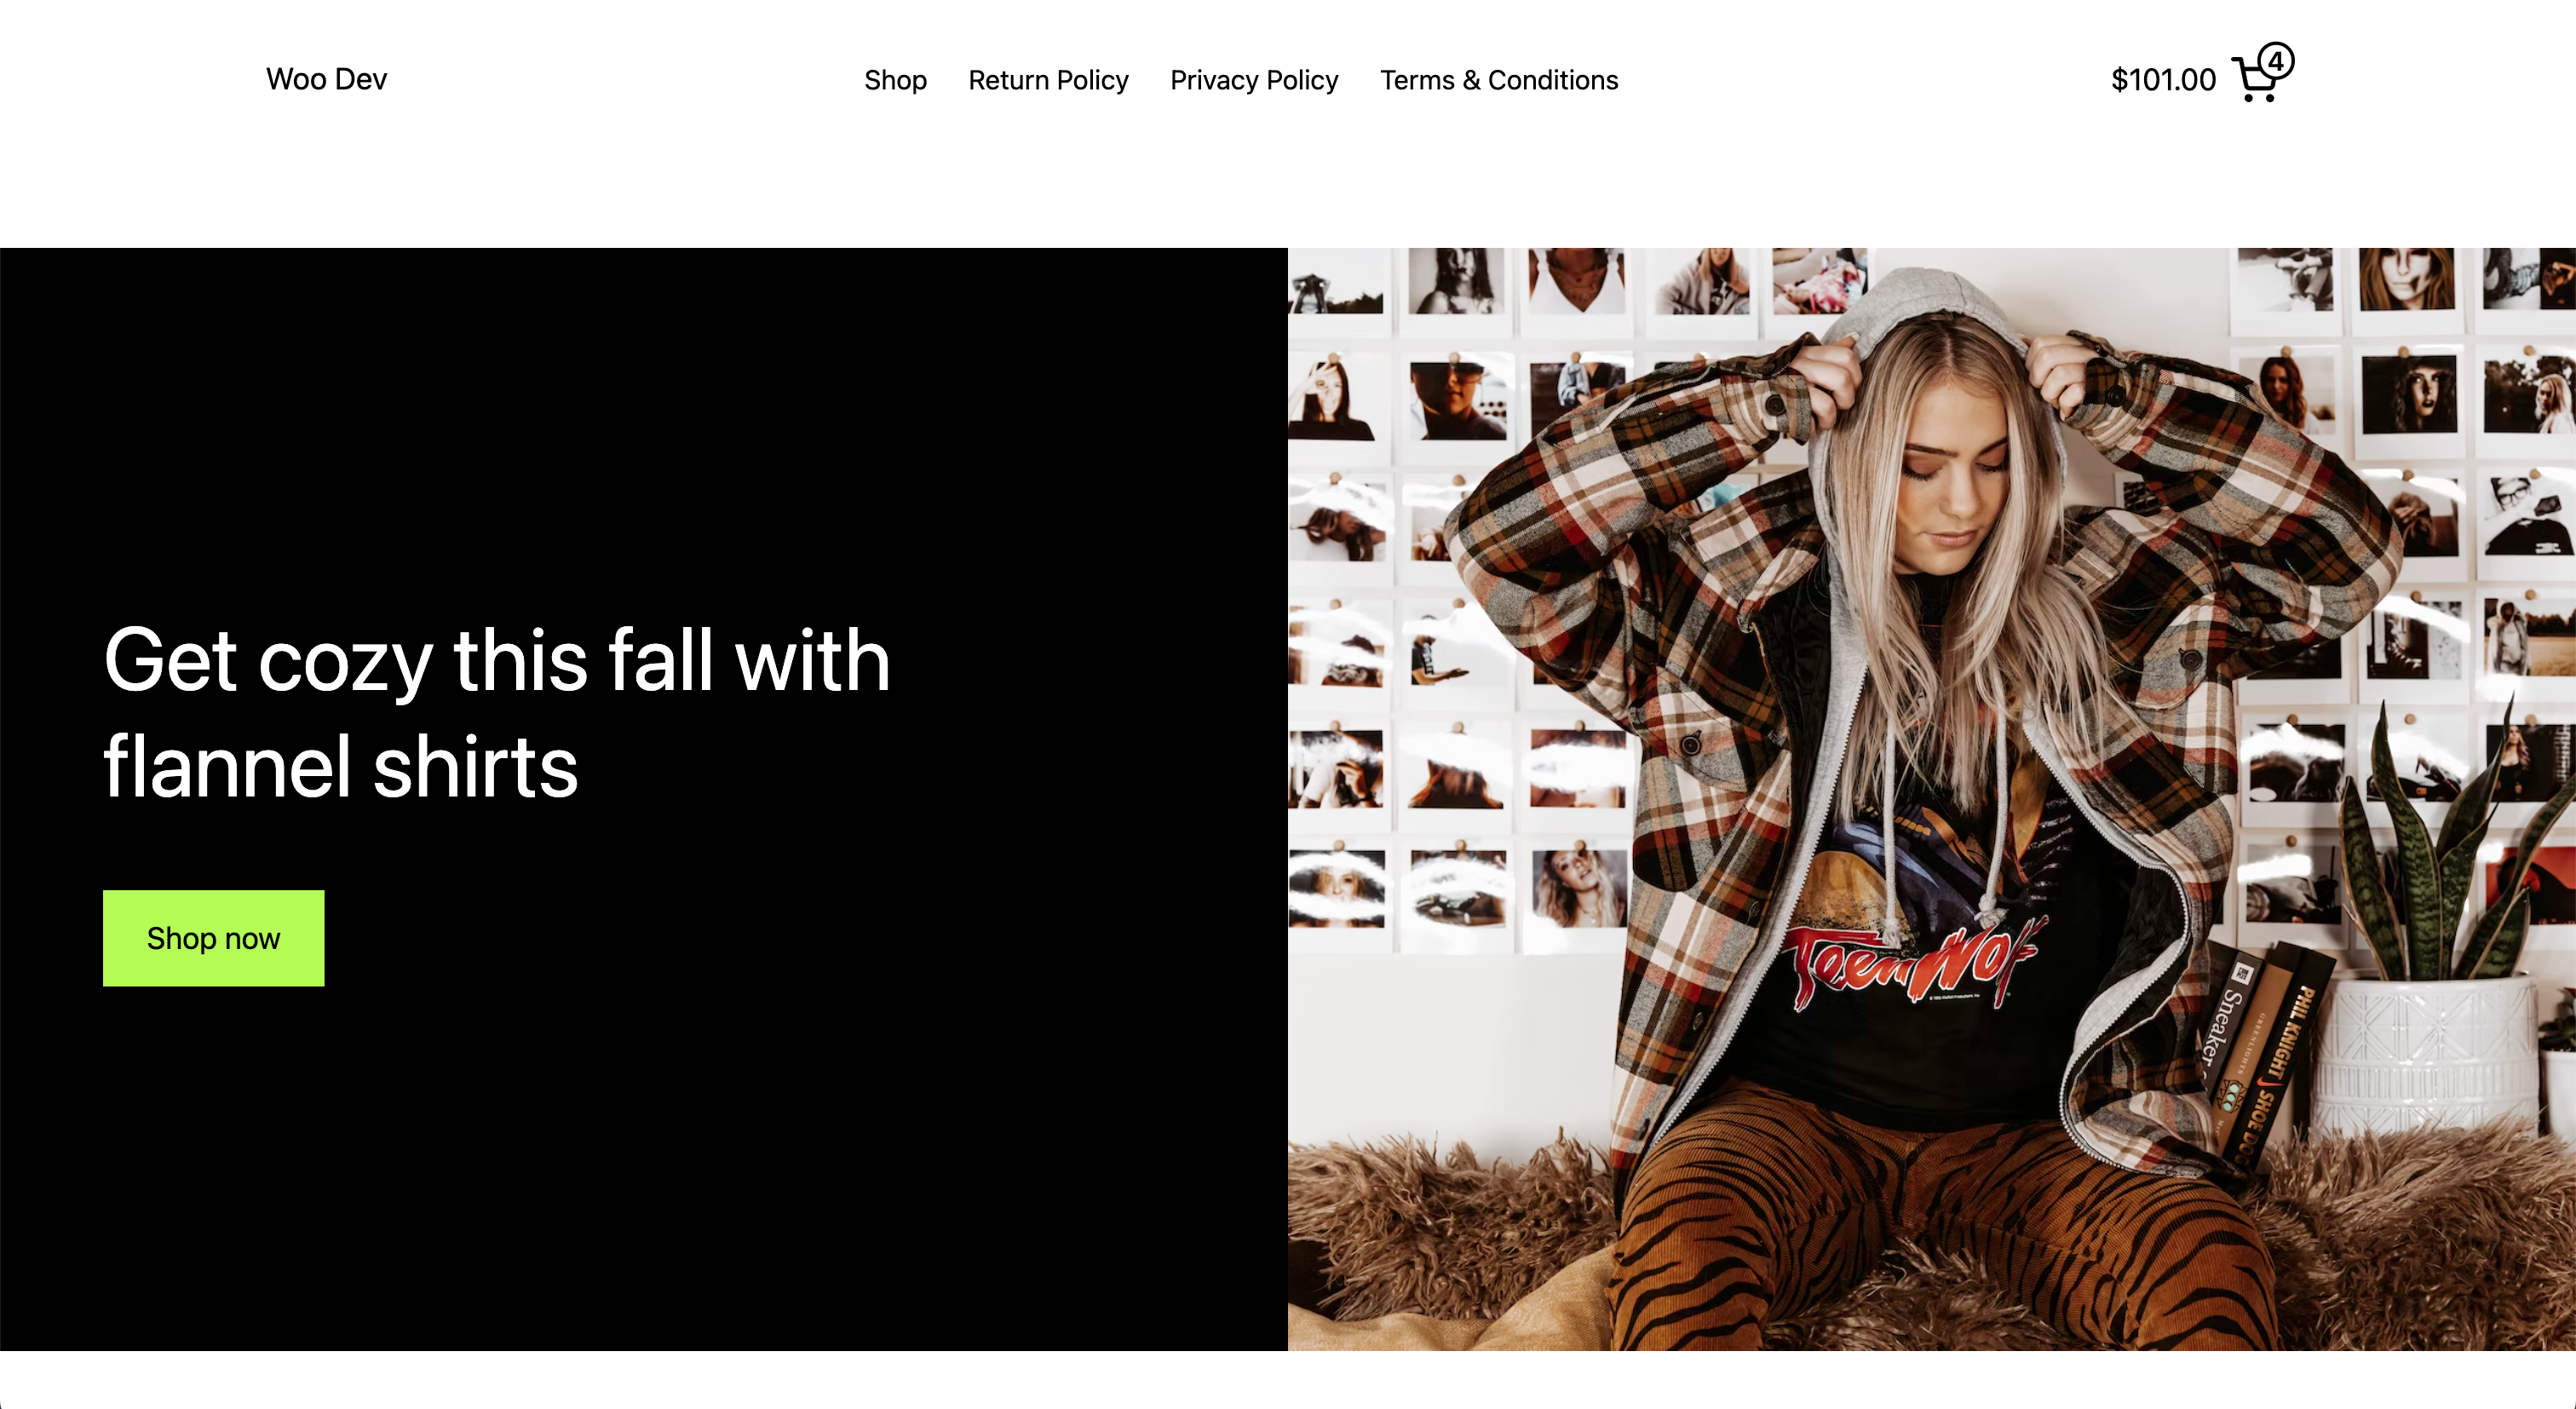
-### Implement new Hero Product – Split pattern [#9191](https://github.com/woocommerce/woocommerce-blocks/pull/9191)
-
-1. Create a new page or post
-2. Make sure the `WooCommerce Hero Product – Split` pattern appears under the WooCommerce category dropdown.
-3. Insert in and make sure it shows as expected on the design.
-
-
-
-### Add featured category cover image [#9284](https://github.com/woocommerce/woocommerce-blocks/pull/9284)
-
-1. Create a page and use the block inserter->patterns->WooCommerce and to insert the Featured Category Cover Image.
-2. Insert the pattern and update/save and check the frontend and ensure it is displaying close to the design from [#9046](https://github.com/woocommerce/woocommerce-blocks/issues/9046)
-
-
-
-### Prevent email address being removed when changing shipping method/entering shipping address [#9328](https://github.com/woocommerce/woocommerce-blocks/pull/9328)
-
-1. Enable local pickup (WooCommerce -> Settings -> Shipping -> Local Pickup) and add some locations.
-2. Add some shipping locations in WooCommerce -> Settings -> Shipping.
-3. In an incognito window, add an item to your cart and go to the Checkout block.
-4. Click the "Local Pickup" button in the shipping method selector.
-5. Enter your email address, then click the "Shipping" button. Ensure the email address remains as you entered it.
-6. Change the email address again, put something different in.
-7. Edit the "First name" field of the shipping address. Ensure the email address remains as you entered it.
-8. Uncheck the "Use shipping as billing" checkbox and check out with two different addresses. Ensure the addresses are correct in the order confirmation email and in the WooCommerce back end.
-
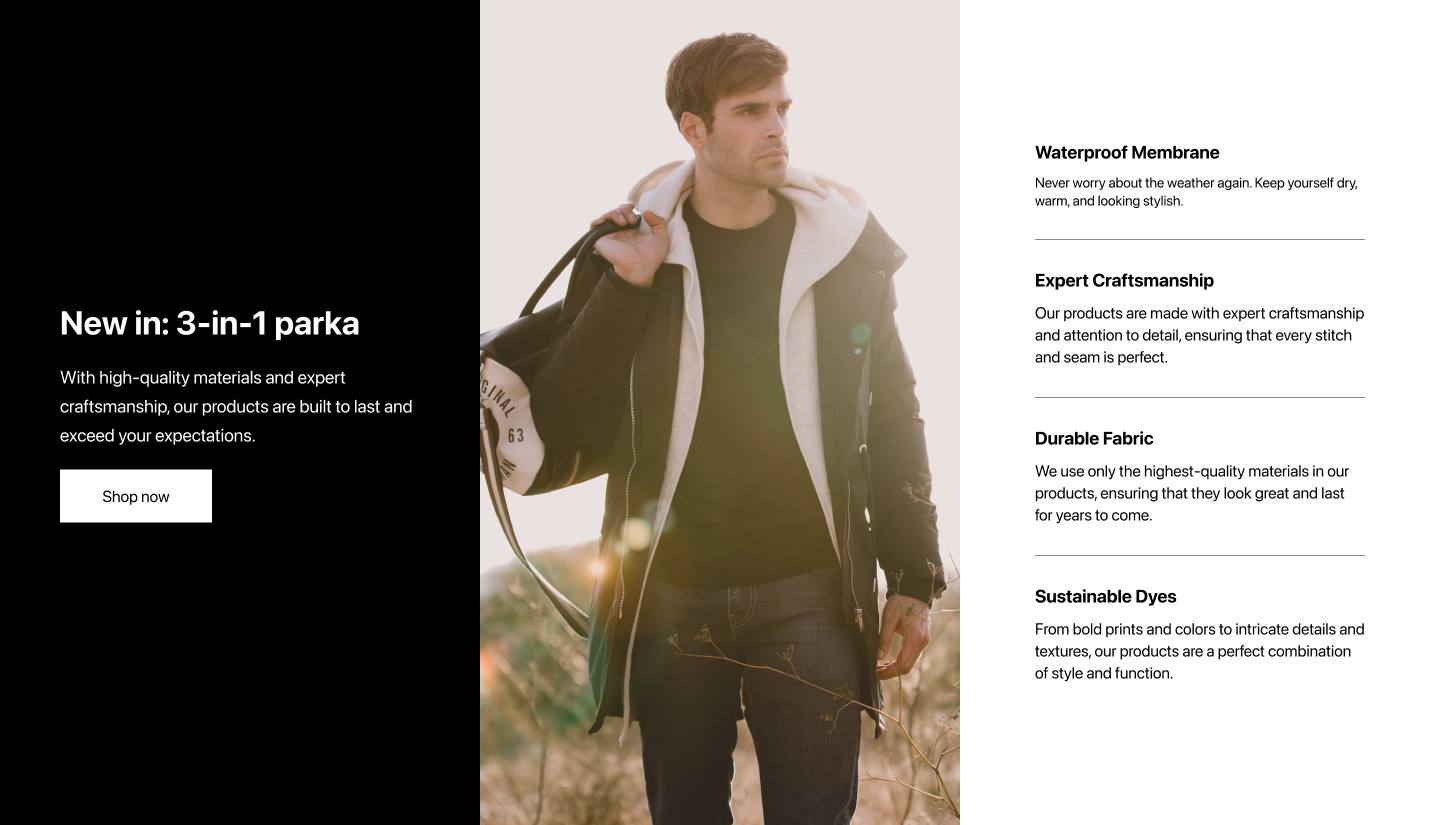
-### [Pattern] Add new Hero product 3 split pattern [#9319](https://github.com/woocommerce/woocommerce-blocks/pull/9319)
-
-1. Create a new page or post
-2. Make sure the `Hero product 3 split` pattern appears under the WooCommerce category dropdown.
-3. Insert in and make sure it shows as expected on the design.
-
-
-
-### Rename Add to Cart [#9315](https://github.com/woocommerce/woocommerce-blocks/pull/9315)
-
-1. Open the Site Editor.
-2. Go to the Single Product Template.
-3. Click on the button "Upgrade to Blockified Single Product Template".
-4. Click on the `Add to Cart" button.
-5. On the sidebar, check the name of the block. Be sure that the name is "Add to Cart with Options".
-
-### Product Image Gallery: fix resize width when the window resizes [#9299](https://github.com/woocommerce/woocommerce-blocks/pull/9299)
-
-1. Edit the Single Product Template.
-2. Switch to the blockified version.
-3. Save.
-4. Visit a product page that has multiple images (if you are using test products, you can visit the `Logo Collection` product.
-5. Be sure that the Product Image Gallery block doesn't overlap with the text when you resize the window.
-
-| Before | After |
-| ------ | ----- |
-|<video src=https://user-images.githubusercontent.com/4463174/235451588-b6efc60f-d15a-4fec-a841-cf1977d47a01.mp4 />| <video src=https://user-images.githubusercontent.com/4463174/235451495-96530cb7-ac9f-4754-9afd-55a183ad3dd7.mp4 />|
-
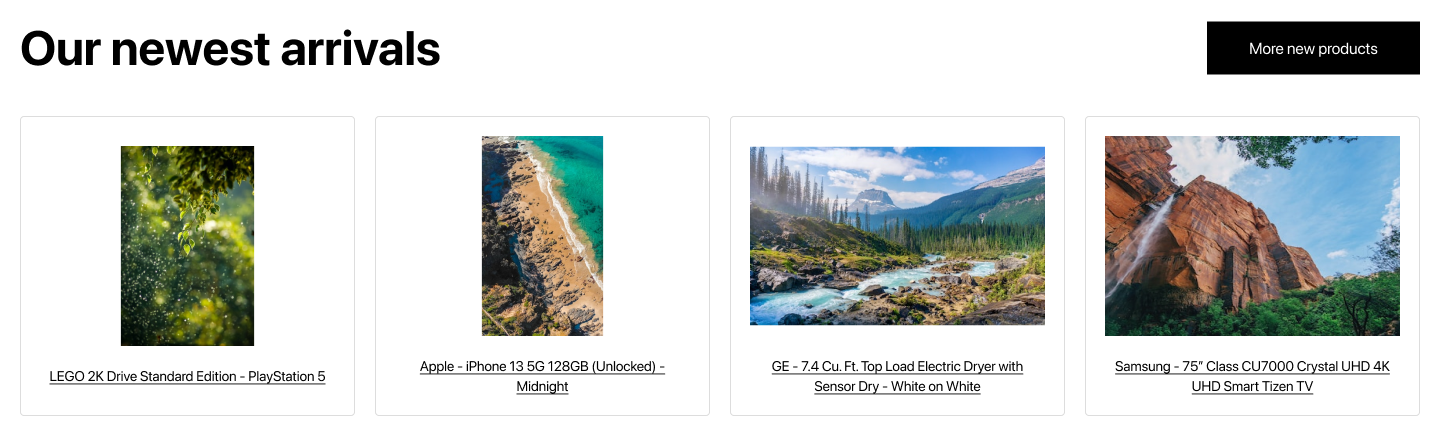
-### [Pattern] Add new Product Collections: Newest Arrivals pattern [#9240](https://github.com/woocommerce/woocommerce-blocks/pull/9240)
-
-1. Create a new page or post
-2. Make sure the `Product Collections: Newest Arrivals` pattern appears under the WooCommerce category dropdown.
-3. Insert in and make sure it shows as expected on the design.
-
-
-
-### Fix Mini Cart block not respecting Add-to-Cart behaviour attribute when adding the first product [#9257](https://github.com/woocommerce/woocommerce-blocks/pull/9257)
-
-1. Go to Appearance > Editor and add the Mini Cart block to the header of your store.
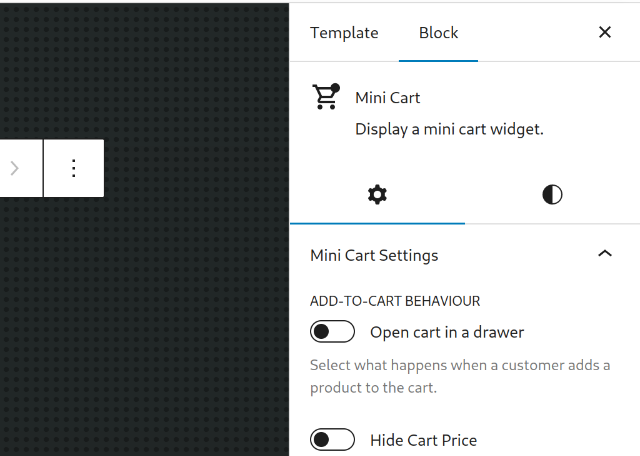
-2. Make sure the _Open cart in a drawer_ option is disabled:
-
-3. Go to the frontend and add a product to your cart from the Shop page.
-4. Verify the drawer doesn't open but the Mini Cart value increases.
-5. Go back to the site editor and enable the _Open cart in a drawer_ option.
-6. Again from the frontend add a product to your cart.
-7. Verify now the drawer does open.
-
-### Fix shipping notices for multiple packages [#9285](https://github.com/woocommerce/woocommerce-blocks/pull/9285)
-
-- Enable “Multiple Packages for WooCommerce” extension.
-- Go to WooCommerce > Settings > Multiple packages
-- Select "group by" product, then save changes.
-- Add several items to your cart.
-- Go to the cart page, toggle open a package section, and choose “local pickup”
-- Toggle open another package and choose something other than "local pickup"
-- See the “Multiple shipments must have the same pickup location” notice above the packages
-- Go to the checkout page
-- Choose "shipping" in the shipping method block
-- Quickly look at the shipping section below and ensure no notice was visible
-
-### Add/featured category focus pattern [#9322](https://github.com/woocommerce/woocommerce-blocks/pull/9322)
-
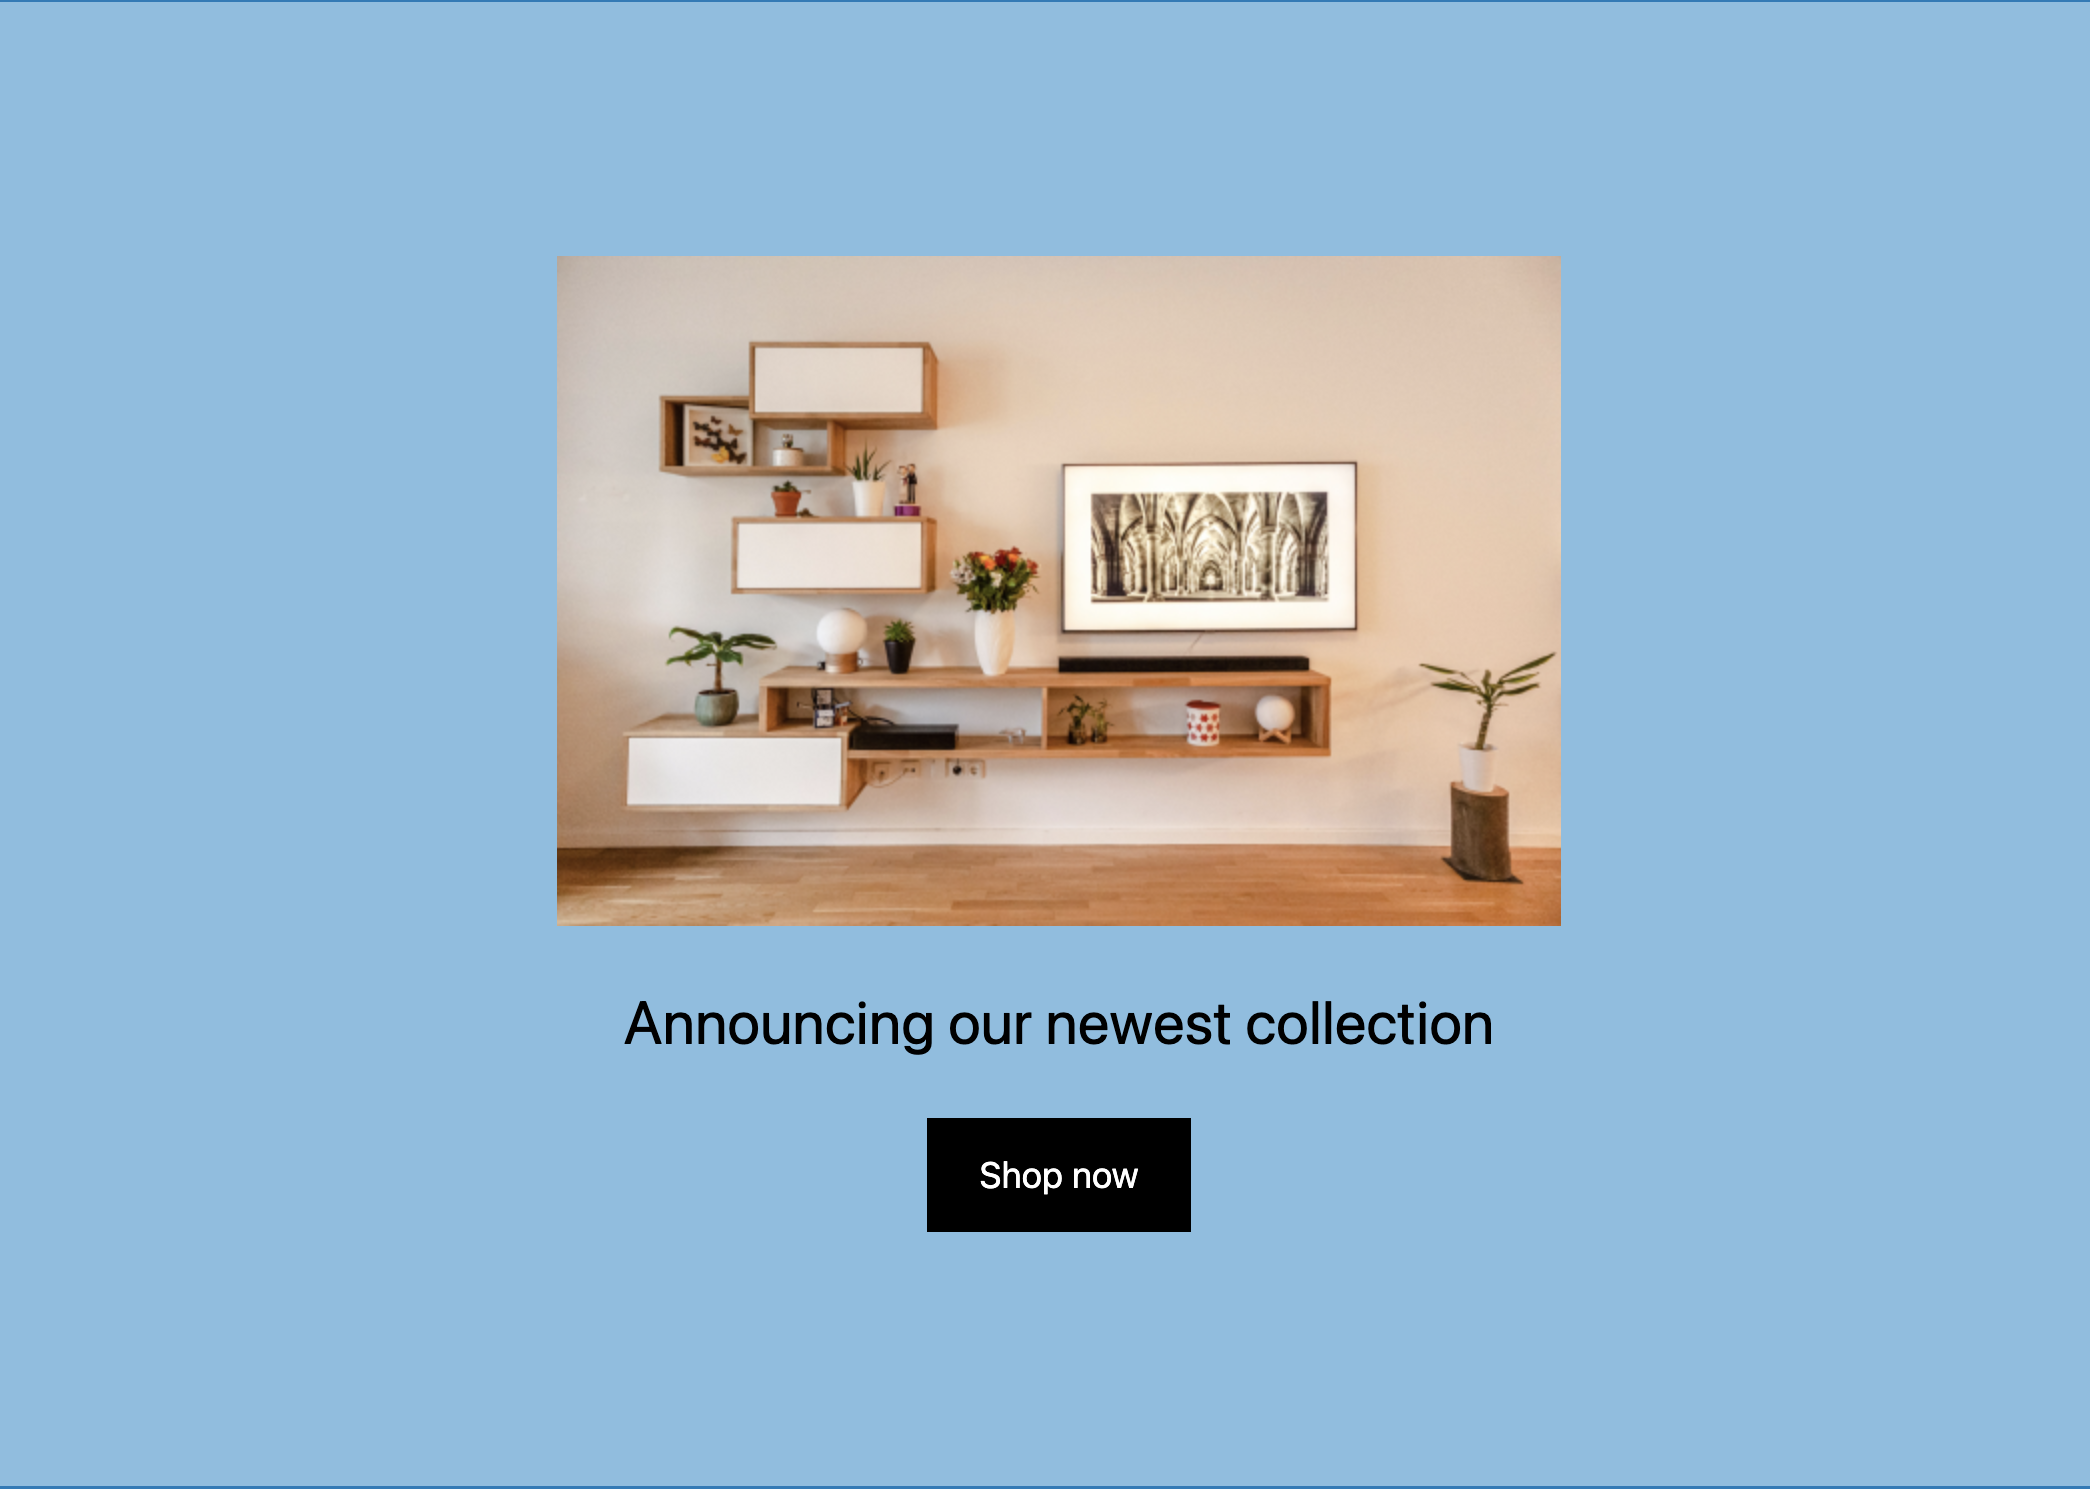
-1. Create a page and use the block inserter->patterns->WooCommerce and to insert the Featured Category Focus.
-2. Notice the preview shows per design screenshot shown above.
-3. Insert the pattern and then update/save and check the frontend and ensure it is displaying as the screenshot above.
-
-
-
-### Related Products: make Product Title a link by default [#9179](https://github.com/woocommerce/woocommerce-blocks/pull/9179)
-
-1. Go to Appearance > Site Editor > Templates > Single Product.
-2. Add the Related Products somewhere in the page.
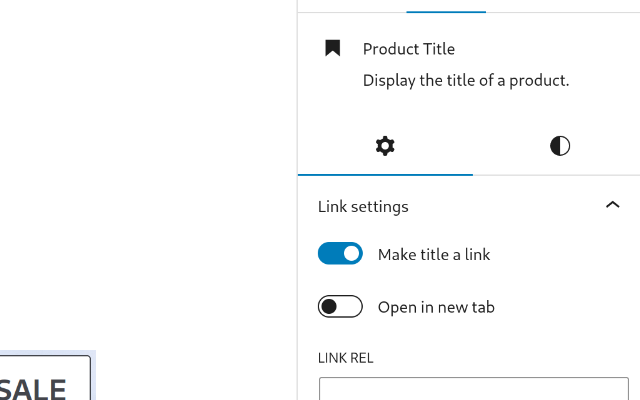
-3. Click on the Product Title inner block.
-4. Verify the _Make title a link_ toggle is on by default.
-
-
-
-### Product Image Gallery: fix inline [#9297](https://github.com/woocommerce/woocommerce-blocks/pull/9297)
-
-1. Edit the Single Product Template.
-2. Switch to the blockified version.
-3. Move the Product Image Gallery before the block `Store breadcrumbs`.
-4. Save.
-5. Visit a product page.
-6. Be sure that the Product Image Gallery isn't displayed inline.
-
-### Add new Product collections: Featured Collection pattern [#9246](https://github.com/woocommerce/woocommerce-blocks/pull/9246)
-
-1. Create a new page or post
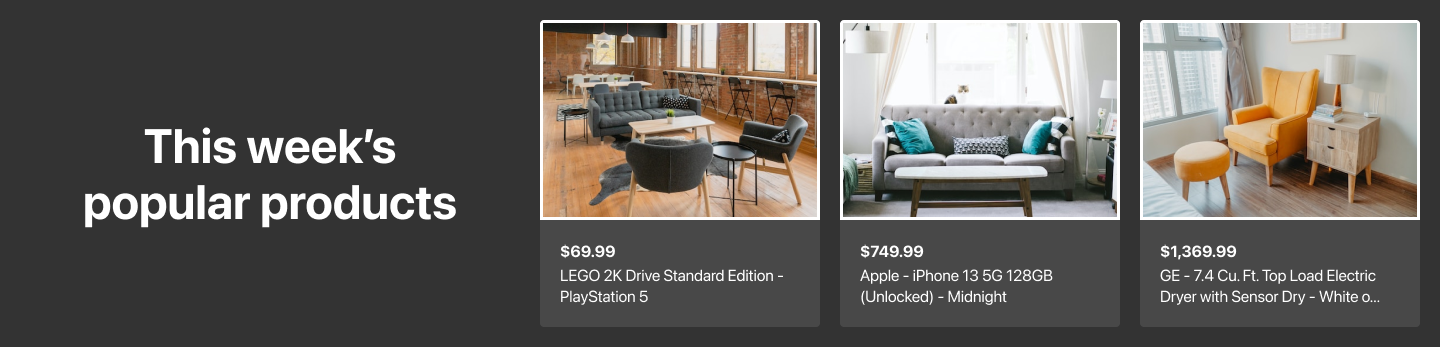
-2. Make sure the `Product Collections: Featured Collection` pattern appears under the WooCommerce category dropdown.
-3. Insert in and make sure it shows as expected on the design.
-
-
-
-### Remove min-height and padding for WP Button elements [#9260](https://github.com/woocommerce/woocommerce-blocks/pull/9260)
-
-1. Enable TT3 theme with the Aubergine style.
-2. Go to the Site Editor and add the mini-cart block to the header and save.
-3. Go to the Site Editor and edit the mini-cart template part and save.
-4. Check the cart buttons in the editor vs the cart buttons in the front-end are the same.
-5. Enable TT3 theme with the Whisper style.
-2. Create a new page and add a Single Product and a Checkout block and save.
-3. Check the cart buttons in the editor vs the cart buttons in the front-end are the same.
-
-#### Before
-
-| Editor | Front-end |
-| ------ | ----- |
-| <img width="486" alt="Screenshot 2023-02-28 at 10 41 52" src="https://user-images.githubusercontent.com/186112/221814583-b6cf968b-5b5b-4d70-821b-7667f83aa5f9.png"> | <img width="485" alt="Screenshot 2023-02-28 at 10 41 46" src="https://user-images.githubusercontent.com/186112/221814479-f42ec118-b41e-4372-9ec8-c52a1d927716.png"> |
-
-| Editor | Front-end |
-| ------ | ----- |
-| <img width="499" alt="Screenshot 2023-03-01 at 10 01 41" src="https://user-images.githubusercontent.com/186112/222092514-201d45e3-88be-47c5-ad9a-58af77f8ef97.png">|<img width="512" alt="Screenshot 2023-03-01 at 10 01 51" src="https://user-images.githubusercontent.com/186112/222092537-fae29747-d360-406c-b0df-35f02a5b78b3.png">|
-
-#### After
-
-| Editor | Frontend |
-| ------ | ----- |
-| 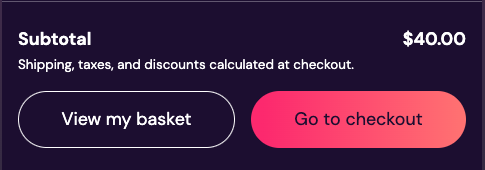 | 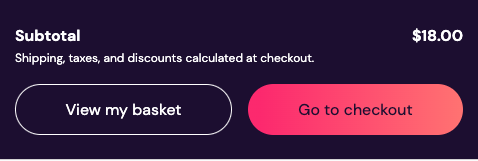 |
-
-| Editor | Frontend |
-| ------ | ----- |
-|| |
-
-### Products block: Using nested selector to add margin between Product elements [#8993](https://github.com/woocommerce/woocommerce-blocks/pull/8993)
-
-1. Create a new post & Add Products block to it.
-2. Add all product elements as inner blocks
-<img width="274" alt="image" src="https://user-images.githubusercontent.com/16707866/233044525-50b864de-0236-4d11-8bdc-9e89c539b611.png">
-
-3. Save & publish
-4. Verify that on Editor & Frontend, There is equal space between the product elements.
-5. Now using following steps, verify that user can still change margin-top & bottom of products elements using Global styles:
- 1. Open the Global Styles sidebar by clicking the "Styles" button at the top right corner of the editor. [video](https://user-images.githubusercontent.com/16707866/228781997-24a9a29f-4be7-46d4-b1b3-41520692d86d.mov)
- 2. In the Global Styles sidebar, locate any product element, for example, "Product Price" block.
- 3. Change margin-top & bottom and save the changes.
- 4. Check the Product Price block in both the editor and on the front-end to ensure that the changes made through the Global styles UI are accurately applied:
- - In the editor, inspect Product Price block & ensure it matches the value set in the Global styles UI.
- - Save the post & publish it. On frontend, inspect Product Price block & ensure it matches the value set in the Global styles UI.
-
-### [Patterns]: Add new Header Centered Search pattern [#9081](https://github.com/woocommerce/woocommerce-blocks/pull/9081)
-
-1. Create a new page or post
-2. Make sure the `WooCommerce Header Centered Search` pattern appears under the WooCommerce category dropdown.
-3. Insert in and make sure it shows as expected on the design.
-
-
-
-### [Patterns] Add new Footer with 3 menus menu [#9175](https://github.com/woocommerce/woocommerce-blocks/pull/9175)
-
-1. Create a new page or post
-2. Make sure the `Footer with 3 menus` pattern appears under the WooCommerce category dropdown.
-3. Insert in and make sure it shows as expected on the design.
-
-
-
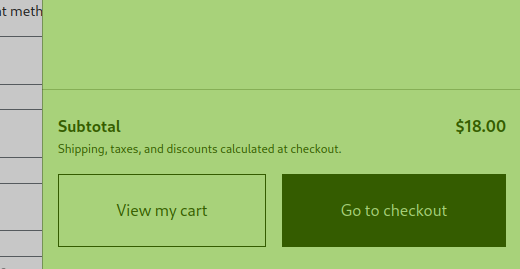
-### Use currentColor for Mini Cart footer border [#9245](https://github.com/woocommerce/woocommerce-blocks/pull/9245)
-
-1. Go to the Appearance > Editor > Template Parts, open the `Header template`, and insert the `Mini Cart` block.
-2. Go to the Appearance > Editor > Template Parts and open the `Mini Cart` template part.
-3. Change the text color of the Mini Cart template part to something different than black or gray. For example, set it to red, blue or green.
-4. Save it and, in the frontend, open the Mini Cart drawer.
-5. Verify the border between the main content of the Mini Cart drawer and the Mini Cart footer follows the text color (it's expected to be a translucent version of that color, similar to the border of the quantity input field of products).
-
-Before | After
---- | ---
-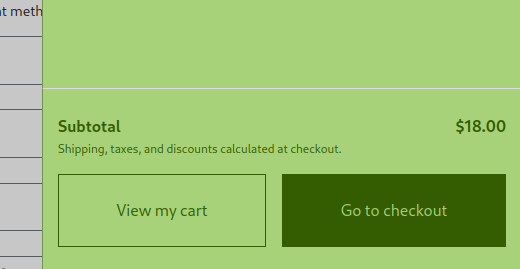 | 
-
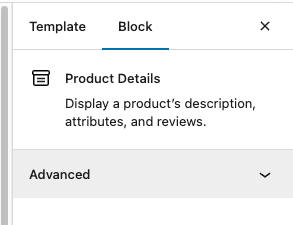
-### Update the icon and description for the Product Details block [#9241](https://github.com/woocommerce/woocommerce-blocks/pull/9241)
-
-1. Open the Site Editor.
-2. Go to the Single Product Template.
-3. Click on the button "Upgrade to Blockified Single Product Template".
-4. Get the focus on the Product Details Block.
-5. On the sidebar, check the icon of the block and the description are equals to the image below:
-
-
-
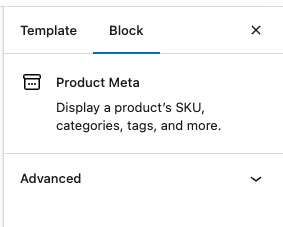
-### Update icon and description for the Product Meta block [#9243](https://github.com/woocommerce/woocommerce-blocks/pull/9243)
-
-1. Open the Site Editor.
-2. Go to the Single Product Template.
-3. Click on the button "Upgrade to Blockified Single Product Template".
-4. Get focus on the Product Meta Block.
-5. On the sidebar, check the icon of the block and the description are equals to the image below:
-
-
-
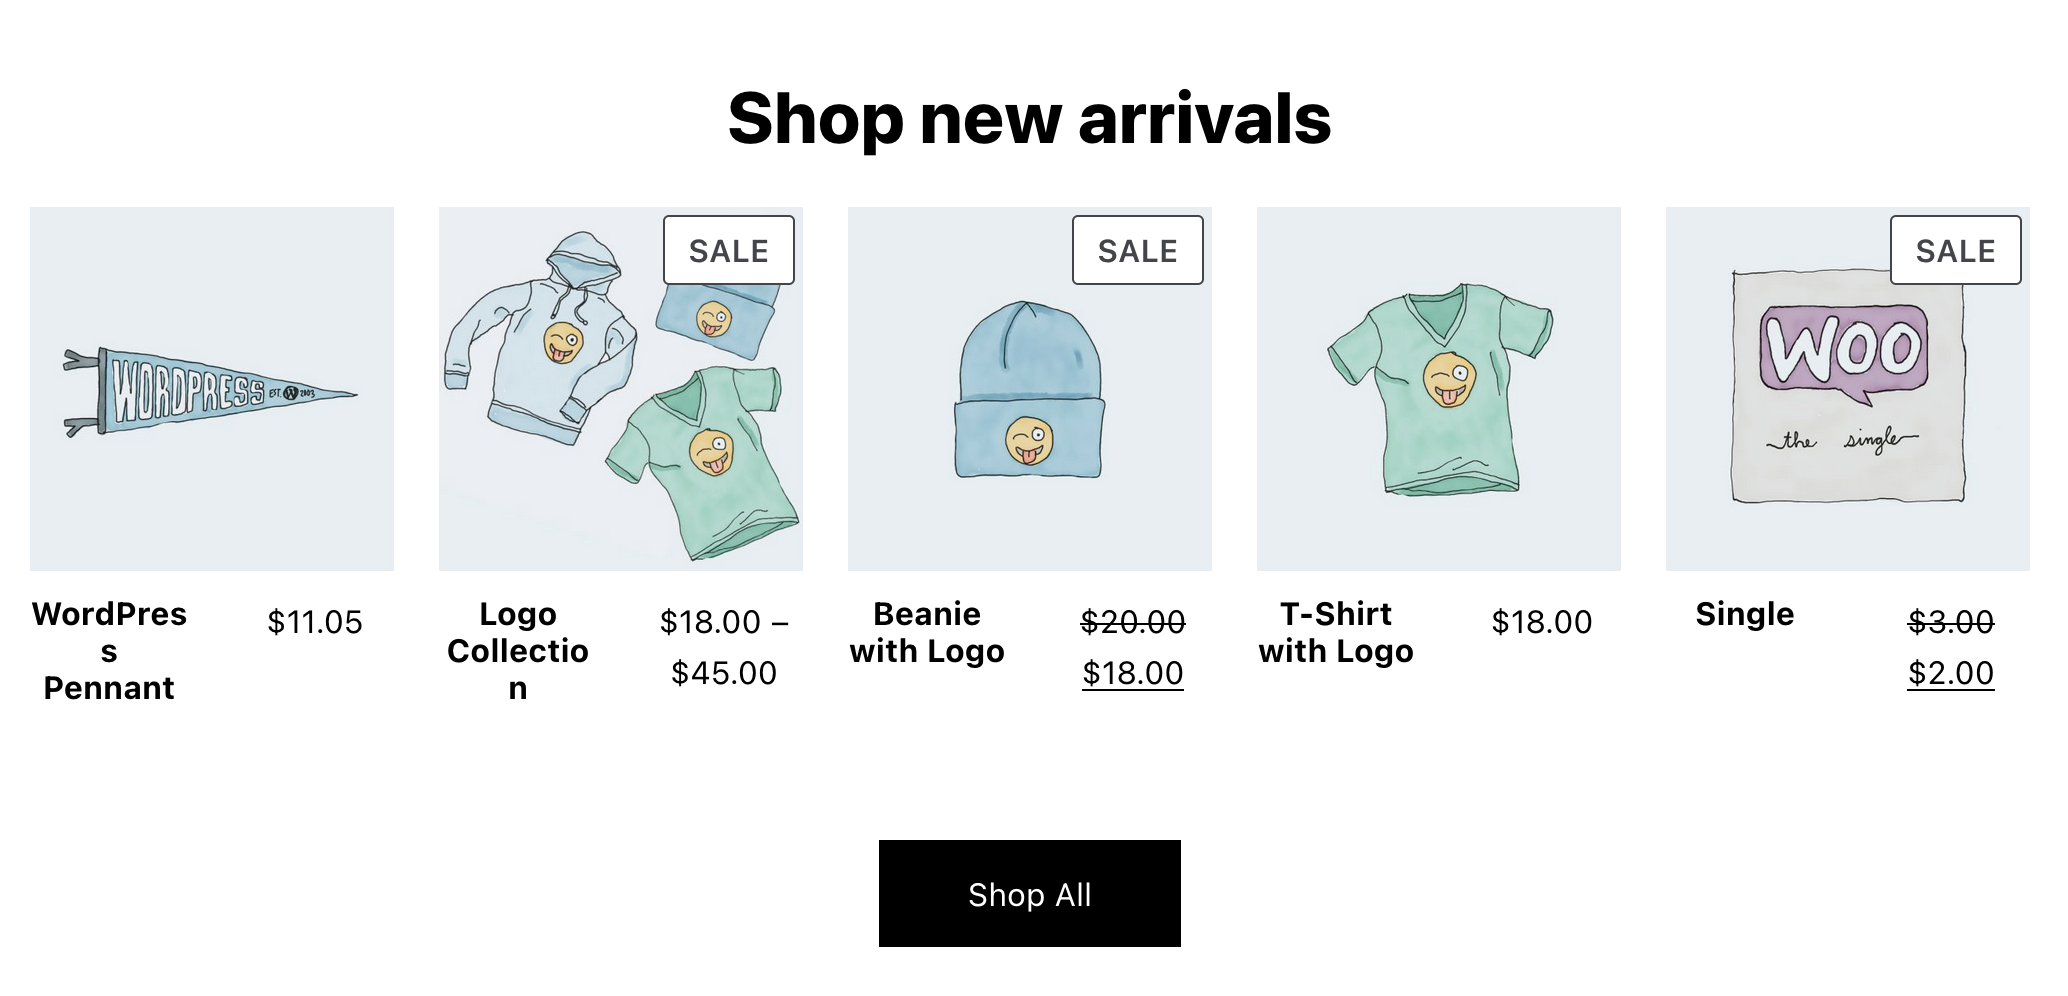
-### [Patterns]: Add new Featured products: 5-item grid pattern [#9006](https://github.com/woocommerce/woocommerce-blocks/pull/9006)
-
-1. Create a new page or post
-2. Make sure the `WooCommerce Featured Products 5-item grid` pattern appears under the WooCommerce category dropdown.
-3. Insert in and make sure it shows as expected on the design.
-
-
-
-### Implement Hand-Picked Products block [#7925](https://github.com/woocommerce/woocommerce-blocks/pull/7925)
-
-#### Simplest path
-
-1. Add a “Products (Beta)” block to your page.
-2. Go to the “Advanced Filters” within the Inspector Controls and add “Hand-picked Products”.
-3. Start typing to select some products.
-4. Ensure the preview is correctly updated as you narrow down your selection.
-5. Click Publish.
-6. Ensure the front-end is correct.
-
-#### Complex path
-
-1. Repeat steps 1–4 above.
-2. Add additional filters (such as “On sale”).
-3. Ensure the block only applies the subsequent filters to the subset of products you have selected.
-
-### Only validate postcode if its required or filled [#9377](https://github.com/woocommerce/woocommerce-blocks/pull/9377)
-
-1. Set country to something with an optional postcode like Vietnam
-2. Try to checkout with the field empty, it should pass fine.
-
-### Remove `<br>` In Hero Product – Split Pattern Heading [#9409](https://github.com/woocommerce/woocommerce-blocks/pull/9409)
-
-1. In the editor, insert the `Hero Product – Split` pattern.
-2. Inspect the output and confirm that there is no `<br>` in the heading.
-3. Adjust the browser/viewport width and confirm that the text flows naturally without any unexpected line-breaks.
-
-
-
-### Related Products: Fix hardcoded limit product [#9407](https://github.com/woocommerce/woocommerce-blocks/pull/9407)
-
-1. Open the Single Product Template.
-2. Switch to the blockified template.
-3. Focus on the `Related Products Controls` block.
-4. Change the option `Items per Page`, for example, put 10.
-5. Be sure that there are often related products. (if not, you can just clone the same product multiple times)
-6. Save the template.
-7. Visit a Product and be sure that the Related Products block shows the number of products that you selected before. (if you select a high number, there is the risk that there will be displayed fewer products. It is not a bug, but it means that aren't so many related products).
-
-## Feature plugin
-
-### Mini Cart Contents block: fix wide width not being applied in the editor [#9201](https://github.com/woocommerce/woocommerce-blocks/pull/9201)
-
-1. Go to the `Editor`, open the `Header template`, and insert the `Mini Cart` block.
-2. Go to the `Editor` > `Template parts` and open the `Mini Cart` template.
-3. Open the `List View` and click on the `Mini Cart Contents` block.
-4. On the settings sidebar change the `Dimensions` to a wider size (like `9000`) and save.
-5. Verify that the change is applied and the Mini Cart Contents block occupies the entire available width.
-
-Before | After
---- | ---
-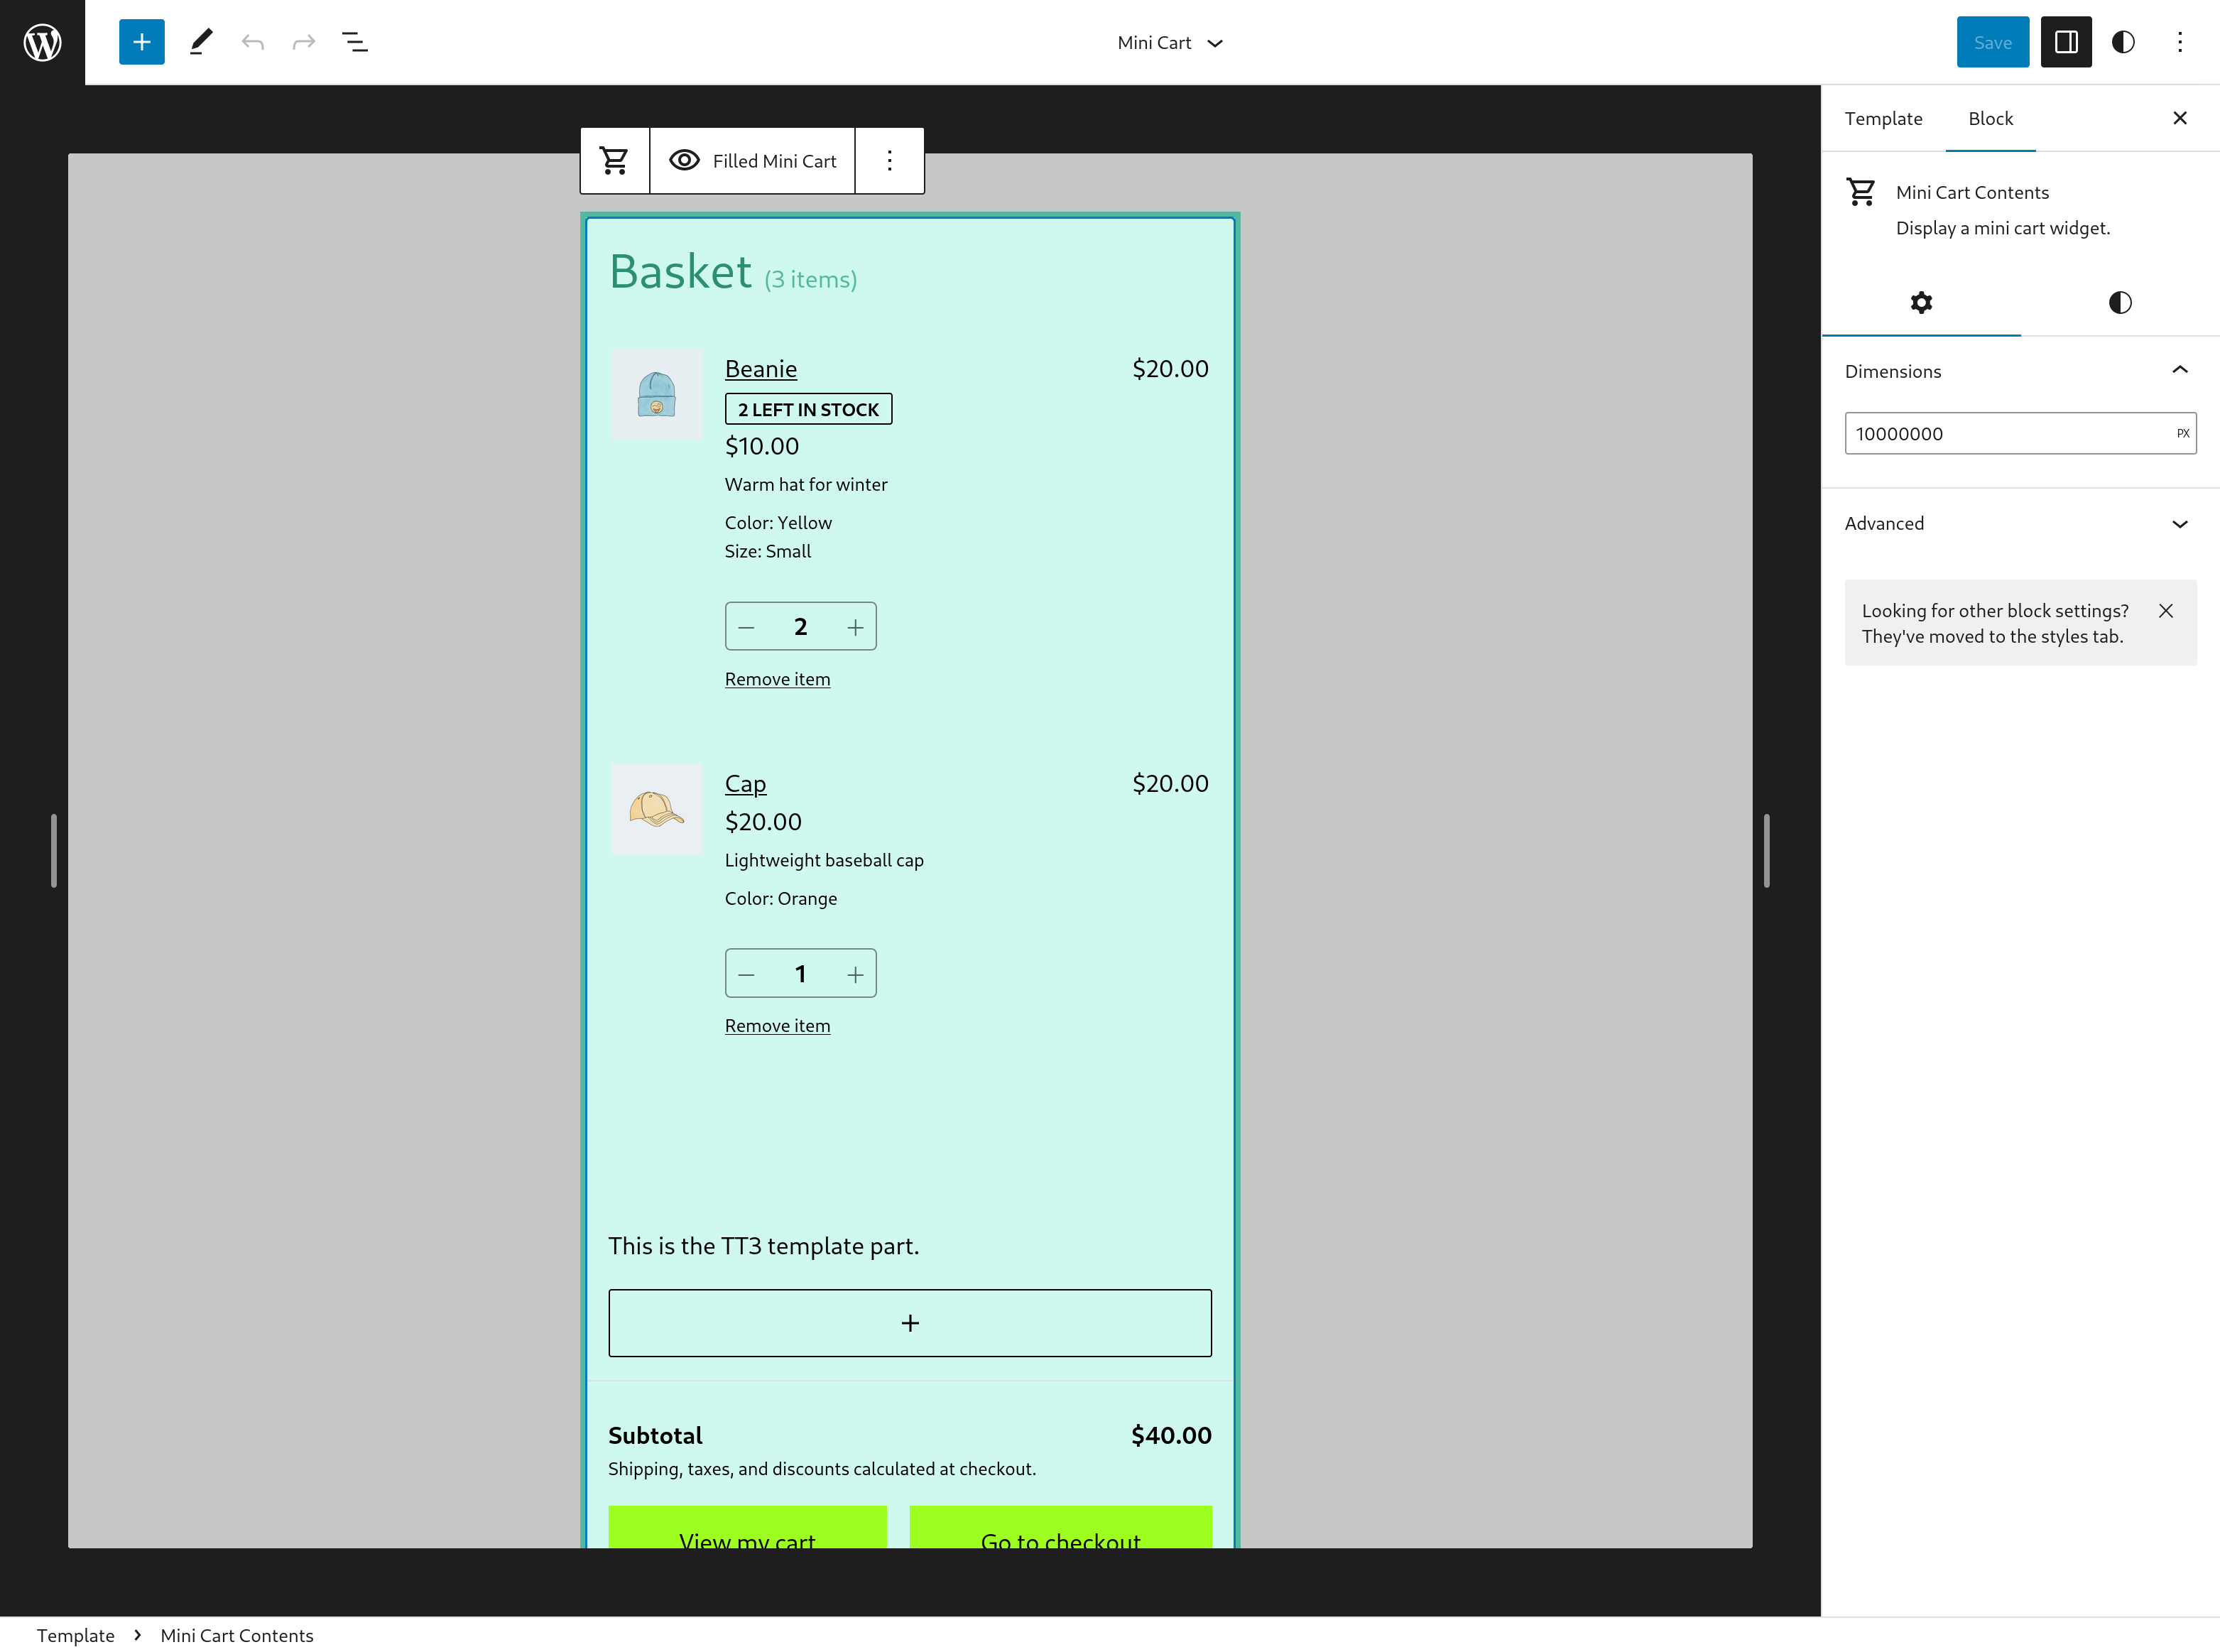 | 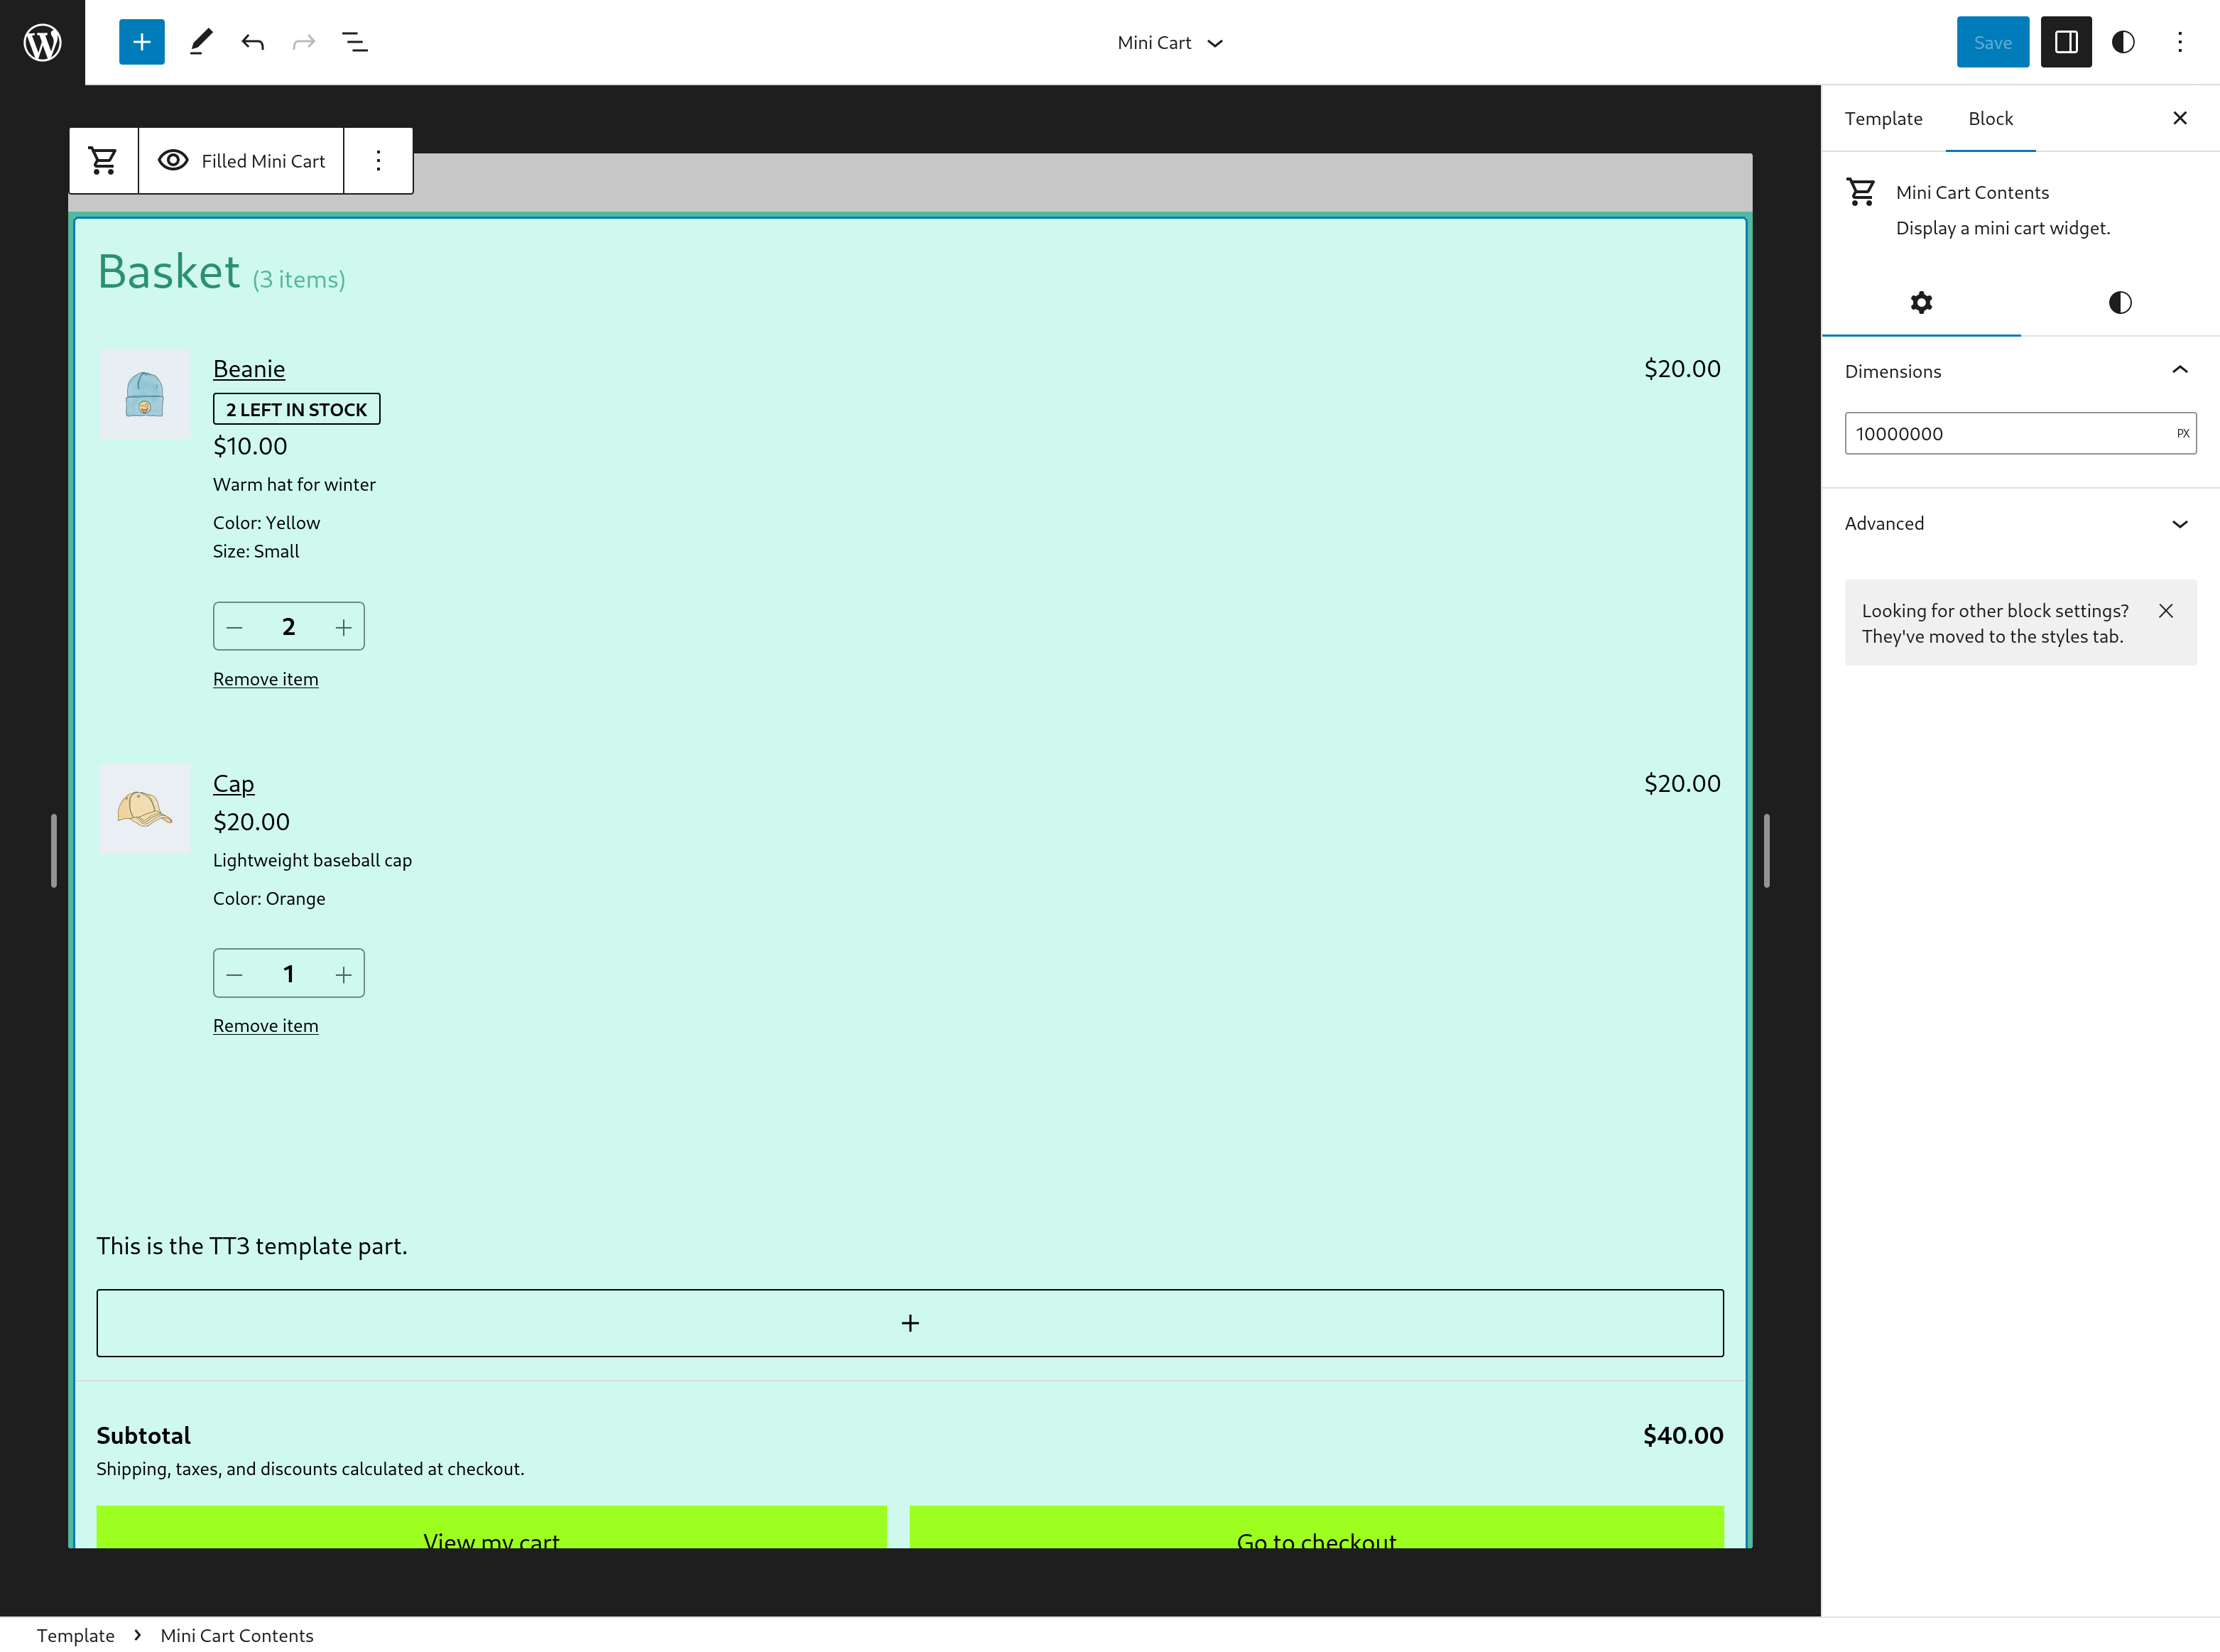
diff --git a/plugins/woocommerce/client/blocks/docs/internal-developers/testing/releases/1021.md b/plugins/woocommerce/client/blocks/docs/internal-developers/testing/releases/1021.md
deleted file mode 100644
index a762d887441..00000000000
--- a/plugins/woocommerce/client/blocks/docs/internal-developers/testing/releases/1021.md
+++ /dev/null
@@ -1,18 +0,0 @@
-# Testing notes and ZIP for release 10.2.1
-
-Zip file for testing: [woocommerce-gutenberg-products-block.zip](https://github.com/woocommerce/woocommerce-blocks/files/11563088/woocommerce-gutenberg-products-block.zip)
-
-## WooCommerce Core
-
-### Fix Mini-Cart block conflict with Page Optimize and Product Bundles. [(9586)](https://github.com/woocommerce/woocommerce-blocks/pull/9586)
-
-1. Make sure you have WC core 7.7.
-2. Enable a block theme.
-3. Add the Mini-Cart block to the header of your store.
-4. Install the Page Optimize and Product Bundles plugins (no need to change anything in their configuration).
-5. Go to a page in the frontend that doesn't have any blocks besides the Mini-Cart you added to the header.
-6. Open the Mini-Cart and verify there is no JS error:
-
-Before | After
---- | ---
- | 
diff --git a/plugins/woocommerce/client/blocks/docs/internal-developers/testing/releases/1022.md b/plugins/woocommerce/client/blocks/docs/internal-developers/testing/releases/1022.md
deleted file mode 100644
index e72429e834a..00000000000
--- a/plugins/woocommerce/client/blocks/docs/internal-developers/testing/releases/1022.md
+++ /dev/null
@@ -1,30 +0,0 @@
-# Testing notes and ZIP for release 10.2.2
-
-Zip file for testing: [woocommerce-gutenberg-products-block.zip](https://github.com/woocommerce/woocommerce-blocks/files/11612989/woocommerce-gutenberg-products-block.zip)
-
-## WooCommerce Core
-
-### Fix Mini-Cart block check to see whether a script has already been enqueued. ([9649](https://github.com/woocommerce/woocommerce-blocks/pull/9649))
-
-0. Make sure you have WC core 7.7.1.
-1. Enable a block theme.
-2. Add the Mini-Cart block to the header of your store.
-3. Go to the frontend and open the Mini-Cart drawer. Verify it opens.
-4. Install the Page Optimize and Product Bundles plugins (no need to change anything in their configuration).
-5. Go to a page in the frontend that doesn't have any blocks besides the Mini-Cart you added to the header.
-6. Open the Mini-Cart drawer and verify it opens without JS errors.
-
-### Experiment: Replace style hooks coming from @wordpress/block-editor. ([9251](https://github.com/woocommerce/woocommerce-blocks/pull/9251))
-
-1. Smoke test blocks that have block styles.
-2. Specifically test adding a Filter by Price, a Filter by Stock and a Filter by Attribute blocks to the template, and modify their styles. Ensure they are displayed correctly in the editor and the frontend.
-4. Add the Products (Beta) block and test changing spacing, color, typography, etc. to one of its inner blocks. Verify styles are applied correctly to the editor and frontend.
-
-### Fix colors not being applied to Mini-Cart Proceed to Checkout Button in the editor. ([9661](https://github.com/woocommerce/woocommerce-blocks/pull/9661))
-
-1. Enable a block theme.
-2. Add the Mini-Cart block to the header of your store.
-3. Go to Appearance > Editor > Template Parts > Mini-Cart.
-4. Modify the text and background colors of _Mini Cart View Cart Button_ and _Mini Cart Proceed to Checkout Button_. Try with colors from the palette and with custom colors. Try also changing the Style from _Default_ to _Outline_/_Fill_.
-5. Save the template part and reload the page. Verify the colors persisted.
-6. Go to the frontend, open the Mini-Cart drawer and verify the colors are applied correctly there too.
diff --git a/plugins/woocommerce/client/blocks/docs/internal-developers/testing/releases/1023.md b/plugins/woocommerce/client/blocks/docs/internal-developers/testing/releases/1023.md
deleted file mode 100644
index 85eb6cf4ff3..00000000000
--- a/plugins/woocommerce/client/blocks/docs/internal-developers/testing/releases/1023.md
+++ /dev/null
@@ -1,51 +0,0 @@
-# Testing notes and ZIP for release 10.2.3
-
-Zip file for testing: [woocommerce-gutenberg-products-block.zip](https://github.com/woocommerce/woocommerce-blocks/files/11706741/woocommerce-gutenberg-products-block.zip)
-
-## WooCommerce Core
-
-### Update/patterns featured category product collection ([9765](https://github.com/woocommerce/woocommerce-blocks/pull/9765))
-
-Featured Category / Focused
-| Before | After |
-| ------ | ----- |
-| | |
-
-Featured Category / Cover image
-| Before | After |
-| ------ | ----- |
-| | |
-
-Featured Category / Triple
-| Before | After |
-| ------ | ----- |
-| ||
-
-1. From the editor (post, page, etc.) apply the Featured Category / Focus, Featured Category / Cover and Featured Category / Triple pattern.
-2. Confirm the image matches the "After" version in the screenshot above in both the admin and the front end.
- Ensure all CTA links/buttons actually links to the Shop page.
-
-### Update the Hero Product Split ([9762](https://github.com/woocommerce/woocommerce-blocks/pull/9762))
-
-| Before | After |
-| ------ | ----- |
-|<img width="1209" alt="Screenshot 2023-06-08 at 21 47 48" src="https://github.com/woocommerce/woocommerce-blocks/assets/186112/92ba194e-5014-45ad-830e-eb821d405239">|<img width="1238" alt="Screenshot 2023-06-08 at 21 49 12" src="https://github.com/woocommerce/woocommerce-blocks/assets/186112/1fc24a6b-7fc5-4c89-983f-d13ff4e703e7">|
-
-1. From the editor (post, page, etc.) apply the Hero Product Split pattern.
-2. Confirm the image matches the "After" version in the screenshot above in both the admin and the front end.
-
-### Update Hero Product 3-split pattern image
-
-1. From the editor (post, page, etc.) apply the Hero Product 3-Split pattern.
-2. Confirm the image matches the image in the screenshot below in both the admin and the front end.
-
-<img width="924" alt="Screenshot 2023-06-09 at 15 48 33" src="https://github.com/woocommerce/woocommerce-blocks/assets/186112/698293ce-f221-4c20-982f-2e9df69c350c">
-
-### Update image for the Product Hero pattern ([9764](https://github.com/woocommerce/woocommerce-blocks/pull/9764))
-
-| Before | After |
-| ------ | ----- |
-|  |  |
-
-1. From the editor (post, page, etc.) apply the Product Hero pattern.
-2. Confirm the image matches the "After" version in the screenshots above in both the admin and the front end.
diff --git a/plugins/woocommerce/client/blocks/docs/internal-developers/testing/releases/1024.md b/plugins/woocommerce/client/blocks/docs/internal-developers/testing/releases/1024.md
deleted file mode 100644
index 4f8a03ef51d..00000000000
--- a/plugins/woocommerce/client/blocks/docs/internal-developers/testing/releases/1024.md
+++ /dev/null
@@ -1,75 +0,0 @@
-# Testing notes and ZIP for release 10.2.4
-
-Zip file for testing: [woocommerce-gutenberg-products-block.zip](https://github.com/woocommerce/woocommerce-blocks/files/11835530/woocommerce-gutenberg-products-block.zip)
-
-## WooCommerce Core
-
-### Add back filter blocks frontend scripts ([9954](https://github.com/woocommerce/woocommerce-blocks/pull/9954))
-
-#### Test that the old markup of filter blocks still works
-
-```text
-Important: test needs to be conducted using WooCommerce 7.8
-```
-
-1. Add a new page, click on three dots on the right top corner and select "Code Editor"
-
-
-2. Paste the following code and exit the code editor
-
-```HTML
-<!-- wp:columns -->
-<div class="wp-block-columns"><!-- wp:column {"width":"33.33%"} -->
-<div class="wp-block-column" style="flex-basis:33.33%"><!-- wp:woocommerce/price-filter -->
-<div class="wp-block-woocommerce-price-filter is-loading" data-showinputfields="true" data-showfilterbutton="false" data-heading="Filter by price" data-heading-level="3"><span aria-hidden="true" class="wc-block-product-categories__placeholder"></span></div>
-<!-- /wp:woocommerce/price-filter -->
-
-<!-- wp:woocommerce/attribute-filter {"attributeId":1,"displayStyle":"dropdown","heading":"Filter by Color"} -->
-<div class="wp-block-woocommerce-attribute-filter is-loading" data-attribute-id="1" data-show-counts="true" data-query-type="or" data-heading="Filter by Color" data-heading-level="3" data-display-style="dropdown"><span aria-hidden="true" class="wc-block-product-attribute-filter__placeholder"></span></div>
-<!-- /wp:woocommerce/attribute-filter -->
-
-<!-- wp:woocommerce/attribute-filter {"attributeId":2,"heading":"Filter by Size"} -->
-<div class="wp-block-woocommerce-attribute-filter is-loading" data-attribute-id="2" data-show-counts="true" data-query-type="or" data-heading="Filter by Size" data-heading-level="3"><span aria-hidden="true" class="wc-block-product-attribute-filter__placeholder"></span></div>
-<!-- /wp:woocommerce/attribute-filter -->
-
-<!-- wp:woocommerce/active-filters -->
-<div class="wp-block-woocommerce-active-filters is-loading" data-display-style="list" data-heading="Active filters" data-heading-level="3"><span aria-hidden="true" class="wc-block-active-product-filters__placeholder"></span></div>
-<!-- /wp:woocommerce/active-filters -->
-
-<!-- wp:woocommerce/stock-filter -->
-<div class="wp-block-woocommerce-stock-filter is-loading" data-show-counts="true" data-heading="Filter by stock status" data-heading-level="3"><span aria-hidden="true" class="wc-block-product-stock-filter__placeholder"></span></div>
-<!-- /wp:woocommerce/stock-filter --></div>
-<!-- /wp:column -->
-
-<!-- wp:column {"width":"66.66%"} -->
-<div class="wp-block-column" style="flex-basis:66.66%"><!-- wp:woocommerce/all-products {"columns":3,"rows":3,"alignButtons":false,"contentVisibility":{"orderBy":true},"orderby":"date","layoutConfig":[["woocommerce/product-image"],["woocommerce/product-title"],["woocommerce/product-price"],["woocommerce/product-rating"],["woocommerce/product-button"]]} -->
-<div class="wp-block-woocommerce-all-products wc-block-all-products" data-attributes="{"alignButtons":false,"columns":3,"contentVisibility":{"orderBy":true},"isPreview":false,"layoutConfig":[["woocommerce/product-image"],["woocommerce/product-title"],["woocommerce/product-price"],["woocommerce/product-rating"],["woocommerce/product-button"]],"orderby":"date","rows":3}"></div>
-<!-- /wp:woocommerce/all-products --></div>
-<!-- /wp:column --></div>
-<!-- /wp:columns -->
-```
-
-2. Publish the page.
-3. Go to the frontend.
-4. Verify filter blocks are rendered correctly. Interact with them and verify they work properly.
-
-Before | After
---- | ---
- | 
-
-
-
-##### Test that filter blocks translations are loaded correctly
-
-```text
-Important: test needs to be conducted using WooCommerce 7.7
-```
-
-1. Change your store language to a locale that has translations (ie: Spanish).
-2. Add the Filter by Attribute, Filter by Price, Filter by Stock and Filter by Rating blocks to a post or page, alongside the Active Filters and Products (beta) blocks.
-3. In the frontend, interact with the filter blocks and verify they all work properly.
-4. Verify translations are loaded correctly. Ie: Filter by Attribute shows "Seleccionar" instead of "Select" in the input field.
-
-Before | After
---- | ---
- | 
diff --git a/plugins/woocommerce/client/blocks/docs/internal-developers/testing/releases/1030.md b/plugins/woocommerce/client/blocks/docs/internal-developers/testing/releases/1030.md
deleted file mode 100644
index 69533efa19a..00000000000
--- a/plugins/woocommerce/client/blocks/docs/internal-developers/testing/releases/1030.md
+++ /dev/null
@@ -1,230 +0,0 @@
-# Testing notes and ZIP for release 10.3.0
-
-Zip file for testing: [woocommerce-gutenberg-products-block.zip](https://github.com/woocommerce/woocommerce-blocks/files/11554379/woocommerce-gutenberg-products-block.zip)
-
-## WooCommerce Core
-
-### Only show the Mini Cart count badge when there are items in the cart [#9259](https://github.com/woocommerce/woocommerce-blocks/pull/9259)
-
-1. Add the Mini Cart block to the header of your store.
-2. In the frontend, with an empty cart, verify the count badge is not visible. Verify you can open and close the Mini Cart drawer and the badge is still not visible.
-3. Now, add some products to your cart and verify the badge becomes visible. Try reloading the page and verify the count badge is still there.
-
-### Store API: Fix payment method validation (fixes COD) [#9375](https://github.com/woocommerce/woocommerce-blocks/pull/9375)
-
-1. Enable Cash on Delivery as a payment method
-2. Make sure "enable for shipping methods" is blank, and 'accept for virtual orders" is off
-3. Add an item to your cart and checkout, selecting COD as the payment method
-4. Place order successfully
-
-### Styling fixes for form step headings [#9437](https://github.com/woocommerce/woocommerce-blocks/pull/9437)
-
-1. Install and activate a block theme, e.g. [Twenty Twenty-Three](https://wordpress.org/themes/twentytwentythree/).
-2. Go to WP Admin » Appearance » Editor.
-3. Open the Styles sidebar.
-4. Increase the font size for headings from the Typography settings.
-5. Go to the Checkout block page editor.
-6. View the form step headings - check that the bottom of the text is not cut off
-
-### Product Gallery Block > Remove global variable overwrite and keep support for the Single Product Block. [#9475](https://github.com/woocommerce/woocommerce-blocks/pull/9475)
-
-1. While having a block theme enabled such as Twenty-twenty Three, head over to your Dashboard, and on the sidebar, click on "Appearance > Editor".
-2. Select the Single Product template to customize it and click on edit.
-3. If you are still not using the blockified version of the template, click on “Transform into blocks” first to ensure all blocks are in place.
-4. Make sure the Product Gallery block is available for usage on the inserter (you can remove/add the block from the template), add it, and save.
-5. On the front end, ensure the block works as expected and the product can be added to the cart.
-6. Now create a new post and add the Single Product Block to it.
-7. Save the post and head over to the FE: make sure the Gallery Block is properly displayed on the post without any problems.
-
-### Fix compatibility between the checkout block and the template editor. [#9495](https://github.com/woocommerce/woocommerce-blocks/pull/9495)
-
-1. Ensure the latest version of Gutenberg is installed. This is required to reproduce the issue.
-2. Go into the template editor - Appearance > Editor > Templates
-3. Insert the Cart block within any template e.g. the page template
-4. Confirm that the preview shows:
- - payment methods and shipping methods
- - cart image previews
-
-### Update Mini-Cart block editor sidebar [#9420](https://github.com/woocommerce/woocommerce-blocks/pull/9420)
-
-1. Add the Mini-Cart block to the header of your site.
-2. Click on the block and open the editor sidebar.
-3. Verify the strings from the design below match the UI (note: it's expected that some options from the design are still not implemented, just focus on the strings of the options that exist in both screenshots):
-
-| Design | Actual |
-| --------------------------------------------------------------------------------------------------------------- | --------------------------------------------------------------------------------------------------------------- |
-|  |  |
-
-### Add to Cart Button > Update block registration to rely on metadata and enable usage for the Single Product Block [#9404](https://github.com/woocommerce/woocommerce-blocks/pull/9404)
-
-1. Create a new Post
-2. Add the Products (Beta) Block
-3. Within the Products (Beta) Block, make sure the "Add to Cart button" block is listed in the inserter and add it.
-4. Save the post and head over to the frontend: make sure the button is correctly displayed and when you click on it, the correct product is added to cart.
-
-### Fix alignment issue with 'Add Coupon Code' button in WooCommerce Blocks (#9391) [#9392](https://github.com/woocommerce/woocommerce-blocks/pull/9392)
-
-1. Go to `/wp-admin/options-general.php` and select `Deutsch` as the site language.
-2. Go to `/wp-admin/update-core.php` and fetch the available translations.
-3. Create a test page with the Checkout block.
-4. Go to the frontend.
-5. Add a product to the cart.
-6. Go to the test page with the Checkout block.
-7. Verify that the _"Gutscheincode oder Rabattcode hinzufügen"_ button is correctly aligned (aligned left with the same intent on both lines when wrapped)
-
-### Improve transform classic product template UX [#9386](https://github.com/woocommerce/woocommerce-blocks/pull/9386)
-
-1. Open the Single Product Template.
-2. Be sure that the description is: "Transform this template into multiple blocks so you can add, remove, reorder, and customize your **single product template** (for other templates, this should correspond to the name of the template)."
-3. Hover the button "transform into blocks".
-4. Ensure the preview corresponds to the "blockified template".
-5. Click the button.
-6. Ensure that the group block around the blockified product is selected.
-7. Ensure the snackbar is visible and the undo button works correctly.
-
-### Add color and typography styles on the mini cart title block [#9382](https://github.com/woocommerce/woocommerce-blocks/pull/9382)
-
-1. Install and activate the Twenty Twenty-Three theme
-2. Go to Appearance > Editor > Template parts > Mini Cart
-3. Select the `Mini Cart Title` block and add some customizations on the settings sidebar (colors, typography).
-4. Check if the customizations are applied in the editor and in the frontend of the website.
-5. Set country to something with an optional postcode, e.g. Vietnam
-6. Try to checkout with the field empty, it should pass fine.
-
-### Fix Checkout block stepped sections numbers overlapping [#9497](https://github.com/woocommerce/woocommerce-blocks/pull/9497)
-
-1. Go to the Checkout block in the page editor.
-2. Click on an inner block.
-3. Make sure stepped checkout is enabled
-4. Confirm the block selection frame is not overlapping with the section number.
-
-### Product Meta block: Remove the fill color of the icon and move it to the Icons library, Product Details block: Remove the fill color of the Product Details icon and move it to the icons library ([#9506](https://github.com/woocommerce/woocommerce-blocks/pull/9506) and [#9503](https://github.com/woocommerce/woocommerce-blocks/pull/9503))
-
-1. In WP Admin, go to Appearance > Themes. Make sure you have a block-based theme installed and activated. If not, you can install one from the Add New option. Block-based themes include "Twenty-twenty Two," "Twenty-twenty Three", etc.
-2. On the left-hand side menu, click on Appearance > Editor. This will open the Site Editor.
-3. On the left-hand side menu, click on Templates. This will open the list of available templates.
-4. Find and select the Single Product template from the list.
-5. When the Classic Product Template renders, click on Transform into Blocks. This will transform the Classic template in a block template if you haven't done it before.
-6. Inside the Site editor, click on the List View button, usually found at the top left of the editing space, to see the list of blocks added to the editor area.
-7. In the list of blocks, click on the Product Meta block. Make sure the icon change its default color from black to white when selected.
-8. In the list of blocks, click on the Product Details block. Make sure the icon change its default color from black to white when selected.
-
-### Update Mini-Cart block logic to use isSiteEditorPage util [#9501](https://github.com/woocommerce/woocommerce-blocks/pull/9501)
-
-1. Create a post or page.
-2. Add the Mini Cart block and select it.
-3. Verify in the sidebar there is no _Mini-Cart in cart and checkout pages_ toggle.
-4. Now go to the Site Editor (Appearance > Editor).
-5. Add the Mini Cart block to the header of your theme.
-6. Verify in the sidebar there is a _Mini-Cart in cart and checkout pages_ toggle.
- 
-7. Now change to a classic theme (ie: Storefront).
-8. Go to Appearance > Widgets and add the Mini Cart block to a widget area.
-9. Verify in the sidebar there is no _Mini-Cart in cart and checkout pages_ toggle.
-
-### Prevent QuantitySelector stealing focus on page load [#9487](https://github.com/woocommerce/woocommerce-blocks/pull/9487)
-
-1. Add one product to your page, making sure you only have one item of that product.
-2. Go to the Cart page (with the Cart block).
-3. Verify the quantity field input doesn't get the focus on page load.
-
-### Allow Shipping method prices to inherit global styles text color [#9456](https://github.com/woocommerce/woocommerce-blocks/pull/9456)
-
-1. Install and activate a block theme, e.g. [Twenty Twenty-Three](https://wordpress.org/themes/twentytwentythree/).
-2. Create a test page with the Checkout block.
-3. Create a test page with the Cart block.
-4. Go to WP Admin » Appearance » Editor.
-5. Open the Styles sidebar.
-6. Adjust all Color settings.
-7. Confirm shipping method price color also gets change.
-
-### Render Product Details block when used along the Post Content block [#9479](https://github.com/woocommerce/woocommerce-blocks/pull/9479)
-
-1. Edit the Single Product Template.
-2. Migrate to the Blockified Template by clicking the button: `Transform into blocks`.
-3. Add the `Post Content` as first block of the main group block.
-4. Save.
-5. Visit a Product page.
-6. Ensure that the Product Details block and Post Content block are visible.
-
-### Mini Cart: stop using Modal component [#9345](https://github.com/woocommerce/woocommerce-blocks/pull/9345)
-
-1. Add the Mini Cart block to the header of your site via (Appearance > Editor).
-2. In the frontend and with the Cart empty, open the Mini Cart drawer, verify you can open and close the drawer without problems.
-3. Add some products to your cart and open the Mini Cart drawer again. Verify you can open and close it, you can change the products quantity, etc.
-4. Go to Appearance > Editor > Template Parts > Mini Cart and change some of the styles of the inner blocks. For example, add a custom background, border and width to the Mini Cart Contents block.
-5. Repeat step 3.
-
-Now, let's test that things keep working if there are two Mini Cart blocks in the same page. We don't officially support it, but at the same time we don't want the experience to be broken.
-
-6. create a post or page and add the Mini Cart block.
-7. Open that post/page in the frontend. You should now have two Mini Cart buttons in the screen, the one from the site header and the one from the post/page.
-8. Verify both buttons work as expected.
-
-### Global Styles: Fix radio control overlap when font-size is small [#9436](https://github.com/woocommerce/woocommerce-blocks/pull/9436)
-
-1. Install and activate a block theme, e.g. [Twenty Twenty-Three](https://wordpress.org/themes/twentytwentythree/).
-2. Create a test page with the Checkout block.
-3. Go to WP Admin » Appearance » Editor.
-4. Open the Styles sidebar.
-5. Adjust the font-size from the typography settings. Reduce the font size to 0.8.
-6. Go to the Cart and Checkout block page.
-7. Confirm Radio buttons are not overlapping with the labels.
-
-## Patterns
-
-### Update `Hero Product – Split` Pattern Color Settings [#9433](https://github.com/woocommerce/woocommerce-blocks/pull/9433)
-
-1. Activate a block theme (TT3).
-2. From the editor, insert the `Hero Product – Split` pattern (under the WooCommerce section).
-3. Confirm the text area has a black background, a white heading, and a white button with black text.
-4. Switch to another block theme and repeat steps 2-3.
-5. Confirm there is no change in colors on the pattern, by default.
-6. Confirm it is possible to update the color settings in the editor.
-
-### [Pattern] Add new `Hero product chessboard` pattern [#9180](https://github.com/woocommerce/woocommerce-blocks/pull/9180)
-
-1. Create a new page or post
-2. Make sure the `Hero product chessboard` pattern appears under the WooCommerce category dropdown.
-3. Insert in and make sure it shows as expected on the design.
-
-### Add new `Product listing with gallery` pattern [#9347](https://github.com/woocommerce/woocommerce-blocks/pull/9347)
-
-1. Create a new page or post
-2. Make sure the `Product listing with gallery` pattern appears under the WooCommerce category dropdown.
-3. Insert in and make sure it shows as expected on the design.
-
-### Add Product Details: product listing pattern [#9383](https://github.com/woocommerce/woocommerce-blocks/pull/9383)
-
-1. Create a new post
-2. Insert the new "Product Details: product listing" as demonstrated on the screencast
-3. Make sure the pattern is properly displayed on the Editor side without any errors in the console
-4. Make sure the pattern is also displayed on the frontend without any problems
-
-### Add new `Product collections: featured collections` pattern [#9388](https://github.com/woocommerce/woocommerce-blocks/pull/9388)
-
-1. Create a new page or post
-2. Make sure the `Product collections: featured collections` pattern appears under the WooCommerce category dropdown.
-3. Insert in and make sure it shows as expected on the design.
-
-### Add product details pattern [#9408](https://github.com/woocommerce/woocommerce-blocks/pull/9408)
-
-1. Add a page/post and use the block inserter and go to Patterns->WooCommerce->Product Details Pattern.
-2. Ensure you see the preview like the screenshot above and add it to the page/post.
-3. Ensure it looks like the design in the screenshot.
-4. Save/update and go to the frontend and ensure it displays the same as well.
-
-### Add banner pattern [#9434](https://github.com/woocommerce/woocommerce-blocks/pull/9434)
-
-1. Add a page/post and use the block inserter to add the `Banner` pattern by going to patterns->woocommerce->Banner
-2. Ensure the preview shows nicely per the screenshot above.
-3. After adding the pattern to the page/post, publish/update and view it in the frontend and ensure it displays as what you saw in the preview.
-
-### Add to Cart with Options block > Restore the global variable to its original value after being overridden [#9581](https://github.com/woocommerce/woocommerce-blocks/pull/9581)
-
-1. While having a block theme enabled such as Twenty-twenty Three, head over to your Dashboard and on the sidebar, click on "Appearance > Editor".
-2. Select the Single Product template to customize it and click on edit.
-3. If you are still using the Classic template, click on the button to transform it to the blockifyed version.
-4. Make sure the Add to Cart with Options block is available for usage on the inserter (you can remove/add the block from the template), add it, and save.
-5. On the frontend, ensure the button works as expected, and the product can be added to the cart.
-6. Access the single template for all available product types, including simple, variable, grouped, and external and make sure you can add all of them to the cart.
diff --git a/plugins/woocommerce/client/blocks/docs/internal-developers/testing/releases/1040.md b/plugins/woocommerce/client/blocks/docs/internal-developers/testing/releases/1040.md
deleted file mode 100644
index 77cd02306ab..00000000000
--- a/plugins/woocommerce/client/blocks/docs/internal-developers/testing/releases/1040.md
+++ /dev/null
@@ -1,466 +0,0 @@
-# Testing notes and ZIP for release 10.4.0
-
-Zip file for testing: [woocommerce-gutenberg-products-block.zip](https://github.com/woocommerce/woocommerce-blocks/files/11681289/woocommerce-gutenberg-products-block.zip)
-
-## WooCommerce Core
-
-### Product Rating: fix the filter woocommerce_product_get_rating_html is removed [#9719](https://github.com/woocommerce/woocommerce-blocks/pull/9719)
-
-1. Ensure that you have the Blockified Single Product Template.
-2. Visit a product.
-3. Add some comments and rate the product.
-4. Be sure that the ratings in the comments don't show the average rating
-
-### Product rating: improve preview style when the product doesn't have rating [#9684](https://github.com/woocommerce/woocommerce-blocks/pull/9684)
-
-1. Edit the Single Product Template (migrate to the blockified template if it isn't).
-2. Add the Product Rating block.
-3. Confirm `No reviews` is displayed under product title when there are no reviews.
-4. Ensure that it looks like the below image.
-
-| Before | After |
-| ------ | ----- |
-|||
-
-### Combine country asset data to reduce the amount of data consumed by the cart and checkout blocks [#9552](https://github.com/woocommerce/woocommerce-blocks/pull/9552)
-
-1. Go to the block based cart
-2. Open the shipping calculator and enter your address, confirming state + country fields are working
-3. Go to the block based checkout
-4. Fill out the shipping and address forms separately,, confirming the country and state fields populate correctly. Ensure an address with states, such as the US, is used at least once.
-5. In WooCommerce > Settings and change "Shipping location(s)" to specific locations. Limit to a few countries
-6. Go back to checkout and confirm the limitations are in place in the shipping address form
-
-
-### Add to Cart with Options Block: Remove global variable overwrite. [#9457](https://github.com/woocommerce/woocommerce-blocks/pull/9457)
-
-1. While having a block theme enabled such as Twenty-twenty Three, head over to your Dashboard and on the sidebar, click on "Appearance > Editor".
-5. Select the Single Product template to customize it and click on edit.
-6. Make sure the Add to Cart with Options block is available for usage on the inserter (you can remove/add the block from the template), add it, and save.
-7. On the frontend, ensure the button works as expected and the product can be added to the cart.
-
-### Product Image Gallery: Reintroduce filters and override-restore the global product variable. [#9630](https://github.com/woocommerce/woocommerce-blocks/pull/9630)
-
-1. While having a block theme enabled such as Twenty-twenty Three, head over to your Dashboard, and on the sidebar, click on "Appearance > Editor".
-2. Select the Single Product template to customize it and click on edit.
-3. If you are still using the Classic template, click on the button to transform it to the blockifyed version.
-4. Make sure the Product Image Gallery block is available for usage on the inserter (you can remove/add the block from the template), add it, and save.
-5. On the frontend, ensure the gallery works as expected, and the thumbnails can be selected.
-
-### Blockified Single Product Template: add product-classes via `wc_get_product_class` [#9697](https://github.com/woocommerce/woocommerce-blocks/pull/9697)
-
-1. Ensure that you are using the Blockified Single Product Template.
-2. Visit a product page.
-3. Check the body and ensure that the product classes are added
-
-### Add to Cart with Options block: Restore the global variable to its original value after being overridden [#9581](https://github.com/woocommerce/woocommerce-blocks/pull/9581)
-
-1. While having a block theme enabled such as Twenty-twenty Three, head over to your Dashboard and on the sidebar, click on "Appearance > Editor".
-2. Select the Single Product template to customize it and click on edit.
-3. If you are still using the Classic template, click on the button to transform it to the blockifyed version.
-4. Make sure the Add to Cart with Options block is available for usage on the inserter (you can remove/add the block from the template), add it, and save.
-5. On the frontend, ensure the button works as expected, and the product can be added to the cart.
-6. Access the single template for all available product types, including simple, variable, grouped, and external and make sure you can add all of them to the cart.
-
-
-
-#### Testing with Jetpack
-
-1. Install and enable the Jetpack plugin on a live site (such as Jurassic Ninja).
-3. Access `wp-admin/admin.php?page=jetpack_modules` to confirm the WooCommerce Analytics module is enabled.
-4. While having a block theme enabled such as Twenty-twenty Three, head over to your Dashboard and on the sidebar, click on "Appearance > Editor".
-2. Select the Single Product template to customize it and click on edit.
-3. Add the single product block on the single product template and save.
-4. Visit the product page on the front end when logged out and make sure everything works as expected (no fatal errors should be observed).
-
-
-
-### Enable Single Product block [#9714](https://github.com/woocommerce/woocommerce-blocks/pull/9714)
-
-1. Add the Single Product block in a post/page.
-2. Visit the created post/page.
-3. Click the `add to cart` button .
-4. Ensure that the product is added to the cart and any notice isn't visible.
-5. Edit the Single Product Template.
-6. Add the Single Product block.
-7. Repeat 3-4 steps.
-
-### Product Image Gallery block: Fix magnifying glass appearing outside the block content area [#9594](https://github.com/woocommerce/woocommerce-blocks/pull/9594)
-
-1. Log in to your WordPress dashboard.
-2. From your WordPress dashboard, go to Appearance > Themes. Make sure you have a block-based theme installed and activated. If not, you can install one from the Add New option. Block-based themes include "Twenty-twenty Two," "Twenty-twenty Three", etc.
-3. On the left-hand side menu, click on Appearance > Editor. This will open the Site Editor.
-4. On the left-hand side menu, click on Templates. This will open the list of available templates.
-5. Find and select the Single Product template from the list.
-6. When the Classic Product Template renders, click on Transform into Blocks. This will transform the Classic template in a block template if you haven't done it before.
-7. Inside the Site editor, click on the List View button, usually found at the top left of the editing space, to see the list of blocks added to the editor area.
-8. In the list of blocks, move the Product Image Gallery block to be above the Breadcrumbs block;
-9. Once the Product Image Gallery block is displayed on top of the Breadcrumbs block in the Editor area, on the top-right side click on the Save button;
-10. Visit the product page and make sure that the magnifying glass is correctly displayed on the top right corner of the image
-
-
-### Make Mini-Cart block work well with caching plugins [#9493](https://github.com/woocommerce/woocommerce-blocks/pull/9493)
-
-**With your admin user:**
-
-1. Install _[WP-Optimize - Clean, Compress, Cache](https://wordpress.org/plugins/wp-optimize/)_ or a similar caching plugin.
-2. Go to WP-Optimize > Settings > Cache and enable page caching.
-
-**In a private/incognito window without being logged in:**
-3. In the frontend visit any page. This will cache the page without products in the cart.
-
-**With your admin user:**
-4. Add some products to your cart.
-5. Visit the same page from step 3.
-6. Notice the Mini Cart totals do include the products you added in step 4, even though it's serving the cached version of step 3.
-
-### Product Price: remove underline on sale price [#9702](https://github.com/woocommerce/woocommerce-blocks/pull/9702)
-
-1. Ensure you are using the Blockified Single Product Template and Product Catalog Template.
-2. Visit a product with a sale price.
-3. Ensure that the sale price isn't underlined.
-4. Visit the `/shop` page.
-5. Ensure that the sale price isn't underlined
-
-
-### Blockified Single Product Template: avoid to add another group block on the editor side when the user creates a template for a specific product [#9699](https://github.com/woocommerce/woocommerce-blocks/pull/9699)
-
-1. Open the Site Editor.
-2. Be sure that the Single Product template is blockified.
-3. Click `Manage All Templates` button.
-4. Click `Add New`.
-5. Select Product.
-6. Select a product.
-7. Open the list view.
-8. Ensure that the template is wrapped by just one group block.
-9. Visit the product.
-10. Ensure that there is a div with the class `woocommerce` that wraps the entire template.
-11. Visit another product.
-12. Ensure that there is a div with the class `woocommerce` that wraps the entire template.
-
-### Blockified Single Product Template: use h1 for the Product Title [#9698](https://github.com/woocommerce/woocommerce-blocks/pull/9698)
-
-1. Ensure that the Single Product Template doesn't have any customization.
-2. Edit it.
-3. Focus on the Product Title.
-4. Ensure that `h1` is set.
-
-### Ensure aria-label is showing correct value based on setting [#9672](https://github.com/woocommerce/woocommerce-blocks/pull/9672)
-
-1. Add the Mini-Cart block to a post or page and set the Display total price attribute to false.
-2. Go to the frontend and with your browser devtools (F12). Inspect element and look for the`.wc-block-mini-cart__button` on the `mini cart block`. Find the `aria-label`.
-3. Notice it says `X item(s) in cart`, with the price. Hover over the `mini cart` icon and click on. Inspect the element again to ensure it is still displaying `X item(s) in cart`.
-4. Go back to the `mini cart` settings and switch it to show `Display total price`.
-5. The `aria-label` should now show "X item(s) in cart, total price of Y".
-6. BONUS: Add another instance of the `mini cart` in the header and perform the same tests and ensure each instance of the `mini cart` shows their own `aria-label` value depending on the `Display total price` settings.
-
-### Product Categories List: Add show child categories only toggle [#9550](https://github.com/woocommerce/woocommerce-blocks/pull/9550)
-
-1. Set up product categories with children and grandchildren, making sure they have products.
-2. Add the Product Categories List block to a page, and also to the Products by Category template.
-3. Check that the toggle only appears when the block is used in the Site Editor (e.g. on a template)
-4. Ensure that when the toggle is enabled and you're visiting a category with children, only the children are shown.
-5. Make sure that if when you have the _show children only_ toggle enabled, and you click the last child then it renders the current category instead of rendering nothing at all.
-6. Ensure no regressions when using this block on posts/pages
-7. Enable Classic theme such as Storefront
-8. Usage the block in the widget area and check that the feature is available and works as expected and described above.
-
-### Stack cart and checkout buttons on smaller screens [#9603](https://github.com/woocommerce/woocommerce-blocks/pull/9603)
-
-1. In a post/page add the `Mini Cart` block.
-2. In the frontend, click on the mini cart button to reveal the drawer.
-3. Ensure the `View my cart` and `Checkout` buttons are visible and side by side.
-4. Using the developer tools, switch to a mobile view.
-5. Ensure now the `View my cart` and `Checkout` buttons are visible and now stacked top and bottom.
-
-### Remove `setFullAddressPushed` to prevent address continually pushing [#9606](https://github.com/woocommerce/woocommerce-blocks/pull/9606)
-
-1. Ensure you have shipping rates set up for UK.
-2. Add an item to your cart, go to the Checkout block.
-3. Enter a full address using United Kingdom as the country, enter `L1 0BP` as the Postcode. Wait for shipping rates to load.
-4. Change country to Portugal. Do not change anything else.
-5. Ensure the shipping rates don't continually load.
-
-### Prevent horizontal shift when opening the Mini-Cart drawer if scrollbars are visible [#9648](https://github.com/woocommerce/woocommerce-blocks/pull/9648)
-
-1. Set up your browser so scrollbars are visible (that might depend on the browser/OS you use).
-2. Add the Mini-Cart block to the header of your store.
-3. In the frontend, open the Mini-Cart drawer and verify there is no horizontal shift of the contents.
-
-Before | After
---- | ---
-[before](https://github.com/woocommerce/woocommerce-blocks/assets/3616980/dedaa44b-2a07-4fd5-9ea2-c3d1b9e13080) | [after](https://github.com/woocommerce/woocommerce-blocks/assets/3616980/9bc56a48-88df-4e0a-af9e-98843433ca7a)
-
-
-### Product Rating block: Add the block to the Single Product template by default [#9510](https://github.com/woocommerce/woocommerce-blocks/pull/9510)
-
-1. Log in to your WordPress dashboard.
-2. From your WordPress dashboard, go to Appearance > Themes. Make sure you have a block-based theme installed and activated. If not, you can install one from the Add New option. Block-based themes include "Twenty-twenty Two," "Twenty-twenty Three", etc.
-3. On the left-hand side menu, click on Appearance > Editor. This will open the Site Editor.
-4. On the left-hand side menu, click on Templates. This will open the list of available templates.
-5. Find and select the Single Product template from the list.
-6. When the Classic Product Template renders, click on Transform into Blocks. This will transform the Classic template in a block template if you haven't done it before.
-7. Make sure the Product Rating block appears below the Product Title block;
-8. On the top right side, click on Save;
-9. Visit a product page and make sure the Product Rating block appears below the Product Title.
-
-### Ensure inner content is not truncated on different widths [#9640](https://github.com/woocommerce/woocommerce-blocks/pull/9640)
-
-1. Create a new post & add the WooCommerce Just Arrived Full Hero pattern.
-2. Adjust the alignment on the Cover Block from Full width (the pattern's default) to either Wide width or None.
-3. Note that the text (Heading, Paragraph, and Buttons blocks) are not squished or truncated to the right and that they show as expected aligning towards the right side of the block.
-
-### Fix invisible Mini-Cart badge in themes without <body> background [#9601](https://github.com/woocommerce/woocommerce-blocks/pull/9601)
-
-1. With any block theme, go to Appearance > Editor > edit any template > Styles > Additional CSS and add these styles:
-
-```CSS
-body {
- background: transparent !important;
-}
-```
-
-2. Add the Mini-Cart block to the header of your site or to a post or page.
-3. In the frontend, add some products to your cart.
-4. Verify the Mini-Cart badge is visible.
-
-Before | After
---- | ---
- | 
-
-### Product Rating block: Add Single Product template support to the block [#9499](https://github.com/woocommerce/woocommerce-blocks/pull/9499)
-
-1. Log in to your WordPress dashboard.
-2. From your WordPress dashboard, go to Appearance > Themes. Make sure you have a block-based theme installed and activated. If not, you can install one from the Add New option. Block-based themes include "Twenty-twenty Two," "Twenty-twenty Three", etc.
-3. On the left-hand side menu, click on Appearance > Editor. This will open the Site Editor.
-4. On the left-hand side menu, click on Templates. This will open the list of available templates.
-5. Find and select the Single Product template from the list.
-6. Inside the Site editor, click on the '+' button, usually found at the top left of the editing space or within the content area itself, to add a new block.
-7. In the block library that pops up, you can search for the 'Product Rating' block. You can do this by typing 'Product Rating' into the search bar at the top of the block library.
-8. Click on the 'Product Rating' block to add it to the template.
-11. Once the block is added to the template, make sure the rating stars appears, and, on the top-right side, click on the Save button;
-12. Visit a product that contains at least one review and check if the Product Rating block is displayed.
-13. Visit a product that does not contain reviews and check if the Product Rating block is hidden.
-
-### Blockified Single Product Template: Show upsells. [#9636](https://github.com/woocommerce/woocommerce-blocks/pull/9636)
-
-1. Edit a product.
-2. Add upsells.
-3. Open the Site Editor.
-4. Edit the Single Product Template.
-5. Migrate to the blockified template.
-6. Visit the product.
-7. Be sure that upsells are visible
-
-### Mini-Cart: Make error notifications non-dismissable [#9578](https://github.com/woocommerce/woocommerce-blocks/pull/9578)
-
-1. In the frontend, add a product to your cart.
-2. In `wp-admin`, edit that product and set it out of stock.
-3. Open a page with the Mini Cart, select to open the drawer.
-4. Ensure the error notice appears: "[Product name] is out of stock and cannot be purchased. Please remove it from your cart." and is non-dismissable.
-
-### Fix Cambodian postcode validation [#9597](https://github.com/woocommerce/woocommerce-blocks/pull/9597)
-
-1. Add a product to the cart and go to the checkout page.
-2. Select Cambodia country as country.
-3. Enter a 5-digit postcode.
-4. Verify that the postcode fails the validation.
-5. Enter a 6-digit postcode.
-6. Verify that the postcode passes the validation.
-7. Select United Kingdom (UK) as country.
-8. Verify that the postcode `AA9A 9AA` passes the validation.
-9. Verify that the postcode `9999 999` fails the validation.
-10. Verify that it's not possible to have spaces before the postcode, .e.g. ` AA9A 9AA`.
-11. Verify that lowercase letters, e.g. `aa9A 9aa`, are automatically converted to uppercase letters, e.g. `AA9A 9AA`.
-
-### Product Rating block: Hide rating when the product has no reviews [#9556](https://github.com/woocommerce/woocommerce-blocks/pull/9556)
-
-#### Product Rating block inside Single Product Block with a selected product that contains reviews
-
-On Editor:
-| Before | After |
-|--------|--------|
-| <img width="1239" alt="image" src="https://github.com/woocommerce/woocommerce-blocks/assets/20469356/ff7be2fc-0326-4c7f-98d3-669f783a56b4"> | <img width="1239" alt="image" src="https://github.com/woocommerce/woocommerce-blocks/assets/20469356/ff7be2fc-0326-4c7f-98d3-669f783a56b4"> |
-
-
-On Frontend:
-| Before | After |
-|--------|--------|
-| <img width="1238" alt="image" src="https://github.com/woocommerce/woocommerce-blocks/assets/20469356/08f725f2-8999-4f66-b4c4-c3bd3f24d5be"> | <img width="1238" alt="image" src="https://github.com/woocommerce/woocommerce-blocks/assets/20469356/08f725f2-8999-4f66-b4c4-c3bd3f24d5be"> |
-
-1. Log in to your WordPress dashboard.
-2. From your WordPress dashboard, go to Appearance > Themes. Make sure you have a block-based theme installed and activated. If not, you can install one from the Add New option. Block-based themes include "Twenty-twenty Two," "Twenty-twenty Three," etc.
-3. On the left-hand side menu, click on Appearance > Editor. This will open the Site Editor.
-4. On the left-hand side menu, click on Templates. This will open the list of available templates.
-5. Find and select any template from the list.
-6. Inside the Site editor, click on the '+' button, usually found at the top left of the editing space or within the content area itself, to add a new block.
-7. In the block library that pops up, you can search for the 'Single Product' block. You can do this by typing 'Single Product' into the search bar at the top of the block library.
-8. Click on the 'Single Product' block to add it to the template. You'll be prompted to select a product from your WooCommerce store to feature in the block. Make sure to select a product that contains at least one review.
-9. Once you've selected a product, the block will be inserted into your template and will display information about the product you've selected.
-10. Within the content area of the Single Product block, click on the '+' button to add a new block.
-11. In the block library that pops up, you can search for the 'Product Rating' block. You can do this by typing 'Product Rating' into the search bar at the top of the block library.
-12. Once the block is added to the template, make sure the rating stars and reviews count appears for the selected product.
-13. On the top-right side, click on the Save button.
-14. Visit a product and check if the Product Rating block is displayed with the rating stars and reviews count.
-
-#### Product Rating block inside Single Product Block with a selected product that has NO reviews
-
-On Editor:
-| Before | After |
-|--------|--------|
-| <img width="1223" alt="image" src="https://github.com/woocommerce/woocommerce-blocks/assets/20469356/53975777-3f3d-4e79-9619-98f83a42cb6e"> | <img width="1244" alt="image" src="https://github.com/woocommerce/woocommerce-blocks/assets/20469356/23df0597-df8d-44c5-8d0e-acd2942504f1"> |
-
-
-On Frontend:
-| Before | After |
-|--------|--------|
-| <img width="1224" alt="image" src="https://github.com/woocommerce/woocommerce-blocks/assets/20469356/6676974c-973c-4087-b2bf-6a6580fea583"> | <img width="1225" alt="image" src="https://github.com/woocommerce/woocommerce-blocks/assets/20469356/32c2b66b-1239-400c-974a-bfcf9998d68b"> |
-
-1. Log in to your WordPress dashboard.
-2. From your WordPress dashboard, go to Appearance > Themes. Make sure you have a block-based theme installed and activated. If not, you can install one from the Add New option. Block-based themes include "Twenty-twenty Two," "Twenty-twenty Three," etc.
-3. On the left-hand side menu, click on Appearance > Editor. This will open the Site Editor.
-4. On the left-hand side menu, click on Templates. This will open the list of available templates.
-5. Find and select any template from the list.
-6. Inside the Site editor, click on the '+' button, usually found at the top left of the editing space or within the content area itself, to add a new block.
-7. In the block library that pops up, you can search for the 'Single Product' block. You can do this by typing 'Single Product' into the search bar at the top of the block library.
-8. Click on the 'Single Product' block to add it to the template. You'll be prompted to select a product from your WooCommerce store to feature in the block. Make sure to select a product that contains at least one review.
-9. Once you've selected a product, the block will be inserted into your template and will display information about the product you've selected.
-10. Within the content area of the Single Product block, click on the '+' button to add a new block.
-11. In the block library that pops up, you can search for the 'Product Rating' block. You can do this by typing 'Product Rating' into the search bar at the top of the block library.
-12. Once the block is added to the template, make sure the rating stars appears empty and the reviews count is not displayed for the selected product.
-13. On the top-right side, click on the Save button.
-14. Visit a product and check if the Product Rating block is hidden.
-
-#### Product Rating block inside Related Products Block
-
-On Editor:
-| Before | After |
-| ------ | ----- |
-| <img width="1241" alt="image" src="https://github.com/woocommerce/woocommerce-blocks/assets/20469356/8ada29fc-6cc3-468b-89b3-5a291415a023"> | <img width="1258" alt="image" src="https://github.com/woocommerce/woocommerce-blocks/assets/20469356/f591756d-02f2-474d-9bfc-a37d06f7d6f4"> |
-
-
-On Frontend:
-| Before | After |
-|--------|--------|
-| <img width="1254" alt="image" src="https://github.com/woocommerce/woocommerce-blocks/assets/20469356/c16a3a8c-ff3f-4d3e-b331-09a68ec00838"> | <img width="1246" alt="image" src="https://github.com/woocommerce/woocommerce-blocks/assets/20469356/1e838f85-ae3a-4047-89b8-3fe765c1f3cb"> |
-
-
-1. Log in to your WordPress dashboard.
-2. From your WordPress dashboard, go to Appearance > Themes. Make sure you have a block-based theme installed and activated. If not, you can install one from the Add New option. Block-based themes include "Twenty-twenty Two," "Twenty-twenty Three," etc.
-3. On the left-hand side menu, click on Appearance > Editor. This will open the Site Editor.
-4. On the left-hand side menu, click on Templates. This will open the list of available templates.
-5. Find and select any template from the list.
-6. Inside the Site editor, click on the '+' button, usually found at the top left of the editing space or within the content area itself, to add a new block.
-7. In the block library that pops up, you can search for the 'Related Products' block. You can do this by typing 'Related Products' into the search bar at the top of the block library.
-8. Click on the 'Related Products' block to add it to the template.
-9. Within the content area of the Related Products block, click on the '+' button to add a new block.
-10. In the block library that pops up, you can search for the 'Product Rating' block. You can do this by typing 'Product Rating' into the search bar at the top of the block library.
-11. Once the block is added to the template, make sure the rating stars appears empty and the reviews count is not displayed for products that has no reviews, but the stars appears filled with the rating for products that contains reviews.
-12. On the top-right side, click on the Save button.
-13. Visit a product and check if the Product Rating block is hidden for products with no reviews, and is displayed for products with reviews.
-
-### Fix total shipping display info when no shipping method is available [#8819](https://github.com/woocommerce/woocommerce-blocks/pull/8819)
-
-The order of the test cases is important!
-
-### Case 1 (Local pickup enabled and no shipping options available)
-
-1. Enable local pickup with pickup price. For that, go to `WooCommerce -> Settings -> Shipping -> Local pickup`, under `General` Check `Enable local pickup` and `Add a price for customers who choose local pickup`, and save. Then add a price under the `Cost` input.
-2. Remove the shipping methods from the WC settings (WooCommerce -> Settings -> Shipping -> Shipping zones)
-3. Go to the store and add an item to the cart
-4. Go to the Checkout block and select the `Local Pickup` option under the `Shipping Method` section. Ensure the correct shipping information is displayed in the `Order Summary` Block (i.e., The correct price and correct local pickup option)
-5. Select `Shipping` under the `Shipping Method` section. Ensure `No shipping options available` is displayed under `shipping` in the `Order Summary` Block
-
-### Case 2 (Local pickup enabled and shipping option(s) available)
-
-1. Add a shipping method in `WooCommerce -> Settings -> Shipping -> Shipping zones`. Ensure the shopper's address is within the shipping zone created.
-2. Go to the Checkout block and select the `Local Pickup` option under the `Shipping Method` section. Ensure the correct shipping information is displayed in the `Order Summary` Block (i.e., The correct price and correct local pickup option)
-3. Select `Shipping` under the `Shipping Method` section. Ensure the correct shipping information is displayed in the `Order Summary` Block (i.e., The correct price and correct shipping option)
-
-### Case 3 (Local pickup disabled and no default shipping rates)
-
-1. Disable local pickup. For that, go to `WooCommerce -> Settings -> Shipping -> Local pickup`, under `General` uncheck `Enable local pickup` and save.
-2. Go to `WooCommerce -> Settings -> General`. Select `No location by default` under `Default customer location`
-3. Remove any default(fallback) shipping rates in `WooCommerce -> Settings -> Shipping -> Shipping zones -> Locations not covered by your other zones`
-4. Open your site in a private session(incognito mode).
-5. Add an item to the cart
-6. Go to the cart page, and confirm the "Add an address for shipping rates" link is present in the shipping calculator.
-7. Click on the link, and confirm it is working as expected.
-8. Open your site in a regular session where you're already logged in and have placed an order before.
-9. Add an item to the Cart
-10. Go to the cart page, confirm the shipping address, and "change address" link present in the shipping calculator.
-11. Click on the link, and confirm it is working as expected.
-
-### Case 4 (With default shipping rates)
-
-1. Add a default(fallback) shipping rate in `WooCommerce -> Settings -> Shipping -> Shipping zones -> Locations not covered by your other zones`
-2. Follow steps 4 and 5 from the previous case (i.e., `Case 3`)
-3. Go to the cart page, and confirm the shipping calculator is hidden and default shipping rates are visible
-4. Follow steps 8 to 11 from the previous case (i.e., `Case 3`)
-
-### Case 5 (Error Notice)
-
-1. Follow steps 3 to 6 from `Case 3`
-2. Click on the link, and change the address to a location where shipping rates are unavailable.
-3. Confirm that `There are no shipping options available. Please check your shipping address.` error is visible in the text form.
-4. Proceed to the Checkout block page, and confirm the `There are no shipping options available. Please check your shipping address` error is visible in the text form under the `Shipping options` section.
-
-
-Note: Notice will appear for a few seconds until we receive the server's response, even with the valid shipping address, when we change the shipping method.
-
-### Classic Product Template block visible in the inserter [#9573](https://github.com/woocommerce/woocommerce-blocks/pull/9573)
-
-1. Open the Site Editor.
-2. Edit the `Single Product` template.
-3. Be sure that the `Classic Product Template` is visible.
-4. Click on `transform into blocks` button.
-5. Open the inserter and search for: `WooCommerce Single Product Block` (for other templates, check the table below).
-6. Repeat those steps for: `Product Catalog`, `Products by Attribute`, `Products by Category`, `Products by Tag` and `Products Search Results` templates.
-
-| Template | Block Name |
-|------------------------|------------------------------------------|
-| Single Product | WooCommerce Single Product Block |
-| Product Catalog | WooCommerce Product Grid Block |
-| Product Search Results | WooCommerce Product Search Results Block |
-| Products by Attribute | WooCommerce Product Attribute Block |
-| Products by Category | WooCommerce Product Taxonomy Block |
-| Products By Tag | WooCommerce Product Tag Block |
-
-
-### Add to Cart with Options block: Prevent page redirection when clicking on Add to Cart button [#9691](https://github.com/woocommerce/woocommerce-blocks/pull/9691)
-
-1. Log in to your WordPress dashboard.
-2. From your WordPress dashboard, go to Appearance > Themes. Make sure you have a block-based theme installed and activated. If not, you can install one from the Add New option. Block-based themes include "Twenty-twenty Two," "Twenty-twenty Three," etc.
-3. On the left-hand side menu, click on Appearance > Editor. This will open the Site Editor.
-4. On the left-hand side menu, click on Templates. This will open the list of available templates.
-5. Find and select the 'Single Product' template from the list.
-6. When the Classic Product Template renders, click on Transform into Blocks. This will transform the Classic template in a block template if you haven't done it before.
-7. Inside the Site editor, click on the '+' button, usually found at the top left of the editing space or within the content area itself, to add a new block.
-8. In the block library that pops up, you can search for the 'Single Product' block. You can do this by typing 'Single Product' into the search bar at the top of the block library.
-9. Click on the 'Single Product' block to add it to the template. You'll be prompted to select a product from your WooCommerce store to feature in the block. Make sure to select a product that contains at least one review.
-10. Once you've selected a product, the block will be inserted into your template and will display information about the product you've selected.
-11. On the top-right side, click on the Save button.
-12. Visit a product and click on the Add To Cart button of the Single Product block that you just added.
-13. Make sure the page is not redirect to another URL and that the Cart is updated with the clicked product.
-
-### Render the single product title as an h1 when transforming from classic template [#9748](https://github.com/woocommerce/woocommerce-blocks/pull/9748)
-
-1. Ensure that the Single Product Template doesn't have any customization.
-2. Edit it.
-3. Transform it to the blockified version.
-4. Focus on the Product Title.
-5. Ensure that it renders as an h1.
-
-## Feature plugin
-
-### Use a portal to render the Drawer close button in order to fix its alignment inside the Mini-Cart Contents block [#9507](https://github.com/woocommerce/woocommerce-blocks/pull/9507)
-
-1. Add the Mini-Cart block to the header of your store.
-2. Go to Appearance > Editor > Template parts > Mini-Cart.
-3. Select the Mini-Cart Contents block and change its border to something excessively thick (ie: a 30px border).
-4. Go to the frontend and open the Mini-Cart drawer.
-5. Verify the close button is inside the Mini-Cart drawer area, instead of being on top of the border.
-
-Before | After
---- | ---
- | 
diff --git a/plugins/woocommerce/client/blocks/docs/internal-developers/testing/releases/1042.md b/plugins/woocommerce/client/blocks/docs/internal-developers/testing/releases/1042.md
deleted file mode 100644
index 8e99c77e969..00000000000
--- a/plugins/woocommerce/client/blocks/docs/internal-developers/testing/releases/1042.md
+++ /dev/null
@@ -1,113 +0,0 @@
-# Testing notes and ZIP for release 10.4.2
-
-Zip file for testing: [woocommerce-gutenberg-products-block.zip](https://github.com/woocommerce/woocommerce-blocks/files/11731631/woocommerce-gutenberg-products-block.zip)
-
-## WooCommerce Core
-
-### Update the Hero Product Split [#9762](https://github.com/woocommerce/woocommerce-blocks/pull/9762)
-
-1. From the editor (post, page, etc.) apply the `Hero Product Split` pattern.
-2. Confirm the image matches the "After" version in the screenshot in both the admin and the front end.
-
-| Before | After |
-| ------ | ----- |
-|<img width="1209" alt="Screenshot 2023-06-08 at 21 47 48" src="https://github.com/woocommerce/woocommerce-blocks/assets/186112/92ba194e-5014-45ad-830e-eb821d405239">|<img width="1238" alt="Screenshot 2023-06-08 at 21 49 12" src="https://github.com/woocommerce/woocommerce-blocks/assets/186112/1fc24a6b-7fc5-4c89-983f-d13ff4e703e7">|
-
-### Update hero patterns titles [#9769](https://github.com/woocommerce/woocommerce-blocks/pull/9769)
-
-1. On a new page or post, insert the `Hero product 3-split` pattern and make sure the h2 title says `Endless Tee's`.
-2. Insert the `Hero product chessboard` pattern and make sure the h3 title says `The Fall Collection`.
-3. Insert the `Hero product - split` pattern and make sure the h3 title says `Get cozy this fall with knit sweaters`.
-
-
-### Update Chessboard pattern images [#9761](https://github.com/woocommerce/woocommerce-blocks/pull/9761)
-
-1. From the editor (post, page, etc.) apply the `Hero Product Chessboard` pattern.
-2. Confirm the image matches the "After" version in the screenshot in both the admin and the front end.
-
-| Before | After |
-| ------ | ----- |
-| <img width="1044" alt="Screenshot 2023-06-08 at 21 33 37" src="https://github.com/woocommerce/woocommerce-blocks/assets/186112/11e92d17-eb30-4419-bab6-96350394df30">| <img width="1075" alt="Screenshot 2023-06-08 at 21 33 03" src="https://github.com/woocommerce/woocommerce-blocks/assets/186112/df3f97b5-b026-4090-b692-8232ac211043">|
-
-
-### Update/collection pattern images [#9766](https://github.com/woocommerce/woocommerce-blocks/pull/9766)
-
-1. From the editor (post, page, etc.) apply the `Product Collections: Featured Collections` pattern.
-2. Confirm the image matches the "After" version in the screenshot in both the admin and the front end.
-3. Ensure all CTA links/buttons actually links to the Shop page.
-4. Add the `Shop by Price` pattern.
-5. Ensure all CTA links/buttons actually links to the Shop page.
-
-| Before | After |
-| ------ | ----- |
-| | |
-
-### Update Images for the Product Details Patterns [#9764](https://github.com/woocommerce/woocommerce-blocks/pull/9764)
-
-1. From the editor (post, page, etc.) apply each of the below patterns.
-2. Confirm the image matches the "After" version in the screenshots in both the admin and the front end.
-
-
-#### Product Hero
-
-| Before | After |
-| ------ | ----- |
-|  |  |
-
-#### Product Listing with Gallery and Description
-
-| Before | After |
-| ------ | ----- |
-|  |  |
-
-#### Product Details: product listing
-
-| Before | After |
-| ------ | ----- |
-|  |  |
-
-#### Product Details Pattern
-
-| Before | After |
-| ------ | ----- |
-|  |  |
-
-
-### Update Banner Pattern To Replace Unsplash Image [#9760](https://github.com/woocommerce/woocommerce-blocks/pull/9760)
-
-1. From the editor (post, page, etc.) apply the `Banner` pattern.
-2. Confirm the image matches the "After" version in the screenshot in both the admin and the front end.
-3. Confirm the CTA button links to the Shop page on the front end.
-4. Confirm vertical spacing is fixed on the text column (extra padding on the top is removed).
-
-
-| Before | After |
-| ------ | ----- |
-|  |  |
-
-### Update/patterns featured category product collection [#9765](https://github.com/woocommerce/woocommerce-blocks/pull/9765)
-
-1. From the editor (post, page, etc.) apply the `Featured Category / Focus, Featured Category / Cover and Featured Category / Triple` pattern.
-2. Confirm the image matches the "After" version in the screenshot in both the admin and the front end.
-3. Ensure all CTA links/buttons actually links to the Shop page.
-
-
-#### Featured Category / Focused
-
-| Before | After |
-| ------ | ----- |
-| | |
-
-#### Featured Category / Cover image
-
-| Before | After |
-| ------ | ----- |
-| | |
-
-#### Featured Category / Triple
-
-| Before | After |
-| ------ | ----- |
-| ||
-
-
diff --git a/plugins/woocommerce/client/blocks/docs/internal-developers/testing/releases/1043.md b/plugins/woocommerce/client/blocks/docs/internal-developers/testing/releases/1043.md
deleted file mode 100644
index 703dcb7ea9d..00000000000
--- a/plugins/woocommerce/client/blocks/docs/internal-developers/testing/releases/1043.md
+++ /dev/null
@@ -1,36 +0,0 @@
-# Testing notes and ZIP for release 10.4.3
-
-Zip file for testing: [woocommerce-gutenberg-products-block.zip](https://github.com/woocommerce/woocommerce-blocks/files/11801978/woocommerce-gutenberg-products-block.zip)
-
-## WooCommerce Core
-
-### Products block: fix compatibility with Gutenberg 16. ([9916](https://github.com/woocommerce/woocommerce-blocks/pull/9916))
-
-1. Ensure that you have Gutenberg 16 installed and enabled.
-2. Open the post/page editor.
-3. Add the Products Block.
-4. Ensure that the Products Block defaults to the grid layout.
-
-### Mini Cart Block: show the total price, including tax, according to the option. ([9878](https://github.com/woocommerce/woocommerce-blocks/pull/9878))
-
-1. Open the WooCommerce Settings via WooCommerce > Settings from the sidebar menu of the WP-Admin.
-2. Enable the option "Enable tax rates and calculations".
-3. Click on the "Tax" tab.
-4. Click on "Standard Rates" and configure a tax rate. Save.
-5. Click on the "Tax" tab.
-6. Set the "Display prices during cart and checkout" option to "Including Tax".
-7. Now set up a Shipping method going to WooCommerce > Settings > Shipping > Add shipping zone. Create the zone and add a shipping method with a price different from 0.
-8. With the Site Editor adds the Mini Cart in the header.
-9. On the front end, add a product to the cart and go to the Cart page, so shipping price is calculated.
-10. Go back to the Shop page
-11. Ensure that the Mini Cart shows the price including the tax, but not including the Shipping prive.
-12. Hover the Mini Cart.
-13. Ensure that the Mini Cart shows always the same price.
-14. Open the WooCommerce Settings.
-15. Click on the "Tax" tab.
-16. Set the "Display prices during cart and checkout" option to "Excluding Tax".
-17. On the front end, add a product to the cart.
-18. Refresh the page.
-19. Ensure that the Mini Cart shows the price excluding the tax.
-20. Hover the Mini Cart.
-21. Ensure that the Mini Cart shows always the same price.
diff --git a/plugins/woocommerce/client/blocks/docs/internal-developers/testing/releases/1044.md b/plugins/woocommerce/client/blocks/docs/internal-developers/testing/releases/1044.md
deleted file mode 100644
index ca92db400e0..00000000000
--- a/plugins/woocommerce/client/blocks/docs/internal-developers/testing/releases/1044.md
+++ /dev/null
@@ -1,75 +0,0 @@
-# Testing notes and ZIP for release 10.4.4
-
-Zip file for testing: [woocommerce-gutenberg-products-block.zip](https://github.com/woocommerce/woocommerce-blocks/files/11840529/woocommerce-gutenberg-products-block.zip)
-
-## WooCommerce Core
-
-### Add back filter blocks frontend scripts ([9954](https://github.com/woocommerce/woocommerce-blocks/pull/9954))
-
-#### Test that the old markup of filter blocks still works
-
-```text
-Important: test needs to be conducted using WooCommerce 7.8
-```
-
-1. Add a new page, click on three dots on the right top corner and select "Code Editor"
-
-
-2. Paste the following code and exit the code editor
-
-```HTML
-<!-- wp:columns -->
-<div class="wp-block-columns"><!-- wp:column {"width":"33.33%"} -->
-<div class="wp-block-column" style="flex-basis:33.33%"><!-- wp:woocommerce/price-filter -->
-<div class="wp-block-woocommerce-price-filter is-loading" data-showinputfields="true" data-showfilterbutton="false" data-heading="Filter by price" data-heading-level="3"><span aria-hidden="true" class="wc-block-product-categories__placeholder"></span></div>
-<!-- /wp:woocommerce/price-filter -->
-
-<!-- wp:woocommerce/attribute-filter {"attributeId":1,"displayStyle":"dropdown","heading":"Filter by Color"} -->
-<div class="wp-block-woocommerce-attribute-filter is-loading" data-attribute-id="1" data-show-counts="true" data-query-type="or" data-heading="Filter by Color" data-heading-level="3" data-display-style="dropdown"><span aria-hidden="true" class="wc-block-product-attribute-filter__placeholder"></span></div>
-<!-- /wp:woocommerce/attribute-filter -->
-
-<!-- wp:woocommerce/attribute-filter {"attributeId":2,"heading":"Filter by Size"} -->
-<div class="wp-block-woocommerce-attribute-filter is-loading" data-attribute-id="2" data-show-counts="true" data-query-type="or" data-heading="Filter by Size" data-heading-level="3"><span aria-hidden="true" class="wc-block-product-attribute-filter__placeholder"></span></div>
-<!-- /wp:woocommerce/attribute-filter -->
-
-<!-- wp:woocommerce/active-filters -->
-<div class="wp-block-woocommerce-active-filters is-loading" data-display-style="list" data-heading="Active filters" data-heading-level="3"><span aria-hidden="true" class="wc-block-active-product-filters__placeholder"></span></div>
-<!-- /wp:woocommerce/active-filters -->
-
-<!-- wp:woocommerce/stock-filter -->
-<div class="wp-block-woocommerce-stock-filter is-loading" data-show-counts="true" data-heading="Filter by stock status" data-heading-level="3"><span aria-hidden="true" class="wc-block-product-stock-filter__placeholder"></span></div>
-<!-- /wp:woocommerce/stock-filter --></div>
-<!-- /wp:column -->
-
-<!-- wp:column {"width":"66.66%"} -->
-<div class="wp-block-column" style="flex-basis:66.66%"><!-- wp:woocommerce/all-products {"columns":3,"rows":3,"alignButtons":false,"contentVisibility":{"orderBy":true},"orderby":"date","layoutConfig":[["woocommerce/product-image"],["woocommerce/product-title"],["woocommerce/product-price"],["woocommerce/product-rating"],["woocommerce/product-button"]]} -->
-<div class="wp-block-woocommerce-all-products wc-block-all-products" data-attributes="{"alignButtons":false,"columns":3,"contentVisibility":{"orderBy":true},"isPreview":false,"layoutConfig":[["woocommerce/product-image"],["woocommerce/product-title"],["woocommerce/product-price"],["woocommerce/product-rating"],["woocommerce/product-button"]],"orderby":"date","rows":3}"></div>
-<!-- /wp:woocommerce/all-products --></div>
-<!-- /wp:column --></div>
-<!-- /wp:columns -->
-```
-
-2. Publish the page.
-3. Go to the frontend.
-4. Verify filter blocks are rendered correctly. Interact with them and verify they work properly.
-
-Before | After
---- | ---
- | 
-
-
-
-##### Test that filter blocks translations are loaded correctly
-
-```text
-Important: test needs to be conducted using WooCommerce 7.7
-```
-
-1. Change your store language to a locale that has translations (ie: Spanish).
-2. Add the Filter by Attribute, Filter by Price, Filter by Stock and Filter by Rating blocks to a post or page, alongside the Active Filters and Products (beta) blocks.
-3. In the frontend, interact with the filter blocks and verify they all work properly.
-4. Verify translations are loaded correctly. Ie: Filter by Attribute shows "Seleccionar" instead of "Select" in the input field.
-
-Before | After
---- | ---
- | 
diff --git a/plugins/woocommerce/client/blocks/docs/internal-developers/testing/releases/1045.md b/plugins/woocommerce/client/blocks/docs/internal-developers/testing/releases/1045.md
deleted file mode 100644
index 87a05dc54ef..00000000000
--- a/plugins/woocommerce/client/blocks/docs/internal-developers/testing/releases/1045.md
+++ /dev/null
@@ -1,91 +0,0 @@
-# Testing notes and ZIP for release 10.4.5
-
-Zip file for testing: [woocommerce-gutenberg-products-block.zip](https://github.com/woocommerce/woocommerce-blocks/files/11916133/woocommerce-gutenberg-products-block.zip)
-
-## WooCommerce Core
-
-### Product Rating block > Ensure the customer reviews text links to the relevant user reviews within the Single Product block and Single Product template. ([9998](https://github.com/woocommerce/woocommerce-blocks/pull/9998))
-
-1. Create a new post
-2. Add the Single Product block to the post (with a product with reviews) and save.
-3. Notice how the "(X customer reviews)" text links to the relevant single product template.
-4. Now head over to Edit site > Templates > Single Product and make you are using the blockified version of the Single Product Template with the Product Rating block in place. Edit and save the template if you made any changes to ensure this criteria.
-5. Now access any Single Product on the front end and make sure the **"X customer review(s)"** text is linked to the relevant section.
-
-| Before | After |
-| ------ | ----- |
-| <img width="1231" alt="Screenshot 2023-06-26 at 21 48 03" src="https://github.com/woocommerce/woocommerce-blocks/assets/15730971/029c44ab-e6a5-43dc-9aa1-eadcc6706407"> | <img width="1246" alt="Screenshot 2023-06-26 at 21 47 26" src="https://github.com/woocommerce/woocommerce-blocks/assets/15730971/65eaa58b-d821-4219-9658-21bbfa6061be"> |
-
-### Fix reviews count not showing for the Product Rating block when inside the Single Product page. ([9995](https://github.com/woocommerce/woocommerce-blocks/pull/9995))
-
-1. From your WordPress dashboard, go to Appearance > Themes. Make sure you have a block-based theme installed and activated. If not, you can install one from the Add New option. Block-based themes include "Twenty-twenty Two," "Twenty-twenty Three," etc.
-2. On the left-hand side menu, click on Appearance > Editor. This will open the Site Editor.
-3. On the left-hand side menu, click on Templates. This will open the list of available templates.
-4. Find and select the 'Single Product' template from the list.
-5. When the Classic Product Template renders, click on Transform into Blocks. This will transform the Classic template in a block template if you haven't done it before.
-6. On the top-right side, click on the Save button.
-7. Visit a product with at least 1 review and check that the Reviews count is being shown.
-
-| Before | After |
-| ------ | ----- |
-|  | <img width="1173" alt="image" src="https://github.com/woocommerce/woocommerce-blocks/assets/20469356/f7e8fff5-bbcc-4424-b0ce-a1aeee927b4a"> |
-
-### Single Product template: Fix variation SKU switching in the blockified template. ([9990](https://github.com/woocommerce/woocommerce-blocks/pull/9990))
-
-1. Select **Appearance > Editor > Templates > Single Product**. Blockify the Single Product template.
-2. Make sure you have a least one variation product, with variations having the **SKU** set.
-3. Go to the frontend view of the variation product, and verify that selecting different variations causes the SKU to reflect the variation's SKU.
-
-| Before | After |
-| ------ | ----- |
-|||
-
-### Single Product template: Fix variation gallery image switching in the blockified template. ([9986](https://github.com/woocommerce/woocommerce-blocks/pull/9986))
-
-1. Select **Appearance > Editor > Templates > Single Product**. Blockify the Single Product template.
-2. Make sure you have a least one variation product, with variations having the **Featured Image** set.
-3. Go to the frontend view of the variation product, and verify that selecting different variations causes the product image gallery to reflect the selected variation Featured Image.
-
-| Before | After |
-| ------ | ----- |
-|||
-
-### Product Image Gallery block: Fix overflow when multiple images are used. ([10013](https://github.com/woocommerce/woocommerce-blocks/pull/10013))
-
-1. Navigate to the "Products" tab in the left-hand sidebar and click on "All Products."
-2. Locate and select the product you want to edit from the list of existing products.
-3. Scroll down to the "Product Image" section. If the product already has a primary image, you can replace it by clicking on the "Set product image" link. If there is no existing image, you will see an "Add product image" button instead.
-4. You'll be presented with options to upload an image. `Select an image with size 512 x 640 pixels`. Click on the "Set product image" button to confirm.
-5. To add additional images to the product gallery, scroll down further to the "Product Gallery" section. Click on the "Add product gallery images" link.
-6. Follow Step 5 to upload or select the additional images for the product. You can use the same image used in step 5.
-7. Click on the "Update" button to save your changes.
-8. From your WordPress dashboard, go to Appearance > Themes. Make sure you have a block-based theme installed and activated. If not, you can install one from the Add New option. Block-based themes include "Twenty-twenty Two," "Twenty-twenty Three," etc.
-9. On the left-hand side menu, click on Appearance > Editor. This will open the Site Editor.
-10. On the left-hand side menu, click on Templates. This will open the list of available templates.
-11. Find and select the 'Single Product' template from the list.
-12. When the Classic Product Template renders, click on Transform into Blocks. This will transform the Classic template in a block template if you haven't done it before.
-13. On the top-right side, click on the Save button.
-14. Visit the product that you edited the image and check that the Product Image Gallery block is being displayed correctly and without any overflow.
-
-| Before | After |
-| ------ | ----- |
-| <img width="1045" alt="image" src="https://github.com/woocommerce/woocommerce-blocks/assets/20469356/610c299b-b40b-4d26-bfe2-3e954a21e515"> | <img width="1016" alt="image" src="https://github.com/woocommerce/woocommerce-blocks/assets/20469356/b88f76c1-1c9e-4dc7-8d3b-163ee2ad3ab4"> |
-
-
-### Single Product Block: avoid to register incompatibility blocks with the Single Product Block on the post/page editor. ([10044](https://github.com/woocommerce/woocommerce-blocks/pull/10044))
-
-1. Open the Single Product Template and ensure you have the blockified version.
-2. Ensure that all the blocks are visible.
-3. Open the post editor and add the Single Product Block.
-4. Follow the table below and ensure that only the blocks with the 🟢 are available as ancestor the Single Product Block
-
-
-| Block Name | Available as the ancestor of the Single Product Block |
-|--------|--------|
-| Add to Cart with Options | 🟢 |
-| Product Details | 🔴 |
-| Product Image Gallery | 🔴 |
-| Product Meta | 🟢 |
-| Product Reviews | 🔴 |
-| Product Rating | 🟢 |
-| Related Products | 🔴 |
diff --git a/plugins/woocommerce/client/blocks/docs/internal-developers/testing/releases/1046.md b/plugins/woocommerce/client/blocks/docs/internal-developers/testing/releases/1046.md
deleted file mode 100644
index e6dda404fc9..00000000000
--- a/plugins/woocommerce/client/blocks/docs/internal-developers/testing/releases/1046.md
+++ /dev/null
@@ -1,29 +0,0 @@
-# Testing notes and ZIP for release 10.4.6
-
-Zip file for testing: [woocommerce-gutenberg-products-block.zip](https://github.com/woocommerce/woocommerce-blocks/files/12072230/woocommerce-gutenberg-products-block.zip)
-
-## WooCommerce Core
-
-### Product Filters > Fix Performance issue and Fatal error on stores with a high volume of products [#10198](https://github.com/woocommerce/woocommerce-blocks/pull/10198)
-
-1. Make sure you have products in your store with attributes and stock status (You can do so by simply importing the sample products from the core of Woo).
-2. Create a new post.
-3. Insert the Products (Beta) block.
-4. Insert the Filter by Attribute, Filter by Stock and Filter by Price
-5. Make sure all filters have the "Display product count" setting enabled (it is disabled by default).
-
-<img width="309" alt="Screenshot 2023-07-13 at 20 09 31" src="https://github.com/woocommerce/woocommerce-blocks/assets/15730971/749275ca-94f9-4990-99f2-f302aaa4aab0">
-
-6. Save the post and go to the front-end
-7. Make sure you can use all filters as expected and without any problems/errors: the product counts should match the number of existing products in the store with the filtered criteria, not just what is displayed on the page.
-
-### Stop reading Product IDs from asset store in filter blocks [#10195](https://github.com/woocommerce/woocommerce-blocks/pull/10195)
-
-1. Go to Editor
-2. Add Filters pattern
-3. Add Products (Beta) block
-4. Save and go to frontend
-5. Play around with filters
-
-Expected: Make sure you can use all filters as expected and without any problems/errors: the product counts should match the number of existing products in the store with the filtered criteria, not just what is displayed on the page.
-
diff --git a/plugins/woocommerce/client/blocks/docs/internal-developers/testing/releases/1050.md b/plugins/woocommerce/client/blocks/docs/internal-developers/testing/releases/1050.md
deleted file mode 100644
index 2c3a120acf1..00000000000
--- a/plugins/woocommerce/client/blocks/docs/internal-developers/testing/releases/1050.md
+++ /dev/null
@@ -1,145 +0,0 @@
-# Testing notes and ZIP for release 10.5.0
-
-Zip file for testing: [woocommerce-gutenberg-products-block.zip](https://github.com/woocommerce/woocommerce-blocks/files/11801343/woocommerce-gutenberg-products-block.zip)
-
-## WooCommerce Core
-
-### Fix error when adding the Reviews by Category block to a store without any product reviews. ([9868](https://github.com/woocommerce/woocommerce-blocks/pull/9868))
-
-1. Make sure your store has no reviews.
-2. Create a new post: To do this, navigate to Posts > Add New from the WordPress dashboard.
-3. Add the Reviews by Category block: Inside the new post editor, click on the plus icon (+) at the top left corner or within the post editor to add a new block. In the search bar that appears, type Reviews by Category and click on it to add the block to your post.
-4. Configure the Reviews by Category block: Now, you can configure the block based on your needs. Select the category you want to display reviews from using the dropdown in the block selector.
-5. Check that the block is inserted to the Editor and no error appears.
-
-| Before | After |
-| ------ | ----- |
-|  |  |
-
-### Allow Customer Account Block to be found with keyword "My Account". ([9815](https://github.com/woocommerce/woocommerce-blocks/pull/9815))
-
-1. Create a new post: To do this, navigate to Posts > Add New from the WordPress dashboard.
-2. Open the inserter and search for "My account".
-3. Check if Customer Account Block shows up.
-
-### Ensure the "Change Address" button is visible in the cart even if local pickup is selected. ([9809](https://github.com/woocommerce/woocommerce-blocks/pull/9809))
-
-1. Ensure you are using the Cart block.
-2. Go to `/my-account/edit-address/` and ensure your test account has a (shipping) address.
-3. Ensure you have an item in the cart that needs shipping, and a mixture of pickup and flat rates.
-4. Select the local pickup shipping method.
-5. Confirm the “change address” button is still shown.
-
-
-
-### WooCommerce Product Filters pattern: Improve the preview of the Filter by Attribute block. ([9812](https://github.com/woocommerce/woocommerce-blocks/pull/9812))
-
-1. Create a new page or post.
-2. Open the block inserter and search for the `WooCommerce Product Filters` pattern.
-3. Check the preview image of the pattern in the inserter and make sure you see one attribute selected and not the "edit" view of the filter by attribute block (see screenshot above).
-4. If the store does not have any attributes you should still see the "edit" view though.
-
-| Before | After |
-| ------ | ----- |
-|||
-
-
-### Mini Cart block: Fix icon render in the widget selector. ([9828](https://github.com/woocommerce/woocommerce-blocks/pull/9828))
-
-1. Enable the Storefront theme.
-2. Click on "Appearance > Customize".
-3. Click on "Widgets > Below Header".
-4. Search for the Mini Cart widget.
-5. Ensure the Mini Cart icon displays correctly.
-
-| Before | After |
-| ------ | ----- |
-|<img width="898" alt="before icon" src="https://github.com/woocommerce/woocommerce-blocks/assets/905781/f8c0bc43-fefc-4771-89f2-b5a9122f25fc">|<img width="827" alt="after icon" src="https://github.com/woocommerce/woocommerce-blocks/assets/905781/520c3f1f-9247-4484-a43b-02c458147c57">|
-
-
-
-### Mini Cart: Add an alternative icon setting. ([9570](https://github.com/woocommerce/woocommerce-blocks/pull/9570))
-
-1. Add the Mini-Cart block to a page.
-2. Select the Bag alternative icon and save.
-3. Make sure it displays correctly in the editor and on the page.
-4. Repeat the same for the third icon (Bag-Alt).
-
-| Before | After |
-| ------ | ----- |
-| <img width="279" alt="Edit_Page_“Mini_cart”_‹_kirigami_—_WordPress-2" src="https://github.com/woocommerce/woocommerce-blocks/assets/905781/35f49092-13c1-4d8c-b411-8e5af8fdff4a">|<img width="280" alt="Edit_Page_“Mini_cart”_‹_kirigami_—_WordPress" src="https://github.com/woocommerce/woocommerce-blocks/assets/905781/15a48120-b16d-4db0-be69-d0f65e2f0ff8">|
-
-
-### Fix capitalization in Product Collections: Newest Arrivals pattern. ([9777](https://github.com/woocommerce/woocommerce-blocks/pull/9777))
-
-1. Create a post or page and open the _Patterns_ tab in the inserter.
-2. Search for `product collections`.
-3. Verify the word _Collections_ is capitalized in all the available patterns.
-
-### Prevent Mini-Cart drawer to show horizontal scrollbar if the system has visible scrollbars. ([9676](https://github.com/woocommerce/woocommerce-blocks/pull/9676))
-
-1. Set up your browser so scrollbars are visible (see [instructions for Mac](https://support.vagaro.com/hc/en-us/articles/204347160-Disable-Disappearing-Scroll-Bars-on-Mac-Computers), on GNOME it's under Settings > Accessibility).
-2. Add the Mini-Cart block to the header of your store.
-3. In the frontend, open the Mini-Cart drawer and verify there is no horizontal scrollbar in the contents table.
-
-Before | After
---- | ---
- | 
-
-### Add RTL preview support for mini-cart. ([9756](https://github.com/woocommerce/woocommerce-blocks/pull/9756))
-
-1. On a block theme (ie: Twenty Twenty Three), create a new post/page and insert the mini-cart block.
-2. Switch to a RTL language such as Arabic.
-3. Click on the mini-cart block in the Editor.
-4. In the inspector controls, you should see a preview of the mini-cart drawer that shows a RTL version. ( where the drawer opens from the left ).
-5. Switch to English language and now the preview should be opening from the right instead.
-
-
-
-### Fix mini cart icon not displaying correctly in RTL sites. ([9707](https://github.com/woocommerce/woocommerce-blocks/pull/9707))
-
-1. Install a plugin called "RTL Tester".
-2. Switch to RTL with the button in your admin bar.
-3. Add a post and insert the `Mini cart` block.
-4. Click on the `Mini cart` icon to open the editor drawer.
-5. Ensure the `Mini cart` icon is facing left instead of right as seen in the screenshot above.
-
-
-
-### All Reviews block: Fix error when adding the block to a store without reviews. ([9869](https://github.com/woocommerce/woocommerce-blocks/pull/9869))
-
-1. Make sure your store has no reviews.
-2. Create a new post: Navigate to Posts > Add New from the WordPress dashboard.
-3. Add the All Reviews block: When you're in the new post editor, click on the plus icon (+) in the top left corner or within the post editor to add a new block. Type All Reviews in the search bar and click on it to add the block to your post.
-4. Check that the block is inserted to the Editor without any errors.
-
-### Mini Cart Block: show the total price, including tax, according to the option. ([9878](https://github.com/woocommerce/woocommerce-blocks/pull/9878))
-
-1. Open the WooCommerce Settings via WooCommerce > Settings from the sidebar menu of the WP-Admin.
-2. Enable the option "Enable tax rates and calculations".
-3. Click on the "Tax" tab.
-4. Click on "Standard Rates" and configure a tax rate. Save.
-5. Click on the "Tax" tab.
-6. Set the "Display prices during cart and checkout" option to "Including Tax".
-7. Now set up a Shipping method going to WooCommerce > Settings > Shipping > Add shipping zone. Create the zone and add a shipping method with a price different from 0.
-8. With the Site Editor adds the Mini Cart in the header.
-9. On the front end, add a product to the cart and go to the Cart page, so shipping price is calculated.
-10. Go back to the Shop page
-11. Ensure that the Mini Cart shows the price including the tax, but not including the Shipping prive.
-12. Hover the Mini Cart.
-13. Ensure that the Mini Cart shows always the same price.
-14. Open the WooCommerce Settings.
-15. Click on the "Tax" tab.
-16. Set the "Display prices during cart and checkout" option to "Excluding Tax".
-17. On the front end, add a product to the cart.
-18. Refresh the page.
-19. Ensure that the Mini Cart shows the price excluding the tax.
-20. Hover the Mini Cart.
-21. Ensure that the Mini Cart shows always the same price.
-
-### Products block: fix compatibility with Gutenberg 16. ([9886](https://github.com/woocommerce/woocommerce-blocks/pull/9886))
-
-1. Ensure that you have Gutenberg 16 installed and enabled.
-2. Create a post/page.
-3. Add the Products block.
-4. Ensure that Products block defaults to the grid layout.
diff --git a/plugins/woocommerce/client/blocks/docs/internal-developers/testing/releases/1060.md b/plugins/woocommerce/client/blocks/docs/internal-developers/testing/releases/1060.md
deleted file mode 100644
index ed1d97b2139..00000000000
--- a/plugins/woocommerce/client/blocks/docs/internal-developers/testing/releases/1060.md
+++ /dev/null
@@ -1,356 +0,0 @@
-# Testing notes and ZIP for release 10.6.0
-
-Zip file for testing: [woocommerce-gutenberg-products-block.zip](https://github.com/woocommerce/woocommerce-blocks/files/11972116/woocommerce-gutenberg-products-block.zip)
-
-## WooCommerce Core
-
-### Add Cart/Checkout/Order-Received Templates [#9301](https://github.com/woocommerce/woocommerce-blocks/pull/9301)
-
-1. On a new WooCommerce installation take note of the contents for Cart and Checkout pages
-2. Enable a blocks theme eg. Twenty Twenty Three
-3. Go to Appearance > Editor > Template Parts and verify the existence of Checkout Header template part
-4. Verify that you can edit, save, and changes persist
-5. Go to Appearance > Editor > Templates and verify the existence of Cart, Checkout and Order Confirmation templates
-6. Verify for Cart and Checkout templates that the content matches the one noted in step 1.
-7. Go to Appearance > Editor > Templates > Manage all templates and verify the Cart and Checkout show "Customized"
-8. Edit said templates, save, and verify that changes persist.
-9. Make a test purchase. Verify that the views for Cart, Checkout and Order Confirmation contain the new templates
-10. Clear the "Customized" state for Checkout and make a new test order. Verify that no footer is present, and the header is the Checkout Header template part
-11. Go to WooCommerce > Settings > Advanced and verify that for Cart and Checkout we have a freeform endpoint textbox, as opposed to the old page selection dropdown
-12. Edit and save them, and verify that a new checkout flow displays Cart and Checkout on the newly chosen endpoints
-
-### Add/attributes filter count display toggle [#9833](https://github.com/woocommerce/woocommerce-blocks/pull/9833)
-
-1. Before checking out this branch add post/page and test the following blocks `Filter by Attributes`, `Filter by Stock` and `Filter by Rating` along with `Products (beta)` block. Just leave all default settings and publish post/page.
-2. Now checkout this PR and load the post/page you created in step 1 and ensure there are no block validation errors in the console.
-3. Add the 3 blocks again. Check that in each of the blocks, `Display product count` option is set to false/off.
-4. Ensure you can toggle `Display product count` and it will hide/show the product counts in editor and frontend.
-
-### Banner pattern: improve spacing and centering in responsive designs [#9877](https://github.com/woocommerce/woocommerce-blocks/pull/9877)
-
-1. Create a new page or post.
-2. Insert the `Banner` pattern and save.
-3. Go to the front end and check the pattern looks like the screenshots below in all the different screen sizes.
-
-<img width="700" alt="Screenshot 2023-06-19 at 12 23 41" src="https://github.com/woocommerce/woocommerce-blocks/assets/186112/08d0043b-c856-497c-86c2-cd5f5b4cadf2">
-<img width="1209" alt="Screenshot 2023-06-19 at 12 23 49" src="https://github.com/woocommerce/woocommerce-blocks/assets/186112/a4d74096-0b3b-48c2-a60a-5d13a6f7e53f">
-
-### Hero Split pattern: add shop link to the button [#9879](https://github.com/woocommerce/woocommerce-blocks/pull/9879)
-
-1. Create a new page or post.
-2. Insert the `Hero Product - Split` pattern and save.
-3. Go to the front end and check the `Shop now` button links to the shop.
-
-### Make use of product search [#9890](https://github.com/woocommerce/woocommerce-blocks/pull/9890)
-
-1. Add the following patterns to a post/page `WooCommerce Essential Header | Dark`, `WooCommerce Essential Header`, `WooCommerce Large Header | Dark` and `WooCommerce Large Header`.
-2. Ensure you see a search bar that searches products.
-3. Check this on the frontend as well.
-
-### Update Hero Product 3 Split pattern with opinionated button styling and margin adjustments [#9893](https://github.com/woocommerce/woocommerce-blocks/pull/9893)
-
-1. Add `Hero Product 3 Split` pattern to a post/page.
-2. Check that the `Shop Now` button has a specific background/text color. Test with a block theme like TT3 and make sure the button is white and text is black.
-3. Check in the front end and reduce the browser viewport to smallest possible and ensure the block of text in the area of the black background that there are margins all around so it is not bumping up to the edges.
-
-### `Featured Products 5-item grid` fix alignment [#9913](https://github.com/woocommerce/woocommerce-blocks/pull/9913)
-
-1. Create a new page or post.
-2. Insert the `Featured Products 5-item grid` pattern.
-3. Change the screen size to a smaller viewport and check the pattern looks like the image below (there's no whitespace at the right of the image).
-
-<img src="https://github.com/woocommerce/woocommerce-blocks/assets/186112/7930ca9e-895a-45f3-b098-b2a85c33c9c9" />
-
-### Shop by Price pattern: add price filters to buttons [#9915](https://github.com/woocommerce/woocommerce-blocks/pull/9915)
-
-1. Create a new page or post.
-2. Insert the `Shop by price` pattern and save.
-3. Go to the front end and check the pattern looks like the image below.
-4. Check that the link inside each of the squares corresponds to its title (highest rated filters by rating, under $X filters by price, etc).
-5. Check that the link under each of the squares is the same as the one in the title.
-
-<img width="1235" alt="Screenshot 2023-06-20 at 16 34 27" src="https://github.com/woocommerce/woocommerce-blocks/assets/186112/561aa7e7-be01-4617-abcd-ff7b71584a1c">
-
-### Use the single product block on the Hero Product pattern [#9935](https://github.com/woocommerce/woocommerce-blocks/pull/9935)
-
-1. Create a new page or post.
-2. Insert the `Hero product` pattern and save.
-3. Check that the pattern is using the `Single Product` block and has a default product selected.
-4. In the front end, check the pattern looks like the image below.
-
-<img width="1199" alt="Screenshot 2023-06-21 at 14 17 30" src="https://github.com/woocommerce/woocommerce-blocks/assets/186112/867d945e-0629-4df3-8e77-aead323c3d54">
-
-### Add new `Discount banner with image` pattern [#9957](https://github.com/woocommerce/woocommerce-blocks/pull/9957)
-
-1. Create a new post or page.
-2. Insert the `Discount banner with image` pattern and save.
-3. In the front end, check the pattern looks like the image below and the `Shop now` button links to the shop page.
-
-<img src="https://user-images.githubusercontent.com/186112/247503800-cf9f3a2b-bb95-4a64-adaa-d1a1e47abe97.png" />
-
-### Add new `Product collection banner` pattern [#9953](https://github.com/woocommerce/woocommerce-blocks/pull/9953)
-
-1. Create a new post or page.
-2. Insert the `Product collection banner` pattern and save.
-3. In the front end, check the pattern looks like the image below and the `Shop now` button links to the shop page.
-
-<img src="https://user-images.githubusercontent.com/186112/247504972-fb452e29-acf8-4458-a2ac-2d45cdb8473c.png" />
-
-### Add new `Small discount banner with image` pattern [#9947](https://github.com/woocommerce/woocommerce-blocks/pull/9947)
-
-1. Create a new post or page.
-2. Insert the `Small discount banner with image` pattern and save.
-3. In the front end, check the pattern looks like the image below and the links go to the shop page (the image is different because I used one of the images already included in the plugin).
-
-<img width="499" alt="Screenshot 2023-06-22 at 09 32 04" src="https://user-images.githubusercontent.com/186112/247504271-9afc1f70-7060-4ece-9f61-2ffb31ea72c1.png">
-
-### Add new `Discount banner` pattern [#9936](https://github.com/woocommerce/woocommerce-blocks/pull/9936)
-
-1. Create a new post or page.
-2. Insert the `Discount banner` pattern and save.
-3. In the front end, check the pattern looks like the image below and the `Shop now` button links to the shop page.
-
-<img width="481" alt="Screenshot 2023-06-21 at 15 31 03" src="https://user-images.githubusercontent.com/186112/247502460-9ff3235a-7770-4ff4-ac58-ef533737731e.png">
-
-### Remove attributes data from save function for active filters [#10047](https://github.com/woocommerce/woocommerce-blocks/pull/10047)
-
-1. Log in to your WordPress dashboard.
-2. Create a new post / page.
-3. Click on the "+" button in the top left corner of the editor to add a new block. Search and add the following blocks to the editor: `Products (beta)`, `Active Filters` and some filter block like the `Filter by attributes`.
-4. On the top-right side, click on the Save button.
-5. Visit the post/page that you just created and check that Active Filters block is working correctly when choosing different options from the Filter by Attributes block
-
-### Remove attributes data from save function for filter by price [#10039](https://github.com/woocommerce/woocommerce-blocks/pull/10039)
-
-1. Log in to your WordPress dashboard.
-2. Create a new post / page.
-3. Click on the "+" button in the top left corner of the editor to add a new block. Search and add the following blocks to the editor: `Products (beta)` and `Filter by Price`.
-4. On the top-right side, click on the Save button.
-5. Visit the post/page that you just created and check that filter by price is working correctly and changes made to it is reflected on the Products (beta) block.
-
-### Add size settings to the `Product Image` block [#10034](https://github.com/woocommerce/woocommerce-blocks/pull/10034)
-
-#### Product Image settings
-
-1. Create a new page or post.
-2. Insert the `Single Product` block.
-3. Click on the `Product Image` block and open the settings sidebar.
-4. Check the `Image size` settings are shown in the sidebar.
-5. Change the settings and check the changes are properly reflected on the editor and in the front end, after saving.
-
-#### Product Hero pattern
-
-1. Insert the `Product Hero` pattern.
-2. Click the image and check the block used is the `Product Image`.
-3. Save and check in the front end that the patterns renders fine.
-
-### Add to Cart with options block > Remove opinionated style for the price list in grouped products. [#9988](https://github.com/woocommerce/woocommerce-blocks/pull/9988)
-
-1. Make sure you have a block theme enabled, such as Twenty-twenty three.
-2. Head over to Edit Site > Templates > Single Product
-3. Make sure you have the blockyified version of this template up and running: if you don't, click on the "Transform into blocks" button and save.
-4. Now on your site's FE, access any grouped product (such as Logo Collection)
-5. Ensure the prices in the list are displayed with a smaller font size as demonstrated on the screenshot.
-
-| Before | After |
-| ------ | ----- |
-| <img width="1107" alt="Screenshot 2023-06-26 at 12 33 18" src="https://github.com/woocommerce/woocommerce-blocks/assets/15730971/2a42ad75-bdf1-4229-a2a1-bc1495a5d8b6"> | <img width="1029" alt="Screenshot 2023-06-26 at 12 32 15" src="https://github.com/woocommerce/woocommerce-blocks/assets/15730971/07959a5c-808b-44bf-aa50-a66513ebb533"> |
-
-### Fix notice banner links for Legacy notices [#9996](https://github.com/woocommerce/woocommerce-blocks/pull/9996)
-
-1. Install Back in Stock Notifications plugin.
-2. Visit an out-of-stock product.
-3. Click the “Notify me” button.
-4. Confirm the notice banner link is displayed correctly.
-
-
-
-### Consistent Pattern Titles [#9814](https://github.com/woocommerce/woocommerce-blocks/pull/9814)
-
-1. Log in to your WordPress dashboard.
-2. Create a new post / page.
-3. Click on the "+" button in the top left corner of the editor to add a new pattern. Search and add the following patterns to the editor:
- - Featured Products 5-Item Grid
- - Product Filters
- - Large Footer Dark
- - Large Footer
- - Simple Footer Dark
- - Simple Footer
- - Footer with 2 Menus Dark
- - Footer with 2 Menus
- - Footer with 3 Menus
- - Centered Header Menu with Search
- - Essential Header Dark
- - Essential Header
- - Large Header Dark
- - Large Header
- - Hero Product Split
- - Just Arrived Full Hero
- - Product Collections Featured Collection
- - Product Collections Featured Collections
- - Product Collections Newest Arrivals
- - Product Details Product Listing
- - Product Hero 2 Column 2 Row
- - 1:1 Image 4-Column Product Row
- - 3-Column Product Row
- - 4-Column Product Row
- - Large Image Product Gallery
- - Minimal 5-Column Product Row
- - Minimal Product List
- - Product Gallery
- - Product List with 1:1 Images
- - Product List with Full Product Description
- - Alternating Image and Text
-4. On the top-left side, click to open the List View
-5. Make sure the blocks are named correctly (as in the list above) and the word "WooCommerce" does not appear in front of the blocks title.
-
-### Remove the word ‘beta’ from the compatibility notice [#10019](https://github.com/woocommerce/woocommerce-blocks/pull/10019)
-
-1. Create a fresh site.
-2. Create a test page and add the Cart block to it.
-3. Select the Cart block and verify that the notice reads:
-
-> _"The Cart & Checkout Blocks are a feature to optimize for faster checkout. To make sure this feature is right for your store, [review the list of compatible extensions](https://woocommerce.com/document/cart-checkout-blocks-support-status/#section-3)."_
-
-4. Create a test page and add the Checkout block to it.
-5. Select the Checkout block and verify that the notice reads:
-
-> _"The Cart & Checkout Blocks are a feature to optimize for faster checkout. To make sure this feature is right for your store, [review the list of compatible extensions](https://woocommerce.com/document/cart-checkout-blocks-support-status/#section-3)."_
-
----
-
-> **Note**
-> When testing this on an existing testing site:
->
-> - Make sure that there's no incompatible payment gateway is installed, as the incompatible payment gateway notice prevents the compatibility notice from appearing.
-> - Make sure that there's no key called `wc-blocks_dismissed_sidebar_compatibility_notices` stored in local storage, as this also prevents the compatibility notice from appearing.
-
-### Hide "collection from" text when a location has an incomplete address. [#9808](https://github.com/woocommerce/woocommerce-blocks/pull/9808)
-
-1. Go to WooCommerce > Settings > Shipping > Local Pickup. Create 2 pickup locations—one should have a full address/pickup location, and one should have no address like so:
-
-
-
-2. Add items to your cart and go to checkout.
-3. Select Local Pickup
-4. Select the pickup location with an address. it should show "collection from" like so:
-
-
-
-5. Select the pickup location with no address. It should not show the collection from section:
-
-
-
-6. Place the order and check the confirmation displays correctly without an address also:
-
-
-
-### Cleanup code to lazy-load wc-settings in the Mini-Cart block [#10042](https://github.com/woocommerce/woocommerce-blocks/pull/10042)
-
-This PR doesn't add any new feature, so testing mostly refers to smoke testing that there are no regressions.
-
-1. Add the Mini Cart block to the header of your store.
-2. In the frontend, verify you can open it, interact with its inner blocks (ie: change the quantity of a product, remove a product, etc.).
-
-### Prevent prefetched Cart payload causing wrong values with cached Mini-Cart block [#10029](https://github.com/woocommerce/woocommerce-blocks/pull/10029)
-
-**With your admin user:**
-
-1. Install _[WP-Optimize - Clean, Compress, Cache](https://wordpress.org/plugins/wp-optimize/)_ or a similar caching plugin.
-2. Go to WP-Optimize > Settings > Cache and enable page caching.
-
-**In a private/incognito window without being logged in:**
-
-3. In the frontend visit any page. This will cache the page without products in the cart.
-
-**With your admin user:**
-
-4. Add some products to your cart.
-5. Visit the same page from step 3.
-6. Notice the Mini Cart totals do include the products you added in step 4, even though it's serving the cached version of step 3.
-7. Hover the Mini-Cart button and verify the totals are still correct.
-
-Before | After
---- | ---
-[before.webm](https://github.com/woocommerce/woocommerce-blocks/assets/3616980/a7bed8d6-13d4-4b8a-b775-eea8feab9d32) | [after.webm](https://github.com/woocommerce/woocommerce-blocks/assets/3616980/c3b75b3b-60fb-4683-be6a-3bc9d108dd42)
-
-8. Add another product to your cart.
-9. Verify Mini-Cart totals updated correctly.
-10. Navigate to any other page.
-11. Verify Mini-Cart values are always correct and at no moment they render incorrect data.
-
-### Make filter by rating preview consistent with default settings [#10007](https://github.com/woocommerce/woocommerce-blocks/pull/10007)
-
-1. Ensure you don't have any product reviews on your store.
-2. Add a new post and add the `Filter by Rating` block.
-3. Because you don't have any reviews, it will show a preview of what the ratings filter would look like.
-4. Ensure you don't see any product counts because by default, the `Display Product count` setting is disabled.
-
-### Mini Cart: Add Price, Icon and Product Count color settings [#9647](https://github.com/woocommerce/woocommerce-blocks/pull/9647)
-
-0. Test with WP 6.3 or WP 6.2 with Gutenberg installed.
-1. Add the Mini Cart block.
-2. Select the "Styles" tab
-3. Set custom colors for the Icon, Price, and Product count.
-4. Make sure the changes are visible in the editor and the page.
-
-### Avoid usage of __experimentalUseFocusOutside [#10017](https://github.com/woocommerce/woocommerce-blocks/pull/10017)
-
-1. Add the Mini Cart block to the header of your site via (Appearance > Editor).
-2. In the frontend and with the Cart empty, open the Mini Cart drawer, verify you can open and close the drawer without problems. Test closing the drawer by clicking on the overlay that appears above the rest of the page.
-3. Add some products to your cart and open the Mini Cart drawer again. Verify you can open and close it, you can change the products' quantity, etc.
-4. Now repeat steps 1-3 with another browser. Ideally test Chrome, Firefox and a Webkit-based browser (like Safari or GNOME Web).
-
-### Single Product Template: fix compatibility layer logic when the blocks aren't wrapped in a group block [#9982](https://github.com/woocommerce/woocommerce-blocks/pull/9982)
-
-1. Edit the Single Product Template.
-2. Remove all the blocks.
-3. Add three paragraph blocks.
-4. Save it.
-5. Visit a product.
-6. Ensure that all three paragraph blocks are visible.
-
-### Product Image: use WC Core function to render image [#9984](https://github.com/woocommerce/woocommerce-blocks/pull/9984)
-
-1. Add a Products (Beta) block to a page.
-2. Save and check the page on the front end.
-3. See `<img>` elements have `loading`, `srcset`, `size` attributes.
-
-### Single Product Block > Ensure the Product Summary and Title are always rendered with the correct context independent of their position [#9968](https://github.com/woocommerce/woocommerce-blocks/pull/9968)
-
-0. Make sure you have the Gutenberg plugin disabled
-1. Create a new post
-2. Add the Single Product block and move the Product Summary block to the last position, as demonstrated in the screenshot below:
-
-<img width="1319" alt="Screenshot 2023-06-22 at 18 37 47" src="https://github.com/woocommerce/woocommerce-blocks/assets/15730971/2774edbe-cc8c-473c-8bae-e590327e0390">
-
-4. Save the post and ensure the content is displayed as expected on the front end and matches the product summary (from the Single Product block) rather than the post's excerpt where it was inserted.
-5. Now move the Product Title to the last position in the editor and save the post.
-6. Ensure the title is displayed as expected on the front end it and matches the product title (from the Single Product block) rather than the title of the post where it was inserted.
-
-### Allow customer account block to center align [#9750](https://github.com/woocommerce/woocommerce-blocks/pull/9750)
-
-1. Add a post/page and insert the `Customer account` block.
-2. With the toolbar, change the width alignment to `center`. Update/Publish.
-3. Ensure you see the icon and text centered on the page.
-4. Go to the frontend and check that it is also centered on the page.
-
-### Remove unnecessary white space from Testimonials 3 Columns pattern [#9786](https://github.com/woocommerce/woocommerce-blocks/pull/9786)
-
-1. Create a post or page.
-2. Add the _Testimonials 3 Columns_ pattern.
-3. Verify there is no white space at the beginning of each paragraph.
-
-Before | After
---- | ---
- | 
-
-### Fix cart and checkout conditionals when using a block based theme and templates [#10098](https://github.com/woocommerce/woocommerce-blocks/pull/10098)
-
-1. Active a non-blocks theme e.g. 2019
-2. Go to Settings > Advanced and set the cart and checkout pages to pages that **do not contain blocks.** For example, set them to pages using the cart and checkout shortcodes
-3. Save settings. Then switch to a block based theme, e.g. TT3
-4. Go to the store and view a product page.
-5. Add to cart. Check that the notice styling is using the new design:
-
-
diff --git a/plugins/woocommerce/client/blocks/docs/internal-developers/testing/releases/1061.md b/plugins/woocommerce/client/blocks/docs/internal-developers/testing/releases/1061.md
deleted file mode 100644
index 11e503ca86d..00000000000
--- a/plugins/woocommerce/client/blocks/docs/internal-developers/testing/releases/1061.md
+++ /dev/null
@@ -1,45 +0,0 @@
-# Testing notes and ZIP for release 10.6.1
-
-Zip file for testing: [woocommerce-gutenberg-products-block.zip](https://github.com/woocommerce/woocommerce-blocks/files/12071467/woocommerce-gutenberg-products-block.zip)
-
-
-## WooCommerce Core
-
-### Product Filters > Fix Performance issue and Fatal error on stores with a high volume of products [#10198](https://github.com/woocommerce/woocommerce-blocks/pull/10198)
-
-1. Make sure you have products in your store with attributes and stock status (You can do so by simply importing the sample products from the core of Woo).
-2. Create a new post.
-3. Insert the Products (Beta) block.
-4. Insert the Filter by Attribute, Filter by Stock and Filter by Price
-5. Make sure all filters have the "Display product count" setting enabled (it is disabled by default).
-
-<img width="309" alt="Screenshot 2023-07-13 at 20 09 31" src="https://github.com/woocommerce/woocommerce-blocks/assets/15730971/749275ca-94f9-4990-99f2-f302aaa4aab0">
-
-6. Save the post and go to the front-end
-7. Make sure you can use all filters as expected and without any problems/errors: the product counts should match the number of existing products in the store with the filtered criteria, not just what is displayed on the page.
-
-### Stop reading Product IDs from asset store in filter blocks [#10195](https://github.com/woocommerce/woocommerce-blocks/pull/10195)
-
-1. Go to Editor
-2. Add Filters pattern
-3. Add Products (Beta) block
-4. Save and go to frontend
-5. Play around with filters
-
-Expected: Make sure you can use all filters as expected and without any problems/errors: the product counts should match the number of existing products in the store with the filtered criteria, not just what is displayed on the page.
-
-### Fix margin issue with the Proceed to checkout button on the site editor [#10182](https://github.com/woocommerce/woocommerce-blocks/pull/10182)
-
-1. Install and activate a block theme (e.g. Twenty Twenty Three)
-2. Edit the Cart page
-3. Check the Proceed to Checkout button has some padding around it
-4. Switch to a non block theme page (e.g. Storefront)
-5. Check that the Proceed to Checkout button has the same padding around it
-
-| Before | After |
-|--------------------------------------------------------------------------------------------------------------------------------------------- |--------------------------------------------------------------------------------------------------------------------------------------------- |
-|  |  |
-
-
-
-
diff --git a/plugins/woocommerce/client/blocks/docs/internal-developers/testing/releases/1062.md b/plugins/woocommerce/client/blocks/docs/internal-developers/testing/releases/1062.md
deleted file mode 100644
index 14d264aede4..00000000000
--- a/plugins/woocommerce/client/blocks/docs/internal-developers/testing/releases/1062.md
+++ /dev/null
@@ -1,60 +0,0 @@
-# Testing notes and ZIP for release 10.6.2
-
-Zip file for testing: [woocommerce-gutenberg-products-block.zip](https://github.com/woocommerce/woocommerce-blocks/files/12214223/woocommerce-gutenberg-products-block.zip)
-
-## WooCommerce Core
-
-### Fix: WooCommerce Blocks causing malfunction of the navigation block on WordPress 6.3. [#10388](https://github.com/woocommerce/woocommerce-blocks/pull/10388)
-
-1. Ensure you have a local install up and running with the release candidate version of WordPress 6.3. You can do so by downloading it via WP-CLI: `wp core update --version=6.3-RC1 --force` followed by `wp core update-db`. Alternatively, you can also download the zip for the release [over here](https://wordpress.org/wordpress-6.3-RC1.zip).
-2. Ensure you have a block theme enabled such as Twenty-Twenty Three
-3. Create a new post
-4. Insert the navigation block
-5. Make sure you can correctly preview it without any problems, as demonstrated in the screenshot in the description of this PR.
-6. Now head over to Appearance > Editor > Templates > Product Catalog and edit it.
-7. If you are seeing the "WooCommerce Product Grid Block", click on "Transform into blocks":
-
-<img width="1218" alt="Screenshot 2023-07-27 at 18 56 37" src="https://github.com/woocommerce/woocommerce-blocks/assets/15730971/fb5621ae-af06-47f5-95d5-3bba7f7d648c">
-
-8. Now, on the sidebar, click on Template and ensure the "Revert to classic template" button is visible (as demonstrated on the screenshot in the description of this PR).
-9. Click on "Revert to classic template" button and make sure everything works as expected: the product blocks should be replaced with the "WooCommerce Product Grid Block".
-
-### Check if WordPress version is higher than 6.2.2 to make Products block compatible with Gutenberg 16+. [#10360](https://github.com/woocommerce/woocommerce-blocks/pull/10360)
-
-| Before - no layout option is chosen, which defaults to list | After - grid option is chosen by default|
-| ------ | ----- |
-| <img width="688" alt="image" src="https://github.com/woocommerce/woocommerce-blocks/assets/20098064/4859c40f-fea7-4fbf-83b8-e2deadf2709b"> | <img width="688" alt="image" src="https://github.com/woocommerce/woocommerce-blocks/assets/20098064/7c139c5c-1977-460a-afce-cf7489cb9a37"> |
-
-Check below steps in following configurations:
-
-- WordPress 6.2:
- - [ ] Gutenberg 16 enabled
- - [ ] Gutenberg 16 disabled
-- WordPress 6.3:
- - [ ] Gutenberg 16 enabled
- - [ ] Gutenberg 16 disabled
-
-1. Create new post
-2. Add Products (Beta) block
-3. **Expected**: It has grid layout applied by default
-
-### Render Checkout/Cart containing pages without template overriding. [#10359](https://github.com/woocommerce/woocommerce-blocks/pull/10359)
-
-1. Create a page/post with cart or checkout shortcodes, and save it with a different slug from the ones in WooCommerce > Advanced screen.
-2. Add extra test content.
-3. On the store, accessing the page/post will render it properly. Accessing the cart/checkout endpoints presented on WooCommerce > Advanced screen
-
-### Remove opinionated styles from Product Hero pattern. [#10255](https://github.com/woocommerce/woocommerce-blocks/pull/10255)
-
-1. In the post editor or the site editor, add the Product Hero pattern.
-2. Verify it looks like the _After_ patterns in screenshot below (styles adapt to the theme) and it matches the design (see <https://github.com/woocommerce/woocommerce-blocks/issues/10216>).
-
-Desktop | Mobile
---- | ---
- | 
-
-### Per block stylesheets. [#9831](https://github.com/woocommerce/woocommerce-blocks/pull/9831)
-
-1. Create a post or page and add the All Products block. Verify styles are loaded correctly.
-2. Visit the page in the frontend and verify styles are loaded correctly in the frontend as well.
-3. Repeat steps 1 and 2 with all blocks listed on [this page](https://wordpress.org/plugins/woo-gutenberg-products-block/). Make sure to test each block individually. So, when possible, try with only one block on the page (in some cases, that's not possible, ie: filter blocks, in that case, try with as few blocks as possible on the page). The reason is that we want to make sure each block includes the style dependencies that it needs, so they need to be tested in isolation, otherwise styles from other blocks might leak into other blocks and "help fix issues".
diff --git a/plugins/woocommerce/client/blocks/docs/internal-developers/testing/releases/1063.md b/plugins/woocommerce/client/blocks/docs/internal-developers/testing/releases/1063.md
deleted file mode 100644
index 786ae0e0859..00000000000
--- a/plugins/woocommerce/client/blocks/docs/internal-developers/testing/releases/1063.md
+++ /dev/null
@@ -1,53 +0,0 @@
-# Testing notes and ZIP for release 10.6.3
-
-Zip file for testing: [woocommerce-gutenberg-products-block.zip](https://github.com/woocommerce/woocommerce-blocks/files/12240473/woocommerce-gutenberg-products-block.zip)
-
-## WooCommerce Core
-
-### Add to Cart Form: Fix broken styles for the block when using inside the Single Product Block [#10282](https://github.com/woocommerce/woocommerce-blocks/pull/10282)
-
-1. Log in to your WordPress dashboard.
-2. From your WordPress dashboard, go to Appearance > Themes. Make sure you have a block-based theme installed and activated. If not, you can install one from the Add New option. Block-based themes include "Twenty-twenty Two," "Twenty-twenty Three," etc.
-3. On the left-hand side menu, click on Pages > Add New.
-4. Inside the Page editor, click on the '+' button, usually found at the top left of the editing space or within the content area itself, to add a new block.
-5. In the block library that pops up, search for the 'Single Product' block. Click on it to add the block to the template.
-6. On the top-right side, click on the Save button.
-7. Visit a product and check if the Single Product block is shown and the Add to Cart Form block is correctly being displayed
-
-| Before | After |
-| ------ | ----- |
-| <img width="649" alt="image" src="https://github.com/woocommerce/woocommerce-blocks/assets/20469356/80a249d6-4a0c-41fe-8b1c-c71c69112717"> | <img width="674" alt="image" src="https://github.com/woocommerce/woocommerce-blocks/assets/20469356/436f48ae-9a9e-467c-95a6-1935a8ff3c11"> |
-
-### Blockified Templates: Improve migration logic [#10415](https://github.com/woocommerce/woocommerce-blocks/pull/10415)
-
-Zip files:
-
-- WooCommerce 7.8: <https://downloads.wordpress.org/plugin/woocommerce.7.8.2.zip>
-- WooCommerce 7.9: <https://downloads.wordpress.org/plugin/woocommerce.7.9.0.zip>
-- WooCommerce 8.0 (include a version of WC Blocks that includes this fix:): <https://anonfiles.com/16O1D75bzd/woocommerce_zip>. If you are testing a WooCommerce 8.0 build that included WooCommerce Blocks 10.3.0, just test the "official" zip.
-
-
-❗ **Create a new website for each use case**
-
-#### Upgrade from WooCommerce Core 7.8 to WooCommerce 7.9 to WooCommerce 8.0
-
-1. Install WooCommerce Core 7.8.
-2. Ensure that the templates aren't blockified.
-3. Upgrade to WooCommerce Core 7.9.
-4. Ensure that the templates aren't blockified.
-5. Upgrade to WooCommerce Core 8.0
-6. Ensure that the templates aren't blockified.
-
-#### Upgrade from WooCommerce Core 7.8 to WooCommerce 8.0
-
-1. Install WooCommerce Core 7.8.
-2. Ensure that the templates aren't blockified.
-3. Upgrade to WooCommerce Core 8.0
-4. Ensure that the templates aren't blockified.
-
-#### Upgrade from WooCommerce Core 7.9 to WooCommerce 8.0
-
-1. Install WooCommerce Core 7.9.
-2. Ensure that the templates are blockified.
-3. Upgrade to WooCommerce Core 8.0
-4. Ensure that the templates are blockified.
diff --git a/plugins/woocommerce/client/blocks/docs/internal-developers/testing/releases/1064.md b/plugins/woocommerce/client/blocks/docs/internal-developers/testing/releases/1064.md
deleted file mode 100644
index 541d9bd5539..00000000000
--- a/plugins/woocommerce/client/blocks/docs/internal-developers/testing/releases/1064.md
+++ /dev/null
@@ -1,23 +0,0 @@
-# Testing notes and ZIP for release 10.6.4
-
-Zip file for testing: [woocommerce-gutenberg-products-block.zip](https://github.com/woocommerce/woocommerce-blocks/files/12262069/woocommerce-gutenberg-products-block.zip)
-
-## WooCommerce Core
-
-### Classic Template block registration: add defensive type handling [#10475](https://github.com/woocommerce/woocommerce-blocks/pull/10475)
-
-1. Ensure that you have installed Gutenberg 16.3.0.
-2. Open the Site Editor.
-3. Click on the navigation.
-4. Click on the pencil (to edit button).
-5. Ensure that the Site Editor doesn't crash
-
-| Before | After |
-|--------|--------|
-| <video src=https://github.com/woocommerce/woocommerce-blocks/assets/4463174/86ce276e-e372-40e1-8142-cfde84e32bd6 /> | <video src=https://github.com/woocommerce/woocommerce-blocks/assets/4463174/e655eab3-6339-47c9-8447-d9b06c55b795/> |
-
-### Update check for active cart template and migration routine [#10462](https://github.com/woocommerce/woocommerce-blocks/pull/10462)
-
-1. Go to Pages > Cart and edit the page. It will load the site editor. Add some text below the header, for example. Feel free to add anything for testing purposes. Save the template.
-2. Add an item to your cart and then load the Cart page on the front end. Ensure your changes from step 1 are visible.
-3. Go to the WP Dashboard, then WooCommerce > Settings > Advanced and change the cart page slug to something different. Repeat step 2 and ensure it still works with your change visible. Ensure the path to the Cart page shown in your browser is the one you updated it to.
diff --git a/plugins/woocommerce/client/blocks/docs/internal-developers/testing/releases/1065.md b/plugins/woocommerce/client/blocks/docs/internal-developers/testing/releases/1065.md
deleted file mode 100644
index e538e83ba23..00000000000
--- a/plugins/woocommerce/client/blocks/docs/internal-developers/testing/releases/1065.md
+++ /dev/null
@@ -1,9 +0,0 @@
-# Testing notes and ZIP for release 10.6.5
-
-Zip file for testing: [woocommerce-gutenberg-products-block.zip](https://github.com/woocommerce/woocommerce-blocks/files/12299587/woocommerce-gutenberg-products-block.zip)
-
-## WooCommerce Core
-
-### Revert "Performance: Cache script data in a transient for production builds" [#10509](https://github.com/woocommerce/woocommerce-blocks/pull/10509)
-
-1. Smoke test blocks.
diff --git a/plugins/woocommerce/client/blocks/docs/internal-developers/testing/releases/1066.md b/plugins/woocommerce/client/blocks/docs/internal-developers/testing/releases/1066.md
deleted file mode 100644
index e70716a3a50..00000000000
--- a/plugins/woocommerce/client/blocks/docs/internal-developers/testing/releases/1066.md
+++ /dev/null
@@ -1,40 +0,0 @@
-# Testing notes and ZIP for release 10.6.6
-
-Zip file for testing: [woocommerce-gutenberg-products-block.zip](https://github.com/woocommerce/woocommerce-blocks/files/12408734/woocommerce-gutenberg-products-block.zip)
-
-## Should be tested by the development team exclusively
-
-### Bug fixes
-
-#### Fix inconsistent new install behaviour for templates when using block themes [#10608](https://github.com/woocommerce/woocommerce-blocks/pull/10608)
-
-1. Get a new env ready to install WP/WC using WP-CLI. You can use this [quick docker setup](https://github.com/woocommerce/woocommerce-blocks/files/12394720/new-test-env.zip)
-2. Alias or copy this branch, built ready to use as a plugin into the env
-3. Using WP-CLI set up WC using the following command sequence (alter args to suit your case)
-
-````bash
-wp config create --dbname=wordpress --dbuser=wordpress --dbpass=wordpress --dbhost=db --force
-wp core install --url=http://localhost --title='WP Staging' --admin_user=admin --admin_password=pass --admin_email=admin@wp.loc
-wp option set blog_public 0
-wp plugin activate woocommerce-blocks
-wp plugin install woocommerce --version=6.0.0
-wp plugin activate woocommerce
-wp plugin install wordpress-importer --activate
-wp import ./wp-content/plugins/woocommerce/sample-data/sample_products.xml --authors=skip
-wp plugin update woocommerce
-````
-
-4. Visit the store for the first time, head to Appearance > Editor > Templates > Manage all templates verify that Cart and Checkout have customizations saved
-5. Open each one and verify they contain the shortcode version
-6. Test the complete checkout flow.
-
-#### Fix: Made migration migrate block templates in the current theme [#10641](https://github.com/woocommerce/woocommerce-blocks/pull/10641)
-
-1. Install a theme that uses block templates. In my case I used FotaWP.
-2. Go to Appearance > Edit > Templates and reset the cart/checkout templates to default.
-3. Delete has_migrated_cart and has_migrated_checkout options from your options database.
-4. View a page on the store.
-5. Confirm by viewing the cart and checkout pages that they inherited the block template from the theme. In this case for instance, instead of the default distraction free template we had, you'll see something like this:
-
-
-
diff --git a/plugins/woocommerce/client/blocks/docs/internal-developers/testing/releases/1070.md b/plugins/woocommerce/client/blocks/docs/internal-developers/testing/releases/1070.md
deleted file mode 100644
index 79545132e25..00000000000
--- a/plugins/woocommerce/client/blocks/docs/internal-developers/testing/releases/1070.md
+++ /dev/null
@@ -1,126 +0,0 @@
-# Testing notes and ZIP for release 10.7.0
-
-Zip file for testing: [woocommerce-gutenberg-products-block.zip](https://github.com/woocommerce/woocommerce-blocks/files/12072609/woocommerce-gutenberg-products-block.zip)
-
-## WooCommerce Core
-
-### Remove opinionated font sizes from Essential Header patterns [#10219](https://github.com/woocommerce/woocommerce-blocks/pull/10219)
-
-1. In the post editor or the site editor, add the Essential Header pattern.
-2. Verify it looks like the screenshot below (font-sizes adapt to the theme).
-3. Repeat 1-2 with the Essential Header Dark pattern.
-
-
-
-### Prevent Mini-Cart template part preview in Site Editor being too high [#10204](https://github.com/woocommerce/woocommerce-blocks/pull/10204)
-
-1. With WP 6.3 and a block theme, go to Appearance > Editor > Patterns.
-2. Open the General template part area.
-3. Scroll down to see the Mini-Cart template part.
-4. Verify its size doesn't occupy the entire window height.
-
-Before | After
---- | ---
- | 
-
-5. Click on it and verify that, when opened, it does take the entire height as always.
-
-
-
-### Fix SearchListControl styles [#10192](https://github.com/woocommerce/woocommerce-blocks/pull/10192)
-
-1. Create a category with an & in its name. Ie: Clothing & Accessories.
-2. Create a new post or page and add the Products by Category block.
-3. In the placeholder, make sure Clothing & Accessories is displayed, instead of Clothing `&` Accessories.
-4. Also verify that as you select categories, the tags added to the "x categories selected" section have a gray background.
-5. Expand a category with children categories and verify the checkboxes have the same size.
-
-Before | After
---- | ---
- | 
-
-### Mini Cart: Fix styling of the Start Shopping button in the drawer [#10169](https://github.com/woocommerce/woocommerce-blocks/pull/10169)
-
-1. Activate Storefront.
-2. Add the Mini-Cart block to a page.
-3. Visit the page on the frontend and select the (empty) Mini-Cart to toggle the drawer.
-4. Verify the button is displaying correctly.
-
-| Before | After |
-| ------ | ----- |
-|<img width="883" alt="before-2" src="https://github.com/woocommerce/woocommerce-blocks/assets/905781/9d8ca8a5-1662-4ebd-8233-3a2948e70843">|<img width="898" alt="after-2" src="https://github.com/woocommerce/woocommerce-blocks/assets/905781/f7088abc-b17b-42fa-b329-57cd401fbe79">|
-
-### Mini Cart block > Update block registration to rely on a metadata file. [#10168](https://github.com/woocommerce/woocommerce-blocks/pull/10168)
-
-1. Create a new post
-2. Make sure the mini-cart block is available for insertion
-3. Insert the block, make changes to its settings and save
-4. On the frontend, make sure everything works as expected: you can add/remove products from the cart and the style changes made in the editor are visible on the frontend.
-
-### Enhance: Bring back user to 1st page when filters are changed [#9952](https://github.com/woocommerce/woocommerce-blocks/pull/9952)
-
-Scenario 1
-
-1. Create a new post.
-2. Add all filter blocks (Filter by Attributes, Filter by Price, Filter by Stock Status, etc) and the 'Products (Beta)' block to it.
-3. Save the post and navigate to the frontend.
-4. Using the block pagination, navigate to the 2nd page of products
-5. Modify any filter and confirm that the page number resets to the 1st page upon filter alteration.
-
-Scenario 2
-
-1. Make sure you have a block theme enabled, such as Twenty-twenty three.
-2. Head over to Edit Site > Templates > Product Catalog.
-3. Add all filter blocks (Filter by Attributes, Filter by Price, Filter by Stock Status, etc) and the 'Classic WooCommerce Product Grid Block' block to it.
-4. Save the post and navigate to the Shop page.
-5. Using the block pagination, navigate to the 2nd page of products
-6. Modify any filter and confirm that the page number resets to the 1st page upon filter alteration.
-
-### Adjust Banner padding to improve mobile experience [#10107](https://github.com/woocommerce/woocommerce-blocks/pull/10107)
-
-1. Create a test page.
-2. Add the Banner pattern to it.
-3. Switch the preview to Mobile.
-4. See that the text looks like the after screenshot above.
-
-| Before | After |
-| ------ | ----- |
-| <img width="407" alt="Screenshot 2023-07-06 at 10 02 40" src="https://github.com/woocommerce/woocommerce-blocks/assets/186112/2eb84729-ecba-490c-99e2-9ce575b0b595"> | <img width="408" alt="Screenshot 2023-07-06 at 10 02 18" src="https://github.com/woocommerce/woocommerce-blocks/assets/186112/c935b846-3451-495a-94ee-27e2f2c7ae4a"> |
-
-### Single Product Template > Ensure extensions can't trigger fatal errors on templates without any post content blocks [#10128](https://github.com/woocommerce/woocommerce-blocks/pull/10128)
-
-1. Make sure you have a block theme enabled, such as Twenty-twenty three.
-2. Head over to Edit Site > Templates > Single Product.
-3. Make sure you have the blockified version of this template up and running: if you don't, click on the "Transform into blocks" button. Delete/remove both the Product Details and the Related Products blocks and save.
-4. Access any Single Product on the front end and ensure everything works as expected: no Fatal Errors should be triggered.
-
-### Adjust the image of the Discount banner with image pattern [#10108](https://github.com/woocommerce/woocommerce-blocks/pull/10108)
-
-- Create a test page.
-- Add the Discount banner with image pattern to it.
-- Switch the preview to Mobile.
-- See that the image is not overlapping in the page editor (like in the After image above).
-
-| Before | After |
-| ------ | ----- |
-| <img width="423" alt="Screenshot 2023-07-06 at 10 17 54" src="https://github.com/woocommerce/woocommerce-blocks/assets/186112/72201971-d490-48eb-848a-59a8479968d1"> | <img width="399" alt="Screenshot 2023-07-06 at 10 18 16" src="https://github.com/woocommerce/woocommerce-blocks/assets/186112/9ca26ce5-ebb1-48bb-82c1-e11df87413c8"> |
-
-### Load product-query stylesheet when rendering the Products block [#10109](https://github.com/woocommerce/woocommerce-blocks/pull/10109)
-
-1. Add the Products (beta) block to a post or page.
-2. Verify there is spacing between the price and the button:
-
-Before | After
---- | ----
- | 
-
-3. Now, create another page with the Query Loop block, displaying posts.
-4. In the frontend, open the _Network_ tab of your browser devtools (<kbd>F12</kbd>) and verify there is no `product-query.css` stylesheet being loaded unnecessarily.
-
-### Per block stylesheets #9831
-
-Testing this PR means making sure there are no styling regressions in existing blocks. I did test all of them, but it's possible that I might have missed something.
-
-1. Create a post or page and add the All Products block. Verify styles are loaded correctly.
-2. Visit the page in the frontend and verify styles are loaded correctly in the frontend as well.
-3. Repeat steps 1 and 2 with all blocks listed on [this page](https://wordpress.org/plugins/woo-gutenberg-products-block/). Make sure to test each block individually. So, when possible, try with only one block on the page (in some cases, that's not possible, ie: filter blocks, in that case, try with as few blocks as possible on the page). The reason is that we want to make sure each block includes the style dependencies that it needs, so they need to be tested in isolation, otherwise styles from other blocks might leak into other blocks and "help fix issues".
diff --git a/plugins/woocommerce/client/blocks/docs/internal-developers/testing/releases/1080.md b/plugins/woocommerce/client/blocks/docs/internal-developers/testing/releases/1080.md
deleted file mode 100644
index 0f79067d3b5..00000000000
--- a/plugins/woocommerce/client/blocks/docs/internal-developers/testing/releases/1080.md
+++ /dev/null
@@ -1,480 +0,0 @@
-# Testing notes and ZIP for release 10.8.0
-
-Zip file for testing: [woocommerce-gutenberg-products-block.zip](https://github.com/woocommerce/woocommerce-blocks/files/12249010/woocommerce-gutenberg-products-block.zip)
-
-## WooCommerce Core
-
-### Use the `Single Product` block for the `Product Details Product Listing` pattern [#9978](https://github.com/woocommerce/woocommerce-blocks/pull/9978)
-
-1. Create a new page or post.
-2. Insert the `Product Details Product Listing` pattern and save.
-3. Check that the pattern is using the `Single Product` block and has a default product selected.
-4. In the front end, check the pattern looks like the image above if the product has reviews.
-5. Check nothing shows in the front end, if the product does not have reviews.
-
-#### Screenshots
-
-<img width="681" alt="Screenshot 2023-06-23 at 15 29 12" src="https://github.com/woocommerce/woocommerce-blocks/assets/186112/1e5d9743-9fff-4c3d-a760-df0d191f0d70">
-
-### Store Customization > Centered Header Menu with Search - Update the pattern to become wireframed [#10226](https://github.com/woocommerce/woocommerce-blocks/pull/10226)
-
-1. Create a new post
-2. Insert the Centered Header Menu with Search pattern and save
-3. Make sure it works as expected and is properly rendered on the front-end
-
-#### Screenshots
-
-
-| Before | After |
-| ------ | ----- |
-| <img width="1285" alt="Screenshot 2023-07-17 at 10 31 35" src="https://github.com/woocommerce/woocommerce-blocks/assets/15730971/5c15e8a3-9594-443c-aded-8544129351c8"> | <img width="1289" alt="Screenshot 2023-07-17 at 10 25 26" src="https://github.com/woocommerce/woocommerce-blocks/assets/15730971/7aaa1d02-2f23-4c89-9bd9-e2b44c9e7ffc"> |
-
-### Store Customization > Minimal Header - Update the pattern to become wireframed [#10227](https://github.com/woocommerce/woocommerce-blocks/pull/10227)
-
-1. Create a new post
-2. Insert the Minimal Header pattern and save
-3. Make sure it works as expected and is properly rendered on the front-end
-
-#### Screenshots
-
-
-| Before | After |
-| ------ | ----- |
-| <img width="1834" alt="Screenshot 2023-07-17 at 10 42 53" src="https://github.com/woocommerce/woocommerce-blocks/assets/15730971/dead1e17-cbd5-4ba2-9188-0d33873dce03"> | <img width="1832" alt="Screenshot 2023-07-17 at 10 43 08" src="https://github.com/woocommerce/woocommerce-blocks/assets/15730971/7dcbaf6a-ca9b-43ef-bf28-475ca4479f67"> |
-
-### Remove styles from `Newest arrivals` pattern [#10256](https://github.com/woocommerce/woocommerce-blocks/pull/10256)
-
-1. In the post editor or the site editor, add the `Product Collections Newest Arrivals` pattern.
-2. Verify there are no opinionated styles (borders, colors, fonts, etc) and the pattern looks like the `After` screenshot above.
-
-#### Screenshots
-
-
-| Before | After |
-| ------ | ----- |
-| <img width="975" alt="Screenshot 2023-07-18 at 15 42 55" src="https://github.com/woocommerce/woocommerce-blocks/assets/186112/59b5d98a-e7f0-4e30-ae90-368157d421a5">| <img width="1049" alt="Screenshot 2023-07-18 at 15 42 30" src="https://github.com/woocommerce/woocommerce-blocks/assets/186112/2af96065-94c6-4da7-b3a2-d5a551abfb5a"> |
-
-### Remove styles from the `Testimonials 3 cols` pattern [#10258](https://github.com/woocommerce/woocommerce-blocks/pull/10258)
-
-1. In the post editor or the site editor, add the `Testimonials 3 columns` pattern.
-2. Verify there are no opinionated styles (borders, colors, fonts, etc) and the pattern looks like the `After` screenshot above.
-
-#### Screenshots
-
-| Before | After |
-| ------ | ----- |
-| <img width="1678" alt="Screenshot 2023-07-18 at 16 18 49" src="https://github.com/woocommerce/woocommerce-blocks/assets/186112/ee16bc83-5316-44ba-a0b6-5ed766e493db"> | <img width="1701" alt="Screenshot 2023-07-18 at 16 18 25" src="https://github.com/woocommerce/woocommerce-blocks/assets/186112/26894af6-0d1c-4a34-9f51-3d3977c371e7"> |
-
-### Store Customization > Hero Product Split pattern - Update the pattern to become wireframed [#10270](https://github.com/woocommerce/woocommerce-blocks/pull/10270)
-
-1. Create a new post
-2. Insert the Hero Product Split pattern and save
-3. Make sure it works as expected and is correctly rendered on the front end: the design should match the one demonstrated on the screenshots of this PR.
-
-#### Screenshots
-
-
-| Before | After |
-| ------ | ----- |
-| <img width="987" alt="Screenshot 2023-07-19 at 12 02 36" src="https://github.com/woocommerce/woocommerce-blocks/assets/15730971/0c73123e-7cec-42e6-839d-ad0f5f5dfa85"> <img width="308" alt="Screenshot 2023-07-19 at 12 03 24" src="https://github.com/woocommerce/woocommerce-blocks/assets/15730971/a55b5817-9111-4e1e-9312-f787f0c7e6bc"> | <img width="987" alt="Screenshot 2023-07-19 at 12 02 51" src="https://github.com/woocommerce/woocommerce-blocks/assets/15730971/4c8f2926-2711-4e91-9002-ddffb0a2418e"> <img width="310" alt="Screenshot 2023-07-19 at 12 03 07" src="https://github.com/woocommerce/woocommerce-blocks/assets/15730971/064260ea-8c33-4177-9e5a-4cad364b0c7a"> |
-
-### Update the `Testimonials Single` pattern to have no opinionated styles [#10275](https://github.com/woocommerce/woocommerce-blocks/pull/10275)
-
-1. In the post editor or the site editor, add the `Testimonials Single` pattern.
-2. Verify the text does not have opinionated styles (borders, colors, fonts, etc) and that the pattern looks like the screenshot above.
-
-#### Screenshots
-
-<img width="1199" alt="Screenshot 2023-07-19 at 15 20 19" src="https://github.com/woocommerce/woocommerce-blocks/assets/186112/a627540e-ef0c-4540-81ea-026fa4880a4e">
-
-### Update the `Footer with 3 menus` pattern to have no opinionated styles [#10294](https://github.com/woocommerce/woocommerce-blocks/pull/10294)
-
-1. In the post editor or the site editor, add the `Footer with 3 menus` pattern.
-2. Verify there are no opinionated styles (borders, colors, fonts, etc) and the pattern looks like the After screenshot above.
-
-#### Screenshots
-
-
-| Before | After |
-| ------ | ----- |
-| <img width="1280" alt="Screenshot 2023-07-20 at 15 26 05" src="https://github.com/woocommerce/woocommerce-blocks/assets/186112/2826ad55-d947-41fa-8ff0-d55009f61123"> | <img width="1280" alt="Screenshot 2023-08-02 at 10 22 42" src="https://github.com/woocommerce/woocommerce-blocks/assets/186112/b751c150-cdfe-4a66-af80-d6fad0898bd6"> |
-
-### Move sale badge to top right of product image [#10297](https://github.com/woocommerce/woocommerce-blocks/pull/10297)
-
-1. Add the following blocks to a post/page. `Hand-picked Products`, `Best Selling Products`, `Products by Category`, `Newest Products`, `On Sale Products`, `Products by Attribute`, `Products by Tag`, `Top Rated Products`.
-2. For each of these blocks, ensure the `Sale` badge is on the top right of the product image as seen in the `After` screenshot above.
-3. Save the post/page and ensure it shows the same in the frontend.
-
-#### Screenshots
-
-
-| Before | After |
-| ------ | ----- |
-| | |
-
-### Update the `Footer with Simple Menu and Cart` pattern to have no opinionated styles [#10306](https://github.com/woocommerce/woocommerce-blocks/pull/10306)
-
-1. In the post editor or the site editor, add the `Footer with Simple Menu and Cart` pattern.
-2. Verify there are no opinionated styles (borders, colors, fonts, etc) - except the margin on the separator - and the pattern looks like the After screenshot above.
-
-#### Screenshots
-
-| Before | After |
-| ------ | ----- |
-| <img width="2023" alt="Screenshot 2023-07-21 at 12 54 00" src="https://github.com/woocommerce/woocommerce-blocks/assets/186112/de6c4f77-77a8-42fe-8009-91b614fa5ba4">|<img width="2021" alt="Screenshot 2023-07-21 at 12 56 29" src="https://github.com/woocommerce/woocommerce-blocks/assets/186112/a705e319-27b4-49a7-a0e3-51bae429f1ca">|
-
-### Store Customization > Large Footer pattern - Update the pattern to become wireframed [#10323](https://github.com/woocommerce/woocommerce-blocks/pull/10323)
-
-1. Create a new post
-2. Insert both the Large Footer and Large Footer Dark patterns.
-3. Make sure they work as expected and are visible both in the editor and on the front-end
-4. Make sure the styles match the screenshot added on this PR description
-
-#### Screenshots
-
-
-| Before | After |
-| ------ | ----- |
-| <img width="1979" alt="Screenshot 2023-07-24 at 12 07 55" src="https://github.com/woocommerce/woocommerce-blocks/assets/15730971/d912b023-7af8-4e9f-ac9d-0c3e3b38bfab"> | <img width="1980" alt="Screenshot 2023-07-24 at 12 06 13" src="https://github.com/woocommerce/woocommerce-blocks/assets/15730971/b6971fe5-e036-4c68-8a4d-fd08b775a2a5"> |
-
-### Store Customization > Introduce the new Featured Products: Fresh & Tasty pattern [#10339](https://github.com/woocommerce/woocommerce-blocks/pull/10339)
-
-1. Create a new post
-2. Add the Featured Products: Fresh & Tasty pattern
-3. Make sure the preview is properly rendered without any problems
-4. Save the post and visualize it on the front-end: make sure the layout displayed matches the screenshots on this PR
-
-#### Screenshots
-
-
-Desktop view:
-
-<img width="1224" alt="Screenshot 2023-07-25 at 10 21 28" src="https://github.com/woocommerce/woocommerce-blocks/assets/15730971/258d794b-b021-4f88-a01b-70aeb7288242">
-
-
-Mobile view:
-
-<img width="389" alt="Screenshot 2023-07-25 at 10 37 28" src="https://github.com/woocommerce/woocommerce-blocks/assets/15730971/f6e58b99-35a5-4791-835b-f0a02974bee1">
-
-### Store Customization > Featured Category Triple pattern - Update the pattern to become wireframed [#10343](https://github.com/woocommerce/woocommerce-blocks/pull/10343)
-
-1. Create a new post and insert the Featured Category Triple pattern
-2. Ensure the pattern is rendered correctly in the editor
-3. Save the post and go to the frontend
-4. Ensure the pattern is rendered correctly without any errors and the styles match the screenshot on this PR.
-
-#### Screenshots
-
-
-| Before | After |
-| ------ | ----- |
-| <img width="1209" alt="Screenshot 2023-07-25 at 13 01 37" src="https://github.com/woocommerce/woocommerce-blocks/assets/15730971/9106e25f-7d76-45dc-86bd-aa515363299a"> | <img width="1209" alt="Screenshot 2023-07-25 at 13 22 51" src="https://github.com/woocommerce/woocommerce-blocks/assets/15730971/4d04067d-6ffb-4e57-bbc3-7cb687f26872"> |
-
-### Remove styles from `Product Details Product Listing` pattern [#10362](https://github.com/woocommerce/woocommerce-blocks/pull/10362)
-
-1. Create a page or post.
-2. Insert the `Product Details Product Listing`.
-3. Click on the product title and in the styles tab check it has no colors.
-4. Click on the product button and in the styles tab check it has no colors or other styles.
-
-### Store Customization > Introduce the new Social: Follow us in social media pattern [#10368](https://github.com/woocommerce/woocommerce-blocks/pull/10368)
-
-1. Create a new post
-2. Insert the **Social: Follow us in social media** pattern
-3. Make sure you can preview the pattern without any problems in the editor and save.
-4. On the front-end, make sure the pattern is properly rendered.
-
-#### Screenshots
-
-
-| Design | Implemented |
-| ------ | ----- |
-| <img width="1214" alt="Screenshot 2023-07-26 at 13 08 52" src="https://github.com/woocommerce/woocommerce-blocks/assets/15730971/2d122488-a24d-4c2d-9ac1-38d015864d86"> | <img width="1221" alt="Screenshot 2023-07-26 at 13 04 33" src="https://github.com/woocommerce/woocommerce-blocks/assets/15730971/5ab6cee4-9038-40e3-8d96-7d44d20f00e7"> |
-
-### Featured Items: Add selection button when id not found [#10387](https://github.com/woocommerce/woocommerce-blocks/pull/10387)
-
-1. Add the `Featured Category` block to a page.
-2. Select an existing ID and click `Done`.
-3. Go into `Code editor` mode and replace the `categoryId` to some random number that does not exists.
-4. Click on `Exit code editor`.
-5. You should now see an error `Sorry, an error occurred`.
-6. Ensure you see the `Select a category` button and click it.
-7. Ensure now you can select an existing category.
-
-#### Screenshots
-
-
-| Before | After |
-| ------ | ----- |
-| | |
-
-### Store Customization > Featured Products 5-Item Grid pattern - Update the pattern to become wireframed [#10401](https://github.com/woocommerce/woocommerce-blocks/pull/10401)
-
-1. Create a new post
-2. Insert the Featured Products 5-Item Grid pattern
-3. Ensure you can see everything working as expected in the editor
-4. Save the post and head over to the front end: ensure everything works as expected and the style rendered matches the one displayed on this PR.
-
-#### Screenshots
-
-
-| Before | After |
-| ------ | ----- |
-| <img width="1227" alt="Screenshot 2023-07-28 at 13 47 10" src="https://github.com/woocommerce/woocommerce-blocks/assets/15730971/8bcf81f3-d220-4fdd-a85b-d7d9d5c4b931"> | <img width="1225" alt="Screenshot 2023-07-28 at 14 40 24" src="https://github.com/woocommerce/woocommerce-blocks/assets/15730971/5a5f909a-ce4e-4a9c-83a3-0e775d40f6da"> |
-
-### Update express checkout title, description, icon [#10237](https://github.com/woocommerce/woocommerce-blocks/pull/10237)
-
-1. Open up the Checkout page in the block editor
-2. Verify the visual elements in the screenshots are correct
-3. On the front end, add some products to your basket and go to Checkout
-4. Verify that the title of the Express Checkout block has a capital "C" for the word "Checkout".
-
-#### Screenshots
-
-Note the capital C in _Checkout_ in the block title, and the description and icon in the settings bar on the right
-
-**Before:**
-
-
-**After:**
-
-
-### Add class specificity to fix indent [#10245](https://github.com/woocommerce/woocommerce-blocks/pull/10245)
-
-1. Switch to Storefront theme.
-2. Create a post.
-3. Add the following blocks to the page. `Filter by Attributes`, `Featured Category`, `Featured Product`, `Hand-picked Products`, `Reviews by Product`, `Reviews by Category`.
-4. Ensure in each of these blocks that default shown search list is not indented to the right as shown in the `after` screenshot. Another words there should be no indentation.
-
-#### Screenshots
-
-
-<table>
-<tr>
-<td>Before:
-<br><br>
-<img width="833" alt="Screenshot 2023-07-06 at 10 50 20" src="https://github.com/woocommerce/woocommerce-blocks/assets/3323310/a411aa91-beaf-45da-a97d-66a3887da04a">
-
-</td>
-<td> After:
-<br><br>
-
-<img width="706" alt="Screenshot 2023-07-06 at 10 51 03" src="https://github.com/woocommerce/woocommerce-blocks/assets/3323310/3da3c17f-9418-4932-a699-ba9ab59218aa">
-
-</td>
-</tr>
-</table>
-
-### Remove Featured Category Cover Image pattern [#10252](https://github.com/woocommerce/woocommerce-blocks/pull/10252)
-
-1. In the post editor or the site editor, open the inserter and search for the Featured Category Cover Image pattern.
-2. Verify it doesn't exist.
-
-<img src="https://github.com/woocommerce/woocommerce-blocks/assets/3616980/b8a5c628-e29f-4465-bf42-d0b86b3c8c3f" alt="" width="375" />
-
-### Remove opinionated styles from Hero Product 3 Split pattern [#10260](https://github.com/woocommerce/woocommerce-blocks/pull/10260)
-
-1. In the post editor or the site editor, add the Hero Product 3 Split pattern.
-3. Verify it looks like the _After_ patterns in screenshot below (styles adapt to the theme) and it matches the design ([see](https://github.com/woocommerce/woocommerce-blocks/issues/10217)).
-
-Desktop | Mobile
---- | ---
- | 
-
-### Add to Cart Form: Fix broken styles for the block when using inside the Single Product Block [#10282](https://github.com/woocommerce/woocommerce-blocks/pull/10282)
-
-1. Log in to your WordPress dashboard.
-2. From your WordPress dashboard, go to Appearance > Themes. Make sure you have a block-based theme installed and activated. If not, you can install one from the Add New option. Block-based themes include "Twenty-twenty Two," "Twenty-twenty Three," etc.
-3. On the left-hand side menu, click on Pages > Add New.
-4. Inside the Page editor, click on the '+' button, usually found at the top left of the editing space or within the content area itself, to add a new block.
-5. In the block library that pops up, search for the 'Single Product' block. Click on it to add the block to the template.
-6. On the top-right side, click on the Save button.
-7. Visit a product and check if the Single Product block is shown and the Add to Cart Form block is correctly being displayed
-
-| Before | After |
-| ------ | ----- |
-| <img width="649" alt="image" src="https://github.com/woocommerce/woocommerce-blocks/assets/20469356/80a249d6-4a0c-41fe-8b1c-c71c69112717"> | <img width="674" alt="image" src="https://github.com/woocommerce/woocommerce-blocks/assets/20469356/436f48ae-9a9e-467c-95a6-1935a8ff3c11"> |
-
-### Unify links to WordPress and WooCommerce websites in patterns [#10380](https://github.com/woocommerce/woocommerce-blocks/pull/10380)
-
-1. Create a new page and add the following patterns: Large Footer, Large Footer Dark, Simple Footer, Simple Footer Dark, Footer with Simple Menu and Cart, Footer with 2 Menus, Footer with 2 Menus Dark and Footer with 3 Menus.
-2. Publish the page and visit it from the frontend.
-4. Click on the links to the WordPress and/or WooCommerce templates which appear at the bottom of the patterns and verify all of them look ok and open in a new tab.
-
-### Fix Classic Template block in Single Product custom templates [#10342](https://github.com/woocommerce/woocommerce-blocks/pull/10342)
-
-1. Go to Appearance > Editor > Templates and create a Product template:
-
-<img src="https://github.com/woocommerce/woocommerce-blocks/assets/3616980/32660cc4-c2f8-4c38-8f00-ad108690d3eb" alt="" width="556" />
-
-3. Choose one of the products and create a custom template for it.
-4. Remove all blocks from the template (except header and footer) and, as a replacement, add the WooCommerce Classic Template block.
-
-<img src="https://github.com/woocommerce/woocommerce-blocks/assets/3616980/a82da4b2-c94b-445f-a4da-45064963ad66" alt="" width="556" />
-
-6. Visit the page of that product in the frontend.
-7. Verify it renders the product details properly.
-
-Before | After
---- | ---
- | 
-
-### Change custom toolbar item to use toolbar button [#10246](https://github.com/woocommerce/woocommerce-blocks/pull/10246)
-
-1. Create a post and add `Featured Category` and `Featured Product` block to the page and have your developer console opened.
-2. Click on each of the block so that you can see the toolbar popup for each block.
-3. In your developer console, ensure you don't see the warning `Using custom components as toolbar controls is deprecated since version 5.6. Please use ToolbarItem, ToolbarButton or ToolbarDropdownMenu components instead.`.
-4. Ensure each of the toolbar items are still functioning as expected.
-
-### Remove opinionated styles from Alternating Image and Text pattern [#10292](https://github.com/woocommerce/woocommerce-blocks/pull/10292)
-
-1. In the post editor or the site editor, add the Alternating Image and Text pattern.
-2. Click on the image placeholders and add images to the pattern.
-3. Visit the frontend of your site.
-4. Verify the patterns looks like the _After_ patterns in screenshots below.
-
-Desktop:
-
-Before | After
---- | ---
- | 
-
-### Fix SearchListControl styles (II) [#10308](https://github.com/woocommerce/woocommerce-blocks/pull/10308)
-
-1. Create a new post or page and add the Single Product, Products by Category and Newest Products blocks.
-2. In all of them, check that the list control UI looks correct; that's the UI that lets you choose the product/category:
-
-Single Product (no change):
-
-Before | After
---- | ---
- | 
-
-Products by Category (slight margin change):
-
-Before | After
---- | ---
- | 
-
-Newest Products (broken UI fixed):
-
-Before | After
---- | ---
-<img src="https://github.com/woocommerce/woocommerce-blocks/assets/3616980/45389590-fef5-41b2-9be8-c7a768b2fc15" alt="" width="304" /> | <img src="https://github.com/woocommerce/woocommerce-blocks/assets/3616980/6836c343-ad95-47d1-a850-5d7ea9c3b204" alt="" width="304" />
-
-:point_up: this UI is displayed in the sidebar, under the Filter by Category panel.
-
-### Add missing page titles in Cart and Checkout templates [#10281](https://github.com/woocommerce/woocommerce-blocks/pull/10281)
-
-» Verify that page titles are visible
-
-1. Install a block-theme, e.g. [Twenty Twenty-Three](https://wordpress.org/themes/twentytwentythree/).
-2. Go to WP Admin » Appearance » Editor » Templates.
-3. Open the Cart template and verify that it has the page title `Cart`.
-4. Open the Checkout template and verify that it has the page title `Checkout`.
-5. Go to the frontend and add a product to the cart.
-6. Go to the Cart page and verify that it has the page title `Cart`.
-7. Go to the Checkout page and verify that it has the page title `Checkout`.
-
-#### Screenshots
-
-<table>
-<tr>
-<td>Cart template (EN) - before:
-<br><br>
-
-<img width="1512" alt="Screenshot 2023-07-19 at 19 14 51" src="https://github.com/woocommerce/woocommerce-blocks/assets/3323310/7027813d-83bf-427e-9d4d-18324be0cbed">
-</td>
-<td>Cart template (EN) - after:
-<br><br>
-
-<img width="1512" alt="Screenshot 2023-07-19 at 19 13 20" src="https://github.com/woocommerce/woocommerce-blocks/assets/3323310/7d060bd5-e455-4dfc-a870-79f210b14f9f">
-</td>
-<td>Cart template (NL) - after:
-<br><br>
-
-<img width="1512" alt="Screenshot 2023-07-20 at 12 40 21" src="https://github.com/woocommerce/woocommerce-blocks/assets/3323310/eedb9060-b1ec-42a4-b2ab-e5b1b83bcace">
-</td>
-</tr>
-<tr>
-<td>Checkout template (EN) - before:
-<br><br>
-
-<img width="1512" alt="Screenshot 2023-07-19 at 19 15 19" src="https://github.com/woocommerce/woocommerce-blocks/assets/3323310/4ea05fda-e1cb-471e-8798-78762adfadeb">
-</td>
-<td>Checkout template (EN) - after:
-<br><br>
-
-<img width="1512" alt="Screenshot 2023-07-19 at 19 13 40" src="https://github.com/woocommerce/woocommerce-blocks/assets/3323310/9e614530-763f-4c64-848d-ba8059a9d7e1">
-</td>
-<td>Checkout template (NL) - after:
-<br><br>
-
-<img width="1512" alt="Screenshot 2023-07-20 at 12 40 42" src="https://github.com/woocommerce/woocommerce-blocks/assets/3323310/6cc88e87-7056-47c7-8e10-6b5e13d6c6f0">
-</td>
-</tr>
-</table>
-
-### Add Color Panel [#10062](https://github.com/woocommerce/woocommerce-blocks/pull/10062)
-
-This testing is utilizing the implementation in the Mini-Cart block to verify functionality
-
-1. Ensure you are running WP 6.3 and/or the latest Gutenberg installed
-2. Insert the Mini-Cart Block into a template.
-3. Select the block, in the settings panel for the block, turn on the "Display total price" toggle so you're able to see the color changes.
-4. Select the "Styles" panel.
-5. Set custom colors for the Icon, Price, and Product count color options. Verify they are changed in the Mini-Cart block.
-6. Save the template and then view on the frontend. Verify the Mini-Cart block has retained the custom colors.
-
-### Create Mini-Cart template part area [#10203](https://github.com/woocommerce/woocommerce-blocks/pull/10203)
-
-1. With WP 6.3 and a block theme, go to Appearance > Editor > Patterns.
-2. Verify there is a Mini-Cart template part area containing the Mini-Cart template part.
-
-Before | After
---- | ---
- | 
-
-### Newest Products: fix Stock Status filter [#10201](https://github.com/woocommerce/woocommerce-blocks/pull/10201)
-
-1. Go to Editor
-2. Add Newest Products block
-3. Focus on block
-4. Try to open "Filter by stock status" and change the switches
-5. Expected: Block doesn't crash and reacts to changes
-6. Save and check that block renders on the frontend
-
-#### Screenshots
-
-Result after clicking "Filter by stock status":
-
-| Before | After |
-| ------ | ----- |
-| <img width="1107" alt="image" src="https://github.com/woocommerce/woocommerce-blocks/assets/20098064/38eb8ccd-b165-4460-9f37-9fe7175663c7"> | <img width="1106" alt="image" src="https://github.com/woocommerce/woocommerce-blocks/assets/20098064/f72189a5-86c4-4026-b066-9de7a7072bc5"> |
-
-### Fix Misplacement of Shipping Radio Buttons [#10150](https://github.com/woocommerce/woocommerce-blocks/pull/10150)
-
-Instructions
-
-1. Create any test site.
-2. Install and activate all the required plugins
-3. Add sample products.
-4. Add some Shipping methods.
-5. Create new test page.
-6. Add Cart block.
-7. Change two-column grid to stacked column using align option.
-8. Observe that "Shipping" radio buttons are not misaligned.
-
-#### Screenshots
-
-| Before | After |
-| ------ | ----- |
-|  | <img width="701" alt="image" src="https://github.com/woocommerce/woocommerce-blocks/assets/5656702/1d7a62cf-14aa-4d27-bb21-04d9d597160b"> |
-
-
-## Feature plugin
-
-### Remove border control for filter by attribute block [#10277](https://github.com/woocommerce/woocommerce-blocks/pull/10277)
-
-1. Add a post and insert `Filter by Attribute` block.
-2. Check that the `border controls` are no longer available in the `Styles` section of the `Inspector controls`.
diff --git a/plugins/woocommerce/client/blocks/docs/internal-developers/testing/releases/1081.md b/plugins/woocommerce/client/blocks/docs/internal-developers/testing/releases/1081.md
deleted file mode 100644
index 24ad6ee8226..00000000000
--- a/plugins/woocommerce/client/blocks/docs/internal-developers/testing/releases/1081.md
+++ /dev/null
@@ -1,23 +0,0 @@
-# Testing notes and ZIP for release 10.8.1
-
-Zip file for testing: [woocommerce-gutenberg-products-block.zip](https://github.com/woocommerce/woocommerce-blocks/files/12274527/woocommerce-gutenberg-products-block.zip)
-
-## WooCommerce Core
-
-### Classic Template block registration: add defensive type handling [#10475](https://github.com/woocommerce/woocommerce-blocks/pull/10475)
-
-1. Ensure that you have installed Gutenberg 16.3.0.
-2. Open the Site Editor.
-3. Click on the navigation.
-4. Click on the pencil (to edit button).
-5. Ensure that the Site Editor doesn't crash
-
-| Before | After |
-|--------|--------|
-| <video src=https://github.com/woocommerce/woocommerce-blocks/assets/4463174/86ce276e-e372-40e1-8142-cfde84e32bd6 /> | <video src=https://github.com/woocommerce/woocommerce-blocks/assets/4463174/e655eab3-6339-47c9-8447-d9b06c55b795/> |
-
-### Update check for active cart template and migration routine [#10462](https://github.com/woocommerce/woocommerce-blocks/pull/10462)
-
-1. Go to Pages > Cart and edit the page. It will load the site editor. Add some text below the header, for example. Feel free to add anything for testing purposes. Save the template.
-2. Add an item to your cart and then load the Cart page on the front end. Ensure your changes from step 1 are visible.
-3. Go to the WP Dashboard, then WooCommerce > Settings > Advanced and change the cart page slug to something different. Repeat step 2 and ensure it still works with your change visible. Ensure the path to the Cart page shown in your browser is the one you updated it to.
diff --git a/plugins/woocommerce/client/blocks/docs/internal-developers/testing/releases/1082.md b/plugins/woocommerce/client/blocks/docs/internal-developers/testing/releases/1082.md
deleted file mode 100644
index d57ea204800..00000000000
--- a/plugins/woocommerce/client/blocks/docs/internal-developers/testing/releases/1082.md
+++ /dev/null
@@ -1,11 +0,0 @@
-# Testing notes and ZIP for release 10.8.2
-
-Zip file for testing: [woocommerce-gutenberg-products-block.zip](https://github.com/woocommerce/woocommerce-blocks/files/12301273/woocommerce-gutenberg-products-block.zip)
-
-## WooCommerce Core
-
-### Invalidate script data cache when site URL, scheme, or plugin name changes [#10278](https://github.com/woocommerce/woocommerce-blocks/pull/10278)
-
-1. Load up your site, ensuring WooCommerce Blocks is active. Visit a page with the Cart or Checkout block on it.
-2. Disable and delete the WooCommerce Blocks plugin from your site.
-3. Load up the page from Step 1 and ensure it loads correctly.
diff --git a/plugins/woocommerce/client/blocks/docs/internal-developers/testing/releases/1083.md b/plugins/woocommerce/client/blocks/docs/internal-developers/testing/releases/1083.md
deleted file mode 100644
index 6f7a226df45..00000000000
--- a/plugins/woocommerce/client/blocks/docs/internal-developers/testing/releases/1083.md
+++ /dev/null
@@ -1,24 +0,0 @@
-# Testing notes and ZIP for release 10.8.3
-
-Zip file for testing: [woocommerce-gutenberg-products-block.zip](https://github.com/woocommerce/woocommerce-blocks/files/12322309/woocommerce-gutenberg-products-block.zip)
-
-## WooCommerce Core
-
-### Create wc-all-block-styles chunk with all blocks stylesheet for classic themes. [#10543](https://github.com/woocommerce/woocommerce-blocks/pull/10543)
-
-⚠️: Following these testing instruction for a classic theme (Storefront) and a block theme (TT3)
-
-#### For classic theme ensure that is loaded only `wc-all-blocks-style.css` and `wc-blocks-vendors-style.css` stylesheets
-
-#### For block theme sure that is loaded only the stylesheets of blocks visible in the page
-
-1. Create a post or page and add the All Products block. Verify styles are loaded correctly.
-2. Visit the page in the frontend and verify styles are loaded correctly in the frontend as well.
-3. Repeat steps 1 and 2 with all blocks listed on [this page](https://wordpress.org/plugins/woo-gutenberg-products-block/). Make sure to test each block individually. So, when possible, try with only one block on the page (in some cases, that's not possible, ie: filter blocks, in that case, try with as few blocks as possible on the page). The reason is that we want to make sure each block includes the style dependencies that it needs, so they need to be tested in isolation, otherwise styles from other blocks might leak into other blocks and "help fix issues".
-
-### Fix the "On Sale" badge position. [#10550](https://github.com/woocommerce/woocommerce-blocks/pull/10550)
-
-1. Enable the `Storefront` theme.
-2. Create a new page or post.
-3. Add the `Products by Attribute`, `Products by Tag`, `Products by Category`, `Handpicked products` and `All products` blocks.
-4. Check the `Sale` back shows on the top-right corner of the image on all of them, in the editor and in the frontend.
diff --git a/plugins/woocommerce/client/blocks/docs/internal-developers/testing/releases/1090.md b/plugins/woocommerce/client/blocks/docs/internal-developers/testing/releases/1090.md
deleted file mode 100644
index 6c530e6fd2e..00000000000
--- a/plugins/woocommerce/client/blocks/docs/internal-developers/testing/releases/1090.md
+++ /dev/null
@@ -1,196 +0,0 @@
-# Testing notes and ZIP for release 10.9.0
-
-Zip file for testing: [woocommerce-gutenberg-products-block.zip](https://github.com/woocommerce/woocommerce-blocks/files/12343048/woocommerce-gutenberg-products-block.zip)
-
-## WooCommerce Core
-
-### Enhancements
-
-#### Add the `wc-blocks-footer-pattern` class identifier to all footer patterns. [#10542](https://github.com/woocommerce/woocommerce-blocks/pull/10542)
-
-1. Create a new post
-2. Insert the following footer patterns to the post:
-
-- Large Footer
-- Large Footer Dark
-- Simple Footer
-- Simple Footer Dark
-- Footer with Simple Menu and Cart
-- Footer with 2 Menus
-- Footer with 2 Menus Dark
-- Footer with 3 Menus
-
-3. Open the code editor and make sure you can see the `wc-blocks-footer-pattern` class in all footer patterns:
-
-<img width="1997" alt="Screenshot 2023-08-11 at 11 16 38" src="https://github.com/woocommerce/woocommerce-blocks/assets/15730971/05048b34-92ed-4020-a4be-87e4a72e2a16">
-
-4. No changes should be observed by the end users: all patterns listed above should work as expected both on the editor side and on the front end.
-
-#### Add the `wc-blocks-header-pattern` class identifier to all header patterns. [#10541](https://github.com/woocommerce/woocommerce-blocks/pull/10541)
-
-1. Create a new post
-2. Insert the following header patterns to the post:
-
-- Centered Header Menu with Search
-- Essential Header
-- Essential Header Dark
-- Large Header
-- Large Header Dark
-- Minimal Header
-
-3. Open the code editor and make sure you can see the `wc-blocks-header-pattern` class in all header patterns:
-
-<img width="1604" alt="Screenshot 2023-08-11 at 10 55 27" src="https://github.com/woocommerce/woocommerce-blocks/assets/15730971/2f534cf2-1b6e-428f-87e3-c08d5cd6db51">
-
-4. No changes should be observed by the end users: all patterns listed above should work as expected both on the editor side and on the front end.
-
-#### Featured Products: Fresh & Tasty pattern: Enhance mobile view and optimize images. [#10521](https://github.com/woocommerce/woocommerce-blocks/pull/10521)
-
-1. Create a new post
-2. Insert the **Featured Products: Fresh & Tasty** pattern
-3. Make sure the pattern is properly displayed in the editor without any problems
-4. Save the post and head over to the front-end
-5. Make sure the pattern is correctly displayed and the mobile view matches the screenshot provided on the description of this PR.
-
-##### Screenshots
-
-<table>
-<tr>
-<td valign="top">Before:
-<br><br>
-<img width="200" alt="Screenshot 2023-08-09 at 18 11 40" src="https://github.com/woocommerce/woocommerce-blocks/assets/15730971/1b3c6d76-bea1-4dd2-8d15-7462798fb7b2">
-</td>
-<td valign="top">After:
-<br><br>
-<img width="220" alt="Screenshot 2023-08-09 at 18 11 57" src="https://github.com/woocommerce/woocommerce-blocks/assets/15730971/a4dff933-7a46-42f7-9b4c-d5c63003b954">
-</td>
-</tr>
-</table>
-
-#### Add placeholder images and update text styles for the Alternating Image and Text pattern. [#10479](https://github.com/woocommerce/woocommerce-blocks/pull/10479)
-
-1. Create a new post.
-2. Insert the **Alternating Image and Text** pattern.
-3. Save the post and ensure everything is working as expected both in the editor and on the frontend. The designs should match the "After" screenshot on this PR.
-
-##### Screenshots
-
-<table>
-<tr>
-<td valign="top">Before:
-<br><br>
-<img width="1245" alt="Screenshot 2023-08-04 at 15 57 46" src="https://github.com/woocommerce/woocommerce-blocks/assets/15730971/a26c67b9-8229-470b-bebb-bd34f4f0db85">
-</td>
-<td valign="top">After:
-<br><br>
-<img width="1212" alt="Screenshot 2023-08-04 at 16 02 36" src="https://github.com/woocommerce/woocommerce-blocks/assets/15730971/948fd856-6a2c-49e0-aa0b-6e33241d7429">
-</td>
-</tr>
-</table>
-
-#### Performance: Selecting shipping rates during checkout, and API calls in general, are now faster. Shipping selection improved by at least 1 second. [#10472](https://github.com/woocommerce/woocommerce-blocks/pull/10472)
-
-1. Add items to the cart and head to checkout.
-2. Enter your address. Ensure your store has a few shipping methods to choose from.
-3. Select a shipping rate. Confirm the UI is blocked (cursor change, faded out radio button).
-4. Confirm shipping totals etc update successfully.
-
-#### Checkout: Prevent postcode validation error notice appearing after pushing changes for other fields. [#10315](https://github.com/woocommerce/woocommerce-blocks/pull/10315)
-
-1. Add some items to the cart and go to the checkout page
-2. Fill out your shipping address and ensure rates appear. You need to complete all required fields before this occurs.
-3. Type into a shipping address field. After a short delay confirm that the shipping rates refresh.
-4. Type into a different field. Without waiting, tab out of the field. The refresh should happen immediately.
-5. Interact with the postcode + country fields.
- - Choose Algeria. Enter invalid postcode e.g. ABC. Notice the inline validation.
- - Choose Albania. Inline validation should disappear. The postcode is now valid.
- - Go back to Algeria. The postcode will clear. There should be no validation message visible.
- - Place order. Empty postcode field now has a validation message.
-6. Correct all errors and successfully place the order.
-
-#### Product Button block: Integrate Interactivity API to make the block dynamically. [#10006](https://github.com/woocommerce/woocommerce-blocks/pull/10006)
-
-1. Ensure that you are using the Blockified Product Catalog Template. If not, enable it.
-2. Open the Site Editor and add the Mini Cart Block on the header. Save.
-3. Visit the Product Catalog (`/shop`).
-4. Click the button to ensure the product is added to the cart.
-5. Ensure that the transition Add to cart -> loading status -> 1 in the cart is smooth.
-6. Click on the Mini Cart.
-7. Edit the quantity of the product.
-8. Ensure that the changes are reflected in the Product Button.
-9. Via dev tools ensure that the button element has the class `added` when the product is in the cart, and the button element has the class `loading` while the product is added to the cart.
-
-##### Test ProductButton with cache plugin
-
-1. Install the plugin [WP Optimize](https://wordpress.org/plugins/wp-optimize/).
-2. Ensure that your cart is empty.
-3. Ensure that you have the Mini Cart block in the header.
-4. Enable the cache.
-5. Visit the page with the Products block.
-6. Refresh the page.
-7. Add a product.
-8. Refresh the page.
-9. Ensure that the counter is updated with a smoother animation.
-10. Open the Mini Cart block and change the quantity of the product in the cart.
-11. Ensure that the counter inside the button is updated with a smoother animation.
-12. Disable the plugin.
-13. Visit the page with the Products block.
-14. Open the Mini Cart block and change the quantity of the product in the cart.
-15. Ensure that the counter inside the button is updated with a smoother animation.
-16. Ensure that there isn't any regression.
-
-#### Interactivity API: Update interactive regions during client-side navigation [#10200](https://github.com/woocommerce/woocommerce-blocks/pull/10200)
-
-1. Ensure that you are using the Blockified Product Catalog Template. If not, enable it.
-2. Open the Site Editor and go to the Product Catalog Template.
-3. In order to make pagination more noticeable, in the Product query block, disable the inherited query settings and manually modify the block markup to set the `perPage` prop inside the `query` attribute to `1`.
-4. Visit the Product Catalog (`/shop`).
-5. Click on any link inside the Pagination block.
-6. Via dev tools, ensure that only the HTML inside the Query block is updated.
-7. Navigate back and forward.
-8. Via dev tools, ensure that only the HTML inside the Query block is updated.
-9. Click on any link outside the Pagination block
-10. Ensure that the browser navigates to the selected link.
-
-##### Screenshots
-
-<table>
-<tr>
-<td valign="top">Before:
-<br><br>
-<video src="https://github.com/woocommerce/woocommerce-blocks/assets/6917969/8ec402c1-a723-4e80-a76c-9e9987192a5f"></video>
-</td>
-<td valign="top">After:
-<br><br>
-<video src="https://github.com/woocommerce/woocommerce-blocks/assets/6917969/ebf388ba-c3d7-4f5a-89f7-43a26a041f66"></video>
-</td>
-</tr>
-</table>
-
-### Bug Fixes
-
-#### Fix Express Payments buttons display in the Cart block. [#10534](https://github.com/woocommerce/woocommerce-blocks/pull/10534)
-
-1. activate Stripe and PayPal and make sure they are active
-2. add a product to cart
-3. visit the Cart block and make sure buttons are stacked
-4. go to the Checkout block and make sure buttons are in a grid
-5. repeat the testing in the editor as well
-6. repeat the steps with different screen sizes
-7. Mini cart does not display express payments so it does not need testing
-
-#### Fixed a bug which caused theme border colors to not correctly show on the blocks on the editor side. [#10468](https://github.com/woocommerce/woocommerce-blocks/pull/10468)
-
-1. Add a “Featured Category” block to your page.
-2. Open the Inspector Controls → Styles tab → Add a border.
-3. Select a custom width and select a color from the theme colors.
-4. Ensure this color is shown correctly in the editor.
-5. [Regression test] Ensure custom colors are shown correctly in the editor.
-6. [Regression test] Ensure both are shown in the front-end.
-
-#### Fix an issue where inner Cart blocks were incorrectly nested. [#10447](https://github.com/woocommerce/woocommerce-blocks/pull/10447)
-
-1. Enable a block theme.
-2. Go to Appearance -> Editor -> Templates -> Cart.
-3. Edit the template and click the "Cart" button at the top of the editor - a dropdown will appear. Click "Clear customizations" here (If it does not show then proceed anyway)
-4. Open the list view of blocks, and expand the Cart block, and the Empty Cart block. Ensure there are no duplicate Empty/Filled cart blocks in the top-level Empty Cart block.
diff --git a/plugins/woocommerce/client/blocks/docs/internal-developers/testing/releases/1091.md b/plugins/woocommerce/client/blocks/docs/internal-developers/testing/releases/1091.md
deleted file mode 100644
index 4eb41036f68..00000000000
--- a/plugins/woocommerce/client/blocks/docs/internal-developers/testing/releases/1091.md
+++ /dev/null
@@ -1,42 +0,0 @@
-# Testing notes and ZIP for release 10.9.1
-
-Zip file for testing: [woocommerce-gutenberg-products-block.zip](https://github.com/woocommerce/woocommerce-blocks/files/12370561/woocommerce-gutenberg-products-block.zip)
-
-## WooCommerce Core
-
-### Bug Fixes
-
-#### Remove client side navigation from Products beta block. [#10636](https://github.com/woocommerce/woocommerce-blocks/pull/10636)
-
-1. Create a new post
-2. Add Products (Beta) block & publish it
-3. On Frontend, verify that
- 1. Client-side navigation isn't there anymore i.e. changing the page should also refresh the page
- 2. Verify that Product button(Add to cart) still works as expected.
-
-## Testing notes for the development team
-
-### Bug Fixes
-
-1. Checkout to the PR branch and run `npm run start`.
-2. Enable a blocks theme (like TT3).
-3. Create a new page or post.
-4. Add the Products (Beta), Products Collection, Products by Attribute, Products by Tag, Products by Category, Handpicked products, and All products blocks.
-5. Check the Sale badge is shown on the top-right corner of the image on all of them, in the editor, and in the frontend.
-6. Go to the classic shop page and check the Sale badge also shows in the top-right corner of the product image.
-7. Repeat steps 3 to 6 with Storefront enabled.
-
-#### Screenshots
-
-<table>
-<tr>
-<td valign="top">Before:
-<br><br>
-<img width="1245" alt="Screenshot 2023-08-17 at 09 57 30" src="https://github.com/woocommerce/woocommerce-blocks/assets/186112/fe1eda4a-549c-4b08-b4aa-34e4a24fbf87">
-</td>
-<td valign="top">After:
-<br><br>
-<img width="1248" alt="Screenshot 2023-08-17 at 09 56 36" src="https://github.com/woocommerce/woocommerce-blocks/assets/186112/9b93adbb-c0b9-4134-b6b2-250bd9bbee42">
-</td>
-</tr>
-</table>
diff --git a/plugins/woocommerce/client/blocks/docs/internal-developers/testing/releases/1092.md b/plugins/woocommerce/client/blocks/docs/internal-developers/testing/releases/1092.md
deleted file mode 100644
index 82af63c573f..00000000000
--- a/plugins/woocommerce/client/blocks/docs/internal-developers/testing/releases/1092.md
+++ /dev/null
@@ -1,74 +0,0 @@
-# Testing notes and ZIP for release 10.9.2
-
-Zip file for testing: [woocommerce-gutenberg-products-block.zip](https://github.com/woocommerce/woocommerce-blocks/files/12397992/woocommerce-gutenberg-products-block.zip)
-
-## WooCommerce Core
-
-### Bug Fixes
-
-#### Load Interactivity API in `bootstrap.php`. [#10657](https://github.com/woocommerce/woocommerce-blocks/pull/10657)
-
-> **Note**
-> Ignore the first step if testing in WooCommerce Core.
-
-1. Install this custom build of WooCommerce that includes this patch: [woocommerce.zip](https://github.com/woocommerce/woocommerce-blocks/files/12397185/woocommerce.zip).
-2. Make sure that `WooCommerce Blocks` plugin is not active.
-3. Open the Site Editor and ensure that you are using the blockified template on the Product Catalog template.
-4. Visit the `/shop` page and ensure that the Product Button(Add to Cart) works as expected.
-
-#### Make View Cart link displayed below the Add to Cart button. [#10675](https://github.com/woocommerce/woocommerce-blocks/pull/10675)
-
-1. Edit Product Catalog template
-2. Add Products (Beta) block if it's not there already
-3. Save and go to frontend
-4. Add a simple product to cart
-5. Expected: "View Cart" link appears BELOW the Add to Cart button
-
-<table>
-<tr>
-<td>Before:
-<br><br>
-<img width="955" alt="image" src="https://github.com/woocommerce/woocommerce-blocks/assets/20098064/6debf2e7-b529-4c45-828b-9705686f08a3">
-</td>
-<td>After:
-<br><br>
-<img width="956" alt="image" src="https://github.com/woocommerce/woocommerce-blocks/assets/20098064/a1b7cb06-0ac0-40d8-b865-5c87977016a8">
-</td>
-</tr>
-</table>
-
-## Should be tested by the development team exclusively
-
-### Bug Fixes
-
-#### Fix: Made migration migrate block templates in the current theme. [#10641](https://github.com/woocommerce/woocommerce-blocks/pull/10641)
-
-1. Install a theme that uses block templates. In my case I used FotaWP.
-2. Go to Appearance > Edit > Templates and reset the cart/checkout templates to default.
-3. Delete has_migrated_cart and has_migrated_checkout options from your options database.
-4. View a page on the store.
-5. Confirm by viewing the cart and checkout pages that they inherited the block template from the theme. In this case for instance, instead of the default distraction free template we had, you'll see something like this:
-
-
-
-#### Fix/10530 Inconsistent new install behaviour for templates when using block themes. [#10608](https://github.com/woocommerce/woocommerce-blocks/pull/10608)
-
-1. Get a new env ready to install WP/WC using WP-CLI. You can use this [quick docker setup](https://github.com/woocommerce/woocommerce-blocks/files/12394720/new-test-env.zip)
-2. Alias or copy this branch, built ready to use as a plugin into the env
-3. Using WP-CLI set up WC using the following command sequence (alter args to suit your case)
-
-```sh
-wp config create --dbname=wordpress --dbuser=wordpress --dbpass=wordpress --dbhost=db --force
-wp core install --url=http://localhost --title='WP Staging' --admin_user=admin --admin_password=pass --admin_email=admin@wp.loc
-wp option set blog_public 0
-wp plugin activate woocommerce-blocks
-wp plugin install woocommerce --version=6.0.0
-wp plugin activate woocommerce
-wp plugin install wordpress-importer --activate
-wp import ./wp-content/plugins/woocommerce/sample-data/sample_products.xml --authors=skip
-wp plugin update woocommerce
-```
-
-4. Visit the store for the first time, head to Appearance > Editor > Templates > Manage all templates verify that Cart and Checkout have customizations saved
-5. Open each one and verify they contain the shortcode version
-6. Test the complete checkout flow.
diff --git a/plugins/woocommerce/client/blocks/docs/internal-developers/testing/releases/1093.md b/plugins/woocommerce/client/blocks/docs/internal-developers/testing/releases/1093.md
deleted file mode 100644
index ffbb6d28f12..00000000000
--- a/plugins/woocommerce/client/blocks/docs/internal-developers/testing/releases/1093.md
+++ /dev/null
@@ -1,33 +0,0 @@
-# Testing notes and ZIP for release 10.9.3
-
-Zip file for testing: [woocommerce-gutenberg-products-block.zip](https://github.com/woocommerce/woocommerce-blocks/files/12432284/woocommerce-gutenberg-products-block.zip)
-
-## WooCommerce Core
-
-### Bug Fixes
-
-#### Add to Cart: fix the problem that variable products couldn't be added to cart [#10657](https://github.com/woocommerce/woocommerce-blocks/pull/10657)
-
-1. Make sure you're using blockified Single Product template
-2. Go to frontend
-3. Go to product page for variable product (e.g. Hoodie when using sample products)
-4. Choose Color and With Logo
-5. Make sure Price appears when you chose the options
-6. Add the product to Cart
-7. Make sure product is added to cart correctly and there's no error
-
-##### Before
-
-<https://github.com/woocommerce/woocommerce-blocks/assets/20469356/7b90f169-263c-4c26-8ee9-70004756d128>
-
-##### After
-
-<https://github.com/woocommerce/woocommerce-blocks/assets/20469356/51ba5589-83cd-4cd1-8956-b8c59f44ce5b>
-
-
-
-
-
-
-
-
diff --git a/plugins/woocommerce/client/blocks/docs/internal-developers/testing/releases/1100.md b/plugins/woocommerce/client/blocks/docs/internal-developers/testing/releases/1100.md
deleted file mode 100644
index 1946aea2a04..00000000000
--- a/plugins/woocommerce/client/blocks/docs/internal-developers/testing/releases/1100.md
+++ /dev/null
@@ -1,193 +0,0 @@
-# Testing notes and ZIP for release 11.0.0
-
-Zip file for testing: [woocommerce-gutenberg-products-block.zip](https://github.com/woocommerce/woocommerce-blocks/files/12472807/woocommerce-gutenberg-products-block.zip)
-
-## WooCommerce Core
-
-### Enhancements
-
-#### Enable Product Collection as a core feature [#10524](https://github.com/woocommerce/woocommerce-blocks/pull/10524)
-
-This PR enables a block that's been developed for a couple of months. Product Collection includes many functionalities and each of the changes at the moment of merging the particular functionalities. I don't think we should test ALL of them again, especially since the testing steps would be unreadable. However, I believe the major paths should be re-tested.
-
-In some cases, I linked PRs. In that case, please refer to the testing scenarios from respective PR:
-
-##### Major scenarios
-
-###### Inserting
-
-0. This PR should be tested in production build, so use `npm run build:deploy` if you test locally. Ignore this step when testing plugin as a whole.
-1. Go to Editor
-2. Type "Product Collection" and "Products (Beta)"
-3. In both cases Product Collection (Beta) should appear in the inserter
-4. Try to insert it
-5. It should appear correctly in the Editor
-6. Save and make sure it displays correctly in the Frontend
-
-###### Inherit from query template
-
-1. Open the Editor and navigate to the "Product Search Results"
-2. Replace the existing 'Classic Template' block with the 'Product Collection' block.
-3. After the 'Product Collection' block is successfully inserted, ensure that the 'Inherit query from template' option is enabled by default.
-4. Save the changes.
-5. Navigate to the frontend of your website. You can emulate a search for "shirt" by visiting the URL "/shop?s=shirt". Confirm that the search query `shirt` effectively displays related products.
-6. Head back to the Editor.
-7. In the 'Product Collection' block, deactivate the 'Inherit query from template' option.
-8. Subsequently, you should observe various settings and filters available in the inspector controls. Modify these filters and settings as required and validate immediately that the changes are visible within the Editor.
-9. Save your modifications and return to the frontend of your website.
-10. Ensure that the adjustments made to the 'Product Collection' block within the Editor are accurately displayed on the frontend of your website.
-
-###### Filters
-
-1. Add Product Collection and Products (Beta) block side by side
-2. Disable "Inherit query from template" in both
-3. Set of filters should appear in the Inspector Controls
-4. Play around with the filters setting up the same conditions in both cases (be aware Product Collection offers more filters than Products (Beta), so you may not be able to recreate all of the scenarios in Products (Beta) block)
-5. Treat Products (Beta) block as a reference - the results in product grid should be the same in both cases. We look for discrepancies between blocks. Keep in mind in some scenarios filters may be mutually exclusive or there may be some existing bugs. If they occur in both blocks, feel free to report it but it's not a blocker to release Product Collection.
-
-###### Global Styles
-
-1. Add Product Collection and Products (Beta) block side by side
-2. Play around with the Global Styles of Product Collection/Products, Product Template and particular Product Elements.
-3. As in case of Filters we look for discrepancies between blocks. If there's bug that occur in both blocks, feel free to report it but it's not a blocker to release Product Collection.
-
-###### Product Elements
-
-1. Make sure you're able to add all of the following blocks in Product Template of Products Collection
-
-- Product Image
-- Product Title
-- Product Price
-- Product SKU
-- Product Summary
-- Product Rating
-- Product Stock Indicator
-- On sale badge
-- Add to Cart Button
-
-###### Others - play with it
-
-1. Play with Product Collection as you would as a merchant. Test it, try to break it. Think of stuff we didn't think of and try it out!
-
-
-#### Enable manual migration of Products to Product Collection [#10655](https://github.com/woocommerce/woocommerce-blocks/pull/10655)
-
-1. Go to Editor and add at least two Products (Beta) block
-2. In one of them disable "Inherit query from template" and apply some advanced filters, for example, "Handpicked products"
-3. Focus on either of the Products (Beta) block
-4. Expected: There's an Upgrade Notice in Inspector Controls
-
-<img width="282" alt="image" src="https://github.com/woocommerce/woocommerce-blocks/assets/20098064/e0238785-b727-4ce9-b874-5349d115f9a9">
-
-5. Click "Upgrade to Product Collection"
-6. Expected: all Products (Beta) blocks should be replaced with Product Collection blocks preserving the block settings (filters)
-
-
-#### Footer Patterns > Ensure the “My Account” text has the same font size as the other texts nearby [#10614](https://github.com/woocommerce/woocommerce-blocks/pull/10614)
-
-| Before | After |
-| ------ | ----- |
-| <img width="917" alt="Screenshot 2023-08-16 at 10 04 33" src="https://github.com/woocommerce/woocommerce-blocks/assets/15730971/ac458d95-b28e-43d5-aede-7424ab4fa381"> <img width="935" alt="Screenshot 2023-08-16 at 10 01 21" src="https://github.com/woocommerce/woocommerce-blocks/assets/15730971/21d6e09a-f5ed-4c20-acb1-6236677b1e2c"> | <img width="930" alt="Screenshot 2023-08-16 at 10 02 12" src="https://github.com/woocommerce/woocommerce-blocks/assets/15730971/5d21540a-a2fc-4d28-a6bc-7de6b8eb6cf7"> <img width="888" alt="Screenshot 2023-08-16 at 10 01 37" src="https://github.com/woocommerce/woocommerce-blocks/assets/15730971/79b3f97d-b160-486f-b364-6ab3aaa255c8"> |
-
-1. Create a new post
-2. Insert the Large Footer, Large Footer Dark, Simple Footer and the Simple Footer Dark patterns
-3. Make sure the size of the My Account text is the same when compared with other texts in the footer (as demonstrated in the "After" column in the description of this PR).
-4. Publish the post and make sure the patterns are correctly displayed on the FE as well.
-
-#### Testimonials Single Pattern > Update the image format and content width [#10600](https://github.com/woocommerce/woocommerce-blocks/pull/10600)
-
-<!-- If your change has a visual component, add a screenshot here. A "before" screenshot would also be helpful. -->
-
-| Before | After |
-| ------ | ----- |
-| <img width="1202" alt="Screenshot 2023-08-15 at 12 33 09" src="https://github.com/woocommerce/woocommerce-blocks/assets/15730971/3fd554e1-a527-48d2-9a42-ab17434f0b30"> <img width="333" alt="Screenshot 2023-08-15 at 12 39 30" src="https://github.com/woocommerce/woocommerce-blocks/assets/15730971/0c5b535b-f248-47b2-89b4-be7af6f3c157"> | <img width="1200" alt="Screenshot 2023-08-15 at 12 36 31" src="https://github.com/woocommerce/woocommerce-blocks/assets/15730971/ab4f5fa8-19e5-45a7-a398-fe45bef1b7a6"> <img width="333" alt="Screenshot 2023-08-15 at 12 37 17" src="https://github.com/woocommerce/woocommerce-blocks/assets/15730971/e2c0a790-3fef-4051-bef3-8fc133f86db1"> |
-
-<!-- Write these steps from the perspective of a "user" (merchant) familiar with WooCommerce. No need to spell out the steps for common setup scenarios (eg. "Create a product"), but do be specific about the thing being tested. Include screenshots demonstrating expectations where that will be helpful. -->
-
-1. Create a new post
-2. Insert the **Testimonials Single** Pattern
-3. Make sure the pattern is correctly displayed in the editor
-4. Save the post and head over to the front end: make sure the pattern is correctly displayed both on desktop and mobile view (the layout should match the one demonstrated in the above screenshots in the **After** column).
-
-### Bug Fixes
-
-#### Fix UI misalignment of Filter by Price in TT1 theme [#10732](https://github.com/woocommerce/woocommerce-blocks/pull/10732)
-
-1. On TT1 theme
-2. Create new post
-3. Add Filter by Price and Products (Beta) so filter is displayed
-4. Make sure it looks like on screenshots (nice UI alignment) and they're functional (change values)
-5. Repeat on TT2 and TT3 to make sure they stayed untouched
-6. Check on Chrome, Firefox, Safari
-
-<!-- Any screenshots of UI changes will be helpful to include here. Leave blank if not applicable. -->
-
-| Before | After |
-| ------ | ----- |
-| <img width="522" alt="image" src="https://github.com/woocommerce/woocommerce-blocks/assets/20098064/c6c3f22a-c042-4c11-9b52-d881dda3af9b"> | <img width="460" alt="image" src="https://github.com/woocommerce/woocommerce-blocks/assets/20098064/0ce0b0b5-d00f-401b-a0dd-a6c5f9f0367e"> |
-
-#### Make View Cart link displayed below the Add to Cart button [#10675](https://github.com/woocommerce/woocommerce-blocks/pull/10675)
-
-1. Edit Product Catalog template
-2. Add Products (Beta) block if it's not there already
-3. Save and go to frontend
-4. Add a simple product to cart
-5. Expected: "View Cart" link appears BELOW the Add to Cart button
-
-| Before | After |
-| ------ | ----- |
-| <img width="955" alt="image" src="https://github.com/woocommerce/woocommerce-blocks/assets/20098064/6debf2e7-b529-4c45-828b-9705686f08a3"> | <img width="956" alt="image" src="https://github.com/woocommerce/woocommerce-blocks/assets/20098064/a1b7cb06-0ac0-40d8-b865-5c87977016a8"> |
-
-#### Store Breadcrumbs block: Fix icon color when block is selected in List View [#10652](https://github.com/woocommerce/woocommerce-blocks/pull/10652)
-
-1. From your WordPress dashboard, go to Appearance > Themes. Make sure you have a block-based theme installed and activated. If not, you can install one from the Add New option. Block-based themes include "Twenty-twenty Two," "Twenty-twenty Three," etc.
-2. On the left-hand side menu, click on Appearance > Editor > Templates
-3. Find and select the 'Single Product' template from the list.
-4. When the Classic Product Template renders, click on Transform into Blocks. This will transform the Classic template in a block template if you haven't done it before.
-5. On the top-right side, click on the Save button.
-6. On the left side, check the List View and select the 'Store Breadcrumbs' block. Make sure the icon changes it's color from a dark color to a white color when the block is selected on the list
-
-| Before | After |
-| ------ | ----- |
-| <img width="352" alt="image" src="https://github.com/woocommerce/woocommerce-blocks/assets/20469356/731f900f-247a-4d48-b399-4bf503a986a2"> | <img width="354" alt="image" src="https://github.com/woocommerce/woocommerce-blocks/assets/20469356/3c7c4c05-fb38-49f2-9710-a278ab3776d1"> |
-
-#### Dispatch the wc-blocks_render_blocks_frontend event when rendering the empty cart block [#10619](https://github.com/woocommerce/woocommerce-blocks/pull/10619)
-
-1. Add the Cart block and switch to the Empty Cart edit mode.
-2. Replace the Newest products block with the All Products block.
-3. View the page in the frontend.
-4. Verify all blocks render correctly when the cart is empty. Try adding a product to the cart (so it switches to the Full Cart view) and removing it (so it switches back to the Empty Cart view). Verify the blocks still render correctly.
-
-#### Remove client side navigation from Products beta block [#10636](https://github.com/woocommerce/woocommerce-blocks/pull/10636)
-
-1. Create a new post
-2. Add Products (Beta) block & publish it
-3. On Frontend, verify that
- 1. Client-side navigation isn't there anymore i.e. changing the page should also refresh the page
- 2. Verify that Product button(Add to cart) still works as expected.
-
-## Should be tested by the development team exclusively
-
-### Bug Fixes
-
-#### Refactor block variation registration in product-collection [#10701](https://github.com/woocommerce/woocommerce-blocks/pull/10701)
-
-1. Since the issue was reproducible in Production build, so run `npm run build:deploy` to create a production build
-2. Create a new post.
-3. Insert a 'Product Collection' block.
-4. Ensure you can include a 'Product Summary' block within it using the block inserter.
-5. Upon adding the 'Product Summary' block, publish the post and check that the 'Product Collection' block is displayed accurately on the frontend.
-
-#### Fix "On sale" badge class [#10634](https://github.com/woocommerce/woocommerce-blocks/pull/10634)
-
-| Before | After |
-| ------ | ----- |
-|<img width="1245" alt="Screenshot 2023-08-17 at 09 57 30" src="https://github.com/woocommerce/woocommerce-blocks/assets/186112/fe1eda4a-549c-4b08-b4aa-34e4a24fbf87">| <img width="1248" alt="Screenshot 2023-08-17 at 09 56 36" src="https://github.com/woocommerce/woocommerce-blocks/assets/186112/9b93adbb-c0b9-4134-b6b2-250bd9bbee42"> |
-
-1. Checkout to the PR branch and run `npm run start`.
-2. Enable a blocks theme (like TT3).
-3. Create a new page or post.
-4. Add the Products (Beta), Products Collection, Products by Attribute, Products by Tag, Products by Category, Handpicked products, and All products blocks.
-5. Check the Sale badge is shown on the top-right corner of the image on all of them, in the editor, and in the frontend.
-6. Go to the classic shop page and check the Sale badge also shows in the top-right corner of the product image.
-7. Repeat steps 3 to 6 with Storefront enabled.
diff --git a/plugins/woocommerce/client/blocks/docs/internal-developers/testing/releases/1110.md b/plugins/woocommerce/client/blocks/docs/internal-developers/testing/releases/1110.md
deleted file mode 100644
index 027997eb21a..00000000000
--- a/plugins/woocommerce/client/blocks/docs/internal-developers/testing/releases/1110.md
+++ /dev/null
@@ -1,160 +0,0 @@
-# Testing notes and ZIP for release 11.1.0
-
-Zip file for testing: [woocommerce-gutenberg-products-block.zip](https://github.com/woocommerce/woocommerce-blocks/files/12577251/woocommerce-gutenberg-products-block.zip)
-
-## WooCommerce Core
-
-### Enhancements
-
-#### Add Product Collection Rows pattern [#10857](https://github.com/woocommerce/woocommerce-blocks/pull/10857)
-
-1. Go to Editor
-2. Insert "Product Collection Rows" pattern
-3. Save and go to frontend
-4. Verify it looks like in the screenshots below. Note: Product Rating color is a plugin feature, meaning that stars will appear in default color (e.g. black) instead of yellow when testing in Core.
-
-| Reference | Editor | Frontend
-| ------ | ----- | -- |
-|  | <img width="757" alt="image" src="https://github.com/woocommerce/woocommerce-blocks/assets/20098064/abeaaa75-155f-4181-b604-b9dab18052a9"> | <img width="747" alt="image" src="https://github.com/woocommerce/woocommerce-blocks/assets/20098064/73079494-2fbd-4214-8638-b6116715b972"> |
-
-#### Add Simple Grid Product Collection pattern [#10835](https://github.com/woocommerce/woocommerce-blocks/pull/10835)
-
-1. Go to Editor
-2. Insert "Product Collection Simple Grid" pattern
-3. Save and go to frontend
-4. Verify it looks like in the screenshots below
-
-| Reference | Editor | Frontend
-| ------ | ----- | -- |
-|  | <img width="712" alt="image" src="https://github.com/woocommerce/woocommerce-blocks/assets/20098064/5c92b850-5a77-4794-8e2b-5cb789506174"> | <img width="738" alt="image" src="https://github.com/woocommerce/woocommerce-blocks/assets/20098064/ba331287-b195-4a29-8157-72a6d5ec5e1a"> |
-
-#### Product Hero Pattern > Adjust the content width [#10832](https://github.com/woocommerce/woocommerce-blocks/pull/10832)
-
-1. Create a new post
-2. Insert the Product Hero pattern
-3. Make sure the pattern is properly displayed both in the editor and on the front end
-
-| Before | After |
-| ------ | ----- |
-| <img width="1199" alt="Screenshot 2023-09-04 at 22 04 40" src="https://github.com/woocommerce/woocommerce-blocks/assets/15730971/ffc2c7a9-00b3-4035-b86a-690d572bab40"> | <img width="1234" alt="Screenshot 2023-09-04 at 22 04 22" src="https://github.com/woocommerce/woocommerce-blocks/assets/15730971/4e8c4c24-d96b-44bd-93b2-b69203dc41ff"> |
-
-#### Fix: Load blocks style separately for classic themes [#10758](https://github.com/woocommerce/woocommerce-blocks/pull/10758)
-
-0. Activate Storefront theme.
-1. Create a post or page and add the All Products block. Verify styles are loaded correctly.
-2. Visit the page in the frontend and verify styles are loaded correctly in the frontend as well.
-3. Repeat steps 1 and 2 with all blocks listed on [this page](https://wordpress.org/plugins/woo-gutenberg-products-block/). Make sure to test each block individually. So, when possible, try with only one block on the page (in some cases, that's not possible, ie: filter blocks, in that case, try with as few blocks as possible on the page). The reason is that we want to make sure each block includes the style dependencies that it needs, so they need to be tested in isolation, otherwise styles from other blocks might leak into other blocks and "help fix issues".
-4. Repeat steps above with a block themes. Block themes are excluded from the newly added logic so there shouldn't be any regression with blocks theme as well, but we should ,at least, smoke test with a block theme.
-
-#### Adjust `Follow us on social media` pattern icon alignment [#10709](https://github.com/woocommerce/woocommerce-blocks/pull/10709)
-
-1. Create a new post or page.
-2. Insert the **Follow us on social media** Pattern.
-3. Confirm the pattern is correctly displayed in the editor.
-4. Save the post and head over to the front end and confirm the pattern is correctly displayed both on desktop and mobile view (the layout should match the one demonstrated in the above screenshots in the After column and in the screencast under the Updated section).
-
-| Before | After |
-| ------ | ----- |
-|  |  |
-
-### Bug Fixes
-
-#### Change default number of columns in Related Products [#10875](https://github.com/woocommerce/woocommerce-blocks/pull/10875)
-
-1. Go to Single Product template
-2. Remove the content and add "WooCommerce Single Product Block"
-3. Transform it to blockified template by clicking a blue button in the center of the block
-4. Related Products blocks has 5 columns and grid layout
-
-| Before | After |
-| ------ | ----- |
-| <img width="1004" alt="image" src="https://github.com/woocommerce/woocommerce-blocks/assets/20098064/858ac043-5979-47e0-a682-d992876d574b"> | <img width="1285" alt="image" src="https://github.com/woocommerce/woocommerce-blocks/assets/20098064/8f88a269-39b5-4b0b-8513-e90e2c3558e4"> |
-
-#### Product Image: Fix bug that prevented block styles being applied within the editor [#10859](https://github.com/woocommerce/woocommerce-blocks/pull/10859)
-
-1. Insert Single Product Block into a page
-2. Select the product image
-3. Open up styles in the inspector
-4. Apply a border radius
-5. Check this gets applied in the editor AND on the frontend.
-6. Now check other styles are working as expected (padding, margin etc) and that no regressions have been introduced.
-7. Now check that other blocks using this are working as expected. E.g. `Products (Beta)` and `Product Collections (Beta)`.
-
-| Before | After |
-| ------ | ----- |
-|  |  |
-
-#### Fix bug with wpautop for the empty cart [#10768](https://github.com/woocommerce/woocommerce-blocks/pull/10768)
-
-1. Install WooCommerce WC 8.0.x and a block theme (such as Twenty Twenty Three)
-2. Go to Appearance > Editor > Templates > Cart
-3. If this has the Cart Block, delete it and Include the `[woocommerce_cart]` shortcode.
-4. Save and visit this page with an empty cart
-5. The `Return to Shop` button should have equal padding top and bottom
-
-| Before | After |
-|----------------------------------------------------------------------------------------------------------------------------------------------------------------------- |----------------------------------------------------------------------------------------------------------------------------------------------------------------------- |
-| <img width="721" alt="Screenshot 2023-08-29 at 15 05 47" src="https://github.com/woocommerce/woocommerce-blocks/assets/3966773/35fbce4d-09da-4c4d-b535-0f76aa786e85"> | <img width="709" alt="Screenshot 2023-08-29 at 15 05 21" src="https://github.com/woocommerce/woocommerce-blocks/assets/3966773/cdb19385-3a7d-49cf-b620-4d5cd5254f55"> |
-
-#### Prevent the Cart block reloading when adding an item to it from the Empty Cart block [#10624](https://github.com/woocommerce/woocommerce-blocks/pull/10624)
-
-1. Add an item to your cart and go to the Cart block. Ensure it renders correctly.
-2. Remove the item from your cart and ensure you see the Empty Cart block.
-3. From the Empty Cart block, add an item to your cart.
-4. Notice the cart loads and shows the new item.
-5. Ensure the page does not reload during this process.
-6. Create a page and add Products (Beta) to it. Save the page.
-7. Visit the page and add items to your cart. Ensure they work and you can go to Cart -> Checkout successfully and place the order.
-8. Repeat step 6 and 7 with the Products by Attribute block, and Product Collection block.
-
-#### Product button: Sync temporary number of items on instantiation [#10604](https://github.com/woocommerce/woocommerce-blocks/pull/10604)
-
-1. Add a Product Collection block
-2. Add items to the cart
-3. Paginate to a different page
-4. Add more items to the cart
-5. Check that when paginating back and forth, it shows the correct number of items
-6. Open the MiniCart block
-7. Change the number of items of products that are in the same page
-8. Check that the animation is triggered
-9. Change the number of items of products that are not in the same page
-10. Navigate to the page that has those products and check that the number of items is correct
-11. Use a cache plugin (or simulate a cached page)
-12. Check everything again
-
-#### Customer Account Block: Fixed an issue that would make the account icon scale incorrectly in certain environments (prominently in the TT1 theme) [#10533](https://github.com/woocommerce/woocommerce-blocks/pull/10533)
-
-1. Add Customer Account block to a page.
-2. Set the font-size to `XL`.
-3. Activate the Twenty-Twenty-One theme.
-4. Ensure the size of the icon is the same in the editor and the front-end, and is aligned with the font size of the label.
-
-| Before | After |
-| ------ | ----- |
-| <img width="711" alt="Screenshot 2023-08-10 at 23 09 08" src="https://github.com/woocommerce/woocommerce-blocks/assets/1847066/d5480538-beac-4b87-b944-2092d9e20329"> | <img width="704" alt="Screenshot 2023-08-10 at 23 09 31" src="https://github.com/woocommerce/woocommerce-blocks/assets/1847066/bc9c240f-83c3-4833-9605-e93be63190be"> |
-
-#### Customer Account Block: Fixed an issue that caused padding to be inconsistent between the editor and the front-end [#10476](https://github.com/woocommerce/woocommerce-blocks/pull/10476)
-
-1. Add a Customer Account block to a post or page.
-2. For easier readability of padding, assign it a background color.
-3. Notice that there is a `0.5em` padding in the container, and the same around the icon.
-4. Save it and test in on the front-end: padding should be the same.
-5. Go back to the editor and remove the icon (select: “Text only” from the Inspector Controls).
-6. Padding should decrease to just `0.5em` around the box.
-7. Save and test it on the front-end: padding should be the same.
-
-| Before | After |
-| ------ | ----- |
-| <img width="591" alt="Screenshot 2023-08-04 at 21 13 02" src="https://github.com/woocommerce/woocommerce-blocks/assets/1847066/40d58f4d-8d3c-46b8-833e-b21b5d736911"> | <img width="698" alt="Screenshot 2023-08-04 at 21 13 16" src="https://github.com/woocommerce/woocommerce-blocks/assets/1847066/a70b145f-9dbe-4f61-a98c-6ba987d09a23"> |
-
-## Feature Plugin
-
-### Bug Fixes
-
-#### Fixed notice displaying on Cart and Checkout template [#10151](https://github.com/woocommerce/woocommerce-blocks/pull/10151)
-
-1. Activate a based theme like TT3
-2. Go to Appearance > Editor > Templates > Manage All Templates
-3. Click the three dots next to the Cart and Checkout templates and then clear customizations
-4. Add product via add to cart link. (Eg: [http://localhost/cart/?add-to-cart=34](http://localhost/cart/?add-to-cart=34))
-5. Verify that the notice stating that the item was added to the cart appears
diff --git a/plugins/woocommerce/client/blocks/docs/internal-developers/testing/releases/1111.md b/plugins/woocommerce/client/blocks/docs/internal-developers/testing/releases/1111.md
deleted file mode 100644
index 615e35e5ad3..00000000000
--- a/plugins/woocommerce/client/blocks/docs/internal-developers/testing/releases/1111.md
+++ /dev/null
@@ -1,11 +0,0 @@
-# Testing notes and ZIP for release 11.1.1
-
-Zip file for testing: [woocommerce-gutenberg-products-block.zip](https://github.com/woocommerce/woocommerce-blocks/files/12664716/woocommerce-gutenberg-products-block.zip)
-
-## WooCommerce Core
-
-### Bug Fixes
-
-#### Improved escaping around attributes [bb37d05](https://github.com/woocommerce/woocommerce-blocks/commit/bb37d056bccccd714fa6617c5da6f50d54837f41)
-
-1. Smoke test blocks to ensure all of the escaped attributes render as expected.
diff --git a/plugins/woocommerce/client/blocks/docs/internal-developers/testing/releases/1112.md b/plugins/woocommerce/client/blocks/docs/internal-developers/testing/releases/1112.md
deleted file mode 100644
index 7e3208f29cc..00000000000
--- a/plugins/woocommerce/client/blocks/docs/internal-developers/testing/releases/1112.md
+++ /dev/null
@@ -1,11 +0,0 @@
-# Testing notes and ZIP for release 11.1.2
-
-Zip file for testing: [woocommerce-gutenberg-products-block.zip](https://github.com/woocommerce/woocommerce-blocks/files/12742332/woocommerce-gutenberg-products-block.zip)
-
-## WooCommerce Core
-
-### Bug Fixes
-
-#### Improved escaping [565cd04](https://github.com/woocommerce/woocommerce-blocks/commit/565cd0461dbcc21fa04f77a736da443fc56a054d)
-
-1. Smoke test blocks to ensure all of the escaped attributes render as expected.
diff --git a/plugins/woocommerce/client/blocks/docs/internal-developers/testing/releases/1113.md b/plugins/woocommerce/client/blocks/docs/internal-developers/testing/releases/1113.md
deleted file mode 100644
index 744ce37b65b..00000000000
--- a/plugins/woocommerce/client/blocks/docs/internal-developers/testing/releases/1113.md
+++ /dev/null
@@ -1,16 +0,0 @@
-# Testing notes and ZIP for release 11.1.3
-
-Zip file for testing: [woocommerce-gutenberg-products-block.zip](https://github.com/woocommerce/woocommerce-blocks/files/13296296/woocommerce-gutenberg-products-block.zip)
-
-## WooCommerce Core
-
-### Bug Fixes
-
-#### Fix Single Product Classic Template block not showing on the front-end. [11455](https://github.com/woocommerce/woocommerce-blocks/pull/11455)
-
-1. Enable WordPress 6.4.
-2. Enable a block theme.
-3. Go to Site Editor → Single Product template.
-4. Remove the blockified template and add the “Classic Template” block.
-5. Save and check the front-end.
-6. Check that the template is correctly rendered on the front-end.
diff --git a/plugins/woocommerce/client/blocks/docs/internal-developers/testing/releases/1120.md b/plugins/woocommerce/client/blocks/docs/internal-developers/testing/releases/1120.md
deleted file mode 100644
index ec3af9a7a3e..00000000000
--- a/plugins/woocommerce/client/blocks/docs/internal-developers/testing/releases/1120.md
+++ /dev/null
@@ -1,360 +0,0 @@
-# Testing notes and ZIP for release 11.2.0
-
-Zip file for testing: [woocommerce-gutenberg-products-block.zip](https://github.com/woocommerce/woocommerce-blocks/files/12739037/woocommerce-gutenberg-products-block.zip)
-
-
-## WooCommerce Core
-
-### Related Products: hide the block outside of Single Product Template and Single Product block [#10978](https://github.com/woocommerce/woocommerce-blocks/pull/10978)
-
-1. Go to Single Product template
-2. Try to add "Related Products" and "Product Reviews" blocks
-3. **Expected:** they should be available in the inserter and should be added normally
-4. Save and go to frontend
-5. Verify there's no fatal error
-
----
-
-1. Go to Product Catalog template
-2. Try to add "Related Products" and "Product Reviews" blocks
-3. **Expected:** they **should NOT** be available in inserter
-4. Add Single Product block
-5. Try to add "Related Products" and "Product Reviews" in scope of Single Product block
-6. **Expected:** they should be available in the inserter and should be added normally
-7. Save and go to frontend
-8. Verify there's no fatal error
-
----
-
-1. Create new post
-2. Try to add "Related Products" and "Product Reviews" blocks
-3. **Expected:** they **should NOT** be available in inserter
-4. Add Single Product block
-5. Try to add "Related Products" and "Product Reviews" in scope of Single Product block
-6. **Expected:** they **should NOT** be available in inserter
-
-
-### Blockified Order Confirmation [#10056](https://github.com/woocommerce/woocommerce-blocks/pull/10056)
-
-1. Go to Appearance > Editor > Templates > Order Confirmation
-2. Convert the legacy order confirmation block to individual blocks using the "transform into blocks" button. Confirm the new blocks appear.
-3. Focus on each new block and confirm there is an appropriate icon, title, description, and style controls for each. Play around with text colours, background colours, and any other options available to ensure changes apply in the editor.
-4. Save changes.
-5. Go to the store frontend, add some items to the cart, and place an order.
-6. Confirm the confirmation page matches the styling you applied and all blocks are present. You can leave this tab open for testing.
-7. Edit the order confirmation page again. Remove some blocks, for example headings.
-8. Save changes, then refresh the confirmation page on the frontend. Confirm changes have applied.
-
-#### Downloadable Products
-
-1. Add a downloadable product to your cart and complete checkout.
-2. The order confirmation page will be shown—no downloads will be visible. Leave this tab open.
-3. In a new tab, go to store admin and edit the order you just placed. Change its status to "processing". This will grant access to downloads.
-4. Go back to the confirmation page and refresh.
-5. Confirm the download section is now visible.
-
-#### Unauthenticated Views
-
-1. Place an order as a logged in admin user. Leave the confirmation page open.
-2. Copy the page address.
-3. Open up a new incognito browser window, or better yet, using a different browser. Paste the URL from earlier.
-4. Confirm no order details are visible—you should only see some text and a login link as follows:
-
-
-
-1. Close all tabs and log out from your store.
-2. Place a new order as a guest. Confirm the order confirmation page shows some order details, but hides email address, payment method, and the full billing/shipping address. This is the limited view that guests can see.
-3. Leave the confirmation page open. Copy the page address.
-4. Open up a new incognito browser window, or better yet, using a different browser. Paste the URL from earlier.
-5. You should still see details if within 10 minutes of placing the order.
-6. Wait 10 minutes then refresh the page.
-7. Confirm you see a message asking you to either login or fill out the form to see order details as follows:
-
-
-
- 1. Enter the incorrect email. See a notice rejecting the request "We were unable to verify the email address you provided. Please try again."
- 2. Enter the correct email. See limited order details.
- 3. Edit the URL of the page to remove the order key. For example, `checkout/order-received/1772/?key=wc_order_GAE4XxQ4k7E77` would become `checkout/order-received/1772`
- 4. You should no longer be able to provide your email and see order details. The key is required. You will see a generic message only.
-
-
-
-
-### Refactor Cart and Checkout Page Templates [#10773](https://github.com/woocommerce/woocommerce-blocks/pull/10773)
-
-Before testing, take note of the frontend appearance of the cart/checkout pages.
-
-1. Using a **non-block** based theme such as Storefront, ensure your existing cart/checkout is unchanged as a result of testing.
-2. Use a **block** based theme such as Twenty Twenty Three
-3. Go to Appearance > Editor > Templates, navigate to both `Page: Cart` and `Page: Checkout`. For both, click the three dots in the inspector and "revert customizations". This will remove any existing template customizations or past migration.
-4. Visit the cart/checkout pages on the frontend and ensure the page contents matches the actual cart/checkout page content.
-5. Edit the contents of the checkout **page**, not the template, either from Admin > Pages or Admin > Appearance > Editor > Pages. After saving, confirm the changes are shown on the frontend.
-6. Go to Appearance > Editor > Templates and edit the Page: Checkout template. Edit something in the **template**. Save and confirm the frontend shows your change. When adding content to the template, make sure you're not within **Group > Checkout Page**, as this will save to the page not the template. Insert something after or outside of that group.
-7. Go to Appearance > Editor > Templates and edit the Page: Checkout template. Click the three dots in the side bar and "revert customizations". Ensure the frontend shows the same default template again without your changes.
-8. Switch to a block based theme with a custom cart/checkout template. For example [FotaWP](https://en-gb.wordpress.org/themes/fotawp/)
-9. After activating the theme, view the checkout page. You should see a custom checkout template (this is from the theme).
-10. Switch back to Twenty Twenty Three—the previous template will be restored.
-
-### Classic Shortcode Block
-
-1. Delete your main cart and checkout pages
-2. Go to WooCommerce > Status > Tools > and use the tool to recreate the default woocommerce pages
-3. Now if you go to the newly recreated Cart/Checkout pages you'll see a placeholder block which when focussed/clicked will look something like this (copy may differ):
-
-
-
-1. Ensure you see a shortcode cart/checkout on the frontend still.
-2. Go to Appearance > Editor > Templates and then Page: Cart and Page: Checkout. Both should show the placeholder.
-3. Go to Appearance > Editor > Pages and then the cart/checkout pages. Both should show the placeholder.
-4. Edit the page again. Click the classic shortcode placeholder then click the 'convert to blocks' button. Save and view the frontend. You should now see checkout blocks instead of the page content.
-5. Likewise, viewing the Templates + Pages in site editor should show the blocks.
-
-### Page Permalink Management
-
-1. Go to WooCommerce > Settings > Advanced and ensure you see classic dropdowns for Cart and Checkout page selector. Compare this with a non blocks theme installation and ensure there are no differences.
-2. Edit Cart and Checkout pages, and changes the titles. Go back to the selectors and ensure it is reflected there.
-3. Edit Cart and Checkout pages permalinks. Ensure Cart and Checkout work on the selected URLs.
-
-### Test Page Wrapper on Site Editor
-
-1. Got to Appearance > Editor > Templates > Manage all templates
-2. Ensure that customizations are deleted for Cart and Checkout templates (if not click the 3 dots next to the template and delete them)
-3. Open the templates for each, then edit content with the page placeholder block. Save.
-4. Exit the site editor and open Cart and Checkout pages for each. Ensure you see the changes added in the site editor.
-5. Verify the changes are reflected on the Cart and Checkout by performing a test order.
-
-### Developer testing
-
-1. Create a fresh instance of JN with previous version of WooCommerce blocks and save some customizations to your cart/checkout page tenplates.
-2. Install and activate the zip file for this release.
-3. You should now see only one "Page: Checkout" template, and it should contain the customizations you previously made to checkout.
-
-### Fix: Password Protection not respected on single product template [#10999](https://github.com/woocommerce/woocommerce-blocks/pull/10999)
-
-1. Ensure you are using the Blockified Single Product Template.
-2. Create a product with password protection.
-3. Visit the Product.
-4. Ensure that the password form is added and the other blocks related to the Single Product Template are not visible.
-
-### Checkout Block: Prevent changes in the selected shipping method when new rates are added or removed [#10457](https://github.com/woocommerce/woocommerce-blocks/pull/10457)
-
-1. Enable local pickup.
-2. Go to the Checkout block page, and add an address for which you don't have a shipping zone defined without changing the selected shipping method.
-3. Confirm local pickup is selected as a shipping method for the address, and shipping is not available for the given address.
-
-
-
-1. In another tab, open shipping zones and add a new rate to your current zone.
-2. Refresh checkout.
-3. Confirm local pickup is selected as a shipping method for the address, and shipping is also available for the given address.
-
-
-
-
-### Product Collection: Transfer layout options from Toolbar to Inspector controls [#10922](https://github.com/woocommerce/woocommerce-blocks/pull/10922)
-
-#### **Case 1: Normal flow**
-
-1. Create a new post.
-2. Add the product collection block.
-3. **Verify:** In the sidebar settings, the options for layout should be visible with 'Grid' being the default selection. Refer to this screenshot for guidance:
-
-4. **Verify:** The products in the editor should be displayed in a grid view by default. Publish the post and ascertain that the grid view is maintained on the frontend.
-5. Change the layout setting to 'Stack'. Ensure that in the editor, products now appear in a single column. Save or update the post and check the frontend to confirm the single column display is applied there as well.
-
-#### **Case 2: Reset button**
-
-1. Create a new post and add the product collection block.
-2. Open the sidebar settings and note the absence of a 'RESET' option in the layout menu, indicated in the screenshot:
-
-
-
-1. Change the layout from 'Grid' to 'Stack'. Open the settings menu again to find the 'RESET' button now visible, as shown here:
-
-
-
-1. Verify that clicking the 'RESET' button changes the layout back to 'Grid'. Similarly, clicking the 'Reset all' button should revert the layout to 'Grid'.
-
-### Single Product: Fix the Align setting [#10977](https://github.com/woocommerce/woocommerce-blocks/pull/10977)
-
-1. `Product Hero` pattern to a new page.
-2. Change the `Align` to full.
-3. Make sure the change is reflected on the front end.
-
-### Update `postcode-validator` to 3.8.15 to validate "new" Taiwanese postcodes [#10924](https://github.com/woocommerce/woocommerce-blocks/pull/10924)
-
-1. Add an item to your cart.
-2. Go to the Checkout block.
-3. Enter your address and choose Taiwan as the country. Enter a postcode with 5 digits. (`12345`) verify there is no validation error.
-4. Enter a postcode with 6 digits (`123456`), verify there is no validation error.
-5. Check out successfully using a Taiwanese postcode.
-
-### Hide unexpected bullet point in Product Collection on Storefront [#10945](https://github.com/woocommerce/woocommerce-blocks/pull/10945)
-
-1. Use Storefront theme
-2. Create new post
-3. Add Product Collection block
-4. Make sure there are no bullet points before the products
-5. Publish the post and go to frontend
-6. Make sure there are no bullet points before the products
-
-| Before | After |
-| --- | --- |
-|  |  |
-
-### Add custom regex for validating Nicaraguan postal codes [#10928](https://github.com/woocommerce/woocommerce-blocks/pull/10928)
-
-1. Add the Cart block to a test page.
-2. Enable the `Shipping calculator` in the Shipping inner block.
-3. Add the Checkout block to another test page.
-4. Add a test product to the cart via the frontend.
-5. Navigate to the test page with the Cart block and click `Change address` in the Shipping section.
-6. Select `Nicaragua` as the country and enter a 5-digit postal code (e.g., `13024`).
-7. See that that validation passes.
-8. Navigate to the test page with the Checkout block.
-9. Repeat steps 6-7.
-10. Change the postal code to `01234`, and see that the validation fails.
-11. Change the postal code to anything other than 5 digits, and see that the validation also fails.
-
-
-### Add pattern chooser in Product Collection [#10876](https://github.com/woocommerce/woocommerce-blocks/pull/10876)
-
-1. Go to Editor
-2. Add Product Collection blocks with different configurations, e.g.
- - one that inherits query from template
- - one that has "On Sale" filter enabled with limited number of products per page
- - one that shows handpicked products
-3. Focus on first Product Collection block you added and click "Choose pattern"
-4. Expected: Modal with 4 patterns is displayed
-5. Click some pattern
-6. Expected: Layout of Product Collection has changed reflecting what you chose, but the query settings are preserved (e.g. enabled inherit query from template or "On Sale" filter)
-7. Repeat for other Product Collection blocks.
-
-#### Screencast
-
-<https://github.com/woocommerce/woocommerce-blocks/assets/20098064/edfd2ddc-4cf1-41aa-a375-bbd5201bb603>
-
-
-### BlockTemplatesController: Check that $attributes['theme'] value isset before operating on it [#10879](https://github.com/woocommerce/woocommerce-blocks/pull/10879)
-
-1. Load WooCommerce template parts in the Site Editor and check they are all there and load as expected.
-2. Customize the template parts (e.g. Checkout Header) and check this is reflect on the frontend.
-3. Clear the customizations, revisit the frontend and check they are expected.
-
-
----
-
-### Should be tested by the development team exclusively
-
-#### Remove order and checkout order endpoints experimental flag [#11022](https://github.com/woocommerce/woocommerce-blocks/pull/11022)
-
-1. Test the [Add an endpoint for getting pay for order orders](https://github.com/woocommerce/woocommerce-blocks/pull/8960) and [checkout order](https://github.com/woocommerce/woocommerce-blocks/pull/10287) endpoints.
-
-#### WooExpress: Fix Checkout and Cart Blocks Editor Crash [#11024](https://github.com/woocommerce/woocommerce-blocks/pull/11024)
-
-You'll need a WooExpress site. You can create a free [WooExpress site](https://woocommerce.com/express/).
-
-To upload Woo Blocks ZIP file, you can either upgrade your WooExpress site or use the CLI.
-
-##### Ensure the block-locking feature is still working
-
-1. Go to `Appearance -> Editor -> Templates -> Checkout` (or Cart)
-2. Clear customizations of the Checkout (or Cart) template if necessary and reload the page
-
-
-
-1. Click on `Edit` to access the template editor
-
-
-
-1. Within the Checkout (or Cart) template editor, open the `List View` and try to delete the `Gift Card Form` or the `Gift Card Totals` Blocks. Untick `Prevent removal` under the `Unlock` option:
-
-
-
-
-
-1. Ensure the `Gift Card Form` (or `Gift Card Totals`) Block isn't deleted (It's actually being reinserted each time we click on `Delete`).
-
-##### Test removing the Checkout (or Cart) Blocks in the Editor
-
-1. Try to delete the Checkout (or Cart) Block
-
-
-
-1. Ensure the Checkout (or Cart) Block is successfully deleted
-
-#### Store Customization > Schedule an action to update the patterns content whenever the business description is changed [#10956](https://github.com/woocommerce/woocommerce-blocks/pull/10956)
-
-1. Install and activate the `woo-ai` plugin (it is available within the [WooCommerce monorepo](https://github.com/woocommerce/woocommerce), under the plugins directory).
-2. From your dashboard, head over to WooCommerce > Settings > Advanced > Features
-3. Fill out a description for your business and save
-
-
-
-1. Now head over to Tools > Scheduled Actions
-2. Search for the woocommerce_update_patterns_content hook
-3. Make sure the action was successfully scheduled:
-
-
-
-1. If the status is still Pending when you check, click on Run and ensure it is successfully executed. If the status is already Complete, no action is required as the process already finished successfully.
-2. Check your error log and make sure you don't see any PHP errors.
-
-#### Store Customization > Create a new endpoint within Store API for updating patterns with AI-generated content [#10881](https://github.com/woocommerce/woocommerce-blocks/pull/10881)
-
-
-1. Create a new [JN install](https://jurassic.ninja/) with both Jetpack and WooCommerce installed and activated.
-
-2. In your wp-admin, you should see the following section for Jetpack:
-
-
-
-1. Click on "Set up Jetpack" and make sure the connection is successful:
-
-
-
-
-1. Using [Postman](https://www.postman.com/) or any other equivalent app, make a POST request to the following endpoint: `wp-json/wc/store/patterns` (e.g. `https://outside-dwelling.jurassic.ninja/wp-json/wc/store/patterns`). Since you are not authenticated, you should get the following error:
-
-
-
-1. Now, we need to make sure the request works for admin users: you can do so by adding your credentials via Postman directly or, alternatively:
-
-- From your admin screen, click on Tools > Plugin editor:
-
-
-
-- Select the WooCommerce Blocks plugin and add the following within your woocommerce-blocks/woocommerce-gutenberg-products-block.php file:
-
-```php
-function connect_to_endpoint() {
- update_option( 'woocommerce_blocks_allow_ai_connection', true );
-
- $request = new WP_REST_Request( 'POST', '/wc/store/patterns' );
-
- $request->set_param( 'business_description', 'selling art' );
-
- $response = rest_do_request( $request )->get_data();
-
- error_log( print_r( $response, true ) );
-}
-
-add_action( 'admin_init', 'connect_to_endpoint' );
-```
-
-- Now access your JN install via SSH (you can copy the command for access over here:)
-
-
-
-- Head over to your wp-content directory and tail the debug.log file. Example:
-
-```terminal
-cd /srv/users/user964902c9/apps/{insert-your-jurassic-ninja-username-here}/public/wp-content
-tail -f debug.log
-```
-
-- Now go back to your browser and refresh the page in the main admin page e.g. `https://your-site.jurassic.ninja/wp-admin`
-
-- Go back to your terminal and confirm that you can see the following response:
-
-
diff --git a/plugins/woocommerce/client/blocks/docs/internal-developers/testing/releases/1130.md b/plugins/woocommerce/client/blocks/docs/internal-developers/testing/releases/1130.md
deleted file mode 100644
index b0ee2cdc6ab..00000000000
--- a/plugins/woocommerce/client/blocks/docs/internal-developers/testing/releases/1130.md
+++ /dev/null
@@ -1,305 +0,0 @@
-# Testing notes and ZIP for release 11.3.0
-
-Zip file for testing: [woocommerce-gutenberg-products-block.zip](https://github.com/woocommerce/woocommerce-blocks/files/12862192/woocommerce-gutenberg-products-block.zip)
-
-
-## WooCommerce Core
-
-### Condensed Address Form Implementation [11167](https://github.com/woocommerce/woocommerce-blocks/pull/11167)
-
-#### As a logged out guest customer
-
-1. Add something to cart and then go to checkout
-2. Notice the address form is shown
-3. Fill out address. Wait for totals to update.
-4. Refresh the page. Condensed address component should be visible.
-
-#### As a logged in user who has checked out before (has an address)
-
-1. Repeat above tests. Condensed address component should be visible upon entry to checkout.
-2. Click "edit" on the condensed shipping address. Form should be shown instead.
-3. Uncheck "use shipping for billing". Billing address form should be shown.
-4. Change some item of billing address data.
-5. Refresh the page.
-6. Condensed billing address should be shown.
-
-
-
-### Store Customization > Update aspect ratio, icons and default text for the Social: Follow us on social media pattern [11161](https://github.com/woocommerce/woocommerce-blocks/pull/11161)
-
-1. Create a new post
-2. Insert the **Social: Follow us on social media** pattern
-3. Make sure it is correctly rendered both on the editor side and on the front end. The images should all be with a square format.
-4. Make sure the icons have the color set as primary.
-
-| Before | After |
-| ------ | ----- |
-| <img width="1163" alt="Screenshot 2023-10-06 at 10 39 06" src="https://github.com/woocommerce/woocommerce-blocks/assets/15730971/4d8c4dfc-9ade-4070-89cd-1bf8bbd2f538"> | <img width="1158" alt="Screenshot 2023-10-06 at 10 50 19" src="https://github.com/woocommerce/woocommerce-blocks/assets/15730971/5361b577-9c5c-4bff-9273-b564a039dc31"> |
-
-### Add horizontal padding to the Featured Category Triple pattern [11160](https://github.com/woocommerce/woocommerce-blocks/pull/11160)
-
-1. Create a new page or post.
-2. Insert the `Featured Category Triple` pattern.
-3. Check if there's a padding left and right of the pattern, both in the editor and the front end.
-
-### Remove placeholder and pagination [11145](https://github.com/woocommerce/woocommerce-blocks/pull/11145)
-
-1. Create a new page or post.
-2. Insert the `Product Collection 3 Columns`, `Product Collection 4 Columns`, `Product Collection 5 Columns`, and `Product Gallery` patterns.
-3. Check they don't have the pagination or the no results blocks.
-4. Check the image's aspect ratio is portrait (height > width).
-
-| Before | After |
-| ------ | ----- |
-| <img width="1175" alt="before" src="https://github.com/woocommerce/woocommerce-blocks/assets/186112/cc9daafe-52ee-4f23-a852-ca33c46173b1"> | <img width="1168" alt="after" src="https://github.com/woocommerce/woocommerce-blocks/assets/186112/58956139-c68b-4fa2-974e-9e59ed9e5696"> |
-
-### Store Customization > Homepage Template 1: Review layout and spacing in between patterns [11144](https://github.com/woocommerce/woocommerce-blocks/pull/11144)
-
-1. Create a new page or post and insert all the patterns shown in the screenshot below 👇
-
-- `Minimal 5-column products row` corresponds to `Product Collection 5 Columns`
-
-2. Make sure the design is the same and the spacing between patterns matches.
-
-<img width="524" alt="Screenshot 2023-10-02 at 17 39 07" src="https://user-images.githubusercontent.com/15730971/272015191-e07193cc-07e2-4a3e-b88e-29f4654850db.png">
-
-### Store Customization > Replace patterns based on the Products (Beta) block with an equivalent based on the Product Collection block [11134](https://github.com/woocommerce/woocommerce-blocks/pull/11134)
-
-| Old Pattern | Replacement |
-| ------ | ----- |
-| 3-Column Product Row <img width="686" alt="Screenshot 2023-10-04 at 17 12 47" src="https://github.com/woocommerce/woocommerce-blocks/assets/15730971/2c18c4ba-d75a-43b2-aa8d-7e7734363655"> | Product Collection 3 Columns <img width="1227" alt="Screenshot 2023-10-04 at 17 13 37" src="https://github.com/woocommerce/woocommerce-blocks/assets/15730971/6e842ad8-b163-4c02-9900-c6400a039960"> |
-| 1:1 Image 4-Column Product Row <img width="685" alt="Screenshot 2023-10-04 at 17 14 25" src="https://github.com/woocommerce/woocommerce-blocks/assets/15730971/120b128d-b31d-42df-a7de-db128840a9ae"> | Product Collection 4 Columns <img width="1233" alt="Screenshot 2023-10-04 at 17 14 59" src="https://github.com/woocommerce/woocommerce-blocks/assets/15730971/5c95339e-0acb-451d-95f5-966b0c22506a"> |
-| Minimal 5-Column Product Row <img width="688" alt="Screenshot 2023-10-04 at 17 15 54" src="https://github.com/woocommerce/woocommerce-blocks/assets/15730971/4b405ace-ef43-4c70-aa0e-0ce9ed268e4e"> | Product Collection 5 Columns <img width="1229" alt="Screenshot 2023-10-04 at 17 16 32" src="https://github.com/woocommerce/woocommerce-blocks/assets/15730971/cbfce4ca-cdf6-440d-86e2-f3f44a18e373"> |
-| Featured Products 5-Item Grid <img width="1215" alt="Screenshot 2023-10-04 at 17 17 40" src="https://github.com/woocommerce/woocommerce-blocks/assets/15730971/127ccbf4-bbf8-4939-96d4-a97dc9125d26"> | Product Collection: Featured Products 5 Columns <img width="1220" alt="Screenshot 2023-10-04 at 17 18 14" src="https://github.com/woocommerce/woocommerce-blocks/assets/15730971/4703a9df-6ab6-4970-9dbb-f2f35414499f"> |
-
-1. Create a new post
-2. Insert the following patterns: Product Collection 3 Columns, Product Collection 4 Columns, Product Collection 5 Columns, Product Collection: Featured Products 5 Columns
-3. Make sure all of them are using the Product Collection block for rendering in the editor:
-
-<img width="1995" alt="Screenshot 2023-10-04 at 17 23 05" src="https://github.com/woocommerce/woocommerce-blocks/assets/15730971/9d63321a-fad2-41de-835b-2490ce7f9d27">
-
-4. Save and head over to the front end: make sure things are working as expected and the designs match the ones displayed on the screenshots in this PR.
-
-### Store Customization > Homepage Template 3: Review layout and spacing in between patterns [11131](https://github.com/woocommerce/woocommerce-blocks/pull/11131)
-
-1. Create a new page or post and insert all the patterns shown in the screenshot below 👇 (`Featured Products 5-Item Grid` corresponds to `Product Collection: Featured Products 5 Columns`)
-2. Make sure the design is the same and the spacing between patterns matches.
-
-<img width="524" alt="Screenshot 2023-10-02 at 17 39 07" src="https://github.com/woocommerce/woocommerce-blocks/assets/15730971/b72469a2-5b03-4193-b0fb-e1c0eb0e3e24">
-
-### Store Customization > Add default image to Just Arrived pattern [11130](https://github.com/woocommerce/woocommerce-blocks/pull/11130)
-
-1. Create a new post and add the pattern "Just Arrived Full Hero"
-2. Check that it looks like the below screenshots on both desktop and mobile viewports both in the editor and on the frontend.
-
-| Desktop | Mobile |
-| ------ | ----- |
-|  |  |
-
-### Store Customization > Homepage Template 2: Review layout and spacing in between patterns [11129](https://github.com/woocommerce/woocommerce-blocks/pull/11129)
-
-1. Create a new page or post and insert all the patterns shown in the screenshot below 👇
-
-- `1:1 image 4-column products row` corresponds to `Product Collection 4 Columns`.
-- `Minimal 5-column products row` corresponds to `Product Collection 5 Columns`.
-
-2. Make sure the design is the same and the spacing between patterns matches.
-
-<img width="449" alt="Screenshot 2023-10-02 at 17 36 50" src="https://github.com/woocommerce/woocommerce-blocks/assets/15730971/56232ac8-8917-4a7f-96f0-058d88aa11e5">
-
-### Add data-price button attribute containing product price [11117](https://github.com/woocommerce/woocommerce-blocks/pull/11117)
-
-1. Add a page with a Products (Beta), Product by Category or Products by Attribute block on it.
-2. Install Pinterest Tag Helper extension into your browser (I use Chrome for that matter).
-3. Navigate to the page with the added block and click Add to Cart button.
-4. See an AddToCart event inside Pinterest Tag Helper has no value attribute value (it has it set to null, instead of a product price).
-
-
-
-Expected value is not `null`
-
-<img width="1335" alt="All_Products_–_WordPress_Pinterest" src="https://github.com/woocommerce/woocommerce-blocks/assets/9010963/1d023231-3807-4bdc-b641-9d51ae4830cd">
-
-### Store Customization > Wireframe and adjust width for the Just Arrived Full Hero pattern [11115](https://github.com/woocommerce/woocommerce-blocks/pull/11115)
-
-1. Create a new post
-2. Insert the **Just Arrived Full Hero** pattern
-3. Add an image to it and save
-4. Make sure the styles match what is on the screenshots of this PR
-5. Save the post and check the front end: make sure things are working as expected as well
-
-| Desktop | Mobile |
-| ------ | ----- |
-| <img width="1214" alt="Screenshot 2023-10-03 at 17 58 13" src="https://github.com/woocommerce/woocommerce-blocks/assets/15730971/c928007f-ede0-419d-b528-e24ad50d228a"> | <img width="385" alt="Screenshot 2023-10-03 at 18 00 10" src="https://github.com/woocommerce/woocommerce-blocks/assets/15730971/2883b7d8-8b60-4c07-9baa-8c69ec5430fa"> |
-
-### Remove opinionated styles from the Hero Product 3 Split pattern [11110](https://github.com/woocommerce/woocommerce-blocks/pull/11110)
-
-1. Insert the `Hero Product 3 Split` pattern into your page.
-2. Go to Site Editor > Styles and select various color palettes.
-3. Ensure the patterns style changes color based on the selected preferences.
-4. Test in various block themes to ensure it works as expected.
-
-| Before | After |
-| ------ | ----- |
-| <img width="1199" alt="Screenshot 2023-10-03 at 15 29 20" src="https://github.com/woocommerce/woocommerce-blocks/assets/8639742/7e0596c6-9873-4ac5-af98-14e014722008"> | <img width="1217" alt="Screenshot 2023-10-03 at 15 27 59" src="https://github.com/woocommerce/woocommerce-blocks/assets/8639742/960ac65f-468f-42f3-99be-1da28b9a20a5"> |
-
-### Store Customization > Add the Featured Category Cover Image pattern [11109](https://github.com/woocommerce/woocommerce-blocks/pull/11109)
-
-1. Create a new post
-2. Insert the **Featured Category Cover Image** pattern
-3. Make sure the styles match what is on the screenshots of this PR
-4. Save the post and check the front end: make sure things are working as expected as well
-
-| Desktop | Mobile |
-| ------ | ----- |
-| <img width="1214" alt="Screenshot 2023-10-03 at 15 39 56" src="https://github.com/woocommerce/woocommerce-blocks/assets/15730971/cc1a509b-0e4f-448a-8483-0844d9d0068d"> | <img width="377" alt="Screenshot 2023-10-03 at 15 39 45" src="https://github.com/woocommerce/woocommerce-blocks/assets/15730971/68317e43-211c-464e-a511-7a3368a5cbab"> |
-
-### Add fee ID/key to parent cart and checkout block [11054](https://github.com/woocommerce/woocommerce-blocks/pull/11054)
-
-#### Testing notes for the development team
-
-1. add a fee to you cart, for example by using this code in your functions.php
-
-```php
-add_action( 'woocommerce_cart_calculate_fees', function( $cart ) {
- $cart->add_fee( 'Fee 0', 5, true );
- $cart->add_fee( 'Fee 2', 10, true );
- $cart->add_fee( 'Fee 3', 50, true );
-});
-```
-
-2. go to your cart or checkout block
-3. check the CSS classes of the fee elements with your browser developer tool
-
-
-
-### Update the sidebar notice we show for incompatible extensions [10877](https://github.com/woocommerce/woocommerce-blocks/pull/10877)
-
-#### Testing notes for the development team
-
-##### Test updated text
-
-1. Install and activate the [Coinbase Commerce extension](https://wordpress.org/plugins/coinbase-commerce/).
-2. Install and activate the [Paystack WooCommerce Payment Gateway extension](https://wordpress.org/plugins/woo-paystack/). You should check `Enable Paystack` in its settings.
-3. Create a test page and add the Checkout block to it.
-4. Open the settings sidebar, if not already open.
-5. Verify that the incompatibility notice lists the `Coinbase` and `Paystack` extensions:
-<img width="280" alt="Screenshot 2023-09-22 at 19 57 49" src="https://github.com/woocommerce/woocommerce-blocks/assets/3323310/f2779b98-0283-48fb-a1e5-fd43aa82bb46">
-
-> **Note**
-> If the compatibility notice does not appear, then open the inspector, go to `Application » Local Storage`, select your local site, remove the entry `wc-wc-blocks_dismissed_incompatible_payment_gateways_notices`, and refresh the page:
-<img width="1279" alt="Screenshot 2023-09-22 at 19 58 40" src="https://github.com/woocommerce/woocommerce-blocks/assets/3323310/0d34d3c9-9330-42cd-8242-1bb95a08ba1e">
-
-##### Test display of incompatible extensions
-
-1. Install and activate the following three helper plugins:
-
- - [helper-plugin-1.zip](https://github.com/woocommerce/woocommerce-blocks/files/12701036/helper-plugin-1.zip)
- - [helper-plugin-2.zip](https://github.com/woocommerce/woocommerce-blocks/files/12701039/helper-plugin-2.zip)
- - [helper-plugin-3.zip](https://github.com/woocommerce/woocommerce-blocks/files/12701041/helper-plugin-3.zip)
-
-2. Create a test page and add the Checkout block to it.
-4. Open the settings sidebar, if not already open.
-5. Verify that the incompatibility notice lists the `A → Incompatible Extension`, `Coinbase`, `N → Incompatible Extension
-`, `Paystack` and `Z → Incompatible Extension` extensions:
-<img width="277" alt="Screenshot 2023-09-22 at 20 12 20" src="https://github.com/woocommerce/woocommerce-blocks/assets/3323310/f86e5ce1-6a1b-4ffa-8c24-a8b88fabfe7a">
-
-##### Test closing of sidebar notice
-
-1. Ensure that you executed the previous test case.
-2. Dismiss the incompatibility sidebar notice by clicking on the X in the upper-right corner.
-3. Refresh the page and verify that the incompatibility sidebar notice remains hidden.
-
-<table>
-<tr>
-<td valign="top">Before:
-<br><br>
-<img width="279" alt="Screenshot 2023-09-22 at 20 23 22" src="https://github.com/woocommerce/woocommerce-blocks/assets/3323310/c8be0e82-fddc-46f2-a8f7-eabda60e3d31">
-</td>
-<td valign="top">After:
-<br><br>
-<img width="277" alt="Screenshot 2023-09-22 at 20 12 20" src="https://github.com/woocommerce/woocommerce-blocks/assets/3323310/f86e5ce1-6a1b-4ffa-8c24-a8b88fabfe7a">
-</td>
-</tr>
-</table>
-
-### Fix: Store Notices block breaks page editors [11165](https://github.com/woocommerce/woocommerce-blocks/pull/11165)
-
-1. Edit a page.
-2. Add the Store Notices Block.
-3. Try Saving the page.
-4. See no error. The page is saved successfully.
-
-| Before | After |
-| ------ | ----- |
-| <img width="957" alt="image" src="https://github.com/woocommerce/woocommerce-blocks/assets/5423135/c2a23518-5ccc-4aee-969c-311c58aa2eaf"> | <img width="953" alt="image" src="https://github.com/woocommerce/woocommerce-blocks/assets/5423135/7c380762-7ca1-466d-a03a-8e6c2a3682f1"> |
-
-### Store Customization > Ensure the Just Arrived Full Hero pattern can have an AI selected image assigned to it [11159](https://github.com/woocommerce/woocommerce-blocks/pull/11159)
-
-1. Access the JN install with the credentials provided here > p1696409554974299-slack-C053716F2H2
-2. Create a new post
-3. Insert the **Just Arrived Full Hero** pattern
-4. Make sure it is correctly rendered both on the editor side and on the front end.
-
-PS: the background image doesn't necessarily have to match what is displayed in the screenshot below; those are dynamically changed depending on the business description.
-
-| Before | After |
-| ------ | ----- |
-| <img width="1207" alt="Screenshot 2023-10-06 at 09 55 46" src="https://github.com/woocommerce/woocommerce-blocks/assets/15730971/a79aa838-1df2-470a-a00b-00776146e87a"> | <img width="1208" alt="Screenshot 2023-10-06 at 09 55 12" src="https://github.com/woocommerce/woocommerce-blocks/assets/15730971/94170c78-463b-4eb9-be32-33dea06f1261"> |
-
-### Store Customization > Fix the Testimonials 3 Columns pattern [11158](https://github.com/woocommerce/woocommerce-blocks/pull/11158)
-
-#### Testing notes for the development team
-
-1. Create a new post
-2. Insert the Testimonials 3 Columns pattern
-3. Make sure it works as expected both on the editor side and on the front end
-4. Check your PHP error log and confirm you don't see any errors related to this pattern in particular.
-
-| Before | After |
-| ------ | ----- |
-| <img width="1278" alt="Screenshot 2023-10-06 at 08 45 52" src="https://github.com/woocommerce/woocommerce-blocks/assets/15730971/ce3eadb2-9109-4649-b4df-0980bbdb4497"> | <img width="1253" alt="Screenshot 2023-10-06 at 08 46 02" src="https://github.com/woocommerce/woocommerce-blocks/assets/15730971/53db772f-653e-4fc8-b5bb-d6515b2dc8cf"> |
-
-### Pattern: fetch product id on the JS side [11138](https://github.com/woocommerce/woocommerce-blocks/pull/11138)
-
-1. Open the post editor.
-2. Add the `Product hero` and `Product details listing` patterns.
-3. Ensure that a product is visible.
-
-### Force 100% width for combobox in checkout block [11133](https://github.com/woocommerce/woocommerce-blocks/pull/11133)
-
-1. Install and activate the Twenty Twenty-Three theme.
-2. Install and activate the Gutenberg plugin.
-3. Create a test page and add the Checkout block.
-4. Edit the page and verify that the Country/Region and State fields are full width.
-
-
-
-### Icon should use current color on checkout error [11127](https://github.com/woocommerce/woocommerce-blocks/pull/11127)
-
-1. With TT3 go to Appearance > Editor, edit one template and open the styles sidebar. Select a dark style variation, like Pilgrimage.
-2. In the frontend, add a product to your cart and go to the Checkout page with the Checkout block.
-3. In the admin, mark that product as out of stock.
-4. Reload the Checkout page.
-5. Icon color should match text.
-
-| Before | After |
-| ------ | ----- |
-|  |  |
-
-### Single Product block: Redirect to the cart page after successful addition setting isn't respected [11151](https://github.com/woocommerce/woocommerce-blocks/pull/11151)
-
-#### Test 1: Redirect shopper to the cart page after successful addition when setting is enabled
-
-1. Enable redirects to the cart page with the setting under WooCommerce > Settings > Products > General > Add to cart behaviour > Check - Redirect to the cart page after successful addition
-2. Create a product and a page with an FSE theme.
-3. Add the product to the page with the Single Product block.
-4. View the page and click "Add to cart". Make sure the shopper is redirected to the Cart page and the product was correctly added to the cart
-
-#### Test 2: Keep shopper at the same page when setting is disabled
-
-1. Enable redirects to the cart page with the setting under WooCommerce > Settings > Products > General > Add to cart behaviour > Check - Redirect to the cart page after successful addition
-2. Create a product and a page with an FSE theme.
-3. Add the product to the page with the Single Product block.
-4. View the page and click "Add to cart". Make sure the shopper is NOT redirected to the Cart page;
-5. Visit the Cart page and make sure the product was correctly added to the cart.
diff --git a/plugins/woocommerce/client/blocks/docs/internal-developers/testing/releases/1131.md b/plugins/woocommerce/client/blocks/docs/internal-developers/testing/releases/1131.md
deleted file mode 100644
index ca95cee1b18..00000000000
--- a/plugins/woocommerce/client/blocks/docs/internal-developers/testing/releases/1131.md
+++ /dev/null
@@ -1,14 +0,0 @@
-# Testing notes and ZIP for release 11.3.1
-
-Zip file for testing: [woocommerce-gutenberg-products-block.zip](https://github.com/woocommerce/woocommerce-blocks/files/12920313/woocommerce-gutenberg-products-block.zip)
-
-## WooCommerce Core
-
-### Bug Fixes
-
-#### Revert #10032 so All Products renders in the frontend [11263](https://github.com/woocommerce/woocommerce-blocks/pull/11263)
-
-1. Go to Editor
-2. Add All Products block
-3. Save and go to frontend
-4. All Products block is correctly rendered and there's no console errors related to this block
diff --git a/plugins/woocommerce/client/blocks/docs/internal-developers/testing/releases/1140.md b/plugins/woocommerce/client/blocks/docs/internal-developers/testing/releases/1140.md
deleted file mode 100644
index b94d1b78cfd..00000000000
--- a/plugins/woocommerce/client/blocks/docs/internal-developers/testing/releases/1140.md
+++ /dev/null
@@ -1,394 +0,0 @@
-<!-- markdownlint-disable MD033 -->
-<!-- markdownlint-disable MD029 -->
-# Testing notes and ZIP for release 11.4.0
-
-Zip file for testing: [woocommerce-gutenberg-products-block.zip](https://github.com/woocommerce/woocommerce-blocks/files/13127290/woocommerce-gutenberg-products-block.zip)
-
-## WooCommerce Core
-
-### Enhancements
-
-#### Store Customization > Update the "Large Footer" pattern [11381](https://github.com/woocommerce/woocommerce-blocks/pull/11381)
-
-1. Create a new page or post.
-2. Insert the `Large Footer` pattern.
-3. Check that it looks like the design.
-
-| Before | After |
-| ------ | ----- |
-| <img width="1327" alt="Screenshot 2023-10-20 at 13 12 39" src="https://github.com/woocommerce/woocommerce-blocks/assets/186112/f5b3ed9c-3f42-4104-aab4-8b5a6de7fc96"> | <img width="1329" alt="Screenshot 2023-10-20 at 13 12 07" src="https://github.com/woocommerce/woocommerce-blocks/assets/186112/eb2da305-88c4-434d-8ef9-69166ddb3425"> |
-
-#### [Store Customization] Update the Footer with 3 Menus pattern [11356](https://github.com/woocommerce/woocommerce-blocks/pull/11356)
-
-1. Create a new page or post.
-2. Insert the `Footer with 3 Menus` pattern.
-3. Check the space between menu items is smaller than before.
-
-| Before | After |
-| ------ | ----- |
-|<img width="1305" alt="Screenshot 2023-10-19 at 15 57 55" src="https://github.com/woocommerce/woocommerce-blocks/assets/186112/e911897d-764c-491a-8dae-8bd746342378">|<img width="1292" alt="Screenshot 2023-10-19 at 15 57 13" src="https://github.com/woocommerce/woocommerce-blocks/assets/186112/c4023cc8-9ee9-4cf8-a947-6358e0346bc6"> |
-
-#### [Store Customization] Update the Social pattern [11355](https://github.com/woocommerce/woocommerce-blocks/pull/11355)
-
-1. Create a new page or post.
-2. Add the `Social: Follow us on social media` pattern.
-3. Save and check that the social icons align to the left on a mobile screen size.
-
-| Before | After |
-| ------ | ----- |
-| <img width="367" alt="Screenshot 2023-10-19 at 15 43 46" src="https://github.com/woocommerce/woocommerce-blocks/assets/186112/871bc990-30a7-4710-8f8e-93dc539b15a6"> | <img width="378" alt="Screenshot 2023-10-19 at 15 42 34" src="https://github.com/woocommerce/woocommerce-blocks/assets/186112/59966839-9fa5-4c89-a97a-6e431e60e9a8"> |
-
-#### [Store Customization] Re-enable the Product Hero 2 Column 2 Row pattern [11346](https://github.com/woocommerce/woocommerce-blocks/pull/11346)
-
-1. Create a new page or post.
-2. Insert the `Product Hero 2 Column 2 Row` pattern.
-3. Check it has images and it renders correctly in the editor and the front end.
-
-
-
-#### Product Collection - shrink columns to fit [11320](https://github.com/woocommerce/woocommerce-blocks/pull/11320)
-
-1. Go to Editor
-2. Add Product Collection block
-3. "Shrink columns to fit" is disabled by default. Enable it
-4. Label of columns control should change from "Columns" to "Max Columns"
-5. Play with the "Max Columns" control and make sure it's respected in the Editor
-6. Narrow down the screen width and make sure the number of columns decreases as the screen gets narrower
-7. Save the Editor with couple of different "Max Columns" settings and go to frontend
-8. Narrow down the screen width and make sure the number of columns decreases as the screen gets narrower
-9. Verify frontend on major browsers
-
-| Before | After |
-| ------ | ----- |
-|[before](https://github.com/woocommerce/woocommerce-blocks/assets/20098064/ae3e12e0-b894-46b8-9027-614da9a5fb51)|[after](https://github.com/woocommerce/woocommerce-blocks/assets/20098064/ecc7e75c-c787-486c-a000-8f951c52416e)|
-
-#### [Store Customization] Adjust margins and paddings for the Featured Category Triple [11319](https://github.com/woocommerce/woocommerce-blocks/pull/11319)
-
-1. Create a new page or post.
-2. Add the `Featured Category Triple` pattern.
-3. Check the margin and padding are right in the editor and the front end (check screenshots below).
-
-| Before | After |
-| ------ | ----- |
-| <img width="1177" alt="Screenshot 2023-10-18 at 15 55 33" src="https://github.com/woocommerce/woocommerce-blocks/assets/186112/7092f04e-268e-4341-b87d-8577506c4c52"> | <img width="1214" alt="Screenshot 2023-10-18 at 15 51 15" src="https://github.com/woocommerce/woocommerce-blocks/assets/186112/90e78844-ad5b-4777-aa6c-91c5b95589cb"> |
-
-#### Move Spinner to components package [11317](https://github.com/woocommerce/woocommerce-blocks/pull/11317)
-
-1. Ensure you have two or more shipping zones set up on your site and each zone contains at least one method.
-2. Add an item to your cart and go to the Checkout block.
-3. Change country and observe the shipping options list.
-4. Ensure the spinner shows while the shipping methods update.
-5. Fill in your details and place the order.
-6. On the "Place order" button ensure a spinner shows while it processes.
-
-#### [Store Customization] Fix "Discount Banner" pattern [11315](https://github.com/woocommerce/woocommerce-blocks/pull/11315)
-
-1. Create a new page or post.
-2. Add the `Discount Banner` pattern.
-3. Check that is centered on the page (like the "after" banner in the screenshot 👇).
-4. Check it works well on mobile as well.
-
-
-
-#### Move RadioControland RadioControlAccordion components to components package [11312](https://github.com/woocommerce/woocommerce-blocks/pull/11312)
-
-1. Install [Multiple Packages for WooCommerce](https://wordpress.org/plugins/multiple-packages-for-woocommerce/) and go to WooCommerce > Settings > Multiple Packages. Set the "Group by" option to Product (individual).
-2. Create at least 2 pickup locations (WooCommerce > Settings > Shipping > Local Pickup)
-3. Add multiple products to your cart. Ensure you add one product more than once (so you have 2+ of a single item in the cart)
-4. Visit the checkout
-5. In the shipping options section, switch between different options and make sure the right option is selected and they are greyed out while the http request is in progress.
-6. In the shipping method section, switch to Local Pickup
-7. Select one of the other pickup locations and make sure the right option is selected.
-8. Scroll down to the Payment Options section.
-9. Change the payment method and make sure the right option is selected.
-10. Fill in all the other details, place the order and make sure it goes through ok.
-
-#### [Store Customization] Fix pattern spacing in homepage template 3 [11279](https://github.com/woocommerce/woocommerce-blocks/pull/11279)
-
-1. Create a new page or post.
-2. Add all the patterns mentioned above in order.
-3. Check there is a margin of exactly 80px between all of them.
-
-#### [Store Customization] Fix pattern spacing in homepage template 2 [11278](https://github.com/woocommerce/woocommerce-blocks/pull/11278)
-
-1. Create a new page or post.
-2. Add all the patterns mentioned above in order.
-3. Check there is a margin of exactly `80px` between all of them.
-
-#### [Store Customization] Fix pattern spacing in homepage template 1 [11268](https://github.com/woocommerce/woocommerce-blocks/pull/11268)
-
-1. Create a new page or post.
-2. Add all the patterns mentioned above in order.
-3. Check there is a margin of exactly `80px` between all of them.
-
-#### Add: menu-order orderby option for Product Attribute Terms route [11232](https://github.com/woocommerce/woocommerce-blocks/pull/11232)
-
-1. Edit or create a new page contain Attribute Filter block.
-2. See the attribute terms list sorted by custom order in the Editor.
-3. Check the page on the front end, confirm the terms are also sorted by custom ordering.
-
-#### Move FormattedMonetaryAmount to the components package [11230](https://github.com/woocommerce/woocommerce-blocks/pull/11230)
-
-1. Set a product to be on sale in your store.
-2. Install [Multiple Packages for WooCommerce](https://wordpress.org/plugins/multiple-packages-for-woocommerce/) and go to WooCommerce > Settings > Multiple Packages. Set the "Group by" option to Product (individual).
-3. Set up local pickup (WooCommerce -> Settings -> Shipping -> Local Pickup) and add a couple of locations. Add a price to this.
-4. Set up a couple of shipping options with a price.
-5. Add the `Filter by Price` and `Products (Beta)` blocks to a page on your site.
-6. Go to the page and ensure the Filter by Price block is displaying the correct range of product prices.
-7. Check the product that you set to be on sale, it should be showing the correct sale price, and all other products should be showing the correct price too.
-8. Add 2 products to your cart.
-9. Go to the Cart block. Ensure all products listed in the order summary sidebar show the correct prices.
-10. Ensure the shipping options shown in the Cart block show the correct prices.
-11. Ensure all totals in the Cart block are show the correct price.
-12. Go to the Checkout block.
-13. Ensure the Local Pickup/Shipping selector shows the correct "From" price in the buttons
-<img width="764" alt="image" src="https://github.com/woocommerce/woocommerce-blocks/assets/5656702/39906db8-9833-4a83-8275-11875a479ca1">
-
-14. Select Shipping and scroll down to the shipping section. Ensure all shipping options show the correct price.
-15. Change to Local Pickup and ensure the correct price is shown alongside the pickup location's name.
-16. Ensure the totals are correct in the checkout sidebar.
-17. Repeat steps 5, 6, 7 but with the `All Products block`.
-
-#### Cart and Checkout block transforms for classic shortcodes [11228](https://github.com/woocommerce/woocommerce-blocks/pull/11228)
-
-Prerequisite: Ensure you're already using cart and checkout blocks and you have an incompatible extension installed. You can use `WooCommerce Checkout Field Editor` as an example.
-
-1. Go to WooCommerce > Home. There should be a task list item "Review your shopper's checkout experience". Click it. You should be taken to the page editor.
-2. Edit the cart page
- 1. Edit the cart page
- 2. Focus on the parent cart block and click its icon. You should be able to transform to "classic cart"
- 3. Refresh the editor
- 4. Focus on the cart block. See the incompatibility notice in the sidebar. Click the "switch to classic cart" button.
- 5. Modal should open. Click switch. Block should be replaced.
- 6. In the snackbar bottom left, click "undo". Should revert back to blocks.
-3. Repeat above tests for **checkout block**. Pay attention to wording and ensure any references to "cart" are updated with "checkout" during the process.
-
-#### Move Chip and RemovableChip to components package [11223](https://github.com/woocommerce/woocommerce-blocks/pull/11223)
-
-1. Create a coupon
-2. Add the Active Filters block to a page, add the Filter by Attribute block, the Filter by Stock block, and the Products (Beta) block too.
-3. Visit the page, apply some filters, ensure the chips show up correctly in the Active Filters block. Remove the filters by pressing the `x` on the chip.
-<img width="344" alt="image" src="https://github.com/woocommerce/woocommerce-blocks/assets/5656702/37a83029-e111-4115-b68e-8810e5ac2d57">
-
-4. Visit the Cart block. Apply the coupon you created in step 1. Ensure the coupon shows correctly:
-<img width="248" alt="image" src="https://github.com/woocommerce/woocommerce-blocks/assets/5656702/30638e26-b0ed-48e0-b8ed-21ff3e880b54">
-
-5. Remove the coupon.
-6. Proceed to the Checkout block and re-apply the coupon, ensure it shows correctly and ensure it can be removed.
-
-#### Move CheckboxList and create new blocksComponents package [11214](https://github.com/woocommerce/woocommerce-blocks/pull/11214)
-
-1. Add the `Filter by Rating`, `Filter by Attribute`, `Filter by Stock`, and `Products (Beta)` blocks to a page.
-2. View the page and ensure all the checkboxes work correctly on each of the filter blocks.
-3. View the Cart and then Checkout blocks. Ensure they render correctly.
-4. Check out and ensure the Checkout form works correctly (Should not be affected by this PR but run this test anyway to make sure we didn't miss anything)
-
-#### [Store Customization MVP] Add fallbacks to all the pattern titles, descriptions and buttons [11208](https://github.com/woocommerce/woocommerce-blocks/pull/11208)
-
-1. Create a new page or post.
-2. Insert all the patterns in the `dictionary.json` file.
-3. Make sure they work as expected both on the editor side and on the front end.
-4. Check your PHP error log and confirm you don't see any errors related to any pattern.
-
-#### Make patterns full width and fix margin [11206](https://github.com/woocommerce/woocommerce-blocks/pull/11206)
-
-##### Test the individual patterns
-
-1. Create a new page or post.
-2. Insert the blocks mentioned on the PR description.
-3. Make sure they are `Full width` and look good on the editor and the front end.
-
-**Test the homepage templates**
-Compare the 3 templates show below to the designs: Mrk6SERPZ4KrFHSjM0a8TK-fi-5716_46688
-
-| Homepage 1 | Homepage 2 | Homepage 3 |
-|--------|--------|--------|
-| | ||
-
-#### Product Collection 5 Columns pattern - Update title and price to be rows instead of columns [11205](https://github.com/woocommerce/woocommerce-blocks/pull/11205)
-
-1. Create post or page.
-2. Insert the `Product Collection 5 Columns` pattern and check that the title and price are stacked rather than side-by-side.
-3. Ensure the spacing between the title and price is consistent with other Product Collection patterns. You can check by searching `Product Collection` under the patterns tab to find others.
-
-| Before | After |
-| ------ | ----- |
-|  |  |
-
-#### Product Collection: Featured Products 5 Columns - Remove no results block. [11198](https://github.com/woocommerce/woocommerce-blocks/pull/11198)
-
-1. Create new page or post
-2. add Product Collection: Featured Products 5 Columns pattern
-3. Ensure the `wp:query-no-results` block isn't rendered and that the text `Add text or blocks that will display when a query returns no results.` isn't present.
-
-| Before | After |
-| ------ | ----- |
-|  |  |
-
-### Bug Fixes
-
-#### Remove hardcoded queryIds from patterns that include Product Collection [11290](https://github.com/woocommerce/woocommerce-blocks/pull/11290)
-
-1. Go to Editor
-2. Add patterns:
- - Product Collection Full Grid
- - Product Collection Grid
- - Product Collection Rows
- - Product Collection Simple Grid
- - Product Gallery
-3. Save and go to frontend
-4. Change the pages of each Product Collection
-5. Expected: Each Product Collection changes pages independently and layout of Product Collection doesn't change
-
-#### Fix: Mini-Cart block shows wrong total if theres multiple installs on the same domain [11257](https://github.com/woocommerce/woocommerce-blocks/pull/11257)
-
-1. Setup _Site B_ on domain.com/test and use USD as the currency
-2. See the Site B Mini Cart works as expected.
-3. Setup _Site A_ on domain.com, lets use EUR as the currency
-4. Add something to the cart on _Site A_
-5. Go to _Site B_ and **don't see** its mini-cart affected by site A.
-
-#### Fix inconsistent border focus styles [11203](https://github.com/woocommerce/woocommerce-blocks/pull/11203)
-
-1. Create a test page and add the Checkout block to it.
-2. Go to the frontend and add a product to the cart.
-3. Go to the checkout and select these fields: `Text input`, `Textarea`, `Radio input`, and `Checkbox input`.
-4. Verify that the border focus styles of the `Text input` and `Textarea` are identical.
-5. Verify that the border focus styles of the `Radio input` and `Checkbox input` are identical.
-
-
-> **Important**
-> Only the border focus styles of the `Radio input` and `Textarea` were adjusted in this PR, as the `Text input` and `Checkbox input` focus styles were already correct.
-
-##### `Radio input`
-
-<table>
-<tr>
-<td>Before:
-<br><br>
-<img width="808" alt="Screenshot 2023-10-11 at 15 58 06" src="https://github.com/woocommerce/woocommerce-blocks/assets/3323310/11cdc9bc-e0b0-4934-ac3a-f52ee914ca8b">
-</td>
-<td>After:
-<br><br>
-<img width="823" alt="Screenshot 2023-10-11 at 15 54 25" src="https://github.com/woocommerce/woocommerce-blocks/assets/3323310/536876ad-265e-40a4-bd29-301f3ece2936">
-</td>
-</tr>
-</table>
-
-##### `Textarea`
-
-<table>
-<tr>
-<td>Before:
-<br><br>
-<img width="822" alt="Screenshot 2023-10-11 at 15 58 19" src="https://github.com/woocommerce/woocommerce-blocks/assets/3323310/adf47ee7-1bc7-4516-8f05-e6034c327c6d">
-</td>
-<td>After:
-<br><br>
-<img width="826" alt="Screenshot 2023-10-11 at 15 54 43" src="https://github.com/woocommerce/woocommerce-blocks/assets/3323310/08cf8a34-95fb-4235-8a29-27b74655164f">
-</td>
-</tr>
-</table>
-
-#### Product Gallery pattern: Use the Product Collection block [11194](https://github.com/woocommerce/woocommerce-blocks/pull/11194)
-
-1. Create a page and add the `woocommerce-blocks/product-query-product-gallery` pattern.
-2. Ensure that `Add "remove more" link text` doesn't appear in the editor above the price.
-3. Ensure that it looks accurate on the frontend based on what you see in the editor.
-
-#### Increase number of visible products when cart is empty [11182](https://github.com/woocommerce/woocommerce-blocks/pull/11182)
-
-1. Create a testing site using [WordPress 6.4 Beta 2](https://wordpress.org/news/2023/10/wordpress-6-4-beta-2/).
-2. Ensure that you are using the Twenty Twenty-Four theme.
-3. Ensure that you have at least four products of which at least one of the most recent ones has a discounted price.
-4. Create a test page and add the Cart block to it.
-5. Switch the view from `Filled Cart` to `Empty Cart`.
-6. Verify that four products are visible and that the sales badge is shown within the product image.
-7. Go to the frontend.
-8. Do not add a product to the cart and go directly to the test page with the cart block.
-9. Verify that four products are visible and that the sales badge is shown within the product image.
-
-<table>
-<tr>
-<td>Before:
-<br><br>
-
-<img width="1279" alt="Screenshot 2023-10-09 at 20 05 46" src="https://github.com/woocommerce/woocommerce-blocks/assets/3323310/1c633575-b2ea-4389-9e87-fc98b014407a">
-
-</td>
-<td>After:
-<br><br>
-
-<img width="1280" alt="Screenshot 2023-10-09 at 20 00 50" src="https://github.com/woocommerce/woocommerce-blocks/assets/3323310/58178674-6cfa-49e3-8172-95566bb192cc">
-
-</td>
-</tr>
-</table>
-
-> **Note**
-> Depending on the screen size, the sales badge might overlap or be visible next to the product image.
-
-#### Copy shipping phone to billing phone if sync is checked [10603](https://github.com/woocommerce/woocommerce-blocks/pull/10603)
-
-1. In Checkout, make sure the "use shipping as billing" is filled.
-2. Fill out the phone number.
-3. Uncheck the checkbox, the value should be copied.
-4. Update shipping, it shouldn't keep syncing.
-
-#### Always show the Enable the shipping calculator on the cart page option in WC Admin [11421](https://github.com/woocommerce/woocommerce-blocks/pull/11421)
-
-1. Go to `WooCommerce -> Settings -> Advanced` - set the Cart page to one containing the Cart Block. Save.
-2. Go to `WooCommerce -> Settings -> Shipping -> Shipping Options` - confirm the `Enable the shipping calculator on the cart page` option is displayed.
-3. Check the `Enable the shipping calculator on the cart page` option and save.
-4. Add a product to the cart and go to the Cart page. Confirm the shipping calculator is displayed
-5. Go to `WooCommerce -> Settings -> Shipping -> Shipping Options` - Uncheck the `Enable the shipping calculator on the cart page` option and save.
-6. Go to the Cart page on the front-end. Confirm the shipping calculator is hidden.
-
-| Before | After |
-| ------ | ----- |
-| <img width="839" alt="image" src="https://github.com/woocommerce/woocommerce-blocks/assets/14235870/678f8311-d242-4b7c-a140-370db44a24a0"> | <img width="686" alt="image" src="https://github.com/woocommerce/woocommerce-blocks/assets/14235870/b05b6ccc-6fc1-4909-8229-b777f289e2f9"> |
-
-#### Add a safe guard that the variable is set before accessing it [11424](https://github.com/woocommerce/woocommerce-blocks/pull/11424)
-
-1. Go to Editor
-2. Add Product Collection block
-3. Enter Code Editor mode
-4. Find and remove `"shrinkColumns":false"` - it will mimic the case it's undefined
-
-<img width="1050" alt="image" src="https://github.com/woocommerce/woocommerce-blocks/assets/20098064/d7d7af04-fd50-4d9d-abb7-d07e106d82af">
-
-5. Save the page/template and go to frontend
-6. Make sure there's no warning and Product Collection is rendered in non-responsive mode (when you narrow down the screen it will preserve the number of columns and finally collapse to single one for mobile view)
-
-### Documentation
-
-#### Add order and checkout order endpoint documentation [11157](https://github.com/woocommerce/woocommerce-blocks/pull/11157)
-
-1. Check that the docs look complete
-
-### Should be tested by the development team exclusively
-
-#### Use the main tag in Cart and Checkout templates [11224](https://github.com/woocommerce/woocommerce-blocks/pull/11224)
-
-1. Install and activate a blocks theme eg TT3/TT4
-2. Go to `Appearance` > `Editor` > `Templates` > `Manage All Templates`
-3. Ensure `Page: Cart` and `Page: Checkout` do not have customizations (or delete them if so), and enter edition mode for each one
-4. On List View select `Group` after the `Header` (`Checkout Header` on `Page: Checkout` template), open `Block` > `Advanced` pane and ensure `HTML ELEMENT` is set to `<main>`
-5. Do a test purchase, and on the cart and checkout pages verify the content is wrapped under a `<main> `tag
-
-#### Update wording on checkout error message to try to prevent retries [10888](https://github.com/woocommerce/woocommerce-blocks/pull/10888)
-
-1. Add a new snippet to your site:
-
-```php
-add_filter( 'wp_mail', function( $args ) {
- exit;
-} );
-```
-
-2. Add an item to your cart and go to the Checkout block.
-3. Place your order and verify the error shows with the correct wording.
-
-| Before | After |
-| ------ | ----- |
-| <img width="774" alt="image" src="https://github.com/woocommerce/woocommerce-blocks/assets/5656702/3912039c-7453-4308-8cce-065db02c8b09"> | <img width="756" alt="image" src="https://github.com/woocommerce/woocommerce-blocks/assets/5656702/f4ebf72b-eb0e-47f7-9b36-c3706099ab73"> |
diff --git a/plugins/woocommerce/client/blocks/docs/internal-developers/testing/releases/1141.md b/plugins/woocommerce/client/blocks/docs/internal-developers/testing/releases/1141.md
deleted file mode 100644
index 9162934195d..00000000000
--- a/plugins/woocommerce/client/blocks/docs/internal-developers/testing/releases/1141.md
+++ /dev/null
@@ -1,13 +0,0 @@
-# Testing notes and ZIP for release 11.4.1
-
-Zip file for testing: [woocommerce-gutenberg-products-block.zip](https://github.com/woocommerce/woocommerce-blocks/files/13166106/woocommerce-gutenberg-products-block.zip)
-
-## WooCommerce Core
-
-### Bug Fixes
-
-#### Regenerate package
-
-1. Add a new post.
-2. Add the All Products block.
-3. Make sure there are no errors in the editor or the page.
diff --git a/plugins/woocommerce/client/blocks/docs/internal-developers/testing/releases/1142.md b/plugins/woocommerce/client/blocks/docs/internal-developers/testing/releases/1142.md
deleted file mode 100644
index 30eac8ba5e2..00000000000
--- a/plugins/woocommerce/client/blocks/docs/internal-developers/testing/releases/1142.md
+++ /dev/null
@@ -1,123 +0,0 @@
-# Testing notes and ZIP for release 11.4.2
-
-Zip file for testing: [woocommerce-gutenberg-products-block.zip](https://github.com/woocommerce/woocommerce-blocks/files/13179867/woocommerce-gutenberg-products-block.zip)
-
-## WooCommerce Core
-
-### Enhancements
-
-#### Improve the button size on the "Product Collection 4 Column" pattern. [11433](https://github.com/woocommerce/woocommerce-blocks/pull/11433)
-
-1. Create a new page or post.
-2. Insert the `Product Collection 4 Column` pattern.
-3. Check the `Add to cart` buttons look like in the after screenshot below.
-
-| Before | After |
-| ------ | ----- |
-| <img width="1201" alt="Screenshot 2023-10-24 at 15 53 25" src="https://github.com/woocommerce/woocommerce-blocks/assets/186112/cc60d499-51b9-4a12-8f11-6c346eb41ce8"> | <img width="1197" alt="Screenshot 2023-10-24 at 15 53 01" src="https://github.com/woocommerce/woocommerce-blocks/assets/186112/a1735c13-f701-46e4-bbe0-b2b2eff275bf"> |
-
-#### Improve the "Minimal header" pattern spacing and title. [11434](https://github.com/woocommerce/woocommerce-blocks/pull/11434)
-
-1. Create a new page or post and insert the `Minimal header` pattern.
-2. Check it matches the screenshot below.
-
-| Mobile |
-| ------ |
-| <img width="405" alt="Screenshot 2023-10-24 at 16 50 08" src="https://github.com/woocommerce/woocommerce-blocks/assets/186112/5e124511-6098-4bc2-a381-9714e254a692"> |
-
-| Desktop |
-| ------ |
-| <img width="1374" alt="Screenshot 2023-10-24 at 16 49 43" src="https://github.com/woocommerce/woocommerce-blocks/assets/186112/2c58a2ca-d270-4145-b1f6-19aa9a884a52"> |
-
-### Improve the Testimonials 3 columns pattern. [11430](https://github.com/woocommerce/woocommerce-blocks/pull/11430)
-
-1. Create a new page or post.
-2. Insert the `Testimonials 3 columns` pattern.
-3. Check the reviewer names are not duplicated.
-
-| Before | After |
-| ------ | ----- |
-| <img width="1207" alt="Screenshot 2023-10-24 at 14 38 29" src="https://github.com/woocommerce/woocommerce-blocks/assets/186112/7c4a1f75-4eb1-4d7a-a38c-6e30d5649c18">| <img width="1201" alt="Screenshot 2023-10-24 at 14 37 42" src="https://github.com/woocommerce/woocommerce-blocks/assets/186112/8a967999-b16a-47f5-96ce-3d3b4c92a67e"> |
-
-### Add overlay to the "Featured Category Triple" pattern. [11428](https://github.com/woocommerce/woocommerce-blocks/pull/11428)
-
-1. Create a new page or post.
-2. Insert the `Featured Category Triple` pattern.
-3. Check each of the images have an overlay with 30% opacity.
-
-| Before | After |
-| ------ | ----- |
-| <img width="967" alt="Screenshot 2023-10-24 at 14 14 29" src="https://github.com/woocommerce/woocommerce-blocks/assets/186112/91f35822-4ca3-4f11-9402-ba93ae80db5e"> | <img width="969" alt="Screenshot 2023-10-24 at 14 14 09" src="https://github.com/woocommerce/woocommerce-blocks/assets/186112/f460edf5-7659-4cc0-8d10-b4ae12dd1cd3"> |
-
-### Improve the "Footer with 3 Menus" pattern. [11379](https://github.com/woocommerce/woocommerce-blocks/pull/11379)
-
-1. Create a new page or post.
-2. Insert the `Footer with 3 menus` pattern.
-3. Check that it looks like the design.
-
-| Desktop |
-| ------ |
-| <img width="1397" alt="Screenshot 2023-10-23 at 16 32 48" src="https://github.com/woocommerce/woocommerce-blocks/assets/186112/747643d2-7548-41d9-8ce1-8f91bcd1c171">|
-
-| Mobile |
-| ------ |
-|<img width="334" alt="CleanShot 2023-10-23 at 16 33 30@2x" src="https://github.com/woocommerce/woocommerce-blocks/assets/186112/1d94f1ed-dad7-4b9b-ad9c-432acb16c2c2"> |
-
-### Update the "Large footer" pattern. [11413](https://github.com/woocommerce/woocommerce-blocks/pull/11413)
-
-1. Create a new page or post.
-2. Insert the `Large Footer` pattern.
-3. Check that it looks like the design.
-
-| Desktop |
-| ------ |
-| <img width="1382" alt="Screenshot 2023-10-23 at 14 52 19" src="https://github.com/woocommerce/woocommerce-blocks/assets/186112/3ff9a4ff-f051-4023-9cb7-faf13da68062"> |
-
-| Mobile |
-| ------ |
-| <img width="342" alt="Screenshot 2023-10-23 at 14 54 43" src="https://github.com/woocommerce/woocommerce-blocks/assets/186112/2926804a-8616-4d67-ae1c-e1340c814030"> |
-
-### Improve the "Essential Header". [11449](https://github.com/woocommerce/woocommerce-blocks/pull/11449)
-
-1. Create a new page or post and insert the `Essential Header`.
-2. Check it looks like the video below.
-
-<video src="https://github.com/woocommerce/woocommerce-blocks/assets/186112/fc3ba66b-1f9e-4cd2-96b1-c59f2aba1e80" />
-
-### Improve the mobile view for the Minimal header pattern. [11463](https://github.com/woocommerce/woocommerce-blocks/pull/11463)
-
-1. Create a new page or post and insert the `Minimal header` pattern.
-2. Check the mobile view looks like the after screenshot below.
-
-| Before | After |
-| ------ | ----- |
-| <img width="376" alt="Screenshot 2023-10-26 at 11 47 05" src="https://github.com/woocommerce/woocommerce-blocks/assets/186112/c1caac6a-c8d6-4144-8978-fe8c75fdd915"> | <img width="379" alt="Screenshot 2023-10-26 at 11 46 46" src="https://github.com/woocommerce/woocommerce-blocks/assets/186112/232cc433-a4ba-49b8-912f-bb53e2124713"> |
-
-### Update the Footer with simple menu and cart pattern. [11409](https://github.com/woocommerce/woocommerce-blocks/pull/11409)
-
-1. Create a new page or post.
-2. Insert the `Footer with simple menu and cart` pattern.
-3. Check that it looks like the design.
-
-<img width="1752" alt="Screenshot 2023-10-24 at 10 50 05" src="https://github.com/woocommerce/woocommerce-blocks/assets/186112/a4118ee8-4c86-49d7-bd69-2402a000a4e2">
-<img width="537" alt="Screenshot 2023-10-24 at 10 51 13" src="https://github.com/woocommerce/woocommerce-blocks/assets/186112/28f69a93-41d0-4272-8766-5fda5a15e0b6">
-<img width="383" alt="Screenshot 2023-10-24 at 10 51 21" src="https://github.com/woocommerce/woocommerce-blocks/assets/186112/2e762e03-1928-4325-97fa-910408029cb2">
-
-
-
-## Should be tested by the development team exclusively
-
-### Update the patterns content after a plugin update. [11210](https://github.com/woocommerce/woocommerce-blocks/pull/11210)
-
-1. Create a Jurassic Ninja site with WooCommerce.
-2. Connect JetPack.
-3. Install the plugin zip from this PR (<https://wcblocks.wpcomstaging.com/wp-content/uploads/woocommerce-gutenberg-products-block-11210.zip>)
-5. Install the [woo-ai](https://github.com/woocommerce/woocommerce-blocks/files/12882468/woo-ai.zip) plugin.
-6. Go to your store `/wp-admin/admin.php?page=wc-settings&tab=advanced§ion=features` and enter a description for your store (like `A store selling books and magazines`).
-
-#### Simulating plugin update
-
-1. Go to the file editor and in WooCommerce Blocks plugin, in the `woocommerce-gutenberg-products-block.php` file modify the `woocommerce-gutenberg-products-block.php` plugin file and change the `* Version: 11.4.0-dev` comment to some lower version `* Version: 10`.
-2. Go to your store plugin's page, you should see the `WooCommerce Blocks` plugin with the version you just changed and a message to update the plugin.
-3. Click on it to update the plugin.
-4. Go to the Scheduled Actions and make sure a new `woocommerce_update_patterns_content` action is scheduled.
diff --git a/plugins/woocommerce/client/blocks/docs/internal-developers/testing/releases/1143.md b/plugins/woocommerce/client/blocks/docs/internal-developers/testing/releases/1143.md
deleted file mode 100644
index 8e6da3f676f..00000000000
--- a/plugins/woocommerce/client/blocks/docs/internal-developers/testing/releases/1143.md
+++ /dev/null
@@ -1,122 +0,0 @@
-# Testing notes and ZIP for release 11.4.3
-
-Zip file for testing: [woocommerce-gutenberg-products-block.zip](https://github.com/woocommerce/woocommerce-blocks/files/13217249/woocommerce-gutenberg-products-block.zip)
-
-## WooCommerce Core
-
-### Enhancements
-
-#### Improve Hero Product Chessboard pattern [11423](https://github.com/woocommerce/woocommerce-blocks/pull/11423)
-
-1. Add a new post.
-2. Add the `Hero Product Chessbord` pattern.
-3. Save the page.
-4. Visit the saved page
-5. Ensure that the pattern looks like in the images below.
-
-| Desktop | Mobile |
-|--------|--------|
-|||
-
-#### Fix spacing on the "Minimal header" pattern. [11477](https://github.com/woocommerce/woocommerce-blocks/pull/11477)
-
-1. Create a new page or post and insert the `Minimal header` pattern.
-2. Make sure there's no space at the right of the navigation block, as in the after screenshot below (note the blue color was added just to make it easier to visualize the space).
-
-| Before | After |
-| ------ | ----- |
-| <img width="1381" alt="Screenshot 2023-10-27 at 11 51 26" src="https://github.com/woocommerce/woocommerce-blocks/assets/186112/9037fbc8-cc75-4b36-8ab7-ebd089dc81bf"> | <img width="1370" alt="Screenshot 2023-10-27 at 11 51 36" src="https://github.com/woocommerce/woocommerce-blocks/assets/186112/76dba159-e330-4cb0-9d5a-2640e3dae639"> |
-
-
-#### "Product Gallery" improvements: remove product summary and update margins. [11464](https://github.com/woocommerce/woocommerce-blocks/pull/11464)
-
-1. Create a new page or post and insert the `Product Gallery` pattern.
-2. Check it does not include the product summary and looks like the screenshot.
-
-
-#### "Product Collection X Columns" patterns: align "no reviews" text with the star. [11468](https://github.com/woocommerce/woocommerce-blocks/pull/11468)
-
-1. Add a post.
-2. Add the Product Collection 3 Columns pattern.
-3. Ensure that the "no reviews" text is aligned with the star.
-
-| Before | After |
-| ------ | ----- |
-|||
-
-#### Enhance the Hero Product Split pattern. [11505](https://github.com/woocommerce/woocommerce-blocks/pull/11505)
-
-1. Create a new post
-2. Insert the Hero Product Split pattern
-3. Make sure things are working as expected on the editor side
-4. Save the post and access the frontend: make sure things are working as expected over there as well.
-
-| Before | After |
-| ------ | ----- |
-| <img width="683" alt="Screenshot 2023-10-30 at 22 17 34" src="https://github.com/woocommerce/woocommerce-blocks/assets/15730971/56c6c94d-6151-4611-8db1-48da5412f857"> | <img width="683" alt="Screenshot 2023-10-30 at 22 17 50" src="https://github.com/woocommerce/woocommerce-blocks/assets/15730971/112c668f-b081-4d81-b9d4-c6072b67d838"> |
-
-#### Simplify the Hero Product 3 Split pattern. [11495](https://github.com/woocommerce/woocommerce-blocks/pull/11495)
-
-1. Create a new page or post and insert the `Hero Product 3 Split` pattern.
-2. Save and check it looks good on desktop and mobile and looks like the screenshot below (ignore the broken image, it's due to how the screenshot was taken).
-
-| Mobile |
-| ------ |
-|  |
-
-| Desktop |
-|--------|
-| <img width="1184" alt="Screenshot 2023-10-30 at 15 35 10" src="https://github.com/woocommerce/woocommerce-blocks/assets/186112/c6b5bdc5-589a-4790-8b1d-023c2610de74">|
-
-#### Product Search Block: unify border-radius. [11515](https://github.com/woocommerce/woocommerce-blocks/pull/11515)
-
-1. Add a new post.
-2. Add the `Footer with Simple Menu`.
-3. Save.
-4. Ensure that the patterns look okay on desktop and mobile (and match with the screenshot).
-5. Repeat 1-4 for each pattern that it is in the screenshot (use the title for searching the pattern in the inserter).
-
-
-
-
-#### Improve the Centered Header Menu with Search pattern. [11304](https://github.com/woocommerce/woocommerce-blocks/pull/11304)
-
-1. Create a new page or post.
-2. Insert the `Centered Header Menu with Search` pattern.
-3. Check it looks like the screenshot below.
-4. Check all the elements are visible on mobile.
-
-⚠️ In the next release, we will update the pattern name: <https://github.com/woocommerce/woocommerce-blocks/issues/11523>
-
-
-| Desktop |
-|--------|
-||
-
-| Mobile |
-|--------|
-||
-
-#### Large Header pattern: improve the layout on mobile view. [11490](https://github.com/woocommerce/woocommerce-blocks/pull/11490)
-
-1. Add a new post.
-2. Add the Large Header pattern.
-3. Save the post.
-4. Visit the saved post.
-5. Ensure that the pattern looks okay.
-6. Switch to the mobile view.
-7. Ensure that the pattern looks okay.
-
-
-
-### Mobile
-
-
-
-#### Improve the "Large footer" spacing. [11520](https://github.com/woocommerce/woocommerce-blocks/pull/11520)
-
-1. Create a new page or post and insert the `Large footer` pattern.
-2. Check there's no space.
-
-
-<img width="707" alt="Screenshot 2023-10-31 at 12 56 33" src="https://github.com/woocommerce/woocommerce-blocks/assets/186112/fa4c0335-9c13-44e1-a599-36ee21663e2c">
diff --git a/plugins/woocommerce/client/blocks/docs/internal-developers/testing/releases/1144.md b/plugins/woocommerce/client/blocks/docs/internal-developers/testing/releases/1144.md
deleted file mode 100644
index 651d730e97b..00000000000
--- a/plugins/woocommerce/client/blocks/docs/internal-developers/testing/releases/1144.md
+++ /dev/null
@@ -1,34 +0,0 @@
-# Testing notes and ZIP for release 11.4.4
-
-Zip file for testing: [woocommerce-gutenberg-products-block.zip](https://github.com/woocommerce/woocommerce-blocks/files/13279921/woocommerce-gutenberg-products-block.zip)
-
-## WooCommerce Core
-
-### Enhancements
-
-#### Enabled the new blockified Order Confirmation by default for block-based themes. [11615](https://github.com/woocommerce/woocommerce-blocks/pull/11615)
-
-1. On a brand new WC installation enable a block based theme (eg TT3)
-2. Place a dummy order
-3. Verify the Thank you page displayed after placing an order renders the new blockified Order Confirmation (see attached printscreen)
-4. Change the website language. Repeat steps 2 & 3 and verify that the headings get properly translated.
-5. Go to Appearance > Site Editor > Templates > Manage all templates. Verify that the blockified Order Confirmation displays properly, saving changes work and they get reflected on a new order.
-
-<img width="1361" alt="image" src="https://github.com/woocommerce/woocommerce-blocks/assets/17236129/f619ccaa-d2dc-4189-8760-86837cf4014f">
-
-### Bug Fixes
-
-#### Filter By Rating: fix overlapping stars. [11644](https://github.com/woocommerce/woocommerce-blocks/pull/11644)
-
-1. Ensure that you have two products with different reviews and different ratings.
-2. Create a new post.
-3. Adds the Filter By Rating, Product Collection blocks and Product Collection 3 Columns pattern.
-4. Ensure that the stars are rendered correctly.
-5. Save the post.
-6. Visit the post.
-7. Ensure that the stars are rendered correctly.
-8. Please, pay attention and ensure that the star is aligned with "no review" (for the products that doesn't have the review)
-
-| Before | After |
-| ------ | ----- |
-| <img src="https://user-images.githubusercontent.com/3323310/280986124-5373fb47-8708-4bab-961d-e750eeb2d1ab.png" width='50%'>| |
diff --git a/plugins/woocommerce/client/blocks/docs/internal-developers/testing/releases/1145.md b/plugins/woocommerce/client/blocks/docs/internal-developers/testing/releases/1145.md
deleted file mode 100644
index 38c20ab4087..00000000000
--- a/plugins/woocommerce/client/blocks/docs/internal-developers/testing/releases/1145.md
+++ /dev/null
@@ -1,16 +0,0 @@
-# Testing notes and ZIP for release 11.4.5
-
-Zip file for testing: [woocommerce-gutenberg-products-block.zip](https://github.com/woocommerce/woocommerce-blocks/files/13294232/woocommerce-gutenberg-products-block.zip)
-
-## WooCommerce Core
-
-### Bug Fixes
-
-#### Fix Single Product Classic Template block not showing on the front-end. [11455](https://github.com/woocommerce/woocommerce-blocks/pull/11455)
-
-1. Enable WordPress 6.4.
-2. Enable a block theme.
-3. Go to Site Editor → Single Product template.
-4. Remove the blockified template and add the “Classic Template” block.
-5. Save and check the front-end.
-6. Check that the template is correctly rendered on the front-end.
diff --git a/plugins/woocommerce/client/blocks/docs/internal-developers/testing/releases/1146.md b/plugins/woocommerce/client/blocks/docs/internal-developers/testing/releases/1146.md
deleted file mode 100644
index 273c22ba273..00000000000
--- a/plugins/woocommerce/client/blocks/docs/internal-developers/testing/releases/1146.md
+++ /dev/null
@@ -1,13 +0,0 @@
-# Testing notes and ZIP for release 11.4.6
-
-Zip file for testing: [woocommerce-gutenberg-products-block.zip](https://github.com/woocommerce/woocommerce-blocks/files/13308368/woocommerce-gutenberg-products-block.zip)
-
-## WooCommerce Core
-
-### Bug Fixes
-
-#### Update Jetpack WooCommerce Analytics module integration to check for changed template names ([#11707](https://github.com/woocommerce/woocommerce-blocks/pull/11707))
-
-1. Enable Jetpack and ensure the WooCommerce Analytics module is set up and enabled.
-2. Install [Query Monitor](https://wordpress.org/plugins/query-monitor/).
-3. Go to the Cart and Checkout blocks and ensure no PHP warnings are logged.
diff --git a/plugins/woocommerce/client/blocks/docs/internal-developers/testing/releases/1147.md b/plugins/woocommerce/client/blocks/docs/internal-developers/testing/releases/1147.md
deleted file mode 100644
index a900c0729b1..00000000000
--- a/plugins/woocommerce/client/blocks/docs/internal-developers/testing/releases/1147.md
+++ /dev/null
@@ -1,24 +0,0 @@
-# Testing notes and ZIP for release 11.4.7
-
-Zip file for testing: [woocommerce-gutenberg-products-block.zip](https://github.com/woocommerce/woocommerce-blocks/files/13311913/woocommerce-gutenberg-products-block.zip)
-
-## WooCommerce Core
-
-### Bug Fixes
-
-#### Fixed address components in Firefox, and editing of address form in the editor ([#11714](https://github.com/woocommerce/woocommerce-blocks/pull/11714))
-
-1. Edit the checkout page
-2. Address form should not be condensed
-3. Toggle company/phone. Leave phone on. There should be no block errors.
-4. Save changes and visit the checkout on the frontend (add something to cart if needed)
-5. As a logged in user the address form should be condensed and phone should be visible. If no, fill out the form and place an order.
-6. After placing the order go back to checkout and repeat the previous step. Phone should be visible in the condensed address component.
-7. Go back to the editor and turn off the phone field. Save and go back to the frontend checkout. Ensure phone is hidden from the condensed address component.
-
-##### Firefox testing
-
-1. Add an item to the cart and go to checkout using Firefox
-2. Fill out the form, then refresh the page.
-3. The condensed address component is shown.
-4. Edit the address. Ensure fields are populated with correct values.
diff --git a/plugins/woocommerce/client/blocks/docs/internal-developers/testing/releases/1148.md b/plugins/woocommerce/client/blocks/docs/internal-developers/testing/releases/1148.md
deleted file mode 100644
index 7385318f874..00000000000
--- a/plugins/woocommerce/client/blocks/docs/internal-developers/testing/releases/1148.md
+++ /dev/null
@@ -1,29 +0,0 @@
-# Testing notes and ZIP for release 11.4.8
-
-Zip file for testing: [woocommerce-gutenberg-products-block.zip](https://github.com/woocommerce/woocommerce-blocks/files/13323235/woocommerce-gutenberg-products-block.zip)
-
-## WooCommerce Core
-
-### Bug Fixes
-
-#### Ensure that incompatible notices are displayed in Safari ([11736](https://github.com/woocommerce/woocommerce-blocks/pull/11736))
-
-1. Install and activate [helper-plugin-1.zip](https://github.com/woocommerce/woocommerce-blocks/files/12701036/helper-plugin-1.zip)
-2. Create a test page and add the Cart block.
-3. Create a test page and add the Checkout block.
-4. Open both test pages using Safari.
-5. Click on the Cart block resp. the Checkout block and verify that the incompatible extension notice is visible.
-6. Repeat the previous step using Chrome, Firefox and Opera.
-
-<table>
-<tr>
-<td valign="top">Before:
-<br><br>
-<img width="1281" alt="Screenshot 2023-11-10 at 21 43 01" src="https://github.com/woocommerce/woocommerce-blocks/assets/3323310/5a68914b-5306-40fd-8270-af880120aa72">
-</td>
-<td valign="top">After:
-<br><br>
-<img width="1282" alt="Screenshot 2023-11-10 at 21 42 18" src="https://github.com/woocommerce/woocommerce-blocks/assets/3323310/8718c04b-fb9e-4db7-af71-c84d8e304fc1">
-</td>
-</tr>
-</table>
diff --git a/plugins/woocommerce/client/blocks/docs/internal-developers/testing/releases/1149.md b/plugins/woocommerce/client/blocks/docs/internal-developers/testing/releases/1149.md
deleted file mode 100644
index a5df7753cab..00000000000
--- a/plugins/woocommerce/client/blocks/docs/internal-developers/testing/releases/1149.md
+++ /dev/null
@@ -1,56 +0,0 @@
-# Testing notes and ZIP for release 11.4.9
-
-Zip file for testing: [woocommerce-gutenberg-products-block.zip](https://github.com/woocommerce/woocommerce-blocks/files/13428260/woocommerce-gutenberg-products-block.zip)
-
-## WooCommerce Core
-
-### Bug Fixes
-
-#### Enhance validation for limited use coupons and guest users. ([11860](https://github.com/woocommerce/woocommerce-blocks/pull/11860))
-
-##### From logged in to logged out
-
-1. Create a new coupon and limit its usage to 1 per customer.
-2. Logged in, with an email you remember, place an order using that coupon, it should pass.
-3. Logged out, using the same email, try placing an order with that coupon, you should get a top level error "coupon_name" was removed from the cart. Coupon usage limit has been reached.".
-
-##### User email vs billing email
-
-1. Create a new coupon and limit its usage to 1 per customer.
-2. Logged in, with an user email you remember, place an order using that coupon, and a different billing email. It should pass.
-3. Logged out, using the same user email (not the billing email), try placing an order with that coupon, you should get a top level error "coupon_name" was removed from the cart. Coupon usage limit has been reached.".
-
-##### From logged out to logged in
-
-1. Create a new coupon and limit its usage to 1 per customer.
-4. Logged out, use the coupon with an email you remember, that email should belong to an existing user.
-5. You should be able to place the order fine.
-6. Logged in with the user that own that email.
-7. Go to checkout, add the coupon, using the same email, try to place the order.
-8. You should get a top level error.
-9. Change your billing email to something else, add the coupon again.
-10. Try to place the order, you should get an error.
-
-##### General regression testing
-
-1. Create a new coupon and limit its usage to 1 per customer.
-2. Logged in, with an email you remember, place an order using that coupon, it should pass.
-3. Logged in again, back to checkout, change your email, and try adding the coupon, you should get an inline error that you can't use the coupon.
-
-## Testing notes for the development team
-
-### Bug fixes
-
-#### Fixed params passed to woocommerce_before_thankyou for block checkout. This should be an order ID, not an order object. ([11862](https://github.com/woocommerce/woocommerce-blocks/pull/11862))
-
-1. Implement a function that expects an integer for the order ID, attached to the woocommerce_before_thankyou hook.
-
-```php
-function test_function_11851( int $order_id ): void {
- printf( 'Hello, this is order %d', $order_id );
-}
-add_action( 'woocommerce_before_thankyou', 'test_function_11851' );
-```
-
-2. Place an order on the WooCommerce store.
-3. Thanks page should show without errors. Should see `Hello, this is order X`
diff --git a/plugins/woocommerce/client/blocks/docs/internal-developers/testing/releases/1150.md b/plugins/woocommerce/client/blocks/docs/internal-developers/testing/releases/1150.md
deleted file mode 100644
index 456a9dd1a8e..00000000000
--- a/plugins/woocommerce/client/blocks/docs/internal-developers/testing/releases/1150.md
+++ /dev/null
@@ -1,247 +0,0 @@
-# Testing notes and ZIP for release 11.5.0
-
-Zip file for testing: [woocommerce-gutenberg-products-block.zip](https://github.com/woocommerce/woocommerce-blocks/files/13279109/woocommerce-gutenberg-products-block.zip)
-
-## Testing Notes
-
-### Fix `Hero Product 3 Split` pattern text content [#11612](https://github.com/woocommerce/woocommerce-blocks/pull/11612)
-
-1. Create a new page or post and insert the `Hero Product 3 Split` pattern.
-2. Check there's no duplicated description and every section description makes sense with their title.
-
-### Move `Textarea` to components package [#11384](https://github.com/woocommerce/woocommerce-blocks/pull/11384)
-
-1. Add an item to your cart.
-2. Go to the Checkout block, ensure the order notes section displays correctly, check the option to add a note to your order and ensure that the text area appears.
-3. Enter text into it and check out.
-4. Ensure your note is saved alongside your order.
-
-<img width="529" alt="image" src="https://github.com/woocommerce/woocommerce-blocks/assets/5656702/52fa2815-8c37-4cf6-b6fe-1b487fe6eefd">
-
-### Remove authors filter from Product Collection block [#11427](https://github.com/woocommerce/woocommerce-blocks/pull/11427)
-
-1. Go to Editor
-2. Add Product Collection block
-3. Disable "Inherit query from template"
-4. Make sure there's no "Authors" filter available in the Inspector Controls
-5. Smoke test the Product Collection in the Editor and Frontend
-6. Go to Editor
-7. Add Products (Beta) block
-8. Disable "Inherit query from template"
-9. Add couple of product filters (for example Sale Status and Attributes)
-10. Click "Upgrade to Product Collection" in Inspectopr Controls
-11. Make sure Product Collection preserved the filters and works correctly after migration
-12. Save and check the frontend.
-
-### Move `SortSelect` to components package [#11411](https://github.com/woocommerce/woocommerce-blocks/pull/11411)
-
-1. Set up some reviews on your products (Go to the product on the front end then the Reviews tab)
-2. Add the All Reviews and All Products blocks to a page.
-3. Visit that page and ensure the select box to change the ordering of reviews is visible. Interact with it and ensure the order of the reviews changes.
-4. On the All Products block, ensure the select box to change the ordering of products is visible. Interact with it and ensure the order of products changes.
-
-### Ensure input is validated when autofilled in Firefox [#11062](https://github.com/woocommerce/woocommerce-blocks/pull/11062)
-
-_Perform these steps both in Firefox and Chrome/Brave/Edge._
-
-1. As a guest user (open the site in an incognito/private window), add an item to your cart and go to the Checkout block.
-2. Enter your details and check out successfully.
-3. Repeat again without closing the window, when you load the Checkout block the second time, expand the saved address card.
-4. The address details should be auto filled based on your last order.
-5. Ensure you can check out without editing the fields.
-
-### Prevent theme button border appearing in opinionated patterns [#11564](https://github.com/woocommerce/woocommerce-blocks/pull/11564)
-
-1. Go to Appearance > Editor > Styles > Blocks > Button and set a border style for Button blocks.
-2. Create a page and add the following patterns: _Discount Banner with Image_, _Discount Banner_ and _Product Collection Banner_.
-3. Verify the buttons in those patterns have no border.
-
-### Add margin bottom to the `Hero Product 3 Split` pattern [#11573](https://github.com/woocommerce/woocommerce-blocks/pull/11573)
-
-1. Create a new page or post and insert the `Hero Product 3 Split` pattern.
-2. Make sure it has a bottom margin of 80px.
-
-### Set explicit margins in the search bar group on the `Large Header` pattern [#11571](https://github.com/woocommerce/woocommerce-blocks/pull/11571)
-
-1. Create a new page or post and insert the `Large Header` pattern.
-2. Check the search bar is aligned with the mini-cart button to the right.
-
-### Add aspect ratio to the `Featured Products 5 Columns` pattern [#11570](https://github.com/woocommerce/woocommerce-blocks/pull/11570)
-
-1. Create a new page or post and insert the `Product Collection: Featured Products 5 Columns` pattern.
-2. Save and check all the images have the same size.
-
-### Prevent Sale badge overflowing the Product Image in some product grid blocks [#11556](https://github.com/woocommerce/woocommerce-blocks/pull/11556)
-
-1. With Twenty-Twenty Four, add the _On Sale Products_, _All Products_ and _Product Collection_ blocks to a page.
-2. Set all of them to _Full Width_.
-3. Preview that page in the frontend.
-4. Verify the _On Sale_ badge doesn't overflow the image.
-5. Do some more smoke testing with other themes to verify there are no regressions (I tested TT1, TT2, TT3, TT4 and Storefront).
-
-### Footer with 2 Menus Dark pattern: Fix the Site Title color contrast in TT4. [#11484](https://github.com/woocommerce/woocommerce-blocks/pull/11484)
-
-1. Activate the **Twenty Twenty-Four** theme.
-2. Create a new page.
-3. Add the **Footer with 2 Menus Dark** pattern.
-4. Verify that the Site Title is visible and has correct color contrast both in the editor and the frontend.
-5. Enable the **Twenty Twenty-Three** theme and repeat all steps to make sure there are no regressions.
-
-### [CYS] Fix `Product Collection 4 Columns` pattern button height [#11553](https://github.com/woocommerce/woocommerce-blocks/pull/11553)
-
-1. Create a new page or post and insert the `Product Collection 4 Columns` pattern.
-2. Check the button height looks like the screenshot below.
-
-<img width="241" alt="Screenshot 2023-11-02 at 15 46 32" src="https://github.com/woocommerce/woocommerce-blocks/assets/186112/922e0069-6c59-4044-9fb7-cf2e0337a1b9">
-
-### Change the "chessboard" pattern structure to improve mobile view [#11545](https://github.com/woocommerce/woocommerce-blocks/pull/11545)
-
-1. Create a new page or post and insert the `Hero Product Chessboard` pattern.
-2. Check it looks good on mobile sizes and looks like the screenshot below.
-
-### `Footer with 3 menus` pattern: update the spacing in the columns to improve the mobile view [#11544](https://github.com/woocommerce/woocommerce-blocks/pull/11544)
-
-1. Create a new page or post and insert the `Footer with 3 menus`.
-2. Check the pattern looks like the after screenshot.
-
-### Ensure that the "Remove Item" link on Cart block has a hover state [#11526](https://github.com/woocommerce/woocommerce-blocks/pull/11526)
-
-1. Create a test page and add a few filters and the Products (beta) block to it.
-2. Create another test page and add the Cart block to it.
-3. Go to the first test page with the Products (beta) block.
-4. Select one of the filters and hover over the `Reset` link.
-5. Verify that this PR does not introduce a regression.
-6. Add a product to the cart.
-7. Go to the second test page with the Cart block.
-8. Hover over the "Remove Item" link and verify that it has a hover state.
-
-### Add checkout-header template to the correct area in site editor [#11528](https://github.com/woocommerce/woocommerce-blocks/pull/11528)
-
-1. Go to Appearance > Editor > Patterns
-2. Click "headers" under the template parts section
-3. Checkout checkout-header is visible
-
-### Move `Title` to components package [#11383](https://github.com/woocommerce/woocommerce-blocks/pull/11383)
-
-1. Set up [WooCommerce Stripe Payment Gateway](https://wordpress.org/plugins/woocommerce-gateway-stripe/) and ensure your site is using HTTPS so express methods from Stripe can show.
-2. Open the Checkout page in the page editor. Ensure the form steps show up correctly with the correct titles.
-3. Add an item to your cart.
-4. Go to the Checkout block, ensure each step on the form has a correctly displaying title.
- <img width="493" alt="image" src="https://github.com/woocommerce/woocommerce-blocks/assets/5656702/49c3ff6a-11f5-4a3d-b24f-599bb962868e">
-
-5. Ensure the express payments method section has a correctly displayed title.
- <img width="471" alt="image" src="https://github.com/woocommerce/woocommerce-blocks/assets/5656702/9ea746e2-20e2-4b0f-9f99-07eebb233142">
-
-6. Check out and ensure it works.
-
-### All Products: Add cursor pointer when hovering over pagination items [#11502](https://github.com/woocommerce/woocommerce-blocks/pull/11502)
-
-1. Add the `All Products` block to a page.
-2. Scroll down to the pagination of the block.
-3. Hover over pagination numbers and arrows and confirm that the cursor changes to `pointer`.
-
-### Comboboxes should match against values before looking at labels [#11410](https://github.com/woocommerce/woocommerce-blocks/pull/11410)
-
-1. In chrome, add a new address for autocompletion. Use a US address with MA as the state.
-2. As a guest user, go to checkout. Autocomplete the shipping address section.
-3. Ensure that the state field selects massachusetts.
-
-### Essential Header Dark pattern: Fix color contrast issues in TT4 [#11480](https://github.com/woocommerce/woocommerce-blocks/pull/11480)
-
-1. Activate the **Twenty Twenty-Four** theme.
-2. Create a new page.
-3. Add the **Essential Header Dark** pattern.
-4. In the `Navigation` block make sure you have some nested items. (Dropdown menu)
-5. Verify that the Search button color contrast is correct both in the editor and the frontend.
-6. Verify that the dropdown menu links have a correct color contrast in the frontend.
-7. Enable the **Twenty Twenty-Three** theme and repeat all steps to make sure there are no regressions.
-
-### Product Collection: Fix the PHP Warning after migrating from Products (Beta) [#11494](https://github.com/woocommerce/woocommerce-blocks/pull/11494)
-
-1. Create a new page or post.
-2. Add the `Large Image Product Gallery` pattern.
-3. Use the `Upgrade to Product Collection` option in the sidebar and save the page.
-4. Ensure there are no warnings in the editor and the front end.
-
-### Remove bullet points and unnecessary padding from `SearchListControl` [#11444](https://github.com/woocommerce/woocommerce-blocks/pull/11444)
-
-1. Add a Single Product, Featured Product and Featured Category to a page.
-2. Ensure that the list of possible selection is shown as a list without bullet points and extra padding (the bottom border should reach all the way through).
-
-### Fix products incorrectly marked as discounted [#11386](https://github.com/woocommerce/woocommerce-blocks/pull/11386)
-
-1. Add a discounted item and a regular-priced item to your cart.
-2. Go to the Cart Block page. Confirm that the discount label is only visible next to the discounted product.
-3. Go to the Checkout Block page. Under the `Order Summary` section, confirm that the discount label is only visible next to the discounted product.
-4. Add the following code snippet using the [Code Snippets](https://wordpress.org/plugins/code-snippets/) plugin:
-
-```PHP
-function calc_price( $cart_object ) {
- foreach ( $cart_object->get_cart() as $hash => $value ) {
- $value['data']->set_price( 50 );
- }
-}
-add_action( 'woocommerce_before_calculate_totals', 'calc_price' );
-```
-
-5. Go to the Cart Block page. Confirm that both products reflect the new price (50) and neither displays a discount label.
-6. Go to the Checkout Block page, under the `Order summary` section, Confirm that both products reflect the new price (50) and neither displays a discount label.
-
-### Display shipping calculator link for guests shopper [#11442](https://github.com/woocommerce/woocommerce-blocks/pull/11442)
-
-#### Case 1
-
-1. Go to the WooCommerce settings page: `wp-admin/admin.php?page=wc-settings`.
-2. Change 'Default customer location' to `No location by default`.
-3. Remove any default(fallback) shipping rates.
-4. Open your site in a private session(incognito mode).
-5. Add some products to the cart.
-6. Go to the cart page, and confirm the "Add an address for shipping rates" link is present in the shipping calculator.
-7. Click on the link, and confirm it is working as expected.
-8. Open your site in a regular session where you're already logged in and have placed an order before.
-9. Add some products to the cart.
-10. Go to the cart page, confirm the shipping address, and "change address" link present in the shipping calculator.
-11. Click on the link, and confirm it is working as expected.
-
-#### Case 2
-
-1. Go to the WooCommerce settings page: `wp-admin/admin.php?page=wc-settings`.
-2. Change 'Default customer location' to `No location by default`.
-3. Add any default(fallback) shipping rates.
-4. Open your site in a private session(incognito mode).
-5. Add some products to the cart.
-6. Go to the cart page, and confirm the shipping calculator is hidden and default shipping rates are visible
-7. Open your site in a regular session where you're already logged in and have placed an order before.
-8. Add some products to the cart.
-9. Go to the cart page, confirm the shipping address, and "change address" link present in the shipping calculator.
-10. Click on the link, and confirm it is working as expected.
-
-#### Case 3
-
-1. Go to the WooCommerce settings page: `wp-admin/admin.php?page=wc-settings`.
-2. Change 'Default customer location' to `Shop country/region`.
-3. Add the store's address.
-4. Add the rates that cover the store's address
-5. As a guest/not logged-in user, visit the cart page with some products added already.
-6. Confirm the shipping address calculator link to change or add a new address is displayed.
-
-### Add a safe guard that the variable is set before accessing it [#11424](https://github.com/woocommerce/woocommerce-blocks/pull/11424)
-
-1. Go to Editor
-2. Add Product Collection block
-3. Enter Code Editor mode
-4. Find and remove `"shrinkColumns":false"` - it will mimic the case it's undefined
-
-
-
-5. Save the page/template and go to frontend
-6. Make sure there's no warning and Product Collection is rendered in non-responsive mode (when you narrow down the screen it will preserve the number of columns and finally collapse to single one for mobile view)
-
-## Testing notes for the development team
-
-### Use the header element for the checkout header [#11222](https://github.com/woocommerce/woocommerce-blocks/pull/11222)
-
-1. Install and activate a blocks theme eg TT3/TT4
-2. Go to `Appearance` > `Editor` > `Templates` > `Manage All Templates` > `Page: Checkout` ensure none has customizations (or delete them if so), and enter edition mode
-3. On `List View` select `Checkout Header`, open `Block` > `Advanced` pane and ensure `HTML ELEMENT` is set to `<header>`
-4. Do a test purchase, and on the checkout page verify the header is wrapped in a `<header>` tag
diff --git a/plugins/woocommerce/client/blocks/docs/internal-developers/testing/releases/1151.md b/plugins/woocommerce/client/blocks/docs/internal-developers/testing/releases/1151.md
deleted file mode 100644
index 0d7bbb574fc..00000000000
--- a/plugins/woocommerce/client/blocks/docs/internal-developers/testing/releases/1151.md
+++ /dev/null
@@ -1,23 +0,0 @@
-# Testing notes and ZIP for release 11.5.1
-
-Zip file for testing: [woocommerce-gutenberg-products-block.zip](https://github.com/woocommerce/woocommerce-blocks/files/13299246/woocommerce-gutenberg-products-block.zip)
-
-## WooCommerce Core
-
-### Bug Fixes
-
-#### Fix Single Product Classic Template block not showing on the front-end. [11455](https://github.com/woocommerce/woocommerce-blocks/pull/11455)
-
-1. Enable WordPress 6.4.
-2. Enable a block theme.
-3. Go to Site Editor → Single Product template.
-4. Remove the blockified template and add the “Classic Template” block.
-5. Save and check the front-end.
-6. Check that the template is correctly rendered on the front-end.
-
-#### Add protection against wrong params in get_block_template_fallback(). [11690](https://github.com/woocommerce/woocommerce-blocks/pull/11690)
-
-1. Go to a Product Category page in the frontend (ie: `/product-category/clothing/accessories/`).
-2. Verify it's displayed with the Product Catalog template.
-3. Go to Appearance > Editor > Templates > Product Catalog and make some edits.
-4. Go again to the Product Category page in the frontend and verify the changes are applied there as well.
diff --git a/plugins/woocommerce/client/blocks/docs/internal-developers/testing/releases/1154.md b/plugins/woocommerce/client/blocks/docs/internal-developers/testing/releases/1154.md
deleted file mode 100644
index a4195013cfd..00000000000
--- a/plugins/woocommerce/client/blocks/docs/internal-developers/testing/releases/1154.md
+++ /dev/null
@@ -1,72 +0,0 @@
-# Testing notes and ZIP for release 11.5.4
-
-Zip file for testing: [woocommerce-gutenberg-products-block.zip](https://github.com/woocommerce/woocommerce-blocks/files/13335241/woocommerce-gutenberg-products-block.zip)
-
-## WooCommerce Core
-
-### Bug Fixes
-
-#### Update Jetpack WooCommerce Analytics module integration to check for changed template names ([#11707](https://github.com/woocommerce/woocommerce-blocks/pull/11707))
-
-1. Enable Jetpack and ensure the WooCommerce Analytics module is set up and enabled.
-2. Install [Query Monitor](https://wordpress.org/plugins/query-monitor/).
-3. Go to the Cart and Checkout blocks and ensure no PHP warnings are logged.
-
-#### Fix address block invalidations in the editor and address card display in Firefox [#11714](https://github.com/woocommerce/woocommerce-blocks/pull/11714)
-
-1. Edit the checkout page
-2. Address form should not be condensed
-3. Toggle company/phone. Leave phone on. There should be no block errors.
-4. Save changes and visit the checkout on the frontend (add something to cart if needed)
-5. As a logged in user the address form should be condensed and phone should be visible. If no, fill out the form and place an order.
-6. After placing the order go back to checkout and repeat the previous step. Phone should be visible in the condensed address component.
-7. Go back to the editor and turn off the phone field. Save and go back to the frontend checkout. Ensure phone is hidden from the condensed address component.
-8. Add an item to the cart and go to checkout using Firefox browser.
-9. Fill out the form, then refresh the page.
-10. The condensed address component is shown.
-11. Edit the address. Ensure fields are populated with correct values.
-
-#### Fix styling of Classic Cart and Checkout Blocks on regular pages ([#11694](https://github.com/woocommerce/woocommerce-blocks/pull/11694))
-
-1. Create a new page
-2. Insert the classic checkout block
-3. Add something to your cart and visit the new page
-4. Confirm it looks correct and you can place an order
-5. Repeat for the classic cart block on another new page
-
-#### Fix double border in cart and notes field width on mobile. ([11742](https://github.com/woocommerce/woocommerce-blocks/pull/11742))
-
-1. Enable TT4 theme and go to cart
-2. Shrink window to mobile size and ensure there is no double border between the cart items table and cart totals table
-3. Go to checkout
-4. Open the order notes field. Check the textarea is as wide as the checkout, not wider.
-
-#### Ensure that incompatible notices are displayed in Safari. ([#11736](https://github.com/woocommerce/woocommerce-blocks/pull/11736))
-
-1. Install and activate [helper-plugin-1.zip](https://github.com/woocommerce/woocommerce-blocks/files/12701036/helper-plugin-1.zip)
-2. Create a test page and add the Cart block.
-3. Create a test page and add the Checkout block.
-4. Open both test pages using Safari.
-5. Click on the Cart block resp. the Checkout block and verify that the incompatible extension notice is visible.
-6. Repeat the previous step using Chrome, Firefox and Opera.
-
-<table>
-<tr>
-<td valign="top">Before:
-<br><br>
-<img width="1281" alt="Screenshot 2023-11-10 at 21 43 01" src="https://github.com/woocommerce/woocommerce-blocks/assets/3323310/5a68914b-5306-40fd-8270-af880120aa72">
-</td>
-<td valign="top">After:
-<br><br>
-<img width="1282" alt="Screenshot 2023-11-10 at 21 42 18" src="https://github.com/woocommerce/woocommerce-blocks/assets/3323310/8718c04b-fb9e-4db7-af71-c84d8e304fc1">
-</td>
-</tr>
-</table>
-
-#### Enabled the new blockified Order Confirmation by default for block-based themes. ([#11615](https://github.com/woocommerce/woocommerce-blocks/pull/11615))
-
-1. On a brand new WC installation enable a block based theme (eg TT3)
-2. Place a test order
-3. Verify the Thank you page displayed after placing an order renders the new blockified Order Confirmation (see attached printscreen)
-4. Change the website language. Repeat steps 2 & 3 and verify that the headings get properly translated.
-5. Go to Appearance > Site Editor > Templates > Manage all templates. Verify that the blockified Order Confirmation displays properly, saving changes work and they get reflected on a new order.
diff --git a/plugins/woocommerce/client/blocks/docs/internal-developers/testing/releases/1160.md b/plugins/woocommerce/client/blocks/docs/internal-developers/testing/releases/1160.md
deleted file mode 100644
index cb3b598709c..00000000000
--- a/plugins/woocommerce/client/blocks/docs/internal-developers/testing/releases/1160.md
+++ /dev/null
@@ -1,407 +0,0 @@
-# Testing notes and ZIP for release 11.6.0
-
-Zip file for testing: [woocommerce-gutenberg-products-block.zip](https://github.com/woocommerce/woocommerce-blocks/files/13439996/woocommerce-gutenberg-products-block.zip)
-
-## Testing Notes
-
-### Make "Use same address for billing" visible by default [#11804](https://github.com/woocommerce/woocommerce-blocks/pull/11804)
-
-1. Open an incognito/guest session
-2. Add some to your cart
-3. Go to checkout
-4. Confirm that on entry, the "Use same address for billing" checkbox is visible.
-
-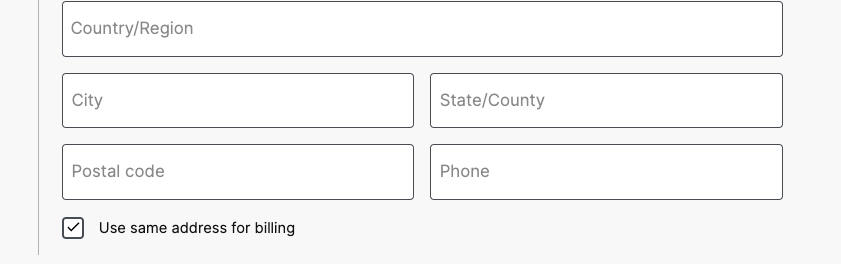
-
-### Fix the order endpoint tax line items format [#11796](https://github.com/woocommerce/woocommerce-blocks/pull/11796)
-
-1. Test the order endpoint wp-json/wc/store/v1/order/{ORDER_NUMBER}?key={KEY}&billing_email={BILLING_EMAIL}
-2. See the tax lines format
-
-| Before | After |
-| ------ | ----- |
-| <img width="245" alt="Screen Shot 2023-11-15 at 6 53 44 PM" src="https://github.com/woocommerce/woocommerce-blocks/assets/56378160/73440009-7a72-4f62-8b49-fb4ace0fd616"> | <img width="258" alt="Screen Shot 2023-11-15 at 7 08 16 PM" src="https://github.com/woocommerce/woocommerce-blocks/assets/56378160/8f830fc6-a2e9-48a7-b404-1841314a141e"> |
-
-### Continue validating schema after validating nested properties [#11792](https://github.com/woocommerce/woocommerce-blocks/pull/11792)
-
-This requires code, so this should only be tested by developers.
-
-1. Testing code:
-
-Add this to functions.php or the main plugin file:
-
-```php
-woocommerce_store_api_register_endpoint_data(
- array(
- 'endpoint' => \Automattic\WooCommerce\StoreApi\Schemas\V1\CheckoutSchema::IDENTIFIER,
- 'namespace' => 'my-extension-test',
- 'schema_callback' => function () {
- return [
- 'my_field' => array(
- 'description' => 'test 1',
- 'type' => 'string',
- 'context' => array( 'view', 'edit' ),
- 'default' => '',
- )
- ];
- },
- )
-);
-
-woocommerce_store_api_register_endpoint_data(
- array(
- 'endpoint' => \Automattic\WooCommerce\StoreApi\Schemas\V1\CheckoutSchema::IDENTIFIER,
- 'namespace' => 'my-extension-test-2',
- 'schema_callback' => function () {
- return [
- 'my_field' => array(
- 'description' => 'test 2',
- 'type' => 'string',
- 'context' => array( 'view', 'edit' ),
- 'required' => true,
- )
- ];
- },
- )
-);
-```
-
-This registers 2 additional schemas on the checkout route.
-
-2. Try to place an order. You will get an error notice: `extensions > my-extension-test is not of type object.`
-3. Open console and run this: `wp.data.dispatch( 'wc/store/checkout' ).__internalSetExtensionData( 'my-extension-test', { 'my_field': 'test' } );` This adds data for the first schema.
-4. Place order again. **This time you'll see `extensions > my-extension-test-2 is not of type object.`**. This is what was fixed.
-5. Open console and run this: `wp.data.dispatch( 'wc/store/checkout' ).__internalSetExtensionData( 'my-extension-test-2', { 'my_field': 'test' } );` This adds data for the second schema.
-6. Place order again. It should go through successfully.
-
-### Product Collection - New 'No Results' block with default UI [#11783](https://github.com/woocommerce/woocommerce-blocks/pull/11783)
-
-#### Case 1: Normal
-
-1. Create a new post & add Product Collection block
-2. Verify that there is "No results" block, which UI should look like this:
- 
-
-
-3. Save the post & verify on Frontend that "No results" blocks work as expected:
- - **Note:** This block will be only visible if there are no products to show on the frontend. You can achieve this by changing the filters in Inspector control such that there are no products to show for those filters. For example, try setting "Stock Status" filter to only "On backorder".
-4. There are two links on frontend:
- - **store's home:** Verify that "store's home" link takes you to the home page of the store.
- - **clearing any filters:** This functionality is tested in Case 2.
-
-#### Case 2: Testing `clearing any filters` link
-
-1. Create a new post.
-2. Add filters blocks, i.e. Filter by Price, Filter by Stock, Filter by Attribute, Filter by Rating, etc. You can use a pattern called "Product Filters" which contains all the filters.
-3. Add Product Collection block & publish the post
-4. Go to frontend:
- - Change all filter block values so that there are no products for selected filters and no results block becomes visible. URL will look something like this: `http://store.local/162-2/?filter_stock_status=instock&filter_color=blue%2Cgray&query_type_color=or&min_price=29&max_price=32`
- - Click on "clearing any filters" link & verify that it clears all filter values.
- - *TO BE TESTED BY DEVELOPERS*
- - You can also add some random query variables to URL, for example `&random=value` & URL will look something like this: `http://store.local/162-2/?filter_stock_status=instock&filter_color=blue%2Cgray&query_type_color=or&min_price=29&max_price=32&random=value`
- - Verify that clicking on `clearing any filters` only removes query variables that are related to filters & doesn't remove this random query variable we added.
-
-#### Case 3: Adding styles to "No results" block
-
-1. Create a new post & add Product Collection block.
-2. Select "No results" block & change styles using Inspector control, i.e.:
- - Text, Background & Link color
- - Typography: Font family, appearance, line height, decoration etc.
-3. Verify the changes made to these styles are visible on Editor.
-4. Publish the post & verify that changes are visible on Frontend as well.
-
-#### Case 4: Adding/removing blocks
-
-1. Create a new post & add Product Collection block.
-2. In “No results” block:
- 1. Verify that you can remove existing blocks.
- 2. Verify that you can add new blocks to it.
- 3. Verify that the above changes are reflected correctly on the frontend.
-
-Here is a [quick demo](https://github.com/woocommerce/woocommerce-blocks/assets/16707866/a5907a6f-8131-45f9-9c18-6f693cd02b5c)
-
-### Move all totals components into components package [#11773](https://github.com/woocommerce/woocommerce-blocks/pull/11773)
-
-1. Install [Extra Fees Plugin for WooCommerce](https://wordpress.org/plugins/woo-conditional-product-fees-for-checkout/)
-2. Set it up like so and save your changes: (Please choose a product in your store if you don't have "Belt")
- <img width="600" alt="image" src="https://github.com/woocommerce/woocommerce-blocks/assets/5656702/16b3d2b5-1bec-4769-95c5-b28d53c44ce0">
-
-3. Set up taxes in your store and ensure some items are taxed.
-4. Add these items, and the item with a fee from step 2 to your cart.
-5. Go to the Cart block and see your "Extra fee" line.
-6. Ensure all the other totals elements appear, e.g. Taxes, Subtotal, Shipping, and Total.
-7. Go to the Checkout block and check the same elements appear correctly.
-
-### Increase CSS specificity for local pickup address [#11772](https://github.com/woocommerce/woocommerce-blocks/pull/11772)
-
-1. Go to `/wp-admin/admin.php?page=wc-settings&tab=shipping§ion=pickup_location`.
-2. Enable local pickup option.
-3. Add a pickup location.
-4. Create a test page and add the Checkout block to it.
-5. Go to the frontend and add a product to the cart.
-6. Go to the test page with the Checkout block.
-7. Select the shipping method `Local Pickup`.
-8. Verify that the local pickup address is left aligned.
-
-<table>
-<tr>
-<td valign="top">Before:
-<br><br>
-<img width="688" alt="Screenshot 2023-11-15 at 00 14 00" src="https://github.com/woocommerce/woocommerce-blocks/assets/3323310/9bd1992d-c9b0-4e87-91fa-9a0cba038336">
-</td>
-<td valign="top">After:
-<br><br>
-<img width="685" alt="Screenshot 2023-11-15 at 00 04 48" src="https://github.com/woocommerce/woocommerce-blocks/assets/3323310/0d7b497f-3139-4d5b-92be-31bffea9fbaf">
-</td>
-</tr>
-</table>
-
-### Fix strings in classic-checkout modal window [#11771](https://github.com/woocommerce/woocommerce-blocks/pull/11771)
-
-1. Install and activate an incompatible extension e.g. [helper-plugin-1.zip](https://github.com/woocommerce/woocommerce-blocks/files/12701036/helper-plugin-1.zip)
-2. Edit the checkout page. Ensure its using blocks, if its not, insert the checkout block and refresh
-3. In the inspector you should see an incompatible extension notice. Click "Switch to classic checkout"
-4. In the modal window, verify the next reads "If you continue, the checkout block will be replaced with the classic experience powered by shortcodes. This means that you may lose:"
-
-### Fix hardcoded shop link in "Hero Product 3 Split" pattern [#11767](https://github.com/woocommerce/woocommerce-blocks/pull/11767)
-
-1. Create a new page or post and insert the "Hero Product 3 Split" pattern.
-2. Save, go to the front end and make sure the `Shop now` button takes you to the correct Shop page of your site.
-
-### Move Button, StoreNotice and StoreNoticesContainer components into the components package [#11766](https://github.com/woocommerce/woocommerce-blocks/pull/11766)
-
-1. Install the [WooCommerce Stripe Payment Gateway](https://wordpress.org/plugins/woocommerce-gateway-stripe/)
-2. Add something to your cart.
-3. Visit the Cart & Checkout and make sure all the buttons appear and function as expected.
-5. Try to make a payment with a random stripe card (or an known invalid one).
-6. You should see a notice appear in the payment section of the checkout.
-
-### Refactor default editing state for customer address fields [#11765](https://github.com/woocommerce/woocommerce-blocks/pull/11765)
-
-1. Go to admin and edit the checkout page
-4. Switch between "Local Pickup" and "Shipping" in the preview. Ensure fields for shipping address/billing address remain visible.
-5. Go to the frontend checkout as a guest user. Fields should start open.
-6. Fill out the address fields and refresh the checkout. Fields should condense.
-7. Toggle the "Use same address for billing" checkbox. Fields should be open.
-8. Fill out the billing address using different data to shipping address then refresh the page. Address should be condensed.
-
-### Move Panel to components package [#11698](https://github.com/woocommerce/woocommerce-blocks/pull/11698)
-
-1. Install [Multiple Packages for WooCommerce](https://wordpress.org/plugins/multiple-packages-for-woocommerce/) and go to the settings for it (WooCommerce -> Settings) set the grouping option to Individual.
-2. Ensure you have a few different shipping methods set up.
-3. Add multiple items to your cart.
-4. Go to the Cart block, ensure there are panels in the sidebar that can collapse/expand to show shipping options for each product.
-
- <img width="376" alt="image" src="https://github.com/woocommerce/woocommerce-blocks/assets/5656702/c4c315ab-5fa5-4890-b0e5-f1caa7127404">
-
-5. Go to the Checkout block. Shrink your screen to mobile size.
-6. Ensure the "Order summary" panel appears and can be collapsed/expanded to show the items in your order.
-
-| Closed | Open |
-| ------- | ----- |
-| <img width="470" alt="image" src="https://github.com/woocommerce/woocommerce-blocks/assets/5656702/8af080d9-f537-4296-8695-a9d7b89252ea"> | <img width="485" alt="image" src="https://github.com/woocommerce/woocommerce-blocks/assets/5656702/e4555d8f-d144-4b4d-b01c-ab4adb67416d"> |
-
-### Translate Related Products heading in Single Product template [#11693](https://github.com/woocommerce/woocommerce-blocks/pull/11693)
-
-#### Prerequisites
-
-1. Make sure your store is using DEFAULT blockified template. It may require creating a new store
-2. Change your store language to something else than English (e.g. Spanish - Espanol)
-3. You may need to update the translations (go to Dashboard -> Updates -> Update translations)
-
-#### Default template
-
-1. Go to Editor and edit "Single Product" template (Producto individual)
-2. Check the Related Products heading is translated and has top and bottom margin
-
-#### Transform from classic template
-
-1. Go to Editor and edit "Single Product" template (Producto individual)
-2. Remove the content and add classic template: "WooCommerce Single Product Block"
-3. Focus on it and click "Transform into blocks"
-4. Check the Related Products heading is translated and has top and bottom margin
-
-| Before | After |
-| ------ | ----- |
-| <img width="946" alt="image" src="https://github.com/woocommerce/woocommerce-blocks/assets/20098064/6243d080-d113-47f0-9695-44f861b10638"> | <img width="883" alt="image" src="https://github.com/woocommerce/woocommerce-blocks/assets/20098064/735019b4-6153-48d6-b827-8927cb6638ae"> |
-
-### Remove author, sticky, parents attributes from the Product Collection block in patterns [#11673](https://github.com/woocommerce/woocommerce-blocks/pull/11673)
-
-1. Go to Editor
-2. Add following patterns
-
-- Product Collection 3 Columns
-- Product Collection 4 Columns
-- Product Collection 5 Columns
-- Product Collection: Featured Products 5 Columns
-- Product Collection Full Grid
-- Product Collection Grid
-- Product Collection Rows
-- Product Collection Simple Grid
-- Product Gallery
-
-3. Make sure they are rendered correctly and there's no errors/warnings
-4. Save and go to frontend
-5. Make sure they are rendered correctly and there's no errors/warnings
-
-### Move TextInput, ValidatedTextInput and ValidationInputError to the @woocommerce/blocks-components package. [#11654](https://github.com/woocommerce/woocommerce-blocks/pull/11654)
-
-1. Ensure your site has coupons enabled and one is added.
-2. Add items to your cart and go to the Cart block.
-3. Add a coupon to your cart using the "Add a coupon" link in the sidebar. Ensure the textbox to enter the coupon in works OK.
-5. Remove the coupon and add another one. This time use an invalid coupon. The textbox should go into an error state with an error message beneath.
-6. Do the same on the Checkout block.
-7. On the Checkout block, ensure you can enter your address in the text inputs.
-8. Ensure the country select works. Choose United States.
-9. Ensure the state select works. Choose any state.
-
-### Move phone to default fields section instead of being handled inline [#11651](https://github.com/woocommerce/woocommerce-blocks/pull/11651)
-
-1. In the editor, disable the phone number. Make sure it's no longer visible in Checkout and you can place an order without it.
-2. Make the phone optional, make sure it's visible but with an optional label, and that you can place an order without filling it.
-3. Make the phone required. Make sure the field is visible without the optional label. Make sure you can't place an order without filling that field, and that errors are visible.
-4. In the inspector, make sure the field type is tel and not text.
-5. When you fill the phone field, and uncheck the "use shipping as billing" checkbox, you should see the same value in the billing one.
-
-### Add to Cart with Options block: fix inconsistency between editor and frontend [#11614](https://github.com/woocommerce/woocommerce-blocks/pull/11614)
-
-0. Make sure you are using a block theme.
-1. In the editor, go to Appearance > Editor > Templates > Single Product. On the frontend, open the page of any simple product.
-2. Verify the Add to Cart form looks the same in both views.
-3. Test with WP 6.3 & Gutenberg disabled and WP 6.4 & Gutenberg enabled (you can use [this plugin](https://wordpress.org/plugins/wordpress-beta-tester/) to update to WP 6.4 before it's released).
-4. Test with different block themes.
-
-Theme | Before | After |
-| --- | ------ | ----- |
-Twenty-Twenty Four |  |  |
-Twenty-Twenty Three |  | 
-Twenty-Twenty Two |  | 
-
-### Migration of Product Collection and Product Button blocks to the new store() API [#11558](https://github.com/woocommerce/woocommerce-blocks/pull/11558)
-
-1. Load a template that contains with Product Button blocks
-2. Test that it keeps working as exactly as it is working on `trunk`
-
-<div>
- <a href="https://www.loom.com/share/cbe30d0c820e4f99a3e6697a5f85b759">
- <img style="max-width:300px;" src="https://cdn.loom.com/sessions/thumbnails/cbe30d0c820e4f99a3e6697a5f85b759-with-play.gif">
- </a>
-</div>
-
-### Product Button: Remove the hardcoded width and padding [#11537](https://github.com/woocommerce/woocommerce-blocks/pull/11537)
-
-1. Add the `4-Column Product Row` pattern to a post or a page.
-2. Go to the front end and try re-sizing the viewport.
-3. Make sure the buttons are not overflowing.
-4. Try adding products to the cart. Make sure there's no odd visual behavior.
-5. Go to the `Shop` page and make sure the buttons look and behave correctly.
-6. Try testing with regular, wide and full width.
-
-| Before | After |
-| ------ | ----- |
-|<img width="754" alt="4-Column_Product_Row_–_newproductgallery" src="https://github.com/woocommerce/woocommerce-blocks/assets/905781/7ee201f1-e2de-4bd7-861c-7f63a7131daa">|<img width="702" alt="4-Column_Product_Row_–_newproductgallery" src="https://github.com/woocommerce/woocommerce-blocks/assets/905781/3d80f974-0d61-4c02-a600-99e0d17abd43">|
-
-### Product Collection: Add support for filtering products by featured status [#11522](https://github.com/woocommerce/woocommerce-blocks/pull/11522)
-
-#### Case 1: Normal
-
-1. Create a new post & add "Product Collection (Beta)" block to it.
-2. In the inspector controls, select the three dots on the filters panel.
-
- <img src="https://github.com/woocommerce/woocommerce-blocks/assets/16707866/97c268e5-89c0-40e2-9ceb-4664c7ecef81" width="300"/>
-
-3. Confirm the visibility of the "Featured" filter.
-4. Click "Featured" to add the Featured filter to the Inspector controls. Ensure it matches the screenshot provided:
- <img src="https://github.com/woocommerce/woocommerce-blocks/assets/16707866/132b1bcb-10c9-43dc-8d58-29c7e0e124dc" width="300"/>
-
-5. Toggle the button to the ON position and confirm that only featured products are displayed in the Editor.
-6. Publish the post and inspect the frontend, verifying that only featured products are visible.
-7. Furthermore, confirm that toggling to the OFF position displays all products in both the Editor and frontend.
-
-#### Case 2: Resetting the value of the Featured filter
-
-1. Follow the steps in Case 1 to add the Featured filter to the Inspector controls.
-2. Toggle it to the ON position to display only featured products in the Editor.
-3. Verify the ability to reset the filter using both options shown in the screenshot below:
- <img src="https://github.com/woocommerce/woocommerce-blocks/assets/16707866/f8d8af9e-f2e0-4a63-a46e-8dbfc6e6074d" width="300"/>
-
-- Click on "Featured" row itself
-- Click on "Reset all" button.
-
-#### Case 3: Ensuring older blocks aren't broken (To be tested by developers only)
-
-1. Switch to the trunk branch.
-2. Create a new post and add "Product Collection (Beta)" block.
-3. Save and publish the post.
-4. Switch to the branch named `add/11358-product-collection-featured-products-filter`.
-5. Verify that everything functions as expected in both the saved post's Editor and frontend.
-
-### Fix the Layout for Shipping and Billing Address Forms in the Checkout Block [#11486](https://github.com/woocommerce/woocommerce-blocks/pull/11486)
-
-1. Add a product to the cart
-2. Go to the Checkout Block
-3. Check the shipping or billing address form fields
-4. Set the country to `Hungary`. Confirm there are no empty spaces in the form and the layout is the same in the classic checkout
-5. Set the country to `Japan`. Confirm the layout is similar to the classic checkout
-
-<img width="450" alt="image" src="https://github.com/woocommerce/woocommerce-blocks/assets/14235870/9d90ce9c-ae2b-434c-8cab-5dca257a9c0d">
-
-| Before | After |
-| ------ | ----- |
-| <img width="665" alt="image" src="https://github.com/woocommerce/woocommerce-blocks/assets/14235870/5031e060-f6d9-4e5d-a4af-3a7dfd041b77"> | <img width="665" alt="image" src="https://github.com/woocommerce/woocommerce-blocks/assets/14235870/8322e8b9-b16e-4ef9-a3f5-6729d146cf19"> |
-
-### Product Button: always enqueue the store [#11858](https://github.com/woocommerce/woocommerce-blocks/pull/11858)
-
-1. Add Price Filter.
-3. Add Product Collection.
-3. Go to frontend.
-4. Set the price filters in a way that there are no products displayed, for example, slide min price fully to the right.
-5. Open the console.
-6. Ensure no error is visible.
-
-### Fix arguments passed to woocommerce_before_thankyou to mirror core hook [#11862](https://github.com/woocommerce/woocommerce-blocks/pull/11862)
-
-From the issue (requires code):
-
-1. Implement a function that expects an integer for the order ID, attached to the woocommerce_before_thankyou hook.
-
-```php
-function test_function_11851( int $order_id ): void {
- printf( 'Hello, this is order %d', $order_id );
-}
-add_action( 'woocommerce_before_thankyou', 'test_function_11851' );
-```
-
-2. Place an order on the WooCommerce store.
-3. Thanks page should show without errors. Should see `Hello, this is order X`
-
-### Validate coupon usage against customer id AND emails [#11860](https://github.com/woocommerce/woocommerce-blocks/pull/11860)
-
-#### From logged in to logged out
-
-1. Create a new coupon and limit its usage to 1 per customer.
-2. Logged in, with an email you remember, place an order using that coupon, it should pass.
-3. Logged out, using the same email, try placing an order with that coupon, you should get a top level error "coupon_name" was removed from the cart. Coupon usage limit has been reached.".
-
-#### User email vs billing email
-
-1. Create a new coupon and limit its usage to 1 per customer.
-2. Logged in, with an user email you remember, place an order using that coupon, and a different billing email. It should pass.
-3. Logged out, using the same user email (not the billing email), try placing an order with that coupon, you should get a top level error "coupon_name" was removed from the cart. Coupon usage limit has been reached.".
-
-#### From logged out to logged in
-
-1. Create a new coupon and limit its usage to 1 per customer.
-4. Logged out, use the coupon with an email you remember, that email should belong to an existing user.
-5. You should be able to place the order fine.
-6. Logged in with the user that own that email.
-7. Go to checkout, add the coupon, using the same email, try to place the order.
-8. You should get a top level error.
-9. Change your billing email to something else, add the coupon again.
-10. Try to place the order, you should get an error.
-
-#### General regression testing
-
-1. Create a new coupon and limit its usage to 1 per customer.
-2. Logged in, with an email you remember, place an order using that coupon, it should pass.
-3. Logged in again, back to checkout, change your email, and try adding the coupon, you should get an inline error that you can't use the coupon.
diff --git a/plugins/woocommerce/client/blocks/docs/internal-developers/testing/releases/1161.md b/plugins/woocommerce/client/blocks/docs/internal-developers/testing/releases/1161.md
deleted file mode 100644
index 579a5cd8a3d..00000000000
--- a/plugins/woocommerce/client/blocks/docs/internal-developers/testing/releases/1161.md
+++ /dev/null
@@ -1,36 +0,0 @@
-# Testing notes and ZIP for release 11.6.1
-
-Zip file for testing: [woocommerce-gutenberg-products-block.zip](https://github.com/woocommerce/woocommerce-blocks/files/13450476/woocommerce-gutenberg-products-block.zip)
-
-## Testing Notes
-
-### Add missing woocommerce classname to Classic Cart/Checkout Blocks container so UI updates when the cart is emptied. [#11919](https://github.com/woocommerce/woocommerce-blocks/pull/11919)
-
-1. Edit the cart page
-2. Convert the cart block into a "Classic Cart" block if not already there. You can use block transforms.
-3. Save the page and go to the store.
-4. Add some items to your cart, then head on to the cart page.
-5. Remove each item from the cart using the X
-6. The last item should be removed from the cart successfully. You can also "undo" the change and the item will come back.
-
-### Fix an issue that caused the Order by select in Reviews blocks to always be disabled. [#11918](https://github.com/woocommerce/woocommerce-blocks/pull/11918)
-
-1. Make sure you have at least one review in your store.
-2. Create a post or page and add the All Reviews, Reviews by Category and Reviews by Product blocks (in the last two, select the category/product which have reviews).
-3. View the page in the frontend.
-4. Verify it's possible to change the _Order by_ value and reviews are sorted accordingly.
-
-| Before | After |
-|------------------------------------------------------------------------------------------------------------------------------------------------------------------------------------------|-----------------------------------------------------------------------------------------------------------------------------------------------------------------------------------------|
-| <img src="https://github.com/woocommerce/woocommerce-blocks/assets/3616980/3a5dcd22-2df7-46e9-922f-087fdc295fe9" alt="Reviews blocks with the _Order by_ select disabled" width="539" /> | <img src="https://github.com/woocommerce/woocommerce-blocks/assets/3616980/bc840ae6-76f2-4830-95aa-9dd004e7bf47" alt="Reviews blocks with the _Order by_ select enabled" width="539" /> |
-
-### Fix All Reviews, Reviews by Product and Reviews by Category blocks not being rendered. [#11913](https://github.com/woocommerce/woocommerce-blocks/pull/11913)
-
-1. Make sure you have at least one review in your store.
-2. Create a post or page and add the All Reviews, Reviews by Category and Reviews by Product blocks (in the last two, select the category/product which have reviews).
-3. Verify no errors are shown in the editor.
-4. Verify the blocks are rendered properly in the frontend.
-
-| Before | After |
-|-------------------------------------------------------------------------------------------------------------------------------------------------------------------------------------|-------------------------------------------------------------------------------------------------------------------------------------------------------------------------------------|
-| <img src="https://github.com/woocommerce/woocommerce-blocks/assets/3616980/d3128bdc-b4cd-4304-a593-61dd8b09bf97" alt="Reviews blocks showing an error in the editor" width="539" /> | <img src="https://github.com/woocommerce/woocommerce-blocks/assets/3616980/6ad74a86-f5a8-4440-a3b3-e890efb8329b" alt="Reviews blocks showing no error in the editor" width="539" /> |
diff --git a/plugins/woocommerce/client/blocks/docs/internal-developers/testing/releases/1162.md b/plugins/woocommerce/client/blocks/docs/internal-developers/testing/releases/1162.md
deleted file mode 100644
index 5e9c7d36c4c..00000000000
--- a/plugins/woocommerce/client/blocks/docs/internal-developers/testing/releases/1162.md
+++ /dev/null
@@ -1,13 +0,0 @@
-# Testing notes and ZIP for release 11.6.2
-
-Zip file for testing: [woocommerce-gutenberg-products-block.zip](https://github.com/woocommerce/woocommerce-blocks/files/13545737/woocommerce-gutenberg-products-block.zip)
-
-## Testing Notes
-
-### Update the "Give us your feedback" link to point to the WooCommerce repo discussions. [#11999](https://github.com/woocommerce/woocommerce-blocks/pull/11999) [#12006](https://github.com/woocommerce/woocommerce-blocks/pull/12006)
-
-1. Create pages and add the Cart Block and Checkout block
-2. Select each of those blocks
-3. Verify that the Give us your feedback link (see printscreen) now directs to [https://github.com/woocommerce/woocommerce/discussions/new?category=checkout-flow&labels=type%3A+product%20feedback](https://github.com/woocommerce/woocommerce/discussions/new?category=checkout-flow&labels=type%3A+product%20feedback).
-
-<img width="326" src="https://github.com/woocommerce/woocommerce-blocks/assets/17236129/933251ca-c3bd-41ae-b46d-77d1c18e89da" alt="Feedback">
diff --git a/plugins/woocommerce/client/blocks/docs/internal-developers/testing/releases/1170.md b/plugins/woocommerce/client/blocks/docs/internal-developers/testing/releases/1170.md
deleted file mode 100644
index cbc05f87a22..00000000000
--- a/plugins/woocommerce/client/blocks/docs/internal-developers/testing/releases/1170.md
+++ /dev/null
@@ -1,499 +0,0 @@
-# Testing notes and ZIP for release 11.7.0
-
-Zip file for testing: [woocommerce-gutenberg-products-block.zip](https://github.com/woocommerce/woocommerce-blocks/files/13549019/woocommerce-gutenberg-products-block.zip)
-
-## Testing Notes
-
-### [Store Customization] Update the "Footer with 3 Menus" pattern to remove the last 2 menus [#11980](https://github.com/woocommerce/woocommerce-blocks/pull/11980)
-
-1. Create a new page or post.
-2. Insert the "Footer with Menus".
-3. Check it only has one menu.
-
-| Before | After |
-|-----------------------------------------------------------------------------------------------------------------------------------------------------------------------|-----------------------------------------------------------------------------------------------------------------------------------------------------------------------|
-| <img width="1407" alt="Screenshot 2023-11-29 at 11 23 27" src="https://github.com/woocommerce/woocommerce-blocks/assets/186112/a2408bf2-bf20-4c03-8388-8e51fbfc9fab"> | <img width="1407" alt="Screenshot 2023-11-29 at 11 23 21" src="https://github.com/woocommerce/woocommerce-blocks/assets/186112/50d4eb2e-a09e-463b-856d-b6ce5e7c4619"> |
-
-### [Store Customization] Update the default content in patterns [#11997](https://github.com/woocommerce/woocommerce-blocks/pull/11997)
-
-1. Insert [all the patterns](https://i.imgflip.com/87rb8e.jpg) from the next list:
-
-- Intro patterns
- - Featured category cover image
- - Hero product split
- - Just arrived full hero
-- Featured selling patterns:
- - Product Collection 4 Columns
- - Product Collection 5 Columns
- - Product Collection 3 Columns
- - Product Collection: Featured Products 5 Columns
- - Featured category triple
- - Large image product gallery
- - Product gallery
- - Hero product 3-split
- - Hero product chessboard
- - Featured category focus
- - Banner
-- About patterns
- - Alternating image and text
-- Review patterns
- - Testimonials 3 Columns
- - Testimonials single
-- Social media patterns
- - Social: Follow us on social media
-
-2. Check the copy is the same expected in the designs (see screenshots here: [#11875](https://github.com/woocommerce/woocommerce-blocks/issues/11875)).
-
-### Update patterns design [#12005](https://github.com/woocommerce/woocommerce-blocks/pull/12005)
-
-1. Create a new page or post.
-2. Insert the "Just Arrived Full Hero" and check it matches the new design below FlPl7fHaGv9mpu8Nfl0joH-fi-158_32406 (the button colors may differ between themes because they are no hard-coded).
-<img width="750" alt="Screenshot 2023-12-04 at 14 53 27" src="https://github.com/woocommerce/woocommerce-blocks/assets/186112/f919bb4a-850b-483d-be35-8ea12e161de9">
-
-3. Insert the "Product Collection 3 Columns" and "Product Gallery" and check they don't have titles anymore.
-4. Insert the "Hero Product Chessboard" and check the bottom-left square has the following copy:
-
-```TXT
-Quality Materials
-We use only the highest-quality materials in our products, ensuring that they look great and last for years to come.
-
-Unique Design
-From bold prints and colors to intricate details and textures, our products are a perfect combination of style and function.
-```
-
-### Hook `woocommerce_single_product_summary` action to `core/post-excerpt` block [#11953](https://github.com/woocommerce/woocommerce-blocks/pull/11953)
-
-1. Ensure that you are using a block theme.
-2. Install [Code Snippets](https://wordpress.org/plugins/code-snippets/), that will allow us to insert some PHP code into our store.
-3. Go to Snippets > Add New. Set the code snippet title to `Product summary` and add this PHP code:
-
-```PHP
-add_action('woocommerce_single_product_summary', function() {
- echo 'woocommerce_single_product_summary';
-});
-```
-
-4. In the frontend, go to a Single product page and ensure that the string `woocommerce_single_product_summary` is visible before the Product Summary.
-
-| Before | After |
-|-----------------------------------------------------------------------------------------------------------------|-----------------------------------------------------------------------------------------------------------------|
-|  |  |
-
-### Remove isExperimental flag from product-query module which is not experimental [#10531](https://github.com/woocommerce/woocommerce-blocks/pull/10531)
-
-1. Go to Editor
-2. Insert Products (Beta) block in some template
-3. Smoke test in Editor
-4. Save and go to frontend - verify it works normal
-5. Repeat the above in new post
-
-### [Product Collection] Fix: HTML entity decoding for product names in Hand-Picked Products [#11927](https://github.com/woocommerce/woocommerce-blocks/pull/11927)
-
-1. Add a hyphen `–` to the name of any product, like **`Hoodie - Black`**.
-2. Insert a Product Collection block into a new post.
-3. Apply the “Hand-picked Products” filter in Inspector Controls.
-4. Search for the product with the hyphen and confirm it displays correctly, as shown below:
-
-
-
-5. Feel free to test other [HTML entities](https://developer.mozilla.org/en-US/docs/Glossary/Entity) too.
-
-**Verifying Label Update**:
-
-- Ensure the text reads “HAND-PICKED PRODUCTS” instead of “PICK SOME PRODUCTS”, as depicted in the image below:
-
-
-
-### Fix: Product Collection show products with correct stock statuses [#11708](https://github.com/woocommerce/woocommerce-blocks/pull/11708)
-
-1. Set some product to be out of stock.
-2. Add Product Collection block to a page.
-3. Set the stock status filter to all options except `outofstock`.
-4. See the out of stock products **not show up** in the editor preview.
-5. Save and see the same on the front end. Out of stock products don't show up.
-
-### Migration of Product Collection and Product Button blocks to the new `store()` API [#11558](https://github.com/woocommerce/woocommerce-blocks/pull/11558)
-
-1. Load a template that contains the Product Button blocks: ie, the `/shop` page.
-2. Do some smoke testing and make sure there are no regressions and products can be added to the cart without issues.
-
-### Preserve shrinkColumns value when switching the layout type of Product Collection [#11905](https://github.com/woocommerce/woocommerce-blocks/pull/11905)
-
-1. Go to Editor
-2. Add Product Collection block
-3. Enable "Responsive" option
-4. Switch view from Grid to Stack and back to Grid - try both Inspector Controls and Toolbar option (red rectangles on the screenshot).
-
-5. When switching back to Grid view, "Responsive" should be still ENABLED
-6. Repeat with the option DISABLED
-
-### Enable shrink columns option in Product Collection by default [#11821](https://github.com/woocommerce/woocommerce-blocks/pull/11821)
-
-#### Case 1: Default Product Collection
-
-1. Go to Editor
-2. Add Product Collection block
-3. Expected: it has "Responsive" enabled by default
-
-#### Case 2: Patterns
-
-1. Go to Editor
-2. Insert patterns:
-
-- Product Collection Grid
-- Product Collection Full Grid
-- Product Collection Simple Grid
-- Product Gallery
-
-3. Make sure each of them has "Responsive" option enabled by default
-4. Insert pattern Product Collection Rows - it has `Stack` view enabled by default and then "Responsive" is not available. Change the view from `Stack` to `Grid`
-5. Make sure it has "Responsive" option enabled by default
-
-#### Testing notes for the development team
-
-1. While on `trunk`, add Product Collection block
-6. It has "Responsive" option disabled by default
-7. Enter "Code editor" and
-8. Find and remove `"shrinkColumns":false"` - this step is to mimic the case when someone added the block before the option was even introduce
-9. Save the post/template
-10. Switch to this branch `add/enable-shrink-column-in-product-collection-by-default`
-11. Refresh the Editor
-12. Change number of columns - this step is to trigger `setAttribute` function
-13. Expected: make sure this block still has the "Responsive" option DISABLED
-
-### Reorganise Columns controls and fix undefined problem in Product Collection settings [#11937](https://github.com/woocommerce/woocommerce-blocks/pull/11937)
-
-1. Go to Editor
-2. Add Product Collection block
-3. Check Inspector Controls
-4. "Columns" and "Responsive" look like in the AFTER image:
-
-| Before | After |
-|--------------------------------------------------------------------------------------------------------------------------------------------|--------------------------------------------------------------------------------------------------------------------------------------------|
-| <img width="286" alt="image" src="https://github.com/woocommerce/woocommerce-blocks/assets/20098064/decb0d07-f6d6-4881-aa21-602d120c3865"> | <img width="288" alt="image" src="https://github.com/woocommerce/woocommerce-blocks/assets/20098064/f3a166f5-4c1b-42d2-b2c4-4627f759c7aa"> |
-
-6. Click three dots next to "Settings"
-7. There's no `undefined` entry, but "Columns" and "Responsive" like in the AFTER image:
-
-| Before | After |
-|--------------------------------------------------------------------------------------------------------------------------------------------|--------------------------------------------------------------------------------------------------------------------------------------------|
-| <img width="289" alt="image" src="https://github.com/woocommerce/woocommerce-blocks/assets/20098064/80c33902-f2da-4474-8658-50fc39dd43fd"> | <img width="285" alt="image" src="https://github.com/woocommerce/woocommerce-blocks/assets/20098064/06608aa3-a85d-43ec-b662-4ce6da634905"> |
-
-### [Product Collection] Fix: HTML Entity Decoding in Taxonomy Controls [#11982](https://github.com/woocommerce/woocommerce-blocks/pull/11982)
-
-1. Create a new post & add Product Collection block to it.
-2. From filters dropdown, Add “Taxonomies” filter. This will add “Product Categories” and “Product Tag” taxonomy filters to inspector control.
-3. Inside “Product Categories” filter, search a category that contains an HTML Entity.
- 1. If you don’t have any category with HTML entities, then you will need to either rename the existing category or create a new category with HTML entities. For example, “Electronics & Gadgets” or “Health & Wellness / Supplements”
- 2. Verify that HTML entities show as expected.
-4. Perform step 3 for “Product Tags” too.
-
-### Reviews by Product: fix reviews count not appearing in product selector [#11976](https://github.com/woocommerce/woocommerce-blocks/pull/11976)
-
-1. Create a post or page.
-2. Add the Reviews by Product block.
-3. Verify the number of reviews next to the product names:
-
-<img src="https://github.com/woocommerce/woocommerce-blocks/assets/3616980/099d4c8a-c2bb-4615-9006-c3283924f768" alt="" width="646" />
-
-4. Using the browser Inspector (<kbd>F12</kbd>), select one of the checkboxes.
-5. Verify the value of the `aria-label` shows the correct value (`<product_name>, has <reviews_count> reviews`). Ie: `Hoodie with Logo, has 1 review`.
-
-<img src="https://github.com/woocommerce/woocommerce-blocks/assets/3616980/afc4aeaa-6fea-4fac-ad54-2e03f8e02e1a" alt="" width="321" />
-
-### Move `CheckboxControl` to components package and leave alias in checkout package [#11662](https://github.com/woocommerce/woocommerce-blocks/pull/11662)
-
-1. Install [WooCommerce Stripe Payment Gateway](https://wordpress.org/plugins/woocommerce-gateway-stripe/) and set it up
-2. Edit the Checkout page in the Site editor, select the "Terms and Conditions block" and set the "Require checkbox" option to true.
-3. Ensure that order notes are enabled on the block. Ensure the checkboxes for these blocks all appear and the block as a whole renders OK.
-4. As a logged-in user, add an item to your cart and go to the Checkout block in the front-end.
-5. Ensure the "Use same address for billing" checkbox is available and works as intended.
-6. Scroll down to the Terms and conditions, ensure the checkbox renders and works correctly.
-7. Check the "Add a note to your order" box. Ensure it works and the textarea renders.
-8. Check out using Stripe and ensure the "Save payment information to my account for future purchases." renders.
-9. Check this box and check out, ensure checkout is successful.
-10. Add an item to your cart again and go back to the Checkout block. Ensure your card was saved.
-11. In the site editor, create a page and add the "All Products" and "Filter by Attribute" blocks.
-12. On "Filter by Attribute" choose an attribute with multiple terms and ensure the checkboxes show up in the editor.
-13. View this page on the front-end and ensure they render there, too.
-
-
-### Import CheckboxControl from a single place [#12015](https://github.com/woocommerce/woocommerce-blocks/pull/12015)
-
-1. In Checkout, click the order note label.
-2. It should not open Shipping as billing checkbox.
-
-### Update notice for default cart and checkout [#11861](https://github.com/woocommerce/woocommerce-blocks/pull/11861)
-
-1. Create a test page and add the Cart block to it.
-2. Open the settings sidebar.
-3. Select the Cart block.
-4. Verify that the notice _"If you would like to use this block as your default cart, update your page settings."_ no longer appears as a warning (yellow border and background), but as info (blue border, white background).
-5. Click the link _"[update your page settings"_.
-6. Verify that the notice _"Page settings updated"_ becomes visible.
-7. Repeat steps 1. until 6. with the Checkout block. In step 4., the message should say _"... as your default checkout, ..."_ instead of _"... as your default cart, ..."_.
-
-#### Cart block
-
-<table>
-<tr>
-<td valign="top">Before:
-<br><br>
-<img width="292" alt="Screenshot 2023-11-21 at 18 17 37" src="https://github.com/woocommerce/woocommerce-blocks/assets/3323310/22e60e36-9818-4a0a-8393-5b5cd53f25d0">
-</td>
-<td valign="top">After:
-<br><br>
-<img width="293" alt="Screenshot 2023-11-21 at 17 57 27" src="https://github.com/woocommerce/woocommerce-blocks/assets/3323310/e5ca3c95-f17a-47a0-b6e9-23395cc14144">
-</td>
-</tr>
-</table>
-
-#### Checkout block
-
-<table>
-<tr>
-<td valign="top">Before:
-<br><br>
-<img width="293" alt="Screenshot 2023-11-21 at 18 11 48" src="https://github.com/woocommerce/woocommerce-blocks/assets/3323310/161a9bb4-626d-49d5-bf93-bc03a2d1d8dc">
-</td>
-<td valign="top">After:
-<br><br>
-<img width="295" alt="Screenshot 2023-11-21 at 18 08 52" src="https://github.com/woocommerce/woocommerce-blocks/assets/3323310/cea552a4-4fd0-427a-8517-0e3eff105f9d">
-</td>
-</tr>
-</table>
-
-### Validate coupon usage against customer id AND emails [#11860](https://github.com/woocommerce/woocommerce-blocks/pull/11860)
-
-#### From logged in to logged out
-
-1. Create a new coupon and limit its usage to 1 per customer.
-2. Logged in, with an email you remember, place an order using that coupon, it should pass.
-3. Logged out, using the same email, try placing an order with that coupon, you should get a top level error "coupon_name" was removed from the cart. Coupon usage limit has been reached.".
-
-#### User email vs billing email
-
-1. Create a new coupon and limit its usage to 1 per customer.
-2. Logged in, with an user email you remember, place an order using that coupon, and a different billing email. It should pass.
-3. Logged out, using the same user email (not the billing email), try placing an order with that coupon, you should get a top level error "coupon_name" was removed from the cart. Coupon usage limit has been reached.".
-
-#### From logged out to logged in
-
-1. Create a new coupon and limit its usage to 1 per customer.
-4. Logged out, use the coupon with an email you remember, that email should belong to an existing user.
-5. You should be able to place the order fine.
-6. Logged in with the user that own that email.
-7. Go to checkout, add the coupon, using the same email, try to place the order.
-8. You should get a top level error.
-9. Change your billing email to something else, add the coupon again.
-10. Try to place the order, you should get an error.
-
-#### General regression testing
-
-1. Create a new coupon and limit its usage to 1 per customer.
-2. Logged in, with an email you remember, place an order using that coupon, it should pass.
-3. Logged in again, back to checkout, change your email, and try adding the coupon, you should get an inline error that you can't use the coupon.
-
-### fix: store notices always shows as an error type #11768 [#11932](https://github.com/woocommerce/woocommerce-blocks/pull/11932)
-
-1. Go to the Cart block.
-2. In the web dev console type: `wp.data.dispatch('core/notices').createSuccessNotice( 'This is a success message, it should show in green!', { context: 'wc/cart' } )`
-3. See the "success" notice display in green.
-
-| Before | After |
-|---------------------------------------------------------------------------------------------------------------------------------------------|---------------------------------------------------------------------------------------------------------------------------------------------|
-|  |  |
-
-### Switch to NoticeBanner component inside Store Notices Block placeholder [#11920](https://github.com/woocommerce/woocommerce-blocks/pull/11920)
-
-1. Go to Appearance > Editor > Templates > Page: Cart.
-2. Confirm the Store Notices Block has an informational notice appearance (blue banner).
-
-| Before | After |
-|-------------------------------------------------------------------------------------------------------------------------------------------|-------------------------------------------------------------------------------------------------------------------------------------------|
-|  |  |
-
-### Improve readability of order note [#11944](https://github.com/woocommerce/woocommerce-blocks/pull/11944)
-
-1. Add a product to your cart and go to the checkout.
-2. Add an order note and place the order.
-3. Verify that the order note is visible below the order detail table.
-4. Verify that the order detail table has the same border radius as the order note section.
-
-<table>
-<tr>
-<td valign="top">Before:
-<br><br>
-<img width="1138" alt="Screenshot 2023-11-27 at 14 37 44" src="https://github.com/woocommerce/woocommerce-blocks/assets/3323310/14b932c9-4c0a-40d0-a9f2-7ffff81836c4">
-
-</td>
-<td valign="top">After:
-<br><br>
-<img width="1135" alt="Screenshot 2023-11-27 at 14 36 28" src="https://github.com/woocommerce/woocommerce-blocks/assets/3323310/a3f53c2a-15eb-4c65-b890-fbf818890feb"></td>
-</tr>
-</table>
-
-### Limit number of visible incompatible extensions in sidebar notice [#11972](https://github.com/woocommerce/woocommerce-blocks/pull/11972)
-
-> [!NOTE]
-> Things to keey an eye on while testing:
->
-> - Number of visible extensions by default and within dropdown.
-> - String for exact 1 vs. more than 1 incompatible extension.
-> - Chevron changed direction based on opening/closing the dropdown.
-> - Link color is gray and link is underlined.
-> - The dropdown functionality works is cross-browser compatible.
-
-<details>
-<summary>
-Test with 2 extensions
-</summary>
-
-1. Install and activate the following helper plugins:
-
-- [helper-plugin-01.zip](https://github.com/woocommerce/woocommerce-blocks/files/13487656/helper-plugin-01.zip)
-- [helper-plugin-02.zip](https://github.com/woocommerce/woocommerce-blocks/files/13487657/helper-plugin-02.zip)
-
-2. Create a test page and add the Cart block.
-3. Select the Cart block and open the sidebar.
-4. Verify that the two incompatible extensions are visible.
-5. Verify that no dropdown, to more extensions, is visible.
-6. Repeat steps 2. until 5. using the Checkout block.
-
-<img width="283" alt="Screenshot 2023-11-28 at 19 13 46" src="https://github.com/woocommerce/woocommerce-blocks/assets/3323310/c98dae13-a013-447a-825f-48b2ec46c6f4">
-
-</details>
-
-<details>
-<summary>
-Test with 3 extensions
-</summary>
-
-1. Install and activate the following helper plugins:
-
-- [helper-plugin-01.zip](https://github.com/woocommerce/woocommerce-blocks/files/13487757/helper-plugin-01.zip)
-- [helper-plugin-02.zip](https://github.com/woocommerce/woocommerce-blocks/files/13487758/helper-plugin-02.zip)
-- [helper-plugin-03.zip](https://github.com/woocommerce/woocommerce-blocks/files/13487759/helper-plugin-03.zip)
-
-2. Create a test page and add the Cart block.
-3. Select the Cart block and open the sidebar.
-4. Verify that the two incompatible extensions are visible by default.
-5. Verify that the dropdown says `1 more incompatibility`.
-6. Click the dropdown link and verify that 1 incompatible extension is visible.
-7. Repeat steps 2. until 6. using the Checkout block.
-
-<table>
-<tr>
-<td valign="top">Closed:
-<br><br>
-<img width="283" alt="Screenshot 2023-11-28 at 21 32 30" src="https://github.com/woocommerce/woocommerce-blocks/assets/3323310/ba6a42ba-9934-4510-8ba7-c1513fc05c85">
-</td>
-<td valign="top">Open:
-<br><br>
-<img width="283" alt="Screenshot 2023-11-28 at 21 32 38" src="https://github.com/woocommerce/woocommerce-blocks/assets/3323310/e2079194-eca8-40df-baca-0691f5930d8e">
-</td>
-</tr>
-</table>
-
-</details>
-
-<details>
-<summary>
-Test with 10 extensions
-</summary>
-
-1. Install and activate the following helper plugins:
-
-- [helper-plugin-01.zip](https://github.com/woocommerce/woocommerce-blocks/files/13488042/helper-plugin-01.zip)
-- [helper-plugin-02.zip](https://github.com/woocommerce/woocommerce-blocks/files/13488043/helper-plugin-02.zip)
-- [helper-plugin-03.zip](https://github.com/woocommerce/woocommerce-blocks/files/13488045/helper-plugin-03.zip)
-- [helper-plugin-04.zip](https://github.com/woocommerce/woocommerce-blocks/files/13488046/helper-plugin-04.zip)
-- [helper-plugin-05.zip](https://github.com/woocommerce/woocommerce-blocks/files/13488047/helper-plugin-05.zip)
-- [helper-plugin-06.zip](https://github.com/woocommerce/woocommerce-blocks/files/13488049/helper-plugin-06.zip)
-- [helper-plugin-07.zip](https://github.com/woocommerce/woocommerce-blocks/files/13488050/helper-plugin-07.zip)
-- [helper-plugin-08.zip](https://github.com/woocommerce/woocommerce-blocks/files/13488051/helper-plugin-08.zip)
-- [helper-plugin-09.zip](https://github.com/woocommerce/woocommerce-blocks/files/13488052/helper-plugin-09.zip)
-- [helper-plugin-10.zip](https://github.com/woocommerce/woocommerce-blocks/files/13488053/helper-plugin-10.zip)
-
-2. Create a test page and add the Cart block.
-3. Select the Cart block and open the sidebar.
-4. Verify that the two incompatible extensions are visible by default.
-5. Verify that the dropdown says `8 more incompatibilities`.
-7. Click the dropdown link and verify that 8 incompatible extension are visible.
-8. Repeat steps 2. until 6. using the Checkout block.
-
-<table>
-<tr>
-<td valign="top">Closed:
-<br><br>
-<img width="283" alt="Screenshot 2023-11-28 at 21 24 23" src="https://github.com/woocommerce/woocommerce-blocks/assets/3323310/6cdd2a81-fa59-4e4f-ada0-dce1bacdda87">
-</td>
-<td valign="top">Open:
-<br><br>
-<img width="282" alt="Screenshot 2023-11-28 at 21 30 26" src="https://github.com/woocommerce/woocommerce-blocks/assets/3323310/e2bb8b51-a253-4c11-9340-2210111e940c">
-</td>
-</tr>
-</table>
-
-</details>
-
-### Decrease modal width [#12003](https://github.com/woocommerce/woocommerce-blocks/pull/12003)
-
-1. Install and activate the following helper plugin:
-[helper-plugin-01.zip](https://github.com/woocommerce/woocommerce-blocks/files/13522252/helper-plugin-01.zip)
-2. Create a test page and add the Cart block to it.
-3. Select the Cart block and open the sidebar.
-4. Click the button `Switch to classic cart` in the incompatible extension notice.
-5. Verify that the model has a max-width of 480px.
-6. Replace the Cart block with the Checkout block.
-7. Select the Checkout block and open the sidebar.
-8. Click the button `Switch to classic checkout`.
-9. Verify that this model also has a max-width of 480px.
-
-<table>
-<tr>
-<td valign="top">Before:
-<br><br>
-<img width="1280" alt="Screenshot 2023-12-01 at 14 23 02" src="https://github.com/woocommerce/woocommerce-blocks/assets/3323310/c1ce59b3-1d5d-4072-bd5b-aec8804cccca">
-</td>
-<td valign="top">After:
-<br><br>
-<img width="1280" alt="Screenshot 2023-12-01 at 14 24 20" src="https://github.com/woocommerce/woocommerce-blocks/assets/3323310/a491a946-0a4f-4b5e-b94f-958a4efb2789">
-</td>
-</tr>
-</table>
-
-### Revert "Remove unused Add to Cart product element (#11948)" [#12033](https://github.com/woocommerce/woocommerce-blocks/pull/12033)
-
-1. Add the Mini-Cart block and the All Products block to the same post or page.
-2. View the post in the frontend.
-3. Open the Mini-Cart.
-4. Verify there is no JS error and the Mini-Cart contents (in case you have added a product to your cart) can be seen.
-
-### Implement the Block Hooks API to automatically inject the Mini-Cart block [#11745](https://github.com/woocommerce/woocommerce-blocks/pull/11745)
-
-Currently, the application of this auto-injection _only_ applies when Twenty Twenty-Four is active. In future iterations, we can expand the list of themes this supports as we test this out and/or eventually remove the restrictions once the Block Hooks API has more support.
-
-General expectations for testing:
-
-- The mini-cart block should only appear after the navigation block in header patterns or template parts.
-- It should not appear in custom patterns or template parts.
-- It should only be auto-injected when the Twenty Twenty-Four theme is active.
-- You should never see two mini-cart blocks in a header pattern or template part (for example WooCommerce header patterns should be untouched).
-- If the mini-cart block is moved or removed and the template part/pattern/template is saved, that should persist and not change on reload.
-- The auto-injection should be reflected on the frontend.
-
-With TT4 active
-
-- [ ] First test without these changes and take note of header template parts and patterns that don't have the mini-cart block (via the site editor).
-- [ ] With this work enabled, verify that header template parts and patterns have the mini-cart block injected (see GIFs below for expectations).
-
-This is how things look _before_ this PR's changes:
-
-[https://github.com/woocommerce/woocommerce-blocks/assets/1429108/4d61ec4e-f1ab-478a-850f-d568993599df](https://github.com/woocommerce/woocommerce-blocks/assets/1429108/4d61ec4e-f1ab-478a-850f-d568993599df)
-
-And how things look after:
-
-[https://github.com/woocommerce/woocommerce-blocks/assets/1429108/289aaccb-0877-462f-8190-fa046aba1799](https://github.com/woocommerce/woocommerce-blocks/assets/1429108/289aaccb-0877-462f-8190-fa046aba1799)
-
-- [ ] Validate the general expectations and verify they are true.
diff --git a/plugins/woocommerce/client/blocks/docs/internal-developers/testing/releases/260.md b/plugins/woocommerce/client/blocks/docs/internal-developers/testing/releases/260.md
deleted file mode 100644
index 22c6249ebcf..00000000000
--- a/plugins/woocommerce/client/blocks/docs/internal-developers/testing/releases/260.md
+++ /dev/null
@@ -1,123 +0,0 @@
-# Testing notes and ZIP for release 2.6.0
-
-**Zip File for testing:**
-[woocommerce-gutenberg-products-block.zip](https://github.com/woocommerce/woocommerce-gutenberg-products-block/archive/v2.6.0.zip)
-
-## Cart and Checkout Blocks
-
-[See testing notes here](../cart-checkout/)
-
-## All Products
-
-- All of these tests should be done in Safari, Chrome, and Firefox (latest version).
-- Also validate the behaviour of the block in mobile views vs desktop.
-
-- [ ] Verify the block can be added to a new page.
-- [ ] Verify only one instance of the block can be added to a page/post.
-- [ ] Verify the various settings and configuration for the block in the editor works as expected for the given UI.
-- [ ] Verify the block functions as expected for the given configuration on the frontend of the site.
-- [ ] For an instance of this block setup on a post in an earlier release, verify that upgrading to this release doesn't break the block functionality in the frontend or in the editor.
-
-### Specific changes to test for in this release
-
-- [ ] When editing the All Products block, verify that when you change the default sorting options in the inspector controls for the block that the corresponding filter dropdown in the block preview updates as expected (see highlighted areas below):
-
-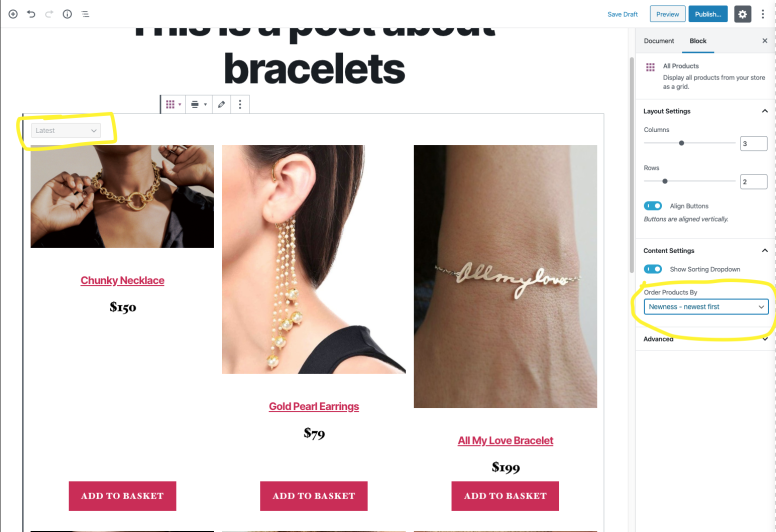
-
-- [ ] Verify that an error notice is shown in the All Products block if you try to add a product to the cart (using the Add to Cart button) if the product is out of stock or is sold individually and there is already an instance of that product in the cart.
-
-## Filter blocks
-
-These blocks are used in tandem with the All Products block to provide filtering options on the content rendered by the All Products block. They include:
-
-- Filter Products By Attribute
-- Filter Products By Price
-- Active Product Filters
-
-These blocks can be tested by adding them to the same page as the All Products block as the selected values in these blocks affects the products displayed by the All Products block.
-
-- [ ] General testing involves setting up the filter blocks and verifying the various configurations for the blocks work as expected in the editor (for settings) and the frontend (according to how the block was configured). Validate that when various filters are applied the expected results are shown in the All Products block.
-
-### Specific changes to test for in this release
-
-#### Testing the price filter block with various settings around taxes and prices
-
-One fix in this release for this block is that when the price display setting (including or excluding tax) for WooCommerce differs from the price entered setting (prices input including or excluding tax), the displayed prices for filtered results from the entered Price Filter block might appear to be a mismatch (when it's querying based on the prices _saved to the database_). With this release, this is fixed so that no matter how WooCommerce is configured for displaying or saving prices respective to taxes, the displayed products will have prices matching the expected range set via the price filter block.
-
-To test:
-
-- [ ] In WooCommerce > Settings > Taxes, **choose to enter prices inclusive of tax, but display prices excluding tax.** Test that filters work as expected for the blocks.
-- [ ] In WooCommerce > Settings > Taxes, **choose to enter prices exclusive of tax, but display prices including tax**. Test that filters work on products.
-
-#### And/Or labelling in Active Filters block
-
-- [ ] Setup various filter blocks so that some are set to `any` type filtering and others are set to `all` type filtering.
-- [ ] Add the Active Filters block to the same post/page.
-- [ ] Verify that when you apply filters on the frontend, the Active Filter block updates it's text to match the type of filtering being done.
-
-#### Dropdown display style to Attribute Filter block
-
-This release introduces a dropdown display style for the Filter Products by Attributes block (for both AND and OR type queries). Expected result:
-
-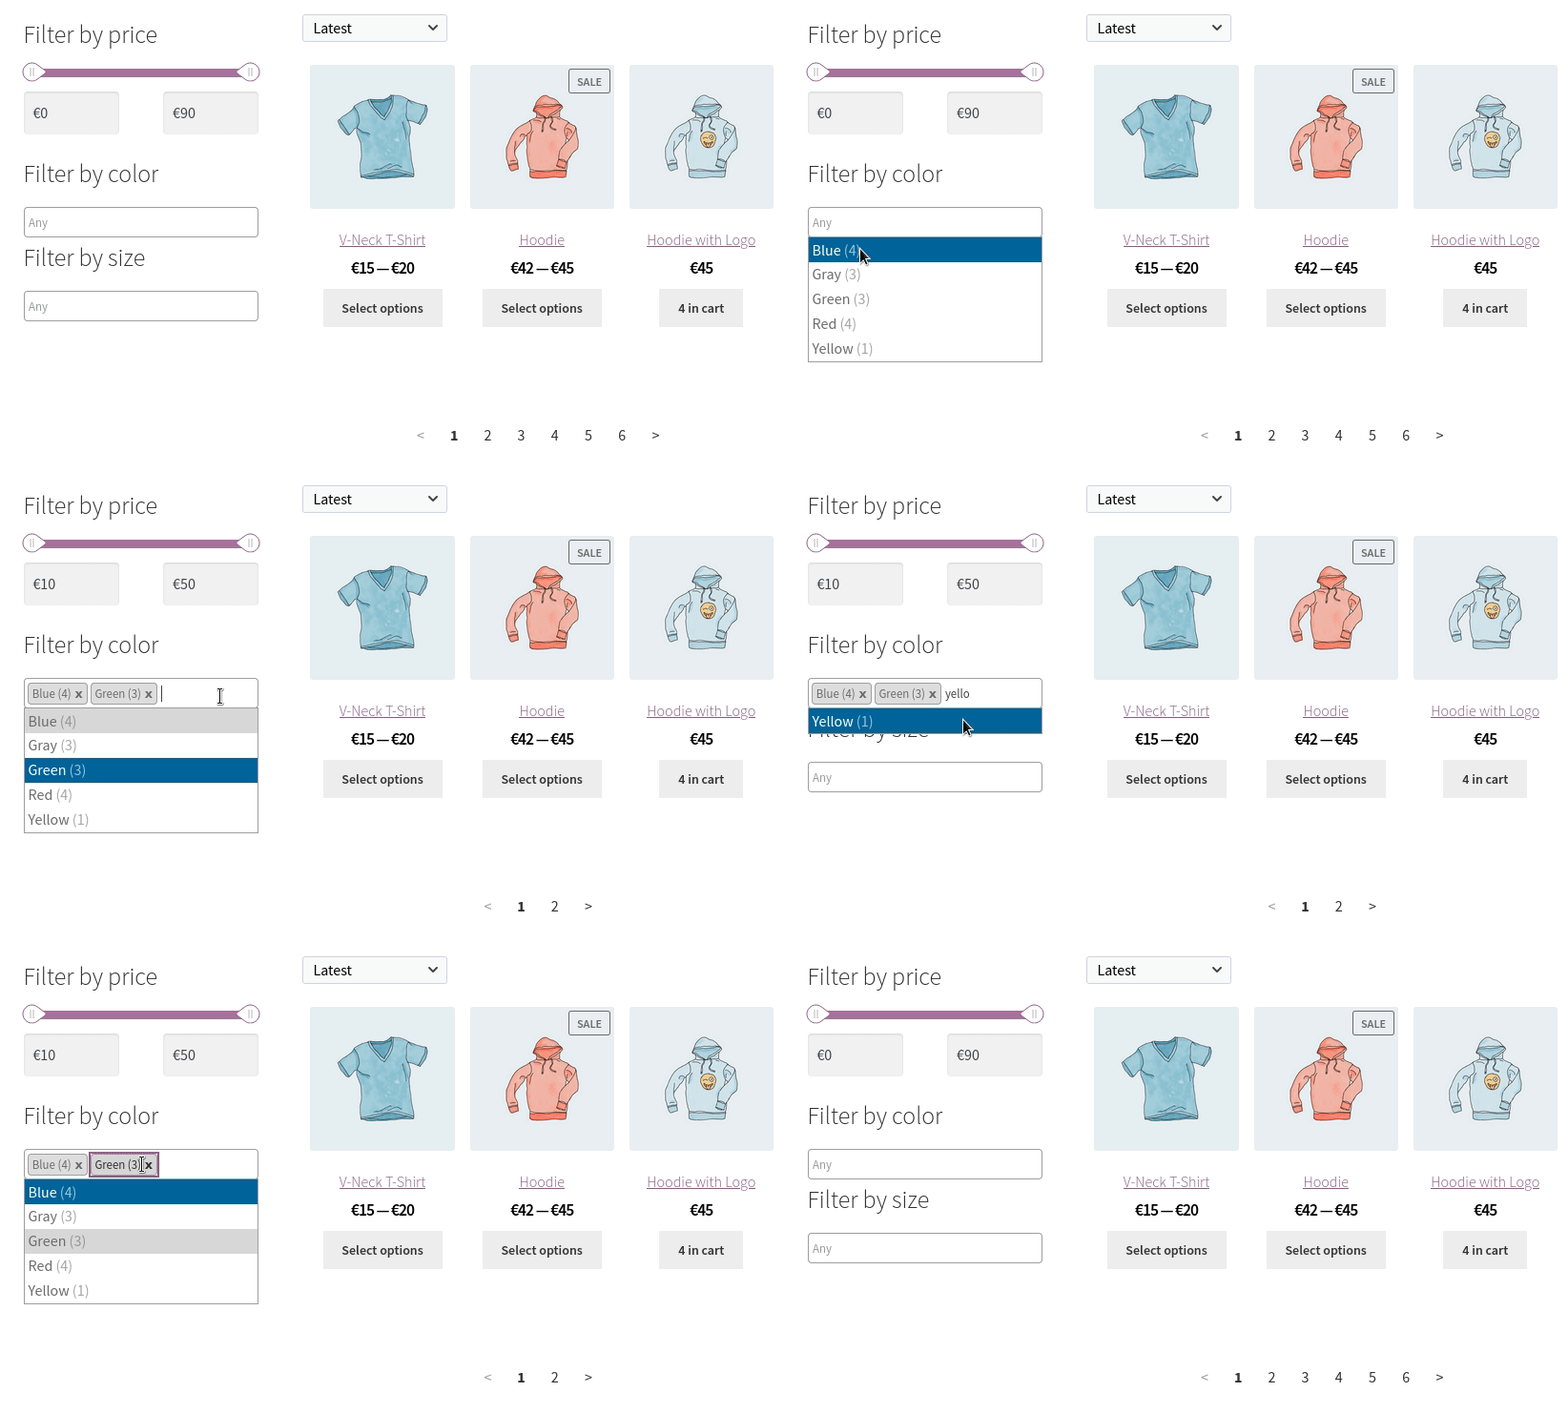
-
-To test:
-
-- [ ] Create a post with a Filter Products by Attribute block and select the Dropdown option in _Display style_ settings.
-- [ ] Preview the post and interact with the filter (search terms, add them, remove them, repeat only using the keyboard, using a screen-reader etc).
-- [ ] Verify everything works as expected for the ui/ux behaviour and for the returned results in the All Products block.
-- [ ] This should work for either "and" or "or" filtering.
-
-#### Add option to display an "apply filter button" for the Filter Products by Attribute block
-
-- [ ] Create a post with an Filter Products by Attribute block and All products block
-- [ ] For the Filter Products by Attribute block, enable the _Filter Button_ option.
-- [ ] Preview the post and verify selecting/unselecting options doesn't update the _All Products_ block until you press the _Go_ button.
-
-## All Product Grid based blocks
-
-All of these blocks share a common ancestor for the PHP side registration, so it's good to test them together. These blocks include:
-
-- Top Rated Products
-- Best Selling Products
-- On Sale Products
-- Products By Attribute
-- Hand-picked Products
-- Products by Category
-- Products by Tag
-- Newest Products
-
-### Specific changes to test for in these blocks for this release
-
-- [ ] Verify that if there are no products on sale, the On Sale Products block shows this placeholder in the editor:
-
-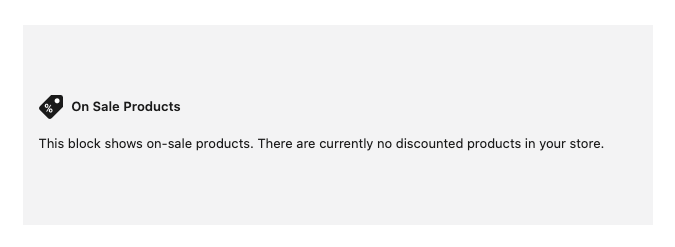
-
-- [ ] For any of the product grid blocks, verify that when a fresh instance of the block is added to the editor, it defaults to 3 rows and 3 columns for the grid.
-- [ ] Verify that changing any of the values for the grid "sticks" and persists across saves. Also verify it shows as expected and configured on the frontend.
-- [ ] For any of the product grid blocks, for an instance of the block setup on a post in an earlier release with no changes to it's settings, verify that upgrading to this release doesn't break the block functionality in the frontend or in the editor (However note that the grid will change from the default of 1 in the earlier release to 3 in the recent release automatically).
-- [ ] Same test as above, except in the earlier release, change the grid to something other than 1 row and save. When upgrading to the new release the setting for the grid should have persisted with the block.
-
-## Other blocks
-
-There are a number of other specific focuses for testing for changes in this release for other blocks:
-
-### Featured Product Block
-
-In this fix, when a product is changed for an existing featured product block, the link in the button updates to the page for the new product. Note, if there is a custom url applied when the product is changed, this will be replaced by the url to the product (that's expected).
-
-To test:
-
-- [ ] Verify any existing instance of this block in a previous release does not show any errors in the editor when updating to this release.
-- [ ] Verify that if you edit the block and change the product it uses, the button url will update as well.
-
-### Product Categories Block
-
-Support was added for showing category images in the Product Categories block. The following expectations:
-
-- For the "List" display style the toggle option for showing category images is available (and is disabled by default).
-- This option is not available for the "Dropdown" display style.
-- When the option is toggled to "Show Category Image", images for categories are shown per category item in the list.
-- [ ] Verify the new option works as expected according to the above both in the editor and in the frontend.
-
-[](https://git-todo.netlify.app/create)
diff --git a/plugins/woocommerce/client/blocks/docs/internal-developers/testing/releases/261.md b/plugins/woocommerce/client/blocks/docs/internal-developers/testing/releases/261.md
deleted file mode 100644
index 0fb7fa2ccd6..00000000000
--- a/plugins/woocommerce/client/blocks/docs/internal-developers/testing/releases/261.md
+++ /dev/null
@@ -1,19 +0,0 @@
-# Testing notes and ZIP for release 2.6.1
-
-Release build zip: [woocommerce-gutenberg-products-block.zip](https://github.com/woocommerce/woocommerce-gutenberg-products-block/archive/v2.6.1.zip)
-
-## To test
-
-1. View your stock table (`wc_reserved_stock`) in the database
-2. Go to checkout with some items in the cart
-3. Check the stock table is updated with a new row
-4. Refresh the checkout page.
-5. Check that the expires column is updated only
-
-To test stock table creation:
-
-_Note: assuming you are using a development site where you are okay with losing the data._
-
-1. Delete the `wc_reserved_stock` table.
-2. Visit anywhere in the WordPress admin.
-3. Verify the `wc_reserved_stock` table was re-created.
diff --git a/plugins/woocommerce/client/blocks/docs/internal-developers/testing/releases/270.md b/plugins/woocommerce/client/blocks/docs/internal-developers/testing/releases/270.md
deleted file mode 100644
index f8eaa5838b9..00000000000
--- a/plugins/woocommerce/client/blocks/docs/internal-developers/testing/releases/270.md
+++ /dev/null
@@ -1,101 +0,0 @@
-# Testing notes and ZIP for release 2.7.0
-
-Zip file for testing: [woocommerce-gutenberg-products-block.zip](https://github.com/woocommerce/woocommerce-gutenberg-products-block/files/4747000/woocommerce-gutenberg-products-block.zip)
-
-## Cart and Checkout styles
-
-- Create pages with the Cart and Checkout blocks.
-- Check the styles of both pages and verify:
- - The Cart and Checkout headings match the styles inherited from the theme (#2597)
- - In Checkout, step progress indicators match the heading style and they don't have a background circle (#2649).
- 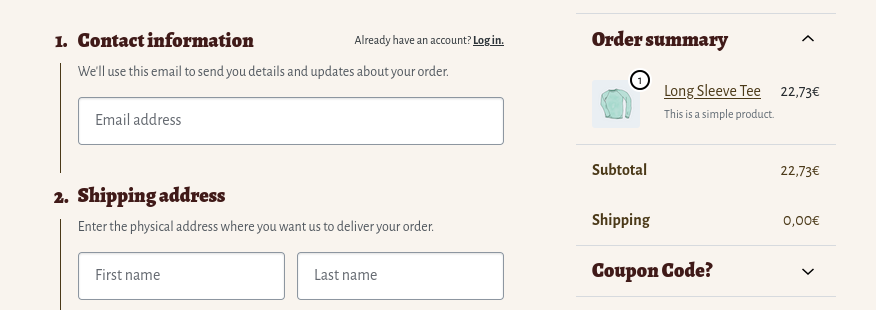
- - In Checkout, the item quantity badges are visible with dark backgrounds (with Storefront, you can change the background color in Appearance > Customize > Background) (#2619). \
- 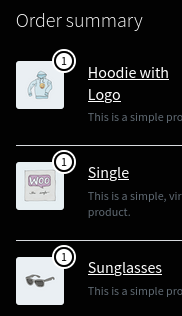
- - Try adding the code snippet from the [Cart and Checkout theming](../../../designers/theming/cart-and-checkout.md#item-quantity-badge) docs (you can do it via a child theme or directly in the browser devtools) and verify the item quantity badge styles update accordingly.
- - In general, verify there were no regressions introduced after 2.6.0.
-- The Cart block title should be `Your cart (X items)` (#2615). \
- 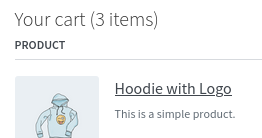
-- Introduce an invalid credit card number and verify there is enough padding around the validation errors (#2662). \
- 
-- In the editor, add the Cart block and verify the headings have the proper font size and there is margin between the `Proceed to Checkout` button and the credit card icons -- to get the icons, you need to install the Stripe payment gateway (#2486).
-
-| 2.6.0 | 2.7.0 |
-| ------------------------------------------------------------------------------------------------------------------------------- | ------------------------------------------------------------------------------------------------------------------------------- |
-| 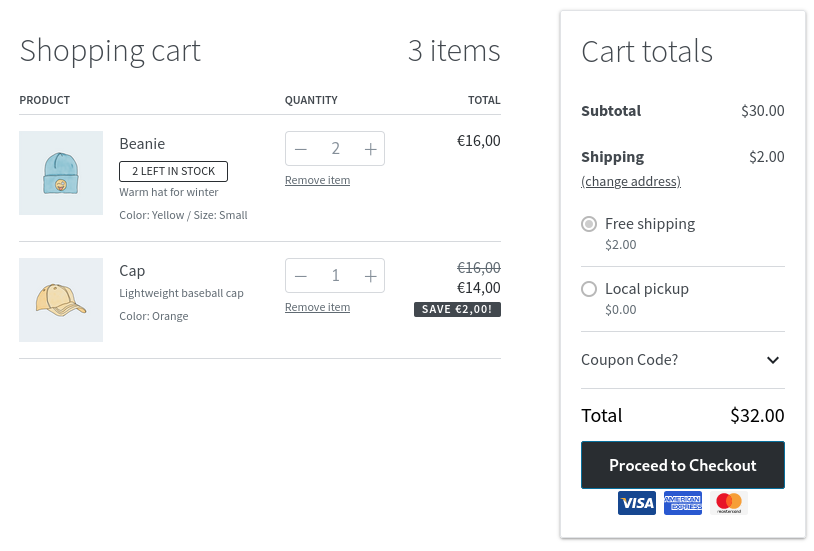 | 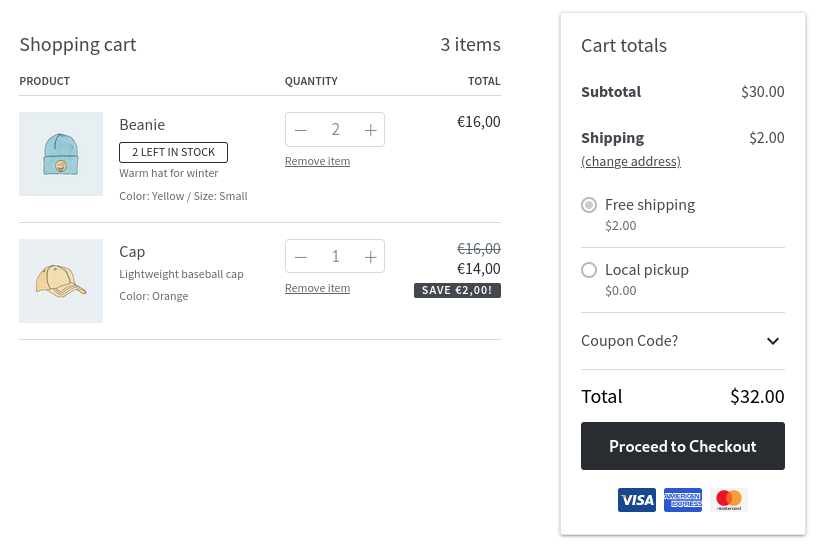 |
-
-### Specific themes
-
-- [Hello theme](https://elementor.com/hello-theme/):
- - Verify the text inside the selects is visible on hover (#2647). \
- 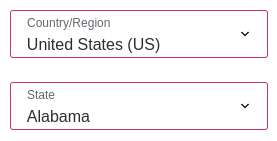
-- Twenty Twenty:
- - Add the All Products block and the Hand-picked Products block in a page and verify (#2573): - That with the All Products block you can add the On Sale badge and it's correctly aligned in the editor and the frontend (before, it was always shown on top of the image). \
- 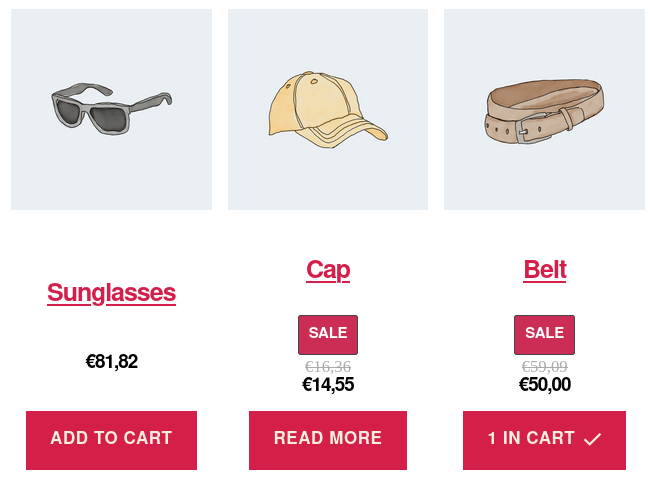
-- The Hand-picked Products block discounted prices are not underlined. \
- 
-- Go to the Checkout block and verify font sizes look correct (they are inherited from the theme) (#2533).
-
-## Cart and Checkout error flow (#2655)
-
-### Scenario One: initial report fixed
-
-1. On Checkout introduce an invalid card number `4000 0000 0000 0002`.
-2. Try to place the order and notice the error `The card was declined`.
-3. Replace the credit card number with a valid one (`4242 4242 4242 4242`).
-4. Try to place the order again and verify the process works.
-
-### Scenario Two: Trying to break via validation errors
-
-You'll need to be logged in with a user that has saved payment methods.
-
-1. On checkout, select CC payment method and then select a saved payment method again.
-2. Leave one of the required fields empty.
-3. Submit the checkout which should cause a validation error on the field.
-4. Fix the validation error
-5. Submit again and checkout should complete using the selected saved payment method.
-
-### Scenario Three: Variation of trying to break via validation errors
-
-1. On checkout, select CC payment method.
-2. Fill out cc number that will trigger declined card (`4000 0000 0000 0002`).
-3. After server response (with error), clear a required field.
-4. Select saved payment method.
-5. Submit the checkout -> this should produce a validation error.
-6. Fix the field.
-7. Submit the checkout and this should result in the purchase completing successfully.
-
-### Scenario Four: Payment with Cheque after failed CC
-
-1. On Checkout, select CC payment method.
-2. Fill out cc number that will trigger declined card (`4000 0000 0000 0002`).
-3. After server response (with error), select cheque payment method.
-4. Submit the checkout and this should result in the purchase completing successfully for the cheque payment method.
-
-## No shipping methods placeholder when they are all disabled (#2543)
-
-> Requires at least WooCommerce 4.3
-
-1. Disable all shipping methods from your store.
-2. Edit a page with the _Checkout_ block and verify the 'no shipping methods' placeholder appears.
-
-## Feature flags (#2591)
-
-- Verify you can't add the Single Product block.
-
-## Single Product page regression (#2648)
-
-- Go to a product page.
-- Verify you can see the product images as usual. \
- 
-
-### Product grid inconsistencies (#2428)
-
-- Update a product so it has a very small image (100px or less).
-- Add the All Products block and a PHP-based product grids block (Hand-picked Products, for example) and verify: - Both of them have the same styles for prices. - Both of them scale up the small image.
- _Hand-picked Products on top, All Products below:_ \
- 
-- Add the [code snippets](../../../designers/theming/product-grid-270.md#product-grid-blocks-style-update-in-270) from the theming docs to undo the changes and verify: - Hand-picked Products block doesn't scale up the image anymore. - All Products block shows discounted prices in two lines.
- _Hand-picked Products on top, All Products below:_ \
- 
-
-[](https://git-todo.netlify.app/create)
diff --git a/plugins/woocommerce/client/blocks/docs/internal-developers/testing/releases/271.md b/plugins/woocommerce/client/blocks/docs/internal-developers/testing/releases/271.md
deleted file mode 100644
index 756865e69ed..00000000000
--- a/plugins/woocommerce/client/blocks/docs/internal-developers/testing/releases/271.md
+++ /dev/null
@@ -1,20 +0,0 @@
-# Testing notes and ZIP for release 2.7.1
-
-Zip file for testing: [woocommerce-gutenberg-products-block.zip](https://github.com/woocommerce/woocommerce-gutenberg-products-block/files/4785662/woocommerce-gutenberg-products-block.zip)
-
-## All Products, Cart and Checkout in IE11
-
-- With IE11, create a page with the All Products block.
-- Verify you can add the block without problems in the editor.
-- Visit the page in the frontend, and verify the block works as expected and no JS errors are shown in the devtools console.
-- Repeat the process above with the Cart and Checkout blocks.
-
-## PHP notices
-
-- Create a new product. For its type chose 'Variable Product', create one attribute and two variations. Leave both variations price to 0.
-- Create a new page with the All Products, Filter by Price and Filter by Attributes blocks.
-- Save the page and visit it in the frontend.
-- Using the Filter by Attributes block, filter the products by a specific attribute, making sure the Variable Product you created gets visible at some point.
-- Go to the PHP logs of your site and verify there isn't any PHP warning in the logs related to the steps described above.
-
-[](https://git-todo.netlify.app/create)
diff --git a/plugins/woocommerce/client/blocks/docs/internal-developers/testing/releases/272.md b/plugins/woocommerce/client/blocks/docs/internal-developers/testing/releases/272.md
deleted file mode 100644
index 1bfdbb86f22..00000000000
--- a/plugins/woocommerce/client/blocks/docs/internal-developers/testing/releases/272.md
+++ /dev/null
@@ -1,38 +0,0 @@
-# Testing Notes and ZIP for testing
-
-**Zip File for testing:**
-[woocommerce-gutenberg-products-block.zip](https://github.com/woocommerce/woocommerce-gutenberg-products-block/files/4932938/woocommerce-gutenberg-products-block.zip)
-
-**Note**: This zip file has 2.7.1 as the version showing in WordPress but it is actually 2.7.2.
-
-This release impacts the logic around draft order cleanup.
-
-Variations of tests:
-
-## When distributed as a package in WooCommerce Core
-
-Expected behaviour here is:
-
-- [ ] `woocommerce_cleanup_draft_orders` action should not appear in the scheduled tasks for Action Scheduler (Tools->Scheduled Actions).
-
-These actions only appear when the feature flag is on for the install. If you are not testing the package inclusion in WooCommerce core, you can simulate this by adding a `blocks.ini` file to the same directory as where this plugin is activated and include in the file the following code:
-
-```text
-woocommerce_blocks_phase = 1
-```
-
-(remember to remove the file after testing!)
-
-## When distributed as the feature plugin
-
-Expected behaviour is:
-
-- [ ] `woocommerce_cleanup_draft_orders` action **should** appear in the scheduled tasks for Action Scheduler (Tools->Scheduled Actions).
-- [ ] Create a draft order (on the frontend load the checkout block with products in the cart and do not complete the order).
-- [ ] Trigger the scheduled action for `woocommerce_cleanup_draft_orders` and verify the just created draft order and none of the other orders on your test site have been deleted.
-- [ ] Modify the draft order date so that it's greater than 24 hours in the past from now (you need to modify the `post_modified_gmt` field)
-- [ ] Trigger the scheduled action again, this time the draft order you modified (and only that draft order) should be deleted.
-
-There are PHPUnit tests covering behaviour as well (including catching errors).
-
-[](https://git-todo.netlify.app/create)
diff --git a/plugins/woocommerce/client/blocks/docs/internal-developers/testing/releases/280.md b/plugins/woocommerce/client/blocks/docs/internal-developers/testing/releases/280.md
deleted file mode 100644
index 83bd8b8a7dd..00000000000
--- a/plugins/woocommerce/client/blocks/docs/internal-developers/testing/releases/280.md
+++ /dev/null
@@ -1,83 +0,0 @@
-# Testing notes and ZIP for release 2.8.0
-
-Zip file for testing: [woocommerce-gutenberg-products-block.zip](https://github.com/woocommerce/woocommerce-gutenberg-products-block/files/4826924/woocommerce-gutenberg-products-block.zip)
-
-## Cart & Checkout <!-- heading -->
-
-### Tax display in shipping methods <!-- heading -->
-
-- [ ] Go to _WooCommerce_ > _Settings_ > _Tax_ > _Tax options_ and set _Display prices during cart and checkout_ to _Including tax_:
- 
-- [ ] Set a flat rate shipping method with cost 5:
- 
-- [ ] Set default tax rates to 10%:
- 
-- [ ] Now, as a customer, add a product that needs shipping to your cart and visit the _Cart_ page (with the block).
-- [ ] Go to the Checkout page and verify shipping method prices also appear with taxes [#2748](https://github.com/woocommerce/woocommerce-gutenberg-products-block/pull/2748).
-
-### Accessibility <!-- heading -->
-
-- [ ] With a screen reader navigate the Cart block and verify when the Change address button is focused, it correctly announces whether it's expanded or not [#2603](https://github.com/woocommerce/woocommerce-gutenberg-products-block/pull/2603).
-
-### Styling <!-- heading -->
-
-- [ ] Change to a theme with a background color different from white or in the customizer change Storefront's background color to another one.
-- Visit the Checkout page and verify that <!-- heading -->
-- [ ] The `Express checkout` title doesn't have a background color different from the rest of the page and has left and right padding (so it doesn't collide with the border).
-- [ ] The `Express checkout` and `Order summary` titles are aligned.
-- [ ] The `Express checkout` box border is 1px wide, like in the [new designs](https://user-images.githubusercontent.com/3616980/83534129-c0161380-a4f0-11ea-985f-851b40d2e92b.png).
-
-- [ ] Disable all shipping methods but one.
-- [ ] Go to the Cart page and verify there is no double-border between the shipping method and the _Coupon Code_ panel (the border should be 1px instead of 2px as it was before).
-
-
-
-- [ ] Create a product with a long name.
-- [ ] Go to the Checkout page and resize the window to trigger different sizes.
-- [ ] Verify there is always spacing between the product name and the price in the _Order summary_ panel.
- 
-
-- [ ] Still in the Checkout page, verify the _Order summary_ panel doesn't have top and bottom borders.
-
-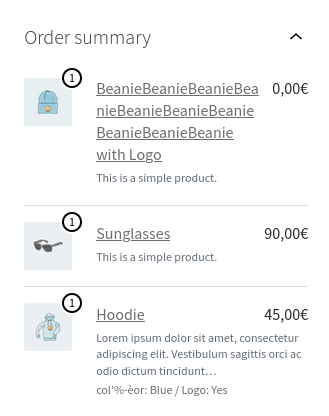
-
-- [ ] Make sure you don't have any express payment method enabled.
-- [ ] Go to the Checkout page.
-- [ ] Verify the step 1 title and the sidebar title are aligned.
-
-
-
-- [ ] Add the Checkout block to a page or post and, in the editor, verify there is no spacing between the product description and the product variations in the _Order summary_.
-
-
-
-- [ ] Disable all shipping options from your store.
-- [ ] Go to the Cart block.
-- [ ] Verify there is margin below the 'no shipping options' notice.
-
-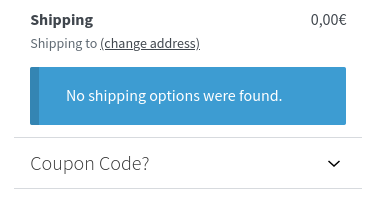
-
-- [ ] With Storefront, go to Appearance > Customize and change the typography color.
-- [ ] Verify the color is applied to the Cart and Checkout text and borders.
-- [ ] Test other themes to verify there are no regressions.
-
-## Product Categories List <!-- heading -->
-
-### Fix Product Categories List breaking when changing align attribute. <!-- heading -->
-
-- [ ] Add a Product Categories List block to a page.
-- [ ] Switch to _Full Width_ align.
-- [ ] Verify the block doesn't show an error.
-- [ ] If you are using Storefront or another theme with sidebar, make sure the page has the _Full Width_ template.
-- [ ] Open the page in the frontend and verify the Product Categories List block is aligned as a full width block.
-
-## Miscellaneous <!-- heading -->
-
-- [ ] Go to Appearance > Customize > WooCommerce > Product images and change the cropping options.
-- [ ] Test the Cart, Checkout and Review blocks (for Review blocks, you might need to change its attributes so it shows the product image instead of the customer image) and verify they show the cropped image.
-- [ ] Edit an old All Products block and verify the block didn't invalidate.
-- [ ] Edit it and select the Product image inner block. There, toggle the _Image sizing_ attribute.
-- [ ] Verify when _Cropped_ is selected, the cropped image is displayed.
-- [ ] Repeat the process with the Product block.
-
-[](https://git-todo.netlify.app/create)
diff --git a/plugins/woocommerce/client/blocks/docs/internal-developers/testing/releases/290.md b/plugins/woocommerce/client/blocks/docs/internal-developers/testing/releases/290.md
deleted file mode 100644
index 7903e190779..00000000000
--- a/plugins/woocommerce/client/blocks/docs/internal-developers/testing/releases/290.md
+++ /dev/null
@@ -1,16 +0,0 @@
-# Testing notes and ZIP for release 2.9.0
-
-Zip file for testing: tbc
-
-## Testing notes
-
-## Correctly sort translated state and country drop-down menus in Checkout block. #2779
-
-In some languages, the `State` and `Country` drop-down menus in the checkout block were sorted incorrectly. They should now be alphabetically sorted in all circumstances.
-
-1. Edit the `Checkout` page, remove the `[checkout]` shortcode, add the `Checkout` block, and save changes.
-1. Go to `Dashboard > Settings > General`, select `Català` from `Site Language`, click `Save Changes`.
-1. Update language packs: `Dashboard > Updates > Download translation packs`.
-1. View the front end of your site and add a product to the cart. Navigate to checkout page.
-1. In checkout, select `Espanya` (Spain) from `País / Regió` (country) dropdown.
-1. Click `Província` (state) dropdown and confirm that the menu items are alphabetically sorted.
diff --git a/plugins/woocommerce/client/blocks/docs/internal-developers/testing/releases/300.md b/plugins/woocommerce/client/blocks/docs/internal-developers/testing/releases/300.md
deleted file mode 100644
index 31234286222..00000000000
--- a/plugins/woocommerce/client/blocks/docs/internal-developers/testing/releases/300.md
+++ /dev/null
@@ -1,136 +0,0 @@
-# Testing notes and ZIP for release 3.0.0
-
-Zip file: [woocommerce-gutenberg-products-block.zip](https://github.com/woocommerce/woocommerce-gutenberg-products-block/files/4953535/woocommerce-gutenberg-products-block.zip)
-
-**Note: the version showing up for the above file is 2.10.0-dev but it actually is the build for 3.0.0 (version bumps haven't happened yet).**
-
-## Verify Single Product block is not available
-
-- Verify in this build that the Single Product block is not available
-
-## When included as a package in Woo Core
-
-- Verify that the Cart and Checkout blocks are not available.
-- Verify that the Single Product block is not available.
-
-## Fix Credit Card Input font size in some themes
-
-### #2668
-
-1. Change your store theme to Twenty Twenty.
-2. Go to the Checkout block and select the Credit Card payment method provided by Stripe.
-3. Introduce some numbers to Credit Card inputs and verify they have the same font size as the rest of the block.
-
-_Before:_
-
-
-_After:_
-
-
-1. Go to Stripe settings and check 'Inline Credit Card Form'.
-2. Go back to the Checkout block and notice the card icon is not too small and the label doesn't overlap the card icon.
-
-_Before:_
-
-
-_After:_
-
-
-### #2867 and #2868
-
-1. Check the credit card inputs when in a wide viewport and verify 'Expiry Date' and 'CVV/CVC' input fields have the same width.
-2. Make the viewport smaller and verify 'CVV/CVC' field gets smaller faster, since it will have fewer characters than 'Expiry Date'.
-3. Also notice 'Card Number' doesn't become too narrow.
-
-_Before:_
-
-
-_After:_
-
-
-Bonus points for doing some testing with other themes, changing the default font size of your browser, etc.
-
-## Cash on Delivery Payment method
-
-1. Go to `WooCommerce > Settings > Payments` and configure `Cash on Delivery` payment gateway.
-2. Set up cart & checkout pages with blocks.
-3. Add stuff to cart, proceed to checkout.
-4. Complete purchase with COD and confirm everything's working as expected.
-5. COD has options so merchant can limit it to shippable products and / or specific shipping methods. Experiment with these settings and confirm that COD works correctly, and is only available when appropriate.
-6. Confirm that all other payment gateways still work correctly.
-
-Bonus points - set up more complicated shipping (multiple packages, different carriers) & orders and confirm that the correct payment methods are available dependent on selected shipping rate.
-
-## Deregister core cart/checkout scripts and styles when rendering the blocks
-
-**Test Empty cart redirects to the Full cart when a product is added:**
-
-1. Go to the cart page without having any product in the cart. Add one from the Block below and verify you are redirected to the `full cart` view.
-1. Repeat the step above but before doing that, edit the empty cart template and replace the Newest products block with a shortcode (ie: `[products limit="3" columns="3" visibility="featured" ]`).
-
-Note: It's not possible to test this flow with the All Products block because of #2836.
-
-**Test there are no regressions in the purchase flow:**
-
-1. Do a purchase from start to end with the blocks and verify everything works and the confirmation page appears after payment.
-1. Do a purchase with the shortcodes and verify there are no regressions: functionality should work as usual and styles should be loaded.
-
-## Show products on backorder
-
-1. Edit a product and under Inventory set:
- 1.1 Manage stock? Checked.
- 1.2 Stock quantity: 0.
- 1.3 Allow backorders? Allow, but notify customer.
-2. Update the product and go to the frontend of the store.
-3. Add that product to the cart.
-4. Go to the Cart page and verify the Cart block shows the product is on backorder.
-5. Proceed to the Checkout page and verify the backorder notification appears in the sidebar.
-6. Would be good to verify there are no style regressions with the 'low stock' and 'product sale' badges.
-
-## Lazy Loading Atomic Components
-
-- Test the All Products block and verify that editing element blocks (the inner blocks that can be added/re-positioned for the rendered grid) on the backend and the behavior of those blocks on the frontend work as expected. The All Products block should work with existing filter blocks as well.
-- Verify adding the All Products block to a new page works as expected with no errors.
-- Verify loading a pre-existing page with the block from an earlier version of the blocks plugin works as expected.
-
-## Remove Dashicon classes
-
-Testing means ensuring there are no visual regressions in the affected blocks:
-
-1. Cart: verify coupon chip close icon looks as it did. \
- 
-2. Attribute Filter: set Query Type: AND, Display Style: Dropdown. Then, select a value and check that the cross icon still shows up correct. \
- 
-
-## Unify Chip styles
-
-1. Ideally, set your theme background to something different from white so you can verify inputs are still legible.
-2. Create a page with the All Products block and the Filter Products by Attribute (set the attributes to Query Type: OR, Display Style: Dropdown) and Active Filters (Display Style: Chips).
-3. Filter Products by Attribute:
- 3.1. Try adding new filters.
- 3.2. Verify chips have the correct styles.
- 3.3. Try removing them with the keyboard (backspace or `Del`).
- 3.4. Try removing them clicking on the chip name.
-4. Active Filters:
- 3.1 Verify chips have the correct styles.
-5. Catching regressions:
- 5.1. Verify there are no regression in the Filter Products by Attribute and the Active Filters blocks with other attribute combinations: verify everything is still working and there are no visual bugs.
- 5.2. Verify there are no regressions with the Chips in the Cart: try adding a coupon in the Cart or Checkout blocks and verify it still looks correct.
-
-## Support bank transfer (BACS) payment method in checkout block
-
-1. Visit `WooCommerce > Settings > Payments` and activate & configure bank transfer.
-2. On front end, add stuff to cart and proceed to checkout.
-3. Select bank transfer payment and complete order.
-
-Confirm that bank details/instructions are displayed in appropriate places (checkout, order received, order emails) and order can be fulfilled as per normal flow for BACS/"manual"/offline payment orders.
-
-Confirm that other payment methods still work correctly.
-
-## Don't load frontend scripts in the editor
-
-1. Create a post with some JS-based blocks (_All Products_ block and filters blocks, for example).
-2. Open your browser devtools and switch to the network tab. There, filter by files that contain the string `frontend` in their name.
-3. Reload the tab.
-4. Verify no file ending with `-frontend.js` was loaded.
-5. With an WP version between 5.2.0 and 5.3.0 (ie: 5.2.5) and verify legacy scripts are still being enqueued.
diff --git a/plugins/woocommerce/client/blocks/docs/internal-developers/testing/releases/310.md b/plugins/woocommerce/client/blocks/docs/internal-developers/testing/releases/310.md
deleted file mode 100644
index ab784e378f3..00000000000
--- a/plugins/woocommerce/client/blocks/docs/internal-developers/testing/releases/310.md
+++ /dev/null
@@ -1,76 +0,0 @@
-# Testing notes and ZIP for release 3.1.0
-
-Zip file: [woocommerce-gutenberg-products-block.zip](https://github.com/woocommerce/woocommerce-gutenberg-products-block/files/4995326/woocommerce-gutenberg-products-block.zip)
-
-## All Products
-
-### Product summary inner block renders in the frontend
-
-First, let's make sure at least one of the products has a summary:
-
-1. In the admin, go to Products > All Products.
-2. Edit any of the products.
-3. Scroll down to the Product short description text area.
-4. If it's blank, add some text there.
-5. In the sidebar, click on Update.
-
-Now, let's make sure the bug is fixed:
-
-1. Create a page and add the All Products block.
-2. Click on the pencil icon on the block toolbar to edit it.
-3. Below the image add an atomic block: the Product Summary.
-4. Verify a text has appeared: `Fly your WordPress banner...`.
-5. Click on Done at the bottom of the block.
-6. Click on Publish at the top right of the screen to publish the page.
-7. Click on the View Post button to view the post in the frontend side of your store.
-8. Verify the Product summary block is rendered for products which have it.
-
-### There are no regressions with other inner blocks
-
-There have been changes in the way All Products inner blocks are loaded, so it should be tested that other inner blocks, in addition to the Product summary block, work fine in the editor and the frontend.
-
-## Styling regressions
-
-This new release has a new system to generate the styles, so it would be great to test all blocks and verify there are no visual regressions or anything looking weird. The list of all blocks is:
-
-- [ ] Featured Product Block
-- [ ] Featured Category Block
-- [ ] Hand-picked Products Block
-- [ ] Best Selling Products Block
-- [ ] Top Rated Products Block
-- [ ] Newest Products Block
-- [ ] On Sale Products Block
-- [ ] Products by Category Block
-- [ ] Products by Tag Block
-- [ ] Products by Attribute Block
-- [ ] Product Categories List Block
-- [ ] Reviews by Product
-- [ ] Reviews by Category
-- [ ] All Reviews
-- [ ] Product Search
-- [ ] All Products
-- [ ] Filter Products by Price
-- [ ] Filter Products by Attribute
-- [ ] Active Product Filters
-
-Note: The below blocks only need tested for the feature plugin
-
-- [ ] Cart
-- [ ] Checkout
-
-## API regressions
-
-We also made some changes to our API endpoints to make them work correctly with WordPress 5.5. We should make sure interacting with the following blocks doesn't show errors in the console or the PHP logs:
-
-- [ ] Reviews by Product
-- [ ] Reviews by Category
-- [ ] All Reviews
-- [ ] All Products
-- [ ] Filter Products by Price
-- [ ] Filter Products by Attribute
-- [ ] Active Product Filters
-
-Note: The below blocks only need tested for the feature plugin
-
-- [ ] Cart
-- [ ] Checkout
diff --git a/plugins/woocommerce/client/blocks/docs/internal-developers/testing/releases/320.md b/plugins/woocommerce/client/blocks/docs/internal-developers/testing/releases/320.md
deleted file mode 100644
index c60347a30a1..00000000000
--- a/plugins/woocommerce/client/blocks/docs/internal-developers/testing/releases/320.md
+++ /dev/null
@@ -1,114 +0,0 @@
-# Testing notes and ZIP for release 3.2.0
-
-[](https://git-todo.netlify.app/create)
-
-Zip file: [woocommerce-gutenberg-products-block.zip](https://github.com/woocommerce/woocommerce-gutenberg-products-block/files/5090607/woocommerce-gutenberg-products-block.zip)
-
-## Cart & Checkout <!-- heading -->
-
-### Order note <!-- heading -->
-
-- [ ] Go to the Checkout block and check the 'Add a note to your order' checkbox.
-- [ ] Introduce some text in the text area that appeared.
-- [ ] Place the order and go to the admin, WooCommerce > Orders and verify the order has the note under Customer provided note.
-
-### Autocapitalize address form fields <!-- heading -->
-
-- [ ] Visit the Checkout page with a handheld device with Chrome for Android or iOS Safari.
-- [ ] Navigate through the input fields in the address form.
-- [ ] Verify when a field is focused, the keyboard shows capital letters by default according to the settings.
-
-### JS-Rendered blocks inside Empty Cart <!-- heading -->
-
-- [ ] Add the Cart block and switch to the Empty Cart edit mode.
-- [ ] Replace the Newest products block with the All Products block. Feel free to add other JS-rendered blocks like a filter or a Reviews block.
-- [ ] View the page in the frontend.
-- [ ] Verify all blocks render correctly when the cart is empty.
-- [ ] Try adding a product to the cart (so it switches to the Full Cart view) and removing it (so it switches back to the Empty Cart view).
-- [ ] Verify the blocks still render correctly.
-
-### Don't show sale badge if saving are negative <!-- heading -->
-
-You will need Product Add-ons extension to test this. <!-- heading -->
-
-- [ ] Add a product with a priced add on.
-- [ ] Add the product to your cart, with the add on enabled.
-- [ ] See that the price is shown without a negative discount value.
-
-### Respect payment gateways order set by merchant <!-- heading -->
-
-- [ ] Set up a few different payment methods.
-- [ ] Reorder your payment methods how you like in WooCommerce > Settings > Payments, then click Save changes to persist.
-- [ ] On front end, add stuff to cart and proceed to checkout.
-- [ ] Payment methods should display using the order you chose.
-- [ ] Complete a few test purchases to confirm that payment methods are still working and there are no regressions in checkout.
-- [ ] Also test payment methods that may be hidden based on checkout state, e.g. make COD only available with specific shipping methods.
-
-### Show Checkout block in Editor when 'guest checkout' is disabled <!-- heading -->
-
-- [ ] Go to WooCommerce > Settings > Accounts & Privacy and uncheck Allow customers to place orders without an account.
-- [ ] Edit a page with the Checkout block.
-- [ ] Verify the whole Checkout block is rendered in the editor, instead of only showing the `You must be logged in to checkout. Click here to log in`. message.
-
-### Remove generic payment methods icons <!-- heading -->
-
-- [ ] Set up Stripe CC (Stripe extension) and Cheque (core) payment methods.
-- [ ] Set up a page with checkout block, add stuff to cart.
-- [ ] View checkout and confirm payment method tabs render and function correctly without icons.
-
-### Error focus styles for inputs and select <!-- heading -->
-
-- [ ] Go to the Checkout block and press 'Place order` without filling any form detail.
-- [ ] Tab through the input fields under 'Shipping address' and verify the outline that appears on focus is red in text inputs and selects.
-- [ ] Repeat the steps above at least with Storefront and Twenty Twenty and with Firefox, Chrome and Safari.
-
-### Hide saved payment methods if their gateway is disabled <!-- heading -->
-
-- [ ] Set up checkout block, Stripe CC payment method, check Enable Payment via Saved Cards.
-- [ ] Complete a purchase with Stripe test card and check the `Save payment information to my account for future purchases.` checkbox on checkout.
-- [ ] Go to WooCommerce > Settings > Payments and disable Stripe CC payment method.
-- [ ] Add new stuff to cart, proceed to checkout.
-- [ ] Scroll down and verify saved card (e.g. Visa ending in 4242 (expires 02/22)) is not there.
-
-### Text overlap with errors and icons <!-- heading -->
-
-- [ ] activate and set up Stripe CC, disable Inline Credit Card Form option.
-- [ ] Add stuff to cart and proceed to checkout.
-- [ ] Select stripe credit card payment, don't enter any card details.
-- [ ] Click Place Order.
-- [ ] Error messages shouldn't overlap with credit card icons.
-
-### Dark mode support for fields and controls <!-- heading -->
-
-- [ ] Test inputs, select, radio, checkbox, quantity selectors, and textarea of Cart and Checkout, they should have light colors and text should be readable.
-- [ ] Switch the colors of your theme to a dark variation, you can do that in the customizer for storefront or dark mode for TwentyTwenty or TwentySeventeen.
-- [ ] Switch the blocks to use dark colors in the blocks settings.
-- [ ] Test inputs, select, radio, checkbox, quantity selectors, and textarea again, make sure nothing is broken and everything is visible.
-
-### Use real previews for Cart and Checkout <!-- heading -->
-
-- [ ] Preview the cart and checkout blocks inside the block inserter.
-- [ ] You should see the actual block, not a white placeholder.
-- [ ] Make sure the block is not very long and overflowing.
-- [ ] Make sure the changes didn't leak to the actual block or the editor block, the block should not be cut.
-
-## All Products <!-- heading -->
-
-### Broken link for "No Products" placeholder
-
-- [ ] In a store with no products (move them to trash).
-- [ ] Create a new page and add the All Products block.
-- [ ] Click on the Add new product link and verify it works.
-
-### PHP Error notices
-
-- [ ] Make sure you have WP_DEBUG set to true.
-- [ ] Load a page that already contains a product data, so single product or All Products, either in the editor or frontend.
-- [ ] Make sure no notices are printed to the page, you can check the source code or at the top of the page.
-
-## Product Search <!-- heading -->
-
-### Updated styling in Editor
-
-- [ ] In the editor, confirm that Product Search input has borders.
-- [ ] the input should be functional.
diff --git a/plugins/woocommerce/client/blocks/docs/internal-developers/testing/releases/330.md b/plugins/woocommerce/client/blocks/docs/internal-developers/testing/releases/330.md
deleted file mode 100644
index 192c58c2bc2..00000000000
--- a/plugins/woocommerce/client/blocks/docs/internal-developers/testing/releases/330.md
+++ /dev/null
@@ -1,59 +0,0 @@
-# Testing notes and ZIP for release 3.3.0
-
-[](https://git-todo.netlify.app/create)
-
-Zip file for testing: [woocommerce-gutenberg-products-block.zip](https://github.com/woocommerce/woocommerce-gutenberg-products-block/files/5159231/woocommerce-gutenberg-products-block.zip)
-
-## Enhancements <!-- heading -->
-
-## Cart block: Show express payment methods in the Cart block (for example: Apple Pay, Chrome Pay). <!-- heading -->
-
-- [ ] This feature requires the following:
- - [WooCommerce Stripe extension](https://woocommerce.com/products/stripe) installed and active.
- - One or more express payment methods supported and enabled on the store and client system (OS, browser). Note that Chrome Pay and Apple Pay are not supported in all regions. Please refer to documentation for Apple Pay and Chrome Pay for more information.
-- [ ] Go to `Dashboard > WooCommerce > Settings > Payments` and activate `Stripe – Credit Card`.
-- [ ] Click `Manage` button for `Stripe – Credit Card`.
-- [ ] Ensure `Payment Request Buttons` checkbox is enabled, and click `Save changes`.
-- [ ] Add the Cart block to a page and publish the page (for example, the main store `cart` page).
-- [ ] In the editor, the Cart block should show a preview of express payment options (for example, Apple Pay button).
-- [ ] View store front end in a browser with an express payment method enabled and configured. For example Chrome or Safari.
-- [ ] Add some products to cart.
-- [ ] View cart. If express payment is supported and available, you should see relevant express payment buttons above the cart `Proceed to checkout` button.
- - Note: if you don't see any express payment options, confirm that they are working in the Checkout block, product page, or shortcode checkout page.
- - The cart block should include the same express payment options as other store pages.
-
-## Enhancements (shipped in 3.1.0) <!-- heading -->
-
-The following enhancements shipped in WooCommerce Blocks 3.1.0 but were missed in the changelog. Including testing instructions here.
-
-### All Products block: Can now customize text size, color and alignment in Product Title child block. <!-- heading -->
-
-- [ ] Add an all products block.
-- [ ] Click the `Edit` (pencil icon) button to edit the layout of products within the grid.
-- [ ] Select the product title block, or add it if needed.
-- [ ] In the block toolbar, change the alignment option to center or right.
-- [ ] In the block toolbar, select a different heading level.
-- [ ] In the settings inspector, change the text size and colour options.
-- [ ] Publish the page or update to save changes.
-- [ ] Verify the product title shows as customized in editor and front end.
-
-## Bug Fixes <!-- heading -->
-
-## Cart block: Fix alignment of discounted prices. <!-- heading -->
-
-- [ ] Add a product on sale to the Cart and visit the Cart block.
-- [ ] Verify regular and discounted prices are both aligned to the right.
-
-## Checkout block: Fix an issue with products sold individually (max of 1 per cart); the Checkout block now shows a notice if shopper attempts to add another instance of product via an add-to-cart link. <!-- heading -->
-
-- Configure your store so the Checkout block is used on the checkout page.
-- [ ] Set a `Sold individually` option on a product:
- - Edit a product. Note down the product ID.
- - Scroll down to `Product data` box, select `Inventory` tab.
- - Enable `Sold individually` option, and click `Update` to save changes to the product.
-- [ ] As a shopper on front end, add the product to your cart. You should have 1x of the product in your cart.
-- [ ] Navigate to a url with add-to-cart URL param for the product ID, for example: `https://one.wordpress.test/checkout/?add-to-cart=19`. This will attempt to add a second item to the cart.
- - Note: Replace `one.wordpress.test` with your test site URL and `19` with the ID of the product you modified.
- - You can navigate to this URL directly - paste the url. OR you can add a button block linking to the url, simulating a "Buy" button on a landing page for the product.
-- [ ] Proceed to checkout block and verify there is an error notice informing shopper why there is a single item in the cart.
-- [ ] Ensure the checkout block works correctly and shopper can complete purchase.
diff --git a/plugins/woocommerce/client/blocks/docs/internal-developers/testing/releases/340.md b/plugins/woocommerce/client/blocks/docs/internal-developers/testing/releases/340.md
deleted file mode 100644
index 18c10c8b5cf..00000000000
--- a/plugins/woocommerce/client/blocks/docs/internal-developers/testing/releases/340.md
+++ /dev/null
@@ -1,88 +0,0 @@
-# Testing notes and ZIP for release 3.4.0
-
-Zip file for testing: [woocommerce-gutenberg-products-block.zip](https://github.com/woocommerce/woocommerce-gutenberg-products-block/files/5220435/woocommerce-gutenberg-products-block.zip)
-
-## The following are changes that only impact Feature Plugin release
-
-### Ensure shopper saved card is used as default payment method (default was being overwritten in some circumstances). ([3131](https://github.com/woocommerce/woocommerce-gutenberg-products-block/pull/3131))
-
-- Set up checkout page using block.
-- Enable BACS and Stripe payment methods (only, though may reproduce with other combinations). Note BACS needs to be earlier in the order than Stripe (drag handle in `WooCommerce > Settings > Payments`).
-- Complete a purchase using a new payment method, Stripe CC, check `Save payment information to my account for future purchases`.
-- Add something to cart, proceed to checkout.
-- Leave the default selected payment method - i.e. the first saved payment method. Submit checkout.
-
-Should always complete the purchase with the correct payment method - the one visibly selected when user clicks submit, i.e. the saved card.
-
-Please also test a variety of other payment method scenarios and ordering - with / without saved cards (are there any other gateways that support saved payment methods?), with more/less gateways available, in different orders, and with dynamically-available gateways (COD can depend on shipping option). In all cases confirm the following:
-
-- There is a payment method tab selected by default.
-- Submitting checkout without touching payment section uses the correct payment method (i.e. saved card, payment method tab).
-- Selecting a non-default saved card (from the default) works correctly, uses correct card/token (may need to check network requests to check token).
-- Selecting a non-default payment method uses correct method.
-- Saving a payment method (card) works and is available for use next checkout with that account.
-- Payment tab order should match the configured order.
-
-### Fix Cart & Checkout sidebar layout broken in some themes. ([3111](https://github.com/woocommerce/woocommerce-gutenberg-products-block/pull/3111))
-
-1. Install and activate [Artisan](https://woocommerce.com/products/artisan/) or [Threads](https://woocommerce.com/products/threads/) theme.
-2. Go to the Cart or Checkout blocks and verify the sidebar is shown on the right instead of below.
-
-_Before:_
-
-
-_After:_
-
-
-### Use wp_login_url instead of hardcoding login path. ([3090](https://github.com/woocommerce/woocommerce-gutenberg-products-block/pull/3090))
-
-1. In an incognito window and add some products and then go to Checkout.
-2. See the login URL, it should take you to `wp-login.php?redirect_to=[CURRENT_URL]`
-3. Enable checkout for users only from WooCommerce -> Settings -> Accounts -> uncheck `Allow customers to place orders without an account`.
-4. Visit Checkout again, the link should do the same.
-5. Install and activate <https://wordpress.org/plugins/change-wp-admin-login/>.
-6. Visit Settings -> Permalinks and change the login URL to something else.
-7. Do 1,2,3 and 4 again, confirm that your value is respected.
-
-### Fix an issue with COD not showing when first enabled. ([3088](https://github.com/woocommerce/woocommerce-gutenberg-products-block/pull/3088))
-
-1. You can either test this on a new website, or delete `woocommerce_cod_settings` option from `wp_options` table.
-2. Enable Cash on Delivery, don't set it up, leave everything as is, it should work with all shipping methods.
-3. Create an order and enter a valid address that has a shipping method with it.
-4. You will see COD as a payment option.
-5. Go to COD settings, select a value for "Enable for shipping methods".
-6. Save the settings.
-7. Delete what was selected to return the field to its initial state.
-8. Visit checkout again, COD is still working.
-
-- Fix JS console error when COD is enabled and no shipping method is available. ([3086](https://github.com/woocommerce/woocommerce-gutenberg-products-block/pull/3086))
-
-1. Enable COD and limit it to a certain shipping method type.
-2. Add that method to a certain address.
-3. Select another address on the Checkout block, you shouldn't see an error with `selectedMethod is undefined` on the console.
-
-### Create DebouncedValidatedTextInput component. ([3108](https://github.com/woocommerce/woocommerce-gutenberg-products-block/pull/3108))
-
-Smoke test the Checkout block:
-
-- create a new page and add the Checkout block, change some attributes in the sidebar and verify changes take place
-- verify the Checkout block works in the frontend: try changing your address, picking a different shipping and payment method, etc.
-- verify you can make a purchase.
-
-## The following impacts testing for both feature plugin and when included in WooCommerce Core
-
-### Fix product reviews schema date fields to use new (WP 5.5) `date-time` format. ([3109](https://github.com/woocommerce/woocommerce-gutenberg-products-block/pull/3109))
-
-- Add some reviews for products.
-- Add an All Reviews block to post or page content.
-- Verify the frontend rendering of the block shows the expected dates for the reviews.
-
-### Merge ProductPrice atomic block and component. ([3065](https://github.com/woocommerce/woocommerce-gutenberg-products-block/pull/3065))
-
-Testing this change basically means verifying there are no regressions:
-
-1. (For feature plugin testing only) Load the Cart and Checkout blocks. **_Verify_** product prices (default prices and on sale prices) are still rendered correctly. \
- 
-2. Add the All Products block in a page. **_Verify_** there are no regressions with the Product Price block.
-3. Repeat the verifications above using a small viewport browser.
-4. Repeat the verifications above using with the [Seedlet theme](https://wordpress.org/themes/seedlet/).
diff --git a/plugins/woocommerce/client/blocks/docs/internal-developers/testing/releases/350.md b/plugins/woocommerce/client/blocks/docs/internal-developers/testing/releases/350.md
deleted file mode 100644
index 23ab73df90e..00000000000
--- a/plugins/woocommerce/client/blocks/docs/internal-developers/testing/releases/350.md
+++ /dev/null
@@ -1,67 +0,0 @@
-# Testing notes and ZIP for release 3.5.0
-
-Zip file for testing: [woocommerce-gutenberg-products-block.zip](https://github.com/woocommerce/woocommerce-gutenberg-products-block/files/5298708/woocommerce-gutenberg-products-block.zip)
-
-## The following are changes that only impact Feature Plugin release
-
-### Use light default background colour for country/state dropdowns in Cart and Checkout blocks
-
-- Test light mode / default
-- [ ] Add checkout block to a page. Disable Dark mode inputs option and publish.
-- [ ] View checkout on front end and expand country or state input.
-- [ ] Background/colours should be consistent - e.g. white background, black text.
-
-- Test dark mode
-- [ ] Add checkout block to a page. Enable Dark mode inputs option and publish.
-- [ ] View checkout on front end and expand country or state input.
-- [ ] Background/colours should look reasonable; text should be white on black.
-
-### Fix broken Express Payment Method use in the Checkout block for logged out or incognito users
-
-- [ ] Make sure you are either logged out or using an incognito mode browser instance.
-- [ ] Add a product to cart.
-- [ ] Load the page with the checkout block.
-- [ ] Click express payment (Chrome Pay if using Chrome, Apple Pay if using Safari).
-- [ ] Choose account details in the express payment modal and submit. Verify that the checkout processes correctly.
-
-### Use noticeContexts from useEmitResponse instead of hardcoded values
-
-- [ ] Install & activate WooCommerce Stripe.
-- [ ] Enable Stripe CC payment method - don't add an api key (or delete the option).
-- [ ] Add checkout block to checkout page.
-- [ ] On front end, add something to cart and proceed to checkout with an **admin user**.
-- [ ] Verify an error appears in the express payment methods section and in the payment methods step.
-
-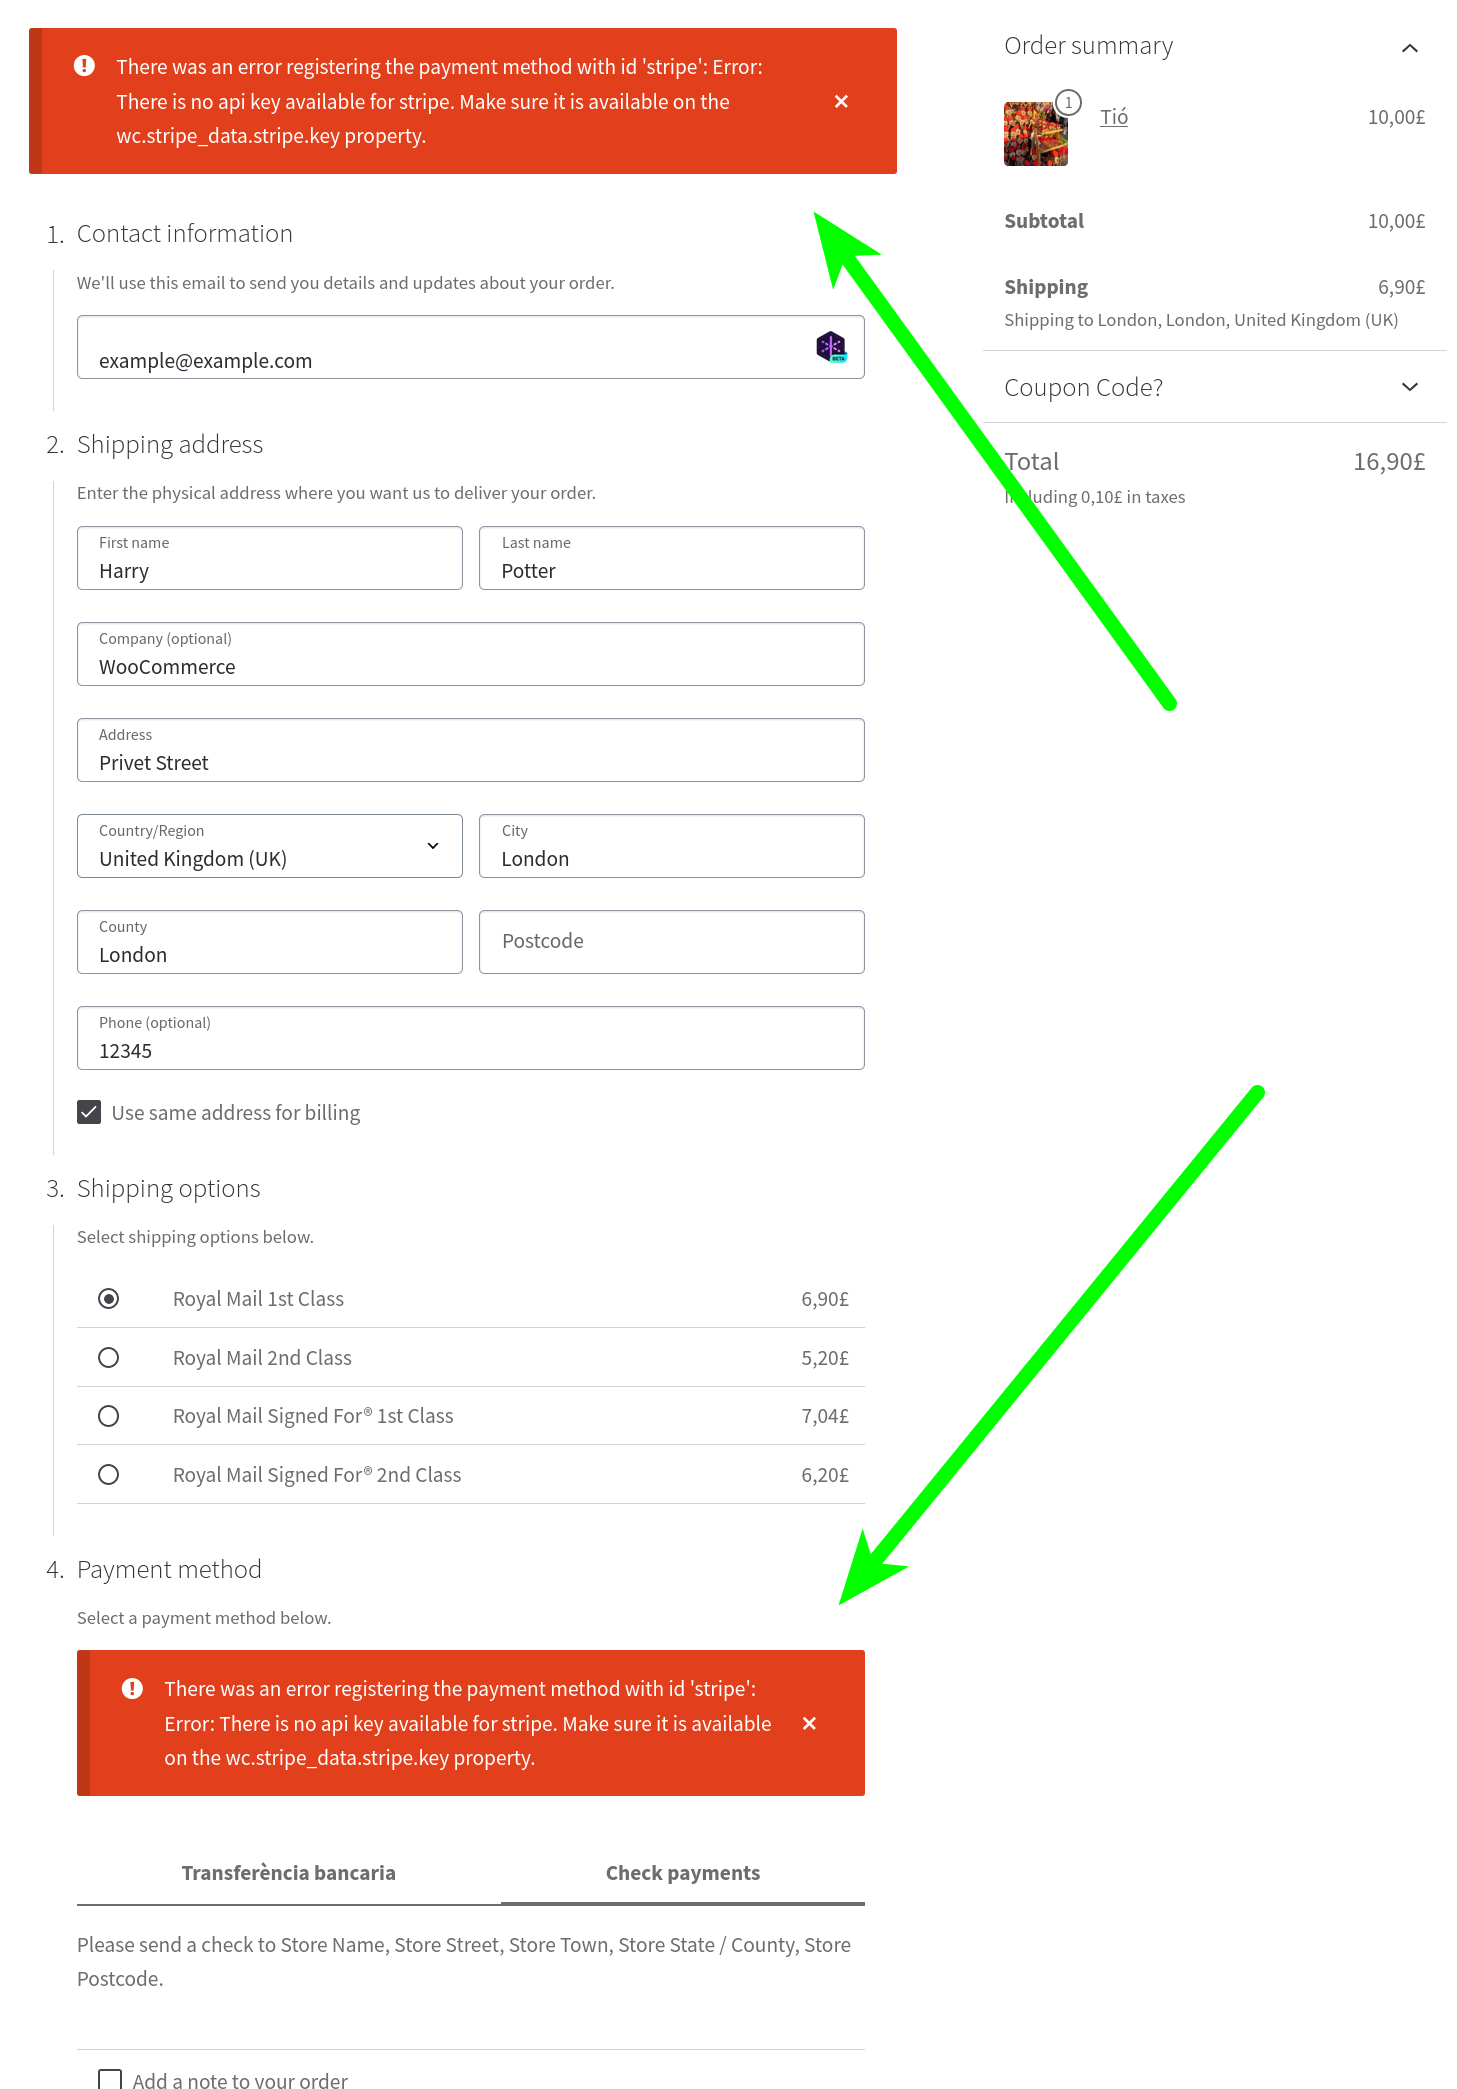
-
-### Fix State label for Spain
-
-- [ ] Go to the Checkout block and change the country to Spain.
-- [ ] Verify the field below the country changes its label to Province instead of State.
-
-### Don't throw an error when registering a payment method fails
-
-#### Confirm other payment methods are shown if Stripe is not configured
-
-- [ ] Install & activate WooCommerce Stripe.
-- [ ] Enable Stripe CC payment method - don't add an api key (or delete the option).
-- [ ] Enable BACS or other payment methods (e.g. cheque).
-- [ ] Add checkout block to checkout page.
-- [ ] On front end, add something to cart and proceed to checkout.
-- [ ] Make sure you have an admin user with saved payment methods and a user without saved payment methods (or a guest).
-- [ ] With those two users, check the Checkout page in the frontend. Also open the Checkout page in the editor.
-- [ ] Verify the statements below are true. 👇
-
-| Scenario | With Stripe API key | Without Stripe API key |
-| ----------------------------------------- | -------------------------------------------------------------------------------------------------------------------------------------------------------------------------- | ------------------------------------------------------------------------------------------------------------------------------------------------------------------------------------------------------- |
-| Admin with saved payment methods / Editor | <ul><li>Saved payment methods are displayed.</li><li>Credit Card payment method is displayed (under use a new payment method).</li><li>There is no error notice.</li></ul> | <ul><li>Saved payment methods are not displayed.</li><li>There is an error notice about Stripe not being registered correctly.</li><li>Other payment methods are displayed as usual.</li></ul> |
-| Guest user | <ul><li>Saved payment methods are not displayed.</li><li>Credit Card payment method is displayed.</li><li>There is no error notice.</li></ul> | <ul><li>Saved payment methods are not displayed.</li><li>Credit Card payment method is not displayed.</li><li>There is no error notice.</li><li>Other payment methods are displayed as usual.</li></ul> |
-
-In order to save a payment method with a user. Enable the WooCommerce Stripe plugin, set the keys and make a purchase with a user selecting the `Save payment information to my account for future purchases.` option. Next time you visit the Checkout with that user, the saved payment method will show up.
-
-#### Stripe Saved credit cards are not available when the 'Enable Payment via Saved Cards' option is unchecked
-
-- Assuming you already have a user with saved credit cards in Stripe from the steps above.
-- [ ] Go to Stripe settings and uncheck `Enable Payment via Saved Cards`. Make sure you have added back the API keys that you might have removed in the steps above.
-- [ ] Start a purchase with a user that has saved payment methods and go to the Checkout block.
-- [ ] Verify saved credit cards are not shown in the Payment method options.
diff --git a/plugins/woocommerce/client/blocks/docs/internal-developers/testing/releases/360.md b/plugins/woocommerce/client/blocks/docs/internal-developers/testing/releases/360.md
deleted file mode 100644
index bf418c53c2c..00000000000
--- a/plugins/woocommerce/client/blocks/docs/internal-developers/testing/releases/360.md
+++ /dev/null
@@ -1,59 +0,0 @@
-# Testing notes and ZIP for release 3.6.0
-
-Zip file for testing: [woocommerce-gutenberg-products-block.zip](https://github.com/woocommerce/woocommerce-gutenberg-products-block/files/5365314/woocommerce-gutenberg-products-block.zip)
-
-While testing the steps below, keep your browser devtools open (F12) and verify there no errors in the Console during the process ([3242](https://github.com/woocommerce/woocommerce-gutenberg-products-block/pull/3242)).
-
-## The following are changes that only impact Feature Plugin release
-
-### Don't load contents of payment method hidden tabs. ([3227](https://github.com/woocommerce/woocommerce-gutenberg-products-block/pull/3227)) / Refactor payment methods components ([3226](https://github.com/woocommerce/woocommerce-gutenberg-products-block/pull/3226))
-
-1. Add products to the cart and go to a page with the Checkout block.
-2. Go to the Payment method step and interact with the payment method tabs. Verify you can toggle them and tab contents always appear.
-3. Finish a purchase with one of the tabs and verify the order was done with the correct payment method.
-
-### Ensure new payment methods are only displayed when no saved payment method is selected. ([3247](https://github.com/woocommerce/woocommerce-gutenberg-products-block/pull/3247))
-
-1. Make sure you are logged in on an account with saved payment methods.
-2. Add products to the cart and go to a page with the Checkout block.
-3. Click on a express payment method (Chrome Pay or Apple Pay) and then close the modal or cancel the payment.
-4. Scroll down and verify the payment methods tabs are not displayed. (Only the radios should be visible)
-
-### Restore saved payment method data after closing an express payment method. ([3210](https://github.com/woocommerce/woocommerce-gutenberg-products-block/pull/3210))
-
-1. Make sure you are logged in on an account with saved payment methods.
-2. Add products to the cart and go to a page with the Checkout block.
-3. Click on a express payment method (Chrome Pay or Apple Pay) and then close the modal or cancel the payment.
-4. Leaving the saved payment method option selected without choosing any other payment method.
-5. Submitting the order.
-6. Verify the payment is processed correctly.
-
-Repeat the process above but instead of using a saved payment method, select a new one and verify the payment is also processed correctly.
-
-### Make 'retry' property on errors from checkoutAfterProcessingWithSuccess/Error observers default to true if it's undefined. ([3261](https://github.com/woocommerce/woocommerce-gutenberg-products-block/pull/3261))
-
-1. Install WC Payments and set it up.
-2. Add products to the cart and go to a page with the Checkout block.
-3. Submit an order using WC Payments with the card number `4000 0027 6000 3184`, but in the validation popup, press on `Fail authentication` or `Cancel`.
-4. Verify the `Place Order` button doesn't stay disabled and you can resubmit the order.
-
-### Simplify emitEventWithAbort logic. ([3256](https://github.com/woocommerce/woocommerce-gutenberg-products-block/pull/3256))
-
-1. Install Stripe payment gateway and set it up.
-2. Add products to the cart and go to a page with the Checkout block.
-3. Place an order using Stripe with the card number `4000000000000101` (it will fail with an invalid CVC error).
-4. Verify the order isn't processed and an error is displayed in the frontend.
-
-### Load WC Blocks CSS after editor CSS 3219. ([3219](https://github.com/woocommerce/woocommerce-gutenberg-products-block/pull/3219))
-
-1. Edit a page with checkout block.
-2. Scroll down to country input.
-3. Verify it has rounded corners and the correct height (see screenshots below for reference).
-
-_Before:_
-
-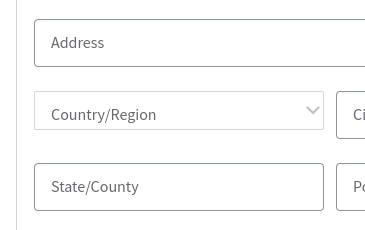
-
-_After:_
-
-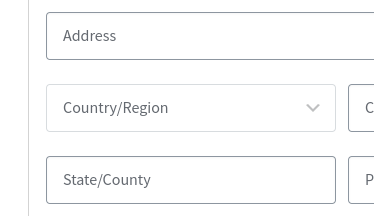
diff --git a/plugins/woocommerce/client/blocks/docs/internal-developers/testing/releases/370.md b/plugins/woocommerce/client/blocks/docs/internal-developers/testing/releases/370.md
deleted file mode 100644
index cebd67e6cd7..00000000000
--- a/plugins/woocommerce/client/blocks/docs/internal-developers/testing/releases/370.md
+++ /dev/null
@@ -1,79 +0,0 @@
-# Testing notes and ZIP for release 3.7.0
-
-Zip file for testing: [woocommerce-gutenberg-products-block.zip](https://github.com/woocommerce/woocommerce-gutenberg-products-block/files/5220435/woocommerce-gutenberg-products-block.zip)
-
-## The following changes affect the feature plugin only
-
-### Allow shoppers to sign-up for an account from the Checkout block. ([3331](https://github.com/woocommerce/woocommerce-gutenberg-products-block/pull/3331))
-
-Merchants can now enable shoppers to sign up for a user account when completing purchase via the Checkout block. This feature requires WooCommerce 4.7 or newer and the Checkout block.
-
-1. Ensure you can see emails from your test site (e.g. new customer account notification email).
-2. Ensure your store is running WooCommerce 4.7 RC or newer.
-3. Install and activate WooCommerce Blocks 3.7 or newer.
-4. Ensure checkout page uses the checkout block – replace the checkout shortcode (if used). Ensure you have a valid payment method set up.
-5. Log out of your store user account if necessary (or use an incognito window). Add something to cart and proceed to checkout block page.
-6. Enter an email address and complete the form.
-7. Check the `Create an account` checkbox.
-8. Complete & submit checkout.
-9. Find the `Your {store} account has been created!` email. Copy the `Click here to set your new password.` url.
- - Link should look something like this: `http://localhost:8333/my-account/lost-password/?action=newaccount&key=6lye4PPX11pbjWPJozSR&login=bob`
-10. In an incognito window, or after logging out, navigate to set password url.
-11. Should see reset password form (2 password fields) with `Set password` title.
-12. Reset the account password and confirm the customer account and password are all correct.
-
-See also [related testing instructions in WooCommerce Core](https://github.com/woocommerce/woocommerce/wiki/Release-Testing-Instructions-WooCommerce-4.7#improvements-to-my-account--lost-password-endpoint).
-
-### Fix 3D secure payment errors. ([3272](https://github.com/woocommerce/woocommerce-gutenberg-products-block/pull/3272))
-
-1. Install Stripe payment gateway and set it up.
-2. Add products to the cart and go to a page with the Checkout block.
-3. Place an order using Stripe with the card number `4000 0027 6000 3184` (it will open an authentication modal).
-4. Click Cancel or fail the authentication.
-5. Verify only one error is displayed, inside the payment methods step.
-6. Without modifying the payment number, click on `Place order` again and verify the authentication modal appears again and you can complete the order.
-
-### Correctly process orders with \$0 total (e.g. via coupon) in Checkout block. ([3298](https://github.com/woocommerce/woocommerce-gutenberg-products-block/pull/3298))
-
-1. Add a $0 product to your cart and checkout. Here are two ways to set up a $0 order:
-
-- Configure a "100% off" coupon and use it.
-- Set the price for product(s) to \$0 (and only add those products to cart).
-
-2. Complete payment and submit the order.
-3. View order in back end.
-4. In the same user/browser session as the first order, repeat another \$0 order and submit.
-5. View orders in back end and confirm both orders are present and correct.
-
-### Respect Enable Taxes setting for checkout block taxes display. ([3291](https://github.com/woocommerce/woocommerce-gutenberg-products-block/pull/3291))
-
-1. Enable taxes and set up a tax rate.
-2. Set these tax options:
-
-- `Display prices in the shop: Excluding tax`
-- `Display prices during cart and checkout: Including tax`
-
-3. Add items to the cart.
-4. View the Checkout block. Tax component should be visible and show tax amount.
-5. Disable taxes: `WooCommerce > Settings > General > Enable taxes: [unchecked]`.
-6. View the Checkout block. Tax component should not be displayed, no taxes should be included in total. Note you may need to refresh the Checkout page if tax values are cached.
-
-### Improve layout of Cart block line item quantity selector & price on smaller screens. ([3299](https://github.com/woocommerce/woocommerce-gutenberg-products-block/pull/3299))
-
-1. Add items to cart with a cost that has 3 leading digits.
-2. Go to a page with a Cart block.
-3. Reduce the viewport and check how the price behaves below 320px width.
-4. View Cart block in various screen sizes and devices and ensure that line items look and function correctly.
-
-## The following changes affect feature plugin and WooCommerce package
-
-### Standardise & refactor colors scss to align with Gutenberg colors and WooCommerce brand. ([3300](https://github.com/woocommerce/woocommerce-gutenberg-products-block/pull/3300))
-
-Test all blocks in editor/frontend and verify there are no evident issues with its display (layout completely broken or colors that are not correctly assigned). You can copy & paste [this gist](https://gist.github.com/Aljullu/d9c76ed510ae6973bd41dcc4184e8eb2) into the editor to automatically add all blocks. You might need to paste it with `Ctrl + Shift + V` so styles are removed and the editor can transform it into blocks.
-
-### Show current selected attributes when re-edit Products by Attribute block. ([3185](https://github.com/woocommerce/woocommerce-gutenberg-products-block/pull/3185))
-
-1. Add a Products by Attribute block.
-2. Select some attributes and click on Done.
-3. Click on the pencil icon to edit the block again.
-4. Confirm your existing attributes are selected by default.
diff --git a/plugins/woocommerce/client/blocks/docs/internal-developers/testing/releases/371.md b/plugins/woocommerce/client/blocks/docs/internal-developers/testing/releases/371.md
deleted file mode 100644
index 43591c92296..00000000000
--- a/plugins/woocommerce/client/blocks/docs/internal-developers/testing/releases/371.md
+++ /dev/null
@@ -1,36 +0,0 @@
-# Testing notes and ZIP for release 3.7.1
-
-> Note: These tests only apply to the feature plugin, nothing in this release impacts what is exposed in WooCommerce core via package.
-
-Zip file for testing: [woocommerce-gutenberg-products-block.zip](https://github.com/woocommerce/woocommerce-gutenberg-products-block/files/5493854/woocommerce-gutenberg-products-block.zip)
-
-All tests require:
-
-- Checkout block published in woo checkout page.
-- Items added to cart.
-- Anon / incognito user session.
-
-## Test 1: Store API will only create an account if store options allow it
-
-1. Render checkout block with `Create an account?` checkbox. We're going to use a stale copy of the page to submit a checkout API request with `should_create_account=true`.
- - Ensure `WooCommerce > Settings > Accounts & Privacy > Allow customers to create an account during checkout` is checked (temporarily enable).
- - Edit checkout page, ensure `Allow shoppers to sign up for a user account during checkout` is enabled, publish.
-2. In another browser/window, view checkout page (with items in cart, as anon user/logged out). Should see `Create an account` checkbox.
-3. Complete checkout form and check `Create an account`. **Do not submit** (yet).
-4. As admin, disable `WooCommerce > Settings > Accounts & Privacy > Allow customers to create an account during checkout` and save settings.
-5. Submit checkout (with `should_create_account=true`).
-6. Ensure no account is created for the customer, and the order is processed correctly.
-
-As an alternative to (1), could also hack the JS REST request to always send `should_create_account=true`, or use other approaches to call the API with that value set.
-
-## Test 2: Checkout block will only offer to create an account if store options allow it
-
-1. As admin, disable `WooCommerce > Settings > Accounts & Privacy > Allow customers to create an account during checkout` and save settings.
-2. View checkout page and ensure there is no `Create an account` checkbox.
-3. Repeat the above test with different block settings and ensure no checkbox is displayed unless store option is enabled. E.g. allow checkout signup in settings, enable block `Allow shoppers to sign up for a user account during checkout` setting, publish, change store setting and refresh page.
-
-## Other possible tests
-
-- Repeat similar tests with a custom plugin implementing `woocommerce_checkout_registration_enabled` hook to disable checkout signup.
-- Test various combinations of store settings (e.g. guest checkout `Allow customers to place orders without an account`) and ensure that accounts are created when appropriate.
-- Test with WooCommerce < v4.7 and ensure that checkout block sign-up feature is not available, and there is no way to sign up using checkout block.
diff --git a/plugins/woocommerce/client/blocks/docs/internal-developers/testing/releases/380.md b/plugins/woocommerce/client/blocks/docs/internal-developers/testing/releases/380.md
deleted file mode 100644
index 0c40354d9dd..00000000000
--- a/plugins/woocommerce/client/blocks/docs/internal-developers/testing/releases/380.md
+++ /dev/null
@@ -1,21 +0,0 @@
-# Testing notes and ZIP for release 3.8.0
-
-Zip file for testing: [woocommerce-gutenberg-products-block.zip](https://github.com/woocommerce/woocommerce-gutenberg-products-block/files/5516903/woocommerce-gutenberg-products-block.zip)
-
-## The following changes affect the feature plugin only
-
-### Show the phone number field in the billing section when shipping is disabled in settings. ([3376](https://github.com/woocommerce/woocommerce-gutenberg-products-block/pull/3376))
-
-Moves the rendering of address fields to a single file so that PhoneNumber (new component) can be rendered in either billing or shipping, depending on visibility, without duplication.
-
-0. Ensure the phone number field is enabled in Checkout block settings, then test 2 cases:
-1. With shipping enabled, ensure phone number displays beneath the shipping step.
-2. With shipping disabled (you can delete all rates and zones to edit general settings), ensure phone number displays beneath the billing step.
-3. In both scenarios the values should change and be saved correctly.
-
-## The following changes affect feature plugin and WooCommerce package
-
-### Change delimiter used for splitChunks from tilde to hyphens. ([3360](https://github.com/woocommerce/woocommerce-gutenberg-products-block/pull/3360))
-
-0. Complete a build and smoke test block inserter - atomic blocks would be affected if this broke anything ( in Core those blocks are only accessible when editing the All Products block ).
-1. Confirm -- usage in built files.
diff --git a/plugins/woocommerce/client/blocks/docs/internal-developers/testing/releases/390.md b/plugins/woocommerce/client/blocks/docs/internal-developers/testing/releases/390.md
deleted file mode 100644
index a06df417317..00000000000
--- a/plugins/woocommerce/client/blocks/docs/internal-developers/testing/releases/390.md
+++ /dev/null
@@ -1,134 +0,0 @@
-# Testing notes and ZIP for release 3.9.0
-
-Zip file for testing: [woocommerce-gutenberg-products-block.zip](https://github.com/woocommerce/woocommerce-gutenberg-products-block/files/5597018/woocommerce-gutenberg-products-block.zip)
-
-## Feature plugin and package inclusion in WooCommerce core
-
-This release only has changes for Cart and Checkout blocks so there is nothing specific to test for other blocks.
-
-## Feature plugin only
-
-### Fix stuck "Proceed to Checkout" button in Safari
-
-Test in Safari to ensure issue is resolved, then test in another browser to ensure nothing else was broken with button behaviour.
-
-1. Add an item to the cart.
-2. Visit a page with the Cart Block in it.
-3. Press the "Proceed to checkout" link.
-4. A spinner should appear on the link.
-5. When on the checkout page, use the browser's back button to get back to the page with the cart block.
-6. When back on the cart block page, ensure the "Proceed to checkout" link does not contain a spinner.
-
-### Fix express payment methods processing not completed when Stripe payment method active
-
-Setup:
-
-- Make sure your testing environment has Stripe setup for both CC and Express payment methods.
-
-Testing:
-
-- [ ] When checkout is loaded, make sure the Stripe CC payment method is the active payment method tab.
-- [ ] Click express payment method button (Chrome Pay or Apple Pay) to initiate payment flow.
-- [ ] Submit the express payment and ensure the checkout order is processed (resulting in a successful redirect to the Order complete page)
-- [ ] Try setting up the scenario, and then instead of completing the express payment, try canceling the express payment and completing payment with CC.
-- [ ] Try cancelling the express payment method and then triggering it again (after setting up the scenario again).
-- [ ] Try all scenarios with a logged out and logged in user.
-
-### Refresh Express Payment methods after cancelling payment to prevent addresses remaining populated on repeat attempts
-
-- [ ] Go to the cart page with items in your cart.
-- [ ] Click on Pay Now (stripe Chrome pay). The PaymentRequest window is opened.
-- [ ] In the PaymentRequest window, select a delivery address.
-- [ ] Cancel the payment.
-- [ ] Click the Pay Now button again.
-- [ ] The delivery address area should not have an address selected. This is the fix.
-
-### Ensure "Add a note to your order" section is styled correctly when disabled
-
-- [ ] Add a product to your cart and go to a page with the checkout block
-- [ ] Fill in the required form fields. Leave the "Add a note to your order" unticked.
-- [ ] Submit the form
-- [ ] Ensure the "Add a note to your order" section looks disabled
-- [ ] Restart the checkout process and fill in all required form fields.
-- [ ] Tick the box next to "Add a note to your order" and (optionally) fill in the textarea with something
-- [ ] Submit the form again and ensure the entire "Add a note to your order" section is disabled (while the order is processing), including the textarea.
-
-### Prevent checkout step heading text overlapping actual heading on small viewports
-
-- [ ] Ensure the Allow customers to log into an existing account during checkout option is enabled in **WooCommerce -> Settings -> Accounts & Privacy**.
-- [ ] Log out of the site and add a product to your cart.
-- [ ] Go to a page with the checkout block on and reduce the viewport so far that the "Already have an account? Log in" text is about to overlap.
-- [ ] Ensure the text drops to below the header and does not overlap with the section heading.
-
-### Hide Stripe Express payment if transaction in cart is lower than 0.30
-
-- [ ] Enable Stripe + Chrome Pay
-- [ ] Add an item to the cart costing 0.10
-- [ ] No express payment method is visible
-- [ ] Increase quantity in cart to 3. Express payment method should then be shown.
-- [ ] Reduce the quantity again. The payment method will disappear.
-- [ ] Go to checkout with total in cart less than 0.30 and ensure Stripe express payment method does not show.
-
-### Stop hidden products from being linked in cart and checkout blocks
-
-- [ ] Create a page that contains the checkout and cart blocks.
-- [ ] Find a product in the dashboard and set its catalogue visibility to hidden.
-- [ ] Add that product to your cart (Note you will have to visit the url for the product directly in order to add it).
-- [ ] Visit the page with the checkout and cart blocks and ensure the name of the hidden product does not link to the product page in the checkout sidebar and in the line items in the cart.
-- [ ] Repeat steps 2-4 with the catalogue visibility set to "Search results only".
-
-### Fix orders not being placed when paying with an Express payment method from the Cart block
-
-In a device compatible with express payment methods and a site with Stripe payment gateway enabled:
-
-- [ ] Verify Apple Pay or Google Pay buttons appear in the Cart block and clicking on them triggers the payment process.
-- [ ] Proceed with the payment and verify you are redirected to the success screen and the order appears in the admin (WooCommerce > Orders).
-- [ ] Verify express payment methods from the Checkout block are not broken.
-- [ ] Verify regular payment methods are not broken either.
-
-### Cart and checkout should respect the global "Hide shipping costs until an address is entered" setting
-
-- [ ] Before running this PR, in **Settings > Shipping > Shipping Options**, turn on the option to require an address
-- [ ] Setup a single shipping rate
-- [ ] The messaging in cart and checkout states that shipping will be shown after providing an address.
-- [ ] After entering your address, rates are then displayed and the total cost is not 0
-- [ ] The "Hide shipping costs until an address is entered" block level option is no longer displayed when editing the block.
-
-### Exclude checkout-draft orders from WC Admin reports and My Account > Orders
-
-- [ ] Make sure your store has at least one completed order and one draft order. You can achieve that adding some products to the cart and navigating to the Cart and Checkout blocks but without completing the order.
-- [ ] Go to Analytics > Settings and verify there isn't a Custom statuses section or, if it exists, make sure none of the statuses is named Draft.
-- [ ] Go to the bottom of the page and click on Delete Previously Imported Data.
-- [ ] Wait until the process finishes and then import all data again.
-- [ ] Go to Analytics > Orders.
-- [ ] Verify the 'draft' order is not counted in the totals.
-- [ ] In the frontend, go to My Account > Orders with the user that made the draft order.
-- [ ] Verify the draft order is not listed there.
-
-### Sync shipping address with billing address when shipping address fields are disabled
-
-#### Case 1
-
-- [ ] Create 2 tax rates; one for UK and one for US
-- [ ] Delete all shipping methods and rates so shipping is disabled and no fields are shown during checkout
-- [ ] Go to checkout. Enter a UK address. See the tax rate.
-- [ ] Change country field. See the tax rates update after the API request completes.
-- [ ] Place order. Check the order has the same shipping and billing address saved.
-
-#### Case 2
-
-- [ ] In general settings, in the option for where you ship to, select 'disable shipping calculations'
-- [ ] Go to checkout. Enter a UK address. See the tax rate.
-- [ ] Change country field. See the tax rates update after the API request completes.
-- [ ] Place order. Check the order has the same shipping and billing address saved.
-
-#### Case 3
-
-- [ ] In tax settings, choose to base taxes on the billing address.
-- [ ] Go to checkout. Enter a different billing and shipping address.
-- [ ] Toggle the "ship to billing" checkbox and see if the rate changes after doing so reliably.
-- [ ] In all cases you should see a network request to update-customer a short while after entering any billing or shipping data, or toggling the 'use shipping address' checkbox on checkout.
-
-### Move feature flag PHP logic to a service class
-
-- [ ] Verify Product Element blocks (i.e. `Product Price`) are not available in the feature plugin from the block picker (it is expected that some product element blocks are available when editing the template view for the All Products block).
diff --git a/plugins/woocommerce/client/blocks/docs/internal-developers/testing/releases/400.md b/plugins/woocommerce/client/blocks/docs/internal-developers/testing/releases/400.md
deleted file mode 100644
index 0a6d3edbe46..00000000000
--- a/plugins/woocommerce/client/blocks/docs/internal-developers/testing/releases/400.md
+++ /dev/null
@@ -1,106 +0,0 @@
-# Testing notes and ZIP for release 4.0.0
-
-Zip file for testing: [woocommerce-gutenberg-products-block.zip](https://github.com/woocommerce/woocommerce-gutenberg-products-block/files/5654619/woocommerce-gutenberg-products-block.zip)
-
-## Feature plugin and package inclusion in WooCommerce core
-
-### Input appearance in IE 11 (Create IE11 SCSS mixin)
-
-Setup:
-
-- Create a Products Block, Filter by Price Block, and Checkout Block.
-
-Testing:
-
-- [ ] With IE11, check that there are no visual regressions in the Filter products by price block.
-- [ ] With IE11, check that there are no visual regressions in the checkboxes of the Checkout block.
-
-See screenshots in <https://github.com/woocommerce/woocommerce-gutenberg-products-block/pull/3473>.
-
-## Feature plugin only
-
-### Fix notice close button color in Twenty Twenty One dark mode
-
-Setup:
-
-- Install and activate Twenty Twenty One.
-- Go to Customize > Colors & Dark mode and check the Dark mode support checkbox.
-- In the frontend, make sure the dark mode is enabled and go to a page with the Checkout block.
-
-Testing:
-
-- [ ] Try submitting the form leaving one of the required inputs empty so the error notice appears.
-- [ ] Verify the close button is visible.
-
-### Ensure correct alignment of checkout notice's dismiss button
-
-Setup:
-
-- Enable Storefront theme
-- Add an item to the cart and go to the checkout block
-
-Testing:
-
-- [ ] Leave a required field on the checkout form blank and attempt checkout
-- [ ] Ensure the error notice's dismiss button is aligned to the right
-
-See screenshot in <https://github.com/woocommerce/woocommerce-gutenberg-products-block/pull/3455>.
-
-### Fix notices in console on Checkout (Update @wordpress/components to v. 11.1.1 and @wordpress/base-styles to v. 3.2.0)
-
-Setup:
-
-- Add the checkout block to a page.
-- Add an item to your cart, and go to checkout.
-
-Testing:
-
-- [ ] Change the value of the Country/Region select.
-- [ ] Verify no errors appear in the browser console.
-
-### Checkout block: Fixes around account creation and coupon validation
-
-Setup:
-
-- Create a coupon with a usage requirement of a specific email address.
-- Enable registration during checkout.
-- Add the checkout block to a page.
-- Add an item to your cart, apply the coupon, and go to checkout.
-
-Testing:
-
-- [ ] Fill out the checkout form, and indicate that you would like to create an account. Use an email address different to the coupon restriction. Submit the form.
-- [ ] Confirm a coupon error appears, and the create account signup box is hidden.
-- [ ] Submit the form again. Order should go through without error.
-
-### Remove held stock for a draft order if an item is removed from the cart
-
-Setup:
-
-- Setup a stock managed item with 1 in stock
-- Add that 1 item to the cart
-- Go to checkout
-- Go back to the cart and remove the item from your cart
-
-Testing:
-
-- [ ] From another device or in another browser, add the same item to the cart. No stock errors should be shown.
-
-### Make sure cart is initialized before the CartItems route is used in the Store API
-
-Setup:
-
-You need to use the StoreAPI. Add an item to your cart via the API (replacing the product ID with one from your store).
-
-POST `https://yourstore.test/wp-json/wc/store/cart/add-item`
-
-```text
-{
- "id": 163,
- "quantity":1
-}
-```
-
-Testing:
-
-- [ ] GET the following endpoint: `https://yourstore.test/wp-json/wc/store/cart/items`. There should be a valid response with response code 200.
diff --git a/plugins/woocommerce/client/blocks/docs/internal-developers/testing/releases/410.md b/plugins/woocommerce/client/blocks/docs/internal-developers/testing/releases/410.md
deleted file mode 100644
index 4e7ff415075..00000000000
--- a/plugins/woocommerce/client/blocks/docs/internal-developers/testing/releases/410.md
+++ /dev/null
@@ -1,184 +0,0 @@
-# Testing notes and ZIP for release 4.1.0
-
-Zip file for testing: [woocommerce-gutenberg-products-block.zip](https://github.com/woocommerce/woocommerce-gutenberg-products-block/files/5739460/woocommerce-gutenberg-products-block.zip)
-
-## Feature plugin and package inclusion in WooCommerce core
-
-### Update minimum required WP version to 5.4
-
-- [ ] Open the inserter when creating/editing a post or page and verify All Products, Price Filter, Attribute Filter, Active Filters, Checkout and Cart blocks are available.
-
-### Update usage of legacy packages (inc. ServerSideRender)
-
-- [ ] check that SSR blocks still function in the editor and frontend. And example of an SSR block is Products by Tag.
-
-### add fallback screen reader styles
-
-- [ ] In your theme, remove the `.screen-reader-text` styles.
-- [ ] Add checkout block to a page and stuff to cart.
-- [ ] View checkout on front end - confirm .screen-reader-text is hidden by default and is helpful when using a screen reader.
-- [ ] Revert the style changes to ensure these styles don't conflict or cause issues.
-
-### Hide elements that use 'hidden' attribute
-
-- [ ] Install Artisan theme.
-- [ ] Go to the Cart or Checkout blocks and verify you can expand/contract the Coupon Code panel.
-
-## Compatibility with WordPress 5.6 (both feature plugin and what is included with package inclusion in core)
-
-### Replace IconButton component with Button
-
-- [ ] Add the Featured Product to a post or page.
-- [ ] Choose a product and select the block.
-- [ ] Verify the Edit media button looks good and ensure there isn't any JS message in the console with a deprecation message for the IconButton component.
- image.
-
-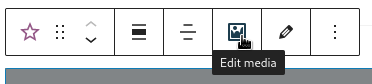
-
-- [ ] Repeat steps 1-3 with Featured Category block.
-- [ ] Add the All Products block to a page.
-- [ ] Click the edit button (pencil icon) and verify the Reset Layout button looks good and there aren't JS errors in the console.
-- [ ] Add the All Products block to a page (or use the one you just added in the steps above).
-- [ ] Click the edit button (pencil icon) and verify the layout looks like in the screenshot on the right.
-
-| Before | After |
-| -------------------------------------------------------------------------------------------------------------- | -------------------------------------------------------------------------------------------------------------- |
-| 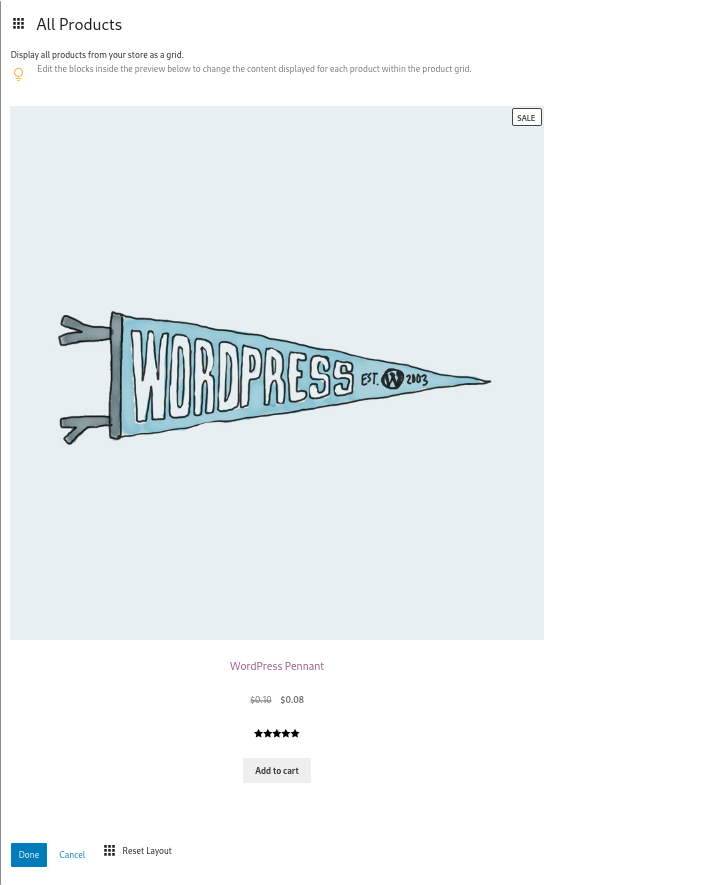 | 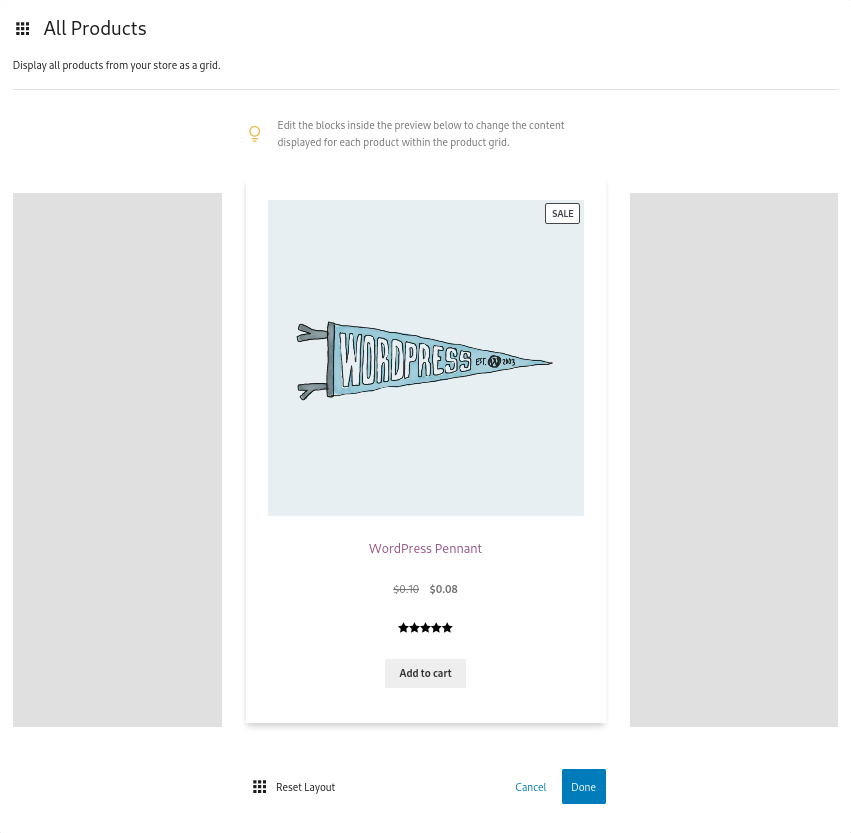 |
-
-### Fix isDefault on Buttons and switch Toolbar with ToolbarGroup
-
-Smoke test the following blocks
-
-- [ ] any atomic block settings.
-- [ ] attributes filter
-- [ ] featured category
-- [ ] featured product
-- [ ] handpicked products
-- [ ] product category
-- [ ] product tag
-- [ ] products by attribute
-- [ ] all products
-- [ ] all reviews
-- [ ] single product
-
-### Fix direct call to setAttribute in EditProductSearch body
-
-- [ ] Insert Product Search, there should be no console errors.
-- [ ] Save the page and reload, the block should render fine.
-- [ ] Checkout the page code, the formId attribute should be set.
-
-### Fix product list images skewed in Widgets editor
-
-- [ ] Install latest Gutenberg version and go to Appearance > Widgets.
-- [ ] Add a Top Rated Products block into one of the widget areas and verify images have the correct aspect ratio.
-
-### Fix select inputs when dark mode is enabled in Twenty Twenty-One
-
-- [ ] Install and activate Twenty Twenty One.
-- [ ] Go to Customize > Colors & Dark mode and check the Dark mode support checkbox.
-- [ ] Add a checkout block to a page, ensure items are in your basket.
-- [ ] Visit the page, enable dark mode (bottom right of screen), and open the country dropdown.
-- [ ] Ensure text is readable.
-- [ ] Change checkout block settings to enable dark mode inputs.
-- [ ] Check again and ensure the colour of the text has changed to white on black and that it is is still readable.
-
-## Feature plugin only
-
-### Fix Fees not visible in Cart & Checkout blocks when order doesn't need shipping
-
-- [ ] Add this PHP code snippet to any PHP file (for example, woocommerce-gutenberg-products-block.php):
-
-```php
-add_action( 'woocommerce_cart_calculate_fees', 'add_fee', 10 );
-function add_fee( $cart ) {
- $cart->add_fee( __( 'Fee', 'woo-gutenberg-products-block' ), 100, true );
-}
-```
-
-- [ ] Add a product that doesn't need shipping to your cart and go to the Cart and Checkout blocks.
-- [ ] Verify 'Fees' is listed in the sidebar.
-
-### Fix Address Validation in the Store API and client
-
-White space:
-For the white space issue, it's easier to test without this PR first to see what happened, and then test it worked.
-
-- [ ] Add something to the cart.
-- [ ] Go to checkout.
-- [ ] Enter a space character in the postcode field.
-- [ ] See if it validates or not. Before this PR it does not—it allows checkout submission.
-
-Validation via API
-For validation, best to post to the API.
-
-First add something to the cart via the API:
-
-```sh
-POST https://one.wordpress.test/wp-json/wc/store/cart/add-item
-```
-
-Body:
-
-```json
-{
- "id": 32,
- "quantity": 1
-}
-```
-
-```sh
-POST https://one.wordpress.test/wp-json/wc/store/checkout
-```
-
-Body:
-
-```json
-{
- "payment_method": "bacs",
- "billing_address": {
- "first_name": "Mike",
- "last_name": "Jolley",
- "address_1": "Test Address",
- "city": "Test City",
- "country": "US",
- "state": "AL",
- "postcode": "90210",
- "email": "test@test.com"
- },
- "shipping_address": {
- "first_name": "Mike",
- "last_name": "Jolley",
- "address_1": "Test Address",
- "city": "Test City",
- "country": "US",
- "state": "AL",
- "postcode": "90210"
- }
-}
-```
-
-- [ ] Leave out certain values to see validation errors. e.g. use an invalid email address, remove the state, enter an invalid state, use a non-existing country etc. Each will produce an error 400 and show a message.
-
-Validation via Checkout
-
-- [ ] Also confirm checkout works as usual and this validation does not block. One thing you can do is checkout using a US address and enter a non-numeric zip code, e.g. ABC. You'll see error notices as the address updates and also if you try to place an order.
-
-### Use em for coupon code button height
-
-- [ ] Set your browser font size to something smaller than 16px.
-- [ ] Open the Cart block and expand the Coupon Code panel.
-- [ ] Verify the button has the same height as the input text on the left.
-
-### use ReplaceMediaFlow in featured category and feature product
-
-- [ ] Insert Featured Category and Featured Product
-- [ ] Try updating the image via media library or directly uploading.
-- [ ] There should be no console errors or warnings.
-- [ ] Your upload should work fine.
-
-### Fix nonce issues when adding product to cart from All Products
-
-- [ ] In a private window, go to All Products, try to add to cart, it should work
-- [ ] Do it several times with several products.
-- [ ] Paginate the block and try to add products again.
-- [ ] If you have filters set up, try using filters and then adding to cart.
diff --git a/plugins/woocommerce/client/blocks/docs/internal-developers/testing/releases/420.md b/plugins/woocommerce/client/blocks/docs/internal-developers/testing/releases/420.md
deleted file mode 100644
index 2da19f9b6a7..00000000000
--- a/plugins/woocommerce/client/blocks/docs/internal-developers/testing/releases/420.md
+++ /dev/null
@@ -1,21 +0,0 @@
-# Testing notes and ZIP for release 4.2.0
-
-Zip file for testing: [woocommerce-gutenberg-products-block.zip](https://github.com/woocommerce/woocommerce-gutenberg-products-block/files/5769544/woocommerce-gutenberg-products-block.zip)
-
-## Feature plugin and package inclusion in WooCommerce core
-
-### SearchListControl styles cleanup ([#3604](https://github.com/woocommerce/woocommerce-gutenberg-products-block/pull/3604))
-
-1. Add a Products by Attribute block in a page or post.
-2. Select some attributes and verify there are no visual regressions.
-3. Test it also with WP 5.4 + WC 4.3 (our oldest supported versions).
-
-## Feature plugin only
-
-### Convert saved payment methods token to a string ([#3627](https://github.com/woocommerce/woocommerce-gutenberg-products-block/pull/3627))
-
-1. Install and enable WooCommerce Stripe Payment Gateway.
-2. With a new user, go to My Account > Payment Methods and add a new payment method.
-3. Add a product to your cart and go to the checkout page.
-4. Fill the details but keep the payment method as the saved card you added in step 2.
-5. Try to make a purchase and verify it completes successfully and no error is shown.
diff --git a/plugins/woocommerce/client/blocks/docs/internal-developers/testing/releases/430.md b/plugins/woocommerce/client/blocks/docs/internal-developers/testing/releases/430.md
deleted file mode 100644
index 552aad150f5..00000000000
--- a/plugins/woocommerce/client/blocks/docs/internal-developers/testing/releases/430.md
+++ /dev/null
@@ -1,61 +0,0 @@
-# Testing notes and ZIP for release 4.3.0
-
-Zip file for testing: [woocommerce-gutenberg-products-block.zip](https://github.com/woocommerce/woocommerce-gutenberg-products-block/files/5837152/woocommerce-gutenberg-products-block.zip)
-
-## Feature plugin and package inclusion in WooCommerce core
-
-No changes.
-
-## Feature plugin only
-
-### - Update input colors and alignment. ([3597](https://github.com/woocommerce/woocommerce-gutenberg-products-block/pull/3597))
-
-1. Open a page with a Checkout Block and observer the checkboxes and radio buttons - they should be clearly visible.
-2. Go to the page Customizer and change page background to a dark color.
-3. Again check the checkboxes and radio buttons at the page with the Checkout Block - they should be clearly visible.
-
-### - Store API - Fix selected rate in cart shipping rates response. ([3680](https://github.com/woocommerce/woocommerce-gutenberg-products-block/pull/3680))
-
-1. Get a cart response from the API.
-2. Check shipping packages are returned correctly.
-
-### - Create get_item_responses_from_schema abstraction. ([3679](https://github.com/woocommerce/woocommerce-gutenberg-products-block/pull/3679))
-
-1. Get a cart response from the Store API.
-2. Check response contains correct: items, coupons and shipping information.
-
-### - Show itemized fee rows in the cart/checkout blocks. [3678](https://github.com/woocommerce/woocommerce-gutenberg-products-block/pull/3678)
-
-1. Use the following code snippet in woocommerce-gutenberg-products-block.php:
-
-```php
-add_action( 'woocommerce_cart_calculate_fees', 'add_fees', 10 );
-function add_fees( $cart ) {
- $cart->add_fee( __( 'Packaging 1', 'woo-gutenberg-products-block' ), 100, true );
- $cart->add_fee( __( 'Packaging 2', 'woo-gutenberg-products-block' ), 50, true );
-}
-```
-
-2. Go to the cart page and see fee rows.
-3. Go to checkout page and see fee rows.
-4. Test with and without prices including tax in WC Tax settings.
-
-### - Extensibility: Show item data in Cart and Checkout blocks and update the variation data styles. ([3665](https://github.com/woocommerce/woocommerce-gutenberg-products-block/pull/3665))
-
-Variations:
-
-1. Add a variable product to your cart and go to the Cart and Checkout pages.
-2. Verify variations are displayed with the new design (a list instead of separated by /).
-
-WC Subscriptions:
-
-1. Currently, WC Subscriptions doesn't use cart item data yet, but you can checkout this WIP branch to test it: fix/subscription-details-cart-item-data.
-2. Create a subscription product with free trial and/or sign up fee.
-3. Add that product to your cart and go to the Cart and Checkout pages.
-4. Verify the free trial and sign up fee are displayed.
-
-WC Product Add-Ons:
-
-1. Create a product with a product add-on.
-2. Add that product to your cart and go to the Cart and Checkout pages.
-3. Verify add-on data is displayed.
diff --git a/plugins/woocommerce/client/blocks/docs/internal-developers/testing/releases/440.md b/plugins/woocommerce/client/blocks/docs/internal-developers/testing/releases/440.md
deleted file mode 100644
index 8ee38e8ff4f..00000000000
--- a/plugins/woocommerce/client/blocks/docs/internal-developers/testing/releases/440.md
+++ /dev/null
@@ -1,97 +0,0 @@
-# Testing notes and ZIP for release 4.4.0
-
-Zip file for testing: [woocommerce-gutenberg-products-block.zip](https://github.com/woocommerce/woocommerce-gutenberg-products-block/files/5918701/woocommerce-gutenberg-products-block.zip)
-
-## Feature plugin and package inclusion in WooCommerce core
-
-### Prevent "Nonce is invalid" error when going back to a page with the products block using the browser back button. #3770
-
-1. Open your store in an incognito window.
-2. Add an item to the cart from the products block.
-3. Click on a link to go to the cart page.
-4. Use the browser back button to go back to the page with the products block.
-5. Add another item to the cart. If it successfully adds to the cart, the fix is working. If you see an error notice about the nonce, there is a problem.
-
-### Ensure empty categories are correctly hidden in the product categories block. #3765
-
-1. Add the Product Categories Block to a page
-2. Make sure the "Show empty categories" setting is disabled
-3. Edit a product and add it to a new category called "Test"
-4. Save the product and see that the "Test" category appears in the Product Categories Block with 1 product
-5. Edit the product again and set it's catalog visibility to hidden (this is in the panel with the update button).
-6. Save the product and see that the "Test" category does not appear in the Product Categories Block.
-7. Change the "Show empty categories" block's settings to true
-8. Notice that the Test category is listed in the Product Categories Block with 0 products.
-
-### Hide the All Products Block from the new Gutenberg Widget Areas until full support is achieved. #3737
-
-1. Ensure Gutenberg feature plugin is enabled and you can see the new Widget Areas screen under Appearance > Widgets.
-2. Go to the screen and try to insert "All Products", "Price Filter", "Attribute Filter", and "Active Filter" blocks. You shouldn't be able to see them in the inspector!
-3. Edit a page and try to insert "All Products", "Price Filter", "Attribute Filter", and "Active Filter" blocks. It should work as expected.
-
-### Legacy star-rating class name has been removed from Product rating block (inside All Products block). That element is still selectable with the .wc-block-components-product-rating class name. #3717
-
-1. Update Storefront to version 3.4.0 or above.
-2. Verify star icons look correct in the All Products block and show an icon rather than a character.
-
-### Improved accessibility of product image links in the products block by using correct aria tags and hiding empty image placeholders. #3722
-
-This test requires the browser dev tools to inspect rendered HTML.
-
-1. Add an All Products Block to a page and make sure you have at least a product without an image
-2. In the browser dev tools, choose slow 3G Network setting to see that the placeholder image is shown until the product image is loaded
-3. Reset Network setting and check that product images have alt attributes using the browser dev tools inspector
-4. Check that a product without an image displays a placeholder image with no alt attribute using the browser dev tools inspector
-
-### Added missing wrapper div within FeaturedCategory and FeatureProduct blocks. #3746
-
-This test requires the browser dev tools to inspect rendered HTML.
-
-1. Add the Featured Category and Featured Product blocks on a page.
-2. On the frontend, inspect the markup using the browser dev tools inspector.
-3. Notice the inner elements (title, text, button) are wrapped with a `<div class="wc-block-featured-X__wrapper"></div>`
-
-### Add missing aria-label for stars image in the review-list-item component. #3706
-
-This test requires the browser dev tools to inspect rendered HTML.
-
-1. Insert All reviews block into a page
-2. Use the developer tools to inspect one of the review items in the Reviews list
-3. Select the div containing the star image
-4. Make sure it has role="img" & aria-label="Rated X out of 5"
-5. Check that the child span has the same text content as the aria-label attribute
-
-### Set correct text color in BlockErrorBoundary notices. #3738
-
-This test requires a code edit to force an error.
-
-1. Chose Storefront and set the background to black and text to white.
-2. Force an error to the Cart or Checkout block. Add on line 74 throw new Error( 'test' ); in `assets/js/blocks/cart-checkout/cart/block.js`
-3. Notice the error text is now visible
-
-## Feature plugin only
-
-### Design tweaks to the cart page (using Cart Block) which move the quantity picker below each cart item and improve usability on mobile. #3734
-
-1. Make sure the cart page is setup with the Cart Block.
-2. Add items to your cart, some with sale prices, add multiple items etc.
-3. See that the subtotal for each item is shown below the item's name, and the overall total is shown to the right. (Overall total is item price \* quantity).
-
-### Hidden cart item meta data will not be rendered in the Cart and Checkout blocks. #3732
-
-This can only be tested with Subscriptions.
-
-1. Checkout fix/details-disappearing branch in WC Subscriptions (see relevant PR: 3968-gh-woocommerce/woocommerce-subscriptions).
-2. Add a subscription with free trial and signup fee to your cart.
-3. Go to the Cart block and verify the free trial and signup fee details are rendered.
-4. Open the Cart shortcode and verify free trial and signup fee metadata is not rendered.
-
-### Changes to cart and checkout for Subscriptions (misc PRs)
-
-This is a regression test due to the changes made for Subscriptions Integration.
-
-1. On the cart page, use the shipping calculator.
- - Confirm your address is populated in the shipping calculated fields.
- - When updating your address, confirm the shipping rates update.
-2. Enter an address that has no rates. Ensure an error notice is shown in the cart shipping package "No shipping options were found.".
-3. Place an order. Confirm details persist.
diff --git a/plugins/woocommerce/client/blocks/docs/internal-developers/testing/releases/450.md b/plugins/woocommerce/client/blocks/docs/internal-developers/testing/releases/450.md
deleted file mode 100644
index 3cd63856b89..00000000000
--- a/plugins/woocommerce/client/blocks/docs/internal-developers/testing/releases/450.md
+++ /dev/null
@@ -1,139 +0,0 @@
-# Testing notes and ZIP for release 4.5.0
-
-Zip file for testing: [woocommerce-gutenberg-products-block.zip](https://github.com/woocommerce/woocommerce-gutenberg-products-block/files/5988965/woocommerce-gutenberg-products-block.zip)
-
-## Feature plugin and package inclusion in WooCommerce core
-
-No changes.
-
-## Feature plugin only
-
-### Login links on the checkout should use the account page. ([3844](https://github.com/woocommerce/woocommerce-gutenberg-products-block/pull/3844))
-
-1. Ensure you have the "My Account" page setup in WooCommerce
-2. In WC > Settings > Accounts, turn off guest checkout
-3. Log out or use an incognito window
-4. Add something to cart and go to checkout
-5. You should see a login link. Click it.
-6. You should be on the account page. Login.
-7. You should be redirected back to the checkout page.
-
-### Prevent checkout linking to trashed terms and policy pages. ([3843](https://github.com/woocommerce/woocommerce-gutenberg-products-block/pull/3843))
-
-1. In WC > Settings > Advanced, set the terms page to a page that exists in the store.
-2. Go to checkout. See the terms page link in the footer of the checkout.
-3. Go to admin and trash the page.
-4. Check the checkout again; the link should no longer be visible.
-
-### Improved nonce logic by moving nonces to cart routes only. ([3812](https://github.com/woocommerce/woocommerce-gutenberg-products-block/pull/3812))
-
-1. Ensure PHP Unit tests pass.
-2. Add a product to cart in incognito and checkout successfully.
-
-### If coupons become invalid between applying to a cart and checking out, show the user a notice when the order is placed. ([3810](https://github.com/woocommerce/woocommerce-gutenberg-products-block/pull/3810))
-
-1. Create a coupon with no expiry date, minimum spend restriction, product restrictions, or usage limit.
-2. Add a product to the cart, go to the checkout block, then apply the coupon.
-3. Repeat these steps several times, with different coupons and new baskets each time.
-
-- Modify the coupon's expiry date to be in the past.
-- Modify the allowed products for the coupon, to ensure it is not applicable to the cart you're testing against.
-- Create a coupon with a single use. Apply it to this test cart. Then use it on another, unrelated cart and complete the checkout.
-- Add a minimum order value to the coupon, that is above the cart's value.
-
-4. Complete checkout
-
-### Improve design of cart and checkout sidebars. ([3797](https://github.com/woocommerce/woocommerce-gutenberg-products-block/pull/3797))
-
-Go to the Cart and Checkout block and verify designs look good. Some ideas of things to try:
-
-- Test in a situation where there are +1 shipping rate options, only 1 or when there are no available options.
-- Test when there is more than one shipping package and when there is only one.
-- Test in several themes.
-- Test with a different browser font size.
-- Verify things look good in the editor as well.
-- Test mobile too.
-
-### Improve error displayed to customers when an item's stock status changes during checkout. ([3703](https://github.com/woocommerce/woocommerce-gutenberg-products-block/pull/3703))
-
-1. **In an incognito window** Add several products to your cart. Add these in differing quantities. Several of these added products need to have a quantity of 3+ in the cart.
-2. Open the checkout page and ensure all the products are showing. **Do different combinations of the following steps in a different session to the one where you've added the items, and also without refreshing the checkout page. This is necessary because we can't be logged in as admin when testing step 3 below.**
-3. Delete one or more of the products from the back end.
-4. Set one or more of the products to "Manage stock?" true, and edit the in-stock amount of one or more of the products ensuring it is below the quantity that is in the cart, but above 0.
-5. Set one or more of the products to "Sold individually"
-6. Set one or more of the products to be entirely out of stock.
-7. Try to check out and ensure you see the correct error messages for the products whose stock you've changed/reduced.
-8. Try a few different scenarios with stock levels, number of products affected, number of products in cart etc.
-
-### Dev - Block Checkout will now respect custom address locales and custom country states via core filter hooks. ([3662](https://github.com/woocommerce/woocommerce-gutenberg-products-block/pull/3662))
-
-1. Change the country on the checkout and check fields are updated/sorted. Japan is a good example because it re-orders all fields. US has states. UK has a text input for state.
-2. Install <https://wordpress.org/plugins/portugal-states-distritos-for-woocommerce/> Confirm states appear for portugal
-3. Complete checkout - no errors, correct address stored.
-
-### Update checkout block payment methods UI. ([3439](https://github.com/woocommerce/woocommerce-gutenberg-products-block/pull/3439))
-
-1. Add items to cart and go to the Checkout block. You will need to test with various combinations of the following payment methods
-
-- No saved payment methods.
-- One saved payment methods.
-- Multiple saved payment methods.
-
-and
-
-- No payment methods.
-- One payment method.
-- Multiple saved payment methods.
-
-2. Ensure the payment methods UI and UX (switching, filling in details) works
-3. Ensure you can still check out and pay.
-
-### Fix JS warning if two cart products share the same name. ([3814](https://github.com/woocommerce/woocommerce-gutenberg-products-block/pull/3814))
-
-1. Add two products (ie: Cap and Beanie with logo) to your Cart.
-2. In `wp-admin`, rename Beanie with logo to `Cart`.
-3. Go to the Cart and Checkout blocks.
-4. Verify there are no errors in the console.
-
-### Align place order button to the right of the block. ([3803](https://github.com/woocommerce/woocommerce-gutenberg-products-block/pull/3803))
-
-1. Go to the Checkout block and verify the Place Order button is aligned to the right and looks correct.
-2. In mobile, verify it takes the entire width.
-3. Optionally, test some other themes in addition to Storefront.
-
-### Ensure special characters are displayed properly in the Cart sidebar. ([3721](https://github.com/woocommerce/woocommerce-gutenberg-products-block/pull/3721))
-
-1. Add this code snippet to any PHP file (ie: `/woocommerce-gutenberg-products-block.php`):
-
-```php
-add_action( 'woocommerce_cart_calculate_fees', 'add_fees', 10 );
-function add_fees( $cart ) {
- $cart->add_fee( __( 'Fee - Number 1', 'woo-gutenberg-products-block' ), 100, true );
- $cart->add_fee( __( 'Fee - Number 2', 'woo-gutenberg-products-block' ), 100, true );
-}
-```
-
-2. Add a product to your cart and visit the Cart or Checkout pages.
-3. Verify the dash is rendered correctly.
-
-### Show cart item total price including taxes when DISPLAY_CART_PRICES_INCLUDING_TAX is true ([3851](https://github.com/woocommerce/woocommerce-gutenberg-products-block/pull/3851))
-
-In wp-admin:
-
-1. Go to WooCommerce > Settings and check the option `Enable tax rates and calculations`.
-2. Go to WooCommerce > Settings > Tax and set `Prices entered with tax` to `No, I will enter prices exclusive of tax` and `Display prices during cart and checkout` to `Including tax`.
-3. Go to WooCommerce > Settings > Tax > Standard Rates and create a tax rate for a specific country.
-
-In the frontend:
-
-1. Add a product to your cart and go to the Cart or Checkout blocks.
-2. Verify the product unitary price and the cart line total show the price including taxes:
-
-| Before | After |
-| -------------------------------------------------------------------------------------------------------------- | -------------------------------------------------------------------------------------------------------------- |
-| 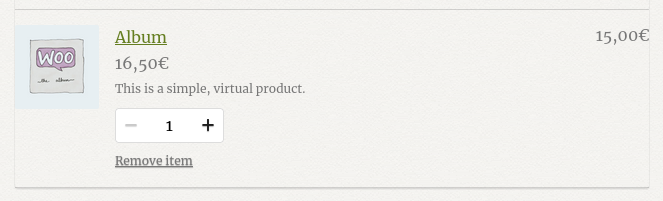 | 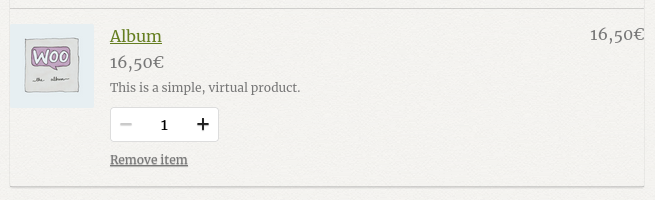 |
-
-### Fix product price not displaying properly when product is on sale ([3853](https://github.com/woocommerce/woocommerce-gutenberg-products-block/pull/3853))
-
-1. Set a product to be on sale and add it to the cart
-2. Go to the cart and checkout blocks and make sure you can see the struckthrough regular price, and the sale price is displayed normally.
diff --git a/plugins/woocommerce/client/blocks/docs/internal-developers/testing/releases/452.md b/plugins/woocommerce/client/blocks/docs/internal-developers/testing/releases/452.md
deleted file mode 100644
index 93c092bff0c..00000000000
--- a/plugins/woocommerce/client/blocks/docs/internal-developers/testing/releases/452.md
+++ /dev/null
@@ -1,22 +0,0 @@
-# Testing notes and ZIP for release 4.5.2
-
-Zip file for testing: [woocommerce-gutenberg-products-block.zip](https://github.com/woocommerce/woocommerce-gutenberg-products-block/files/6028194/woocommerce-gutenberg-products-block.zip)
-
-## Feature plugin and package inclusion in WooCommerce core
-
-No changes.
-
-## Feature plugin only
-
-### Fix cart line subtotal display when currency has 0 decimals [(3876)](https://github.com/woocommerce/woocommerce-gutenberg-products-block/pull/3876)
-
-1. Go to WooCommerce > Settings and change the currency format so it has 0 decimals, ie:
- 
-2. Add any product to your cart and go to the Cart and Checkout blocks.
-3. Verify cart line prices are displayed correctly, instead of being `0`.
-
-### Show total sale badge in medium carts & make it display below price [(3879)](https://github.com/woocommerce/woocommerce-gutenberg-products-block/pull/3879)
-
-1. Set your currency settings to display without a decimal place, like this: 
-1. Add a product that is on sale to your cart, if you've got an up to date WooCommerce Subscriptions repo (on branch: `feature/checkout-block-simple-multiple-subscriptions`) then add a subscription product that's on sale, too.
-1. View the Cart block and ensure the price and sale badge display well.
diff --git a/plugins/woocommerce/client/blocks/docs/internal-developers/testing/releases/460.md b/plugins/woocommerce/client/blocks/docs/internal-developers/testing/releases/460.md
deleted file mode 100644
index 32e7211c47f..00000000000
--- a/plugins/woocommerce/client/blocks/docs/internal-developers/testing/releases/460.md
+++ /dev/null
@@ -1,75 +0,0 @@
-# Testing notes and ZIP for release 4.6.0
-
-Zip file for testing: [woocommerce-gutenberg-products-block.zip](https://github.com/woocommerce/woocommerce-gutenberg-products-block/files/6069952/woocommerce-gutenberg-products-block.zip)
-
-## Feature plugin and package inclusion in WooCommerce core
-
-### General smoke testing
-
-The following are related to various changes impacting some existing flows so just need validated there's nothing broken:
-
-- Test that adding products to the cart via the add to cart button in the All Products block works as expected (product is added to cart and button updated accordingly).
-
-### Fix button styles in Twenty Nineteen Theme (#3862)
-
-- Insert all products block in a page.
-- View a product with a link (external product).
-- Verify the text in the button for the link is white on blue background.
-
-#### Screenshots
-
-Before:
-
-
-After:
-
-
-### Handle out of stock product visibility setting in All Products block (#3859)
-
-1. Add All products block to a page.
-2. Mark one product as `Out of stock`, and one as `On back order`.
-3. Select WC > Settings > Products > Inventory > Hide out of stock items from the catalog.
-4. Go to the frontend and view the page with the All products block on it. Verify that the `Out of stock` product is not showing, but the `On back order` product is visible.
-
-## Feature plugin only
-
-### Update Panel component class names to follow guidelines (#3860)
-
-1. Go to a page with the Cart and/or Checkout block inserted and verify there are no visual regressions. Pay special attention to elements that use the Panel component (Coupon code, shipping selector, order summary, etc).
-2. Verify there is no regressions in the Stripe payment method card icons (you will need the [Stripe Payment Method extension](https://woocommerce.com/products/stripe/) installed).
-
-### Remove shadows from text buttons and gradient background from selects in some themes (#3846)
-
-- Install and activate the [Bookshop](https://woocommerce.com/products/bookshop/) theme.
-- Go to the cart block output on the frontend and verify the `Delete item` button doesn't have text shadow.
-
-| Before | After |
-| --------------------------------------------------------------------------------------------------------------- | --------------------------------------------------------------------------------------------------------------- |
-|  |  |
-
-- Go to the checkout block and verify Country and State selects don't have a gradient in the background.
-
-| Before | After |
-| --------------------------------------------------------------------------------------------------------------- | --------------------------------------------------------------------------------------------------------------- |
-|  |  |
-
-### Only use `SHOP_URL` if set (#3845)
-
-- In WC > Settings > Products, unset the shop page and save.
-- Insert a NEW cart block instance into a page.
-- Confirm the empty cart template does not include a link to browse the shop.
-
-### Show cart item subtotal instead of total in Cart and Checkout blocks (#3905)
-
-1. Add a product to your cart.
-2. Go to the Cart block and apply a coupon with a fixed cart discount.
-3. Verify the cart item subtotal doesn't change when the coupon discount is applied.
-
-### Smoke Testing
-
-The following are related to various changes impacting some existing flows so just need validated there's nothing broken
-
-- Cart and checkout coupons interaction works as expected.
-- Cart and checkout changing quantities works as expected.
-- Cart and checkout shipping interaction works as expected.
-- Cart and checkout express payment method works as expected.
diff --git a/plugins/woocommerce/client/blocks/docs/internal-developers/testing/releases/470.md b/plugins/woocommerce/client/blocks/docs/internal-developers/testing/releases/470.md
deleted file mode 100644
index fdbaffe2099..00000000000
--- a/plugins/woocommerce/client/blocks/docs/internal-developers/testing/releases/470.md
+++ /dev/null
@@ -1,126 +0,0 @@
-# Testing notes and ZIP for release 4.7.0
-
-Zip file for testing: [woocommerce-gutenberg-products-block.zip](https://github.com/woocommerce/woocommerce-gutenberg-products-block/files/6149138/woocommerce-gutenberg-products-block.zip)
-
-## Feature plugin and package inclusion in WooCommerce core
-
-### General smoke testing
-
-The following are related to various changes impacting some existing flows so just need validated there's nothing broken:
-
-- Create a post or page and add some WC Blocks.
-- Verify they look correct and styles loaded properly.
-- Publish that post or page.
-- In the frontend, verify blocks also look correct and styles loaded properly.
-
-### Fix FSE not being visible when WC Blocks was enabled (#3898)
-
-1. Install a FSE compatible theme (ie, [Armando](https://wordpress.org/themes/download/armando.1.0.0.zip?nostats=1)).
-2. Enable Gutenberg and WooCommerce.
-3. Click on the _Site Editor_ sidebar menu item.
-4. Verify the FSE page loads correctly.
-
-### Fix block elements that don't play well with dark backgrounds (#3887)
-
-1. Add the block to a page: Filter by price, Active filters, Product search & Product Categories List
-2. Set a dark background for the website
-3. Check that all the component elements are visible.
-
-#### Screenshots
-
-The cursor for _Filter Products by price_ is cut on top-bottom and is more visible on dark backgrounds
-Before:
-
-
-
-after:
-
-
-
-The button from _Product search_ and _Product Categories List_ is barely visible
-
-Before:
-
-
-after:
-
-
-
-The remove button from _Active Product filters_ is barely visible.
-
-Before:
-
-
-after:
-
-
-### Fix Price not showing on All Products (#3958)
-
-1. View all Products Block
-2. Confirm prices are displayed
-3. Confirm prices still display in cart/checkout to verify no regressions
-
-## Feature plugin only
-
-### Ensure sale badges have a uniform height in the Cart block. (#3897)
-
-1. Add an item that's on sale to your cart then go to the cart block. Increase its quantity to 2 or more.
-2. Verify the sale badges are the same height.
-
-#### Screenshots
-
-Before:
-
-
-after:
-
-
-### Remove extra padding from payment methods with no description #3952
-
-1. Go to WooCommerce > Settings > Payments, edit one of the payment methods and remove any text in its description field.
-2. Go to the Checkout block and select the payment method you modified in step 1.
-3. Verify there isn't extra padding at the bottom.
-
-#### Screenshots
-
-Before:
-
-(notice the extra padding that appears when selecting check payments)
-
-after:
-
-
-### Fix "save payment" checkbox not showing for payment methods (#3950)
-
-1. Enable stripe or WCPay (stripe is easier).
-2. Enable using saved payment methods.
-3. Add a regular (not a subscription product) to your cart and checkout.
-4. Open Stripe payment box, see if the save checkbox is visible.
-
-### Fix cart preview when shipping rates are set to be hidden until an address is entered (#3946)
-
-1. Tick WooCommerce > Settings > Shipping > Hide shipping costs until an address is entered
-2. Add a cart block to a page, and in the block options disable "Shipping Calculator"
-3. See the preview of the block
-
-#### Screenshots
-
-Before:
-
-
-after:
-
-
-### Provided billing data to payment method extensions so they can decide if payment is possible (#3992)
-
-1. Smoke test checkout and the payment process.
-2. smoke test payments via stripe for any regression.
-
-### Smoke Testing
-
-The following are related to various changes impacting some existing flows so just need validated there's nothing broken
-
-- Cart and checkout coupons interaction works as expected.
-- Cart and checkout changing quantities works as expected.
-- Cart and checkout shipping interaction works as expected.
-- Cart and checkout express payment method works as expected.
diff --git a/plugins/woocommerce/client/blocks/docs/internal-developers/testing/releases/480.md b/plugins/woocommerce/client/blocks/docs/internal-developers/testing/releases/480.md
deleted file mode 100644
index 10d6db9e456..00000000000
--- a/plugins/woocommerce/client/blocks/docs/internal-developers/testing/releases/480.md
+++ /dev/null
@@ -1,65 +0,0 @@
-# Testing notes and ZIP for release 4.8.0
-
-Zip file for testing: [woocommerce-gutenberg-products-block.zip](https://github.com/woocommerce/woocommerce-gutenberg-products-block/files/6236544/woocommerce-gutenberg-products-block.zip)
-
-## Feature plugin only
-
-### General smoke testing
-
-The following are related to various changes impacting some existing flows so just need validated there's nothing broken:
-
-- Place orders via the Checkout block starting from the Cart Block & shortcode
-- Test existing payment methods work as expected
-- In the frontend, verify blocks also look correct and styles are loaded properly.
-
-### Expose the shouldSavePayment method value to registered payment methods (#3990)
-
-Just smoke test existing payment methods to ensure there is no breakage with existing behaviour. It should surface immediately if there is.
-
-### Refactor Payment Methods Integration API to fire onPaymentProcessing event with saved tokens (#3982)
-
-The changes here implement any payment method type processing, so it's important to verify there is no impact to existing payment method handling by these changes. This means setting up an environment where you have the core payment methods and Stripe (along with Stripe express payments, either Chrome Pay or Apple Pay) available for testing.
-
-- [ ] Verify that you can pay with a saved token.
-- [ ] Verify that you can pay with an express payment method (Apple Pay or Chrome Pay - either working should be sufficient).
-- [ ] Verify that you can pay with a Stripe Credit Card
-- [ ] Verify that you can pay with any other Woo core payment method.
-- [ ] Try all of the above (except saved token) in incognito mode.
-
-### Fix customer address country saving to orders in certain circumstances (#4013)
-
-1. Go to the shortcode Cart, ensure the Shipping calculator has a saved address in.
-2. If it does not, then you may need to complete an order.
-3. Open the Shipping calculator and save the address without making any changes.
-4. Proceed to checkout (you should be using the checkout _block_) and try to complete the order without changing any address fields. (You may need to fill the missing required fields)
-5. Make sure you are able to submit the order without validation errors for address fields
-
-### Fix the Proceed to checkout button click bug happening when the Coupon error is visible in the Cart block. (#3996)
-
-- Add any product to the Cart and go to the Cart block.
-- Enter an invalid coupon code.
-- See coupon validation error appear
-- Click on the "Proceed to Checkout" button
-- Notice you are directed to the Checkout
-
-#### Screenshots
-
-##### Before
-
-Error message appears and pushes the button lower.
-
-
-##### After
-
-Error message appears and the button stays in place.
-
-
-
-### Smoke Testing
-
-The following are related to various changes impacting some existing flows so just need validated there's nothing broken
-
-- Cart and checkout coupons interaction works as expected.
-- Cart and checkout changing quantities works as expected.
-- Cart and checkout shipping interaction works as expected.
-- Cart and checkout express payment method works as expected.
diff --git a/plugins/woocommerce/client/blocks/docs/internal-developers/testing/releases/490.md b/plugins/woocommerce/client/blocks/docs/internal-developers/testing/releases/490.md
deleted file mode 100644
index 49d555767ba..00000000000
--- a/plugins/woocommerce/client/blocks/docs/internal-developers/testing/releases/490.md
+++ /dev/null
@@ -1,109 +0,0 @@
-# Testing notes and ZIP for release 4.9.0
-
-Zip file for testing: [woocommerce-gutenberg-products-block.zip](https://github.com/woocommerce/woocommerce-gutenberg-products-block/files/6295807/woocommerce-gutenberg-products-block.zip)
-
-## Feature plugin and package inclusion in WooCommerce core
-
-### Remove deprecated shortcode save handling from SSR Blocks (#4010)
-
-Smoke test these blocks can be inserted and render correctly:
-
-- Hand-picked Products Block
-- Best Selling Products Block
-- Top Rated Products Block
-- Newest Products Block
-- On Sale Products Block
-- Products by Category Block
-- Products by Tag Block
-- Products by Attribute Block
-
-### Fix Featured Product and Featured Category button alignment (#4028)
-
-1. Add a Featured Product and Featured Category blocks.
-2. Without making any change on them, preview them in the frontend and verify the button is centered.
-3. Change the alignment of the button to the left, right, back to the center, etc. and verify it works.
-
-| Before | After |
-| -------------------------------------------------------------------------------------------------------------- | -------------------------------------------------------------------------------------------------------------- |
-| 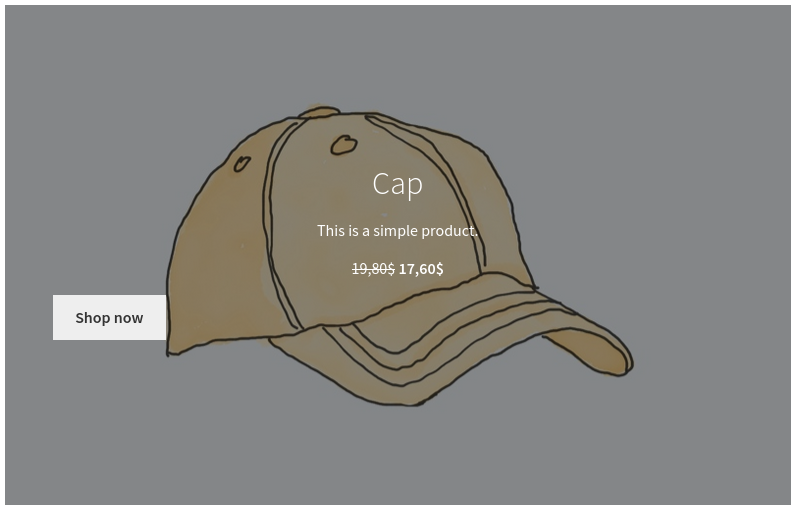 | 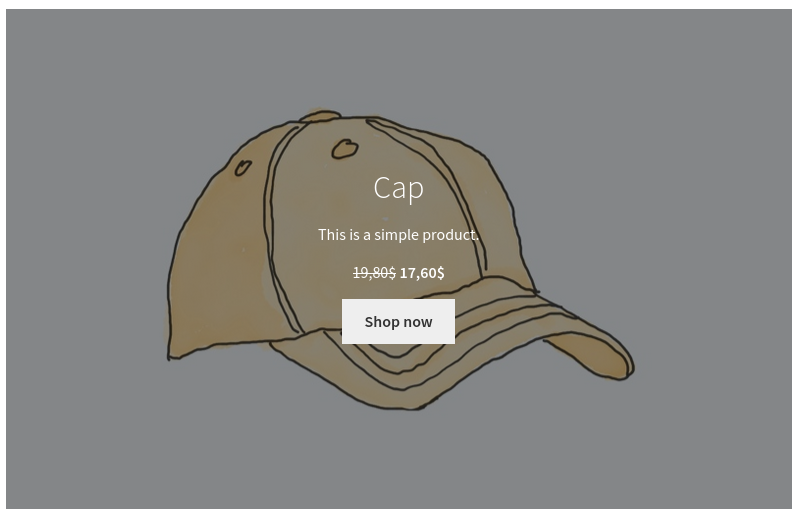 |
-
-### Enable Google Analytics Integration (#4020)
-
-- Install the [Google Analytics Integration Extension](https://github.com/woocommerce/woocommerce-google-analytics-integration)
-- Setup the extension with a G-X type ID from your Google Analytics account. Google Analytics account is required to test this.
-- Install [Google Analytics Debugger](https://chrome.google.com/webstore/detail/google-analytics-debugger/jnkmfdileelhofjcijamephohjechhna?hl=en) browser extension. It needs to be installed, but do not click it (debug mode should be off).
-- Go to the store and trigger some events using the All Products Block and Cart block (feature plugin only). See list of events in <https://github.com/woocommerce/woocommerce-gutenberg-products-block/pull/3953>.
-- Google Analytics Debugger should indicate that an event was fired.
-
-To test SSR blocks:
-
-1. Insert product grid block into a page
-2. View the page. Check a view_item_list event fired in GA.
-
-To test the checkout functionality (feature plugin only):
-
-1. Visit checkout with items in your cart. You will see a begin_checkout event
-2. Start editing fields. Depending on the field you edit (which step) you will see a checkout_progress event. e.g. adding billing information will add checkout_progress with a number indicating the step you are on.
-3. Select a shipping rate. See that a set_checkout_option event fired.
-4. Select a payment method. See that a set_checkout_option fired.
-5. Leave a required field blank and place order. See _exception_ event.
-6. Place order. See add_payment_info event.
-
-## Feature plugin only
-
-### General smoke testing
-
-The following are related to various changes impacting some existing flows so just need validated there's nothing broken:
-
-- Cart and Checkout blocks:
- - Coupons interaction works as expected.
- - Changing quantities works as expected.
- - Shipping interaction works as expected.
-- Orders can be placed using regular and express payment methods.
-- Orders can be placed from the Checkout block starting from the Cart block and from the shortcode.
-
- _Testing steps of these PRs are included in this section: Fix Circular Dependencies During Builds (#4025), Remove useCheckoutRedirectUrl() (#4032) and Update @automattic/data-stores and remove mapped-types.ts (#4024)_
-
-### Load translation file for JS files that has translatable strings (#4050))
-
-- In WooCommerce > Settings check the option to Enable tax rates and calculations.
-- In the Tax tab, set `Display prices during cart and checkout` to `Excluding tax` and `Display tax totals` to `As a single total`.
-- In the Standard rates tab, make sure you have at least one tax rate created. If not, create it.
-- In Settings > General, change site language to something other than English; Spanish is a good example of a 100% translated language.
-- Go to Dashboard > Updates and scroll down to download the new translations immediately.
-- Visit Cart or Checkout block.
-- Strings like `Taxes` should be translated (in Spanish, it should be `Impuestos`).
-
-### Fix Twenty(X) styling issues for cart/checkout form fields (#4046)
-
-1. In Twenty Seventeen theme, enable dark mode in the customiser.
-2. Add any item to the cart then go to the cart page.
-3. Hover over a quantity input. There should be no underline or background change.
-4. Hover over the coupon code button. There should be no underline or background change.
-5. Go to checkout.
-6. Confirm the checkbox styling is correct (no overlap of check mark and box)
-7. Go to the editor for the checkout page. See that the select box (country) is styling with rounded corners like other inputs.
-
-
-
-### Use font color in payment methods border (#4051
-
-1. Using Storefront, in the admin go to Appearance > Customize.
-2. Set the font color to something different than gray/black. For example, red.
-3. Apply the changes and go to the Checkout page in the frontend.
-4. Verify the payments methods of the Checkout block have a border with the same color as the text.
-
-| Before | After |
-| -------------------------------------------------------------------------------------------------------------- | -------------------------------------------------------------------------------------------------------------- |
-| 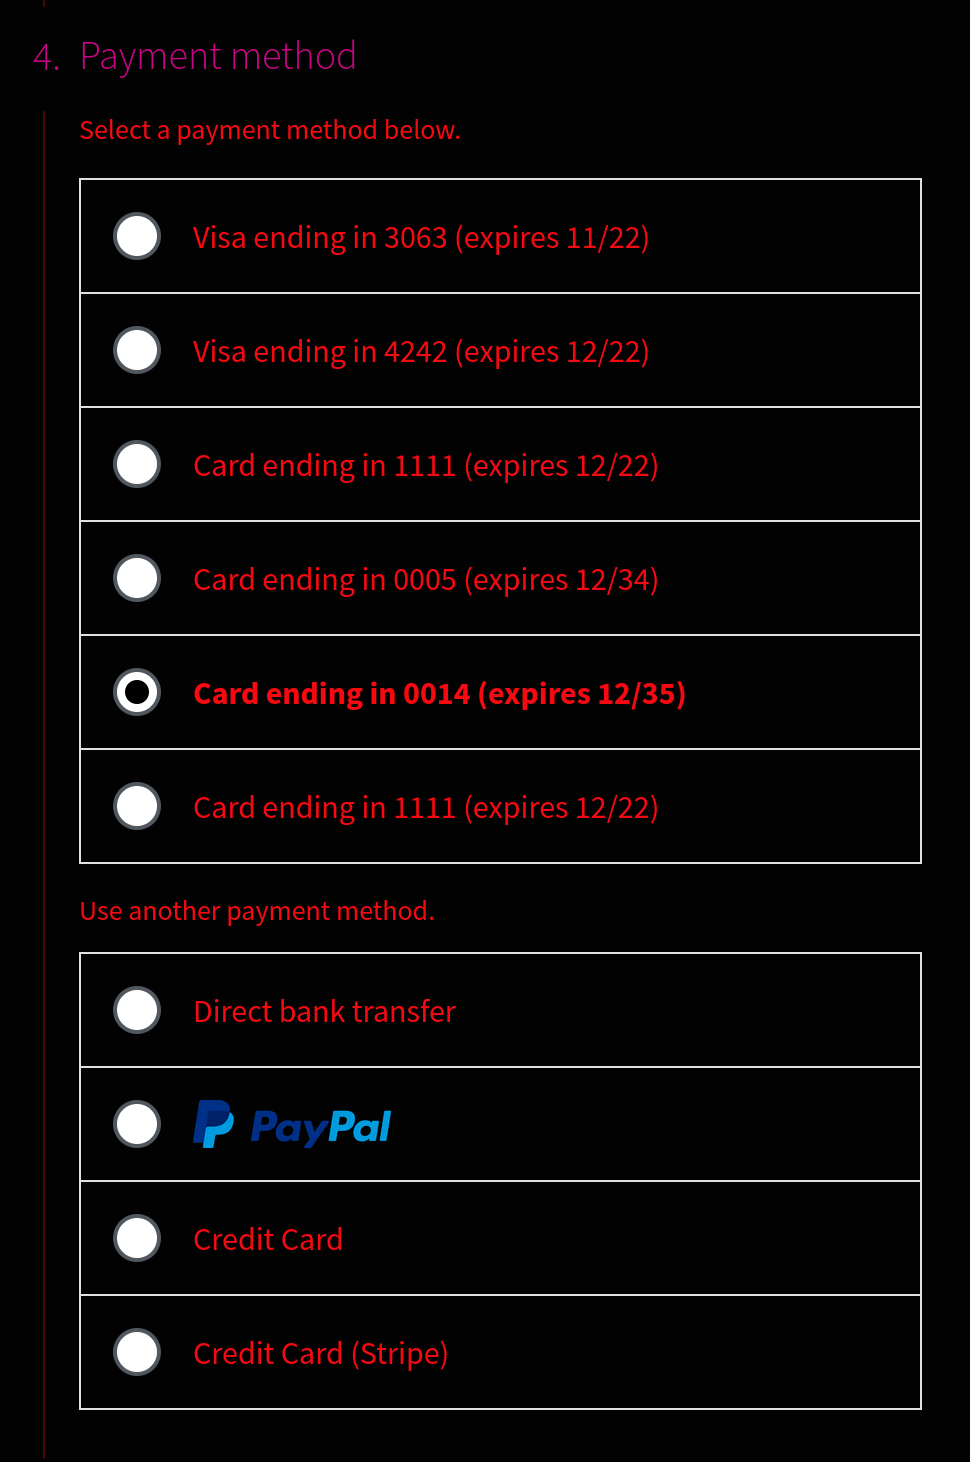 | 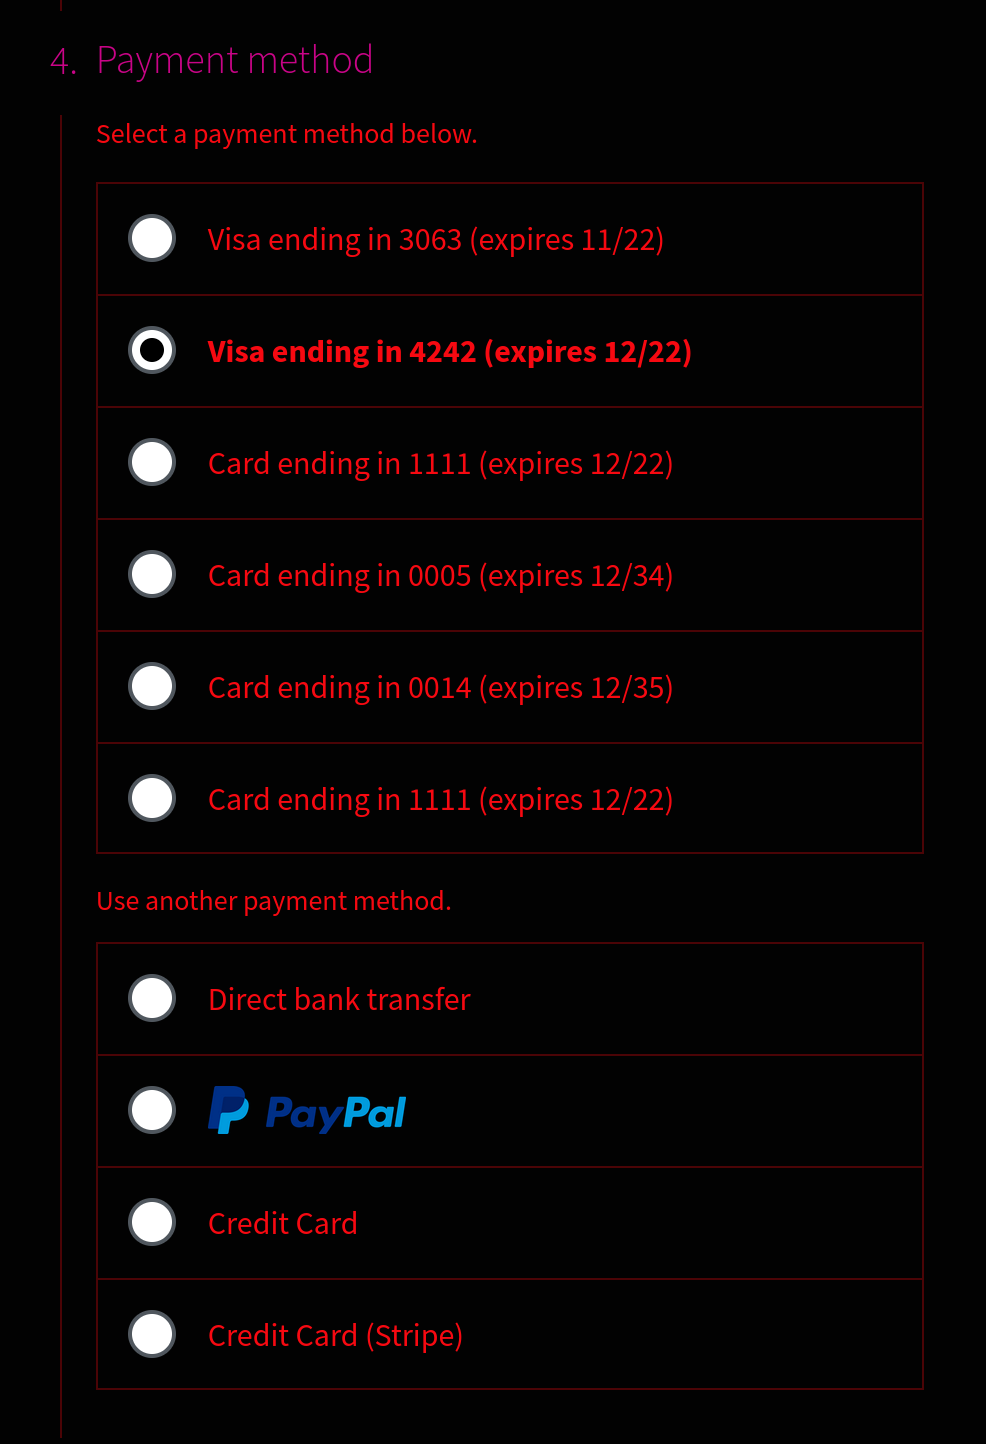 |
-
-### Cart: fix headline alignment in the empty state of the cart block (#4044)
-
-1. Prerequisite: ensure you have an empty cart.
-2. Create a new page and add the Cart block.
-3. Check that the empty state looks as expected in the editor (see After state below).
-4. Publish the page and check the empty state in the frontend.
-
-| Before | After |
-| -------------------------------------------------------------------------------------------------------------- | -------------------------------------------------------------------------------------------------------------- |
-| 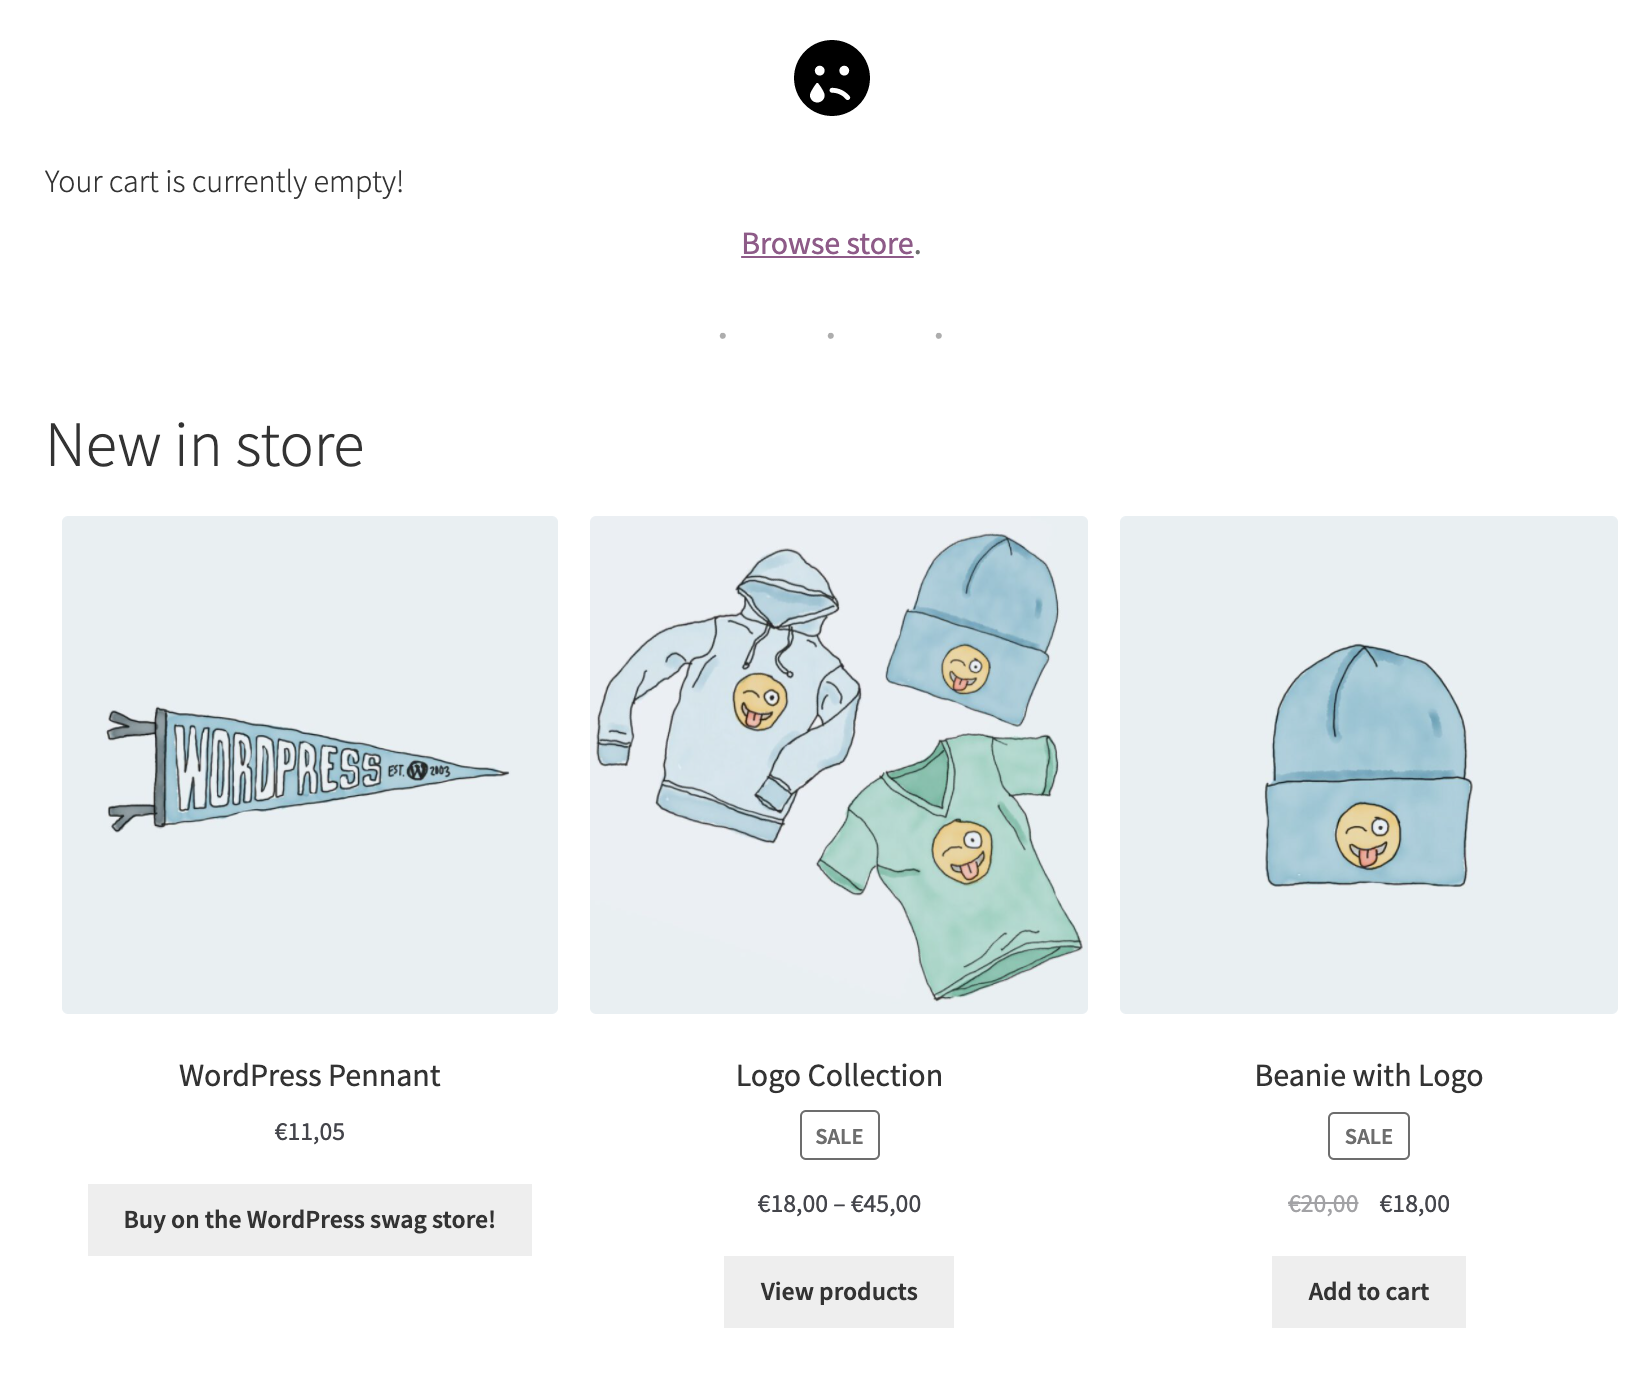 | 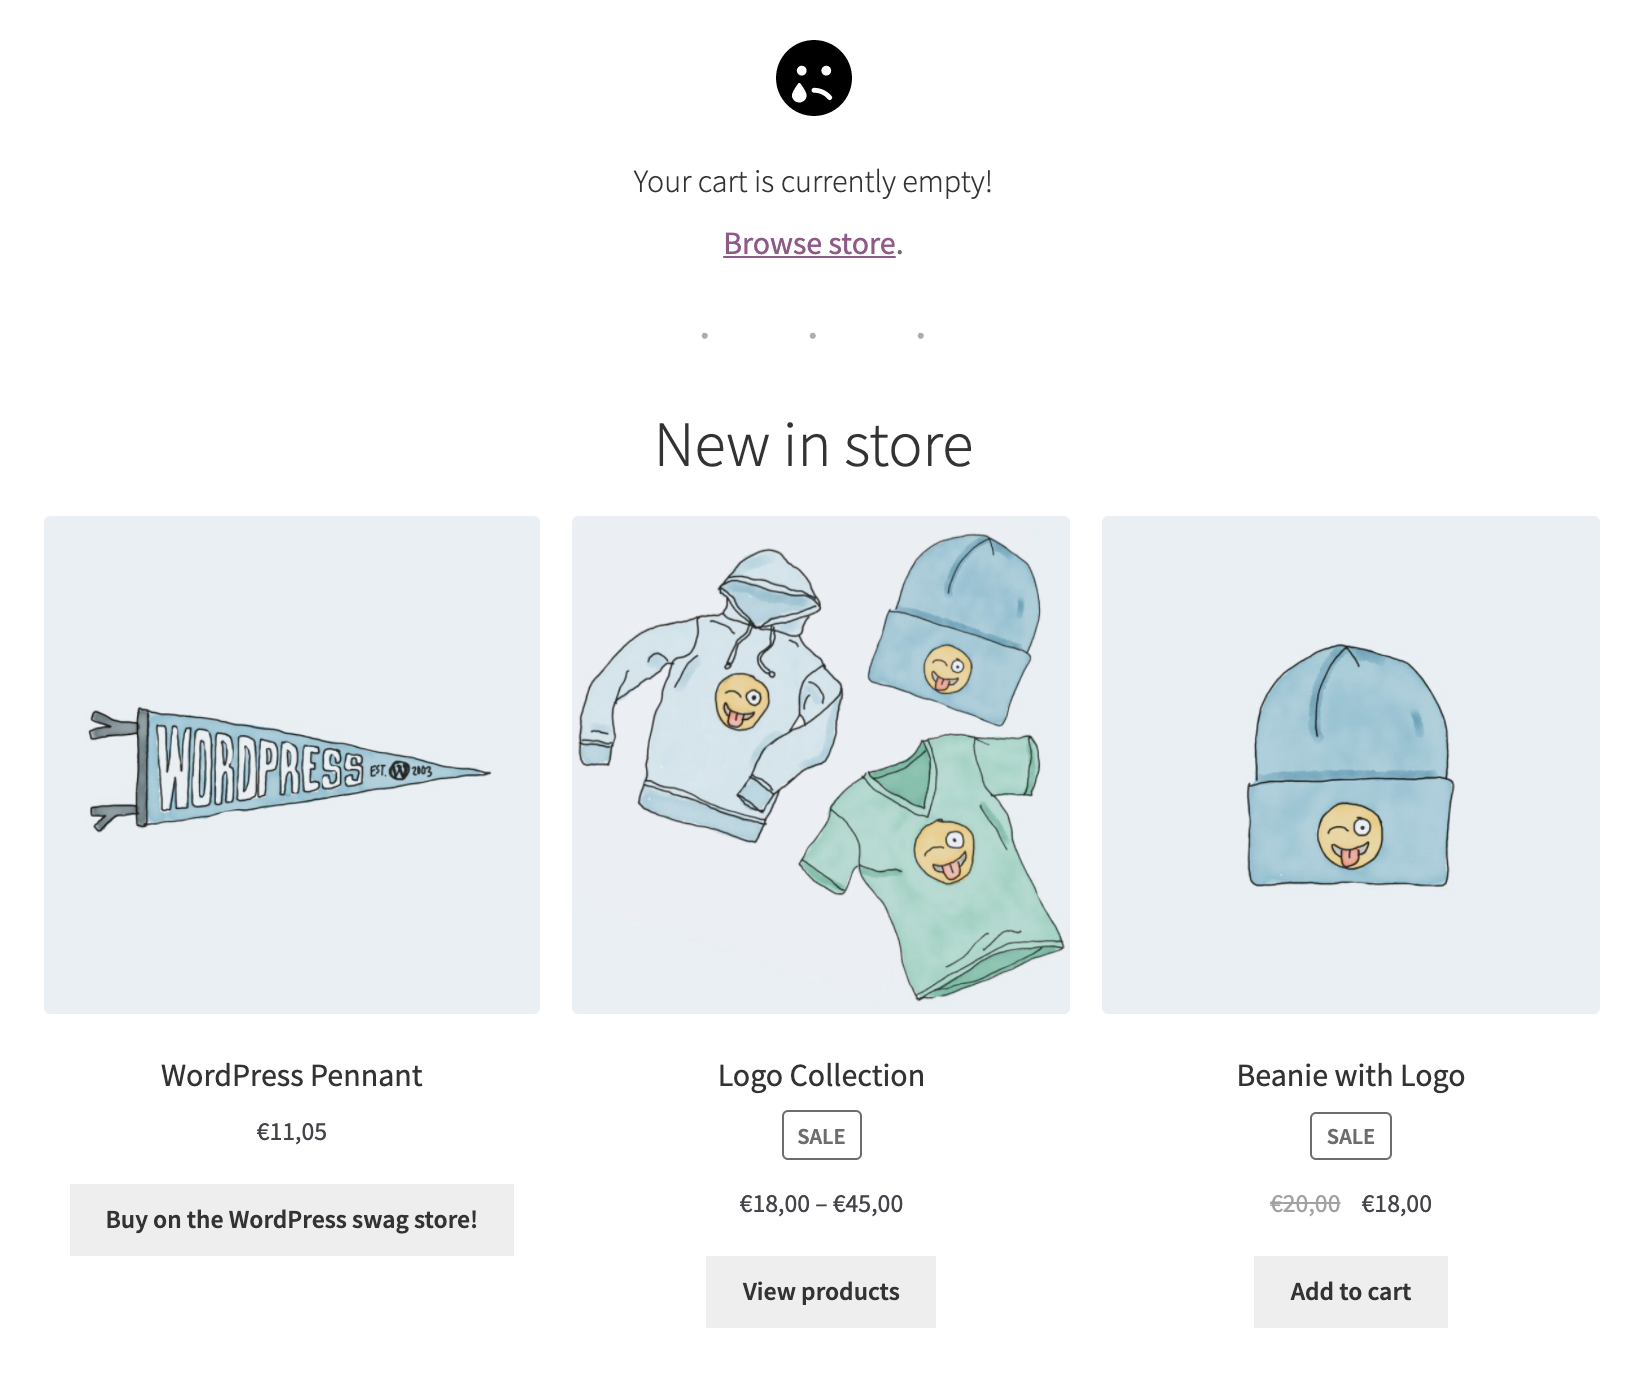 |
diff --git a/plugins/woocommerce/client/blocks/docs/internal-developers/testing/releases/491.md b/plugins/woocommerce/client/blocks/docs/internal-developers/testing/releases/491.md
deleted file mode 100644
index fbf72d53731..00000000000
--- a/plugins/woocommerce/client/blocks/docs/internal-developers/testing/releases/491.md
+++ /dev/null
@@ -1,16 +0,0 @@
-# Testing notes and ZIP for release 4.9.1
-
-Zip file for testing: [woocommerce-gutenberg-products-block.zip](https://github.com/woocommerce/woocommerce-gutenberg-products-block/files/6304864/woocommerce-gutenberg-products-block.zip)
-
-## Feature plugin and package inclusion in WooCommerce core
-
-### Breakage with Elementor ([4056](https://github.com/woocommerce/woocommerce-gutenberg-products-block/pull/4056))
-
-- On a website with PHP 8, install Elementor.
-- Enable any payment method.
-- Create a new page, and select "Edit with Elementor", there should be no fatal errors.
-
-### Smoke Testing
-
-- Cart and Checkout block should load fine on frontend.
-- Cart and Checkout should be insertable.
diff --git a/plugins/woocommerce/client/blocks/docs/internal-developers/testing/releases/500.md b/plugins/woocommerce/client/blocks/docs/internal-developers/testing/releases/500.md
deleted file mode 100644
index f7d9cb5d2f7..00000000000
--- a/plugins/woocommerce/client/blocks/docs/internal-developers/testing/releases/500.md
+++ /dev/null
@@ -1,58 +0,0 @@
-# Testing notes and ZIP for release 5.0.0
-
-Zip file for testing: [woocommerce-gutenberg-products-block.zip](https://github.com/woocommerce/woocommerce-gutenberg-products-block/files/6392862/woocommerce-gutenberg-products-block.zip)
-
-## Feature plugin only
-
-### General smoke testing
-
-The following are related to various changes impacting existing flows, so smoke testing is needed to verify there are no regressions:
-
-- Confirm blocks are available in the editor, and confirm insertion works for the All Products Block, Cart and Checkout Blocks specifically.
-- Place orders via the Checkout block starting from the Cart Block & shortcode
-- During checkout, submit the form without filling out a required field. Confirm validation messages are displayed.
-- Fix the validation warnings and submit the order successfully.
-
-### Remove work-around to load our stylesheets after wp-edit-post #4097
-
-
-
-Open the Checkout block in the editor and verify the Country/Region selector has the same height as the City field next to it, rounded corners, etc.
-
-### Prevent unwanted parts of address being displayed #4038
-
-1. Add an item to the cart.
-2. Go to the shortcode cart - use the shipping calculator to enter a US address. (State: California, City: Beverly Hills, ZIP: 90210)
-3. Proceed to checkout and successfully complete. If you get errors, ensure the form is filled properly, and submit again (This is a known issue in #3975)
-4. Add another item to the cart and go back to the shortcode cart, change your address on the shipping calculator to a Polish one (or any other that doesn't use states). (City: Gdansk, Postcode: 80-000)
-5. Go to the cart Block and see there is no CA shown in the address in the shipping totals area.
-
-### Rest API batching support #4075
-
-1. Open up the browser console and go to the Network tab. Filter by XHR requests.
-2. Smoke test add to cart functionality from the all products block.
-3. After adding to cart, confirm the network tab shows a request to the /batch endpoint.
-4. Confirm that each time you add to cart, a new batch/ request is made.
-
-Optionally, because this is difficult to achieve, if you tab to an add to cart button and hover over another add to cart button with your mouse, hit enter and then click the 2nd add to cart button (we want to trigger 2 add to cart events in quick succession). After a very short delay you should see ONE batch request, but both items should be added to the cart.
-
-### Deprecate the woocommerce_shared_settings hook #4092
-
-1. Running WooCommerce 5.2, visit the admin Dashboard.
-2. Open up the browser error console.
-3. A warning will be shown stating that the woocommerce_shared_settings hook is deprecated.
-4. Again running WooCommerce 5.2, go to the Checkout page (running the checkout block). The same notice will be shown in the console.
-
-### Change checkoutAllowsGuest to the correct value. #4146
-
-1. In WooCommerce Settings > Accounts and Privacy, prevent customers from placing orders without an account, Allow them to create an account during checkout:
-
-
-
-2. Allow customers to create account during checkout by setting this option within the Checkout Block:
-
-
-
-3. On the frontend, as a logged-out guest, add an item to your cart and go to the Block Checkout.
-4. You shouldn't see a "Create an Account?" checkbox on Checkout.
-5. When placing an order, an account will be created for you.
diff --git a/plugins/woocommerce/client/blocks/docs/internal-developers/testing/releases/510.md b/plugins/woocommerce/client/blocks/docs/internal-developers/testing/releases/510.md
deleted file mode 100644
index f82a48a6df8..00000000000
--- a/plugins/woocommerce/client/blocks/docs/internal-developers/testing/releases/510.md
+++ /dev/null
@@ -1,23 +0,0 @@
-# Testing notes and ZIP for release 5.1.0
-
-Zip file for testing: [woocommerce-gutenberg-products-block.zip](https://github.com/woocommerce/woocommerce-gutenberg-products-block/files/6452221/woocommerce-gutenberg-products-block.zip)
-
-## Feature plugin only
-
-### General smoke testing
-
-The following are related to various changes impacting existing flows, so smoke testing is needed to verify there are no regressions:
-
-- Place orders via the Checkout block and ensure the following:
- - All payment methods included with the blocks work as expected for completing the order.
- - Intentionally triggering payment errors for various payment methods surface the errors as expected and another payment method can be tried.
- - Express payment methods (via Stripe) work as expected in both the Cart context and Checkout context.
-
-### Fixed bug with clearing email and phone fields when using separate billing address
-
-Test both guest and logged in scenarios for the following:
-
-- On checkout, fill out email address, shipping fields, and phone number.
-- Uncheck "use shipping for billing" checkbox.
-- Verify email and phone fields still have their values.
-- Submit the order and make sure those values persist on the server with the order.
diff --git a/plugins/woocommerce/client/blocks/docs/internal-developers/testing/releases/520.md b/plugins/woocommerce/client/blocks/docs/internal-developers/testing/releases/520.md
deleted file mode 100644
index 8124868dd12..00000000000
--- a/plugins/woocommerce/client/blocks/docs/internal-developers/testing/releases/520.md
+++ /dev/null
@@ -1,144 +0,0 @@
-# Testing notes and ZIP for release 5.2.0
-
-Zip file for testing: [woocommerce-gutenberg-products-block.zip](https://github.com/woocommerce/woocommerce-gutenberg-products-block/files/6547433/woocommerce-gutenberg-products-block.zip)
-
-## Feature plugin only
-
-### Added a key prop to each `CartTotalItem` within `usePaymentMethodInterface`. ([4240](https://github.com/woocommerce/woocommerce-gutenberg-products-block/pull/4240))
-
-1. Smoke test cart and checkout. The key prop is added in `prepareTotalItems` but is not visible.
-2. To _really_ test this you may `console.log` the result of `prepareTotalItems` and verify the key is there.
-
-### Sync customer data during checkout with draft orders. ([4197](https://github.com/woocommerce/woocommerce-gutenberg-products-block/pull/4197))
-
-1. Go to checkout
-2. Fill out billing email
-3. Go to admin, Orders > Drafts. See if the billing email is populated in the draft order.
-
-### Update the display of the sidebar/order summary in the Cart and Checkout blocks. ([4180](https://github.com/woocommerce/woocommerce-gutenberg-products-block/pull/4180))
-
-#### Setup steps
-
-1. Ensure some items in your store are taxable, and add a few of them to your cart, for bonus points you can set up additional tax rates and add products from each rate to your cart.
-2. Ensure you have a coupon available to use in your store.
-3. Go to `WooCommerce -> Settings -> Tax` and set `Display tax totals` to `Itemized` and `Display prices during basket and checkout` to `Excluding Tax`.
-4. Using the designs presented in #4093 - Figma link: eaQcoMs7E8Ys0YgxfkOKxR-fi-727%3A1243 do the following:
-
-#### Editor testing - do these in the block editor
-
-**These instructions are for both the Cart and Checkout block!**
-
-1. Add the block and ensure it matches the designs from the Figma file.
-2. Ensure you have the option to `Show rate after tax name` in the editor sidebar.
-3. Toggle this on and off and verify the rate percentage is shown in the Taxes section of the block preview.
-4. Go to `WooCommerce -> Settings -> Tax` and set `Display tax totals` to `As a single total` and then ensure the option to `Show rate after tax name` is no longer available in the Cart and Checkout blocks.
-5. Ensure the individual tax lines are not shown in the block preview.
-6. Set it back to `Itemized`.
-7. Go to `WooCommerce -> Settings -> Tax` and set `Display prices during basket and checkout` to `Including Tax`.
-8. Ensure the Taxes section is not shown, but that the amount of tax is shown under the total.
-9. Set it back to `Excluding Tax`.
-10. While doing the next set of testing instructions, experiment with combinations of these settings ensuring they work correctly.
-
-#### Front-end testing
-
-1. Go to the Cart/Checkout and ensure the rendered cart matches the Figma file. Ensure you have the correct Taxes section based on your configuration.
-2. Go to `WooCommerce -> Settings -> Tax` and set `Display tax totals` to `As a single total` and then ensure the Taxes section of the sidebar does not include a further breakdown of rates.
-3. Set it back to `Itemized` and ensure the rates are broken down correctly.
-4. Toggle the `Show rate after tax name` option in the block and ensure the changes are reflected on the front-end.
-5. Go to `WooCommerce -> Settings -> Tax` and set `Display prices during basket and checkout` to `Including Tax`.
-6. Ensure the Taxes section is not shown, but that the amount of tax is shown under the total.
-7. Select different shipping methods and ensure the `via X` updates in the Shipping section of the sidebar. Do this in both Cart and Checkout.
-8. Add a coupon and ensure the discounts section shows the reduction amount.
-
-### Improved accessibility and styling of the controls of several of ours blocks. ([4100](https://github.com/woocommerce/woocommerce-gutenberg-products-block/pull/4100))
-
-The controls modified in this PR are used in many blocks, so the steps below should be repeated for all of them.
-
-1. Add the block to a page and ensure you can select items in the controls.
-2. If there are expandable items (Featured Products or Products by Attribute), make sure you can select inner items.
-3. If a count is displayed, make sure it's displayed correctly.
-4. Verify that you can do this actions also in the control which are in the sidebar:
- 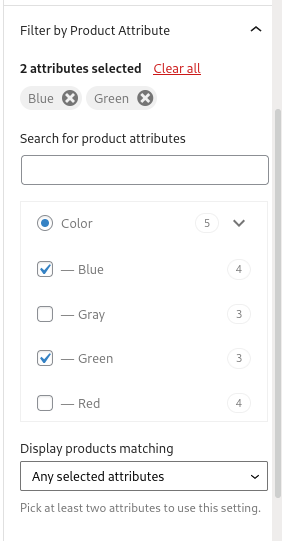
-5. Test adding several blocks in the same page, verify controls work independently of each other.
-
-Affected blocks:
-
-- Featured Product Block
-- Featured Category Block
-- Hand-picked Products Block
-- Products by Category Block
-- Products by Tag Block
-- Products by Attribute Block
-- Reviews by Product
-- Reviews by Category
-- Filter Products by Attribute
-
-### Hide tax breakdown if the total amount of tax to be paid is 0. ([4262](https://github.com/woocommerce/woocommerce-gutenberg-products-block/pull/4262))
-
-1. Enable taxes and ensure "Display prices during cart and checkout" is set to "Including taxes"
-2. Add an item to your cart with a zero-rate tax setting.
-3. View the Cart and Checkout block and ensure it does not say "Including £0.00 in taxes".
-
-### Prevent Coupon code panel from appearing in stores were coupons are disabled. ([4202](https://github.com/woocommerce/woocommerce-gutenberg-products-block/pull/4202))
-
-1. Go to WooCommerce > Settings > General and uncheck Enable the use of coupon codes.
-2. Go to the Cart or Checkout blocks and verify there is no Coupon panel in the sidebar.
-
-### For payment methods, only use `canMakePayment` in the frontend (not the editor) context. ([4188](https://github.com/woocommerce/woocommerce-gutenberg-products-block/pull/4188))
-
-1. Test this by enabling the Stripe plugin and ensuring the preview (apple pay) appeared correctly in the editor.
-2. Also confirm that canMakePayment still works on the frontend, and that it isn't running in the editor context.
-
-### Fix duplicate react keys in ProductDetails component. ([4187](https://github.com/woocommerce/woocommerce-gutenberg-products-block/pull/4187))
-
-1. Using WooCommerce Product Add-ons, create a product with checkbox addons.
-2. View the product page, select two of the checkboxes and add the product to the cart.
-3. View the cart block.
-4. Ensure there is no error in the console.
-
-### Fix sending of confirmation emails for orders when no payment is needed. ([4186](https://github.com/woocommerce/woocommerce-gutenberg-products-block/pull/4186))
-
-1. Add a VIRTUAL product costing \$0 to the cart. The order total should be 0.
-2. Go to Block checkout and place the order.
-3. Check mailhog (if using WP Local) and confirm the new order emails (x2) were received.
-
-### Stopped a warning being shown when using WooCommerce Force Sells and adding a product with a Synced Force Sell to the cart. ([4182](https://github.com/woocommerce/woocommerce-gutenberg-products-block/pull/4182))
-
-1. Install WooCommerce Force Sells (<https://woocommerce.com/products/force-sells/> or <https://github.com/woocommerce/woocommerce-force-sells/>)
-2. Edit a product to add a "Synced force sell"
- 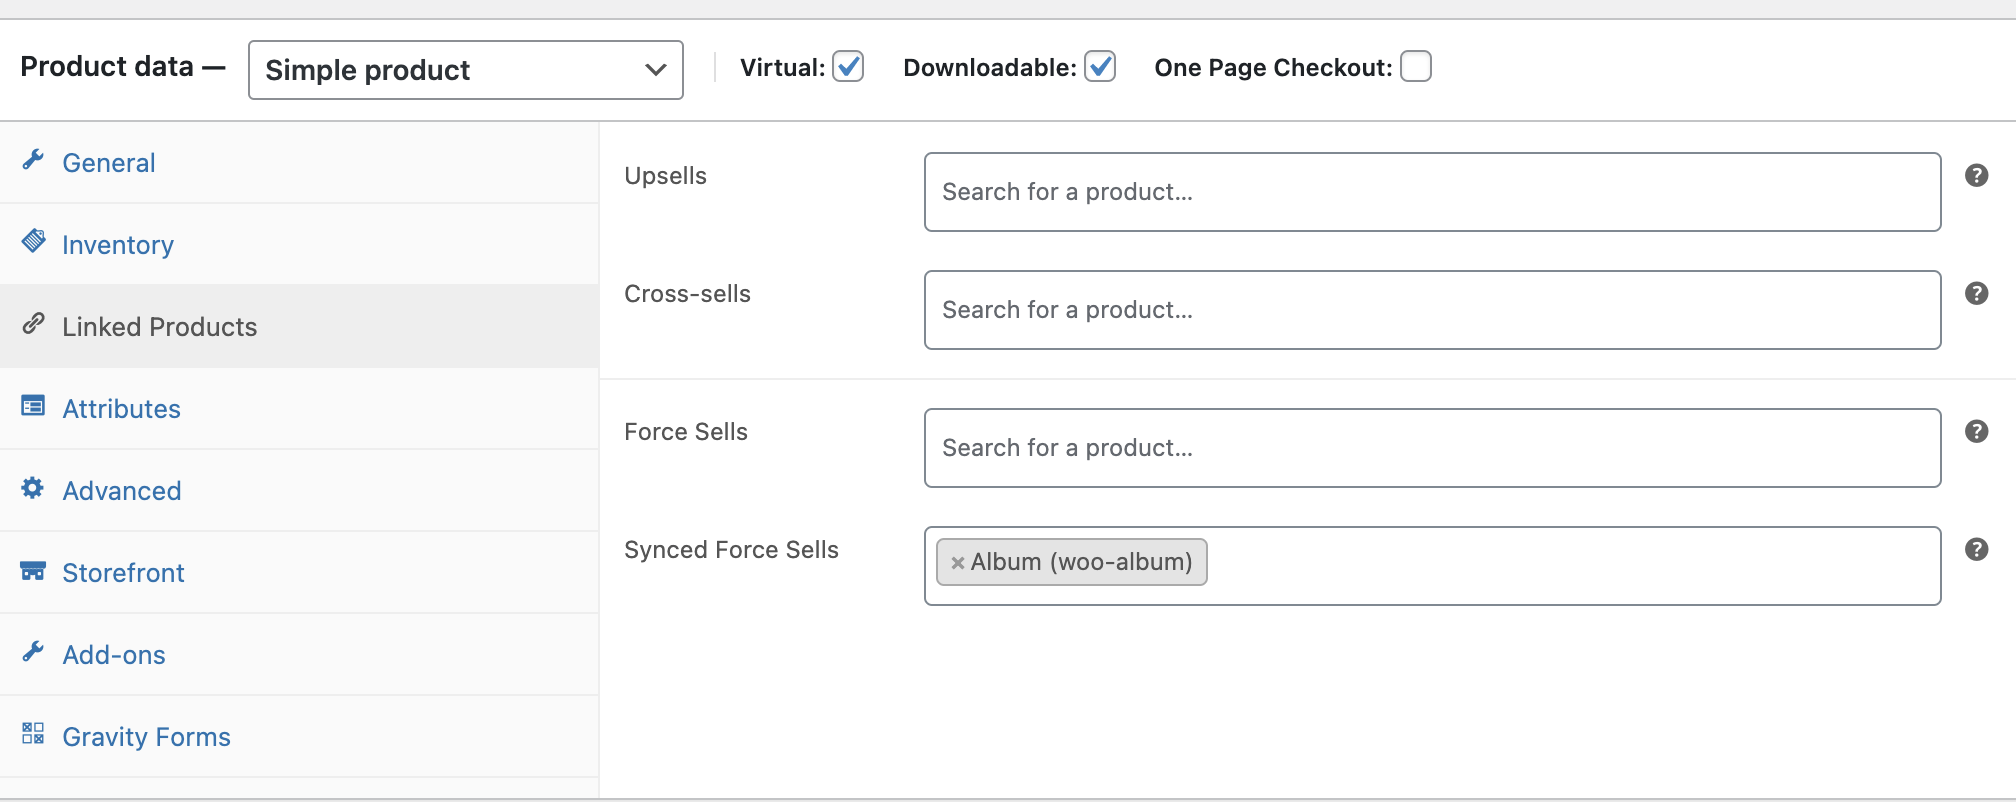
-3. Add this product to your cart
-4. Go to the Cart block and ensure no warnings are visible
-5. Do the same for the Checkout block
-
-### Move Button and Label components to `@woocommerce/blocks-checkout` package. ([4222](https://github.com/woocommerce/woocommerce-gutenberg-products-block/pull/4222))
-
-1. Smoke test of Blocks functionality.
-2. Ensure critical flows work, such as adding items to cart from the All Products Block, continuing to Checkout from the Cart Block and placing an order in the Checkout Block.
-3. Ensure labels are displaying correctly in blocks, compare to trunk and ensure nothing is different or missing.
-
-### Add couponName filter to allow extensions to modify how coupons are displayed in the Cart and Checkout summary. ([4166](https://github.com/woocommerce/woocommerce-gutenberg-products-block/pull/4166))
-
-1. Check out 422-gh-woocommerce/woocommerce-points-and-rewards
-2. Run npm run build in both repositories.
-3. In the dashboard, go to WooCommerce > Points and rewards > Manage points and add some points to your user account.
-4. Add items to your cart.
-5. Go to the shortcode cart, apply the points discount using the notice and, observe the discount in the cart.
-6. Go to the Cart Block and ensure the coupon applied reads Points redemption and not the long system generated coupon code.
-7. Try removing the coupon and ensure the discount is removed, and no errors are shown
-
-## Feature plugin and package inclusion in WooCommerce core
-
-### Hide legacy widgets with a feature-complete block equivalent from the widget area block inserter. ([4237](https://github.com/woocommerce/woocommerce-gutenberg-products-block/pull/4237))
-
-Do the testing steps for the following widgets: Product Search, Product Categories, Products, Products by Rating, and Recent Product Reviews
-
-1. Ensure the Gutenberg feature plugin is enabled. To enable block widgets in the Customizer, go to Gutenberg -> Experiments and check the checkbox next to Widgets. After you’ve saved the experimental settings, navigate to Appearance -> Customize -> Widgets. **Note:** Later versions of Gutenberg will have the block widget interface already enabled (and no longer experimental) - if the option to enable this is not on this page just go to the next step.
-2. Go to Appearance -> Widgets and try to insert the above-mentioned widgets. You shouldn't be able to see them in the inspector.
-3. Insert the "Legacy Widget" block in the Widget editor. You shouldn't be able to see the above-mentioned widgets in the Select widget dropdown.
-
-### Hide the All Products Block from the Customizer Widget Areas until full support is achieved. ([4225](https://github.com/woocommerce/woocommerce-gutenberg-products-block/pull/4225))
-
-1. Ensure Gutenberg feature plugin is enabled. To enable block widgets in the Customizer, go to Gutenberg -> Experiments and check the checkbox next to Widgets. After you’ve saved the experimental settings, navigate to Appearance -> Customize -> Widgets. **Note:** Later versions of Gutenberg will have the block widget interface already enabled (and no longer experimental) - if the option to enable this is not on this page just go to the next step.
-2. Go to Appearance -> Customize and then click Widgets. Try to insert "All Products", "Price Filter", "Attribute Filter", and "Active Filter" blocks into the Sidebar area. You shouldn't be able to see them in the inspector!
-3. Edit a page and try to insert "All Products", "Price Filter", "Attribute Filter", and "Active Filter" blocks. It should work as expected.
diff --git a/plugins/woocommerce/client/blocks/docs/internal-developers/testing/releases/530.md b/plugins/woocommerce/client/blocks/docs/internal-developers/testing/releases/530.md
deleted file mode 100644
index 3bad79f9320..00000000000
--- a/plugins/woocommerce/client/blocks/docs/internal-developers/testing/releases/530.md
+++ /dev/null
@@ -1,52 +0,0 @@
-# Testing notes and ZIP for release 5.3.0
-
-Zip file for testing: [woocommerce-gutenberg-products-block.zip](https://github.com/woocommerce/woocommerce-gutenberg-products-block/files/6608747/woocommerce-gutenberg-products-block.zip)
-
-## Feature plugin only
-
-### Hide the Cart and Checkout blocks from the new block-based widget editor. ([4303](https://github.com/woocommerce/woocommerce-gutenberg-products-block/pull/4303))
-
-1. Using a classic theme (ie: Storefront) with Gutenberg enabled, go to Appearance > Widgets.
-2. Verify you can't add the Cart block or the Checkout block. (You will see a widget called Cart, that's the widget from WC core and is not related to this PR, so ignore it).
-3. Now go to Appearance > Customize > Widgets and open a widget area.
-4. Verify you can't add the Cart block or the Checkout block either.
-
-### Fix some missing translations from the Cart and Checkout blocks. ([4295](https://github.com/woocommerce/woocommerce-gutenberg-products-block/pull/4295))
-
-1. Create a checkout page with the Checkout block
-2. Change your site language to a fully localized language as es-Es. ([Translation status](https://translate.wordpress.org/locale/es/default/wp-plugins/woo-gutenberg-products-block/))
-3. Go to Updates, scroll down and click update translation.
-4. Navigate to the checkout page and see that the checkout fields are being translated correctly.
-
-### Fix the flickering of the Proceed to Checkout button on quantity update in the Cart Block. ([4293](https://github.com/woocommerce/woocommerce-gutenberg-products-block/pull/4293))
-
-1. Smoke test Cart block, make sure changing quantity works fine.
-2. Make sure removing items works fine.
-3. When changing an item quantity, make sure the button is disabled immediately as you change the quantity and is re-enabled once the server request finishes
-
-### Fix a bug in which Cart Widget didn't update when adding items from the All Products block. ([4291](https://github.com/woocommerce/woocommerce-gutenberg-products-block/pull/4291))
-
-1. Use a theme that shows the Mini Cart in the header, like Storefront
-2. Go to a page with the All Products block in the content.
-3. Click on the Add to Cart button for a product.
-4. View the Mini Cart in the header and the total should be updated to reflect the change.
-
-### Fix a display issue when itemized taxes are enabled, but no products in the cart are taxable. ([4284](https://github.com/woocommerce/woocommerce-gutenberg-products-block/pull/4284))
-
-| Before | After |
-| -------------------------------------------------------------------------------------------------------------- | -------------------------------------------------------------------------------------------------------------- |
-| 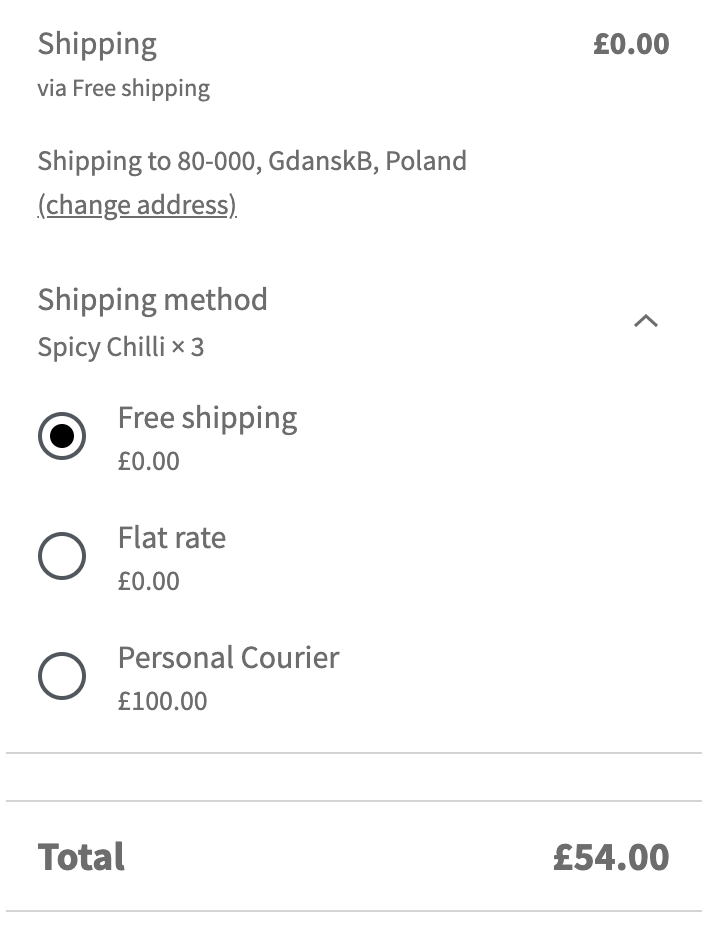 | 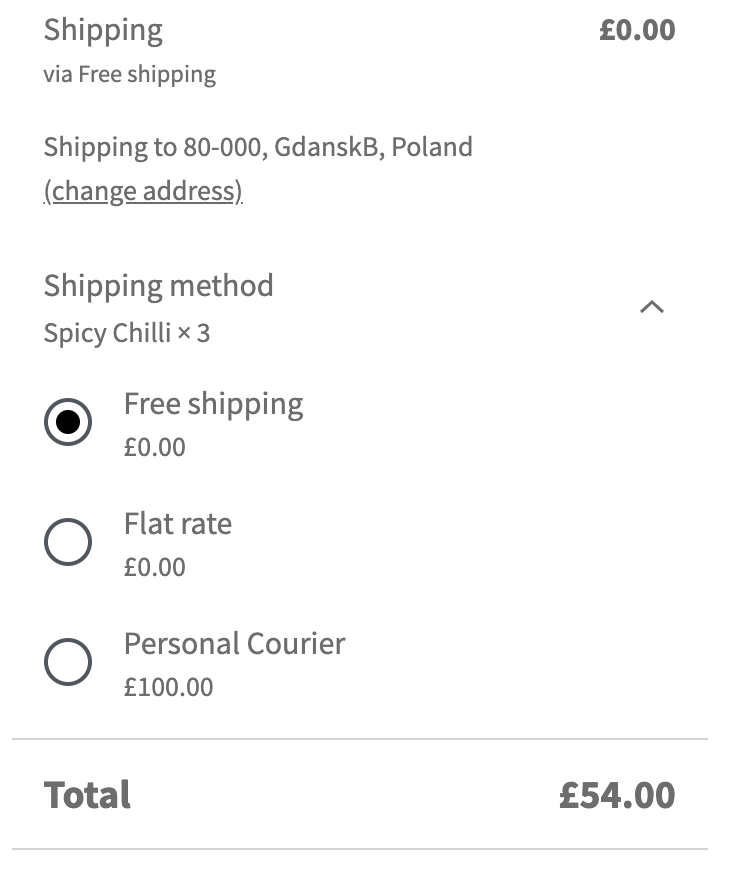 |
-
-1. Go WooCommerce -> Settings -> Tax and set Display prices during basket and checkout to Excluding Tax.
-2. Set Display tax totals to Itemised
-3. Add an item to the cart with a zero-rated tax rate.
-4. Check there are no borders without anything in them, like the before screenshot above.
-
-## Feature plugin and package inclusion in WooCommerce core
-
-### Fix an issue where an attempt to add an out-of-stock product to the cart was made when clicking the "Read more" button. ([4265](https://github.com/woocommerce/woocommerce-gutenberg-products-block/pull/4265))
-
-1. Go to 'WooCommerce > Settings > Products > Enable AJAX add to cart buttons on archives
-2. Edit a page and add a 'Products by Category' block (choose a category with an out of stock product)
-3. On the front-end, go to the page and click on the out of stock product's "Read more" link
-4. Verify you cannot see the spinner on the button and when redirected on the product page, the WooCommerce error message does not show.
diff --git a/plugins/woocommerce/client/blocks/docs/internal-developers/testing/releases/531.md b/plugins/woocommerce/client/blocks/docs/internal-developers/testing/releases/531.md
deleted file mode 100644
index 91d02729fec..00000000000
--- a/plugins/woocommerce/client/blocks/docs/internal-developers/testing/releases/531.md
+++ /dev/null
@@ -1,42 +0,0 @@
-# Testing notes and ZIP for release 5.3.1
-
-Zip file for testing: [woocommerce-gutenberg-products-block.zip](https://github.com/woocommerce/woocommerce-gutenberg-products-block/files/6654288/woocommerce-gutenberg-products-block.zip)
-
-## Feature plugin and package inclusion in WooCommerce core
-
-### Fix Product Categories List display issues in WP 5.8. ([4335](https://github.com/woocommerce/woocommerce-gutenberg-products-block/pull/4335))
-
-1. In your admin panel, install and activate the [Gutenberg Plugin](https://wordpress.org/plugins/gutenberg/).
-2. Install the [TT1 Blocks](https://wordpress.org/themes/tt1-blocks/) theme
-3. In the Admin sidebar click on to the Site Editor (beta) menu
-4. Add a Product Categories List block.
-5. Set the `Show category images` attribute to true.
-6. Verify images have the correct size:
-
-| Before | After |
-| --------------------------------------------------------------------------------------------------------------------------------------------------------------------- | ------------------------------------------------------------------------------------------------------------------------------------------------------------------------------------ |
-|  |  |
-
-5. With the same theme, add the Product Categories List block to a post or page and verify there is no bottom space between the image and the border.
-
-| Before | After |
-| ----------------------------------------------------------------------------------------------------------------------------------------------------------------------------- | -------------------------------------------------------------------------------------------------------------------------------------------------------------------------------- |
-|  |  |
-
-### Make Product Categories List links unclickable in the editor. ([4339](https://github.com/woocommerce/woocommerce-gutenberg-products-block/pull/4339))
-
-1. Add the Product Categories List block to a post or page.
-2. Try to click on a Category Link. \
- 
-3. Verify you can't click on it and you aren't redirected to the Category page.
-
-### Load woocommerce.css in Site editor. ([4345](https://github.com/woocommerce/woocommerce-gutenberg-products-block/pull/4345))
-
-1. Make sure you are using the latest version of WooCommerce `trunk`.
-2. Enable a block-based theme (ie: TT1 Blocks) and Gutenberg.
-3. Go to the Site Editor.
-4. Add a Reviews block and verify rating stars are rendered correctly.
-
-| Before | After |
-| -------------------------------------------------------------------------------------------------------------------------------------------------------- | -------------------------------------------------------------------------------------------------------------------------------------------------------------- |
-|  |  |
diff --git a/plugins/woocommerce/client/blocks/docs/internal-developers/testing/releases/532.md b/plugins/woocommerce/client/blocks/docs/internal-developers/testing/releases/532.md
deleted file mode 100644
index 7b484857ea1..00000000000
--- a/plugins/woocommerce/client/blocks/docs/internal-developers/testing/releases/532.md
+++ /dev/null
@@ -1,15 +0,0 @@
-# Testing notes and ZIP for release 5.3.2
-
-Zip file for testing: [woocommerce-gutenberg-products-block.zip](https://github.com/woocommerce/woocommerce-gutenberg-products-block/files/6724701/woocommerce-gutenberg-products-block.zip)
-
-## Feature plugin and package inclusion in WooCommerce core
-
-### Remove the ability to filter snackbar notices. ([4398](https://github.com/woocommerce/woocommerce-gutenberg-products-block/pull/4398))
-
-1. Add items to your cart and then go to the Cart block. Apply a coupon.
-2. Ensure the snackbar notice is shown in the bottom left of the screen.
-3. Remove the coupon, ensure the snackbar notice is shown again.
-
-## Feature plugin only
-
-No changes.
diff --git a/plugins/woocommerce/client/blocks/docs/internal-developers/testing/releases/540.md b/plugins/woocommerce/client/blocks/docs/internal-developers/testing/releases/540.md
deleted file mode 100644
index 71e71bbf522..00000000000
--- a/plugins/woocommerce/client/blocks/docs/internal-developers/testing/releases/540.md
+++ /dev/null
@@ -1,38 +0,0 @@
-# Testing notes and ZIP for release 5.4.0
-
-Zip file for testing: [woocommerce-gutenberg-products-block.zip](https://github.com/woocommerce/woocommerce-gutenberg-products-block/files/6694563/woocommerce-gutenberg-products-block.zip)
-
-## Feature plugin only
-
-### Show loading state in the express payments area whilst payment is processing or the page is redirecting. ([4228](https://github.com/woocommerce/woocommerce-gutenberg-products-block/pull/4228))
-
-To test this properly you'll need Stripe setup locally in sandbox mode. You can test the express payments with Chrome/Edge Pay, or Apple Pay in Safari.
-
-1. Add an item to the cart
-2. Go to checkout and wait for express payment methods to display
-3. Toggle to change shipping; express payments should show the loading spinner and be blocked until the request is complete
-4. Pay using an express payment method
-5. After clicking Pay, the express payments area will show a loading spinner. When the request is complete and the checkout starts to redirect, the express payments area will remain blocked (no spinner).
-
-### Fix a warning shown when fees are included in the order. ([4360](https://github.com/woocommerce/woocommerce-gutenberg-products-block/pull/4360))
-
-1. Add fees to your cart (using the extra fees extension <https://woocommerce.com/products/extra-fees-for-woocommerce/> set up an order fee, or any other combination of fees).
-2. Go to the cart/checkout blocks and ensure no console warning is shown.
-
-### Prevent PHP notice for variable products without enabled variations. ([4317](https://github.com/woocommerce/woocommerce-gutenberg-products-block/pull/4317))
-
-1. Create a variable product with one disabled variation and at least one variation attribute.
-2. Create a new blog post with a "Product category" block and select the category that contains the newly created product.
-3. Visiting the new blog post throws a PHP notice (NOTICE: PHP message: WordPress database error You have an error in your SQL syntax ...)
-
-## Feature plugin and package inclusion in WooCommerce core
-
-### Made script and style handles consistent. ([4324](https://github.com/woocommerce/woocommerce-gutenberg-products-block/pull/4324))
-
-1. Smoke test blocks and make sure they're insertable.
-
-### Allow products to be added by SKU in the Hand-picked Products block. ([4366](https://github.com/woocommerce/woocommerce-gutenberg-products-block/pull/4366))
-
-1. Insert the Hand-picked Products block
-2. See SKUs shown for products with a SKU
-3. Try searching for a SKU. See results.
diff --git a/plugins/woocommerce/client/blocks/docs/internal-developers/testing/releases/550.md b/plugins/woocommerce/client/blocks/docs/internal-developers/testing/releases/550.md
deleted file mode 100644
index 92fa56ea1af..00000000000
--- a/plugins/woocommerce/client/blocks/docs/internal-developers/testing/releases/550.md
+++ /dev/null
@@ -1,52 +0,0 @@
-# Testing notes and ZIP for release 5.5.0
-
-Zip file for testing: [woocommerce-gutenberg-products-block.zip](https://github.com/woocommerce/woocommerce-gutenberg-products-block/files/6763909/woocommerce-gutenberg-products-block.zip)
-
-## Feature plugin only
-
-### Wrap components in the Cart and Checkout sidebar in a TotalsWrapper. This will ensure consistent spacing and borders are applied to items in the sidebar. ([4415](https://github.com/woocommerce/woocommerce-gutenberg-products-block/pull/4415))
-
-1. Add only virtual products to your cart (i.e. ones that don't need shipping).
-2. Go to the Cart and Checkout blocks and verify that there are no double borders or empty sections in the sidebars.
-3. Add a product that does need shipping to your cart and go back to the Cart and Checkout blocks. Verify that the Shipping section is present, and again verify that there are no double borders, or empty sections.
-4. Go to WooCommerce -> Settings and disable coupons in the store.
-5. Go back to the Cart/Checkout blocks and verify there are no double borders or empty sections.
-6. In WooCommerce -> Settings -> Tax set the "Calculate tax based on" option to "Customer shipping address". Then ensure you have at least one tax rate set up for a specific country. Also make sure you have no tax rates with a wildcard (\*) country name in them.
-7. Go to the Cart and Checkout blocks and change your shipping address to be in the country for which you have a tax rate set up. Verify the taxes section shows in the sidebars, and that no double borders or empty sections are present.
-8. Change your shipping address to be in a country that your store doesn't have a tax rate for. Verify no empty sections or double borders are present.
-
-## Feature plugin and package inclusion in WooCommerce core
-
-### Add screen reader text to price ranges. ([4367](https://github.com/woocommerce/woocommerce-gutenberg-products-block/pull/4367))
-
-1. View the All Products block.
-2. Find a product with a price range (grouped product), e.g. Logo Collection in the default content.
-3. Use VoiceOver or screen reader to read the price e.g. using VoiceOver use the Tab key to get to the "View Products" button, then use Control+Option+Left to select the price. It should announce "Price between X and X". Some tools will also read the other price but this is wrapped in aria-hidden so can be ignored.
-
-### Allow HTML in All Products Block Product Titles. ([4363](https://github.com/woocommerce/woocommerce-gutenberg-products-block/pull/4363))
-
-1. Edit a product and add HTML to the title e.g. `<strong>Text</strong>`.
-2. View the product within the All Products Block.
-3. Confirm the strong tag is rendered, rather than the HTML as a string.
-
-### Ensure product grids display as intended in the editor. ([4424](https://github.com/woocommerce/woocommerce-gutenberg-products-block/pull/4424))
-
-Test in the block editor:
-
-1. Ensure the Gutenberg feature plugin is enabled and up to date.
-2. Create a new page.
-3. Insert blocks that use the product grid e.g. _Top Rated Products_.
-4. Save the page as a draft.
-5. Navigate to Pages > All Pages and then select `Edit` on the draft you just saved.
-6. Confirm that the number of columns displayed equals the number set in the block settings (Default: 3).
-
-Test in the widget editor:
-
-1. Ensure the Gutenberg feature plugin is enabled and up to date.
-2. Go to the Widgets editor in Appearance > Widgets.
-3. Go to Sidebar widgets and insert blocks that use the product grid e.g. _Top Rated Products_.
-4. Confirm that the number of columns displayed equals the number set in the block settings (Default: 3).
-
-| Before | After |
-| -------------------------------------------------------------------------------------------------------------- | -------------------------------------------------------------------------------------------------------------- |
-|  |  |
diff --git a/plugins/woocommerce/client/blocks/docs/internal-developers/testing/releases/560.md b/plugins/woocommerce/client/blocks/docs/internal-developers/testing/releases/560.md
deleted file mode 100644
index bb93e83f9d9..00000000000
--- a/plugins/woocommerce/client/blocks/docs/internal-developers/testing/releases/560.md
+++ /dev/null
@@ -1,76 +0,0 @@
-# Testing notes and ZIP for release 5.6.0
-
-Zip file for testing: [woocommerce-gutenberg-products-block.zip](https://github.com/woocommerce/woocommerce-gutenberg-products-block/files/6916635/woocommerce-gutenberg-products-block.zip)
-
-## Feature plugin and package inclusion in WooCommerce core
-
-### Fix SKU search in the Store API ([4469](https://github.com/woocommerce/woocommerce-gutenberg-products-block/pull/4469))
-
-Try some search requests via the Store API, for example:
-
-`https://store.local/wp-json/wc/store/products?search=woo-album`
-
-Ensure matched results match your query. Try searching for both titles and SKUs.
-
-### Fix all review memory leak on block transform ([4428](https://github.com/woocommerce/woocommerce-gutenberg-products-block/pull/4428))
-
-- Create an empty page and add the All Reviews block.
-- Select the block and in the toolbar select the transform option
-- Hover on one option and hover out before the preview is loaded
-- Check the console is free of error warnings
-
-### Switch arrow unicode characters ([4364](https://github.com/woocommerce/woocommerce-gutenberg-products-block/pull/4364))
-
-View the pagination rendered on the all products block and confirm the symbol matches the screenshot above.
-
-| Before | After |
-| ------------------------------------------------------------------------------------------------------------- | ------------------------------------------------------------------------------------------------------------ |
-|  |  |
-
-## Feature plugin only
-
-### Add missing class to Cart skeleton title ([4498](https://github.com/woocommerce/woocommerce-gutenberg-products-block/pull/4498))
-
-1. Load the Cart block and verify the margin under the `Your cart` title doesn't change between the rendered block and the loading skeleton.
-
-| Before | After |
-| --------------------------------------------------------------------------------------------------------------- | -------------------------------------------------------------------------------------------------------------- |
-|  |  |
-
-### Add styles to stop totals items being padded inside panels ([4435](https://github.com/woocommerce/woocommerce-gutenberg-products-block/pull/4435))
-
-1. Add a subscription product to your cart with WC Subscriptions.
-2. Go to the Cart and Checkout blocks.
-3. Expand the "Daily/Weekly/Monthly recurring total" section at the bottom of the sidebar in both blocks.
-4. Ensure there is no extra padding and that the totals for each recurring section are aligned well.
-
-| Before | After |
-| -------------------------------------------------------------------------------------------------------------- | -------------------------------------------------------------------------------------------------------------- |
-|  |  |
-
-### Make payment method icons display well even if theme tries to override their height/width ([4427](https://github.com/woocommerce/woocommerce-gutenberg-products-block/pull/4427))
-
-1. Add some custom CSS to your theme, do something that will "accidentally" catch all images in the Cart/Checkout blocks, e.g:
-
-```css
-.wp-block-woocommerce-cart img,
-.wp-block-woocommerce-checkout img {
- height: auto !important;
- width: 100% !important;
-}
-```
-
-2. Go to the Cart and Checkout blocks and ensure that the payment method icons display correctly and are not too large.
-3. Experiment with a few different themes and ensure this works for each one you test.
-
-#### Cart
-
-| Before | After |
-| --------------------------------------------------------------------------------------------------------------- | -------------------------------------------------------------------------------------------------------------- |
-|  |  |
-
-#### Checkout
-
-| Before | After |
-| -------------------------------------------------------------------------------------------------------------- | -------------------------------------------------------------------------------------------------------------- |
-|  |  |
diff --git a/plugins/woocommerce/client/blocks/docs/internal-developers/testing/releases/570.md b/plugins/woocommerce/client/blocks/docs/internal-developers/testing/releases/570.md
deleted file mode 100644
index 653c03fc689..00000000000
--- a/plugins/woocommerce/client/blocks/docs/internal-developers/testing/releases/570.md
+++ /dev/null
@@ -1,95 +0,0 @@
-# Testing notes and ZIP for release 5.7.0
-
-Zip file for testing: [woocommerce-gutenberg-products-block.zip](https://github.com/woocommerce/woocommerce-gutenberg-products-block/files/6992852/woocommerce-gutenberg-products-block.zip)
-
-## Feature plugin and package inclusion in WooCommerce
-
-### Enable re-select category for Featured Category block ([4559](https://github.com/woocommerce/woocommerce-gutenberg-products-block/pull/4559))
-
-1. Insert a featured category block into a page.
-2. Select a category and save the block.
-3. Reselect the block you just created.
-4. Click on the edit button (pencil icon). Confirm you can select a different category.
-
-### Reviews by Category: Show review count instead of product count ([4552](https://github.com/woocommerce/woocommerce-gutenberg-products-block/pull/4552))
-
-1. Create a new test product. Make sure it is in a product category.
-2. As a customer, add a review for the new test product.
-3. Add the Reviews by Category block to a page.
-4. Select the block and in the inspector, see the "Category" section.
-5. Confirm the "Category" section shows the correct review count next to each category. It should match the number of reviews in the category, not the number of products in the category.
-
-### Fix unfiltered html usage of blocks ([4551](https://github.com/woocommerce/woocommerce-gutenberg-products-block/pull/4551))
-
-1. Login to WordPress as an author, not an admin user.
-2. Create a page and add the Product Search Block. Save the page.
-3. View the page on the frontend. Confirm the search input and form is shown.
-
-### Twenty Twenty: Fix broken sale badge left alignment ([4549](https://github.com/woocommerce/woocommerce-gutenberg-products-block/pull/4549))
-
-Test with the Twenty Twenty theme active.
-
-1. Create a new test product with both a regular and sale price.
-2. Create a page and add the All Products Block.
-3. Select and edit the All Products Block to change the layout.
-4. Within the All Products Block editor, select the Product Image. In it's settings, change the "sale badge alignment" to "left".
-5. Save the page and view it on the frontend. Confirm the sale badge is left aligned, not full width.
-
-| Before | After |
-| --------------------------------------------------------------------------------------------------------------------- | -------------------------------------------------------------------------------------------------------------------- |
-| 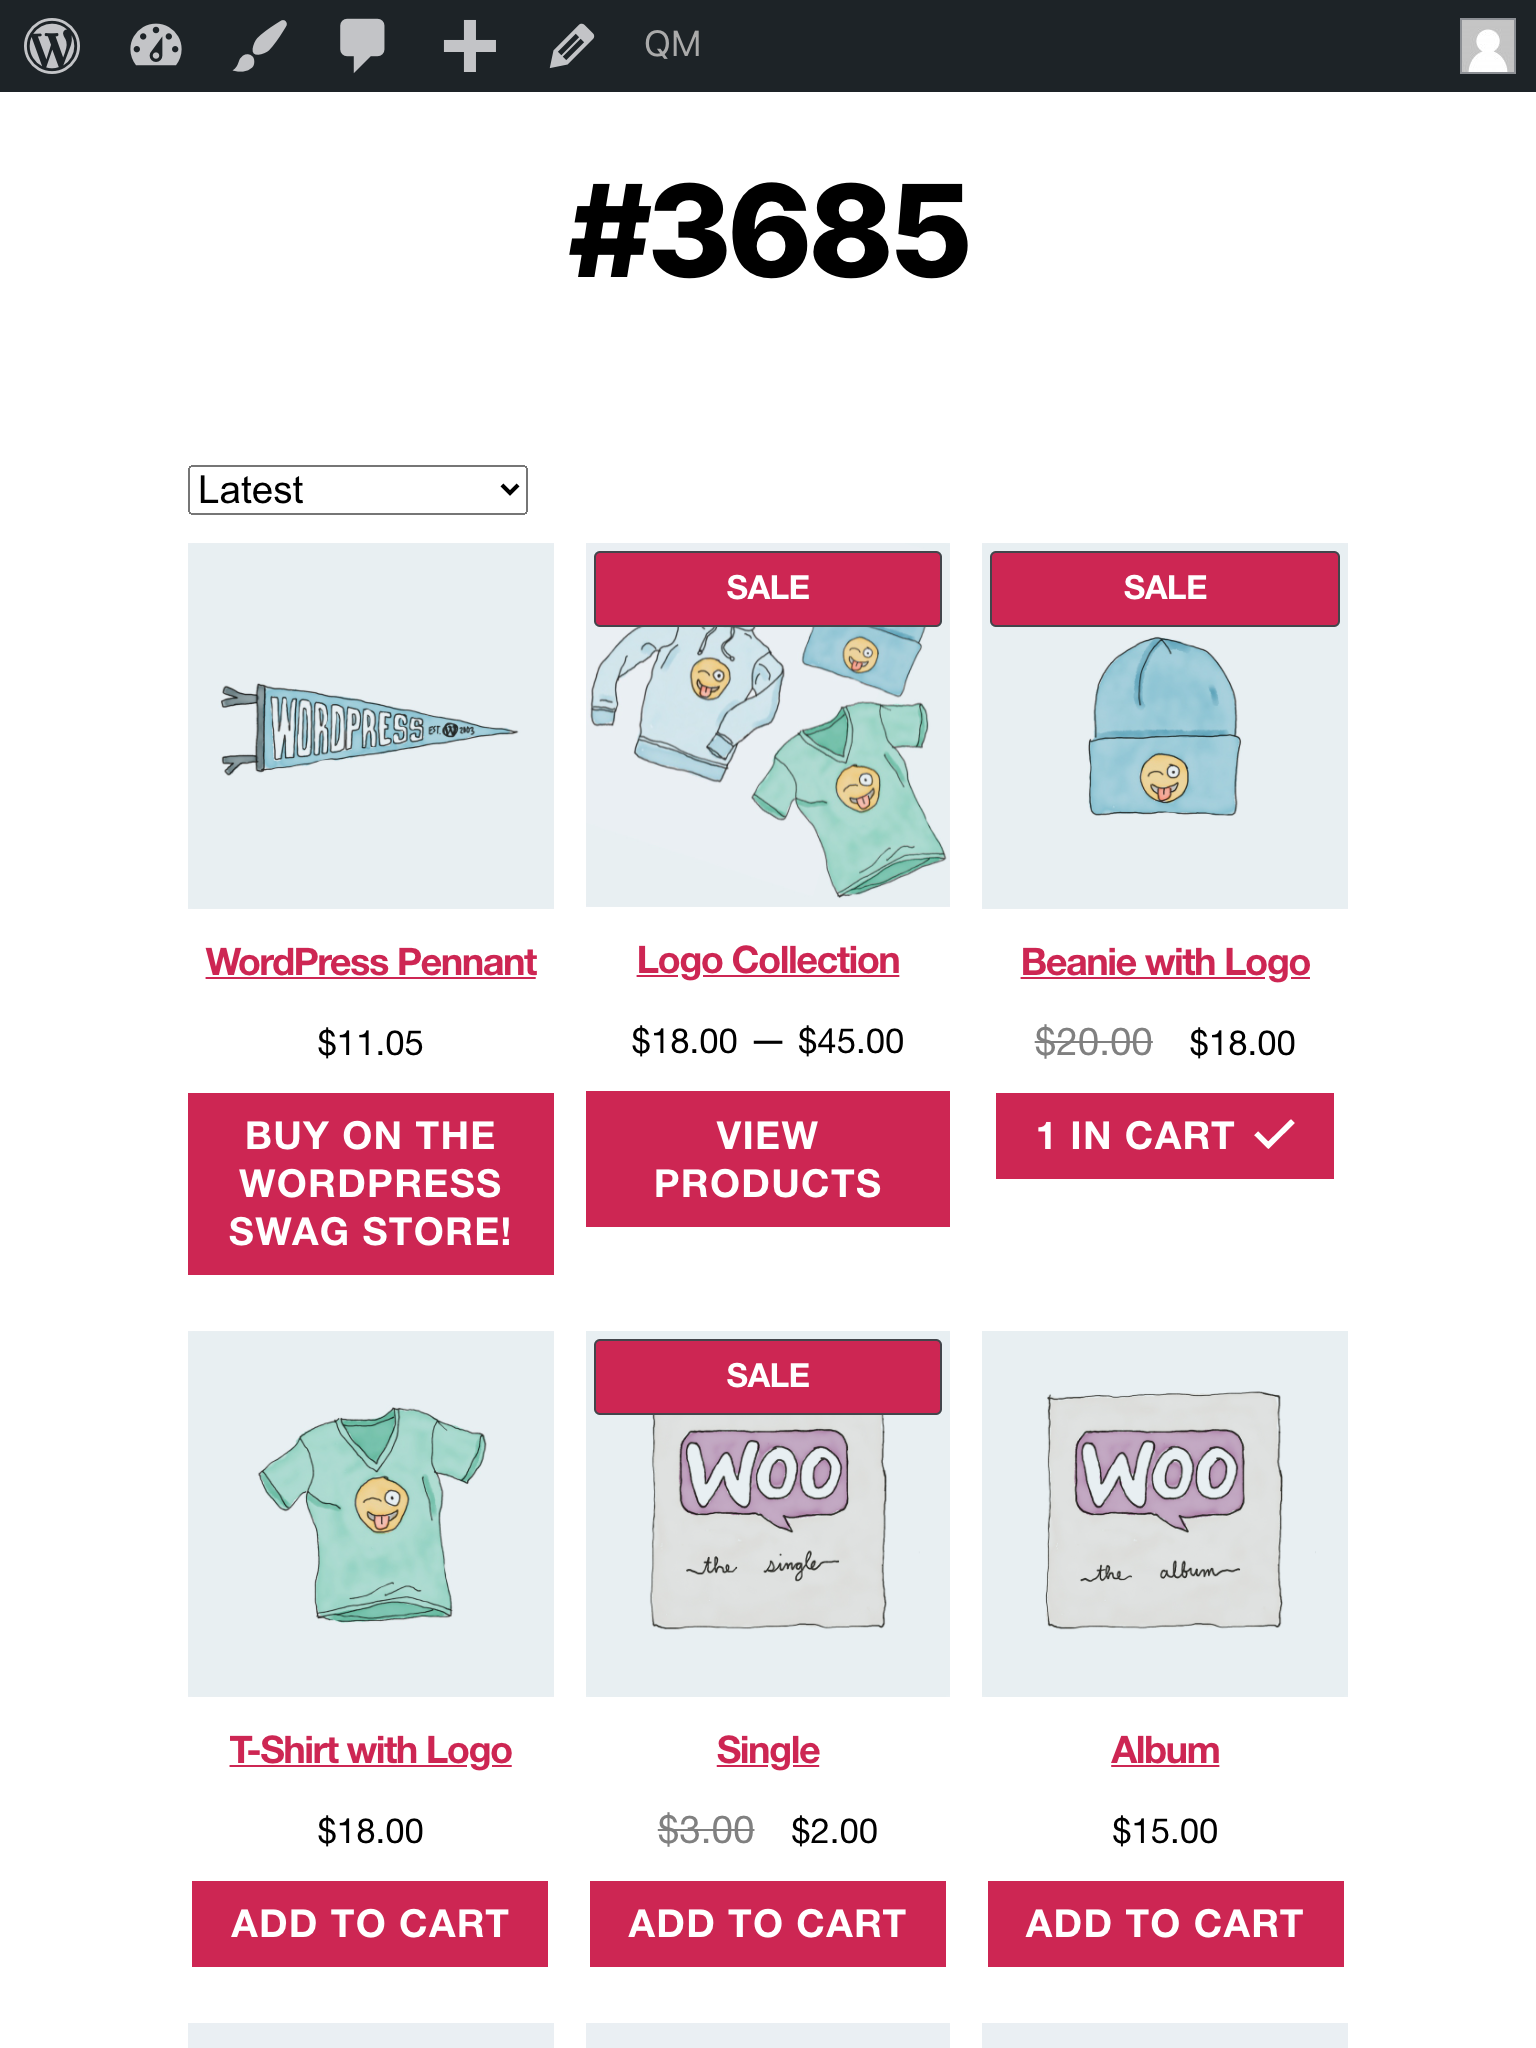 | 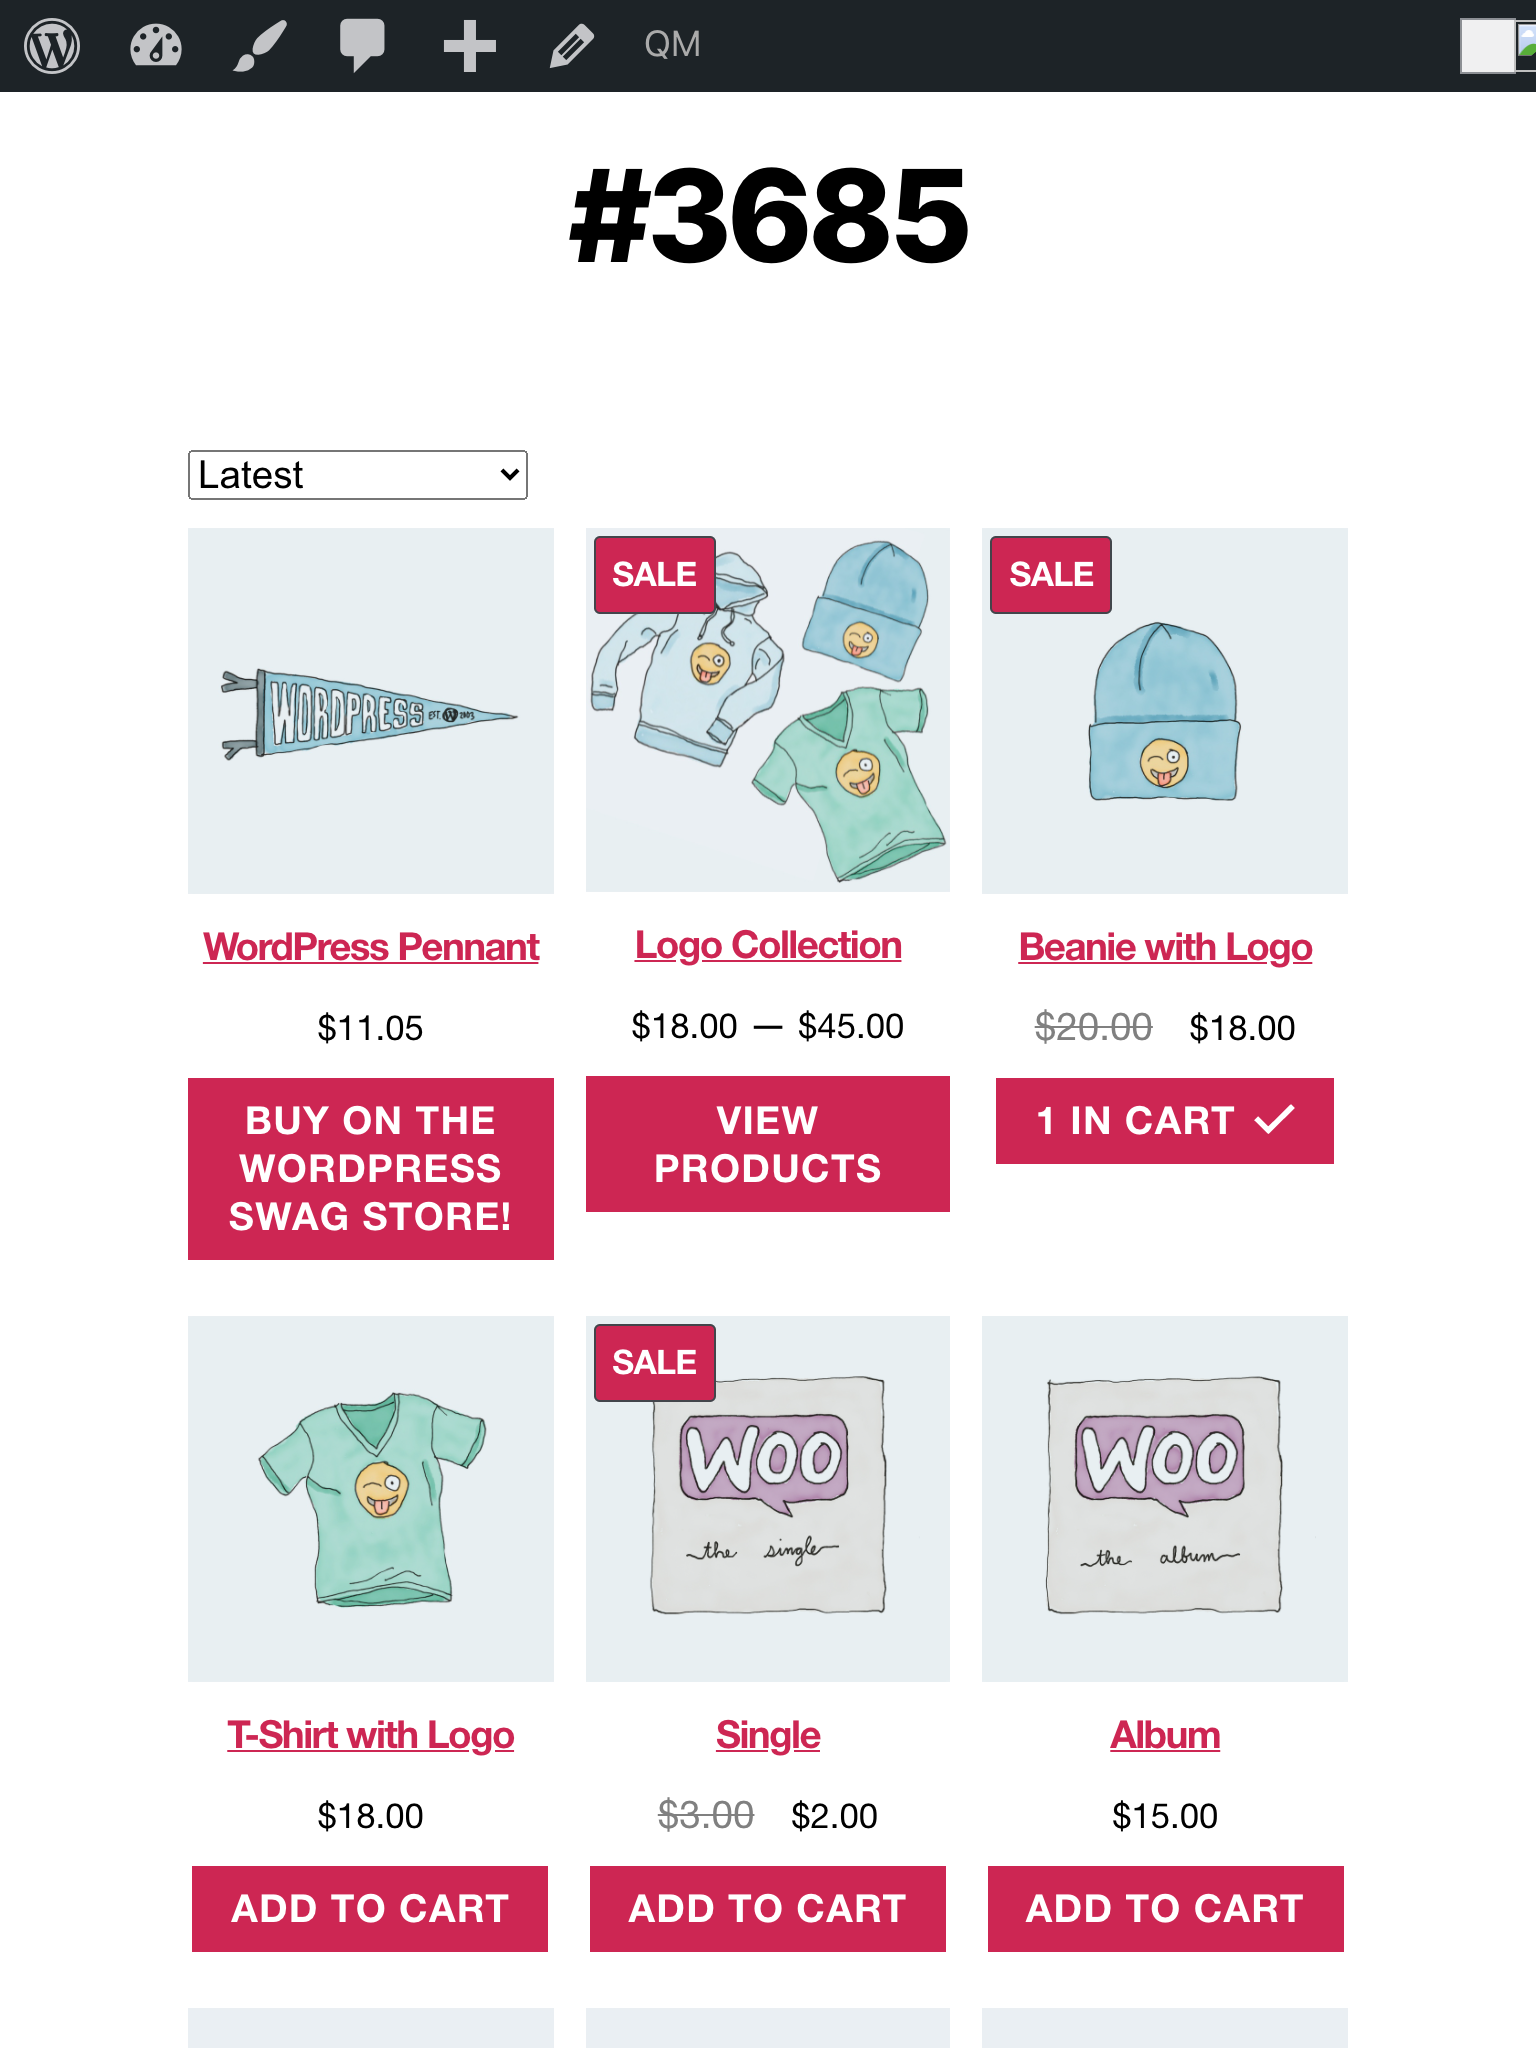 |
-
-### Fix handpicked product selections when a store has over 100 products. ([4534](https://github.com/woocommerce/woocommerce-gutenberg-products-block/pull/4534))
-
-To test this you need a catalog with > 100 products.
-
-1. Add a handpicked product block to a page.
-2. Make 20 selections. You may need to search for products to have more results appear.
-3. Save and reload the page.
-4. Confirm the 20 selections you made before and still visible and selected.
-
-## Feature plugin only
-
-### Switch from Select to Combobox for Country and State Inputs ([4369](https://github.com/woocommerce/woocommerce-gutenberg-products-block/pull/4369))
-
-1. Add an item to the cart and visit the checkout block page
-2. Try searching for a country in the country input. Matching values should be shown, and the selected value should persist after making a selection.
-3. Repeat for state input (for countries with states such as USA).
-
-### Call validation before submitting the order ([4561](https://github.com/woocommerce/woocommerce-gutenberg-products-block/pull/4561))
-
-1. Using a private/incognito browser window, add an item to the cart and visit the checkout block page
-2. Use browser autofill to populate the checkout form
-3. Submit the order. Check order contains the correct address details.
-4. Start a new private/incognito browser window, add an item to the cart and visit the checkout page
-5. Edit the email field by removing @ to make it invalid.
-6. Submit the order. Ensure a validation error is shown.
-
-### Fix store notice classes ([4568](https://github.com/woocommerce/woocommerce-gutenberg-products-block/pull/4568))
-
-1. Set up WooCommerce Stripe Payment Gateway and go to a page with the Checkout block.
-2. Try to pay with a card number that fails like 4000000000000127.
-3. Notice the payment will be rejected.
-4. Verify the correct icon (exclamation mark instead of check mark) is rendered in the error message.
-
-| Before | After |
-| --------------------------------------------------------------------------------------------------------------- | -------------------------------------------------------------------------------------------------------------- |
-| 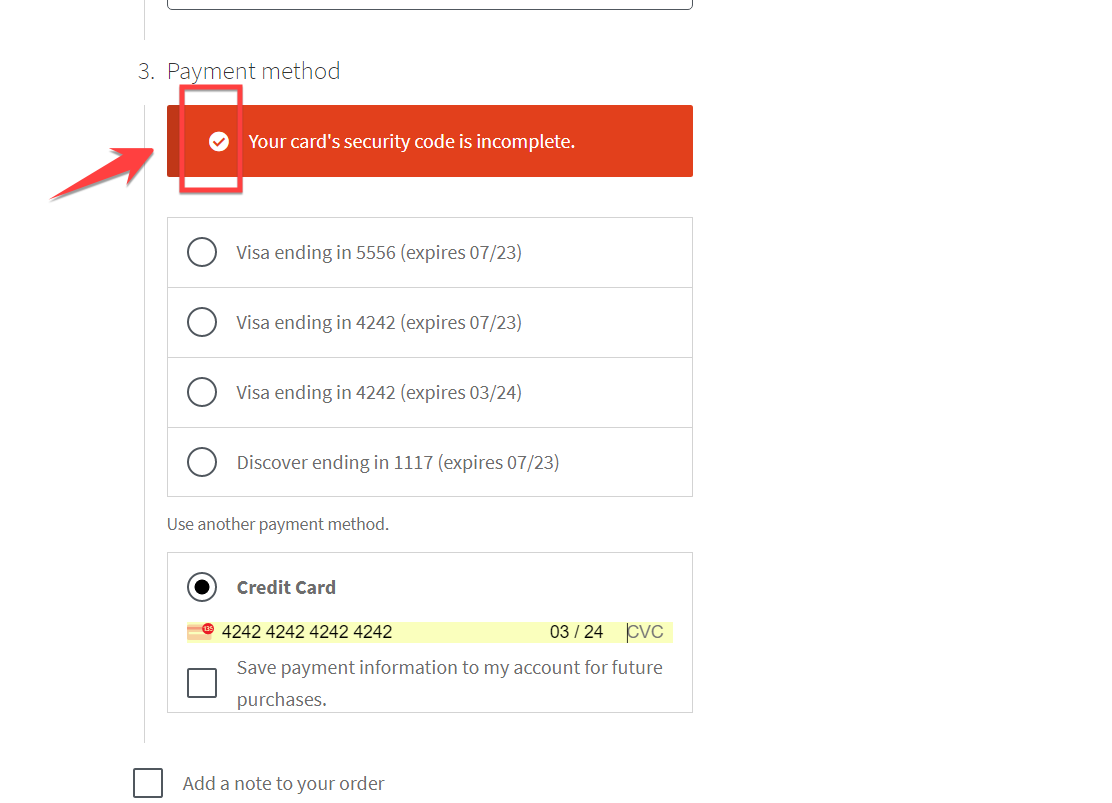 | 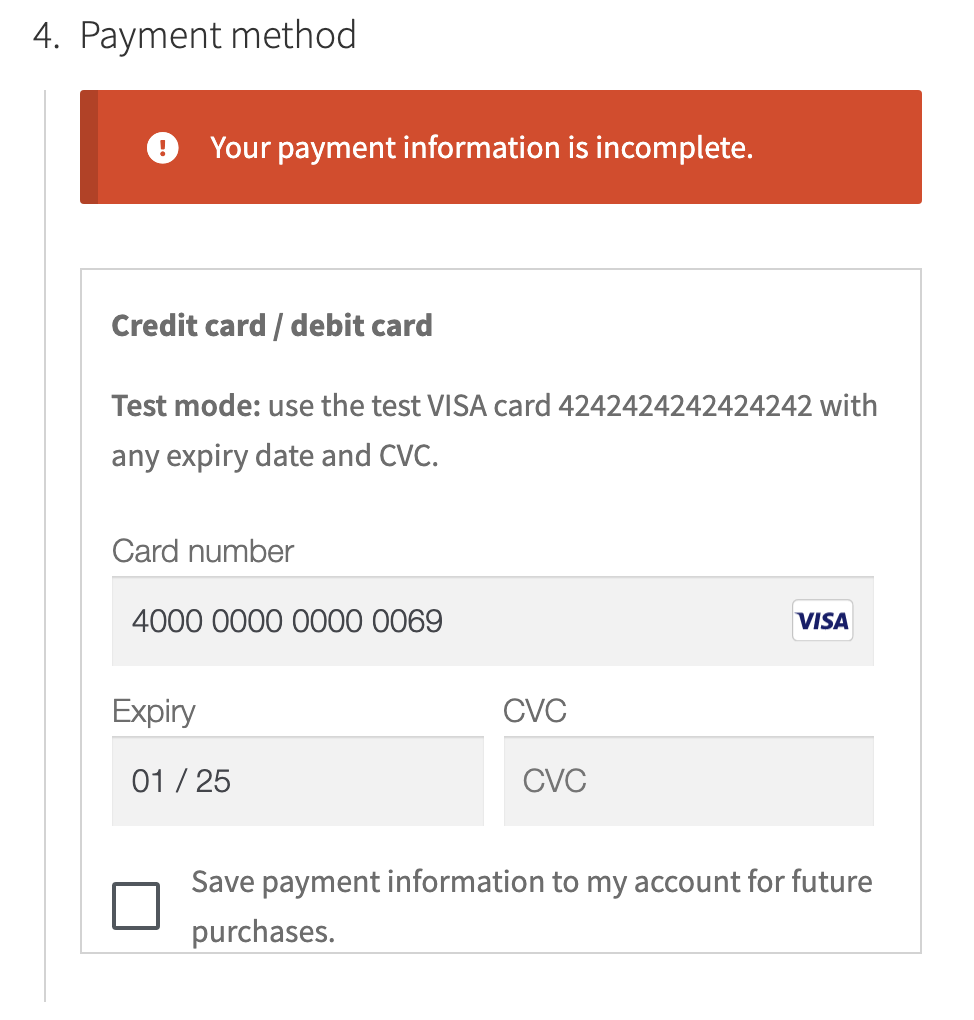 |
-
-### Remove top rule so validation messages are positioned correctly below ([4582](https://github.com/woocommerce/woocommerce-gutenberg-products-block/pull/4582))
-
-1. Add an item to the cart and visit the checkout block page
-2. Click inside a required input, leave it blank, then click outside of it
-3. A red validation notice should appear below the field. It should not overlap other content.
-
-### Twenty Twenty-One: Adjust removable chip background color ([4547](https://github.com/woocommerce/woocommerce-gutenberg-products-block/pull/4547))
-
-Test with the Twenty Twenty-One theme active. You'll need a test product and a test coupon code.
-
-1. Add an item to the cart and visit the cart block page.
-2. Apply a coupon.
-3. Confirm the coupon has the correct styling:
-
-| Before | After |
-| --------------------------------------------------------------------------------------------------------------------- | -------------------------------------------------------------------------------------------------------------------- |
-| 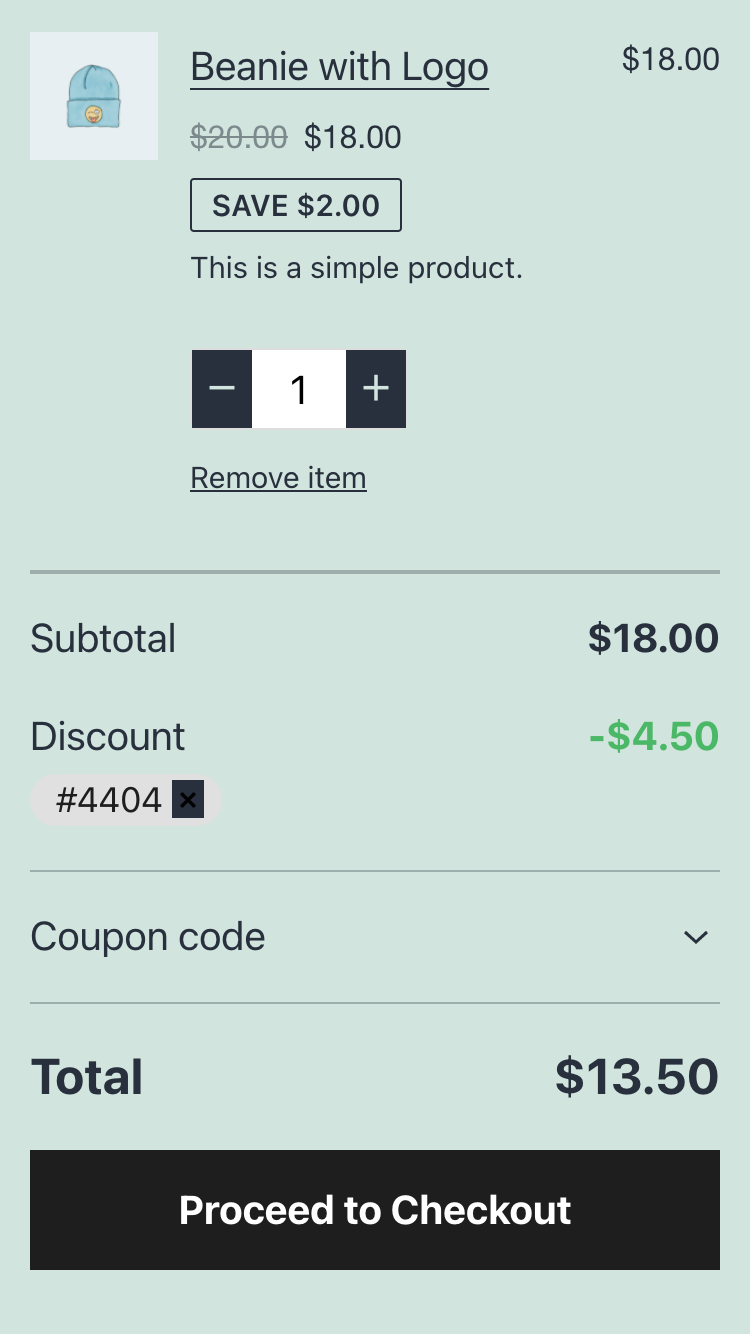 | 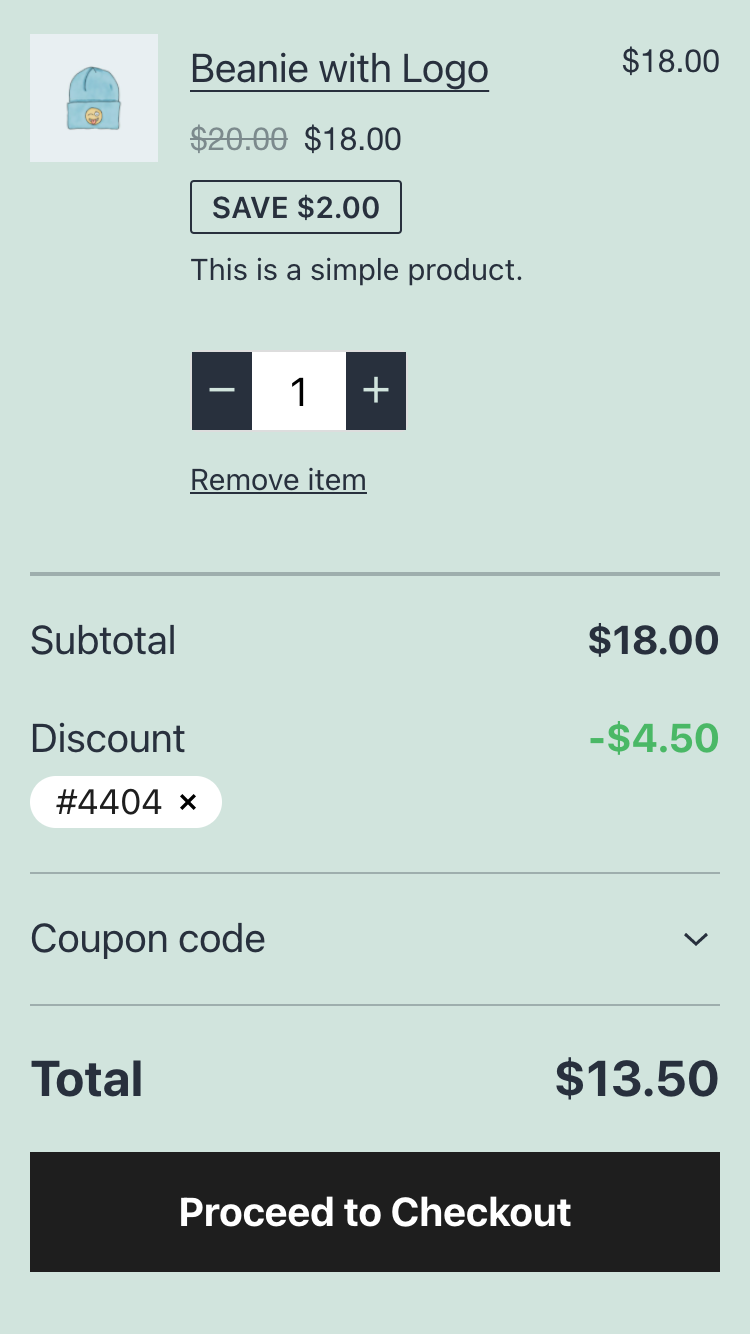 |
diff --git a/plugins/woocommerce/client/blocks/docs/internal-developers/testing/releases/571.md b/plugins/woocommerce/client/blocks/docs/internal-developers/testing/releases/571.md
deleted file mode 100644
index 43a6be48a89..00000000000
--- a/plugins/woocommerce/client/blocks/docs/internal-developers/testing/releases/571.md
+++ /dev/null
@@ -1,13 +0,0 @@
-# Testing notes and ZIP for release 5.7.1
-
-Zip file for testing: [woocommerce-gutenberg-products-block.zip](https://github.com/woocommerce/woocommerce-gutenberg-products-block/files/7074986/woocommerce-gutenberg-products-block.zip)
-
-## Feature plugin and package inclusion in WooCommerce
-
-### Disable Cart, Checkout, All Products & filters blocks from the widgets screen ([4646](https://github.com/woocommerce/woocommerce-gutenberg-products-block/pull/4646))
-
-With Storefront and WP 5.8:
-
-1. Go to Appearance > Widgets and verify you can't add the Cart, Checkout, All Products & filters blocks.
-2. Go to Appearance > Customizer > Widgets and verify you can't add those blocks either.
-3. Create a new post or page and verify those blocks can be added without problems.
diff --git a/plugins/woocommerce/client/blocks/docs/internal-developers/testing/releases/572.md b/plugins/woocommerce/client/blocks/docs/internal-developers/testing/releases/572.md
deleted file mode 100644
index b36b437d711..00000000000
--- a/plugins/woocommerce/client/blocks/docs/internal-developers/testing/releases/572.md
+++ /dev/null
@@ -1,22 +0,0 @@
-# Testing notes and ZIP for release 5.7.2
-
-Zip file for testing: [woocommerce-gutenberg-products-block.zip](https://github.com/woocommerce/woocommerce-gutenberg-products-block/files/7217707/woocommerce-gutenberg-products-block.zip)
-
-## Feature plugin and package inclusion in WooCommerce
-
-### Fix infinite recursion when removing an attribute filter from the Active filters block ([4816](https://github.com/woocommerce/woocommerce-gutenberg-products-block/pull/4816))
-
-1. Insert All Products, Filter Products by Attribute, and Active Filter blocks into a page.
-2. Save and publish the page.
-3. View the page on the frontend.
-4. Apply a filter for any attribute so that the product list is filtered and the active filters block shows the filter you just added.
-5. Verify you can remove applied attribute filters either using the cross icon next to each filter, or pressing the "Clear All" link.
-
-### Fix Product Search block displaying incorrectly ([4740](https://github.com/woocommerce/woocommerce-gutenberg-products-block/pull/4740))
-
-With Storefront active:
-
-1. Add the Product Search block to a page.
-2. Save and publish the page.
-3. View the page on the frontend.
-4. The search block should be shown full width, with a gap between the search input and the button.
diff --git a/plugins/woocommerce/client/blocks/docs/internal-developers/testing/releases/580.md b/plugins/woocommerce/client/blocks/docs/internal-developers/testing/releases/580.md
deleted file mode 100644
index 345ef8059d1..00000000000
--- a/plugins/woocommerce/client/blocks/docs/internal-developers/testing/releases/580.md
+++ /dev/null
@@ -1,60 +0,0 @@
-# Testing notes and ZIP for release 5.8.0
-
-Zip file for testing: [woocommerce-gutenberg-products-block.zip](https://github.com/woocommerce/woocommerce-gutenberg-products-block/files/7083656/woocommerce-gutenberg-products-block.zip)
-
-## Feature plugin and package inclusion in WooCommerce
-
-### Testing Link to Product Page setting in All Products Block ([4630](https://github.com/woocommerce/woocommerce-gutenberg-products-block/pull/4630))
-
-1. Create a test page.
-2. Add the `All Products` block.
-3. Click the pencil icon to edit the block.
-4. Click on the product image.
-5. Activate/deactivate the `Link to Product Page` setting in the sidebar.
-6. Save the changes
-7. Open the test page on the frontend to ensure that the `Link to Product Page` setting behaves as expected for the image.
-
-### New Filter Products by Stock block ([4145](https://github.com/woocommerce/woocommerce-gutenberg-products-block/pull/4145))
-
-A new block was introduced for filtering products by stock:
-
-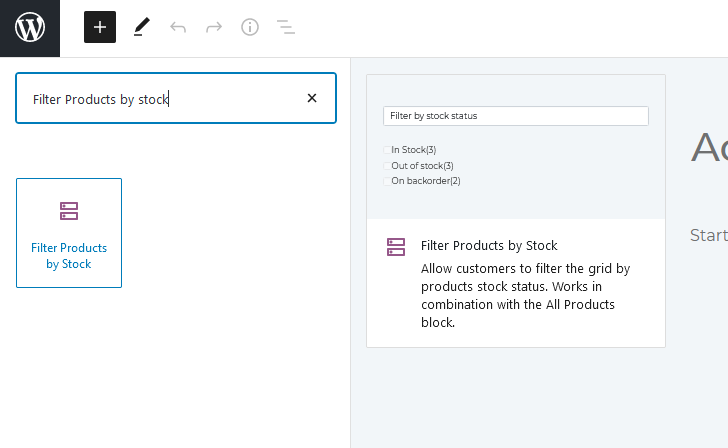
-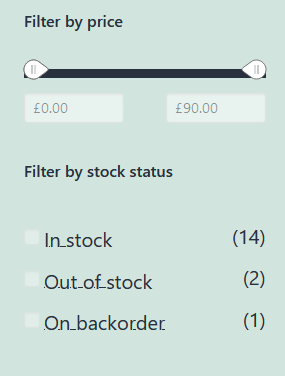
-
-1. Create a page and on the page add "Filter Products by Stock", "All Products", "Active Filters", and "Filter by Attributes Blocks" to a page.
-2. Ensure `Hide out of stock products from catalogue` is **disabled** in **WooCommerce > Settings > Products > Inventory**
-3. Set the stock status of some products to `out of stock`, some to `on backorder`.
-4. Go to the page on the front end and verify that you can filter products by the three different stock levels.
-5. For any product that is `out of stock` change it back to `in stock`. All products should now either be `on backorder` or `in stock`.
-6. Reload the page and ensure the option to filter out of stock products is not there.
-7. Set some products back to being `out of stock`.
-8. Change the `Hide out of stock products from catalogue` to **enabled** in **WooCommerce > Settings > Products > Inventory**
-9. Reload the page and ensure the option to filter out of stock products is not there.
-10. Add the `Filter Products by Price` and `Filter Products by Attribute` block to the page.
-11. Verify that the filters work together and the correct products are shown in the `All Products` block..
-
-### Fix layout issues with Category List Block ([4587](https://github.com/woocommerce/woocommerce-gutenberg-products-block/pull/4587))
-
-| Before | After |
-| -------------------------------------------------------------------------------------------------------------- | -------------------------------------------------------------------------------------------------------------- |
-|  |  |
-
-1. Add the Product Category List block to a page.
-2. View the page on the frontend and ensure there category list block displays as expected with no excessive line-breaks.
-3. Go to WooCommerce > Settings > Products and set the "Shop Page" to be the page you created in the previous step.
-4. Visit the page and ensure the category list is rendered correctly with no excessive line-breaks.
-
-### Ensure no impact from changes to SortSelect components ([4580](https://github.com/woocommerce/woocommerce-gutenberg-products-block/pull/4580))
-
-#### Reviews blocks
-
-1. Make sure you have at least a couple of reviews in your store.
-2. Create a post or page with the All Reviews, Reviews by Product and Reviews by Category blocks.
-3. In the editor, make sure you can change the `Order Product Reviews by` value under `List Settings` and blocks are updated accordingly.
-4. In the frontend, make sure you can change the order reviews are displayed in.
-
-#### All Products block
-
-1. Create a post or page with the All Products block.
-2. In the editor, make sure you can change the `Order Products By` value under `Content Settings` and the block is updated accordingly.
-3. In the frontend, make sure you can change the order products are displayed in.
diff --git a/plugins/woocommerce/client/blocks/docs/internal-developers/testing/releases/590.md b/plugins/woocommerce/client/blocks/docs/internal-developers/testing/releases/590.md
deleted file mode 100644
index a38d8eec756..00000000000
--- a/plugins/woocommerce/client/blocks/docs/internal-developers/testing/releases/590.md
+++ /dev/null
@@ -1,50 +0,0 @@
-# Testing notes and ZIP for release 5.9.0
-
-Zip file for testing: [woocommerce-gutenberg-products-block.zip](https://github.com/woocommerce/woocommerce-gutenberg-products-block/files/7161568/woocommerce-gutenberg-products-block.zip)
-
-## Feature plugin
-
-### Add extensibility point for extensions to filter payment methods ([4668](https://github.com/woocommerce/woocommerce-gutenberg-products-block/pull/4668))
-
-1. Make sure Check payments and Cash on delivery payment methods are activated and appear in the Checkout block
-2. Install this extension specifically made for testing: [woocommerce-payment-method-test.zip](https://github.com/woocommerce/woocommerce-gutenberg-products-block/files/7160423/woocommerce-payment-method-test.zip)
-
-```js
-import { registerPaymentMethodExtensionCallbacks } from '@woocommerce/blocks-registry';
-
-registerPaymentMethodExtensionCallbacks( 'woocommerce-marketplace-extension', {
- cod: ( arg ) => {
- return false;
- },
- cheque: ( arg ) => {
- return arg.billingData.city === 'Denver';
- },
-} );
-```
-
-3. Go to the Checkout block
-4. Notice that Cash on delivery is no longer available
-5. Notice that Check payments are available only when the City is set to "Denver"
-
-### Smoke test the Checkout block
-
-Because of experimental work done during this release, we need to ensure no regressions have been made to the checkout block. Please smoke test the checkout block.
-
-1. Enable a few different payment methods in your store.
-2. Add some products to your cart.
-3. Go to the Checkout block, ensure it displays with no errors and the correct cart contents are showing.
-4. Ensure you can enter your shipping and billing addresses.
-5. Ensure validation still works, (focus a field, delete the content and ensure an error is shown, e.g. postcode field).
-6. Ensure you can use different payment methods.
-7. Ensure you can check out and that the order is placed.
-
-## Feature plugin and package inclusion in WooCommerce
-
-### Fix Product Search block displaying incorrectly ([4740](https://github.com/woocommerce/woocommerce-gutenberg-products-block/pull/4740))
-
-1. Add the Product Search block to a page.
-2. Ensure it renders at full width with a gap between the input and the button.
-
-| Before | After |
-| -------------------------------------------------------------------------------------------------------------- | -------------------------------------------------------------------------------------------------------------- |
-|  |  |
diff --git a/plugins/woocommerce/client/blocks/docs/internal-developers/testing/releases/591.md b/plugins/woocommerce/client/blocks/docs/internal-developers/testing/releases/591.md
deleted file mode 100644
index 86e42bbe74d..00000000000
--- a/plugins/woocommerce/client/blocks/docs/internal-developers/testing/releases/591.md
+++ /dev/null
@@ -1,13 +0,0 @@
-# Testing notes and ZIP for release 5.9.1
-
-Zip file for testing: [woocommerce-gutenberg-products-block.zip](https://github.com/woocommerce/woocommerce-gutenberg-products-block/files/7218507/woocommerce-gutenberg-products-block.zip)
-
-## Feature plugin and package inclusion in WooCommerce
-
-### Fix infinite recursion when removing an attribute filter from the Active filters block ([4816](https://github.com/woocommerce/woocommerce-gutenberg-products-block/pull/4816))
-
-1. Insert All Products, Filter Products by Attribute, and Active Filter blocks into a page.
-2. Save and publish the page.
-3. View the page on the frontend.
-4. Apply a filter for any attribute so that the product list is filtered and the active filters block shows the filter you just added.
-5. Verify you can remove applied attribute filters either using the cross icon next to each filter, or pressing the "Clear All" link.
diff --git a/plugins/woocommerce/client/blocks/docs/internal-developers/testing/releases/600.md b/plugins/woocommerce/client/blocks/docs/internal-developers/testing/releases/600.md
deleted file mode 100644
index f8e7f5d88ea..00000000000
--- a/plugins/woocommerce/client/blocks/docs/internal-developers/testing/releases/600.md
+++ /dev/null
@@ -1,195 +0,0 @@
-# Testing notes and ZIP for release 6.0.0
-
-Zip file for testing: [woocommerce-gutenberg-products-block.zip](https://github.com/woocommerce/woocommerce-gutenberg-products-block/files/7245389/woocommerce-gutenberg-products-block.zip)
-
-## Feature plugin
-
-### Checkout v1 updates fine to Checkout i2. ([4745](https://github.com/woocommerce/woocommerce-gutenberg-products-block/pull/4745))
-
-- Before installing WooCommerce Blocks 6.0.0, install WooCommerce Blocks 5.9.0.
-- Insert Checkout into a page and save it.
-- Install WooCommerce Blocks 6.0.0.
-- Add an item to your cart.
-- Visit the frontend of the checkout page you saved, it should render fine.
-- Visit the checkout page in the editor, the block should load fine, you should be able to save the page.
-- Save the page, visit the frontend again, the block should work fine.
-
-### Terms and Conditions block. ([4745](https://github.com/woocommerce/woocommerce-gutenberg-products-block/pull/4745))
-
-- On the Checkout editor, the terms and conditions block should be preinserted.
-- Assuming you didn't setup a Terms and Conditions page and a Privacy Policy page, you should see a notice telling you to set them up.
-- After setting up those pages, the notice should be gone and links should work fine.
-- You can edit the text, and it would persist on frontend.
-- If you remove or change the links, you will get a warning that you must insert the correct links.
-- If you require checkbox on the block, you should not be able to place an order on the frontend without checking it.
-
-### Improve the Checkout Order Summary block accessibility by making more info available to screen readers. ([4810](https://github.com/woocommerce/woocommerce-gutenberg-products-block/pull/4810))
-
-- Add one or more items to your cart.
-- Visit Checkout and click on Order Summary to expand the tab, or navigate to it using TAB key.
-- Navigate using the TAB key.
-- Optionally you could enable the screen reader.
-
-### Pass billingData to canMakePayment and debounce its calls ([4776](https://github.com/woocommerce/woocommerce-gutenberg-products-block/pull/4776))
-
-- Add this code somewhere (you can try `assets/js/base/context/providers/cart-checkout/payment-methods/use-payment-method-registration.ts`).
-- If you can't edit files, install `Custom CSS & JS` plugin and insert this code:
-
-```js
-wc.wcBlocksRegistry.registerPaymentMethodExtensionCallbacks(
- 'woocommerce-marketplace-extension',
- {
- cod: ( arg ) => {
- console.log( 'checking COD' );
- return arg.billingData.first_name === 'Alexandra';
- },
- }
-);
-```
-
-- Make the console visible
-- Go to Checkout block and notice that COD payment method is missing and that an initial check was made COD (see console.log())
-- Deselect Use same address for billing and write "Alexandra" for First Name in the Billing Address section. Cash on Delivery option should be available as a payment method.
-- Notice that the check for COD is done only after the user finished typing
-
-### Add support for extensions to filter express payment methods. ([4774](https://github.com/woocommerce/woocommerce-gutenberg-products-block/pull/4774))
-
-- As the previous step, paste this code somewhere:
-
-```js
-wc.wcBlocksRegistry.registerExpressPaymentMethod( {
- name: 'expressMethod',
- edit: null,
- content: wp.element.createElement( 'div', {}, 'My express test method' ),
- canMakePayment: () => true,
- paymentMethodId: 'expressMethod',
- supports: {
- features: [ 'products' ],
- },
-} );
-```
-
-- Make sure that you see "My express test method" in Checkout.
-- Add this code now:
-
-```js
-wc.wcBlocksRegistry.registerPaymentMethodExtensionCallbacks(
- 'woocommerce-marketplace-extension',
- {
- expressMethod: ( arg ) => {
- console.log( 'canMakePayment expressMethod' );
- return false;
- },
- }
-);
-```
-
-- You shouldn't be able to see that express method now.
-- Remove the code.
-
-### Checkout: Throw an exception if there is a shipping method required and one isn't selected at the time of placing an order. ([4784](https://github.com/woocommerce/woocommerce-gutenberg-products-block/pull/4784))
-
-- Set a shipping zone in a country of your choice
-- Add a physical product to your cart and enter a country that isn't covered by the shipping zone
-- Clicking "Place Order" should throw an exception which should be displayed in the checkout, whilst preventing you from placing an order.
-
-### Show placeholder message in the shipping section when there are no rates. ([4765](https://github.com/woocommerce/woocommerce-gutenberg-products-block/pull/4765))
-
-- In WooCommerce Shipping Settings, enable "Hide shipping until an address is entered"
-- Open checkout in a new incognito window as a guest
-- Add an item to the cart and go to the checkout
-- Confirm the shipping section shows a message: "Shipping options will be displayed here after entering your full shipping address."
-
-#### Screenshots
-
-Before:
-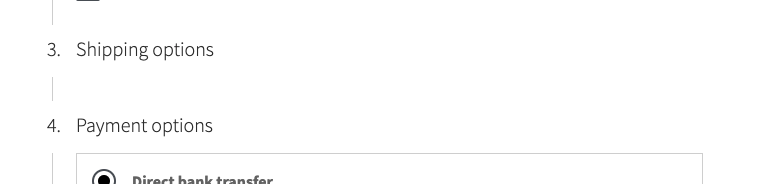
-
-After:
-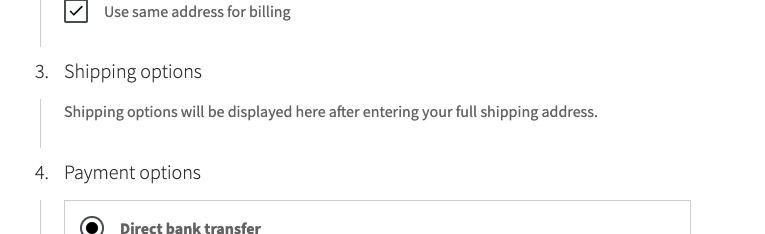
-
-### Fix state validation if base location has a state, and the address has an optional state. ([4761](https://github.com/woocommerce/woocommerce-gutenberg-products-block/pull/4761))
-
-- Setup base location to have a state (US Address)
-- Setup a global shipping rate.
-- On Checkout, Select New Zeland, do not select a state during checkout. Ensure you can place the order.
-
-### Fix validation message styling so they never overlap other elements. ([4734](https://github.com/woocommerce/woocommerce-gutenberg-products-block/pull/4734))
-
-1. Add any product to the cart and go to the Cart block.
-2. Enter an invalid coupon code.
-3. See coupon validation error appear.
-4. The error shouldn't stick/collide with the border.
-5. When clicking on the "Proceed to Checkout" button, there shouldn't be a jump and you should be able to click on the button.
-
-## Feature plugin and package inclusion in WooCommerce
-
-### Added global styles to All Reviews, Reviews by Category and Reviews by Product blocks. ([4323](https://github.com/woocommerce/woocommerce-gutenberg-products-block/pull/4323))
-
-In a classic theme (Storefront):
-
-- Add the All Reviews block to a post or page.
-- Verify you can change the text color and font size.
-- Repeat the process for the Reviews by Category and Reviews by Product blocks.
-
-#### Screenshots
-
-| Default display (before) | Default display (after) |
-| -------------------------------------------------------------------------------------------------------------- | -------------------------------------------------------------------------------------------------------------- |
-|  | 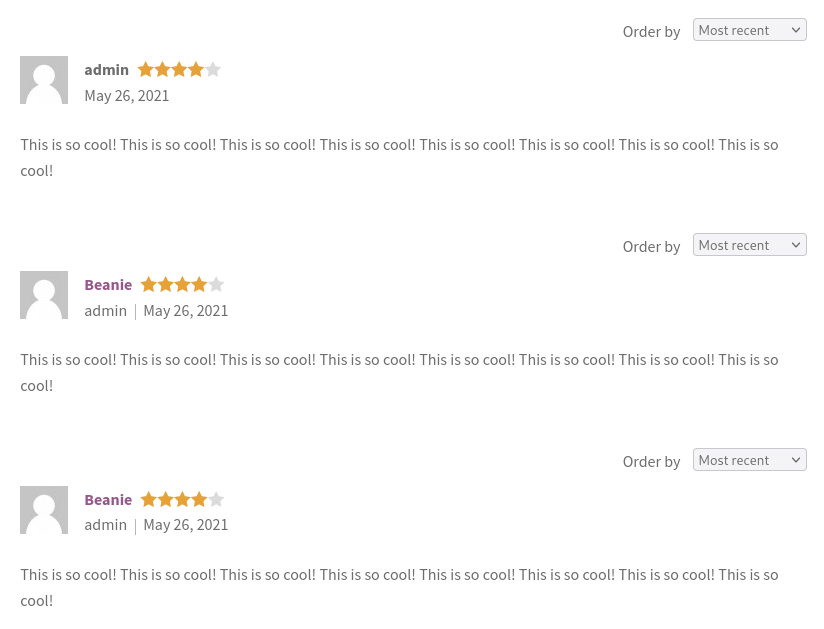 |
-
-Tweaking some colors and font size in Storefront:
-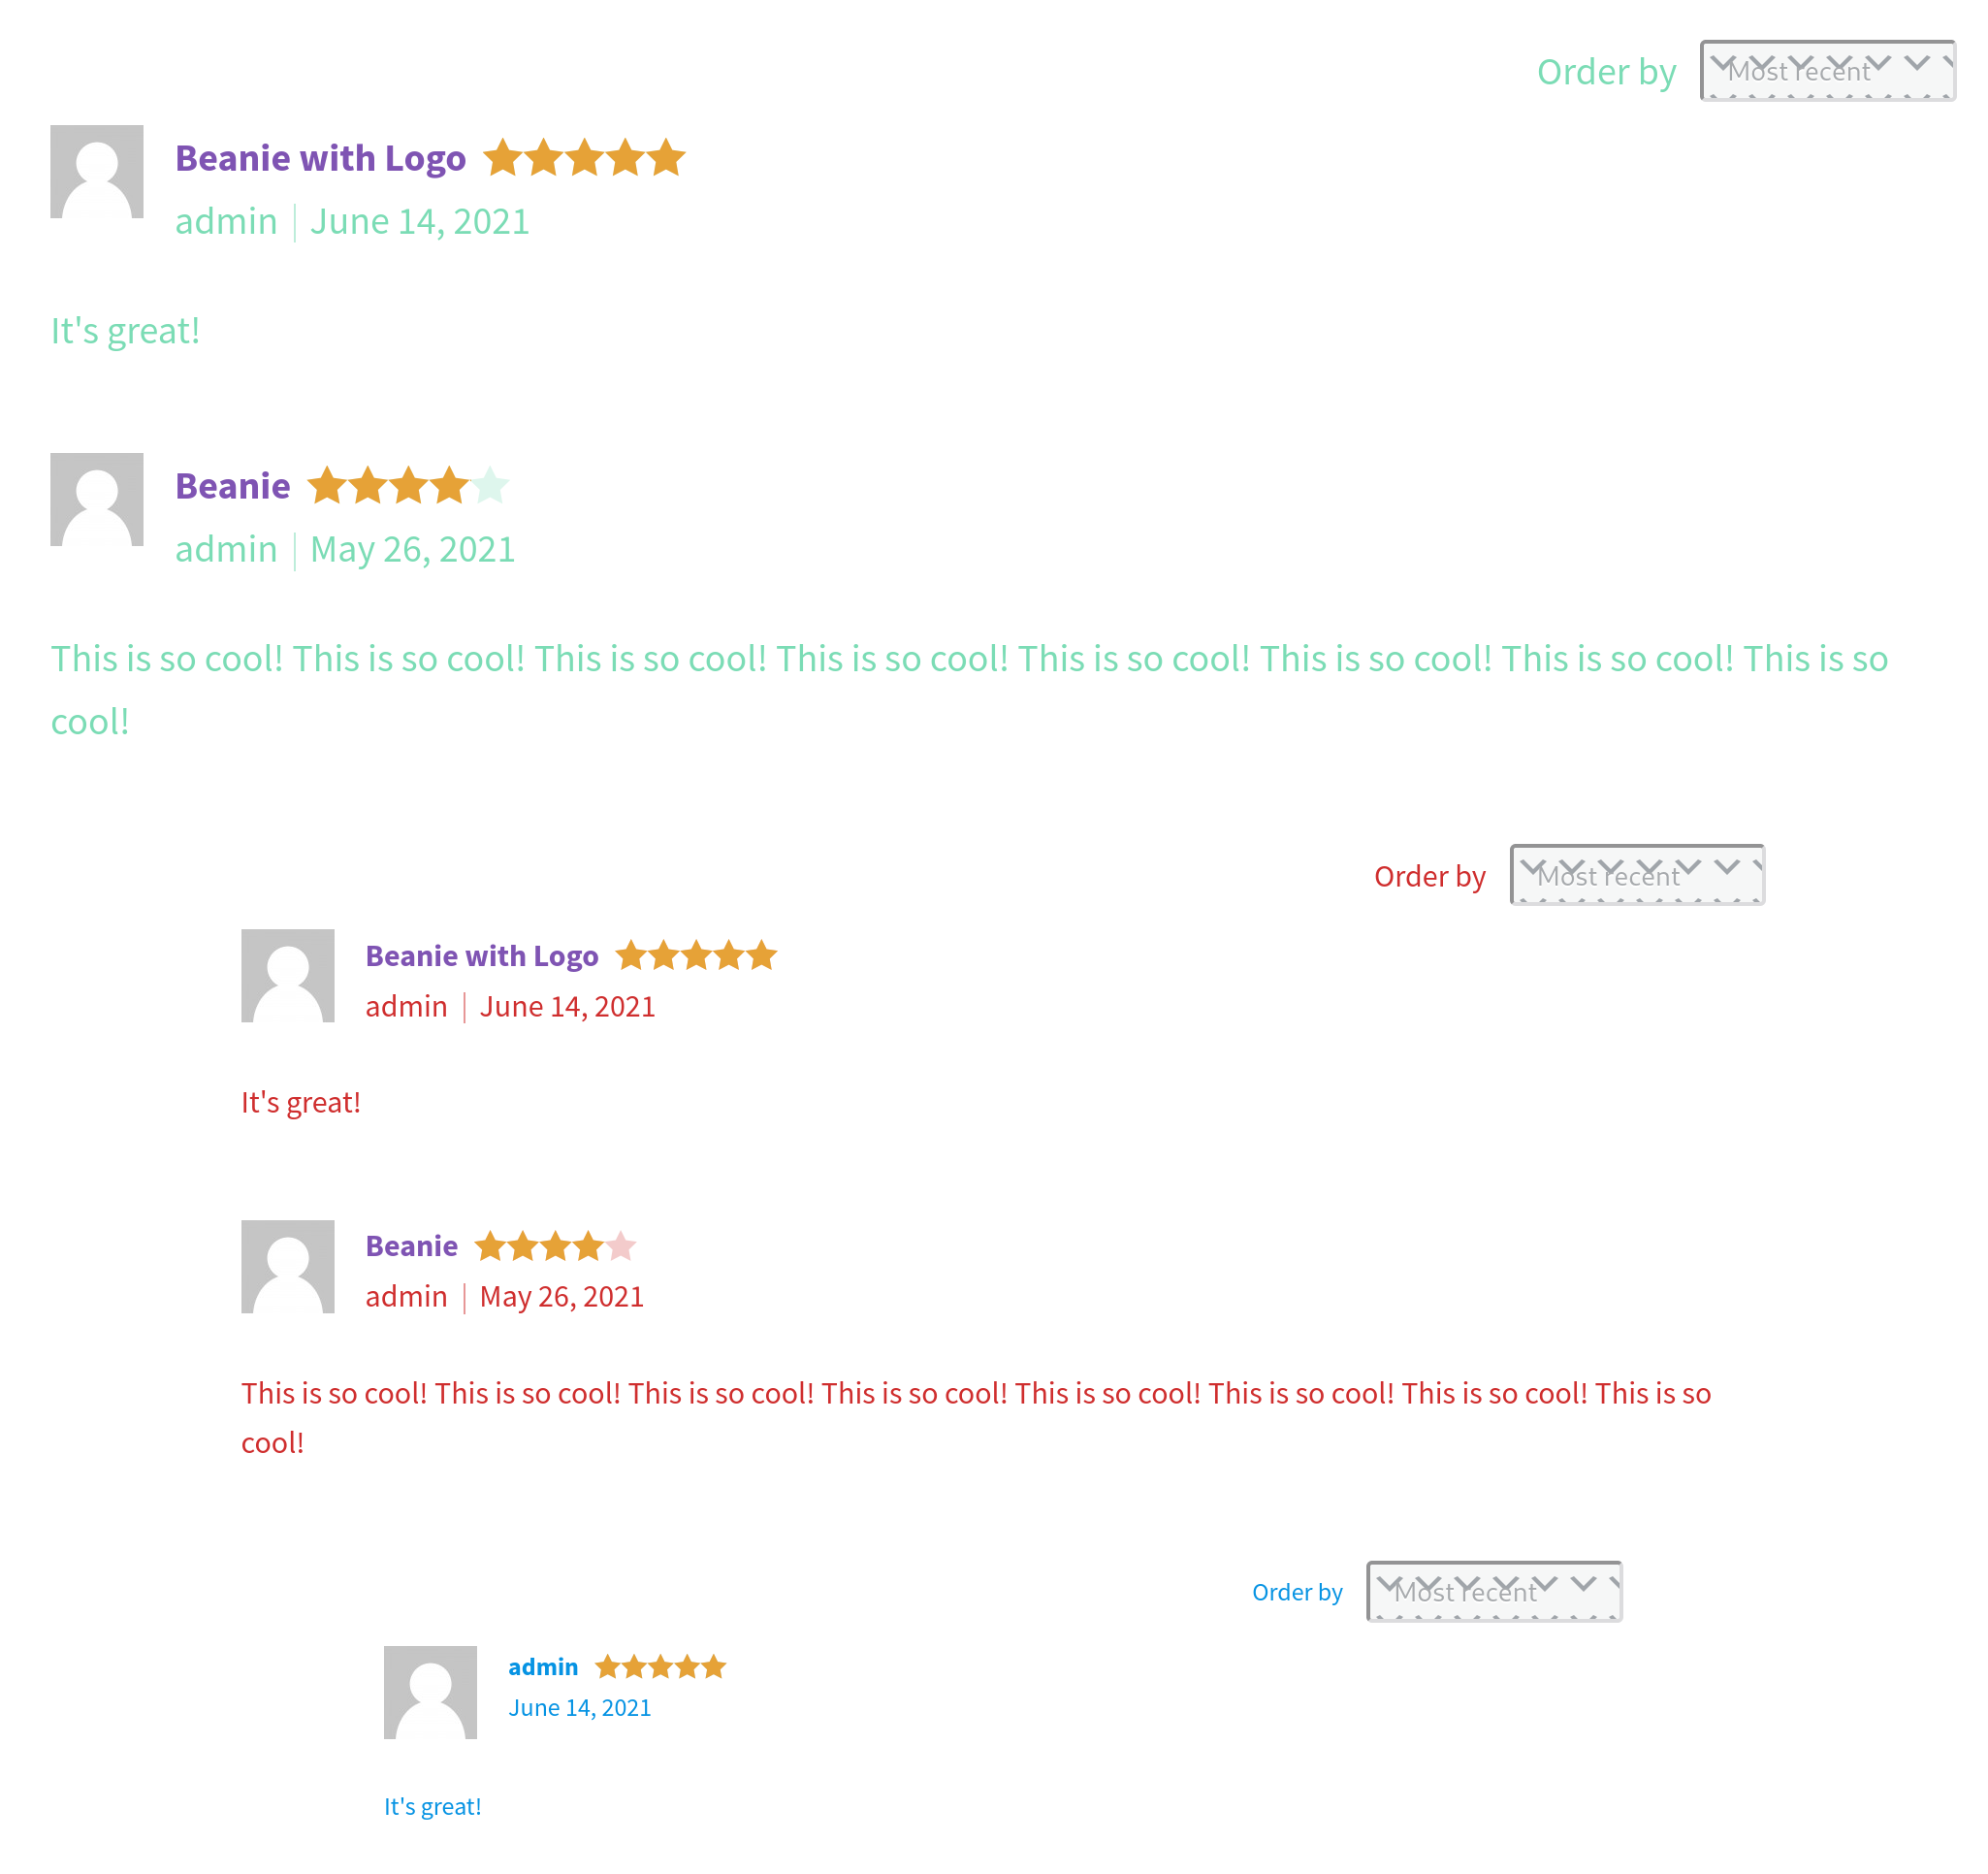
-
-In a block-based theme (ie: TT1 Blocks) with Gutenberg enabled:
-
-- Go to Appearance > Site editor, click on the Global styles icon and verify the All Reviews block is shown and you can tweak its styles.
-- Add the All Reviews block to a post or page.
-- Verify it honors the styles you set in the Site editor.
-- Change the styles in the post/page editor and verify they have priority over the styles from the Site editor.
-- Repeat the process for the Reviews by Category and Reviews by Product blocks.
- 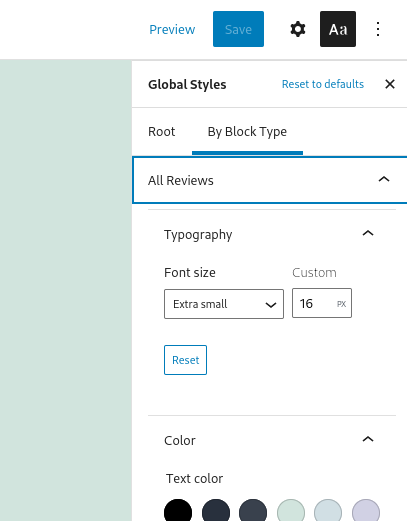.
-
-### Update All Reviews block so it honors 'ratings enabled' and 'show avatars' preferences. ([4764](https://github.com/woocommerce/woocommerce-gutenberg-products-block/pull/4764))
-
-1. In wp-admin, go to _Settings_ > _Discussion_ > _Avatars_ and uncheck _Show Avatars_.
-2. Add an All Reviews block and verify avatars are not shown and instead there is a warning in the sidebar:
-
-
-
-3. In wp-admin, go to _WooCommerce_ > _Settings_ > _Products_ and uncheck _Enable star rating on reviews_.
-4. In the All Reviews block, verify ratings and the _Sort by_ select aren't displayed.
-
-### Fix infinite recursion when removing an attribute filter from the Active filters block. ([4816](https://github.com/woocommerce/woocommerce-gutenberg-products-block/pull/4816))
-
-- Insert All Products, Filter Products by Attribute and Active filter blocks into a page.
-- Publish the page.
-- Go to Frontend on same page which created in above step.
-- Apply filter for any attribute.
-- Verify you can remove attribute filters either using the cross icon next to it or pressing Clear All.
-
-### Products by Category: Moved renderEmptyResponsePlaceholder to separate method to prevent unnecessary rerender. ([4751](https://github.com/woocommerce/woocommerce-gutenberg-products-block/pull/4751))
-
-- Go to a new or existing page and add the "Products by Category" block
-- Select a category with products in it.
-- Select and unselect the block.
-- The block should no longer go into loading state and rerender products again.
-
-### Fix calculation of number of reviews in the Reviews by Category block. ([4729](https://github.com/woocommerce/woocommerce-gutenberg-products-block/pull/4729))
-
-- Add some reviews to some of your products.
-- Create a page and add the Reviews by Category block.
-- Verify the counter shows the correct number of reviews. Take special attention to categories with more than one review and categories with subcategories.
-
-#### Screenshots
-
-| Before | After |
-| -------------------------------------------------------------------------------------------------------------------------- | ------------------------------------------------------------------------------------------------------------------------- |
-| 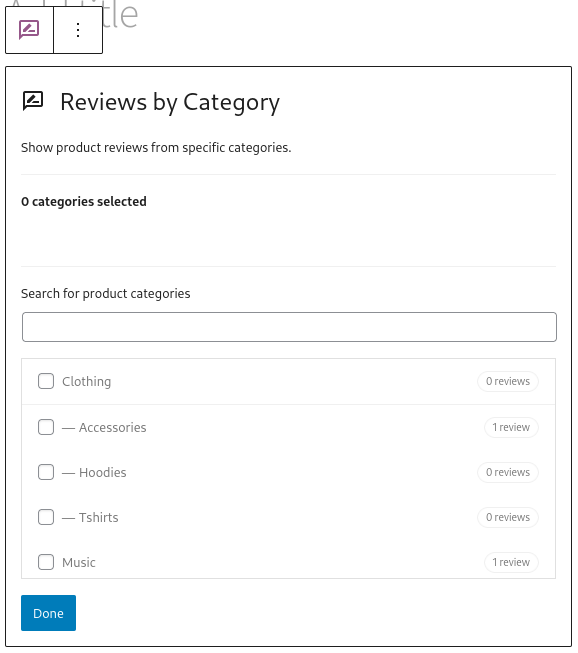 | 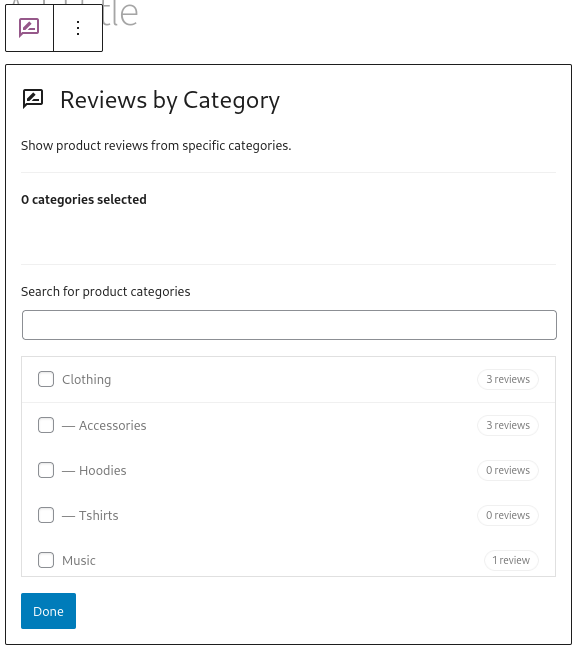 |
-
-### Removed `wp-blocks` dependency from several frontend scripts. ([4767](https://github.com/woocommerce/woocommerce-gutenberg-products-block/pull/4767))
-
-- Open a page with the Cart block.
-- In the browser devtools, open the Network tab.
-- Search for a JS script with this part in the name `blocks/index.min.js`.
-- Verify it isn't there meaning it was loaded.
diff --git a/plugins/woocommerce/client/blocks/docs/internal-developers/testing/releases/610.md b/plugins/woocommerce/client/blocks/docs/internal-developers/testing/releases/610.md
deleted file mode 100644
index 99660e45a49..00000000000
--- a/plugins/woocommerce/client/blocks/docs/internal-developers/testing/releases/610.md
+++ /dev/null
@@ -1,48 +0,0 @@
-# Testing notes and ZIP for release 6.1.0
-
-Zip file for testing: [woocommerce-gutenberg-products-block.zip](https://github.com/woocommerce/woocommerce-gutenberg-products-block/files/7329441/woocommerce-gutenberg-products-block.zip)
-
-## Feature Plugin
-
-### Remove IntersectionObserver shim in favor of dropping IE11 support. ([4808](https://github.com/woocommerce/woocommerce-gutenberg-products-block/pull/4808))
-
-1. Smoke test the Cart block and ensure no errors appear in the console
-
-## Feature plugin and package inclusion in WooCommerce
-
-### Product categories list block hierarchy display fix ([4920](https://github.com/woocommerce/woocommerce-gutenberg-products-block/pull/4920))
-
-1. Create 4 WooCommerce product categories, each one nested under the previous one created, like follows:
-
-- Level 1
- - Level 2
- - Level 3
- - Level 4
-
-2. Add a product to the last category
-3. To a page, add the block Product Categories List
-4. Under the block settings > List settings > Display style, pick "Dropdown"
-5. Again under the block settings > Content, switch On "Show hierarchy"
-6. Save and view page
-
-### Fixed string translations within the All Products Block. ([4897](https://github.com/woocommerce/woocommerce-gutenberg-products-block/pull/4897))
-
-1. Switch to Brazilian Portuguese translation.
-2. View the all products block. Confirm sale badges are translated to "Oferta".
-
-### Filter By Price: Update aria values to be more representative of the actual values presented. ([4839](https://github.com/woocommerce/woocommerce-gutenberg-products-block/pull/4839))
-
-1. Add the Filter By Price block to your All Products page
-2. Turn Voice Over on your Mac (click the power button 3 times to do this)
-3. Move the slider back and forth, the voice should say "Ninety" instead of "Nine thousand" for example.
-
-### Fixed: Filter button from Filter Products by Attribute block is not aligned with the input field. ([4814](https://github.com/woocommerce/woocommerce-gutenberg-products-block/pull/4814))
-
-1. Add the Filter Products by Attribute block and select 'Display Style: Dropdown' and check 'Filter button'.
-2. See the filter button aligned correctly on both editor and front end.
-
-### Prefix the search input id with wc- instead of wp- ([4882](https://github.com/woocommerce/woocommerce-gutenberg-products-block/pull/4882))
-
-1. Add a WordPress search block to a page.
-2. Add a Product search block to the same page.
-3. Go to frontend and open the browser tools console, ensure no errors about elements with non-unique IDs appear (relating to the search box ID).
diff --git a/plugins/woocommerce/client/blocks/docs/internal-developers/testing/releases/620.md b/plugins/woocommerce/client/blocks/docs/internal-developers/testing/releases/620.md
deleted file mode 100644
index 6fc67f4c3b6..00000000000
--- a/plugins/woocommerce/client/blocks/docs/internal-developers/testing/releases/620.md
+++ /dev/null
@@ -1,59 +0,0 @@
-# Testing notes and ZIP for release 6.2.0
-
-Zip file for testing: [woocommerce-gutenberg-products-block.zip](https://github.com/woocommerce/woocommerce-gutenberg-products-block/files/7431561/woocommerce-gutenberg-products-block.zip)
-
-## Feature Plugin
-
-### Cart v2: The cart block, like checkout block, now supports inner blocks that allow for greater customizability. ([4973](https://github.com/woocommerce/woocommerce-gutenberg-products-block/pull/4973))
-
-1. Insert the Cart block into a new page and smoke test the following functionality:
-
-- Confirm you can select inner blocks in the Cart.
-- Change some settings of inner blocks. Preview your changes and make sure they persist on the frontend of your store.
-- Using the Cart block's toolbar switch from the Filled Cart to the Empty Cart. Confirm you can switch back and forth between both states.
-- Change the content of the empty cart. Preview your changes and make sure they persist on the frontend of your store.
-- Add custom classnames. They should persist on all blocks.
-- Change the alignment options. Again, changes should persist.
-- On frontend of your store, you should see a loading indicator before seeing your cart.
-- On frontend of your store, add an item to your cart. Now when you empty your cart, the cart should change to the empty cart state.
-
-### Fix custom classname support for inner checkout blocks. ([4978](https://github.com/woocommerce/woocommerce-gutenberg-products-block/pull/4978))
-
-1. Smoke test the Checkout block.
-2. Confirm you can add classnames to the Checkout block's inner blocks and that they persist on the frontend of your store.
-
-- Select an inner block e.g. the shipping address.
-- In the block's sidebar settings, open the Advanced section.
-- Add additional CSS class(es).
-- Preview the changes on the frontend of your store.
-- Inspect the inner block using your browser's developer tools and confirm the class(es) are present.
-
-### Fix a bug in free orders and trial subscription products. ([4955](https://github.com/woocommerce/woocommerce-gutenberg-products-block/pull/4955))
-
-1. Create a free (\$0) virtual product. Add only this product to the cart.
-2. View the Checkout block on the frontend of your store. The Payment and Express Payment steps shouldn't show.
-3. Place the order. You should not see an error.
-
-## Feature plugin and package inclusion in WooCommerce
-
-### Improve accessibility for the editor view of the Product search block. ([4905](https://github.com/woocommerce/woocommerce-gutenberg-products-block/pull/4905))
-
-1. Create a new post and add the Product Search block.
-2. Start a Screen reader e.g. toggle VoiceOver on macOS by pressing Command+F5.
-3. Select the Search label block and confirm that it's announced as Search label.
-
-### Remove duplicate attributes in saved block HTML. ([4941](https://github.com/woocommerce/woocommerce-gutenberg-products-block/pull/4941))
-
-1. Smoke test that all WooCommerce Blocks render on the frontend of your store.
-2. Add the Checkout block to a page and save. Smoke test that it works as expected both in the editor and on the frontend of your store.
-
-### Fix render error of Filter by Attribute block when no attribute is selected. ([4847](https://github.com/woocommerce/woocommerce-gutenberg-products-block/pull/4847))
-
-1. Ensure your store has no product attributes set up. You can delete them on the Products > Attributes page.
-2. Create a new product attribute with no products assigned to it.
-3. Create a new page and add the Filter by Attribute block.
-4. Click the Done button at the bottom of the block without selecting any attribute.
-5. Confirm a related warning message appears.
-6. Edit the block using the pencil icon in the block toolbar.
-7. Select the previously created attribute that isn't assigned to any product.
-8. Confirm a different warning message appears.
diff --git a/plugins/woocommerce/client/blocks/docs/internal-developers/testing/releases/630.md b/plugins/woocommerce/client/blocks/docs/internal-developers/testing/releases/630.md
deleted file mode 100644
index 7d6fbd2ac99..00000000000
--- a/plugins/woocommerce/client/blocks/docs/internal-developers/testing/releases/630.md
+++ /dev/null
@@ -1,112 +0,0 @@
-# Testing notes and ZIP for release 6.3.0
-
-Zip file for testing: [woocommerce-gutenberg-products-block.zip](https://github.com/woocommerce/woocommerce-gutenberg-products-block/files/7552325/woocommerce-gutenberg-products-block.zip)
-
-## Feature Plugin
-
-### Improve readability of terms and condition text by not displaying the text justified. ([5120](https://github.com/woocommerce/woocommerce-gutenberg-products-block/pull/5120))
-
-1. Create a test page, add the checkout block and save the page.
-2. Add a short custom text to the terms and conditions section.
-3. Verify that the terms and conditions text is left-aligned and contains even spacing between the words.
-
-### Partially fix missing translations in the Checkout block. ([5020](https://github.com/woocommerce/woocommerce-gutenberg-products-block/pull/5020))
-
-1. Set the site language to Spanish.
-2. Download the translation files via Dashboard → Updates.
-3. Create a test page, add the checkout block and save the page.
-4. Verify that all texts of the checkout block are available in Spanish in the editor.
-
-⚠️ Please note that some strings are not translated in the frontend. This problem will be addressed with ([5112](https://github.com/woocommerce/woocommerce-gutenberg-products-block/pull/5112)).
-
-### Make order note block removable ([5139](https://github.com/woocommerce/woocommerce-gutenberg-products-block/pull/5139))
-
-1. Create a test page, add the Checkout block and save the page.
-2. Remove the order note block and verify that it will not be added again.
-3. Go to the frontend and verify that the order note block is not visible.
-
-## Feature plugin and package inclusion in WooCommerce
-
-### FSE: Add basic single product block template. ([5054](https://github.com/woocommerce/woocommerce-gutenberg-products-block/pull/5054))
-
-1. Install and activate version 11.9.1 of [the Gutenberg plugin](https://wordpress.org/plugins/gutenberg/).
-2. Install and activate a FSE enabled theme, such as [the TT1 Blocks theme](https://wordpress.org/themes/tt1-blocks/).
-3. Load the Site Editor (Appearance → Editor). Open the left editor sidebar navigation by clicking the WordPress logo in the top left. In the Templates > General Templates section select the `Single Product Page` template.
-4. Confirm you can load the template in the editor and it looks as expected in large/small viewports.
-5. Confirm you can add blocks to the template and saving works as expected.
-6. Load a single product page (e.g. `/product/album/`) on the Frontend of your store. Confirm the template is loaded and your modifications from the previous step are visible.
-
-### FSE: Add basic product archive block template. ([5049](https://github.com/woocommerce/woocommerce-gutenberg-products-block/pull/5049))
-
-1. Install and activate version 11.9.1 of [the Gutenberg plugin](https://wordpress.org/plugins/gutenberg/).
-2. Install and activate a FSE enabled theme, such as [the TT1 Blocks theme](https://wordpress.org/themes/tt1-blocks/).
-3. Load the Site Editor (Appearance → Editor). Open the left editor sidebar navigation by clicking the WordPress logo in the top left. In the Templates > General Templates section select the `Product Archive Page` template.
-4. Confirm you can load the template in the editor and it looks as expected in large/small viewports.
-5. Confirm you can add blocks to the template and saving works as expected.
-
-### FSE: Add basic taxonomy block templates. ([5063](https://github.com/woocommerce/woocommerce-gutenberg-products-block/pull/5063))
-
-1. Install and activate version 11.9.1 of [the Gutenberg plugin](https://wordpress.org/plugins/gutenberg/).
-2. Install and activate a FSE enabled theme, such as [the TT1 Blocks theme](https://wordpress.org/themes/tt1-blocks/).
-3. Load the Site Editor (Appearance → Editor). Open the left editor sidebar navigation by clicking the WordPress logo in the top left. In the Templates > General Templates section select the `Product Category Page` template.
-4. Confirm you can load the template in the editor and it looks as expected in large/small viewports.
-5. Confirm you can add blocks to the template and saving works as expected.
-6. Repeat steps 3-5 for the `Product Tag Page` template.
-
-### Add placeholder text when modifying product search input in the editor. ([5122](https://github.com/woocommerce/woocommerce-gutenberg-products-block/pull/5122))
-
-1. Add the Product Search block to any page in the editor.
-2. Delete the “Search Products…” value from the Search input.
-3. “Enter search placeholder text” should be displayed in the input as a placeholder.
-4. The text should disappear as you start typing.
-
-### Improve the product images placeholder display by adding a light gray border to it. ([4950](https://github.com/woocommerce/woocommerce-gutenberg-products-block/pull/4950))
-
-1. Create a product with no product image.
-2. Create a test page and add the Newest Products block.
-3. Verify that the placeholder image has a visible border.
-
-### Improve accessibility by using self-explaining edit button titles. ([5113](https://github.com/woocommerce/woocommerce-gutenberg-products-block/pull/5113))
-
-1. Create a test page and add the following blocks to it:
- - Featured Category block
- - Featured Product block
- - Hand-picked Products block
- - Products by Category block
- - Products by Attribute block
- - Reviews by Product block
- - Reviews by Category block
- - Products by Tag block
- - All products block
-2. Click on the `edit` button of each block and verify that the button text corresponds to the value of the following list:
- - Featured Category: Edit selected category
- - Featured Product: Edit selected product
- - Hand-picked Products: Edit selected products
- - Products by Category: Edit selected categories
- - Products by Attribute: Edit selected attributes
- - Reviews by Product: Edit selected product
- - Reviews by Category: Edit selected categories
- - Products by Tag: Edit selected tags
- - All products: Edit inner product layout
-
-Example of button text for the Hand-picked Products block:
-
-
-
-### Fix label alignment of the product search in the editor. ([5072](https://github.com/woocommerce/woocommerce-gutenberg-products-block/pull/5072))
-
-1. Create a test page, add the Product Search block and save the page.
-2. Verify that the search label is vertically aligned with the search input field in the editor side and in the frontend side.
-3. Verify that the right button is aligned with the input field.
-
-### Fix duplicate queries in product grids. ([5002](https://github.com/woocommerce/woocommerce-gutenberg-products-block/pull/5002))
-
-1. Add multiple product grid blocks to a page, e.g. `Products by Category` and `Products by Category`.
-2. Ensure there are some variable products visible.
-3. Check the product grid blocks render correctly on the frontend.
-
-### Fix sale badge alignment on smaller screen. ([5061](https://github.com/woocommerce/woocommerce-gutenberg-products-block/pull/5061))
-
-1. Create a test page, add the All Products block and save the page.
-2. Simulate a screen that has a width between 480px and 600px.
-3. Verify that the sale badge is aligned on the right.
diff --git a/plugins/woocommerce/client/blocks/docs/internal-developers/testing/releases/631.md b/plugins/woocommerce/client/blocks/docs/internal-developers/testing/releases/631.md
deleted file mode 100644
index 2e39d8bec6f..00000000000
--- a/plugins/woocommerce/client/blocks/docs/internal-developers/testing/releases/631.md
+++ /dev/null
@@ -1,15 +0,0 @@
-# Testing notes and ZIP for release 6.3.1
-
-Zip file for testing: [woocommerce-gutenberg-products-block.zip](https://github.com/woocommerce/woocommerce-gutenberg-products-block/files/7555061/woocommerce-gutenberg-products-block.zip)
-
-## Feature Plugin
-
-### Fix ‘Country is required’ error on the Cart block when updating shipping address ([5129](https://github.com/woocommerce/woocommerce-gutenberg-products-block/pull/5129))
-
-1. Add a product to the cart and go to the cart page.
-2. Provide a shipping address in the shipping calculator and click the `Update` button.
-3. Provide a shipping address from a different country and click the `Update` button again.
-4. Verify that the new shipping address is visible.
-5. Verify that the error `Country is required` is not visible.
-6. Go to the checkout page and verify that the new shipping address is visible.
-7. Finalize the order and verify that the new shipping address is visible on the order details.
diff --git a/plugins/woocommerce/client/blocks/docs/internal-developers/testing/releases/632.md b/plugins/woocommerce/client/blocks/docs/internal-developers/testing/releases/632.md
deleted file mode 100644
index 8b2d34a4381..00000000000
--- a/plugins/woocommerce/client/blocks/docs/internal-developers/testing/releases/632.md
+++ /dev/null
@@ -1,14 +0,0 @@
-# Testing notes and ZIP for release 6.3.2
-
-Zip file for testing: [woocommerce-gutenberg-products-block.zip](https://github.com/woocommerce/woocommerce-gutenberg-products-block/files/7556942/woocommerce-gutenberg-products-block.zip)
-
-## Feature plugin and package inclusion in WooCommerce
-
-### Legacy Template Block: allow users to delete the block. ([5176](https://github.com/woocommerce/woocommerce-gutenberg-products-block/pull/5176))
-
-1. Install and activate version 11.9.1 of [the Gutenberg plugin](https://wordpress.org/plugins/gutenberg/).
-2. Install and activate a FSE enabled theme, such as [the TT1 Blocks theme](https://wordpress.org/themes/tt1-blocks/).
-3. Load the Site Editor (Appearance → Editor). Open the left editor sidebar navigation by clicking the WordPress logo in the top left. In the Templates → General Templates section select the `Product Archive Page` template.
-4. Confirm you can load the template in the editor and it looks as expected in large/small viewports.
-5. Select the Legacy Template Block and click `Remove WooCommerce Legacy Template`.
-6. Confirm that the block gets deleted in the editor.
diff --git a/plugins/woocommerce/client/blocks/docs/internal-developers/testing/releases/633.md b/plugins/woocommerce/client/blocks/docs/internal-developers/testing/releases/633.md
deleted file mode 100644
index 928e81e0d7f..00000000000
--- a/plugins/woocommerce/client/blocks/docs/internal-developers/testing/releases/633.md
+++ /dev/null
@@ -1,14 +0,0 @@
-# Testing notes and ZIP for release 6.3.3
-
-Zip file for testing: [woocommerce-gutenberg-products-block.zip](https://github.com/woocommerce/woocommerce-gutenberg-products-block/files/7601543/woocommerce-gutenberg-products-block.zip)
-
-## Feature plugin and package inclusion in WooCommerce
-
-### Check that functions gutenberg_supports_block_templates and gutenberg_get_block_template exist before usages. ([5183](https://github.com/woocommerce/woocommerce-gutenberg-products-block/pull/5183))
-
-1. Make sure Gutenberg is NOT active on your site
-2. Install the [WordPress Beta Tester plugin](https://wordpress.org/plugins/wordpress-beta-tester/).
-3. Go to Tools > Beta Testing and select "Bleeding edge" as the update channel.
-4. Go to Dashboard > Updates and click "Update to latest 5.9 nightly".
-5. After updating to e.g. WP 5.9-alpha-52211 navigate to `/shop`.
-6. Verify there is no fatal error in `/shop`.
diff --git a/plugins/woocommerce/client/blocks/docs/internal-developers/testing/releases/640.md b/plugins/woocommerce/client/blocks/docs/internal-developers/testing/releases/640.md
deleted file mode 100644
index f75ed52f594..00000000000
--- a/plugins/woocommerce/client/blocks/docs/internal-developers/testing/releases/640.md
+++ /dev/null
@@ -1,68 +0,0 @@
-# Testing notes and ZIP for release 6.4.0
-
-Zip file for testing: [woocommerce-gutenberg-products-block.zip](https://github.com/woocommerce/woocommerce-gutenberg-products-block/files/7581080/woocommerce-gutenberg-products-block.zip)
-
-## Feature Plugin
-
-### Switch variables round in the error message of `mustContain` validation function. ([5155](https://github.com/woocommerce/woocommerce-gutenberg-products-block/pull/5155))
-
-1. Install the [Simple Custom CSS and JS](https://wordpress.org/plugins/custom-css-js/) plugin and, inside its settings, add this JS code to the footer:
-
-```js
-wc.blocksCheckout.__experimentalRegisterCheckoutFilters( 'my-test-extension', {
- subtotalPriceFormat: ( value ) => 'test',
-} );
-```
-
-2. Visit the Cart or Checkout block and ensure the error message reads `Error: Returned value must include "<price/>", you passed "test"`
-3. Change the code to
-
-```js
-wc.blocksCheckout.__experimentalRegisterCheckoutFilters( 'my-test-extension', {
- subtotalPriceFormat: ( value ) => '<price/>test',
-} );
-```
-
-4. Reload the page and verify the Cart and Checkout block loads correctly.
-
-
-
-### Lazy load missing translation files. ([5112](https://github.com/woocommerce/woocommerce-gutenberg-products-block/pull/5112))
-
-1. Switch the site language to Spanish.
-2. Update the translations via `WP Admin → Dashboard → Translations → Update Translations`.
-3. Create a test page, add the Checkout block and save it.
-4. Ensure that the _"Terms and conditions"_ text in the editor is in Spanish.
-5. Look up the frontend and verify that the _"Terms and conditions"_ text is in Spanish (see screenshot).
-6. Switch the site language to German and repeat steps 2. until 5. (texts should then appear in German)
-
-
-
-
-
-### Checkout Terms Block: Fix Terms and Conditions checkbox position in editor. ([5191](https://github.com/woocommerce/woocommerce-gutenberg-products-block/pull/5191))
-
-1. Go to the post editor.
-2. Add Checkout block.
-3. Select **Terms and Conditions** child block.
-4. Activate `Require checkbox` display option.
-5. Confirm that the checkbox is aligned to the top of the paragraph.
-
-
-
-### Fix manual entry within Quantity Inputs. ([5197](https://github.com/woocommerce/woocommerce-gutenberg-products-block/pull/5197))
-
-- Add a product to your cart.
-- Go to a page with the Cart block.
-- Try typing a quantity into the line item.
-- Totals should update.
-- Try typing a letter. Input should be ignored and reset to `1`.
-
-## Feature plugin and package inclusion in WooCommerce
-
-### Feature gate WC Block Templates to WC v6.0.0. ([5210](https://github.com/woocommerce/woocommerce-gutenberg-products-block/pull/5210))
-
-1. Install and activate version 11.9.1 of [the Gutenberg plugin](https://wordpress.org/plugins/gutenberg/).
-2. Install and activate a FSE enabled theme, such as [the TT1 Blocks theme](https://wordpress.org/themes/tt1-blocks/).
-3. In WC 5.9, check that block templates are not loading. You can verify that going to a single product page (ie: Cap) and verify that contents don't appear twice.
-4. Also check the templates are not loading in the Site Editor (Appearance > Editor > Templates > General templates -- if this last folder doesn't exist, that means this is testing well).
diff --git a/plugins/woocommerce/client/blocks/docs/internal-developers/testing/releases/650.md b/plugins/woocommerce/client/blocks/docs/internal-developers/testing/releases/650.md
deleted file mode 100644
index 1e74a28fda5..00000000000
--- a/plugins/woocommerce/client/blocks/docs/internal-developers/testing/releases/650.md
+++ /dev/null
@@ -1,33 +0,0 @@
-# Testing notes and ZIP for release 6.5.0
-
-Zip file for testing: [woocommerce-gutenberg-products-block.zip](https://github.com/woocommerce/woocommerce-gutenberg-products-block/files/7661998/woocommerce-gutenberg-products-block.zip)
-
-## Feature Plugin
-
-### Add global style for Product Categories List block ([5133](https://github.com/woocommerce/woocommerce-gutenberg-products-block/pull/5133))
-
-1. Install and enable Gutenberg plugin
-2. Install and enable a block theme (e.g. TT1 Blocks)
-3. Add the "Product Categories List" block to a post
-4. Verify you can change the text color, font size, and line-height.
-5. Save
-6. Go on the page and check if there are changes
-7. Reset to default
-8. In WP Admin go to the Site Editor via the menu item.
-9. Click on the Global styles icon
-10. Verify the Product Categories List block is shown, and you can tweak its styles
-11. Save
-12. Go on the page created earlier and check if all styles are applied correctly
-13. Edit previous post/page again
-14. Change again text color, font size, and line-height
-15. Save
-16. Check if these styles have priority over the styles from the Site editor.
-
-## Feature plugin and package inclusion in WooCommerce
-
-### Fix Featured Product Search not working for large stores ([5156](https://github.com/woocommerce/woocommerce-gutenberg-products-block/pull/5156))
-
-1. Ensure you have a large catalog of above 100 products (or download [this](https://github.com/woocommerce/woocommerce-gutenberg-products-block/files/7666753/100_wc_products.csv) CSV)
-2. Insert Featured Product Block in the editor
-3. Enter a search term for a product not visible in the list (if you've downloaded the above CSV try WordPress Pennant)
-4. Should see relevant search results based on search
diff --git a/plugins/woocommerce/client/blocks/docs/internal-developers/testing/releases/660.md b/plugins/woocommerce/client/blocks/docs/internal-developers/testing/releases/660.md
deleted file mode 100644
index 743713984ec..00000000000
--- a/plugins/woocommerce/client/blocks/docs/internal-developers/testing/releases/660.md
+++ /dev/null
@@ -1,148 +0,0 @@
-# Testing notes and ZIP for release 6.6.0
-
-Zip file for testing: [woocommerce-gutenberg-products-block.zip](https://github.com/woocommerce/woocommerce-gutenberg-products-block/files/7755553/woocommerce-gutenberg-products-block.zip)
-
-## Feature Plugin
-
-### Fix You attempted to edit an item that doesn't exist error on WordPress 5.8 [#5425](https://github.com/woocommerce/woocommerce-gutenberg-products-block/pull/5425)
-
-Test the following under these scenarios:
-
-- WordPress 5.8 and the Gutenberg plugin
-- WordPress 5.8 without the Gutenberg plugin
-- WordPress 5.9 and the Gutenberg plugin
-
-1. Open the FSE editor
-2. From the sidebar on the left click on Templates.
-3. Click on one of these templates Product Category Page, Product Archive Page, Product Archive Page or Single Product Page.
-4. Edit the template and save it.
-5. Go back (not refresh the page, because you will reproduce a known bug (#5426).
-6. Reopen the same template and check if the changes are still there.
-7. Check if the template works correctly on the frontend side too.
-
-### Fix modified block templates to have a user friendly Plugin name. [#5420](https://github.com/woocommerce/woocommerce-gutenberg-products-block/pull/5420)
-
-1. Modify one of the WooCommerce block templates via the Site Editor. Save it.
-2. Load the templates screen and ensure the Added By column value says WooCommerce and not woocommerce
-3. Ensure the modified version of the template loads in the Site Editor and on the frontend.
-
-### Check if the current theme has a product-archive block template in the absence of a product taxonomy block template. [#5380](https://github.com/woocommerce/woocommerce-gutenberg-products-block/pull/5380)
-
-Add the following block markup to the following templates so you know which one is getting rendered:
-
-1. woo-blocks/archive-product.html
-2. woo-blocks/taxonomy-product_tag.html
-3. woo-blocks/taxonomy-product_cat.html
-
-Template:
-
-```html
-<!-- wp:paragraph -->
-<p>Woo Blocks: [template-filename].html</p>
-<!-- /wp:paragraph -->
-```
-
-1. Install Gutenberg plugin and Blockbase theme to activate Site Editor and FSE.
-2. Go to a product category page and check that woo-blocks/taxonomy-product_cat.html is the template being used.
-3. Duplicate woo-blocks/archive-product.html into blockbase/block-templates/ and change the markup you added above to say "Blockbase" instead of "Woo Blocks" so we can differentiate.
-4. Reload the product category page, product tag page, and main shop page/product archive page and check that the archive-product.html from Blockbase is being loaded.
-5. Go into Site Editor > All Templates and check that "Product Archive Page", "Product Category Page" and "Product Tag Page" are all in the list and it states they're being loaded from the Blockbase theme
-6. Customise the Product Category Page template and save your changes
-7. Reload the product category page on the frontend and check the customised version of this template is being rendered.
-
-### Switch to correct view if inner block is selected [#5358](https://github.com/woocommerce/woocommerce-gutenberg-products-block/pull/5358)
-
-1. Insert or edit the Cart block.
-2. Open the block navigation list panel.
-3. Ensure the current view is the Filled Cart.
-4. Select an inner block of the Empty Cart parent block. The view should change to "empty cart".
-
-### Fix extra network request on cart [#5394](https://github.com/woocommerce/woocommerce-gutenberg-products-block/pull/5394)
-
-To test this, you must open developer tools and look at the network requests sent.
-
-1. View the cart page on the frontend.
-2. There should be no requests (batch or otherwise) to update customer data once the cart is mounted. Look for calls to the /batch endpoint (filter by XHR requests).
-
-### Sync order data with cart data when cart is updated from any route [5379](https://github.com/woocommerce/woocommerce-gutenberg-products-block/pull/5379)
-
-Ensure you have a store with products and at least 2 shipping methods.
-
-1. Add an item to the cart.
-2. Visit the checkout page.
-3. In another tab, open admin and view the draft order. Note the shipping method.
-4. Leave checkout and go to the cart page. Change the shipping method.
-5. In your admin tab, refresh the order. Confirm the shipping method + totals all updated.
-6. Smoke test checkout/cart to ensure totals, taxes, items, and fee totals all make sense and change when the cart changes.
-
-### Trigger validation on change if the input is not focussed [#5373](https://github.com/woocommerce/woocommerce-gutenberg-products-block/pull/5373)
-
-1. In a clean browser session with no address, add an item to the cart.
-2. Go to Cart block on the front end.
-3. Open the shipping calculator form and use browser autofill to fill out the address fields.
-4. Click update - you should see no inline validation errors and shipping rates should update.
-
-### Revise checkout payment statuses to avoid data loss on error [#5350](https://github.com/woocommerce/woocommerce-gutenberg-products-block/pull/5350)
-
-This requires Stripe and a saved payment method.
-
-1. Go to checkout and select a saved method for payment.
-2. Leave a required address field blank and try to place an order. Validation errors should be displayed.
-3. Correct mistake and fill out required fields, then place the order again.
-4. The order should go through without an error.
-
-### Add error message for fetch errors on checkout [#5341](https://github.com/woocommerce/woocommerce-gutenberg-products-block/pull/5341)
-
-1. Go to checkout and open network tools (in browser development tools).
-2. Place an order using an invalid postcode so that an error is returned. Confirm postcode error is shown.
-3. Right click the checkout/ request in browser tools and block it.
-4. Place order again and it should give you a network error, for example: "You are probably offline. Please try placing your order again."
-
-### Remove legacy shipping_phone handling in the StoreAPI [#5326](https://github.com/woocommerce/woocommerce-gutenberg-products-block/pull/5326)
-
-1. Go through the checkout flow with a new address, taking note of your billing and shipping phone number.
-2. Confirm the address persists to the order.
-3. Confirm the billing and shipping phone numbers are correct.
-
-### Remove full-width mode from cart and checkout block [#5315](https://github.com/woocommerce/woocommerce-gutenberg-products-block/pull/5315)
-
-1. Create a test page with the cart block.
-2. Verify that both the Cart, the Filled Cart and the Empty Cart only show the alignment options None and Wide width.
-3. Create a test page with the checkout block.
-4. Verify that only the alignment options None and Wide width are available.
-
-### Fix saving WooCommerce templates in WP 5.9 beta 3 ([5408](https://github.com/woocommerce/woocommerce-gutenberg-products-block/pull/5408))
-
-1. With WP 5.9 beta 3 and Gutenberg disabled, go to Appearance > Editor.
-2. Edit one of the WooCommerce templates and try to save it.
-3. Verify the template is saved without errors.
-4. Repeat the process with Gutenberg enabled and verify it works as well.
-
-### Fix required scripts not loading for WC block templates. ([5346](https://github.com/woocommerce/woocommerce-gutenberg-products-block/pull/5346))
-
-1. Install a Block Theme such as [TT1](https://en-gb.wordpress.org/themes/tt1-blocks/) and the [Gutenberg plugin](https://wordpress.org/plugins/gutenberg/).
-2. Load the product page of a variable product.
-3. Change some of the options (such as colour) on the variable product and check that the image in the product gallery updates to show the correct image for that variant.
-4. Clicking "Add to cart" should successfully add the product to the cart.
-
-### Fix reverting WC templates. ([5342](https://github.com/woocommerce/woocommerce-gutenberg-products-block/pull/5342))
-
-1. With WC 6.0 or later, Gutenberg and a block theme installed, go to Appearance > Editor.
-2. Go to the Templates page and edit one of the WooCommerce templates (ie: Single Product Page).
-3. In the frontend, verify the changes you just saved are applied.
-4. Go back to the Templates page and press on _Clear Customizations_ of the template you just edited.
-5. Verify there is no error and the changes have been reverted in the frontend.
-6. Repeat the steps above with WP 5.9 beta without Gutenberg enabled.
-
-### Fix WC templates loading for WP 5.9 without Gutenberg plugin. ([5335](https://github.com/woocommerce/woocommerce-gutenberg-products-block/pull/5335))
-
-1. Make sure you have WP 5.9 or above.
-2. Install a Block Theme such as [TT1](https://en-gb.wordpress.org/themes/tt1-blocks/).
-3. Make sure you can load the list of Block Templates in the Appearance > Site Editor
-
-### Make it so WooCommerce template names are not editable ([5385](https://github.com/woocommerce/woocommerce-gutenberg-products-block/pull/5385))
-
-1. With WC 6.0 beta 3 and a block theme installed, go to Appearance > Editor.
-2. Go to the Templates page and edit one of the WooCommerce templates (ie: Single Product Page).
-3. Save and refresh the page.
-4. Verify the template name is not editable.
diff --git a/plugins/woocommerce/client/blocks/docs/internal-developers/testing/releases/670.md b/plugins/woocommerce/client/blocks/docs/internal-developers/testing/releases/670.md
deleted file mode 100644
index 41d23b483d4..00000000000
--- a/plugins/woocommerce/client/blocks/docs/internal-developers/testing/releases/670.md
+++ /dev/null
@@ -1,87 +0,0 @@
-# Testing notes and ZIP for release 6.7.0
-
-Zip file for testing: [woocommerce-gutenberg-products-block.zip](https://github.com/woocommerce/woocommerce-gutenberg-products-block/files/7802539/woocommerce-gutenberg-products-block.zip)
-
-## Feature Plugin
-
-### Fixed an issue where the checkout address fields would be blank for logged in customers. ([5473](https://github.com/woocommerce/woocommerce-gutenberg-products-block/pull/5473))
-
-1. While logged in, with a customer than has checked out before, visit the Checkout block page
-2. Confirm shipping address fields are populated
-3. Toggle the `Different billing address` box. Confirm that the billing fields are populated.
-4. Finish your purchase successfully
-
-### Prevent a 0 value shipping price being shown in the Checkout if no shipping methods are available. ([5444](https://github.com/woocommerce/woocommerce-gutenberg-products-block/pull/5444))
-
-| Before | After |
-| -------------------------------------------------------------------------------------------------------------- | -------------------------------------------------------------------------------------------------------------- |
-| 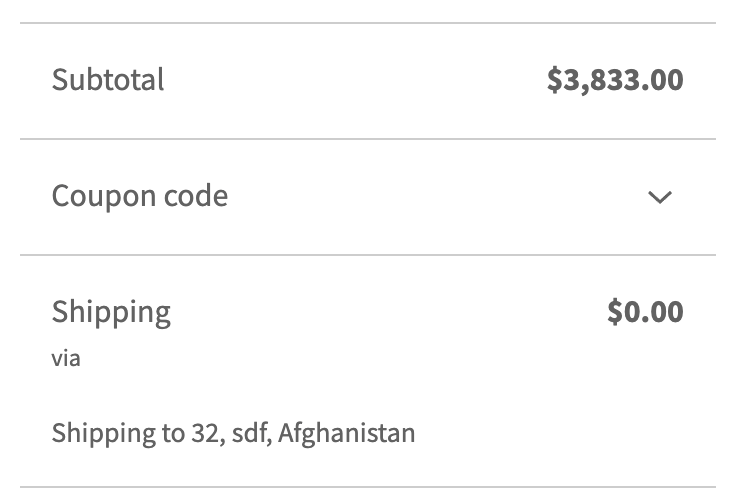 | 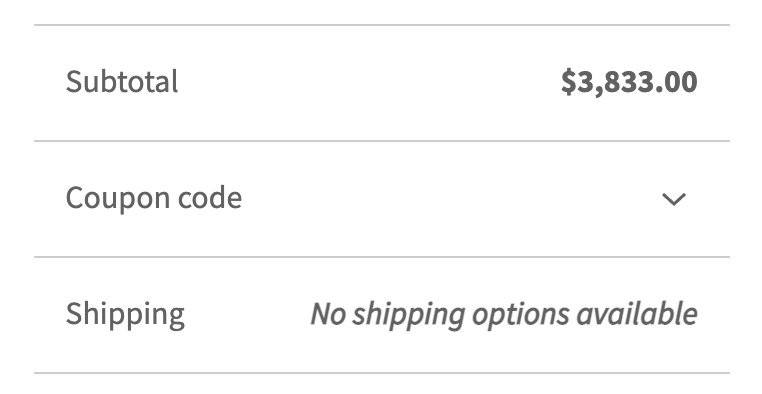 |
-
-1. Go to WooCommerce > Settings > Shipping and remove all shipping methods, including shipping methods for `Locations not covered by your other zones`.
-2. Add a shipping zone for a specific country, for example USA.
-3. Add some methods to this zone, free shipping and flat rate are fine.
-4. Add some items to the cart.
-5. Go to the Cart.
-6. Check you can still use the shipping calculator.
-7. Check that the shipping rates show when using a USA address.
-8. Check the error shows when using an address from another country, e.g. UK.
-9. Go to the Checkout block.
-10. Notice the shipping subtotal does not contain a price if your address is in an invalid country.
-11. Change country on the Checkout form.
-12. Notice that a shipping price is only shown when the address is in a valid country.
-13. Try changing country back and forth and selecting different shipping rates.
-
-### Ensure that the translation of the "Proceed to Checkout" button is working. ([5453](https://github.com/woocommerce/woocommerce-gutenberg-products-block/pull/5453))
-
-| Before | After |
-| -------------------------------------------------------------------------------------------------------------- | -------------------------------------------------------------------------------------------------------------- |
-| 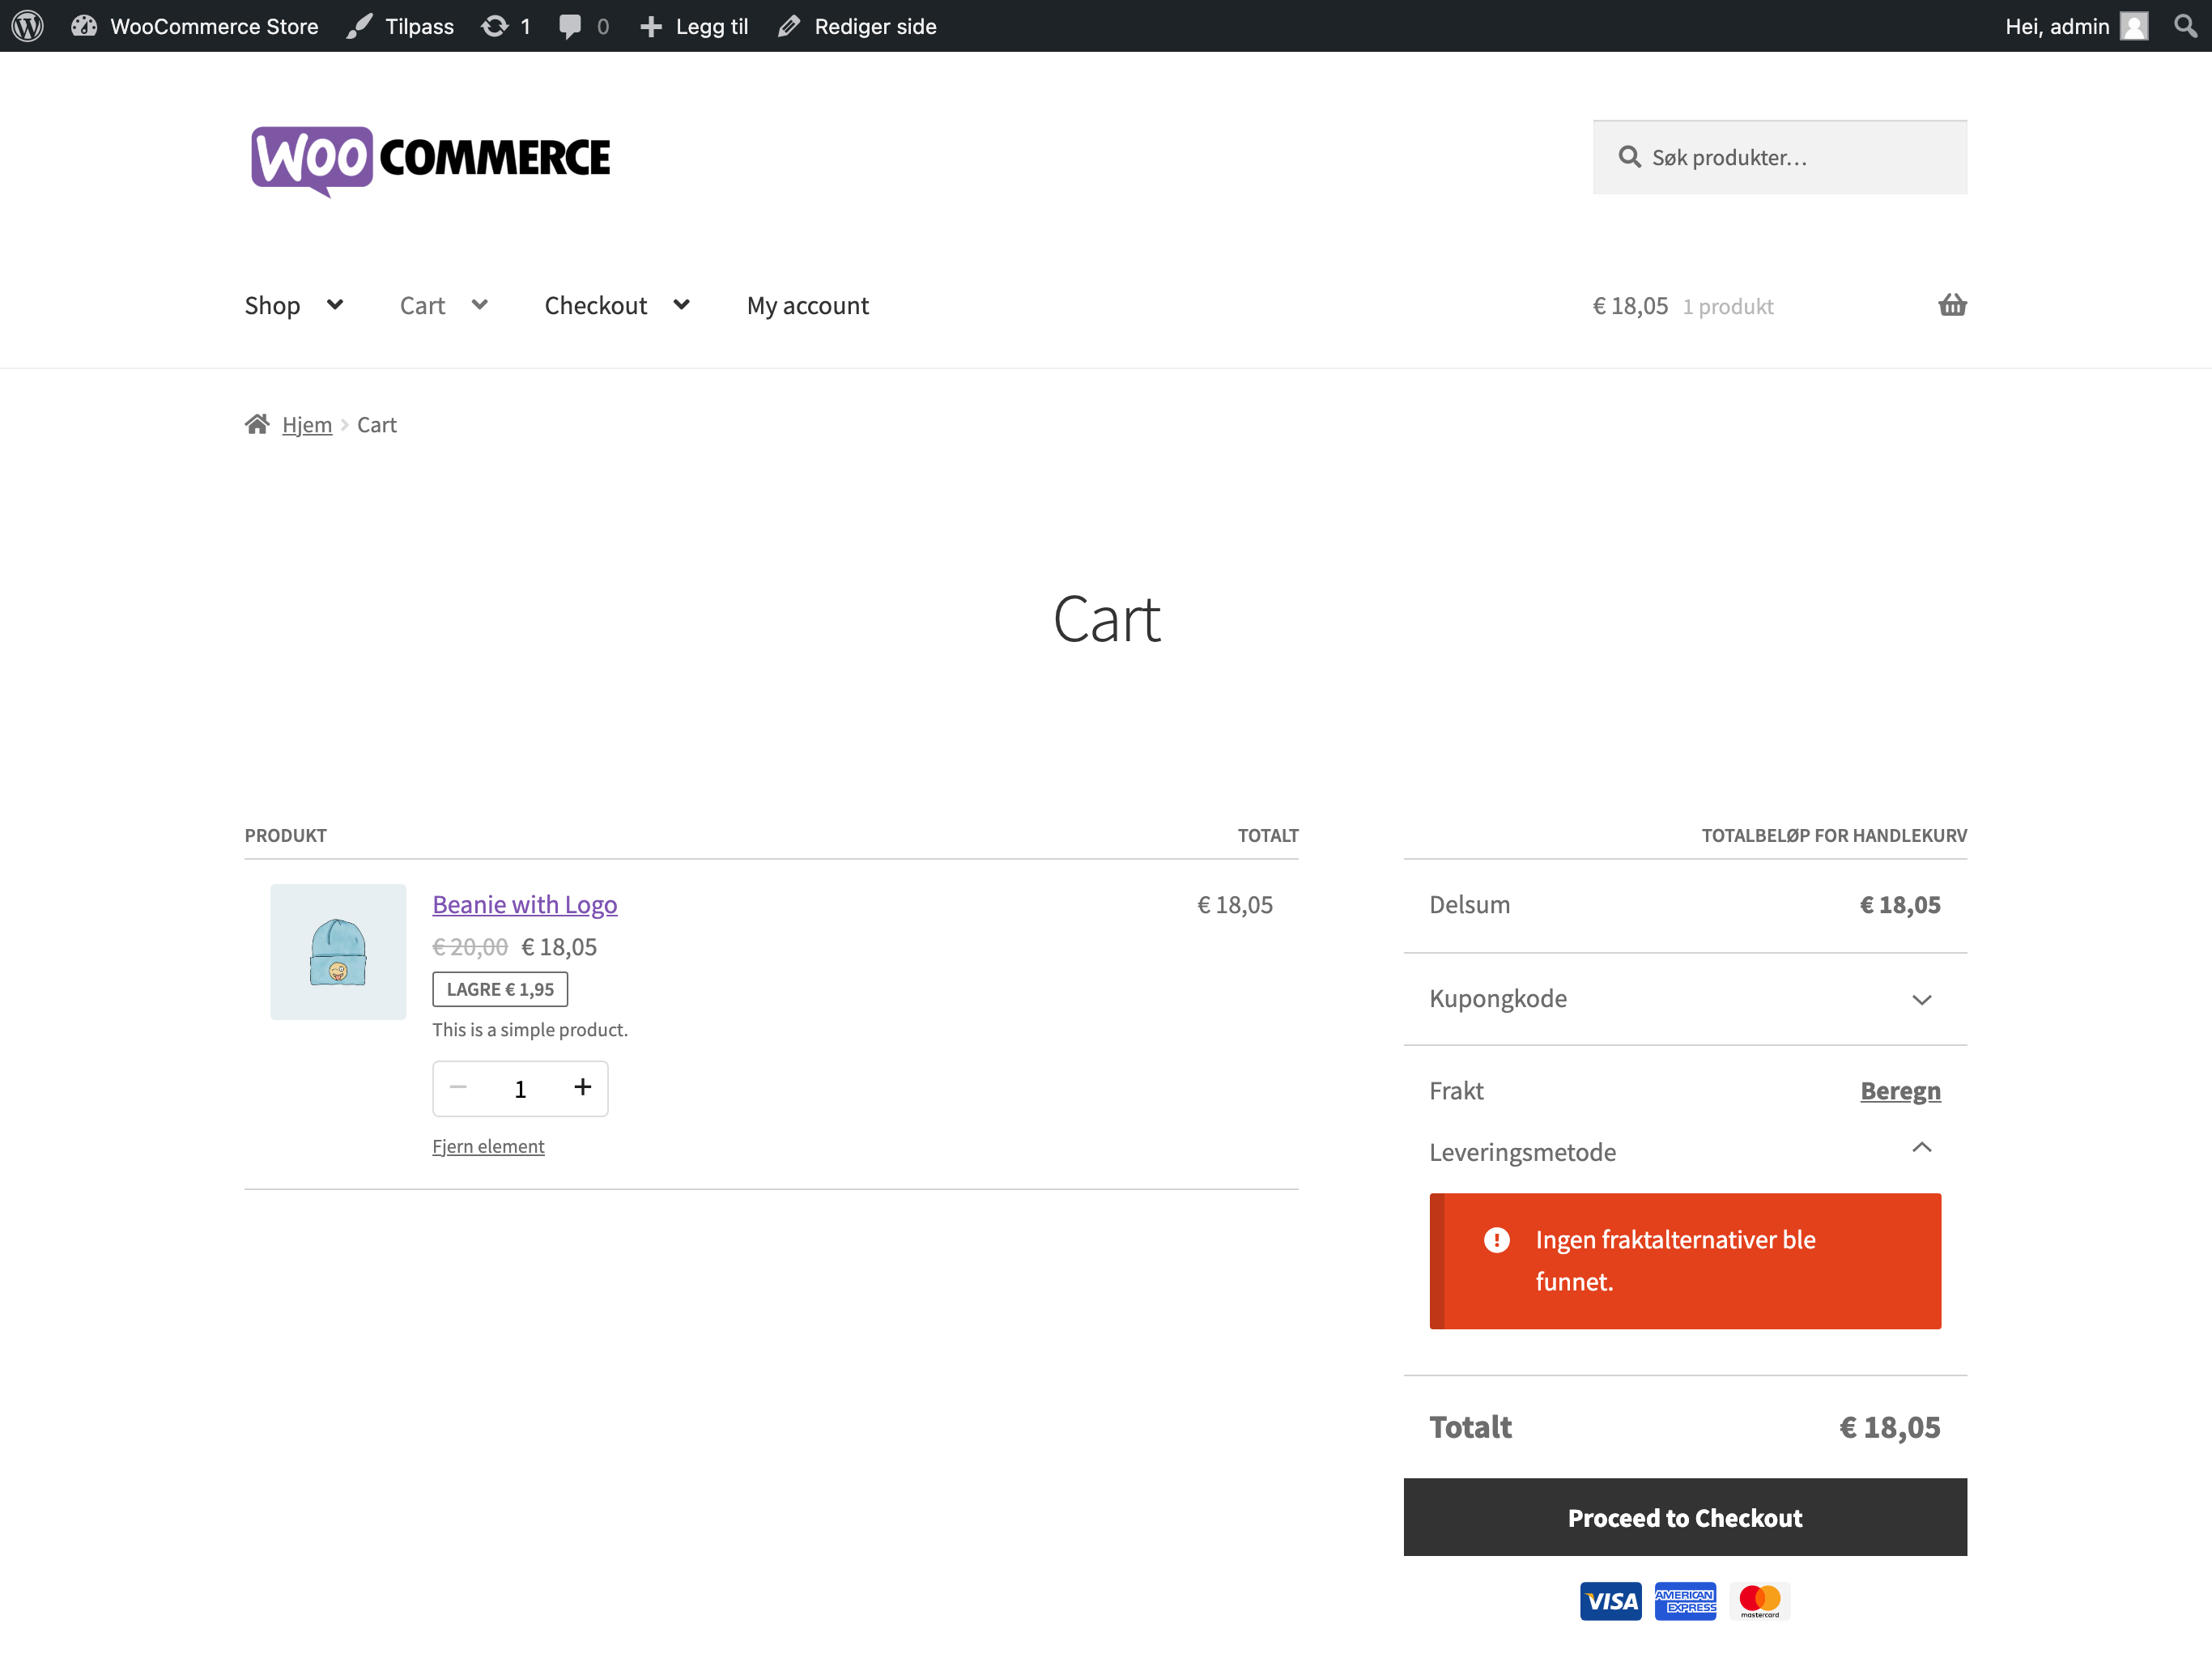 | 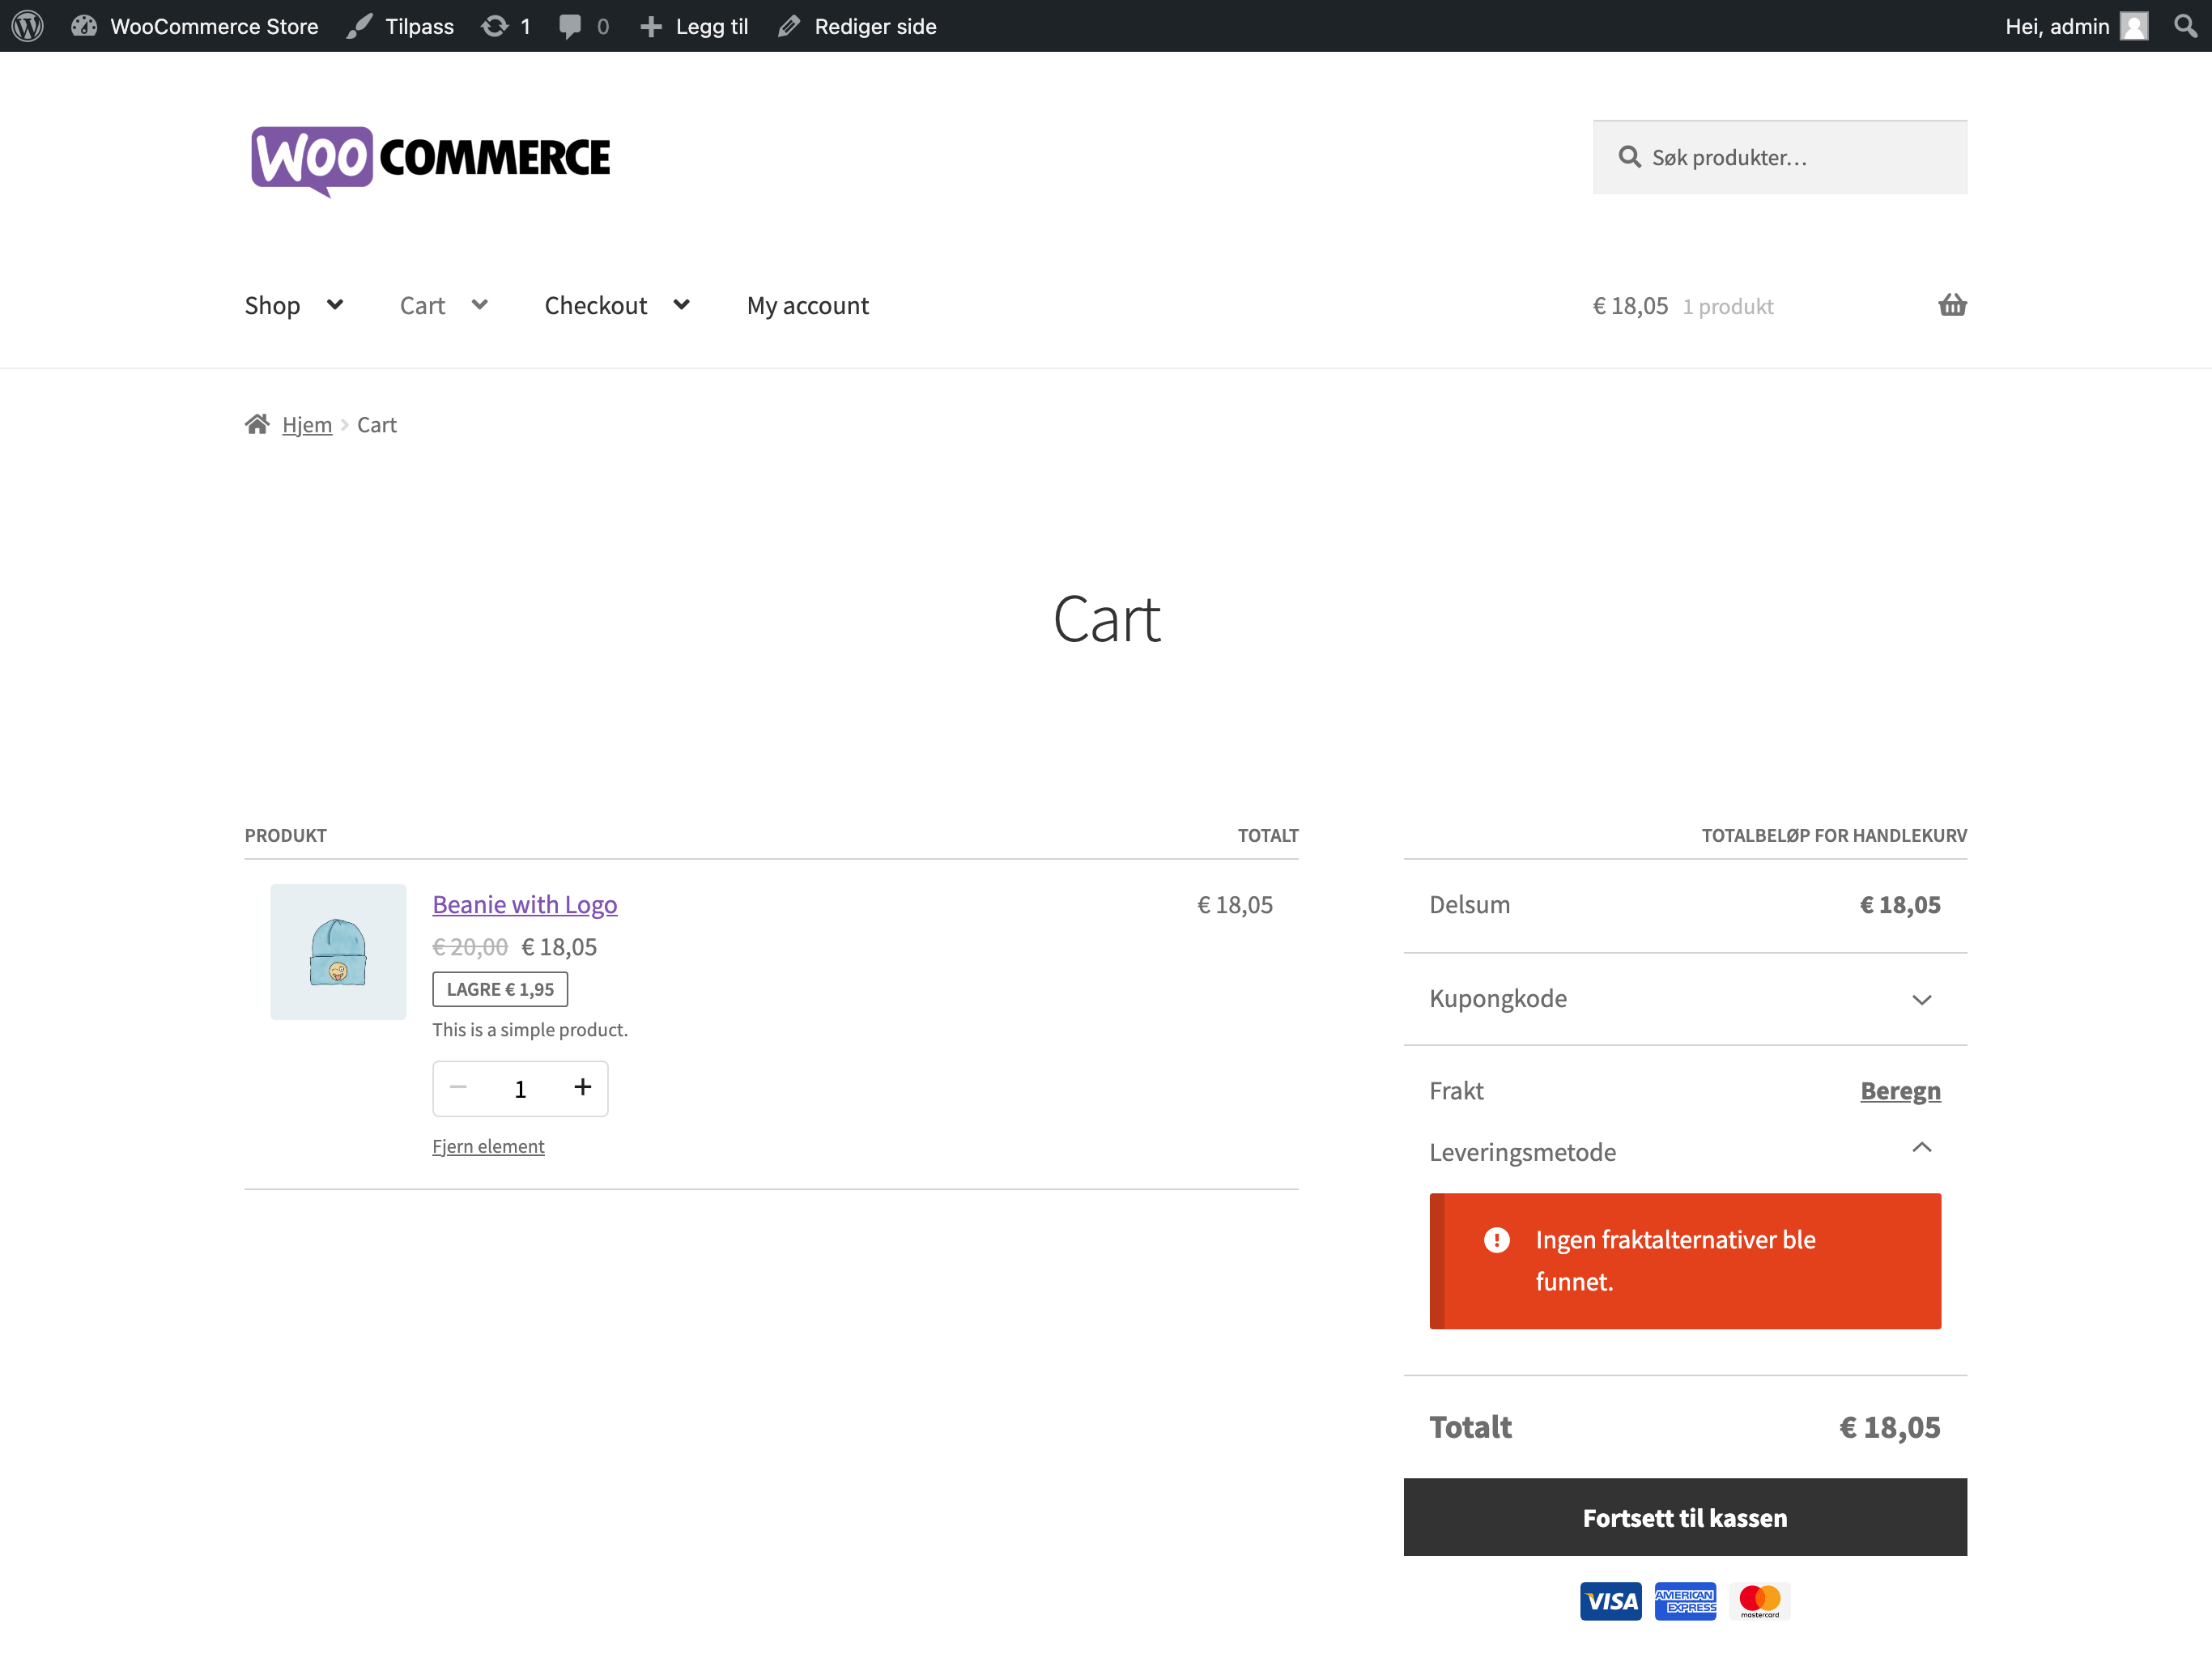 |
-
-1. Create a test page and add the Cart block.
-2. Go to `/wp-admin/options-general.php` and change the site language to `Norsk bokmål`.
-3. Go to `/wp-admin/update-core.php` and update the translations.
-4. Go to the front-end page, add a product to cart and visit the Cart block.
-5. See that the "Proceed to Checkout" button is now translated.
-
-### Added global styles (text color) to the Active Product Filters block. ([5465](https://github.com/woocommerce/woocommerce-gutenberg-products-block/pull/5465))
-
-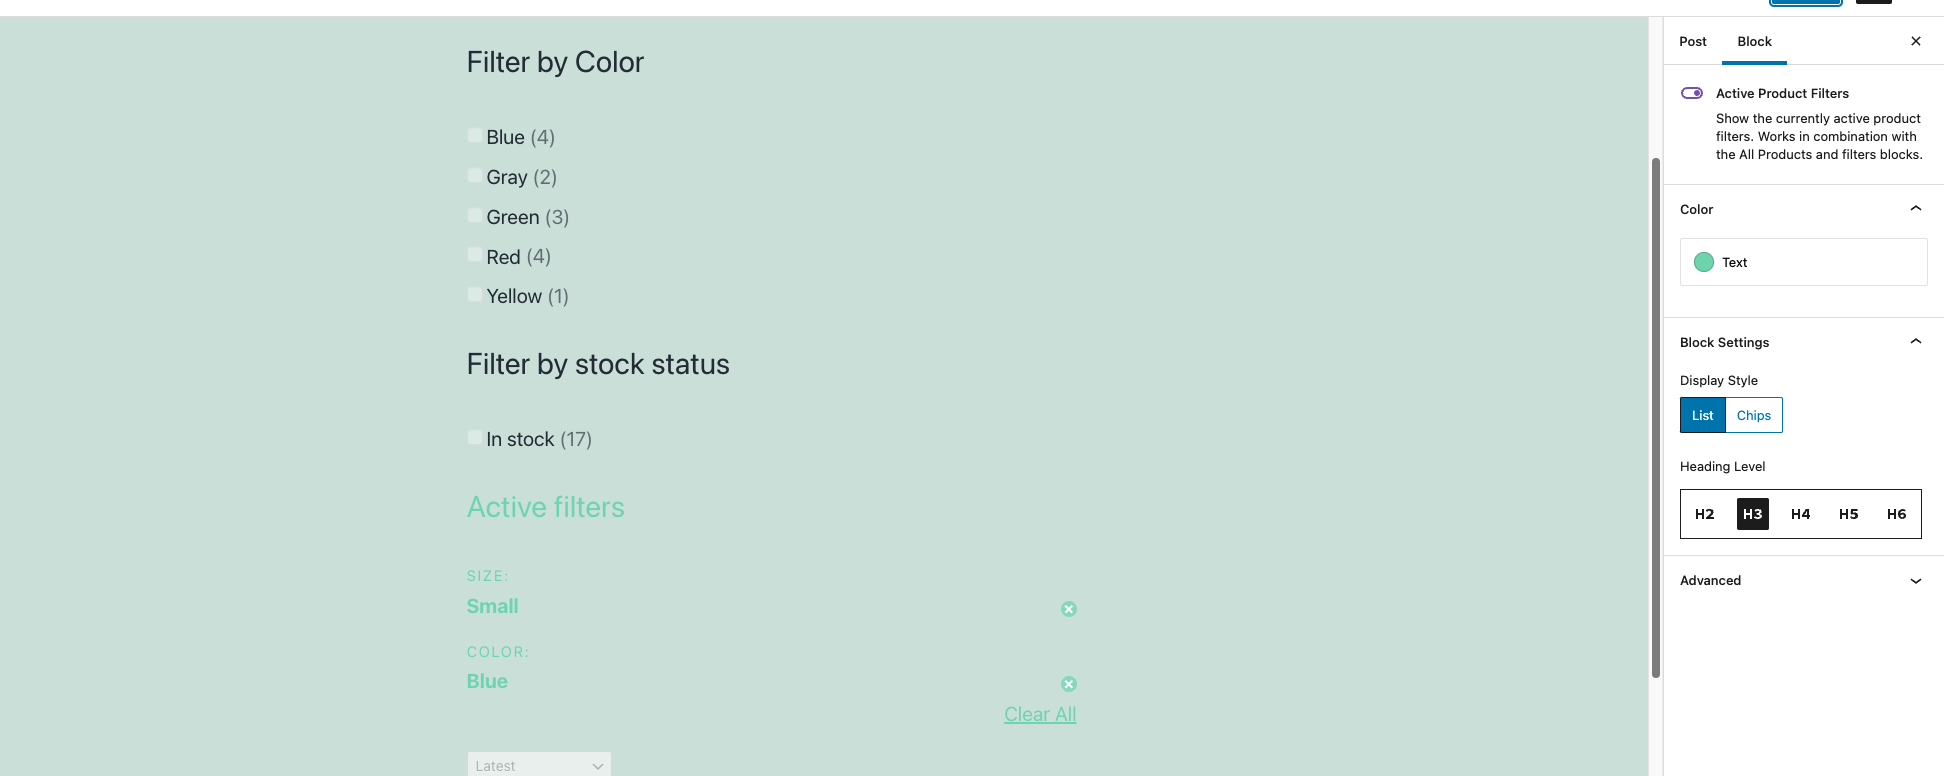
-
-1. Install and enable the `Gutenberg` plugin.
-2. Install and enable the `TT1 Blocks` theme.
-3. Add the Active Product Filters block block to a post. (you need to add a block like `Filters Product By Attribute`)
-4. Go to Color section & verify you can change the text color.
-5. Save your changes.
-6. Go on the page and check if there are changes.
-7. Reset to default using the `Clear` button from Styles > Text color window.
-8. Go to Dashboard and select Appearance > Editor (beta).
-9. On the Editor page click on the `Styles` icon on the right-top corner.
-10. Verify that the Active Product Filters block is shown Under the `Blocks` section .
-11. Save your changes.
-12. Go on the page created earlier and check if all styles are applied correctly.
-13. Edit your previous post/page again.
-14. Change again the text color.
-15. Save your changes.
-16. Check if these styles have priority over the styles from the Site Editor.
-
-## Feature plugin and package inclusion in WooCommerce
-
-### Account for products without variations in the On Sale Products block. ([5470](https://github.com/woocommerce/woocommerce-gutenberg-products-block/pull/5470))
-
-On an store with no products add the Query Monitor extension, then:
-
-1. Add 2 simple products on sale and publish them.
-2. Go to a test page and add the On Sale Products block.
-3. Visit the front-end page.
-4. Notice that no MySQL error is present in Query Monitor extension.
-
-### Remove text decorations from product filtering blocks items. ([5384](https://github.com/woocommerce/woocommerce-gutenberg-products-block/pull/5384))
-
-| Before | After |
-| -------------------------------------------------------------------------------------------------------------- | -------------------------------------------------------------------------------------------------------------- |
-|  |  |
-
-1. Create a test page.
-2. Add the Filter Products by Attribute, Filter Products by Stock and All Products blocks to it.
-3. Visit the front-end test page.
-4. Verify that the options within the Filter Products by Attribute and Filter Products by Stock blocks are not underlined.
diff --git a/plugins/woocommerce/client/blocks/docs/internal-developers/testing/releases/671.md b/plugins/woocommerce/client/blocks/docs/internal-developers/testing/releases/671.md
deleted file mode 100644
index 90c199ffff8..00000000000
--- a/plugins/woocommerce/client/blocks/docs/internal-developers/testing/releases/671.md
+++ /dev/null
@@ -1,15 +0,0 @@
-# Testing notes and ZIP for release 6.7.1
-
-Zip file for testing: [woocommerce-gutenberg-products-block.zip](https://github.com/woocommerce/woocommerce-gutenberg-products-block/files/7829419/woocommerce-gutenberg-products-block.zip)
-
-## Feature Plugin
-
-### Convert token to string when setting the active payment method. ([5535](https://github.com/woocommerce/woocommerce-gutenberg-products-block/pull/5535))
-
-1. On your site make sure you have Stripe set up
-2. Create a new customer user for your website
-3. Login with that user and add a product to the Cart block
-4. In the Checkout block pay with a Stripe card and select Save payment information to my account for future purchases.
-5. Successfully place the order
-6. Do another purchase and make sure to select the saved card as a payment method
-7. Notice that you can successfully place the order and no `payment_data[0][value] is not of type string.boolean` error is showed.
diff --git a/plugins/woocommerce/client/blocks/docs/internal-developers/testing/releases/672.md b/plugins/woocommerce/client/blocks/docs/internal-developers/testing/releases/672.md
deleted file mode 100644
index 620f3ec2d38..00000000000
--- a/plugins/woocommerce/client/blocks/docs/internal-developers/testing/releases/672.md
+++ /dev/null
@@ -1,16 +0,0 @@
-# Testing notes and ZIP for release 6.7.2
-
-Zip file for testing: [woocommerce-gutenberg-products-block.zip](https://github.com/woocommerce/woocommerce-gutenberg-products-block/files/7886795/woocommerce-gutenberg-products-block.zip)
-
-## Feature plugin and package inclusion in WooCommerce
-
-### Update WooCommerce plugin slug for Block Templates ([5519](https://github.com/woocommerce/woocommerce-gutenberg-products-block/pull/5519))
-
-Note: This is mostly regression testing.
-
-- Activate the Gutenberg plugin (or use WordPress 5.9).
-- Download the Tove theme: <https://en-gb.wordpress.org/themes/tove/>. Unzip the theme and copy the archive-product.html file of this release's templates/block-templates directory to the theme's templates directory. Zip the theme folder and upload the theme to your test site.
-- Check Site Editor > Templates and ensure the new template in the theme overrides the default one provided by WooCommerce. Check this also renders correctly on the frontend and within the site editor.
-- Customise the newly created archive-product.html provided by your theme, ensure on the Site Editor > Templates list you are still seeing the customised template in this list and it renders correctly on the frontend, and in site editor.
-- Clear the customisations of the themes archive-product.html template to ensure this works correctly.
-- Check that we're now not receiving 404 network requests for WooCommerce templates on the Site Editor templates list page as described here: <https://github.com/woocommerce/woocommerce-gutenberg-products-block/issues/5327>
diff --git a/plugins/woocommerce/client/blocks/docs/internal-developers/testing/releases/673.md b/plugins/woocommerce/client/blocks/docs/internal-developers/testing/releases/673.md
deleted file mode 100644
index 2a22c08ef7a..00000000000
--- a/plugins/woocommerce/client/blocks/docs/internal-developers/testing/releases/673.md
+++ /dev/null
@@ -1,11 +0,0 @@
-# Testing notes and ZIP for release 6.7.3
-
-Zip file for testing: [woocommerce-gutenberg-products-block.zip](https://github.com/woocommerce/woocommerce-gutenberg-products-block/files/7924587/woocommerce-gutenberg-products-block.zip)
-
-## Feature plugin and package inclusion in WooCommerce
-
-### Enable Mini Cart template-parts only for experimental builds ([5606](https://github.com/woocommerce/woocommerce-gutenberg-products-block/pull/5606))
-
-1. Install Gutenberg (or use WordPress 5.9) and select a block theme e.g. `TT1 Blocks`.
-2. Open Appearance > Editor > Templates Parts.
-3. Check that `Mini Cart` template is NOT visible.
diff --git a/plugins/woocommerce/client/blocks/docs/internal-developers/testing/releases/680.md b/plugins/woocommerce/client/blocks/docs/internal-developers/testing/releases/680.md
deleted file mode 100644
index b577d268ad6..00000000000
--- a/plugins/woocommerce/client/blocks/docs/internal-developers/testing/releases/680.md
+++ /dev/null
@@ -1,180 +0,0 @@
-# Testing notes and ZIP for release 6.8.0
-
-Zip file for testing: [woocommerce-gutenberg-products-block.zip](https://github.com/woocommerce/woocommerce-gutenberg-products-block/files/7903801/woocommerce-gutenberg-products-block.zip)
-
-## WC Core
-
-### FSE: Add support for the global style for the Price Filter block. ([5559](https://github.com/woocommerce/woocommerce-gutenberg-products-block/pull/5559))
-
-1. Upgrade to `WordPress 5.9`.
-2. Install and enable the `Twenty Twenty-Two` theme.
-3. Add the `Price Filter block` to a post.
-4. On the right sidebar, personalize the styles of the block.
-5. Go on the page and check if there are changes.
-6. Reset to default using the `Reset` button from the different sections.
-7. Go to Dashboard and select Appearance > Editor (beta). On top of the screen, select Home > Browser all templates > Single Post. When the page is loaded, add the block to the page.
-8. On the Editor page click on the `Styles` icon on the right-top corner.
-9. Verify that the `Price Filter block` is shown under the `Blocks` section. Personalize the block.
-10. Save your changes.
-11. Go on the page created earlier and check if all styles are applied correctly.
-12. Edit your previous post/page again.
-13. Change again the styles.
-14. Save your changes.
-15. Check if these styles have priority over the styles from the Site Editor.
-
-### FSE: Update the block theme folders to latest Gutenberg convention (i.e. `templates` and `parts`). ([5464](https://github.com/woocommerce/woocommerce-gutenberg-products-block/pull/5464))
-
-1. Activate the Gutenberg plugin (or use WordPress 5.9). Select a block theme e.g. TT1 Blocks.
-2. Open Appearance > Editor > Templates.
-3. Make sure all the templates and parts appear correctly. WooCommerce templates that should be available: `Archive Product`, `Single Product`, `Product Category` and `Product Tag`. WooCommerce template-parts that should be available `Mini Cart`.
-
-### FSE: Add support for the wide and full alignment for the legacy template block. ([5433](https://github.com/woocommerce/woocommerce-gutenberg-products-block/pull/5433))
-
-1. Activate the Gutenberg plugin (or use WordPress 5.9). Select a block theme e.g. TT1 Blocks.
-2. From the dashboard, click on Theme > Site Editor.
-3. Check Site Editor > Templates.
-4. Edit a legacy template (for example `Product Category Page`).
-5. Check if you can change the alignment.
-6. Change it.
-7. Check if the changes are also reflected on the frontend side.
-
-You should test these steps at least one between `Product Category Page`, `Product Archive Page` and `Product Tag Page`.
-You should test `Single Product Page`.
-
-### Added controls to product grid blocks for filtering by stock levels. ([4943](https://github.com/woocommerce/woocommerce-gutenberg-products-block/pull/4943))
-
-1. Create a new post.
-2. Add a new product grid block (namely, `Products by Attribute`, `Products by Tag`, `Top Rated Products`, `Products by Attribute`, `On Sale Products` or `Newest Products`).
-3. In the right hand edit column, open the 'Stock level' panel.
-4. Change the drop down menu setting and observe the product list changing to match the new filter.
-5. Repeat with any variations and combinations of settings.
-
-### All Products block displays thumbnails. ([5551](https://github.com/woocommerce/woocommerce-gutenberg-products-block/pull/5551))
-
-1. With a previous version of Woo Blocks and create a new post and add `All Product` block and save it. Enable the version of this release (6.8.0).
-2. Add a product with a portrait image ([example you can use](https://user-images.githubusercontent.com/3966773/149120479-b266c2b1-ac13-48e6-944b-6785cd7ee4a9.jpeg)), and one with a landscape image ([example you can use](https://user-images.githubusercontent.com/3966773/149120600-f6e0ef32-16e1-46ec-bd0f-575fc8a658c6.jpeg)).
-3. Edit the existing page with the `All Products block`. Edit the block, select the image. In the sidebar, under "Block" tab, the "Image Sizing" setting should be "Full Size". This confirms existing blocks are not affected.
-4. Visit the page with this block on the front end. Sort by "latest" so that the two new products you added are visible. Notice the aspect ratios of these are different and cause the other items out of alignment.
-5. Add the `All Products` block to a new page and save it.
-6. Edit the `All products` block, click on pencil to edit and select the image. In the sidebar, under "Block" tab, the "Image Sizing" setting should have "Cropped" selected.
-7. Visit this page on the front end and sort by "latest" so that the two new products you added are visible.
-8. All product images should be the same aspect ratio and align within the grid.
-9. Go to Appearance > Customize > WooCommerce > Product Images and set a custom aspect ratio (for example, 16:9).
-10. Visit the all products page again. All product images should be rendered with this new aspect ratio.
-
-### Filter Products By Price block: Don't allow to insert negative values on inputs. ([5123](https://github.com/woocommerce/woocommerce-gutenberg-products-block/pull/5123))
-
-1. Create a post and add `All Products` block and add `Filter Products by Price` block.
-2. Save the post.
-3. Go to the page having all the above block added.
-
-Check that:
-
-- the user can't insert in both inputs a negative number.
-- the user can't insert on input left a number that is greater than input on the right.
-- if the user inserts on the input on the right a number that is lower than input on the left, the component sets to 0 the minimum price.
-
-## Feature Plugin only
-
-### Hold stock for 60mins if the order is pending payment. ([5546](https://github.com/woocommerce/woocommerce-gutenberg-products-block/pull/5546))
-
-1. Edit an item and ensure it has inventory enabled.
-2. Successfully place an order.
-
-### Fix duplicated checkout error notices. ([5476](https://github.com/woocommerce/woocommerce-gutenberg-products-block/pull/5476))
-
-1. Make sure you're using the Blocks checkout and an payment method configurate (for example Stripe).
-2. Add 1 or more products to your cart.
-3. Go to the blocks checkout page
-4. Pay through the credit card form with a card that will be declined, e.g. 4000 0000 0000 0002.
-5. Ensure that only one error notice is displayed
-
-### Store API and Cart block now support defining a quantity stepper and a minimum quantity. ([5406](https://github.com/woocommerce/woocommerce-gutenberg-products-block/pull/5406))
-
-1. Smoke test adding items to cart and changing quantity, either via the + and - buttons, or directly via the input.
-2. Edit a product and make it "sold individually"
-3. Confirm that no quantity box shows on the cart page for this product
-4. Edit a product and set stock to 6, no backorders.
-5. Confirm that you can only have 6 maximum for this product.
-
-### Fixed a styling issue in the Checkout block when an order has multiple shipping packages. ([5529](https://github.com/woocommerce/woocommerce-gutenberg-products-block/pull/5529))
-
-1. Install `Woo Subscriptions`.
-2. Add Simple subscription product with a subscription price and a signup fee.
-3. Go to the front-end and add the subscription price to the cart.
-4. Go to the `Checkout` block and look at the shipping options, notice that there is a gap between the two shipping options.
-
-### Fixed a visual bug (#5152) with the points and rewards plugin. ([5430](https://github.com/woocommerce/woocommerce-gutenberg-products-block/pull/5430))
-
-1. Install `WooCommerce Points and Rewards`, go to WooCommerce > Points and Rewards and add points to your user.
-2. Go to WooCommerce > Points and Rewards > Settings and enable "Allow partial redemption"
-3. Go to Cart and see the input to redeem points is showing
-4. The text input should be inline with the "Apply Discount" button
-
-### Remove Stripe Payment Method Integration (which is now part of the Stripe Payment Method extension itself). ([5449](https://github.com/woocommerce/woocommerce-gutenberg-products-block/pull/5449))
-
-Install the [Stripe Payment Method Extension](https://github.com/woocommerce/woocommerce-gateway-stripe/), activate it, enable it and test it works by:
-
-1. Adding items to your cart.
-2. Go to checkout.
-3. Select Stripe Credit Card extension and make a payment. Do so while logged in and save the card to your account.
-4. Repeat checkout with a saved card.
-
-## Experimental blocks only
-
-### FSE: Add support for the global style for the Product Title block. ([5515](https://github.com/woocommerce/woocommerce-gutenberg-products-block/pull/5515))
-
-1. Upgrade to `WordPress 5.9`.
-2. Install and enable the `Twenty Twenty-Two` theme.
-3. Add the `All Product Block` (this block contains `Product Title block`) to a post.
-4. Click on the pencil to edit the block, add the `Product Title block` and get the focus on the `Product Title block`.
-5. On the right sidebar, personalize the styles of the block.
-6. Go on the page and check if there are changes.
-7. Reset to default using the `Reset` button from the different sections.
-8. Go to Dashboard and select Appearance > Editor (beta). On top of the screen, select Home > Browser all templates > Single Post. When the page is loaded, add the block to the page. Click on the pencil to edit the block, add the `Product Title block`.
-9. On the Editor page click on the `Styles` icon on the right-top corner.
-10. Verify that the `Product Title block` is shown under the `Blocks` section. Personalize the block.
-11. Save your changes.
-12. Go on the page created earlier and check if all styles are applied correctly.
-13. Edit your previous post/page again.
-14. Change again the styles.
-15. Save your changes.
-16. Check if these styles have priority over the styles from the Site Editor.
-
-### FSE: Add support for the global style for the Stock Indicator block. ([5525](https://github.com/woocommerce/woocommerce-gutenberg-products-block/pull/5525))
-
-1. Upgrade to `WordPress 5.9`.
-2. Install and enable the `Twenty Twenty-Two` theme.
-3. Add the `All Product Block` (this block contains `Stock Indicator block`) to a post.
-4. Click on the pencil to edit the block, add the `Stock Indicator Block` and get the focus on the `Stock Indicator block`.
-5. On the right sidebar, personalize the styles of the block.
-6. Go on the page and check if there are changes.
-7. Reset to default using the `Reset` button from the different sections.
-8. Go to Dashboard and select Appearance > Editor (beta). On top of the screen, select Home > Browser all templates > Single Post. When the page is loaded, add the block to the page. Click on the pencil to edit the block, add the `Stock Indicator Block`.
-9. On the Editor page click on the `Styles` icon on the right-top corner.
-10. Verify that the `Stock Indicator block` is shown under the `Blocks` section. Personalize the block.
-11. Save your changes.
-12. Go on the page created earlier and check if all styles are applied correctly.
-13. Edit your previous post/page again.
-14. Change again the styles.
-15. Save your changes.
-16. Check if these styles have priority over the styles from the Site Editor.
-
-### FSE: Add support for the global style for the Summary Product block. ([5524](https://github.com/woocommerce/woocommerce-gutenberg-products-block/pull/5524))
-
-1. Upgrade to `WordPress 5.9`.
-2. Install and enable the `Twenty Twenty-Two` theme.
-3. Add the `All Product Block` (this block contains `Summary Product block`) to a post.
-4. Click on the pencil to edit the block, add the `Summary Product block` and get the focus on the `Summary Product block`.
-5. On the right sidebar, personalize the styles of the block.
-6. Go on the page and check if there are changes.
-7. Reset to default using the `Reset` button from the different sections.
-8. Go to Dashboard and select Appearance > Editor (beta). On top of the screen, select Home > Browser all templates > Single Post. When the page is loaded, add the block to the page. Click on the pencil to edit the block, add the `Summary Product block`.
-9. On the Editor page click on the `Styles` icon on the right-top corner.
-10. Verify that the `Summary Product block` is shown under the `Blocks` section. Personalize the block.
-11. Save your changes.
-12. Go on the page created earlier and check if all styles are applied correctly.
-13. Edit your previous post/page again.
-14. Change again the styles.
-15. Save your changes.
-16. Check if these styles have priority over the styles from the Site Editor.
diff --git a/plugins/woocommerce/client/blocks/docs/internal-developers/testing/releases/690.md b/plugins/woocommerce/client/blocks/docs/internal-developers/testing/releases/690.md
deleted file mode 100644
index 6efb8e942ae..00000000000
--- a/plugins/woocommerce/client/blocks/docs/internal-developers/testing/releases/690.md
+++ /dev/null
@@ -1,66 +0,0 @@
-# Testing notes and ZIP for release 6.9.0
-
-Zip file for testing: [woocommerce-gutenberg-products-block.zip](https://github.com/woocommerce/woocommerce-gutenberg-products-block/files/7980490/woocommerce-gutenberg-products-block.zip)
-
-## WC Core
-
-### FSE: Revert "Allow LegacyTemplate block to be reinserted, only on WooCommerce block templates.". ([5643](https://github.com/woocommerce/woocommerce-gutenberg-products-block/pull/5643))
-
-1. Load Appearance > Site Editor and select one of the WooCommerce templates. Confirm it loads the correct Legacy Template block in the Editor for the given block template.
-2. Remove this block, you should not be able to reinsert it and do not save (this is expected as part of this revert)
-3. Refresh the page and confirm the correct Legacy Template block still gets rendered in the Site Editor
-4. Customise this template, and save it. Now reload this template and ensure it loads the customised template in the 5. Site Editor and on the frontend.
-5. Try clearing the customisations on Site Editor > Templates screen, ensure these are reset in the Site Editor and on the frontend.
-
-### FSE: Add support for the global style for the Featured Category block. ([5542](https://github.com/woocommerce/woocommerce-gutenberg-products-block/pull/5542))
-
-1. On WordPress 5.9, install and enable the Gutenberg plugin.
-2. Install and enable the Twenty Twenty-Two theme.
-3. Add the Featured Category Block to a post.
-4. On the right sidebar, personalize the styles of the block.
-5. Go on the page and check if there are changes.
-6. Reset to default using the Reset button from the different sections.
-7. Go to Dashboard and select Appearance > Editor (beta). On top of the screen, select Home > Browser all templates > Single Post. When the page is loaded, add the block to the page.
-8. On the Editor page click on the Styles icon on the right-top corner.
-9. Verify that the Featured Category block is shown under the Blocks section. Personalize again the block.
-10. Save your changes.
-11. Go on the page created earlier and check if all styles are applied correctly.
-12. Edit your previous post/page again.
-13. Change again the styles.
-14. Save your changes.
-15. Check if these styles have priority over the styles from the Site Editor.
-
-### FSE: Enable Mini Cart template-parts only for experimental builds. ([5606](https://github.com/woocommerce/woocommerce-gutenberg-products-block/pull/5606))
-
-1. Using WordPress 5.9, select a block theme e.g. TT1 Blocks.
-2. Open Appearance > Editor > Templates Parts.
-3. Check that Mini Cart template is NOT visible.
-
-## Feature Plugin only
-
-### Show express payment button in full width if only one express payment method is available. ([5601](https://github.com/woocommerce/woocommerce-gutenberg-products-block/pull/5601))
-
-1. Create a test page with the checkout block.
-2. Install the WooCommerce Stripe Gateway plugin and enable express checkouts.
-3. Go to the frontend.
-4. Add a product to the cart.
-5. Go to the checkout page using the Chrome browser, where you are signed in with a Google account that has payment information stored in Google Pay (you might need to test using your personal profile in Google Chrome)
-6. Ensure that the express payment button is displayed in full width.
-7. Install the WooCommerce Payments plugin and enable express checkouts as well. (Note: The WooCommerce Payments plugin cannot be used on a local development site.)
-8. Go to the checkout page.
-9. Ensure that the express payment buttons is displayed next to each other.
-
-### Wrapped cart item product contents in inner div. ([5240](https://github.com/woocommerce/woocommerce-gutenberg-products-block/pull/5240))
-
-1. Add two different products to the cart.
-2. Visit the cart page.
-3. Inspect the cart table when the small/medium/large CSS breakpoints are active.
-4. Confirm that no visual issues are caused by the additional div wrapping the product.
-
-### Fix alignment issue with the "create account" section on the checkout block in the editor ([5633](https://github.com/woocommerce/woocommerce-gutenberg-products-block/pull/5633))
-
-1. Create a test page and add the checkout block.
-2. Click on email address field.
-3. Open settings sidebar.
-4. Activate Account Options » Allow shoppers to sign up for a user account during checkout.
-5. Verify that the Create an account? section has [sufficient top margin](https://user-images.githubusercontent.com/3323310/150910947-7e54c5cc-6f65-4eb9-8a9b-16328d0af2c1.png) as opposed to [being crammed](https://user-images.githubusercontent.com/3323310/150910955-97d4fb04-a619-40ce-8758-32ba4aa90bb0.png).
diff --git a/plugins/woocommerce/client/blocks/docs/internal-developers/testing/releases/700.md b/plugins/woocommerce/client/blocks/docs/internal-developers/testing/releases/700.md
deleted file mode 100644
index 0c2d4296be9..00000000000
--- a/plugins/woocommerce/client/blocks/docs/internal-developers/testing/releases/700.md
+++ /dev/null
@@ -1,122 +0,0 @@
-# Testing notes and ZIP for release 7.0.0
-
-Zip file for testing: [woocommerce-gutenberg-products-block.zip](https://github.com/woocommerce/woocommerce-gutenberg-products-block/files/8074954/woocommerce-gutenberg-products-block.zip)
-
-## Feature Plugin
-
-### FSE: Enable global style for Attribute Filter Block ([5557](https://github.com/woocommerce/woocommerce-gutenberg-products-block/pull/5557))
-
-1. Upgrade to `WordPress 5.9`.
-2. Install and enable the `Twenty Twenty-Two` theme.
-3. Add the `Filter Products By Attribute` Block to a post.
-4. On the right sidebar, personalize the styles of the block.
-5. Go on the page and check if there are changes.
-6. Reset to default using the `Reset` button from the different sections.
-7. Go to Dashboard and select Appearance > Editor (beta). On top of the screen, select Home > Browser all templates > Single Post. When the page is loaded, add the block to the page.
-8. On the Editor page click on the `Styles` icon on the right-top corner.
-9. Verify that the `Filter Products By Attribute` Block is shown under the `Blocks` section. Personalize again the block.
-10. Save your changes.
-11. Go on the page created earlier and check if all styles are applied correctly.
-12. Edit your previous post/page again.
-13. Change again the styles.
-14. Save your changes.
-15. Check if these styles have priority over the styles from the Site Editor.
-
-### FSE: Enable global style for Sale Product Block ([5565](https://github.com/woocommerce/woocommerce-gutenberg-products-block/pull/5565))
-
-1. Install and enable the `Twenty Twenty-Two` theme.
-2. Add the `All Products` Block to a post.
-3. Go to Dashboard and select Appearance > Editor (beta).
-4. On the Editor page click on the `Styles` icon on the right-top corner.
-5. Verify that the `On-Sale Badge` is shown under the `Blocks` section. Click on the label. Personalize the block.
-6. Save your changes.
-7. Go on the page created earlier and check if all styles are applied correctly.
-
-### FSE: Revert template customization for WooCommerce templates ([5746](https://github.com/woocommerce/woocommerce-gutenberg-products-block/pull/5746))
-
-1. Ensure you have the latest WooCommerce, WordPress 5.9 and a block theme so that the FSE feature is enabled.
-2. Go to Appearance > Editor and load Single Product template, customize the content and save the template.
-3. In a separate tab ensure these changes are represented on the frontend, be careful _not_ to reload the current tab.
-4. Back in your Site Editor tab, using the navigation please navigate back to All Templates view. In the list of templates your customized Single Product template should indicate it has been customized.
-5. Click the three dots on the right of this template and click "Clear Customizations" and wait until the action has been complete.
-6. Click "Single Product" again to go back into this template, check that all customizations have been cleared.
-7. In a separate tab ensure these changes are represented on the frontend, be careful _not_ to reload the current tab.
-8. Now in your Site Editor tab make another customization in this template and save it. Then using the navigation please navigate back to All Templates view. In the list of templates your customized Single Product template should indicate it has been customized.
-9. Now click "Single Product" again to go back into the Site Editor, check that these customizations are showing still in the Site Editor.
-10. Click the downward chevron in the top bar next to the block template title. It should show a "Clear Customizations" option here, click this and check that all customizations are reverted.
-11. Now add a WooCommerce template (e.g. `single-product.html`) into your theme or download and install [this version of TwentyTwentyTwo](https://github.com/woocommerce/woocommerce-gutenberg-products-block/files/8036005/twentytwentytwo.zip) and test steps 1-10 again.
-
-### Checkout: Local state management for shipping options ([5802](https://github.com/woocommerce/woocommerce-gutenberg-products-block/pull/5802))
-
-1. Ensure your store has multiple shipping methods setup
-2. Add something to your cart that requires shipping
-3. Go to the cart block
-4. Select a shipping option. Confirm the UI updates instantly, and the option remains checked once totals are updated
-5. Open 2 tabs with a cart block in each
-6. In tab 1, select a shipping method
-7. In tab 2, change an item qty. Confirm that once the update completes, the correct shipping method is selected.
-
-### Cart and Checkout: Appender button overlap ([5801](https://github.com/woocommerce/woocommerce-gutenberg-products-block/pull/5801))
-
-1. Open up a page with the Checkout block in the editor
-2. Select the “Wide Width” option
-3. Confirm that the "Place Order" button and the "Add Block" button at the bottom of the block don't overlap
-4. Confirm that in the right hand side bar, the total price doesn't overlap with the "Add block" button
-5. Also check the Cart block that the insert inner block buttons don't overlap
-
-### Cart and Checkout: Fix button hover and focus states ([5712](https://github.com/woocommerce/woocommerce-gutenberg-products-block/pull/5712))
-
-1. Create test pages for cart, mini cart, and checkout blocks.
-2. In each page check the hover and focus styles for the `View my cart`, `Go to checkout`, `Proceed to Checkout`, and `Place Order` buttons.
-3. You can do the same test using the available default themes and the Storefront theme as well.
-
-### Product blocks: Fix ignoring redirection to cart after add ([5708](https://github.com/woocommerce/woocommerce-gutenberg-products-block/pull/5708))
-
-1. Go to WooCommerce Settings > Products > General and toggle _Redirect to the cart page after successful addition_
-2. Add All Blocks and/or other products blocks.
-3. Hit the _Add to Cart_ button
-4. If setting is enabled you should be automatically redirected to the cart
-
-### Checkout: Fix default attributes not being passed to the front-end ([5732](https://github.com/woocommerce/woocommerce-gutenberg-products-block/pull/5732))
-
-1. Add the Checkout block and select the Shipping Address in the editor.
-2. Change the settings (try a few different, random settings) in the sidebar and ensure the block changes as expected.
-3. Save the block and load it on the front-end and ensure the block is rendered as you expect based on the attributes you saved.
-4. Go back to the editor and select the Checkout block as a whole, set the "Dark mode inputs" option to true.
-5. Load the block in the front-end again and ensure the dark mode inputs are being used.
-
-### Checkout: Fix handling of orders without payments ([5720](https://github.com/woocommerce/woocommerce-gutenberg-products-block/pull/5720))
-
-1. Create a coupon for 100% of the order total.
-2. Add items to cart.
-3. Apply the coupon. The order total should be 0 and the payment section hidden during checkout.
-4. Place the order. Confirm it goes through without errors.
-
-### TS conversion of several blocks ([5668](https://github.com/woocommerce/woocommerce-gutenberg-products-block/pull/5668))
-
-The following components have been converted to TypeScript, hence they benefit from a smoke test:
-
-- `base/components/ProductList`
-- `base/components/FilterElementLabel`
-- `base/components/FilterSubmitButton`
-- `base/components/Form`
-- `base/components/LoadMoreButton`
-- `base/components/LoadingMask`
-- `base/components/Pagination`
-- `base/components/SortSelect`
-
-### FSE: Add a “Remove Image” option to the Featured Category Block ([5719](https://github.com/woocommerce/woocommerce-gutenberg-products-block/pull/5719))
-
-1. Go to post or page
-2. Add Featured Category block and add an image to it
-3. Check the "Remove" button that appears in the toolbar
-4. Click the "Remove" button and check it removes the image, save block and check frontend.
-
-### TT2: Fix Twenty Twenty-Two Products by Category Block item tile styling issues ([5684](https://github.com/woocommerce/woocommerce-gutenberg-products-block/pull/5684))
-
-1. Get the [Twenty Twenty Two](https://wordpress.org/themes/twentytwentytwo/) theme
-2. Create a page with Products by category block with products on sale available
-3. Visit the page
-4. Confirm sale price on products on sale **is not** underlined
-5. Add product to cart
-6. Confirm `View cart` action is centred under the `Add to cart` button and not broken into two lines
diff --git a/plugins/woocommerce/client/blocks/docs/internal-developers/testing/releases/710.md b/plugins/woocommerce/client/blocks/docs/internal-developers/testing/releases/710.md
deleted file mode 100644
index 74a452dc4f9..00000000000
--- a/plugins/woocommerce/client/blocks/docs/internal-developers/testing/releases/710.md
+++ /dev/null
@@ -1,72 +0,0 @@
-# Testing notes and ZIP for release 7.1.0
-
-Zip file for testing: [woocommerce-gutenberg-products-block.zip](https://github.com/woocommerce/woocommerce-gutenberg-products-block/files/8153605/woocommerce-gutenberg-products-block.zip)
-
-## Feature plugin and package inclusion in WooCommerce
-
-### Add Global Styles support to the Product Price block. ([5950](https://github.com/woocommerce/woocommerce-gutenberg-products-block/pull/5950))
-
-1. Be sure that you are on `WordPress 5.9`.
-2. Install and enable the `Twenty Twenty-Two` theme.
-3. Select Appearance > Editor (beta). On the Editor page click on the `Styles` icon in the top-right corner.
-4. Edit some Global Styles e.g. color & font-size for the Product Price block in the Blocks section.
-5. Create a new post and add the All Products block.
-6. The Price component should reflect the changes made in Global Styles.
-7. Click the Edit icon in the block toolbar. Select the Price block and change its styles in the right sidebar. Click Done & save.
-8. Ensure the local styles override the Global Styles on the Frontend of your store.
-
-### Add Global Styles support to the Add To Cart Button block. ([5816](https://github.com/woocommerce/woocommerce-gutenberg-products-block/pull/5816))
-
-1. Be sure that you are on `WordPress 5.9`.
-2. Install and enable the `Twenty Twenty-Two` theme.
-3. Add the `All Products` block (this block contains the `Add To Cart Button Block`) to a post.
-4. Click the Edit icon in the block toolbar. Select the `Add To Cart Button`.
-5. On the right sidebar, personalize the styles of the block. Click Done & save.
-6. View the post on the Frontend and confirm your changes changes.
-7. Reset to default using the `Reset` button from the different sections.
-8. Go to Dashboard and select Appearance > Editor (beta). At the top of the screen, select Home > Browse all templates > Single Post. When the page is loaded, add the `All Products` block to the page.
-9. On the Editor page click on the `Styles` icon in the top-right corner.
-10. Verify that the `Add To Cart Button` is shown under the `Blocks` section. Personalize the block again.
-11. Save your changes.
-12. Go on the page created earlier and check if all styles are applied correctly.
-13. Edit your previous post/page again.
-14. Change the styles again and save your changes.
-15. Check if these new styles have priority over the global styles from the Site Editor.
-
-### Store API - Introduced `wc/store/v1` namespace. ([5911](https://github.com/woocommerce/woocommerce-gutenberg-products-block/pull/5911))
-
-1. Smoke test checkout process to highlight any problems with cart/checkout endpoints.
-2. Smoke test the All Products block to highlight any problems with product endpoints.
-3. Try accessing old endpoints, for example, `https://store.local/wp-json/wc/store/cart`. These should still work.
-4. Try accessing new endpoints, for example, `https://store.local/wp-json/wc/store/v1/cart`.
-
-### Renamed WooCommerce block templates to more e-commerce related names. ([5935](https://github.com/woocommerce/woocommerce-gutenberg-products-block/pull/5935))
-
-1. Be sure that you are on `WordPress 5.9`.
-2. Install and enable the `Twenty Twenty-Two` theme.
-3. Select Appearance > Editor (beta).
-4. Select the dropdown next to Home and click the "Browse all templates" button.
-5. Confirm that the WooCommerce block template names appear on the list according to the following table:
-
-| Old Title | New Title |
-| ---------------- | -------------------- |
-| Product Archive | Product Catalog |
-| Product Tag | Products by Tag |
-| Product Category | Products by Category |
-| Single Product | _no change_ |
-
-### Featured Product block: Add the ability to reset to a previously set custom background image. ([5886](https://github.com/woocommerce/woocommerce-gutenberg-products-block/pull/5886))
-
-1. Add a Featured Product block to a page, post, or template. Select a product that has a product image.
-2. In the block toolbar, click Replace and add custom background media.
-3. The button to Reset the image should become available in the block toolbar.
-4. Clicking the Reset button should remove the custom media.
-5. The original product image should show again.
-
-## Feature Plugin
-
-### Fix loading WC core translations in locales where WC Blocks is not localized for some strings. ([5910](https://github.com/woocommerce/woocommerce-gutenberg-products-block/pull/5910))
-
-1. Go to Settings > General > Language (`/wp-admin/options-general.php`) and select a language which has WC core translation at 100% but WC Blocks' at 0% e.g. `Català`.
-2. Go to the updates screen (`/wp-admin/update-core.php`), scroll down and update the language translations.
-3. Visit the Cart or Checkout block in the frontend and verify the texts are translated.
diff --git a/plugins/woocommerce/client/blocks/docs/internal-developers/testing/releases/720.md b/plugins/woocommerce/client/blocks/docs/internal-developers/testing/releases/720.md
deleted file mode 100644
index a57aa985122..00000000000
--- a/plugins/woocommerce/client/blocks/docs/internal-developers/testing/releases/720.md
+++ /dev/null
@@ -1,46 +0,0 @@
-# Testing notes and ZIP for release 7.2.0
-
-Zip file for testing: [woocommerce-gutenberg-products-block.zip](https://github.com/woocommerce/woocommerce-gutenberg-products-block/files/8245571/woocommerce-gutenberg-products-block.zip)
-
-## Feature plugin and package inclusion in WooCommerce
-
-### Store API: Consistent error code and hook naming [#5992](https://github.com/woocommerce/woocommerce-gutenberg-products-block/pull/5992) and Remove v1 string from Store Keys [#5987](https://github.com/woocommerce/woocommerce-gutenberg-products-block/pull/5987)
-
-1. Smoke test the All Products Block and confirm products are still displayed.
-2. Smoke test Cart/Checkout Blocks and confirm the Blocks render and show cart contents.
-
-### Featured Product block: Add the ability to reset to a previously set custom background image ([5886](https://github.com/woocommerce/woocommerce-gutenberg-products-block/pull/5886))
-
-1. Add a Featured Product block to a page, post, or template. Select a product that has a product image.
-2. In the block toolbar, click Replace and add custom background media.
-3. The button to Reset the image should become available in the block toolbar.
-4. Clicking the Reset button should remove the custom media.
-5. The original product image should show again.
-
-## Feature Plugin
-
-### Correctly load JS translations from WC core [#6036](https://github.com/woocommerce/woocommerce-gutenberg-products-block/pull/6036)
-
-1. Go to Settings > General > Language (/wp-admin/options-general.php) and select a language which has WC core translation at 100% but WC Blocks' at 0%. (I tested with Català).
-2. Go to the updates screen (/wp-admin/update-core.php), scroll down and update the language translations.
-3. Visit the Cart or Checkout block in the frontend and verify all texts are translated.
-
-### Try to memoize/cache filter results so that we don't call third party filters too often [#5143](https://github.com/woocommerce/woocommerce-gutenberg-products-block/pull/5143)
-
-These instructions use WooCommerce Subscriptions as this is known to use several filters in different places.
-
-1. Install WooCommerce Subscriptions and create a subscription product.
-2. Add it to the cart.
-3. Go to the Cart block and ensure it shows the details of the subscription product under the line item.
-4. Ensure you can still successfully check out and you are charged the amount you expect to be based on the item price in the database, what is displayed in the Cart block and what is displayed in the Checkout block.
-
-### Checkout: Missing country error for virtual orders (edge case) [#6050](https://github.com/woocommerce/woocommerce-gutenberg-products-block/pull/6050)
-
-1. WC settings > General - set default customer location to "no location by default"
-2. Create a downloadable, virtual product
-3. Go to the store as a logged out guest in incognito mode
-4. Add the virtual/downloadable product to your cart
-5. Go to checkout
-6. Fill out billing address
-7. Place order. It should succeed.
-8. Check order details. Shipping should match billing address.
diff --git a/plugins/woocommerce/client/blocks/docs/internal-developers/testing/releases/721.md b/plugins/woocommerce/client/blocks/docs/internal-developers/testing/releases/721.md
deleted file mode 100644
index d6b78bc2fec..00000000000
--- a/plugins/woocommerce/client/blocks/docs/internal-developers/testing/releases/721.md
+++ /dev/null
@@ -1,13 +0,0 @@
-# Testing notes and ZIP for release 7.2.1
-
-Zip file for testing: [woocommerce-gutenberg-products-block.zip](https://github.com/woocommerce/woocommerce-gutenberg-products-block/files/8333094/woocommerce-gutenberg-products-block.zip)
-
-## Feature plugin and package inclusion in WooCommerce
-
-### Hide deprecation notices before headers are sent. [#6074](https://github.com/woocommerce/woocommerce-gutenberg-products-block/pull/6074)
-
-1. Enable WooCommerce Payments or WooCommerce Subscriptions. It hasn't been updated with compatibility yet (I put in a PR a week ago).
-2. Enable WP_DEBUG mode
-3. Go to WP Admin. No notices are visible.
-4. Check the error log. See the notices there.
-5. Edit the code in this PR and remove the 7.4 from the function calls. Repeat steps 2-4 and confirm logs are used.
diff --git a/plugins/woocommerce/client/blocks/docs/internal-developers/testing/releases/722.md b/plugins/woocommerce/client/blocks/docs/internal-developers/testing/releases/722.md
deleted file mode 100644
index 764de5c36ea..00000000000
--- a/plugins/woocommerce/client/blocks/docs/internal-developers/testing/releases/722.md
+++ /dev/null
@@ -1,12 +0,0 @@
-# Testing notes and ZIP for release 7.2.2
-
-[woocommerce-gutenberg-products-block.zip](https://github.com/woocommerce/woocommerce-gutenberg-products-block/files/8495877/woocommerce-gutenberg-products-block.zip)
-
-## Feature plugin and package inclusion in WooCommerce
-
-### WC-Admin doesn't crash when WC Subscriptions is installed. ([6260](https://github.com/woocommerce/woocommerce-gutenberg-products-block/pull/6260))
-
-1. Go to an atomic website (or locally with symlinked WooCommerce).
-2. Install WC Subscriptions.
-3. Try to open wp-admin > WooCommerce > Home (/wp-admin/admin.php?page=wc-admin).
-4. Page should load normally.
diff --git a/plugins/woocommerce/client/blocks/docs/internal-developers/testing/releases/730.md b/plugins/woocommerce/client/blocks/docs/internal-developers/testing/releases/730.md
deleted file mode 100644
index ccc572fb461..00000000000
--- a/plugins/woocommerce/client/blocks/docs/internal-developers/testing/releases/730.md
+++ /dev/null
@@ -1,68 +0,0 @@
-# Testing notes and ZIP for release 7.3.0
-
-Zip file for testing: [woocommerce-gutenberg-products-block.zip](https://github.com/woocommerce/woocommerce-gutenberg-products-block/files/8362307/woocommerce-gutenberg-products-block.zip)
-
-## Feature plugin and package inclusion in WooCommerce
-
-### Filter Products by Attribute: Fix dropdown search case sensitivity [#6096](https://github.com/woocommerce/woocommerce-gutenberg-products-block/pull/6096)
-
-1. Check out this branch and compile the changes
-2. Activate a **block theme**, like Twenty Twenty Two
-3. Create a new page, and add the **Filter Products by Attribute** block
-4. Change the **Display Style** to **Dropdown**
-5. In the **Filter Products by Attribute** section select the attribute you want to be filtering by (in my case 'Size')
-6. Test the page on the front-end by searching for product attributes
-7. Make sure that relevant values are being found for both Uppercase and Lowercase input
-
-### Stop showing the PricesSlider skeleton when moving the slider handles [#6078](https://github.com/woocommerce/woocommerce-gutenberg-products-block/pull/6078)
-
-1. Create a new page with the "All Products" and the "Filter Products by Price" blocks.
-2. Go to the page on the front and check that when the `PriceSlider` loads it shows the skeleton like: \
- 
-3. After it finishes loading, move the slider handles and check it does not show the skeleton on the slider again.
-
-### Rename Legacy Template block to Classic Template block [#6021](https://github.com/woocommerce/woocommerce-gutenberg-products-block/pull/6021)
-
-1. With a block theme active open the site editor.
-2. Go to Appearance > Site Editor and select one of the WooCommerce templates (for example Single Product Page).
-3. Open the List view and check that `WooCommerce Legacy Template` is now `WooCommerce Classic Template`.
-4. Click on it and check that in the right sidebar it also appears as Classic template: `WooCommerce Classic Template Renders classic WooCommerce PHP templates.`
-
-### Product Ratings: Add Global Styles font size and spacing support [#5927](https://github.com/woocommerce/woocommerce-gutenberg-products-block/pull/5927)
-
-1. Activate a **block theme**, like Twenty Twenty Two
-2. Create a new page, and add the **All Products** block
-3. Edit the **Product Ratings** block, and make sure the **Typography** and **Dimensions** block settings are present
-4. Ensure the **Typography** and **Spacing** customizations work correctly both on the block level and on the Global Styles level
-
-## Feature Plugin
-
-### Prefetch cart and checkout block assets when cart has contents [#5553](https://github.com/woocommerce/woocommerce-gutenberg-products-block/pull/5553)
-
-Users cannot see these changes in an obvious way, so smoke testing should be performed only of the checkout flow.
-
-### Prepare the Mini Cart block for Feature Plugin [#6127](https://github.com/woocommerce/woocommerce-gutenberg-products-block/pull/6127)
-
-With Storefront:
-
-1. Go to Appearance > Widgets.
-2. Add a new block to the Sidebar.
-3. See the Mini Cart block available inside the inserter.
-4. Add the Mini Cart block to the sidebar. Save changes.
-5. See the block load and works properly on the front end.
-
-With Twenty Twenty-Two:
-
-1. Edit the Header template part.
-2. Can add the block to the header.
-3. Save changes.
-4. See it load and work properly on the front end.
-5. Edit the Mini Cart template part.
-6. See the template part containing the Mini Cart Contents block.
-
-### Allow memoized filters to re-run if defaultArg changes [#6102](https://github.com/woocommerce/woocommerce-gutenberg-products-block/pull/6102)
-
-1. Create a coupon in your store.
-2. Add this coupon to your order in the Cart block, ensure a snackbar notice appears when adding and removing the coupon.
-3. Do this multiple times and ensure the snackbar notice appears each time it changes.
-4. Repeat step 2 and 3 in the Checkout block.
diff --git a/plugins/woocommerce/client/blocks/docs/internal-developers/testing/releases/740.md b/plugins/woocommerce/client/blocks/docs/internal-developers/testing/releases/740.md
deleted file mode 100644
index 8de8e487f36..00000000000
--- a/plugins/woocommerce/client/blocks/docs/internal-developers/testing/releases/740.md
+++ /dev/null
@@ -1,74 +0,0 @@
-# Testing notes and ZIP for release 7.4.0
-
-Zip file for testing: [woocommerce-gutenberg-products-block.zip](https://github.com/woocommerce/woocommerce-gutenberg-products-block/files/8482828/woocommerce-gutenberg-products-block.zip)
-
-## Feature plugin and package inclusion in WooCommerce
-
-### Allow adding the Filter Products by Price block to Product Catalog templates to filter products. ([6146](https://github.com/woocommerce/woocommerce-gutenberg-products-block/pull/6146))
-
-1. With a block theme, go to Appearance > Editor > Template > Product Catalog.
-2. Add the Filter Products by Price block above the product grid and set _Filter Button_ attribute to true.
-3. Change the values of the price slider.
-4. Notice the page reloads and the list of products updates accordingly.
-
-
-
-### Mini Cart block: Fix translations loading. ([6158](https://github.com/woocommerce/woocommerce-gutenberg-products-block/pull/6158))
-
-1. Go to **Settings -> General** and change the language of the site to any language other than English (my suggestion is to use Deutsch because all the translations are available).
-2. Enable a classic theme (for example Storefront)
-3. Now go to **Appearance -> Widgets** and add `Mini Cart` widget to any Widget Area.
-4. Go to any page containing that Widget Area and check that any error related to `wp.i18n`.
-5. Check that the `Mini Cart` is translated (check with an empty cart and with a filled cart). Please, be sure that you are using a language that has translations for the Mini Cart Block. My suggestion is to use the Deutsch language.
-6. Enable a block theme (for example TT2).
-7. Now go to **Appearance -> Editor** and add the `Mini Cart` block in the header. Save.
-8. Check that the `Mini Cart` is translated (check with an empty cart and with a filled cart). Please, be sure that you are using a language that has translations for the Mini Cart Block. My suggestion is to use the Deutsch language.
-
-### Fix Featured Product and Featured Category buttons misalignment in Twenty Twenty Two theme. ([6156](https://github.com/woocommerce/woocommerce-gutenberg-products-block/pull/6156))
-
-1. Activate a block theme (ie: Twenty Twenty-Two).
-2. Add Featured Product and/or Featured Category blocks to a post or page.
-3. Verify the button is centered by default.
-4. Verify you can change the alignment of the button using the _Justify items_ dropdown inherited from the _Buttons_ block.
- 
-5. Test again with a classic theme (ie: Storefront).
-
-### Remove the ToggleButtonControl in favor of ToggleGroupControl. ([5967](https://github.com/woocommerce/woocommerce-gutenberg-products-block/pull/5967))
-
-1. Activate a **block theme**, like Twenty Twenty Two
-2. Create a new page, and add the following blocks:
- - Active Filters
- - Attribute Filter
- - Price Filter
- - Product Categories
- - Reviews
-3. Open each block settings and ensure that options are using the new component's design (toggle button) and are working correctly:
-
-| Before | After |
-| ----------------------------------------------------------------------------------------------------------- | ----------------------------------------------------------------------------------------------------------- |
-|  |  |
-
-## Feature Plugin
-
-### The order summary area for the Cart and Checkout Blocks is now powered by Inner Blocks allowing for more customizations and extensibility. ([6065](https://github.com/woocommerce/woocommerce-gutenberg-products-block/pull/6065))
-
-1. Go to a page and add the Checkout block.
-2. Go to a page and add the Cart block
-3. In the editor, inside each block, select the Order summary and notice that you can select the following inner blocks:
-
- | Cart | Checkout |
- | ----------------------------------------------------------------- | -------------------------------------------------------- |
- | Heading, Subtotal, Cart Items, Fees, Coupon Form, Shipping, Taxes | Subtotal, Cart Items, Fees, Coupon Form, Shipping, Taxes |
-
-4. Try to move some of the inner blocks and save. Confirm that in the Cart block only Order Summary Heading and the Coupon form inner blocks can be removed, and for the Checkout block only the Coupon form.
-5. Check on the website that your changes are reflected. Note that Taxes, Fees and Coupons will appear on the website only if the shop supports them.
-6. For the Cart > Shipping inner block make sure you can enable disable the shipping calculator and that the change is visible in the website
-7. Enable Taxes on your website (`/wp-admin/admin.php?page=wc-settings`) by clicking `Enable tax rates and calculations`
-8. Go to the C & C blocks and select the Taxes inner block.
-9. In the inner block's setting toggle on / of `Show rate after tax name` and make sure that is reflected in the website
-10. Try to place an order and make sure it's successful.
-
-### Increase Cart product quantity limit. ([6202](https://github.com/woocommerce/woocommerce-gutenberg-products-block/pull/6202))
-
-1. Go to the shop page and add any product to the cart
-2. Go to the Cart block page and increase product quantity to 9999
diff --git a/plugins/woocommerce/client/blocks/docs/internal-developers/testing/releases/741.md b/plugins/woocommerce/client/blocks/docs/internal-developers/testing/releases/741.md
deleted file mode 100644
index 39f3b2ac2a3..00000000000
--- a/plugins/woocommerce/client/blocks/docs/internal-developers/testing/releases/741.md
+++ /dev/null
@@ -1,12 +0,0 @@
-# Testing notes and ZIP for release 7.4.1
-
-Zip file for testing: [woocommerce-gutenberg-products-block.zip](https://github.com/woocommerce/woocommerce-gutenberg-products-block/files/8482828/woocommerce-gutenberg-products-block.zip)
-
-## Feature plugin and package inclusion in WooCommerce
-
-### WC-Admin doesn't crash when WC Subscriptions is installed. ([6260](https://github.com/woocommerce/woocommerce-gutenberg-products-block/pull/6260))
-
-1. Go to an atomic website (or locally with symlinked WooCommerce).
-2. Install WC Subscriptions.
- Try to open wp-admin > WooCommerce > Home (/wp-admin/admin.php?page=wc-admin).
-3. Page should load normally.
diff --git a/plugins/woocommerce/client/blocks/docs/internal-developers/testing/releases/742.md b/plugins/woocommerce/client/blocks/docs/internal-developers/testing/releases/742.md
deleted file mode 100644
index 3e52283417e..00000000000
--- a/plugins/woocommerce/client/blocks/docs/internal-developers/testing/releases/742.md
+++ /dev/null
@@ -1,21 +0,0 @@
-# Testing notes and ZIP for release 7.4.2
-
-[woocommerce-gutenberg-products-block.zip](https://github.com/woocommerce/woocommerce-gutenberg-products-block/files/8496130/woocommerce-gutenberg-products-block.zip)
-
-## Feature plugin and package inclusion in WooCommerce
-
-### Fix bug with server errors not showing in Cart/Checkout. ([6268](https://github.com/woocommerce/woocommerce-gutenberg-products-block/pull/6268))
-
-#### Checkout
-
-1. Create a Simple Product that is in stock.
-2. Add it to the cart.
-3. Navigate to the checkout block.
-4. Change the stock status to "Out of stock" and place the order. Ensure an error notice appears at the top of the Checkout block.
-
-#### Cart
-
-1. Create a Simple Product that is in stock.
-2. Add it to the cart.
-3. Change the stock status to "Out of stock" and refresh the page.
-4. Ensure a notice informing the customer that there is an out of stock product in the cart appears at the top of the block.
diff --git a/plugins/woocommerce/client/blocks/docs/internal-developers/testing/releases/750.md b/plugins/woocommerce/client/blocks/docs/internal-developers/testing/releases/750.md
deleted file mode 100644
index 5c5dd2afc31..00000000000
--- a/plugins/woocommerce/client/blocks/docs/internal-developers/testing/releases/750.md
+++ /dev/null
@@ -1,148 +0,0 @@
-# Testing notes and ZIP for release 7.5.0
-
-Zip file for testing: [woocommerce-gutenberg-products-block.zip](https://github.com/woocommerce/woocommerce-gutenberg-products-block/files/8563282/woocommerce-gutenberg-products-block.zip)
-
-## Feature plugin and package inclusion in WooCommerce
-
-### Add PHP templates support to the Active Product Filters block. ([6295](https://github.com/woocommerce/woocommerce-gutenberg-products-block/pull/6295))
-
-1. With a block theme, go to Edit Site > Product Catalog.
-2. Add `Active Product Filters`, `Filter Products by Stock`, `Filter Products by Attribute`, `Filter Products by Price` blocks to the template.
-3. Go to the shop page on the front end.
-4. Select some filters, see the page reload and the selected filters appear in the Active Products Filters block.
-5. Remove an arbitrary filter, see the page reload and the removed filter doesn't appear in the Active Product Filters block. See the filtered product results updates accordingly.
-
-### Enhanced the _Featured Category block_ ([6276](https://github.com/woocommerce/woocommerce-gutenberg-products-block/pull/6276))
-
-1. Use a block theme (such as Twenty Twenty Two)
-2. Add the ”Featured Category” block to a page and select a product.
-3. Make sure that the resizable handle is a shown fully (it should be a full circle), and that is shown only when the block is selected.
-4. Select the block and apply a Duotone filter.
-5. Make sure the overlay color control is under the `Overlay` section and change the overlay color to a gradient.
-6. Add a padding to the block and make sure the padding is added on the inside of the wrapper (i.e. no white space is created outside of the block).
-7. Move around your image focal point and make sure you can actually move around the entire image and not only constrained on one dimension.
-8. Apply “Image fit > Cover” and notice how the image will scale along with the container. As opposed to point 5 above, now the focal point picker is limited to one dimension.
-9. Increase the `padding-top` of the block and notice that the content can't get pushed out of the container, but instead the container resizes.
-10. When that's the case, try resizing the block through the handle to a lower height: the handle should move but the container should not resize. When the mouse is lifted, the handle should return to its original position.
-11. For the steps 4–9 above, save the page and check that the styles are applied correctly on the front-end (as the block is rendered statically via PHP).
-
-### Allow adding the Filter Products by Stock block to Product Catalog templates to filter products. ([6261](https://github.com/woocommerce/woocommerce-gutenberg-products-block/pull/6261))
-
-1. With a block theme, go to Appearance > Editor > Template > Product Catalog.
-2. Add the Filter Products by Stock block above the product grid.
-3. Be sure that you have some out stock products. Check "out of stock" on the frontend.
-4. Notice the page reloads and the list of products updates accordingly.
-5. Add a test page to your site with the `All Products` block, and the `Filter Product by Stock` block and ensure no regressions have been introduced here.
-
-### Enhanced the _Featured Product block_ ([6181](https://github.com/woocommerce/woocommerce-gutenberg-products-block/pull/6181))
-
-1. Use a block theme (such as Twenty Twenty Two)
-2. Add the ”Featured Product” block to a page and select a product.
-3. Make sure that the resizable handle is a shown fully (it should be a full circle), and that is shown only when the block is selected.
-4. Select the block and apply a Duotone filter.
-5. Make sure the overlay color control is under the `Overlay` section and change the overlay color to a gradient.
-6. Add a padding to the block and make sure the padding is added on the inside of the wrapper (i.e. no white space is created outside of the block).
-7. Move around your image focal point and make sure you can actually move around the entire image and not only constrained on one dimension.
-8. Apply “Image fit > Cover” and notice how the image will scale along with the container. As opposed to point 5 above, now the focal point picker is limited to one dimension.
-9. Increase the `padding-top` of the block and notice that the content can't get pushed out of the container, but instead the container resizes.
-10. When that's the case, try resizing the block through the handle to a lower height: the handle should move but the container should not resize. When the mouse is lifted, the handle should return to its original position.
-11. For the steps 4–9 above, save the page and check that the styles are applied correctly on the front-end (as the block is rendered statically via PHP).
-
-### Allow saved payment methods labels other than card/eCheck to display brand & last 4 digits if present. ([6177](https://github.com/woocommerce/woocommerce-gutenberg-products-block/pull/6177))
-
-1. Install latest dev/release version of WooCommerce Payments & setup an account in [dev mode](https://woocommerce.com/document/woopayments/testing-and-troubleshooting/sandbox-mode/).
-2. Under WooCommerce Payments -> Settings, Enable the new WooCommerce Payments checkout experience and add new payment methods.
- - This _should_ have enabled Euros in Multi-Currency automatically, but if not, go to WooCommerce > Settings > Multi-Currency and enable Euros as an additional currency.
-3. Save SEPA account to your customer account in one of two ways:
-
- - Add item to your cart and go to the classic checkout page, select SEPA, enter the account, and choose Save payment information to my account for future purchases., then check out.
- - Go to My Account > Payment Methods, and add the SEPA method there.
- - SEPA account to useAT611904300234573201 or other test numbers available here: <https://stripe.com/docs/testing#sepa-direct-debit>
-
-4. Once the SEPA method is saved, add an item to your cart and go to the page with the checkout block.
-5. Confirm that under Payment options you will see SEPA IBAN ending in 3201.
-
-### Store API: Allow Store API to filter products by custom taxonomies. ([6152](https://github.com/woocommerce/woocommerce-gutenberg-products-block/pull/6152))
-
-1. Add an All Products Block to a page, add the Filter Products by Attribute Block, and Filter by Price Block too.
-2. Go to the page and use the filters, ensure they update the All Products Block correctly.
-
-### Filter Products by Attribute: Fix the page reload which happens when clicking the filter button on Woo templates using the Classic Template block. ([6287](https://github.com/woocommerce/woocommerce-gutenberg-products-block/pull/6287))
-
-1. On a block theme, go to Edit Site > Product Catalog template.
-2. Add Active Filters and Filter Products by Attribute block to the template.
-3. Choose an attribute to filter, and make sure the filter button is toggled.
-4. Go to the shop page.
-5. Select an attribute, a reload should not happen until you click the filter button.
-6. Once the filter has been applied. Uncheck it, a reload should not happen until you click the filter button.
-7. Try this again with the filter button untoggled, although these reloads should now happen as soon as you check the attribute you're filtering by
-8. Check there are no regressions on All Products block.
-
-### Store API: Show visible attributes in simple products, and hidden attributes in variable products. ([6274](https://github.com/woocommerce/woocommerce-gutenberg-products-block/pull/6274))
-
-1. Create a simple product with attributes and set them as visible.
-2. Using a REST client, fetch `wc/store/v1/products/:id` and check the attributes field for the product where `:id` is the product id, in both cases, you should see the attributes you added.
-3. Uncheck visible attributes, fetch your product again, no attributes should be returned.
-4. Turn the product into a variable product, keep attributes hidden but check "used for variations".
-5. Fetch your product again, you should see your attributes.
-6. Make them visible, you should still see the attributes.
-
-### Add RTL support for the Mini Cart icon. ([6264](https://github.com/woocommerce/woocommerce-gutenberg-products-block/pull/6264))
-
-1. Add Mini Cart to the site (Header for block themes, Sidebar for classic theme).
-2. Set the language to an RTL language (ie: Arabic).
-3. See the Mini Cart looks good on the front end.
-
-### Fix page load problem due to incorrect URL to certain assets. ([6260](https://github.com/woocommerce/woocommerce-gutenberg-products-block/pull/6260))
-
-1. Install WC 6.4 but move and symlink its folder.
-
-```sh
-mv wp-content/plugins/woocommerce ~/Desktop/woocommerce
-ln -s ~/Desktop/woocommerce wp-content/plugins/woocommerce
-```
-
-2. Install WooCommerce Subscriptions.<!-- markdownlint-disable-line MD029 -->
-3. Try to open wp-admin > WooCommerce > Home (/wp-admin/admin.php?page=wc-admin). With base branch, expect a blank page. With this PR branch, expect page loads normally.<!-- markdownlint-disable-line MD029 -->
-
-### Make Filters Products by Price work with Active Filters block for the PHP rendered Classic Template. ([6245](https://github.com/woocommerce/woocommerce-gutenberg-products-block/pull/6245))
-
-1. Add the `Filter Products by Price` block & `Active Filters` block to the **Shop** Page
-2. Open the **Shop** page
-3. Use the `Filter Products by Price` block, the page should reload with the filter params now being in the URL too.
-4. Check the `Active Filters` block shows the active price filter.
-
-### Fix attribute filter dropdown list z-index level. ([6294](https://github.com/woocommerce/woocommerce-gutenberg-products-block/pull/6294))
-
-1. Create new page with Filter Products by Attribute and All Products block right under
-2. Configure Filter block to use Dropdown display style and show Colour attribute (if using sample products)
-3. Have products on sale in first row
-4. Visit page and focus on field to see dropdown
-
-- All Products block Placeholder elements should be under the dropdown
-- Sale badge shouldn't bleed through the dropdown
-
-### Fix Featured Product block frontend mismatch. ([6263](https://github.com/woocommerce/woocommerce-gutenberg-products-block/pull/6263))
-
-1. Switch to a block-enabled theme (such as Twenty-twentytwo).
-2. Add the Featured Product block to a page.
-3. Confirm that it has a default, semi-transparent, black overlay and that a default height of 500 px or whatever the theme supports through the `featured_block::default_height` setting.
-4. Publish the page.
-5. Preview the page and confirm that the block looks like the one in the editor (specifically for height and overlay).
-6. Play around with the styles of the block on the editor (change the overlay color, the padding, the opacity, the image fit etc.).
-7. Confirm they get correctly applied on the frontend.
-
-### Fix Customizer fatal error on PHP 8. ([6317](https://github.com/woocommerce/woocommerce-gutenberg-products-block/pull/6317))
-
-1. Switch to PHP 8.
-2. Activate WC 6.5 beta 1 and Storefront.
-3. Apply change in this PR to `wp-content/plugins/woocommerce/packages/woocommerce-blocks/src/BlockTypes/MiniCart.php`.
-4. Go to Appearance > Customize.
-5. See no fatal error, the Customizer is loading and working as expected.
-
-### Fix page refresh when using filters with the All Products block on non-product archive templates for WooCommerce. ([6324](https://github.com/woocommerce/woocommerce-gutenberg-products-block/pull/6324))
-
-1. Activate Storefront
-2. Add the All Products block to a newly created page, along with a filter block such as Filter by Attribute
-3. Visit this page on the frontend and select some attributes to filter by.
-4. Observe the filters being applied without a page refresh.
diff --git a/plugins/woocommerce/client/blocks/docs/internal-developers/testing/releases/760.md b/plugins/woocommerce/client/blocks/docs/internal-developers/testing/releases/760.md
deleted file mode 100644
index 664dbcbbedc..00000000000
--- a/plugins/woocommerce/client/blocks/docs/internal-developers/testing/releases/760.md
+++ /dev/null
@@ -1,152 +0,0 @@
-# Testing notes and ZIP for release 7.6.0
-
-Zip file for testing: [woocommerce-gutenberg-products-block.zip](https://github.com/woocommerce/woocommerce-gutenberg-products-block/files/8651068/woocommerce-gutenberg-products-block.zip)
-
-## Feature plugin and package inclusion in WooCommerce
-
-### Featured Category: Add background color option. ([6368](https://github.com/woocommerce/woocommerce-gutenberg-products-block/pull/6368))
-
-Prerequisites:
-
-- Use the latest WordPress version (we want to use the site editor / Global Styles in testing).
-- Install & use a block theme e.g.[ Twenty Twenty-Two](https://pcm.wordpress.org/themes/twentytwentytwo/).
-- **Deactivate** the Gutenberg plugin for testing as we're currently observing [this issue](https://github.com/WordPress/gutenberg/issues/40808).
-
-1. Create a new post/page.
-2. In the editor, add two `Featured Category` blocks.
-3. For each block select the same category, it should have a product picture.
-4. Select each block and use the Replace button in the block toolbar to add a product image smaller than the Featured Category block (for an example see screenshots above).
-5. Now select the first `Featured Category` block. In the editor sidebar's `Color` section of the block select a `Background` color. The background color should be visible in the parts not covered by the product image.
-6. Save your post/page.
-7. In the admin dashboard navigate to `Appearance` > `Editor` (`/wp-admin/site-editor.php`).
-8. Open the Styles sidebar by clicking the round Styles icon in the top right of the editor.
-9. In the Styles sidebar navigate to `Blocks` > `Featured Category` > `Colors` > `Background`.
-10. Change the background color and save your changes.
-11. Navigate back to the post/page you previously created.
-12. The first block should still show the background color you selected in step 5. The second block should show the Global Styles color you selected in step 10.
-13. Click `Preview` > `Preview in new tab` and confirm the colors appear as expected on the Frontend of your site as well.
-
-### Featured Product: Add background color option. ([6367](https://github.com/woocommerce/woocommerce-gutenberg-products-block/pull/6367))
-
-Prerequisites:
-
-- Use the latest WordPress version (we want to use the site editor / Global Styles in testing).
-- Install & use a block theme e.g.[ Twenty Twenty-Two](https://pcm.wordpress.org/themes/twentytwentytwo/).
-- **Deactivate** the Gutenberg plugin for testing as we're currently observing [this issue](https://github.com/WordPress/gutenberg/issues/40808).
-
-1. Create a new post/page.
-2. In the editor, add two `Featured Product` blocks.
-3. For each block select the same product, it should have a product picture.
-4. Select each block and use the Crop tool in the block toolbar to crop the product image smaller than the Featured product block e.g. by setting the aspect ratio to 2:3.
-5. Now select the first `Featured Product` block. In the editor sidebar's `Color` section of the block select a `Background` color. The background color should be visible in the parts not covered by the product image.
-6. Save your post/page.
-7. In the admin dashboard navigate to `Appearance` > `Editor` (`/wp-admin/site-editor.php`).
-8. Open the Styles sidebar by clicking the round Styles icon in the top right of the editor.
-9. In the Styles sidebar navigate to `Blocks` > `Featured Product` > `Colors` > `Background`.
-10. Change the background color and save your changes.
-11. Navigate back to the post/page you previously created.
-12. The first block should still show the background color you selected in step 5. The second block should show the Global Styles color you selected in step 10.
-13. Click `Preview` > `Preview in new tab` and confirm the colors appear as expected on the Frontend of your site as well.
-
-### Added media controls allowing the user to edit images within the editor on a Featured Category block. ([6360](https://github.com/woocommerce/woocommerce-gutenberg-products-block/pull/6360))
-
-1. Add the Featured Category block
-2. Choose either a category with an associated image or select an image for the block through the toolbar
-3. Click on the “Crop” icon on the toolbar
-4. Ensure the toolbar controls are now changed and show: `Zoom, Aspect ratio, Rotate | Apply, Cancel` controls
-5. Ensure only the image is now visible instead of the whole block inside the image editor
-6. Try executing edits and applying them
-7. Ensure the image turns semi-transparent and a loading spinner shows in the image
-8. Ensure the block now shows your edited image
-9. Click on the “Crop” icon again
-10. Click away from the block
-11. Ensure the block exits “Edit mode”
-
-### Added media controls allowing the user to edit images within the editor on a Featured Product block. ([6348](https://github.com/woocommerce/woocommerce-gutenberg-products-block/pull/6348))
-
-1. Add the Featured Product block
-2. Choose a product with an image or select an image for the block through the toolbar
-3. Click on the “Crop” icon on the toolbar
-4. Ensure the toolbar controls are now changed and show: `Zoom, Aspect ratio, Rotate | Apply, Cancel` controls
-5. Ensure only the image is now visible instead of the whole block inside the image editor
-6. Try executing edits and applying them
-7. Ensure the image turns semi-transparent and a loading spinner shows in the image
-8. Ensure the block now shows your edited image
-9. Click on the “Crop” icon again
-10. Click away from the block
-11. Ensure the block exits “Edit mode”
-
-### Add the alt text control to the Featured Category block media settings. ([6341](https://github.com/woocommerce/woocommerce-gutenberg-products-block/pull/6341))
-
-1. Create a new page and add a `Featured Category`.
-2. On the block settings go to `Media Settings` and check the `Alt text` textarea appears empty.
-3. Add an `alt` text, save the block and check it renders on the frontend with the specified `alt` text.
-4. Edit the block again, remove the `alt` text and save it.
-5. Check the `alt` rendered on the frontend corresponds to the category name.
-
-### Hide the Product Tag Cloud from the Widgets screen in classic themes. ([6327](https://github.com/woocommerce/woocommerce-gutenberg-products-block/pull/6327))
-
-1. With a classic theme (ie: Storefront), go to Appearance > Widgets.
-2. Open the block inserter and make sure the Product Tag Cloud (isn't showing up)
-
-### Add the alt text control to the Featured Product block media settings. ([6308](https://github.com/woocommerce/woocommerce-gutenberg-products-block/pull/6308))
-
-1. Create a new page and add a `Featured Product`.
-2. On the block settings go to `Media Settings` and check the `Alt text` textarea appears empty.
-3. Add an `alt` text, save the block and check it renders on the frontend with the specified `alt` text.
-4. Edit the block again, remove the `alt` text and save it.
-5. Check the `alt` rendered on the frontend corresponds to the product name.
-
-### GridContentControl: Add product image control. ([6302](https://github.com/woocommerce/woocommerce-gutenberg-products-block/pull/6302))
-
-1. Activate a **block** theme, like Twenty Twenty Two
-2. Create a new page, and add all the aforementioned, affected blocks (Handpicked Products etc.)
-
-- Hand-picked Products
-- Products by Tag
-- Products by Attribute
-- Products by Category
-- Best Selling Products
-- Newest Products
-- On Sale Products
-- Top Rated Products
-
-3. Check if the **Product image** toggle is present under **Content**
-4. Verify that the toggle shows/hides product Images both in the editor and the frontend
-
-### Remove the Template panel from the Setting Sidebar for Shop page. ([6366](https://github.com/woocommerce/woocommerce-gutenberg-products-block/pull/6366))
-
-1. Active Twenty Twenty-Two.
-2. Make sure WooCommerce is setup (WC pages are installed).
-3. Edit the Shop Page, don't see the Template panel.
-4. Edit other pages, see the Template panel as normal.
-
-### Parse categories coming from the back-end as a json array. ([6358](https://github.com/woocommerce/woocommerce-gutenberg-products-block/pull/6358))
-
-1. Create two products assigned to two different categories and add one review to each of them.
-2. Create a new page and add a `Reviews by Category` block.
-3. Select only one category on the block (corresponding to one of the previous products/reviews) and save it.
-4. Check that it renders the expected reviews only on the edit mode.
-5. Publish the page, go to the frontend and check it renders the same expected reviews.
-6. Edit the block and select multiple categories.
-7. Check that it renders the expected reviews only on the edit mode.
-8. Update the page, go to the frontend and check it renders the same expected reviews.
-9. Edit again the block and deselect all the categories.
-10. Check that it renders **all** the reviews only on the edit mode.
-11. Update the page, go to the frontend and check it renders also **all** the reviews.
-
-### Fix: Mini Cart block is not available from the Edit template screen. ([6351](https://github.com/woocommerce/woocommerce-gutenberg-products-block/pull/6351))
-
-1. With Twenty Twenty-Two, add the Mini Cart block to the header template part.
-2. Edit a page using Block Editor.
-3. From the Page sidebar, edit the template. \
- 
-4. Notice the Mini Cart block works as expected.
-
-### Fix Filter Products by Attribute block not working on PHP templates when Filter button was enabled. ([6332](https://github.com/woocommerce/woocommerce-gutenberg-products-block/pull/6332))
-
-1. With a block theme, go to Appearance > Site Editor.
-2. Go to Templates and edit the Product Catalog template.
-3. Above the WooCommerce Classic Template block, add the Filter Products by Attribute block (making sure you only have one Filter Products by Attribute block) and set its _Filter button_ attribute to true.
-4. In the frontend, filter by attribute.
-5. Verify the page reloads and the filter is applied.
diff --git a/plugins/woocommerce/client/blocks/docs/internal-developers/testing/releases/761.md b/plugins/woocommerce/client/blocks/docs/internal-developers/testing/releases/761.md
deleted file mode 100644
index 0b3723d11ee..00000000000
--- a/plugins/woocommerce/client/blocks/docs/internal-developers/testing/releases/761.md
+++ /dev/null
@@ -1,37 +0,0 @@
-# Testing notes and ZIP for release 7.6.1
-
-Zip file for testing: [woocommerce-gutenberg-products-block.zip](https://github.com/woocommerce/woocommerce-blocks/files/8927877/woocommerce-gutenberg-products-block.zip)
-
-## Feature plugin and package inclusion in WooCommerce
-
-### Fix PHP notice in Mini Cart when prices included taxes. ([6537](https://github.com/woocommerce/woocommerce-blocks/pull/6537))
-
-1. Go to _WooCommerce_ > _Settings_ and check _Enable tax rates and calculations_.
-2. Go to the _Tax_ tab in the settings and check _Yes, I will enter prices inclusive of tax_ and _Display prices during cart and checkout: Including tax_.
-3. Add the Mini Cart block to a post or page.
-4. Visit that post or page in the frontend, and verify there isn't a PHP notice.
-
-| Before | After |
-| ----------------------------------------------------------------------------------------------------------------------------------------- | ------------------------------------------------------------------------------------------------------------------------------------------ |
-|  |  |
-
-### Replace instances of wp_is_block_theme() with wc_current_theme_is_fse_theme(). ([6590](https://github.com/woocommerce/woocommerce-blocks/pull/6590))
-
-**Templates logic:**
-
-1. With a block theme.
-2. Go to Appearance > Editor and verify you can modify the WooCommerce templates: Products by Tag, Products by Category, Single Product or Product Catalog (don't test Product Search template yet).
-3. Do some smoke testing: make an edit, save it, go to the frontend and verify the change has been applied, restore the template, etc.).
-
-**Product Search template:**
-
-1. With a block theme.
-2. Go to Appearance > Editor and verify you can modify the Product Search Results template.
-3. Do some smoke testing: make an edit, save it, go to the frontend and verify the change has been applied, restore the template, etc.).
-
-**Mini Cart link:**
-
-1. With a block theme.
-2. In a post or page, add the Mini Cart block.
-3. In the sidebar, click on _Edit Mini Cart template part(opens in a new tab)_.
-4. Verify you land in the template part editor, editing the Mini Cart block.
diff --git a/plugins/woocommerce/client/blocks/docs/internal-developers/testing/releases/762.md b/plugins/woocommerce/client/blocks/docs/internal-developers/testing/releases/762.md
deleted file mode 100644
index 92d69516422..00000000000
--- a/plugins/woocommerce/client/blocks/docs/internal-developers/testing/releases/762.md
+++ /dev/null
@@ -1,16 +0,0 @@
-# Testing notes and ZIP for release 7.6.2
-
-Zip file for testing: [woocommerce-gutenberg-products-block.zip](https://github.com/woocommerce/woocommerce-blocks/files/8940540/woocommerce-gutenberg-products-block.zip)
-
-## Feature plugin and package inclusion in WooCommerce
-
-### Fix images hidden by default in Product grid blocks after WC 6.6 update. ([6599](https://github.com/woocommerce/woocommerce-blocks/pull/6599))
-
-1. With WC core 6.5.1 and WC Blocks disabled, add a Handpicked Products block to a post or page.
-2. Hide the Product price and Product rating using the sidebar toggles.
-3. Publish the post or page.
-4. Update to WC core to 6.6.0.
-5. Notice the images are no longer visible.
-6. Enable WC Blocks (with this branch).
-7. Verify images are visible by default.
-8. Verify you can still toggle the images.
diff --git a/plugins/woocommerce/client/blocks/docs/internal-developers/testing/releases/770.md b/plugins/woocommerce/client/blocks/docs/internal-developers/testing/releases/770.md
deleted file mode 100644
index 0079434987b..00000000000
--- a/plugins/woocommerce/client/blocks/docs/internal-developers/testing/releases/770.md
+++ /dev/null
@@ -1,36 +0,0 @@
-# Testing notes and ZIP for release 7.7.0
-
-Zip file for testing: [woocommerce-gutenberg-products-block.zip](https://github.com/woocommerce/woocommerce-blocks/files/8777633/woocommerce-gutenberg-products-block.zip)
-
-## Feature plugin and package inclusion in WooCommerce
-
-### Add the `Fixed image` and `Repeated image` media controls to the Featured Product block. ([6344](https://github.com/woocommerce/woocommerce-blocks/pull/6344))
-
-1. Create a new page and add a `Featured Product`.
-2. On the block settings go to `Media Settings` and toggle `Fixed image` and `Repeated image` and save.
-3. Check the rendered product on the frontend is correct and matches the one on the edit page.
-4. Edit the block again, repeat the steps above with different combinations on `Fixed image`, `Repeated image` and any other configuration.
-
-### Remove bold styles from All Products block. ([6436](https://github.com/woocommerce/woocommerce-blocks/pull/6436))
-
-| Before | After |
-| -------------------------------------------------------------------------------------------------------------- | -------------------------------------------------------------------------------------------------------------- |
-| 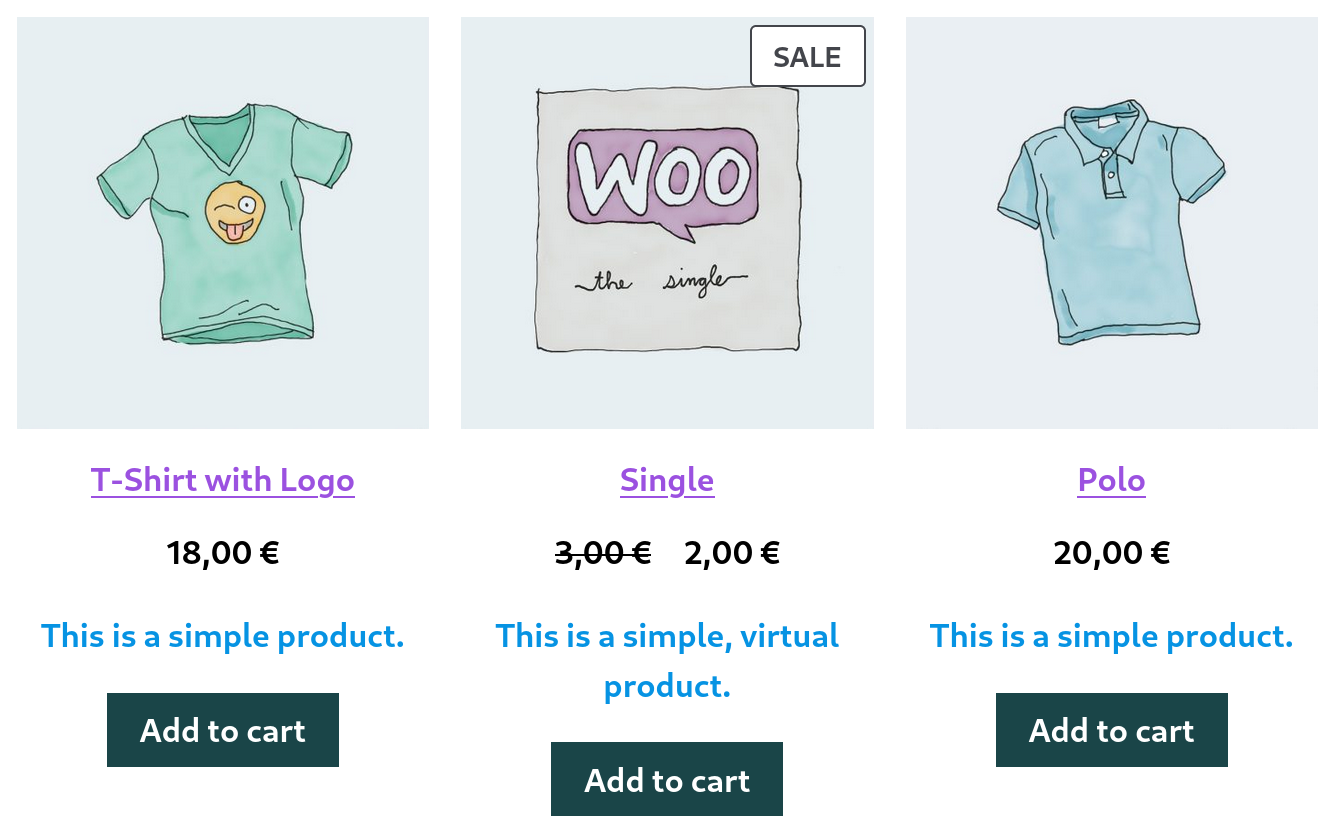 | 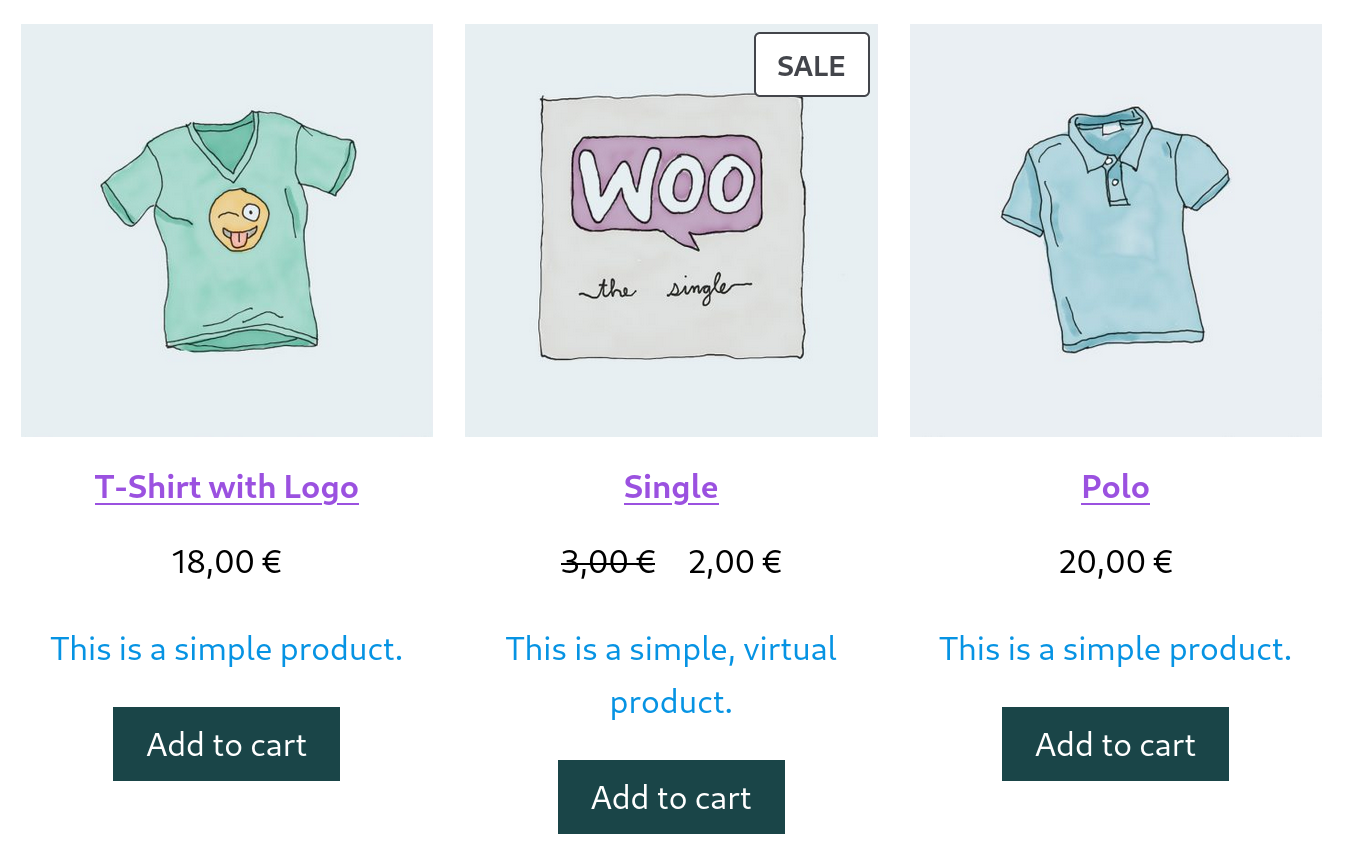 |
-
-1. Create a post or page and add the All Products block. Optionally, edit the inner blocks and add the Product Summary inner block (this will make the issue more visible).
-2. Preview the post in the frontend.
-3. Verify product price and product summary are not bold.
-4. Verify there are no regressions in the All Products block and in the Shop page.
-
-## Feature plugin only
-
-### Fix an issue where the Cart & Checkout could have some of the locked inner blocks removed. ([6419](https://github.com/woocommerce/woocommerce-blocks/pull/6419))
-
-1. Install WordPress beta tester plugin and update to WP 6.0.
-2. Go to the Cart page in the editor.
-3. Click on list view.
-4. Try to unlock every inner block with a padlock icon next to it. This should not be possible.
-5. Try to delete any of the inner blocks with a padlock next to it. This should not be possible.
-6. Go to the Checkout page in the editor.
-7. Try to unlock every inner block with a padlock icon next to it (except Order Note block, this is locked for moving, but not for removing). This should not be possible.
-8. Try to delete any of the inner blocks with a padlock next to it. This should not be possible.
diff --git a/plugins/woocommerce/client/blocks/docs/internal-developers/testing/releases/780.md b/plugins/woocommerce/client/blocks/docs/internal-developers/testing/releases/780.md
deleted file mode 100644
index 46636a4a69e..00000000000
--- a/plugins/woocommerce/client/blocks/docs/internal-developers/testing/releases/780.md
+++ /dev/null
@@ -1,130 +0,0 @@
-# Testing notes and ZIP for release 7.8.0
-
-Zip file for testing: [woocommerce-gutenberg-products-block.zip](https://github.com/woocommerce/woocommerce-blocks/files/8853168/woocommerce-gutenberg-products-block.zip)
-
-## Feature plugin and package inclusion in WooCommerce
-
-### Filter Products by Price: Decrease price slider step sequence from 10 to 1. ([6486](https://github.com/woocommerce/woocommerce-blocks/pull/6486))
-
-1. Create a new page and add a "Filter Products by Price" block plus the "All Products" to the page.
-2. Save and preview the site on the Frontend e.g. via "Preview > Preview in new tab".
-3. Interact with the price slider and confirm the price slider now increments in steps of 1 instead of 10.
-4. Smoke test to ensure all other "Filter Products by Price" is still working as expected.
-
-### Add the `Fixed image` and `Repeated image` media controls to the Featured Category block. ([6440](https://github.com/woocommerce/woocommerce-blocks/pull/6440))
-
-1. Create a new page and add a `Featured Category` block, select a Category and, if it doesn't have an image, set one with the _Replace_ button in the toolbar.
-2. On the block settings go to `Media Settings` and toggle `Fixed image` and `Repeated image` and save.
-3. Check the rendered category on the frontend is correct and matches the one on the edit page.
-4. Add a gradient overlay, save, and check the gradient is rendered on the frontend.
-5. Edit the block again, repeat the steps above with different combinations on `Fixed image`, `Repeated image` and any other configuration.
-6. Repeat steps 1-5 for the `Featured Product` block.
-
-### Featured Item Blocks: Fix an issue where the default color could be overridden by a theme, and where custom colors where not applied correctly. ([6492](https://github.com/woocommerce/woocommerce-blocks/pull/6492))
-
-| Before | After |
-| --------------------------------------------------------------------------------------------------------------- | -------------------------------------------------------------------------------------------------------------- |
-| 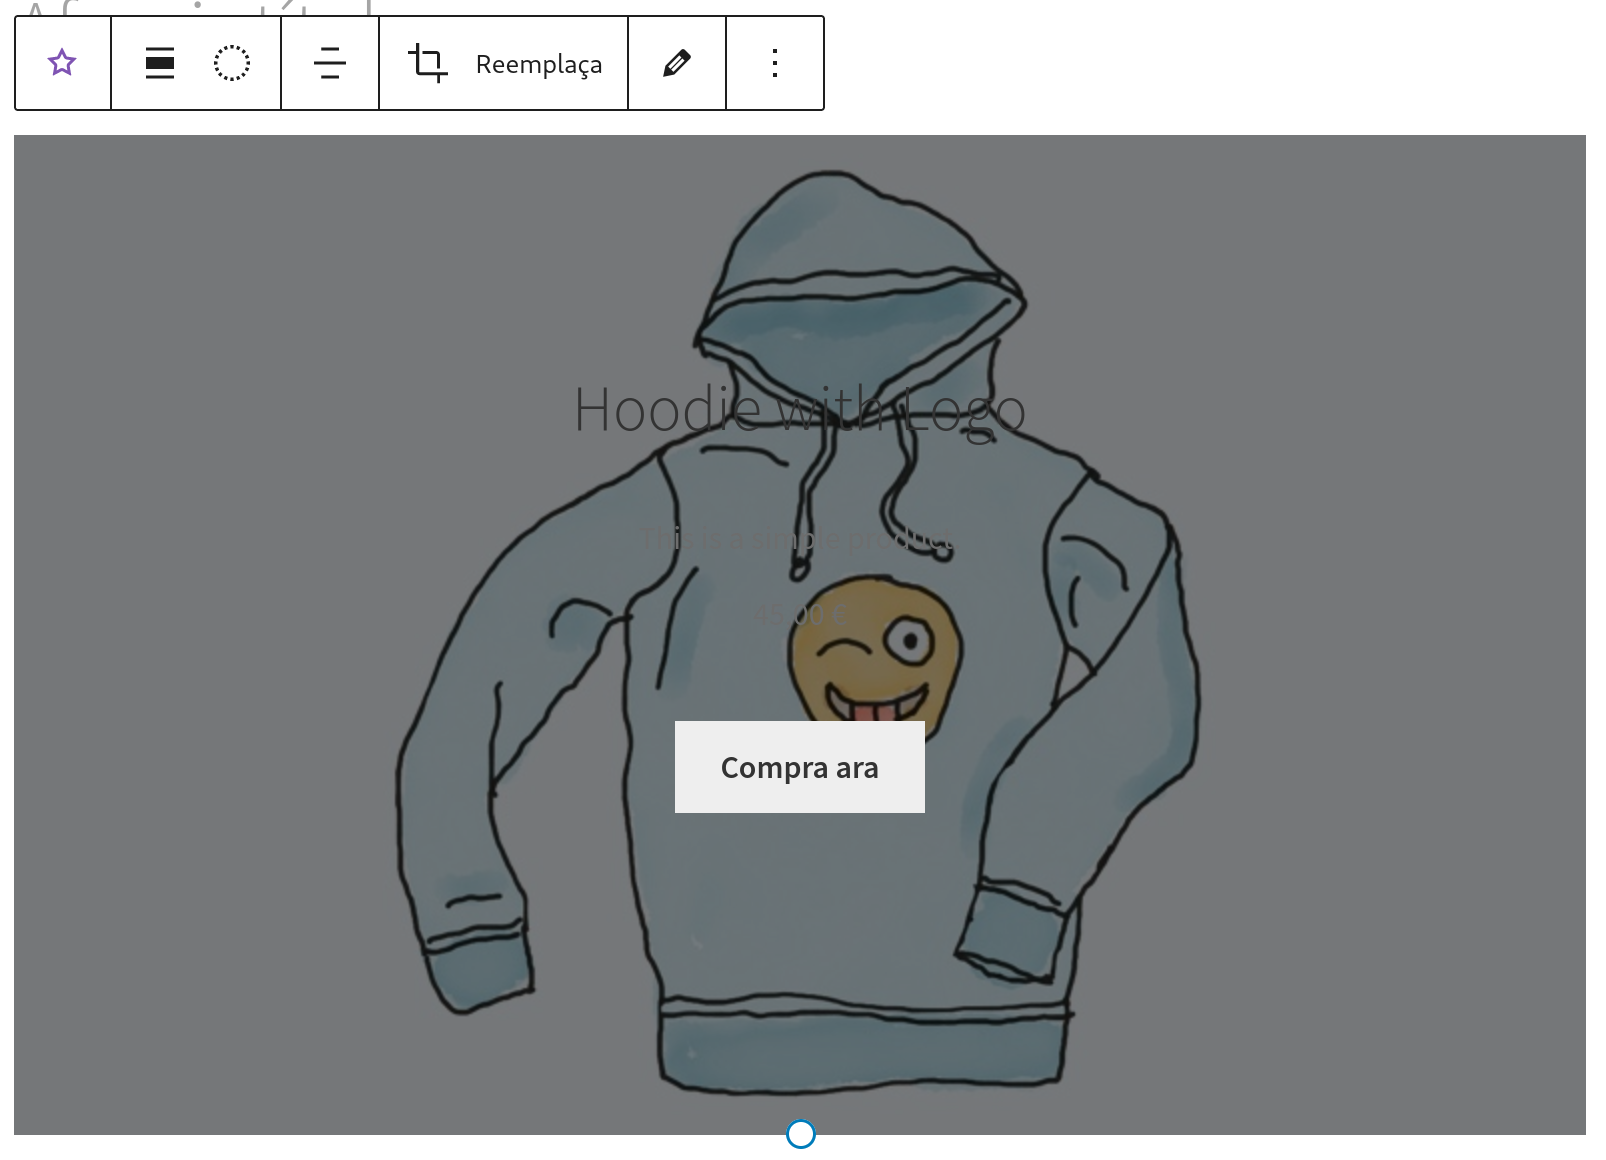 | 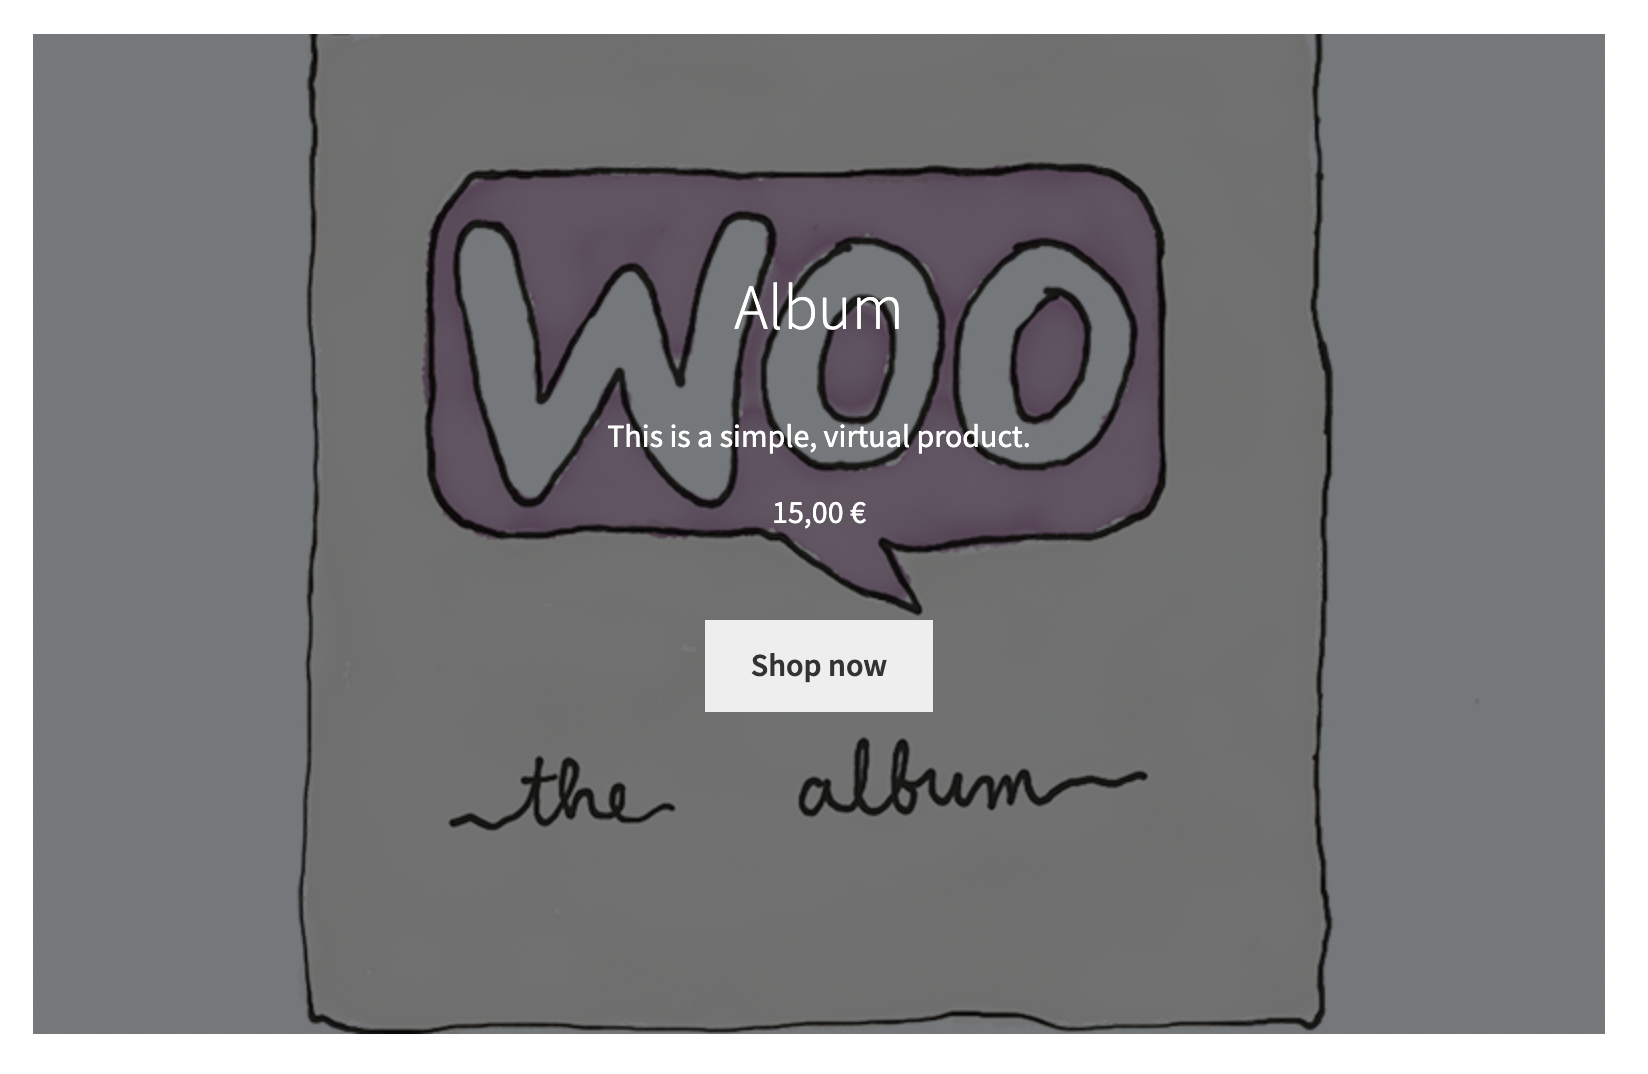 |
-
-1. Activate the Storefront theme.
-2. Add the Featured Product block to the page.
-3. Select a product.
-4. Notice that the default color of the text inside should be white.
-5. Change the color using the picker to a custom one (not included in the default palette).
-6. The color of the text should change.
-7. Repeat steps 2–6 with the Featured Category block.
-
-### Fix: All Products block: New product is missing in the Cart block if `Redirect to the cart page after successful addition` is enabled. ([6466](https://github.com/woocommerce/woocommerce-blocks/pull/6466))
-
-1. Go to WooCommerce > Settings > Products > check both 'add to cart' behaviors to redirect and use AJAX, then save
-2. On the home page, add the All Products block
-3. On the front-end, click "add to cart" for any product
-4. See the page is redirected to the Cart page and the Cart block contains the newly added product.
-
-### Add support for `Font size` and `Font family` for the `Mini Cart` block. ([6396](https://github.com/woocommerce/woocommerce-blocks/pull/6396))
-
-| Before | After |
-| ------------------------------------------------------------------------------------------------------------------ | ----------------------------------------------------------------------------------------------------------------- |
-| 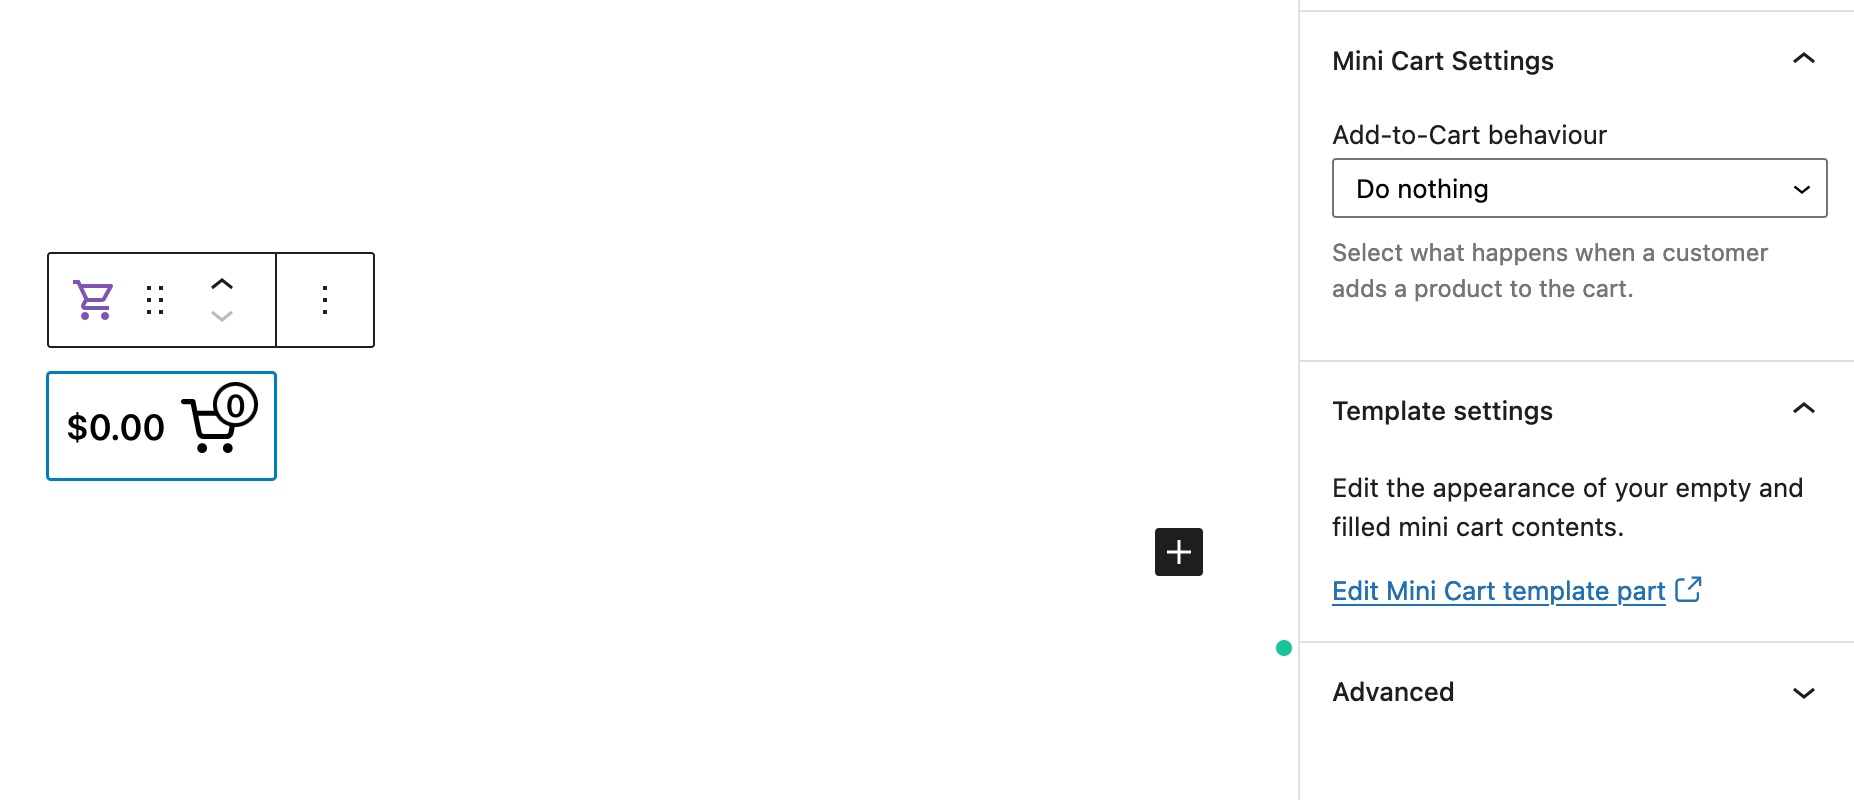 | 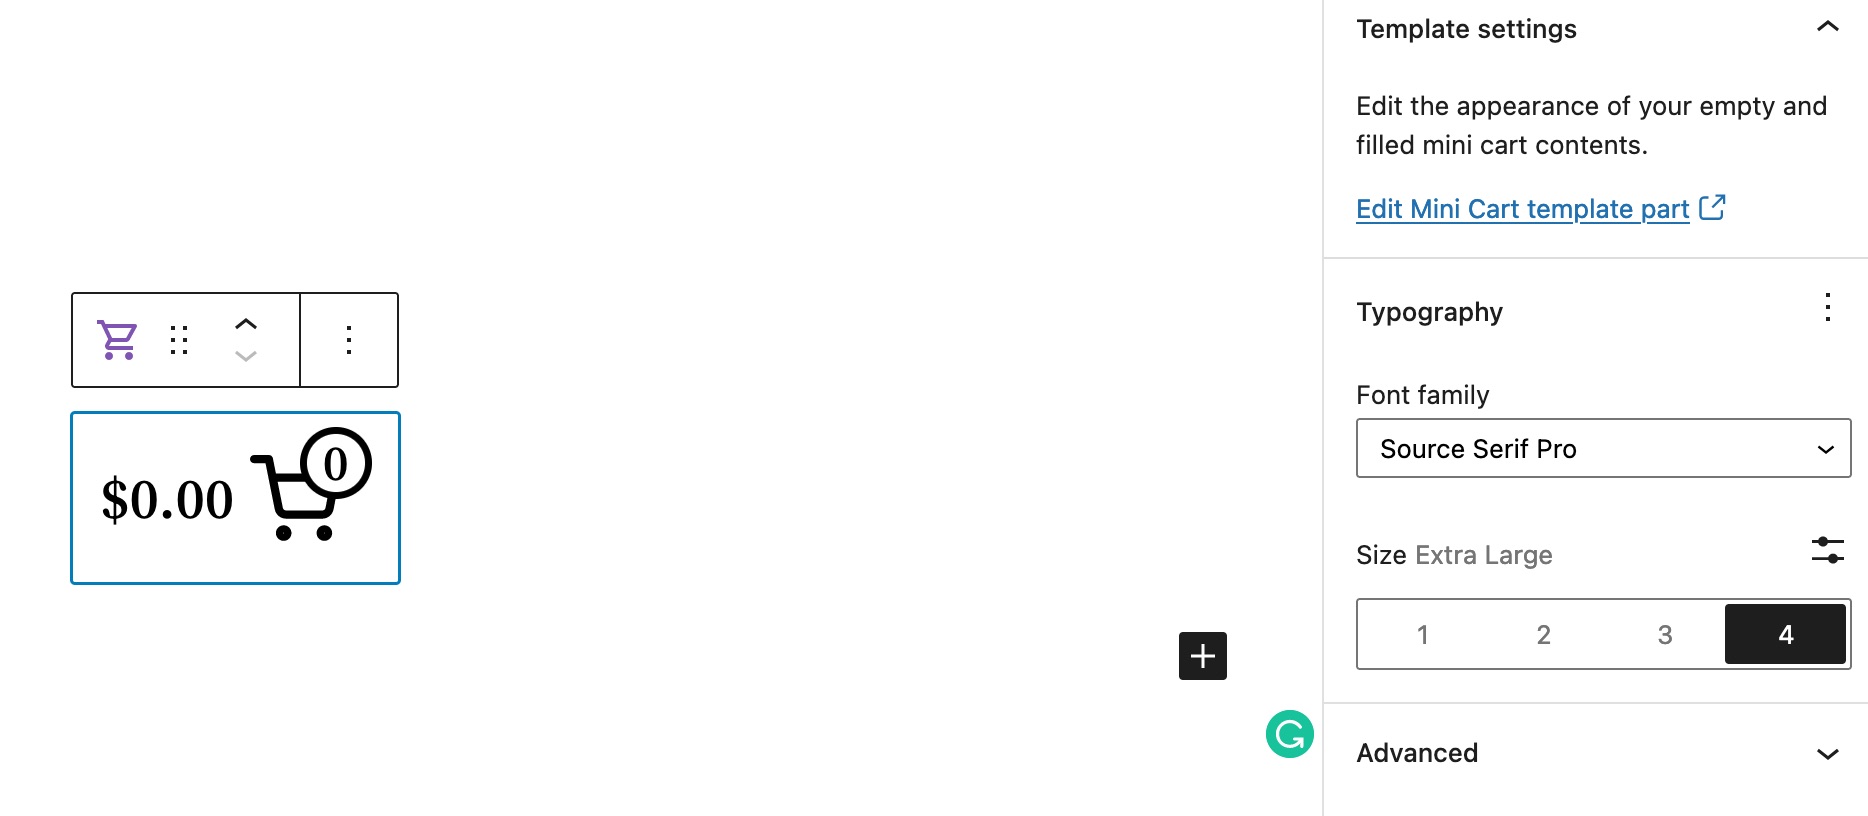 |
-
-1. Activate a **block** theme, like Twenty Twenty Two
-2. Create a new page, and add the Mini Cart block
-3. Check if the `Typography` option is available for the block
-4. Check if the `Font size` and `Font family` options work correctly both in the editor and on the frontend
-
-2b. After testing the above, try the same with the Mini Cart block added via the FSE editor (for example in the header)
-
-### Set the default value for focalPoint on `block.json`. ([6499](https://github.com/woocommerce/woocommerce-blocks/pull/6499))
-
-<img width="802" alt="Screenshot 2022-05-31 at 12 31 54" src="https://user-images.githubusercontent.com/186112/171153985-f4227ec0-9bd0-4a8e-823f-5ce396a3985d.png">
-
-1. Create a new page and add a `Featured Product` or a `Featured Category` block and open the console.
-2. Save the page and refresh the editor.
-3. Click on the added block, edit some settings and check the error shown on the screenshot above does not appear.
-4. Edit the focal point, save the block and check the block is rendered correctly on the edit page and on the frontend.
-
-### Featured items: ensure valid DOM nesting in inspector controls. ([6501](https://github.com/woocommerce/woocommerce-blocks/pull/6501))
-
-<img width="539" alt="Screenshot 2022-05-31 at 15 45 53" src="https://user-images.githubusercontent.com/1562646/171188665-aa0f82e8-2d74-4936-b0ad-122ee301925b.png">
-
-<img width="266" alt="Screenshot 2022-05-31 at 14 28 01" src="https://user-images.githubusercontent.com/1562646/171189159-48bf6f3b-504b-4dee-9eab-f6ca8cc079c0.png">
-
-1. Create a new page and add a `Featured Product` or a `Featured Category` block and open the console.
-2. Click on the added block, edit some settings and check the error shown on the screenshot above does not appear.
-
-### Migrate Featured Items Blocks to TypeScript. ([6439](https://github.com/woocommerce/woocommerce-blocks/pull/6439))
-
-1. Add the **Featured Product** block to a page
-2. Compare its functionality with the same block before these changes. Non-exhaustive list:
- - When added, it shows a full-width selection dropdown to choose the product
- - After choosing the product and clicking "Done", a loading spinner appears and the product is loaded
- - All the info are displayed correctly (default image, title, description, price, call to action)
- - The block toolbar shows the same tools (duotone, alignment, cropping/replacing, editing)
- - The block sidebar shows the same options and they all work correctly (colors, content, media settings, etc.); note that the “border” does not currently work.
- - The block appears resizable and resizing works the same way.
-3. Verify the same for the **Featured Category** block.
-
-### Refactor: Featured product and Featured category classes. ([6443](https://github.com/woocommerce/woocommerce-blocks/pull/6443))
-
-1. Create a page and add a `Featured Category` block.
-2. Save the page and check it renders correctly the default config in the frontend.
-3. Edit the page and make some changes to the block (duotone, padding, overlay, focal point, fixed/repeated image etc.).
-4. Save the page and check it renders correctly with the new settings.
-5. Repeat steps 1-4 with the `Featured Product` block.
-
-## Feature plugin only
-
-### Fix: Only enqueue the relevant translations script. ([6478](https://github.com/woocommerce/woocommerce-blocks/pull/6478))
-
-0. Change the language to the Netherlands then update all translations.
-1. Visit a page without any blocks on the front end.
-2. View source (don't use the Inspector).
-3. See no unnecessary translations as the screenshot in [#6023](https://github.com/woocommerce/woocommerce-blocks/pull/6023) shows.
-4. Create a page with the All Products block.
-5. See translations work as expected in the editor and on the front end.
-6. See the translation of Cart and Checkout blocks (and their inner blocks) are working as expected.
-7. Check the page source of the pages containing WooCommerce Blocks, see only related translations are loaded.
-
-### Respect low stock visibility setting in Cart/Checkout. ([6444](https://github.com/woocommerce/woocommerce-blocks/pull/6444))
-
-1. Change a product to have its stock be managed, and set the stock quantity to 8.
-2. Set that product Low stock threshold value to 10.
-3. In WooCommerce -> Settings -> Products -> Inventory, set display format to "only show when below".
-4. Add the item to your cart, you should see the low stock badge.
-5. Change the setting to "never".
-6. Visit cart again, the product no longer has the badge.
-
-### Remove `useStoreSnackbarNotices` and interact directly with data store instead. ([6411](https://github.com/woocommerce/woocommerce-blocks/pull/6411))
-
-1. Add a coupon to your store.
-2. Add items to your cart.
-3. Go to the Cart block, and apply the coupon. Ensure you see the snackbar notice for a successful coupon application.
-4. **In a new tab**, open the Cart block again and remove the coupon. Ensure you see the snackbar notice for successful coupon removal.
-5. Go back to the original tab and try removing the coupon, ensure you see an error message above the Cart.
-6. Repeat the same steps but for the Checkout block.
-
-### Decouple Store API payment handling from Checkout block loading code. ([6519](https://github.com/woocommerce/woocommerce-blocks/pull/6519))
-
-1. Have a payment method like Stripe or WooCommerce payments enabled.
-2. Go to checkout and try to place an order.
-3. The order is placed and payment is captured and highlighted in admin area.
diff --git a/plugins/woocommerce/client/blocks/docs/internal-developers/testing/releases/781.md b/plugins/woocommerce/client/blocks/docs/internal-developers/testing/releases/781.md
deleted file mode 100644
index b5b9698dada..00000000000
--- a/plugins/woocommerce/client/blocks/docs/internal-developers/testing/releases/781.md
+++ /dev/null
@@ -1,16 +0,0 @@
-# Testing notes and ZIP for release 7.8.1
-
-Zip file for testing: [woocommerce-gutenberg-products-block.zip](https://github.com/woocommerce/woocommerce-blocks/files/8891266/woocommerce-gutenberg-products-block.zip)
-
-## Feature plugin and package inclusion in WooCommerce
-
-### Fix PHP notice in Mini Cart when prices included taxes. ([6537](https://github.com/woocommerce/woocommerce-blocks/pull/6537))
-
-1. Go to _WooCommerce_ > _Settings_ and check _Enable tax rates and calculations_.
-2. Go to the _Tax_ tab in the settings and check _Yes, I will enter prices inclusive of tax_ and _Display prices during cart and checkout: Including tax_.
-3. Add the Mini Cart block to a post or page.
-4. Visit that post or page in the frontend, and verify there isn't a PHP notice.
-
-| Before | After |
-| ----------------------------------------------------------------------------------------------------------------------------------------- | ------------------------------------------------------------------------------------------------------------------------------------------ |
-|  |  |
diff --git a/plugins/woocommerce/client/blocks/docs/internal-developers/testing/releases/782.md b/plugins/woocommerce/client/blocks/docs/internal-developers/testing/releases/782.md
deleted file mode 100644
index 2e62744d9c7..00000000000
--- a/plugins/woocommerce/client/blocks/docs/internal-developers/testing/releases/782.md
+++ /dev/null
@@ -1,26 +0,0 @@
-# Testing notes and ZIP for release 7.8.2
-
-Zip file for testing: [woocommerce-gutenberg-products-block.zip](https://github.com/woocommerce/woocommerce-blocks/files/8938665/woocommerce-gutenberg-products-block.zip)
-
-## Feature plugin and package inclusion in WooCommerce
-
-### Replace instances of wp_is_block_theme() with wc_current_theme_is_fse_theme(). ([6590](https://github.com/woocommerce/woocommerce-blocks/pull/6590))
-
-**Templates logic:**
-
-1. With a block theme.
-2. Go to Appearance > Editor and verify you can modify the WooCommerce templates: Products by Tag, Products by Category, Single Product or Product Catalog (don't test Product Search template yet).
-3. Do some smoke testing: make an edit, save it, go to the frontend and verify the change has been applied, restore the template, etc.).
-
-**Product Search template:**
-
-1. With a block theme.
-2. Go to Appearance > Editor and verify you can modify the Product Search Results template.
-3. Do some smoke testing: make an edit, save it, go to the frontend and verify the change has been applied, restore the template, etc.).
-
-**Mini Cart link:**
-
-1. With a block theme.
-2. In a post or page, add the Mini Cart block.
-3. In the sidebar, click on _Edit Mini Cart template part(opens in a new tab)_.
-4. Verify you land in the template part editor, editing the Mini Cart block.
diff --git a/plugins/woocommerce/client/blocks/docs/internal-developers/testing/releases/783.md b/plugins/woocommerce/client/blocks/docs/internal-developers/testing/releases/783.md
deleted file mode 100644
index 17327691f4b..00000000000
--- a/plugins/woocommerce/client/blocks/docs/internal-developers/testing/releases/783.md
+++ /dev/null
@@ -1,16 +0,0 @@
-# Testing notes and ZIP for release 7.8.3
-
-Zip file for testing: [woocommerce-gutenberg-products-block.zip](https://github.com/woocommerce/woocommerce-blocks/files/8940643/woocommerce-gutenberg-products-block.zip)
-
-## Feature plugin and package inclusion in WooCommerce
-
-### Fix images hidden by default in Product grid blocks after WC 6.6 update. ([6599](https://github.com/woocommerce/woocommerce-blocks/pull/6599))
-
-1. With WC core 6.5.1 and WC Blocks disabled, add a Handpicked Products block to a post or page.
-2. Hide the Product price and Product rating using the sidebar toggles.
-3. Publish the post or page.
-4. Update to WC core to 6.6.0.
-5. Notice the images are no longer visible.
-6. Enable WC Blocks (with this branch).
-7. Verify images are visible by default.
-8. Verify you can still toggle the images.
diff --git a/plugins/woocommerce/client/blocks/docs/internal-developers/testing/releases/790.md b/plugins/woocommerce/client/blocks/docs/internal-developers/testing/releases/790.md
deleted file mode 100644
index fdad7434a0d..00000000000
--- a/plugins/woocommerce/client/blocks/docs/internal-developers/testing/releases/790.md
+++ /dev/null
@@ -1,78 +0,0 @@
-# Testing notes and ZIP for release 7.9.0
-
-Zip file for testing: [woocommerce-gutenberg-products-block.zip](https://github.com/woocommerce/woocommerce-blocks/files/8950815/woocommerce-gutenberg-products-block.zip)
-
-## Feature plugin and package inclusion in WooCommerce
-
-### Disable page scroll when Mini Cart drawer is open. ([6532](https://github.com/woocommerce/woocommerce-blocks/pull/6532))
-
-1. Add the Mini Cart block to a post, page, or in the Site Editor.
-2. In the frontend, click on the Mini Cart button so the drawer opens.
-3. Try scrolling the page and verify you can't.
-4. Close the drawer and verify you can scroll again.
-
-### Register filter blocks using block metadata. ([6505](https://github.com/woocommerce/woocommerce-blocks/pull/6505))
-
-1. Smoke test that filters blocks are being loaded in the editor.
-2. Smoke test those blocks in frontend.
-
-### Fix images hidden by default in Product grid blocks. ([6599](https://github.com/woocommerce/woocommerce-blocks/pull/6599))
-
-| Before | After |
-| --------------------------------------------------------------------------------------------------------------- | --------------------------------------------------------------------------------------------------------------- |
-|  | 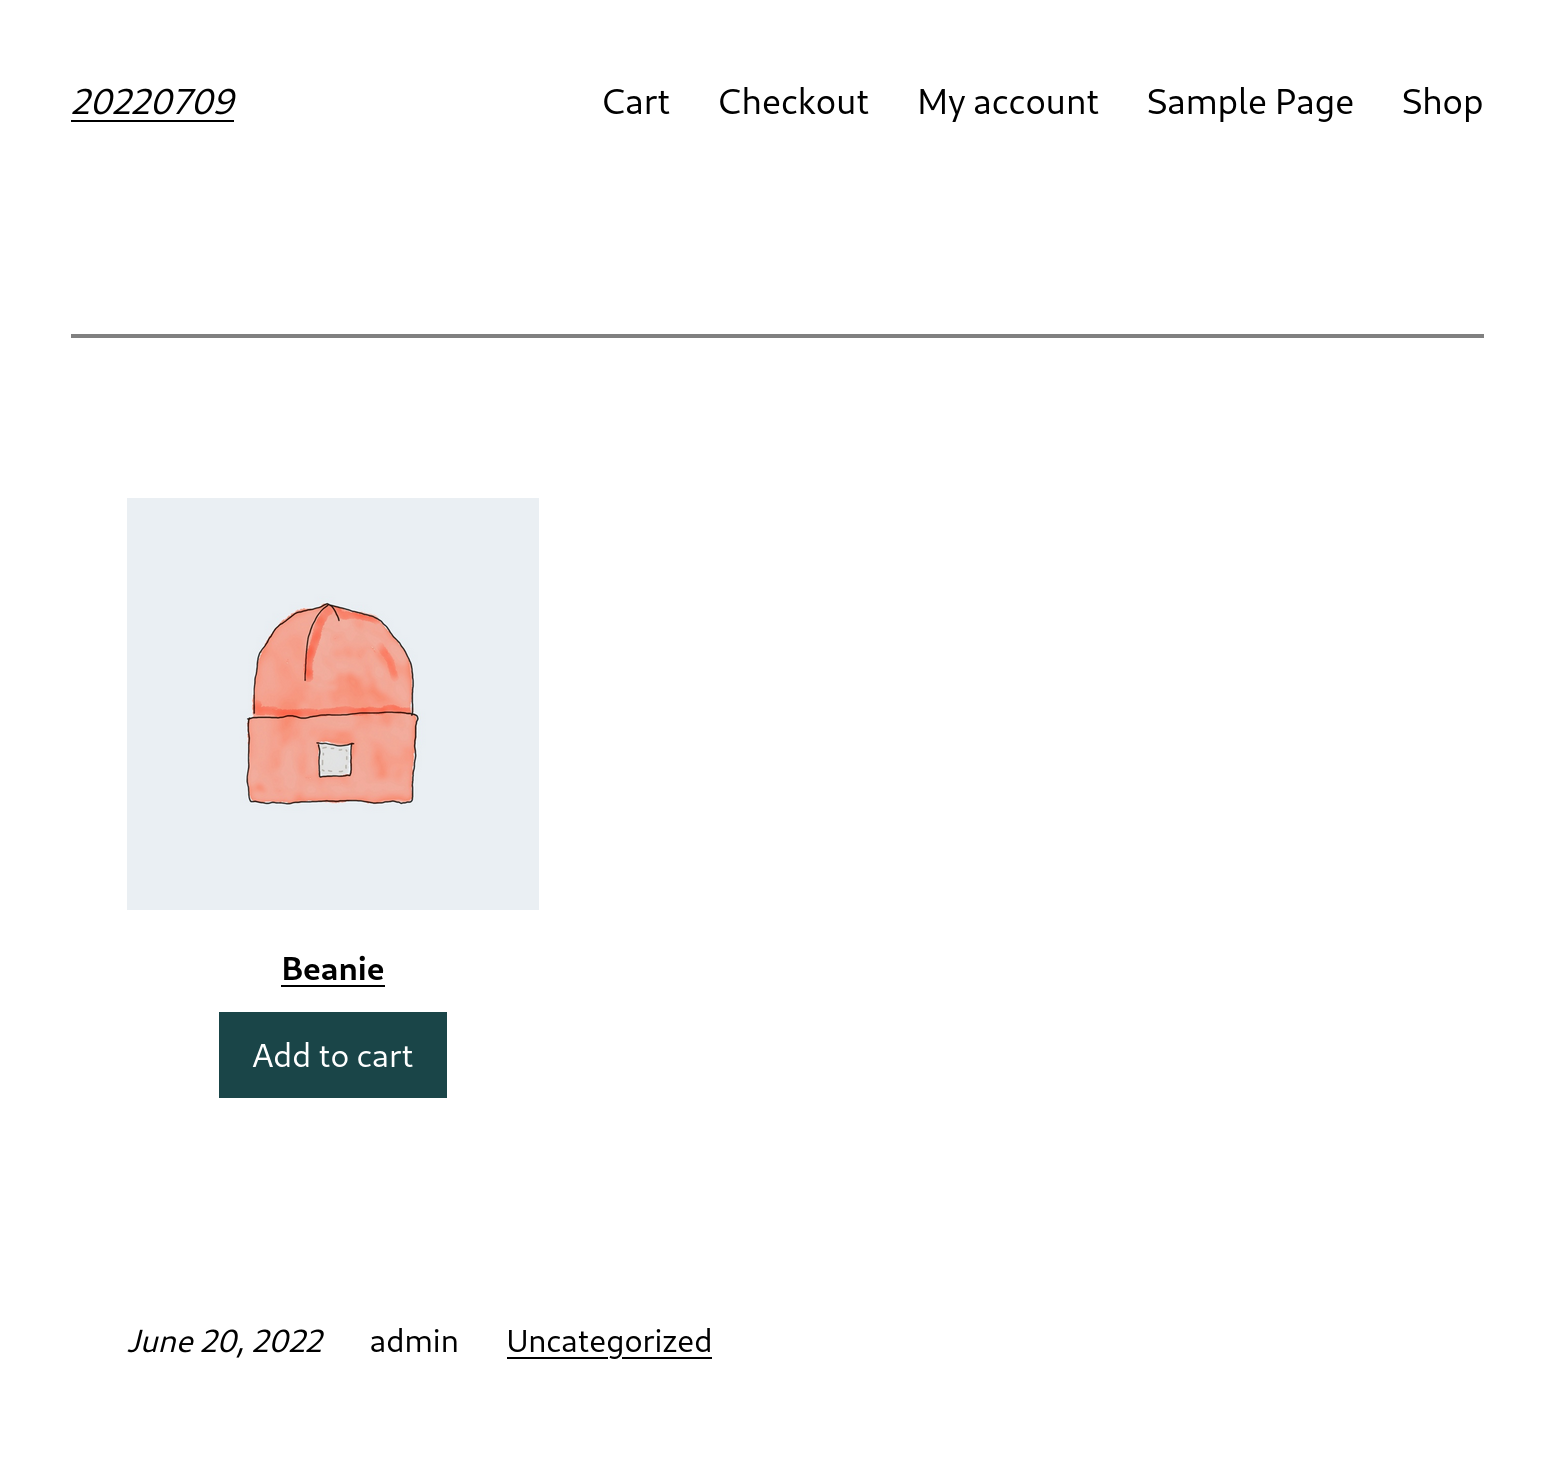 |
-
-1. With WC core 6.5.1 and WC Blocks disabled, add a Handpicked Products block to a post or page.
-2. Hide the Product price and Product rating using the sidebar toggles.
-3. Publish the post or page.
-4. Update to WC core to 6.6.0.
-5. Notice the images are no longer visible.
-6. Enable WC Blocks.
-7. Verify images are visible by default.
-8. Verify you can still toggle the images.
-
-### Fix: Scrolling issue of the Filled Mini Cart view block. ([6565](https://github.com/woocommerce/woocommerce-blocks/pull/6565))
-
-| Before | After |
-| ----------------------------------------------------------------------------------------------------------------------------------------- | ----------------------------------------------------------------------------------------------------------------------------------------- |
-| 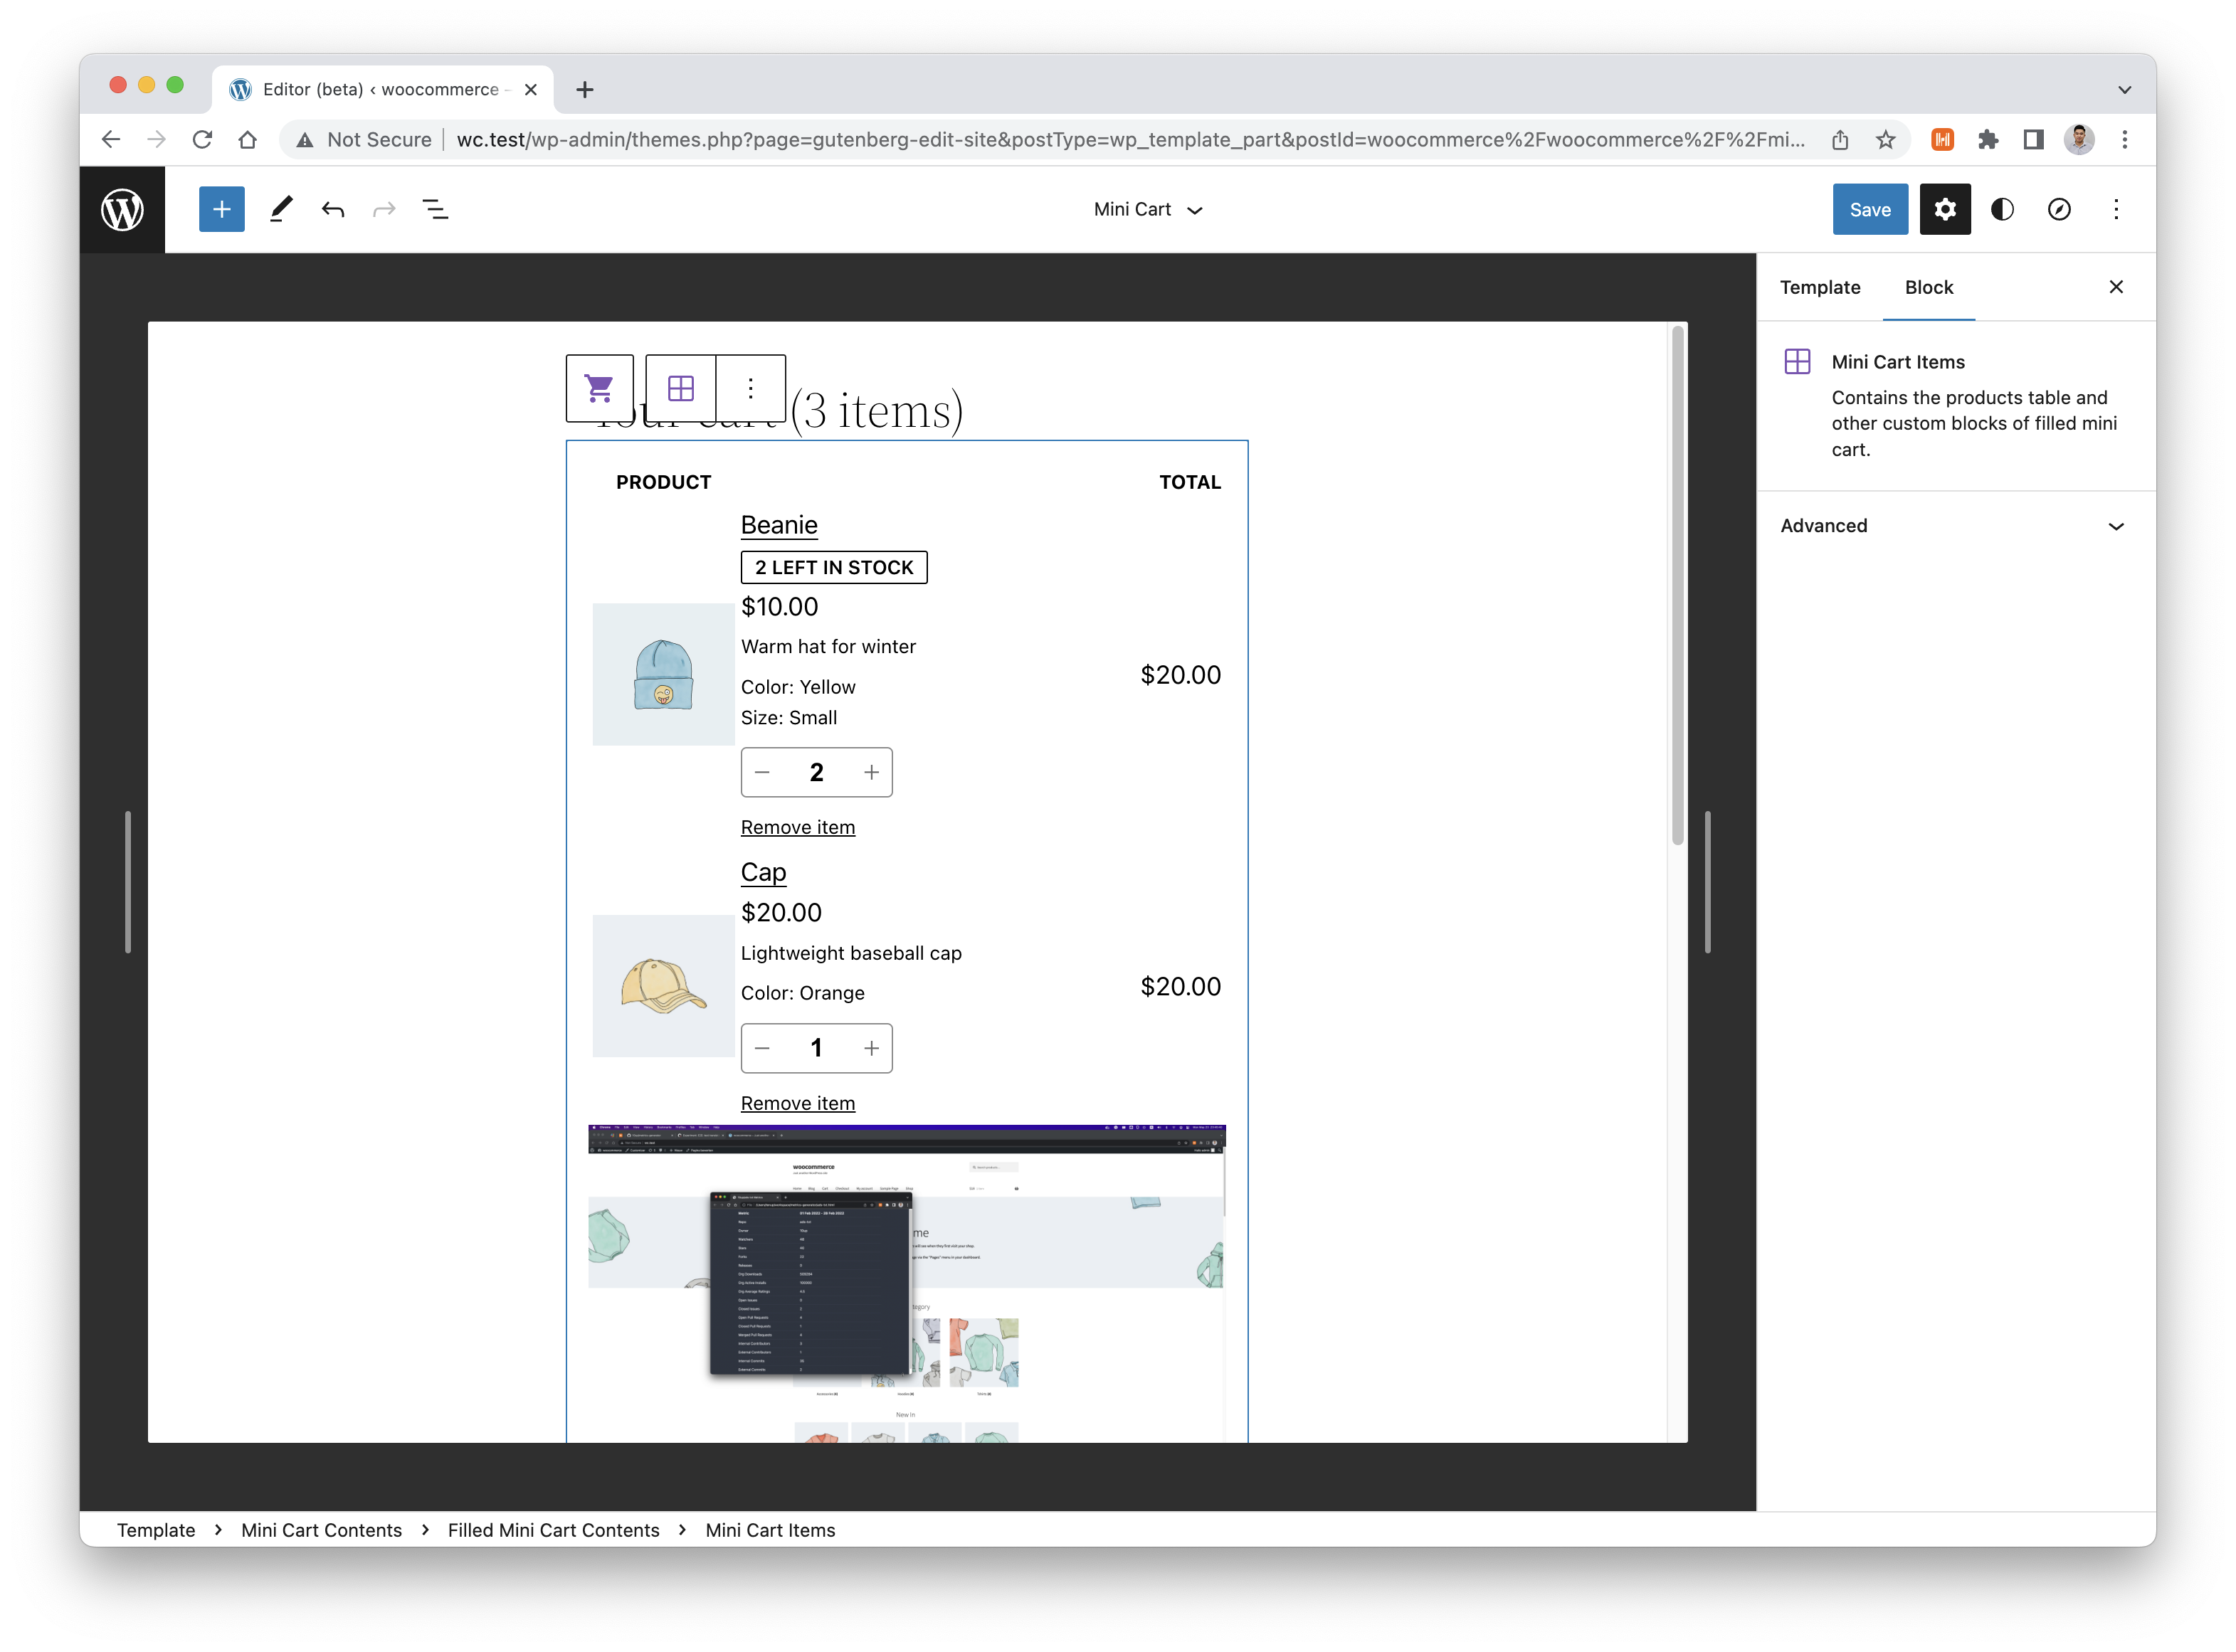 | 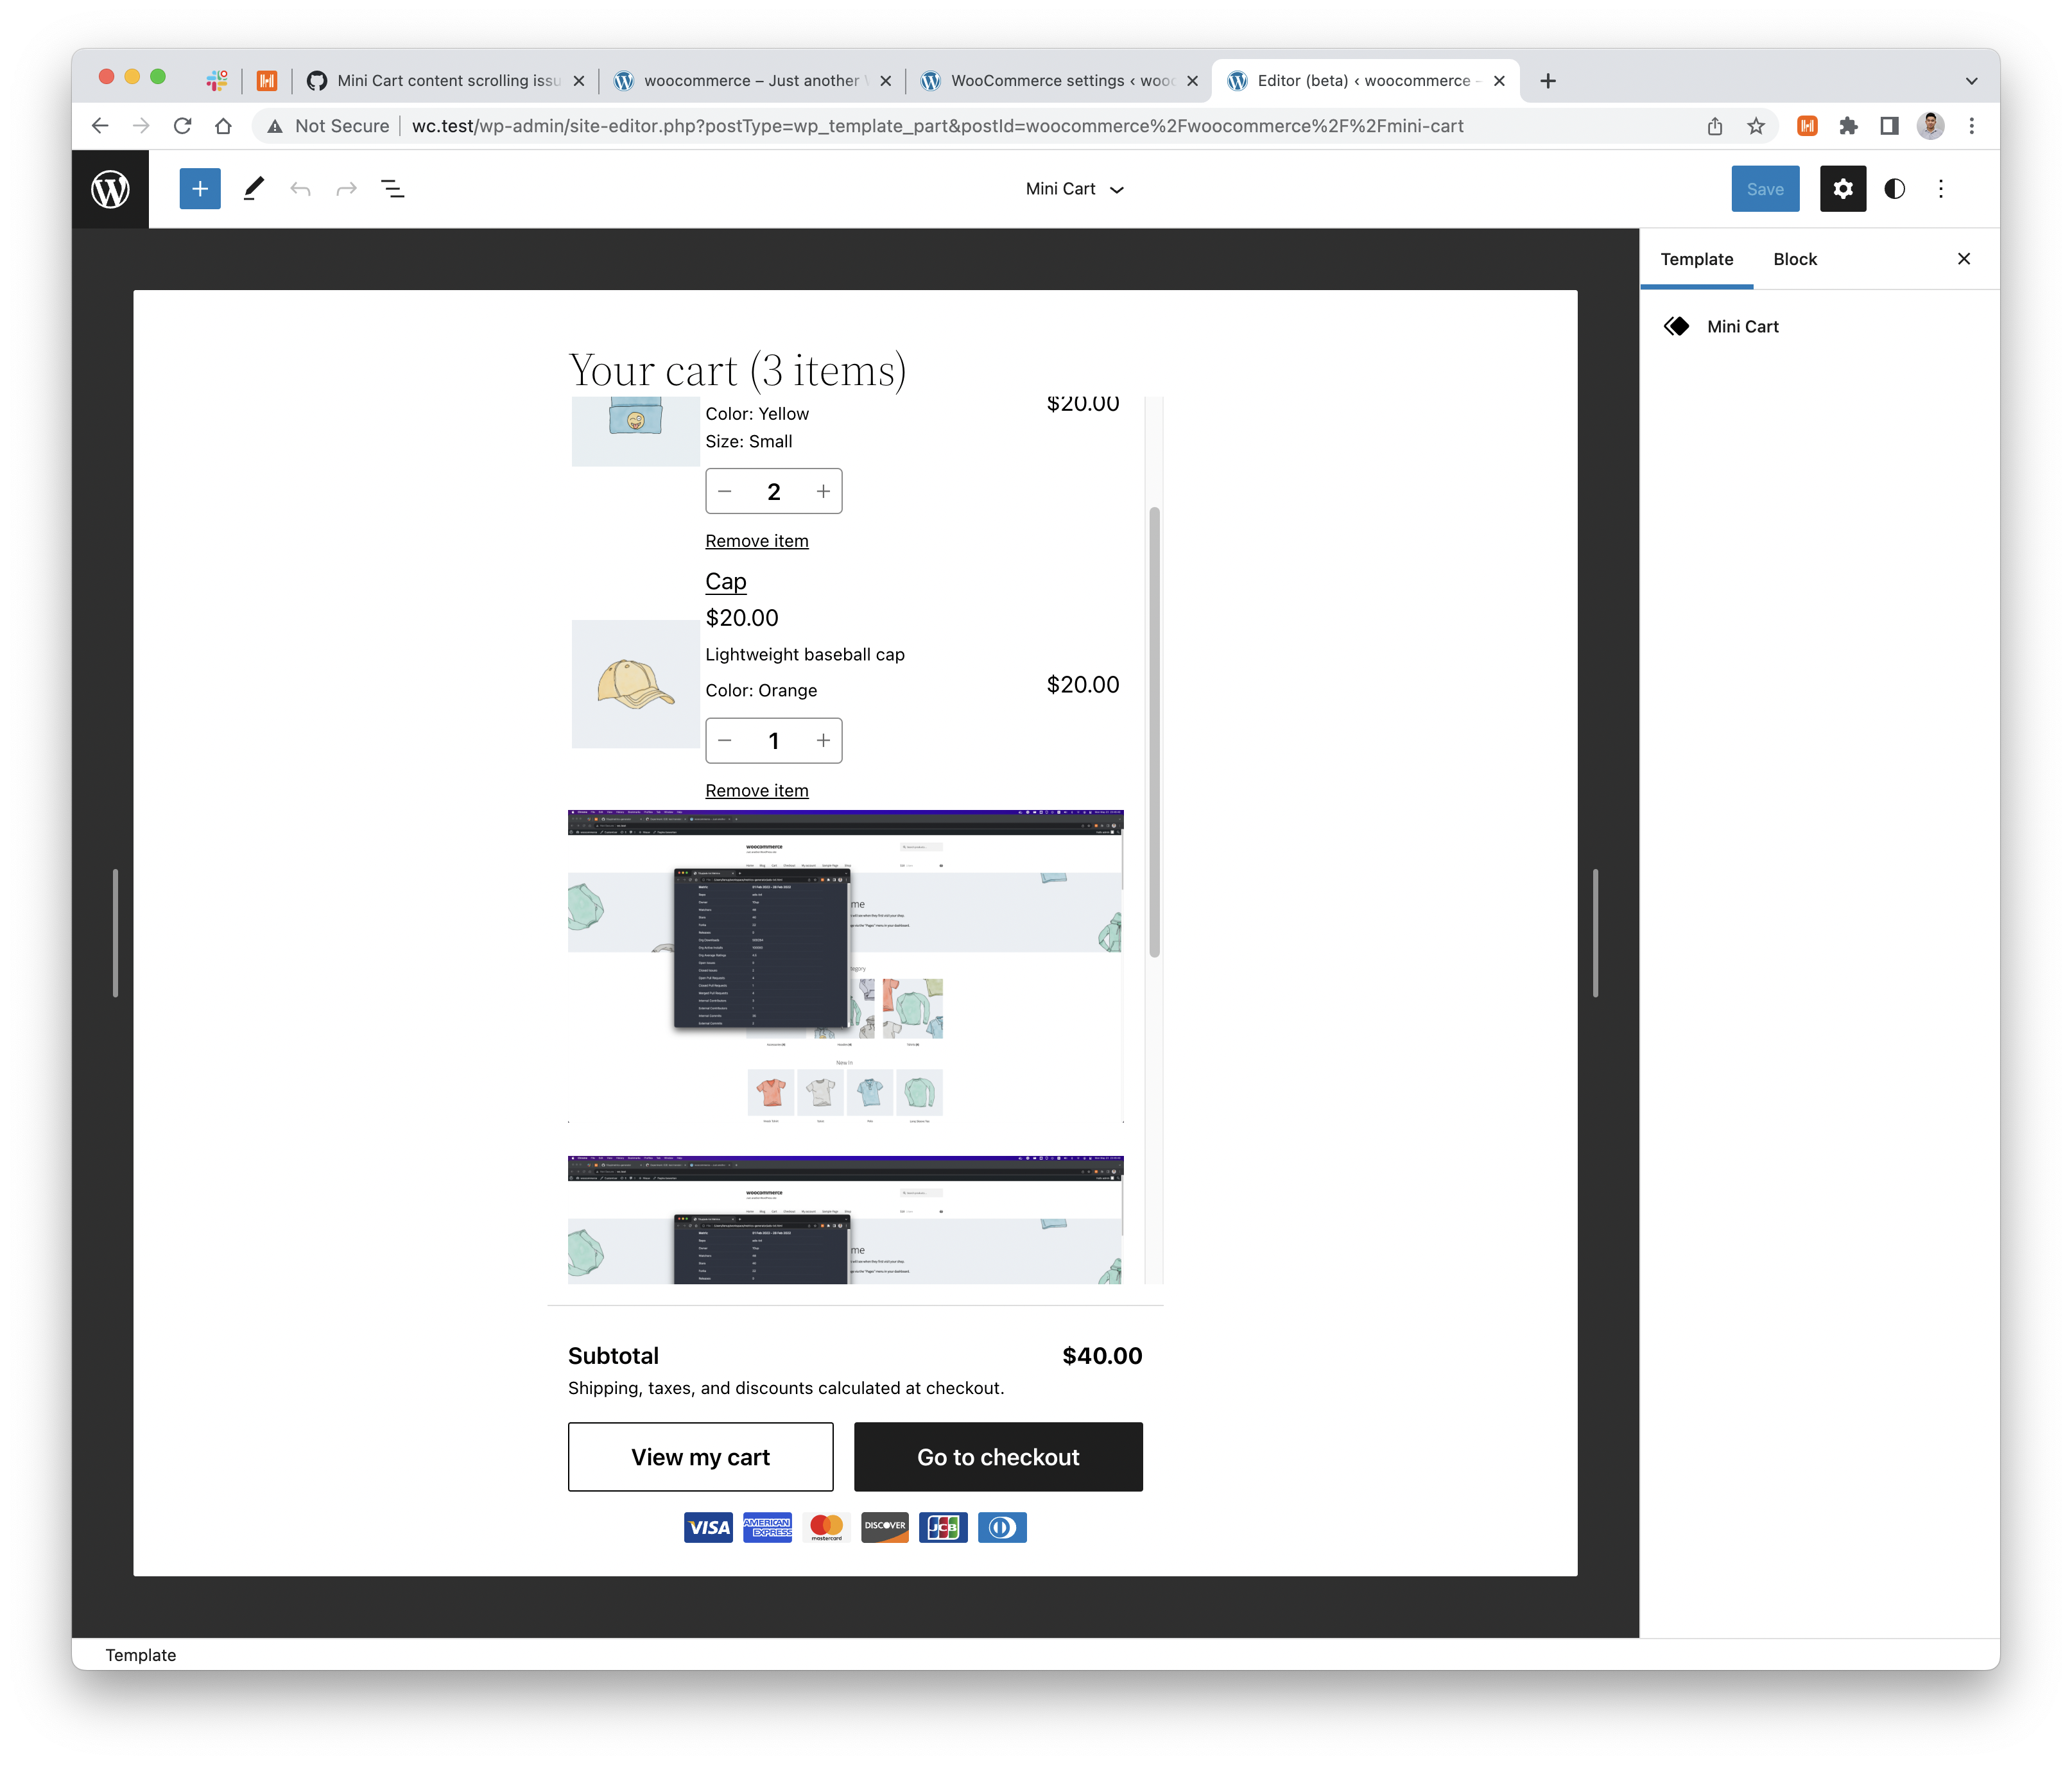 |
-| <img width="1571" alt="image" src="https://user-images.githubusercontent.com/5423135/173493990-c15572f2-fca1-4c9c-8909-178c108b83d1.png"> | <img width="1615" alt="image" src="https://user-images.githubusercontent.com/5423135/173535254-bd08ddae-6cc2-45d7-b727-43a24902610a.png"> |
-
-1. With a block theme like 2022. Edit the Mini Cart template part.
-2. Add some blocks to the Mini Cart Items section to make the content overflow.
-3. See the footer inside the viewport, and the Mini Cart Items block is now scrollable to view the underneath content.
-4. Save the template.
-5. On the front end, add a product to the cart then open the Mini Cart.
-6. See the Mini Cart Items section is scrollable, with the product table on top.
-
-### Added descriptions to the FSE WooCommerce Templates in the Editor UI. ([6345](https://github.com/woocommerce/woocommerce-blocks/pull/6345))
-
-| Before | After |
-| ------------------------------------------------------------------------------------------------------------------- | --------------------------------------------------------------------------------------------------------------------- |
-| 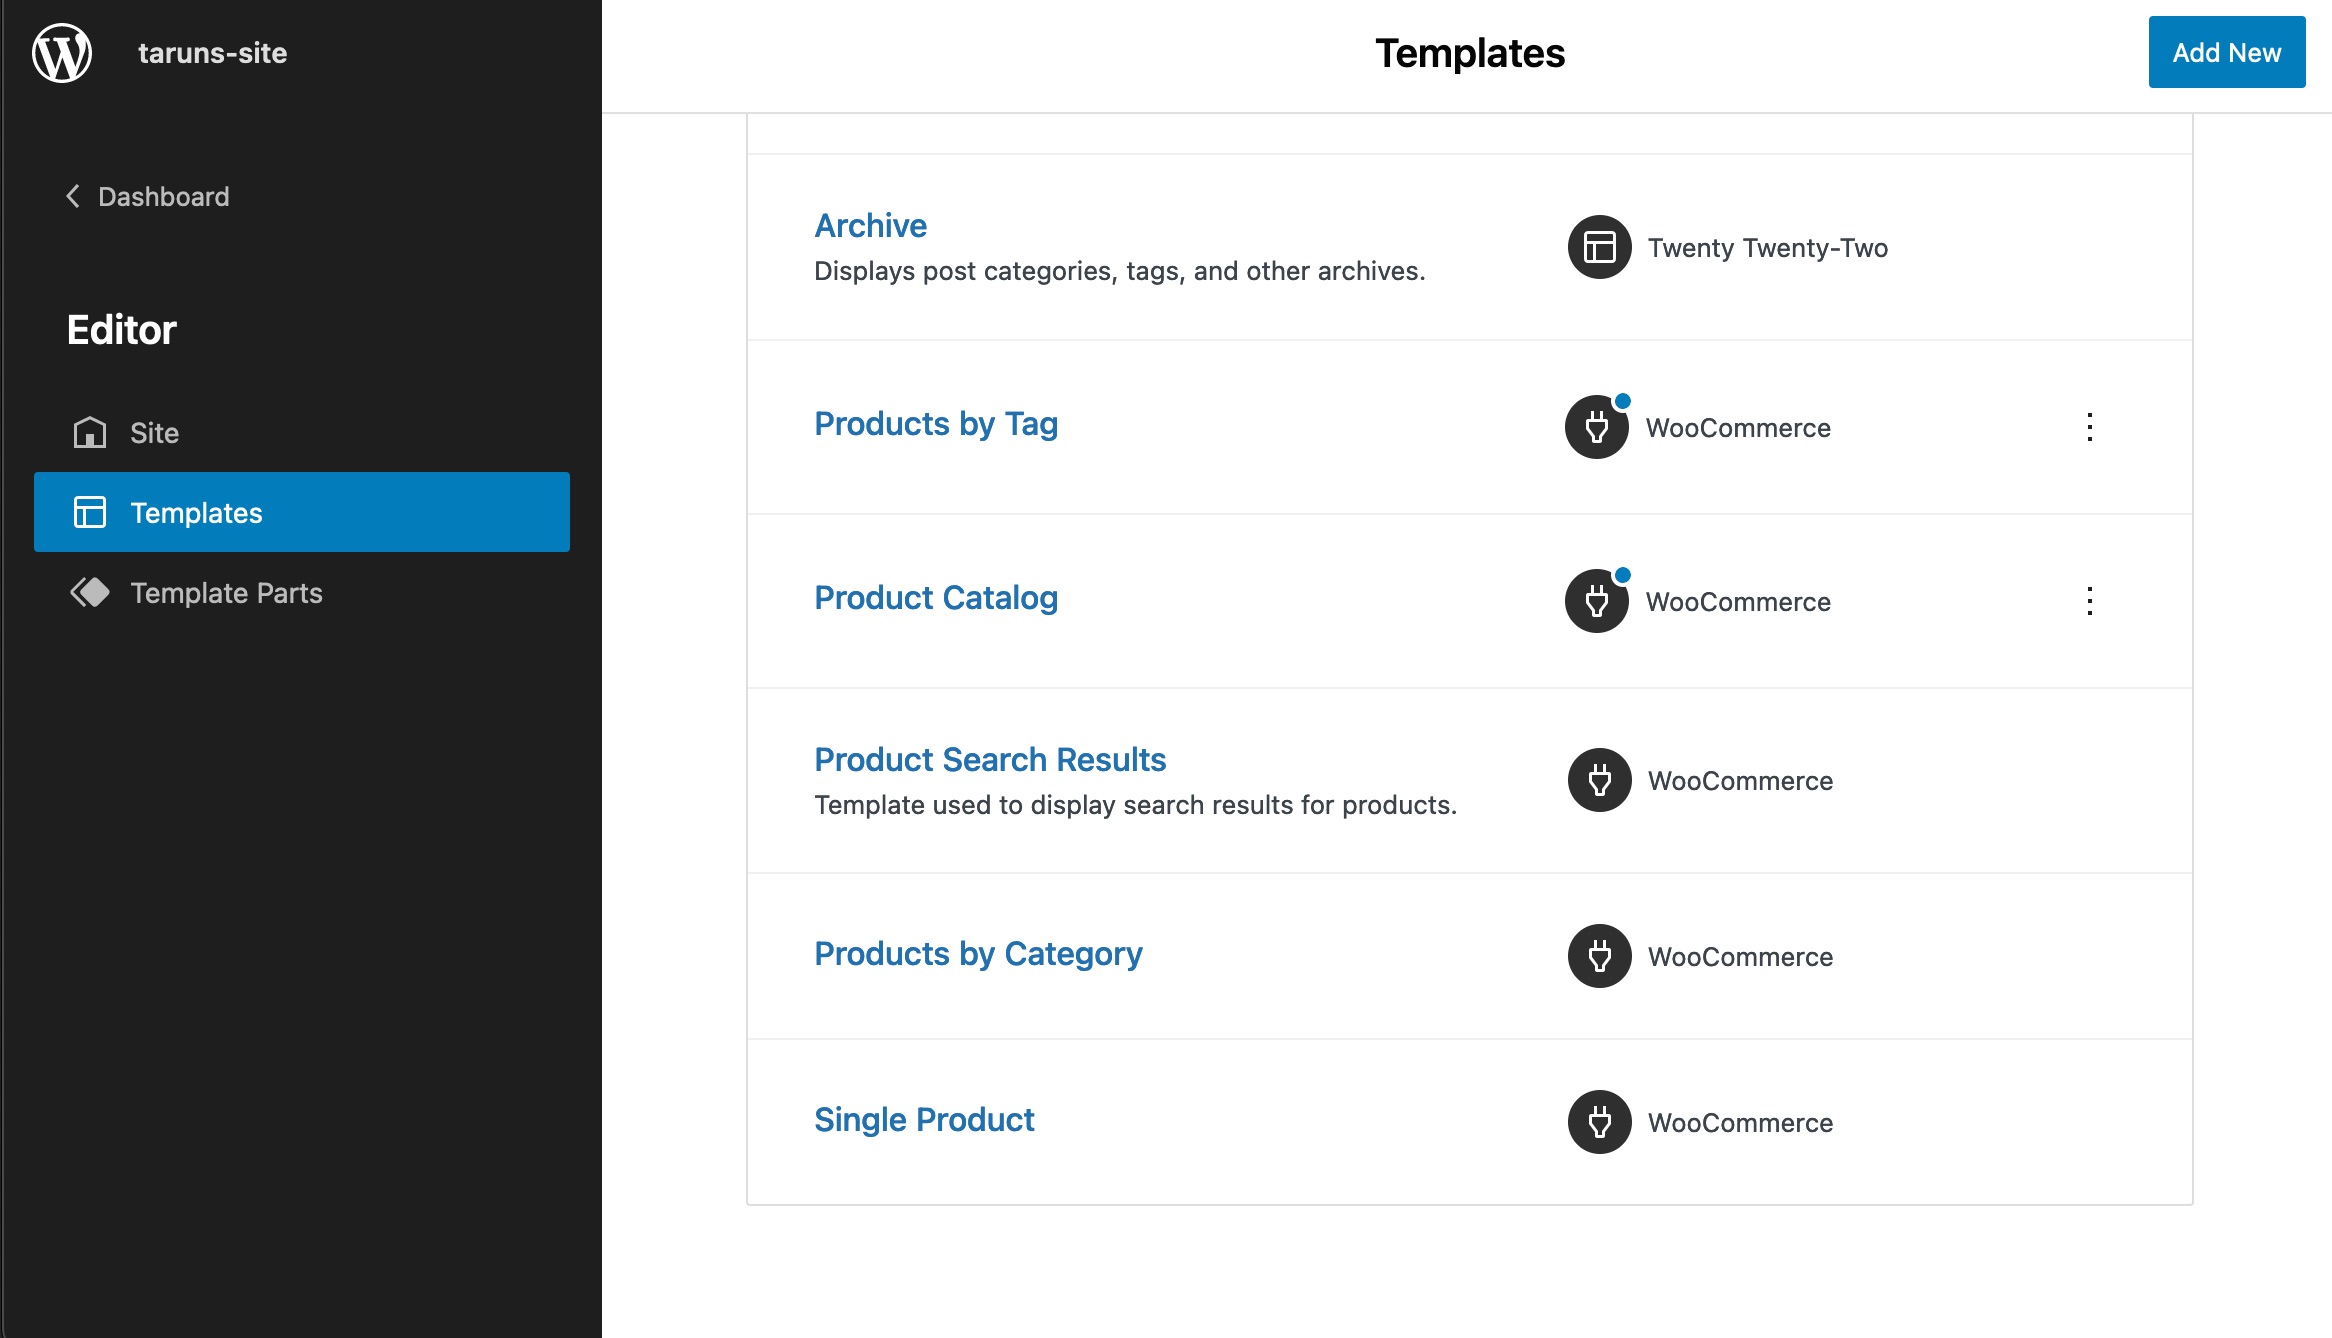 |  |
-
-#### Testing template descriptions\*\*
-
-1. Activate a **block** theme, like Twenty Twenty Two
-2. Open the **Appearance > Editor (Beta)**
-3. Using the dropdown arrow next to the Template name, select the **Browse all templates** button
-4. Confirm that all WooCommerce templates have descriptions
-5. Open a template (like Mini cart)
-6. make sure you can edit and save the content.
-
-#### Testing the search template\*\*
-
-1. Activate a **block** theme, like Twenty Twenty Two
-2. Make sure there's at least 1 product added
-3. Run a product search: `?s={keyword}&post_type=product` and make sure the products are being displayed correctly in a grid (using the search template, instead of the default one).
-
-## Feature plugin only
-
-### Prevent warnings appearing when using some plugins for managing shipping packages. ([6470](https://github.com/woocommerce/woocommerce-blocks/pull/6470))
-
-1. Install this free plugin from the WP plugin repository: "Multiple Packages for WooCommerce"
-2. Navigate to WooCommerce -> Settings -> Multiple Packages
-3. Adjust the settings to work based on "Per Product".
-4. Add multiple items to your cart.
-5. Go to the Checkout/Cart Block.
-6. Ensure you see no errors.
diff --git a/plugins/woocommerce/client/blocks/docs/internal-developers/testing/releases/800.md b/plugins/woocommerce/client/blocks/docs/internal-developers/testing/releases/800.md
deleted file mode 100644
index 2f8bfa49c79..00000000000
--- a/plugins/woocommerce/client/blocks/docs/internal-developers/testing/releases/800.md
+++ /dev/null
@@ -1,49 +0,0 @@
-# Testing notes and ZIP for release 8.0.0
-
-Zip file for testing: [woocommerce-gutenberg-products-block.zip](https://github.com/woocommerce/woocommerce-blocks/files/9047059/woocommerce-gutenberg-products-block.zip)
-
-## Feature plugin and package inclusion in WooCommerce
-
-### Enhancement: Footer Template Parts use now `<footer>` instead of `<div>` and Header uses `<header>` instead of `<div>`. ([6596](https://github.com/woocommerce/woocommerce-blocks/pull/6596))
-
-1. Go to a WooCommerce page and view the source.
-2. Check the header is wrapped in a `<header>` tag, not in a `<div>` tag.
-3. Check the footer is wrapped in a `<footer>` tag, not in a `<div>` tag.
-
-### Enhancement: Replace the ProductTag tax_query field to be the term_id instead of the id. ([6585](https://github.com/woocommerce/woocommerce-blocks/pull/6585))
-
-1. Create a page and add a `Products by Tag` block.
-2. Check that is rendered correctly in the editor.
-3. Save the page and check that is rendered correctly in the frontend.
-
-### Fix: Ensure WooCommerce templates show correct titles. ([6452](https://github.com/woocommerce/woocommerce-blocks/pull/6452))
-
-1. Install and activate the [Extendable theme](https://wordpress.org/themes/extendable/).
-2. Go to `Appearance → Editor → Browse all templates`.
-3. Make sure you have `archive-product.html` in your theme's templates directory.
-4. Notice the templates shows the correct title and description and not the file name like e.g. `archive-product.html`.
-
-## Feature plugin only
-
-### Enhancement: Make form components require onChange and have a default value. ([6636](https://github.com/woocommerce/woocommerce-blocks/pull/6636))
-
-1. Create a new page with `All Products` block, `Filter Products By Price` block and `Filter Products By Attribute` block.
-2. Go to the `All Products` page, ensure you're able to sort products and filter products by price and attribute.
-3. Add a product to the cart.
-4. Go to the `Checkout` block page.
-5. Ensure you're able to use radio controls.
-
-### Fix: Correctly calculate taxes for local pickups. ([6631](https://github.com/woocommerce/woocommerce-blocks/pull/6631))
-
-1. Set store address to `123 Test Street, 90210 Beverly Hills, CA, USA`.
-2. Enable taxes.
-3. Add a `"Standard" tax rates` in US, CA and set it to `10%`.
-4. Add the following shipping methods: `Flat rate` for $10 and `Local pickup` for free.
-5. Add a payment option (e.g., `Cash on delivery`).
-6. Add a physical product to the cart.
-7. Use an outside state address on the front-end. (e.g., `60 29th Street #343, 35005 Birmingham, AL, USA`).
-8. Go to the `Cart` block and select the `Local pickup` shipping method. Check that we have a tax of 10% applied.
-9. Go to the `Checkout` block and select the `Local pickup` shipping method. Check that we have a tax of 10% applied.
-10. Place your order. Check on the `Order received` page that the displayed **tax is actually added to the total**.
-11. Go to `Edit Order`. Check that **taxes were applied correctly there as well**.
-12. On the `Checkout` again, select `Flat rate`, using the same external address, and make sure **taxes are not applied**.
diff --git a/plugins/woocommerce/client/blocks/docs/internal-developers/testing/releases/810.md b/plugins/woocommerce/client/blocks/docs/internal-developers/testing/releases/810.md
deleted file mode 100644
index 0125c29c0f9..00000000000
--- a/plugins/woocommerce/client/blocks/docs/internal-developers/testing/releases/810.md
+++ /dev/null
@@ -1,55 +0,0 @@
-# Testing notes and ZIP for release 8.1.0
-
-Zip file for testing: [woocommerce-gutenberg-products-block.zip](https://github.com/woocommerce/woocommerce-blocks/files/9131847/woocommerce-gutenberg-products-block.zip)
-
-## Feature plugin and package inclusion in WooCommerce
-
-### Update WooCommerce block template descriptions. ([6667](https://github.com/woocommerce/woocommerce-blocks/pull/6667))
-
-1. Activate a block theme, like Twenty Twenty-Two.
-2. Open the Appearance > Editor (Beta).
-3. Using the dropdown arrow next to the Template name, select the Browse all templates button.
-4. Confirm the following updated WooCommerce templates' descriptions:
- - Single Product: Displays a single product.
- - Product Catalog: Displays your products.
- - Products by Category: Displays products filtered by a category.
- - Products by Tag: Displays products filtered by a tag.
- - Product Search Results: Displays search results for your store.
-
-### Add filter URL support to filter blocks when filtering for All Products block. ([6642](https://github.com/woocommerce/woocommerce-blocks/pull/6642))
-
-For each filter block (by Price, by Attribute, by Stock and Active filters) ensure:
-
-1. No regression when used with PHP templates.
-2. The URL is updated when checking or unchecking filters.
-3. For filter blocks using the filter button, the URL is updated after clicking the filter button.
-4. With the updated URL, all selected filters are set correctly after reloading the page. Filter blocks with or without the filter button should work the same.
-5. Removing the filter from the Active Filters block should update the URL and the corresponding filter block.
-
-### Add: Allow choosing between single and multiple sections. ([6620](https://github.com/woocommerce/woocommerce-blocks/pull/6620))
-
-1. Edit a page containing an attribute filter block.
-2. See no "Attempt block recovery" button for that block.
-3. Select that attribute filter block, and see the new setting "Allow selecting multiple options?" set to "Multiple by default".
-4. Switch that setting to Single. See the Query Type setting disappear.
-5. Switch back to Multiple. Set display style to Dropdown and query type to AND.
-6. Save the page.
-7. Visit the page on the front end, and see that we can select multiple attributes.
-
-### Prevent Featured Product block from breaking when product is out of stock + hidden from catalog. ([6640](https://github.com/woocommerce/woocommerce-blocks/pull/6640))
-
-1. Add a Featured Product block to a page and save.
-2. Head to the product and set the product to Out of Stock.
-3. Under WooCommerce > Settings > Products > Inventory, check the box that says "Hide out of stock items from the catalog".
-4. Return to the page with your Featured Product block, select it, and select "Edit" to choose a new product to feature.
-5. Make sure the block can still be edited to choose a new product.
-
-### Contrast improvement for checkout error messages when displayed over a theme's dark mode. ([6292](https://github.com/woocommerce/woocommerce-blocks/pull/6292))
-
-1. Use a theme that supports dark mode and enable it, e.g. Eksell.
-2. Create a test page and add the checkout block.
-3. Click on the checkout block and activate the option Style » Dark mode inputs in the sidebar.
-4. Save that test page and go to the frontend.
-5. Add a product to the cart and go to the test page with the checkout block.
-6. Clear all form fields, if they're pre-filled, and click on place order.
-7. See the error messages with sufficient color contrast.
diff --git a/plugins/woocommerce/client/blocks/docs/internal-developers/testing/releases/820.md b/plugins/woocommerce/client/blocks/docs/internal-developers/testing/releases/820.md
deleted file mode 100644
index 9bb7a43871b..00000000000
--- a/plugins/woocommerce/client/blocks/docs/internal-developers/testing/releases/820.md
+++ /dev/null
@@ -1,143 +0,0 @@
-# Testing notes and ZIP for release 8.2.0
-
-Zip file for testing: [woocommerce-gutenberg-products-block.zip](https://github.com/woocommerce/woocommerce-blocks/files/9242756/woocommerce-gutenberg-products-block.zip)
-
-## Feature plugin and package inclusion in WooCommerce
-
-### Remove compatibility notice for Mini Cart block ([6803](https://github.com/woocommerce/woocommerce-blocks/pull/6803))
-
-0. Make sure you have a blocks theme active (like Twenty Twenty-Two).
-1. Clear the local storage of your browser.
-2. Add the Mini Cart block to the header template part.
-3. Don't see compatibility notice.
-4. Create a new page > Add the Cart block to that page.
-5. See the compatibility notice as normal.
-
-### Add new icon for mini cart block ([6784](https://github.com/woocommerce/woocommerce-blocks/pull/6784))
-
-1. Make sure you have a blocks theme active (like Twenty Twenty-Two).
-2. Navigate to **Appearance > Editor (Beta)** and add a Mini Cart block somewhere in your site.
-3. Select the Mini Cart block in the editor and confirm the icon in the inserter and toolbar reflect the changes.
-
-| Before | After |
-| ---------------------------------------------------------------------------------------------------------------------------------------- | ---------------------------------------------------------------------------------------------------------------------------------------- |
-| 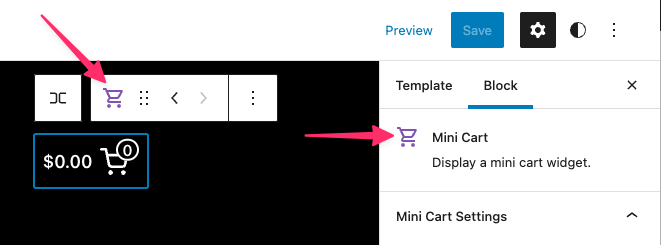 | 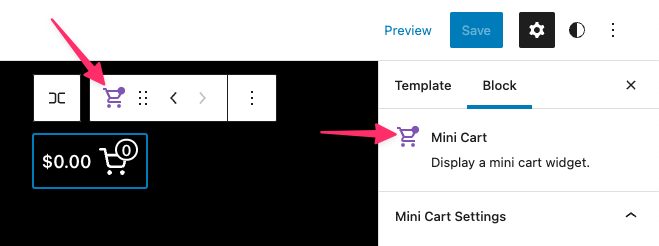 |
-
-### Fix: Replace DropdownSelector with FormTokenField from Gutenberg ([6647](https://github.com/woocommerce/woocommerce-blocks/pull/6647))
-
-1. Add the Filter Products by Attribute block and the All Products block into a post or page.
-2. Change the display type of Filter Products by Attribute to `Dropdown`.
-3. Ensure the block functions normally.
-4. Enable the Filter button, and ensure the block functions normally.
-
-### Use the archive-product template to render product attributes pages ([6776](https://github.com/woocommerce/woocommerce-blocks/pull/6776))
-
-1. Make sure you have a blocks theme active (like Twenty Twenty-Two).
-2. Navigate to `Products` > `Attributes` and edit an existing one or create a new one.
-3. Click the `Enable Archives` option and save, go back.
-4. Click `Configure terms` next to your attribute.
-5. Hover over one of the terms and click the `View` link of one of the attributes.
-6. Check that the page is rendered with a header, a footer, and using a product grid.
-
-| Before | After |
-| -------------------------------------------------------------------------------------------------------------------------------------------------------------------- | ----------------------------------------------------------------------------------------------------------------------------------------- |
-| <img width="1338" alt="Screenshot 2022-07-27 at 16 38 51" src="https://user-images.githubusercontent.com/186112/181275852-03346db7-efa1-40bc-9e11-17d5c83fafe8.png"> | 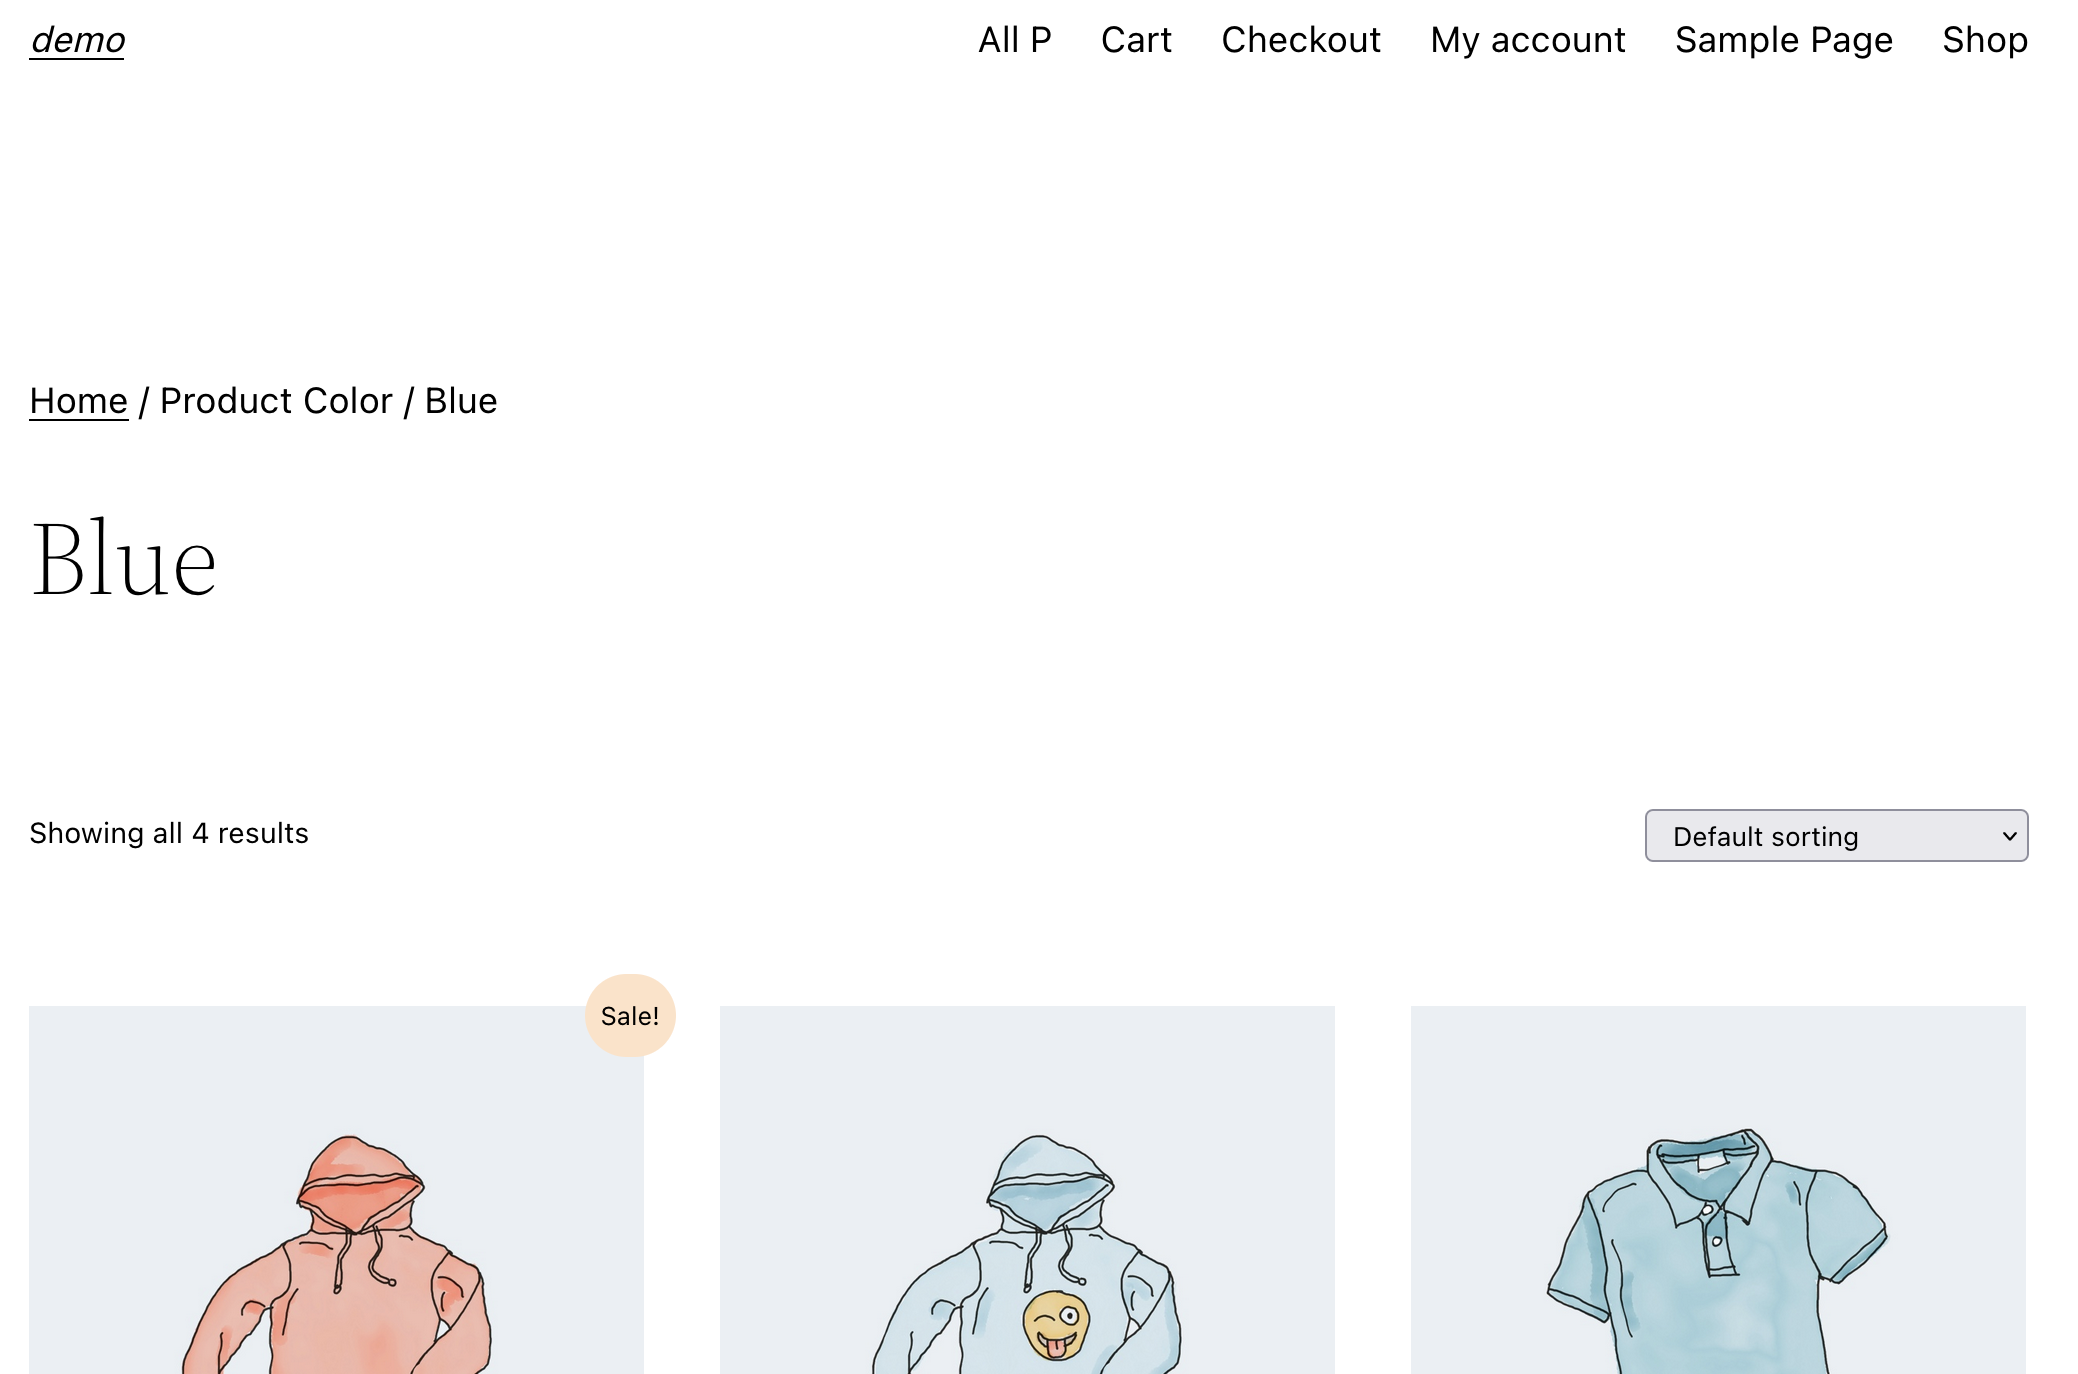 |
-
-### All Products block: Migrate to block.json ([6754](https://github.com/woocommerce/woocommerce-blocks/pull/6754))
-
-1. Add the All Products block to a post or page.
-2. Verify it works as before in the editor and the frontend and there are no errors.
-
-### Start using block.json and convert to TS the Product by Category block ([6680](https://github.com/woocommerce/woocommerce-blocks/pull/6680))
-
-Test that there are no regressions compared with the previous `Products by Category` block version.
-
-1. Create a page and add a `Products by Category` block.
-2. Save the page and check it renders correctly the default config in the frontend.
-3. Edit the page again and make some changes to the block (hiding some content, changing columns number, ordering, etc.).
-4. Save the page and check it renders properly with the new config.
-
-### Start using block.json and convert to TS the Product Best Sellers block ([6683](https://github.com/woocommerce/woocommerce-blocks/pull/6683))
-
-Test that there are no regressions compared with the previous `Product Best Sellers` block version.
-
-1. Create a page and add a `Product Best Sellers` block.
-2. Save the page and check it renders correctly the default config in the frontend.
-3. Edit the page again and make some changes to the block (hiding some content, changing columns number, ordering, etc.).
-4. Save the page and check it renders properly with the new config.
-
-### Select the correct inner button for the "Featured Item" button to update its url ([6741](https://github.com/woocommerce/woocommerce-blocks/pull/6741))
-
-1. Create a new page and add a `Featured Product` block.
-2. Edit the block and select a different product.
-3. Make sure the button URL on the block is updated to the new product link.
-4. Duplicate the block and change the new block to a different product.
-5. Make sure the button URL on the block is updated to the new product link.
-6. Repeat 1-5 for the `Featured Category` block.
-
-### Fix: navigate through Mini Cart contents with keyboard ([6731](https://github.com/woocommerce/woocommerce-blocks/pull/6731))
-
-1. In the site editor, add the Mini Cart block to your site header.
-2. Edit the Mini Cart template part and add an image in the inner contents.
-3. In the frontend, add some products to the Cart.
-4. With the keyboard, open the Mini Cart.
-5. With the <kbd>Tab</kbd> key try to navigate to the Mini Cart products.
-6. Notice you can focus the Mini Cart products inner elements.
-
-### Fix: WooCommerce messages don't appear in block themes with Mini Cart block ([6728](https://github.com/woocommerce/woocommerce-blocks/pull/6728))
-
-1. Switch to a block theme (ie: Twenty Twenty-Two), add the Mini Cart block to the header, and go to a product page.
-2. Add the product to your cart.
-3. Notice the add to cart success message is shown on the top of the page.
-
-### SearchListControl: Fix preserving case of original item ([6551](https://github.com/woocommerce/woocommerce-blocks/pull/6551))
-
-1. Add a “Hand-picked Products” block to your page.
-2. Type the name of one of your products with the incorrect case (e.g. if you have imported the sample data, type “hOoDiE”.
-3. Make sure all matching products appear on the list.
-4. Make sure all items on the list preserve their original case.
-
-| Before | After |
-| --------------------------------------------------------------------------------------------------------------------------------------------------------------------------------- | ------------------------------------------------------------------------------------------------------------------------------------------ |
-| <img width="747" alt="172268138-7445fbf1-ad25-4716-8b5a-ee4b463af54b" src="https://user-images.githubusercontent.com/1847066/173202016-249f5fe1-08f1-4ab9-aec5-18507c754d68.png"> | 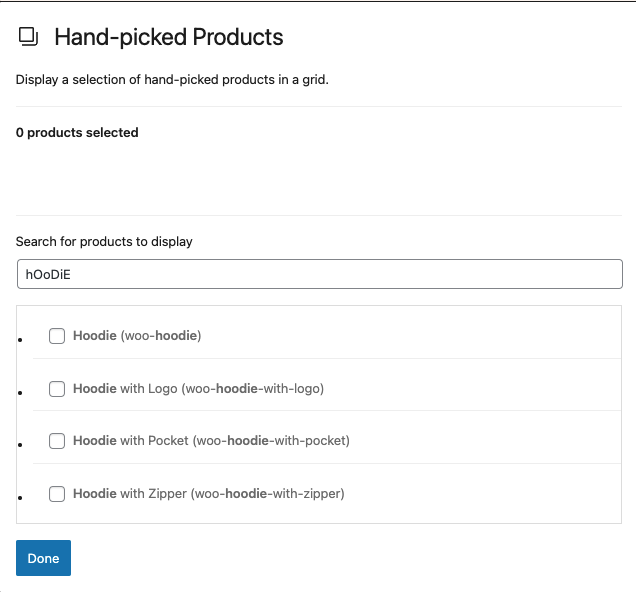 |
-
-## Feature plugin
-
-### Fix proceed to checkout button on Cart ([6804](https://github.com/woocommerce/woocommerce-blocks/pull/6804))
-
-1. In a new page, insert Cart block.
-2. Select Proceed to Checkout block.
-3. In the sidebar, change the link to something else.
-4. On frontend, add an item to cart, go that newly created cart page, and click the proceed to checkout button.
-5. It should take you to your new page.
-
-### Ensure addresses sync correctly when loading the Checkout Shipping Address Block ([6773](https://github.com/woocommerce/woocommerce-blocks/pull/6773))
-
-1. Add items to your cart.
-2. Go to the Checkout Block
-3. Uncheck "use shipping as billing" and fill out different addresses for shipping and billing.
-4. Place the order and verify on the order confirmation screen that the addresses were different.
-5. Add another item to your cart then go to the Checkout Block.
-6. Leave "use shipping as billing" checked.
-7. Place order, check the thank you page, ensure the billing and shipping addresses match.
-
-### Ensure shipping rate names show when multiple packages are used ([6753](https://github.com/woocommerce/woocommerce-blocks/pull/6753))
-
-1. Install the ["Multiple Packages for WooCommerce" plugin](https://wordpress.org/plugins/multiple-packages-for-woocommerce/)
-2. Navigate to WooCommerce -> Settings -> Multiple Packages
-3. Adjust the settings to work based on "Per Product"
-4. Add two/three/four different products to the cart and typically need shipping.
-5. Go the checkout page and look at the shipping options, ensure there is a title for each one.
-6. Disable the plugin and reload the Checkout Block, ensure the shipping section still looks OK.
-
-| Before | After |
-| ------------------------------------------------------------------------------------------------------------------ | ---------------------------------------------------------------------------------------------------------------------------------------- |
-| <img src="https://user-images.githubusercontent.com/6944811/169669731-e783c2e1-3d12-4b9d-8cdd-c2eb0c8ce339.png" /> | <img width="490" alt="image" src="https://user-images.githubusercontent.com/5656702/180825265-553e6c81-9f79-4a25-ac80-efcbd239ecf4.png"> |
-
-### Fix missing translations in inspector ([6737](https://github.com/woocommerce/woocommerce-blocks/pull/6737))
-
-1. Change your site language (I tested using French & NL)
-2. Go to the C&C Blocks (Editor mode)
-3. Select each inner block and make sure the `title` & `description` are translated in the inspector. See image below:
-
-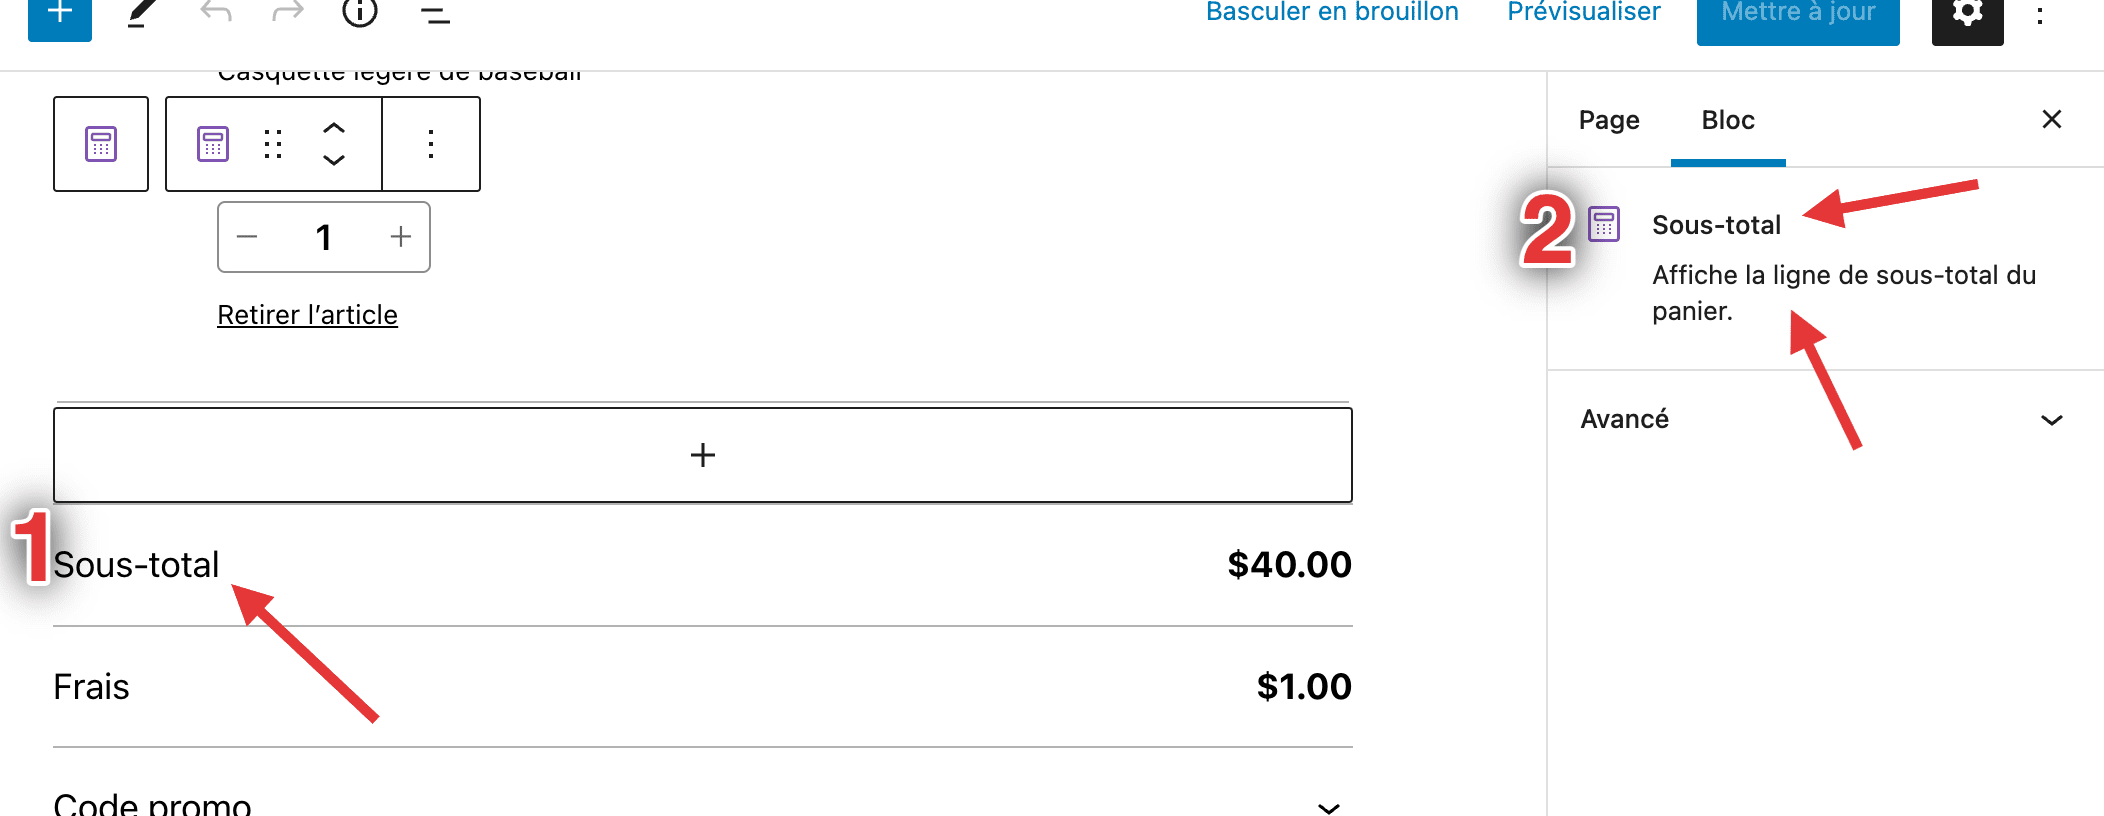
diff --git a/plugins/woocommerce/client/blocks/docs/internal-developers/testing/releases/821.md b/plugins/woocommerce/client/blocks/docs/internal-developers/testing/releases/821.md
deleted file mode 100644
index a6b846acaa0..00000000000
--- a/plugins/woocommerce/client/blocks/docs/internal-developers/testing/releases/821.md
+++ /dev/null
@@ -1,15 +0,0 @@
-# Testing notes and ZIP for release 8.2.1
-
-Zip file for testing: [woocommerce-gutenberg-products-block.zip](https://github.com/woocommerce/woocommerce-blocks/files/9250889/woocommerce-gutenberg-products-block.zip)
-
-## Feature plugin
-
-### Ensure onChange is set for radio buttons in `SavedPaymentMethodOptions` ([6825](https://github.com/woocommerce/woocommerce-blocks/pull/6825))
-
-1. Install Stripe, set it up so you can use it at Checkout.
-2. Add items to your cart and go to checkout. Add a credit/debit card via stripe and choose `Save payment information to my account for future purchases.`
-3. Check out. Repeat step 2 once more with a different card number. **Ensure the new card you use ends in four different numbers than the first one!** You can see test cards here: <https://stripe.com/docs/testing>
-4. Add items to your cart and go to checkout a third time. This time ensure you can switch between saved cards.
- <img width="662" alt="image" src="https://user-images.githubusercontent.com/5656702/182586601-d0cd308f-b8fa-45f3-9ce6-1b2f142d13c3.png">
-5. Check out successfully, and then go to the back end of your site. Go to the orders you made (WooCommerce -> Orders) and for each order check the payment method used (you'll need to follow this through to Stripe), and ensure the card number used matches the one you chose in the Checkout block. (Click the link on the order page)
- <img width="880" alt="image" src="https://user-images.githubusercontent.com/5656702/182587320-4f8e511a-b4cc-4420-a91a-cb2732617183.png">
diff --git a/plugins/woocommerce/client/blocks/docs/internal-developers/testing/releases/830.md b/plugins/woocommerce/client/blocks/docs/internal-developers/testing/releases/830.md
deleted file mode 100644
index a4fd2ddf4fb..00000000000
--- a/plugins/woocommerce/client/blocks/docs/internal-developers/testing/releases/830.md
+++ /dev/null
@@ -1,113 +0,0 @@
-# Testing notes and ZIP for release 8.3.0
-
-Zip file for testing: [woocommerce-gutenberg-products-block.zip](https://github.com/woocommerce/woocommerce-blocks/files/9350354/woocommerce-gutenberg-products-block.zip)
-
-## Feature plugin and package inclusion in WooCommerce
-
-### Enable the Cart and Checkout blocks when WooCommerce Blocks is bundled in WooCommerce Core. ([6805](https://github.com/woocommerce/woocommerce-blocks/pull/6805))
-
-**Cart Block**:
-
-1. In the Cart Block in the editor, ensure the shipping calculator is enabled.
-2. Enable coupons on your site (WooCommerce -> Settings -> General -> Enable the use of coupon codes) and add one.
-3. Add two shipping methods for different locations, e.g. two for USA and two for UK.
-4. Do not add items to your cart.
-5. Go to the Cart Block and ensure the empty cart is displayed.
-6. Add items to your cart and revisit the Cart Block.
-7. Enter your address in the shipping calculator, ensure the correct shipping prices are displayed based on your location.
-8. Enter a coupon and ensure it works, and the price is modified accordingly.
-9. Modify the quantities of items in your cart, ensure it works and the prices update properly.
-10. If you have express payments enabled and working, try checking out from the Cart Block using GPay or Apple pay.
-11. If you don't, hit proceed to checkout and ensure it works correctly.
-
-**Checkout Block**:
-
-1. Go to WooCommerce -> Settings -> Accounts & Privacy and enable ` Allow customers to create an account during checkout` and `Allow customers to log into an existing account during checkout`.
-2. Go to Checkout Block editor, select contact information block and enable `Allow shoppers to sign up for a user account during checkout`.
-3. Enable the Stripe payment method, COD, and cheque.
-4. Log out of the site then add items to your cart and go to the Checkout Block.
-5. Check the `create account` box when entering your details.
-6. Remove the coupon added in the Cart testing steps, and try re-adding it.
-7. Change shipping methods and ensure the prices update.
-8. Change address, ensure shipping prices update when the country changes.
-9. Leave some fields empty on the address form, ensure you get an error.
-10. Re-fill them and enter an invalid ZIP code. (Set country to UK and enter 234345 as the Postcode). Ensure you see an error at the top of the block.
-11. Correct the error (A valid one is `SW19 1AA` if in UK).
-12. Check out and ensure it works and the order is logged correctly.
-13. Ensure you received emails relating to your order (if using Local WP you can go to your site -> tools -> mailhog to check this).
-
-### Refactor Product Categories block to use block.json. ([6875](https://github.com/woocommerce/woocommerce-blocks/pull/6875))
-
-**WooCommerce Blocks**:
-
-1. Add Product Categories List block as a widget (Appearance → Widgets)
-2. Open block settings
-3. Test block controls, save, and review if it still renders correctly in the frontend
-
-**WPCOM**:
-
-1. Add Product Categories List block as a widget (Appearance → Widgets)
-2. Open block settings
-3. Open Advanced and click on "Add new rule" under Visibility
-
-### Add feedback box to the Cart & Checkout Inner Blocks in the inspector. ([6881](https://github.com/woocommerce/woocommerce-blocks/pull/6881))
-
-1. Go to the Cart and Checkout editor pages
-2. Select the Block and each of its inner blocks. You should notice the feedback box in the inspector.
-
-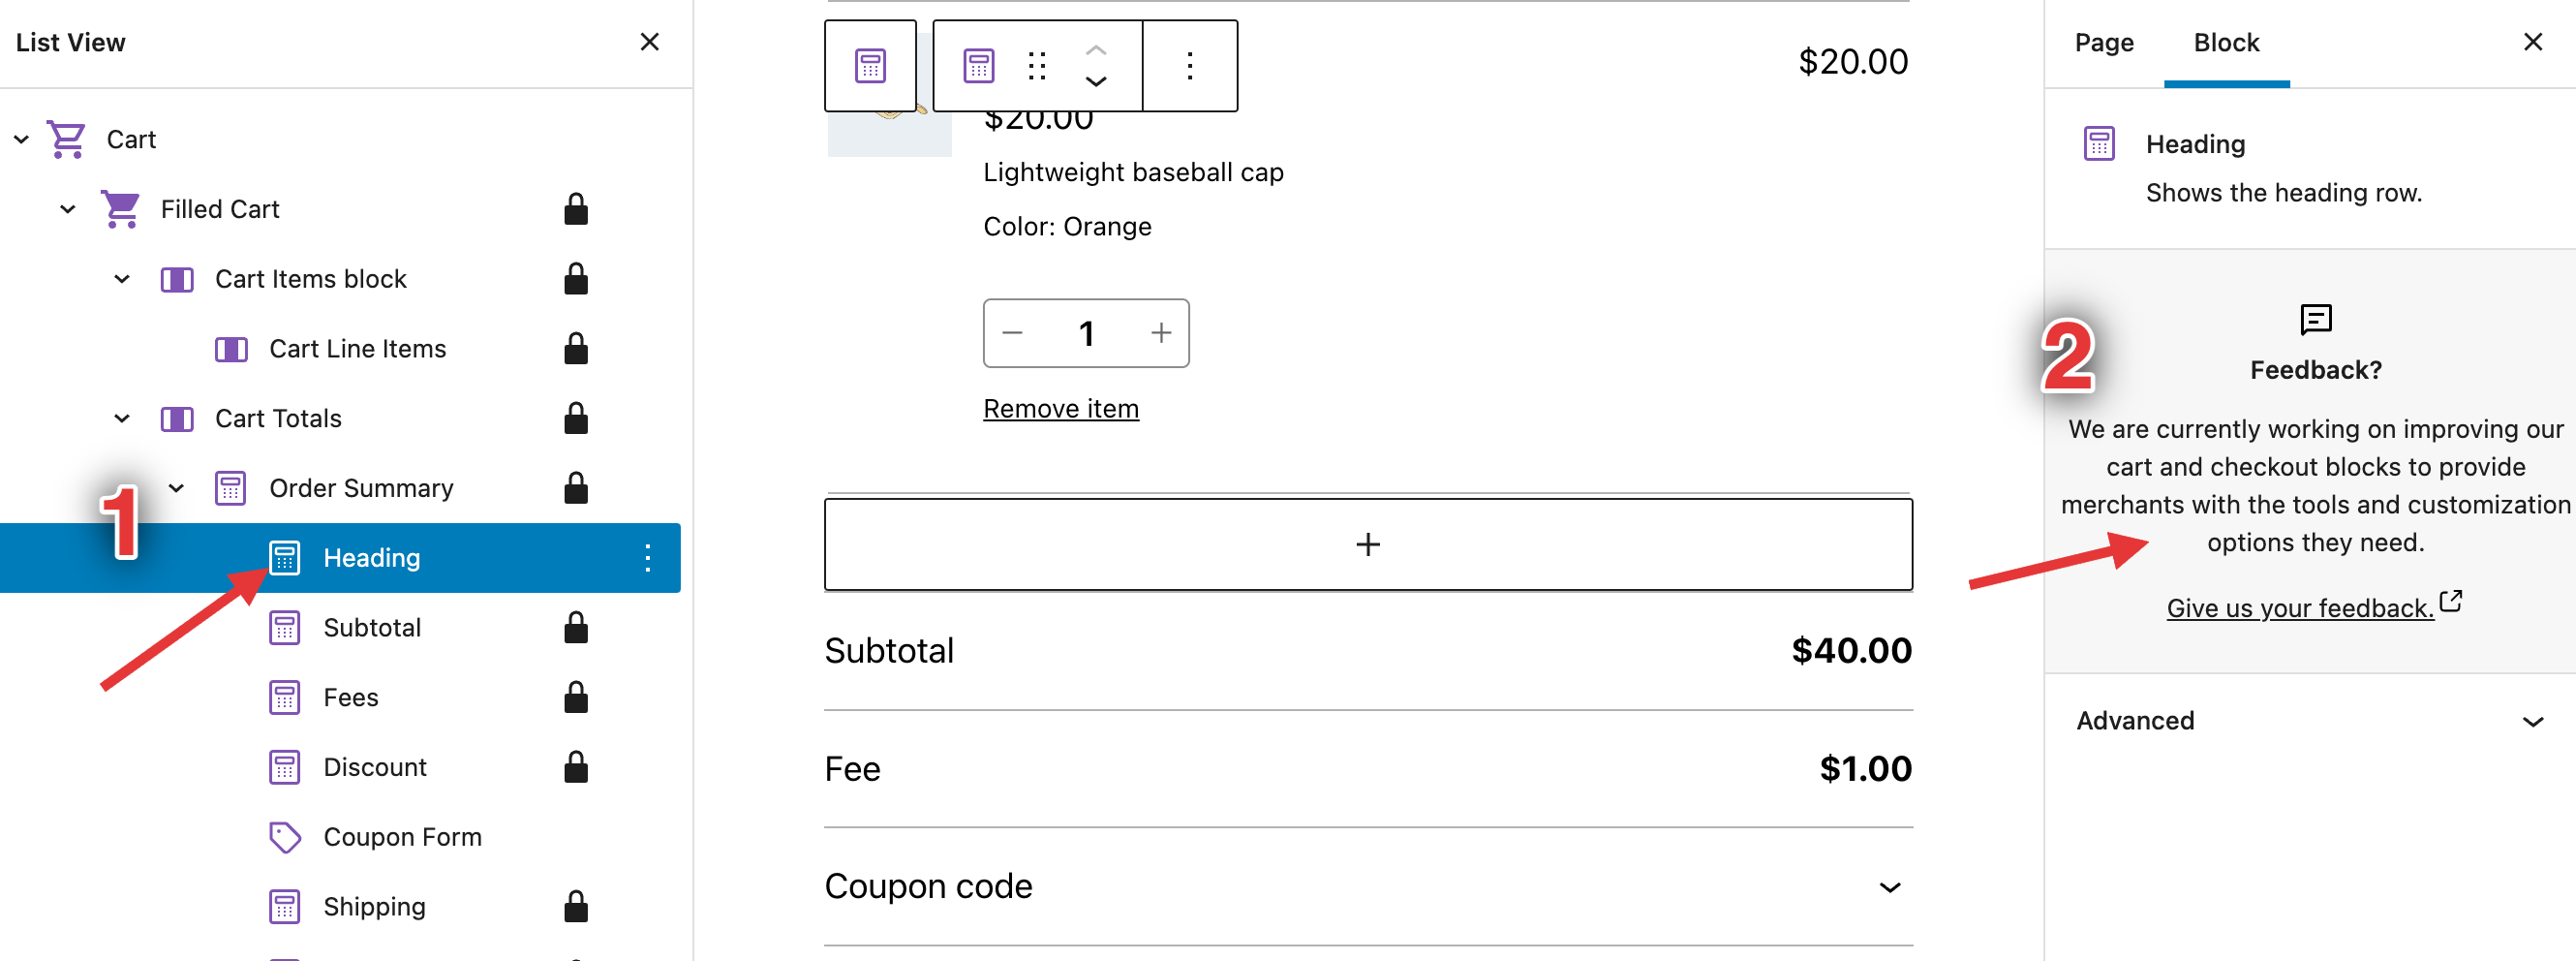
-
-### Add notice to Cart and Checkout blocks' inspector controls which links to the list of compatible plugins. ([6869](https://github.com/woocommerce/woocommerce-blocks/pull/6869))
-
-1. Go to the editor, insert the Checkout block.
-2. Select it, verify you see the notice. Click through each and every inner block and ensure the notice displays for it.
-3. Dismiss the notice, click back through the inner blocks and ensure the notice is gone. Reload the page, ensure the notice is still gone.
-4. Go to the editor, insert the Cart block.
-5. Select it, verify you see the notice. Click through each and every inner block and ensure the notice displays for it.
-6. Dismiss the notice, click back through the inner blocks and ensure the notice is gone. Reload the page, ensure the notice is still gone.
-7. Clear local storage again.
-8. Go back to the Cart and Checkout blocks and ensure the notice is back.
-9. Create a new page. Add the Checkout Block. Select it and verify the sidebar contains the default warning:
- <img width="266" alt="image" src="https://user-images.githubusercontent.com/5656702/183895778-44d3d079-09a4-4806-9096-e80e2a46a318.png">.
- Verify the wording says **checkout**.
-10. Add the Cart Block, ensure the same notice appears but ensure it says **cart**.
-
-### Add the ability to register patterns by adding them under the "patterns" folder and add the new "WooCommerce Filters" pattern. ([6861](https://github.com/woocommerce/woocommerce-blocks/pull/6861))
-
-1. Create a new page with the `All Products` block.
-2. Open the block inserter, go to the patterns tab, and select the WooCommerce category from the dropdown
-3. Make sure you see a pattern under that category named: `WooCommerce Filters`
-4. Click on it to insert it on the page.
-5. Check that all 4 filter blocks (by attribute, price, stock, and active filters) are added.
-6. Complete the filter by attribute by selecting one of them.
-7. Save the page and make sure all the filters are rendered on the front-end.
-
-### Override the description to prevent infinite loop. ([6849](https://github.com/woocommerce/woocommerce-blocks/pull/6849))
-
-1. Make sure you are using a block theme (ie: Twenty Twenty Two).
-2. Go to Appearance > Editor > Templates.
-3. Click on Add New and select Single Item: Product.
-4. Select any product from the list (ie: Hoodie).
-5. In the template, add the Hand-picked Products block and select the same product.
-6. Visit that product page in the frontend and notice the correct product is selected.
-
-### Update billing address when shipping address gets change in shipping calculator at Cart block. ([6823](https://github.com/woocommerce/woocommerce-blocks/pull/6823))
-
-1. Add a product to the cart and go to the Cart block.
-2. Add a new address with a valid zip code in the Shipping calculator, different from what you already used.
-3. Click on the Update button and wait for the update.
-4. Proceed to Checkout.
-5. In the Checkout block, see the new address for shipping being added to the Shipping address.
-6. Uncheck the checkbox for `Use same address for billing`.
-7. Look at the Billing address form and confirm it has the same address which was selected in the shipping calculator.
-
-## Feature plugin
-
-### Fix: Add font-weight controls to the Mini Cart block text. ([6760](https://github.com/woocommerce/woocommerce-blocks/pull/6760))
-
-1. Make sure you have a blocks theme active (like Twenty Twenty-Two).
-2. Navigate to Appearance > Editor (Beta) and add a Mini Cart block somewhere in your site.
-3. In the editor, select the Mini Cart block and, in the block settings, choose Font Weight under the Typography section.
-4. Adjust the font weight to something other than the Default.
-5. Confirm changes are present in the editor.
-6. Save changes and preview the frontend to confirm the changes have persisted.
diff --git a/plugins/woocommerce/client/blocks/docs/internal-developers/testing/releases/831.md b/plugins/woocommerce/client/blocks/docs/internal-developers/testing/releases/831.md
deleted file mode 100644
index 3a71c81bbbe..00000000000
--- a/plugins/woocommerce/client/blocks/docs/internal-developers/testing/releases/831.md
+++ /dev/null
@@ -1,17 +0,0 @@
-# Testing notes and ZIP for release 8.3.1
-
-Zip file for testing: [woocommerce-gutenberg-products-block.zip](https://github.com/woocommerce/woocommerce-blocks/files/9358719/woocommerce-gutenberg-products-block.zip)
-
-## Feature plugin and package inclusion in WooCommerce
-
-### Prevent unnecessarily showing the item names in a shipping package if it's the only package. ([6899](https://github.com/woocommerce/woocommerce-blocks/pull/6899))
-
-1. Set up shipping zones so you have multiple methods for your country (flat rate and free is fine) and a single method for a different country.
-2. Install the ["Multiple Packages for WooCommerce" plugin](https://wordpress.org/plugins/multiple-packages-for-woocommerce/)
-3. Navigate to WooCommerce -> Settings -> Multiple Packages
-4. Adjust the settings to work based on "Per Product"
-5. Add two items that require shipping to your cart.
-6. Go to the Cart block. Ensure you see the item name listed under each package.
-7. Remove one of the items, ensure the list of shipping options updates and does not include the item name.
-8. Change your address to one that only has a single shipping method. Repeat steps 5-7.
-9. Repeat 5-7 on the Checkout block too.
diff --git a/plugins/woocommerce/client/blocks/docs/internal-developers/testing/releases/840.md b/plugins/woocommerce/client/blocks/docs/internal-developers/testing/releases/840.md
deleted file mode 100644
index 0887b7ef1ed..00000000000
--- a/plugins/woocommerce/client/blocks/docs/internal-developers/testing/releases/840.md
+++ /dev/null
@@ -1,128 +0,0 @@
-# Testing notes and ZIP for release 8.4.0
-
-Zip file for testing: [woocommerce-gutenberg-products-block.zip](https://github.com/woocommerce/woocommerce-blocks/files/9444105/woocommerce-gutenberg-products-block.zip)
-
-## Feature plugin and package inclusion in WooCommerce
-
-### Update the filter `Apply` buttons to match the new designs. ([6958](https://github.com/woocommerce/woocommerce-blocks/pull/6958))
-
-1. Create a new page and add the `All Products` block and the filter pattern containing all filter blocks.
-2. Save it and check the buttons look like the `After` screenshot on the editor and the frontend.
-
-| Before | After |
-| ------ | ----- |
-| <img width="664" alt="Screenshot 2022-08-22 at 16 03 13" src="https://user-images.githubusercontent.com/186112/185940267-432c2866-c41a-4fda-8b0d-e6fbd3ef397b.png"> | <img width="684" alt="Screenshot 2022-08-23 at 10 41 03" src="https://user-images.githubusercontent.com/186112/186113450-1e59dfe5-6619-41e9-8f0c-a2e71a8eedde.png">|
-
-### Update the design of the Filter Products by Attribute block. ([6920](https://github.com/woocommerce/woocommerce-blocks/pull/6920))
-
-1. Add the `Filter by Attribute` block to a page.
-2. Check that it looks like the new design in the editor and the front-end.
-3. Check that the `Reset` button appears when a checkbox is checked.
-4. Edit the page and change the Display Style to dropdown.
-5. Check that it looks like the new design in the editor and the front-end (it won't look exactly like the design, check [this conversation](p1660817888642199-slack-C02SGH7JBGS) for more context)
-
-| Before | After |
-| ------ | ----- |
-| <img width="675" alt="Screenshot 2022-08-19 at 11 36 19" src="https://user-images.githubusercontent.com/186112/185591110-209a3767-9701-4564-978c-c61a6b805ff6.png"> | <img width="691" alt="Screenshot 2022-08-19 at 11 35 10" src="https://user-images.githubusercontent.com/186112/185591165-f1216f4b-b8ee-4af6-9519-ddafb437894e.png"> |
-| <img width="668" alt="Screenshot 2022-08-19 at 11 36 41" src="https://user-images.githubusercontent.com/186112/185591294-dd6d531c-5dfc-471a-ad96-6d7b57b63550.png">| <img width="673" alt="Screenshot 2022-08-19 at 11 37 15" src="https://user-images.githubusercontent.com/186112/185591322-917c6967-289b-44c8-932f-9b29d84be815.png"> |
-| <img width="685" alt="Screenshot 2022-08-19 at 11 38 01" src="https://user-images.githubusercontent.com/186112/185591479-b914d75e-b176-485c-93d0-35ac969fbbae.png"> | <img width="670" alt="Screenshot 2022-08-19 at 11 37 28" src="https://user-images.githubusercontent.com/186112/185591503-b0705eba-58ba-4536-b97f-cff5f1761244.png"> |
-
-### Update the design of the Filter by Attribute block settings panel. ([6912](https://github.com/woocommerce/woocommerce-blocks/pull/6912))
-
-1. Add the `Filter by Attribute` block to a page.
-2. Check the copy and the design matches with the new design.
-3. Check no regression has happened.
-
-### Terms and conditions, and Privacy policy links open in a new tab by default. ([6908](https://github.com/woocommerce/woocommerce-blocks/pull/6908))
-
-1. Insert Checkout page and save the page.
-2. On frontend, click on the terms or privacy links in the checkout block.
-3. They should open in a new tab.
-
-### Layout updates to the Active Filters block. ([6905](https://github.com/woocommerce/woocommerce-blocks/pull/6905))
-
-1. Add the Active Filters block alongside some other Filters blocks.
-2. Apply some filters to the page.
-3. Confirm the layout matches the **After** screenshot above.
-4. Confirm the **Remove Filter** buttons for each active filter have a hover state of an alternate shade of grey - also confirm they function as expected.
-
-| Before | After |
-| ------ | ----- |
-| <img width="725" alt="CleanShot 2022-08-24 at 09 22 27@2x" src="https://user-images.githubusercontent.com/481776/186429719-de3cb516-467a-4635-b336-64bf63b96f9e.png"> | <img width="650" alt="CleanShot 2022-08-24 at 09 19 27@2x" src="https://user-images.githubusercontent.com/481776/186429883-6bfe4c9d-d7a4-4caf-a31f-72dbd33f88a7.png"> |
-| | |
-| <img width="725" alt="CleanShot 2022-08-24 at 09 21 47@2x" src="https://user-images.githubusercontent.com/481776/186430028-2f076c50-d6c9-4931-b5d1-347c844c43d1.png"> | <img width="650" alt="CleanShot 2022-08-24 at 09 20 16@2x" src="https://user-images.githubusercontent.com/481776/186430096-b2841edf-bbc3-47dc-8f36-7b568e697310.png"> |
-
-### Update the design of the Filter Products by Stock block. ([6883](https://github.com/woocommerce/woocommerce-blocks/pull/6883))
-
-1. Add the Filter by Stock component to a page using the All Products block, and also a block template.
-2. Check that the control panel for this block looks like the design (minus Typography)
-3. On both the page and the template frontends select a checkbox and observe that it looks as it should do with the design.
-4. Check that a "Reset" button appears and clicking this resets the filter again.
-5. Now go to your Edit Page & Edit Template pages and enable "'Apply filters' button".
-6. On the frontends again, re-select your filter options and check that they are not applied immediately until you click "Apply"
-7. Check that when this block is used with the PHP template & the All Products block that regardless of whether the "Apply Filters" button is active, that clicking "Reset" immediately clears the selected filter options
-
-| Before | After |
-| ------ | ----- |
-| <img width="509" alt="Screenshot 2022-08-17 at 12 33 57" src="https://user-images.githubusercontent.com/8639742/185108568-1c6875e8-10a1-4070-919d-876c42af8a89.png"> | <img width="555" alt="Screenshot 2022-08-17 at 12 32 28" src="https://user-images.githubusercontent.com/8639742/185410884-45952fdd-14fe-4784-9ba6-c58c248630ad.png"> |
-
-### Update the design of the Filter Products by Price block. ([6877](https://github.com/woocommerce/woocommerce-blocks/pull/6877))
-
-1. Add `Filter Products by Price` block to a page.
-2. Verify that the `Inline input fields` only shows when the `Price Range` is Editable.
-3. Toggle Inline input fields, see the block in the editor updates accordingly.
-4. Toggle Filter button, see the Reset and Apply button.
-5. Add the All Products block then save the page.
-6. On the front end, see the new style applied as in the editor.
-7. Change the price using the slider then click the Apply button.
-8. See the filter works as expected.
-9. Click on the Reset button, see the price filter is reset. (Even if the filter button is enabled, clicking on the reset button should reset the filter query).
-10. Tested again with PHP templates, ensure no regression.
-
-<img width="1256" alt="image" src="https://user-images.githubusercontent.com/5423135/184097877-5210b4c6-907b-404f-bcf3-c7d83c02a563.png">
-
-### Allow making the Cart/Checkout block page the default one from within the editor. ([6867](https://github.com/woocommerce/woocommerce-blocks/pull/6867))
-
-To test this feature you need the latest trunk of WooCommerce, or WooCommerce 6.9.0. For older versions of WC (pre 6.9.0), the notice would show the old text:
-
-<img width="297" alt="image" src="https://user-images.githubusercontent.com/6165348/184404663-11cac5f1-1729-4782-a39f-ee5f101a78a7.png">
-
-1. Make sure you have a Cart and Checkout pages in WooCommerce -> Settings -> Advanced.
-2. Those pages urls can be `/cart` and `/checkout`.
-3. Open a new page, give it a title, insert Cart block.
-4. Select Cart block, you should see the notice, select an inner block, you should see the notice as well.
-5. Click on the notice, it will load for a couple of seconds, once it's green, visit your new page.
-6. Make sure it's on the previous url, so `/cart`.
-7. Go back to settings, make sure your new page is that value there.
-8. Do the same thing for Checkout block.
-9. Open a new page, add Cart block, save the page and publish it.
-10. Select the block or one of its inner blocks, start the flow again.
-11. It should work, confirm that by visiting the frontend.
-
-<video src="https://user-images.githubusercontent.com/6165348/183219991-4b904273-67ef-43e1-94fb-7498531f104f.mov" controls="controls" style="max-width: 730px;">
-</video>
-
-### Register product search as a core/search variation when available. ([6191](https://github.com/woocommerce/woocommerce-blocks/pull/6191))
-
-1. Ensure the Gutenberg version is ≥ 13.4 and it is deactivated.
-2. With a block theme (2022 for example), add the Product Search block to the header.
-3. See the Product Search is the independent block (as it is in `trunk`), not a variation of the Search block. See the block is editable in the editor and working as expected on the front end.
-4. Activate Gutenberg.
-5. On the front end, see the block is still working as expected and is still a WC block (notice the classes, and search icon).
-6. Edit the header, see the Deprecation notice, and a call to action button to upgrade the search block to search variation.
-7. Click on the CTA button to see if the block is converted to WC variation of the core search block.
-8. Save and see the block functions flawlessly on the front end.
-9. Edit the header again, try adding the Product Search block, only variation is available in the inserter. The legacy can't be found and inserted from the inserter.
-
-<video src="https://user-images.githubusercontent.com/5423135/181692749-8ce8ea51-824a-49c3-97e3-fc1c05130fdb.mov" controls="controls" style="max-width: 730px;">
-</video>
-
-### Fixed a bug with a class name deriving from a translatable string. ([6914](https://github.com/woocommerce/woocommerce-blocks/pull/6914))
-
-1. Add an item to your cart that has multiple variants. E.g. Hoodie (Blue, Logo)
-2. Go to the Cart Block
-3. Inspect the text for one of the variants (e.g. Colour: Blue)
-4. Make sure there is a class called `wc-block-components-product-details__item` on the `<li>` element. This should be a child of `<ul className="wc-block-components-product-details">`
-5. Change the language of your store
-6. Refresh the cart page
-7. Repeat steps 3 and 4. You should see the same result.
diff --git a/plugins/woocommerce/client/blocks/docs/internal-developers/testing/releases/850.md b/plugins/woocommerce/client/blocks/docs/internal-developers/testing/releases/850.md
deleted file mode 100644
index c91d1fb1068..00000000000
--- a/plugins/woocommerce/client/blocks/docs/internal-developers/testing/releases/850.md
+++ /dev/null
@@ -1,162 +0,0 @@
-# Testing notes and ZIP for release 8.5.0
-
-Zip file for testing: [woocommerce-gutenberg-products-block.zip](https://github.com/woocommerce/woocommerce-blocks/files/9554999/woocommerce-gutenberg-products-block.zip)
-
-## Feature plugin and package inclusion in WooCommerce
-
-### Improve the alignment of the Remove button in the Filter by Attribute block. ([7088](https://github.com/woocommerce/woocommerce-blocks/pull/7088))
-
-1. Create a page with the filter blocks and the All Products block. Make sure to add two Filter by Attribute blocks with display style set to dropdown. One allowing single selection and the other one allowing multiple selection.
-2. Add some attribute filters.
-3. Verify the remove icons are properly aligned.
-4. Try with different themes (e.g. Storefront and Twenty Twenty Two).
-
-| Before | After |
-| ------ | ----- |
-| <img src="https://user-images.githubusercontent.com/3616980/189088145-1723a855-1389-49f8-af35-12ead11c5087.png" alt="" width="220" /> | <img src="https://user-images.githubusercontent.com/3616980/189088116-1af556da-aeb9-4245-bbc3-cc4b9d046d3c.png" alt="" width="220" /> |
-
-### Enhance the display of the Active filters block changing the sizes of the text. ([7087](https://github.com/woocommerce/woocommerce-blocks/pull/7087))
-
-1. Create a page with the filter blocks and the All Products block.
-2. In the frontend add some filters.
-3. Verify the active filters texts have a size which doesn't seem broken compared to other filter blocks.
-4. Try changing the display style to chips and verify the same.
-5. Try with different themes (e.g. Storefront and Twenty Twenty Two).
-
-#### List
-
-| Before | After |
-| ------ | ----- |
-| <img src="https://user-images.githubusercontent.com/3616980/189081550-08b0e9a7-caba-449e-9502-80ec8a5dda35.png" alt="" width="281"/> | <img src="https://user-images.githubusercontent.com/3616980/189081514-bae1eac6-efe2-4af4-99b4-122e86b07789.png" alt="" width="281"/> |
-
-#### Chips
-
-| Before | After |
-| ------ | ----- |
-| <img src="https://user-images.githubusercontent.com/3616980/189084122-45e253fe-bee0-42a8-a919-df5d87020a88.png" alt="" width="281"/> | <img src="https://user-images.githubusercontent.com/3616980/189083973-14ee92ee-f122-4721-a247-5317a2411f76.png" alt="" width="281"/> |
-
-### Add loading placeholders to Active Filters block. ([7083](https://github.com/woocommerce/woocommerce-blocks/pull/7083))
-
-1. Enable TT2 theme. Create a new page with an `All Products` block and a `Active Filters` block with other filter blocks. Save the page.
-2. Open the page in the frontend and check that the `Active Filters` block shows like the screenshot while loading.
-3. Try different combinations of settings (show the `Apply` button, Chips vs List etc) and make sure the loading state makes sense and there are no regressions.
-4. Repeat steps 1-3 with the Storefront theme.
-
-| List | Chips |
-| ------ | ----- |
-| |  |
-
-
-### Featured Item Blocks: Remove inline default color so that custom colors from Global Styles are applied correctly. ([7036](https://github.com/woocommerce/woocommerce-blocks/pull/7036))
-
-1. Ensure you have a block theme active (i.e., Twenty Twenty-Two).
-2. Go to Appearance > Editor (Beta).
-3. Click on the Global Styles panel and select the Blocks section.
-4. Scroll down to the Featured Product or Featured Category block and edit the text and the background Global Styles.
-5. Confirm that both the text and background colors reflect the changes from the sidebar controls.
-
-| Before | After |
-| ------ | ----- |
-| 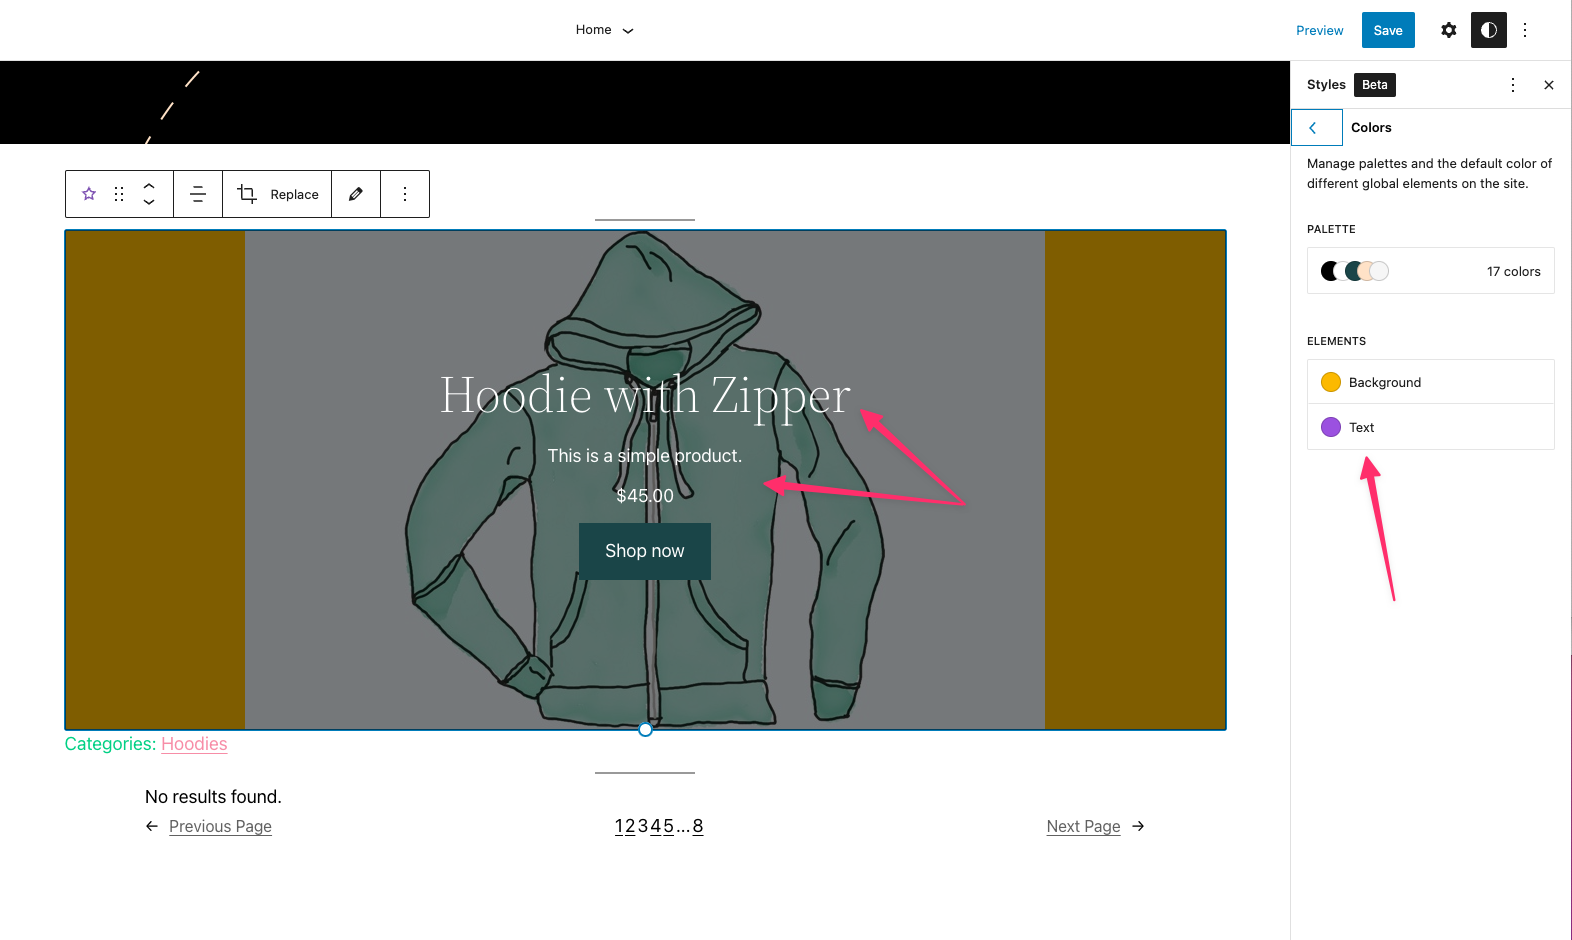 | 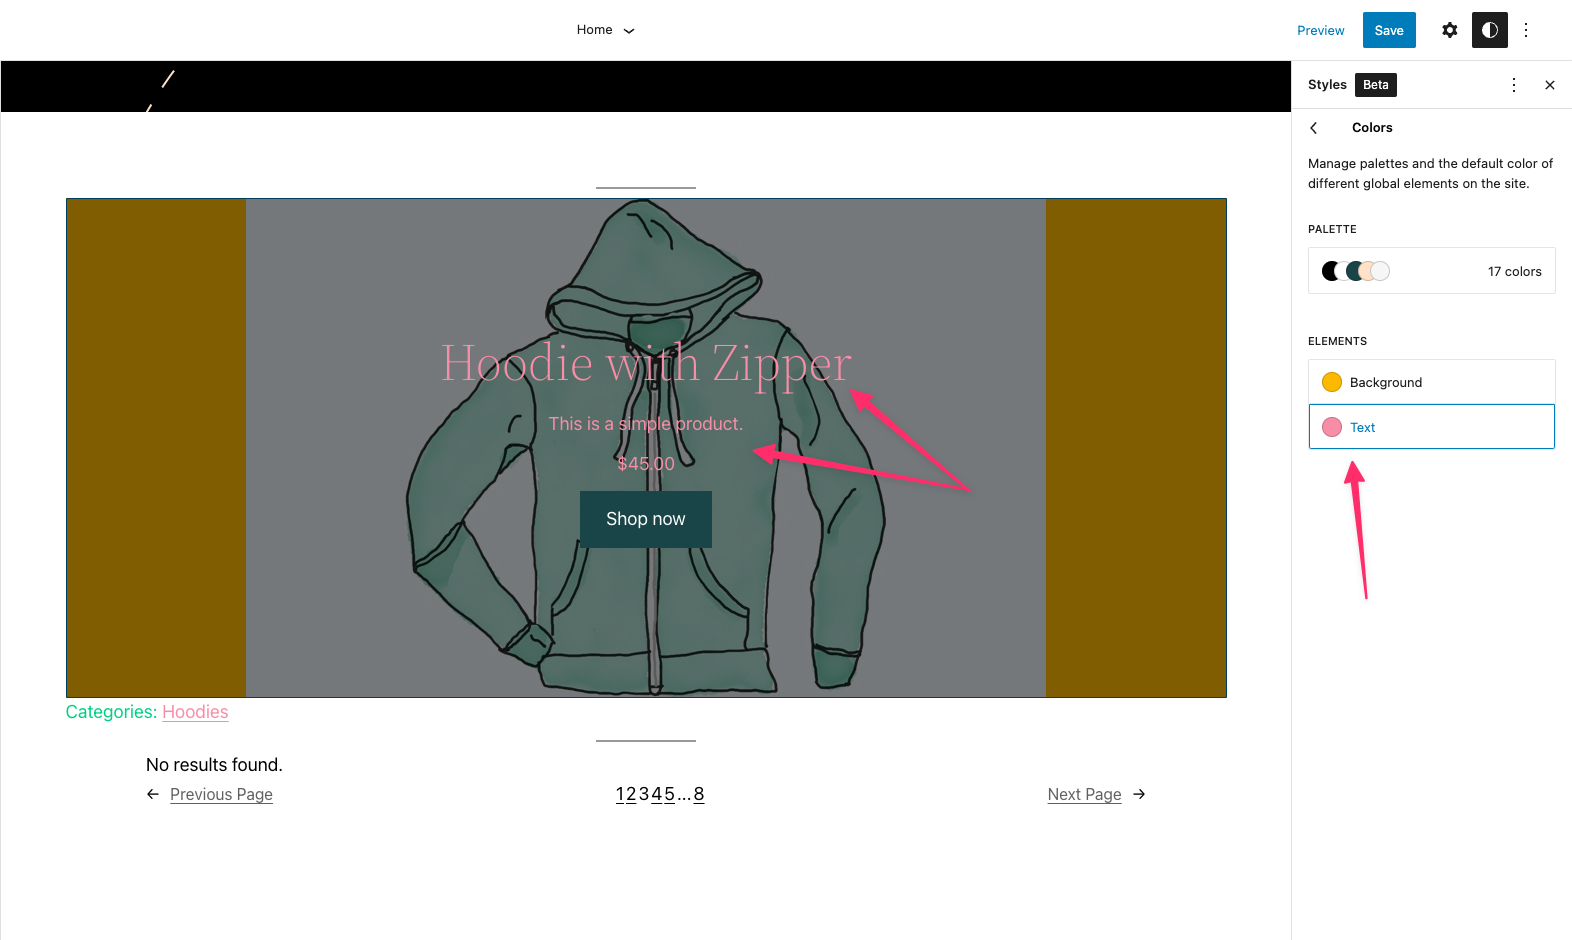 |
-
-### Update "remove filter" icon on the Active Filters block to use Icon component in both layouts. ([7035](https://github.com/woocommerce/woocommerce-blocks/pull/7035))
-
-1. Add the Active Filters block, in List view alongside some other Filters blocks.
-3. Apply some filters to the page.
-4. Confirm the remove button matches the After screenshot above. Also confirm that the remove button is visually consistent with the remove button in Chips view.
-5. Confirm the remove buttons for each active filter have a hover state of an alternate shade of grey - also confirm they function as expected.
-6. Confirm no JS or PHP errors.
-
-| Before | After |
-| ------ | ----- |
-| 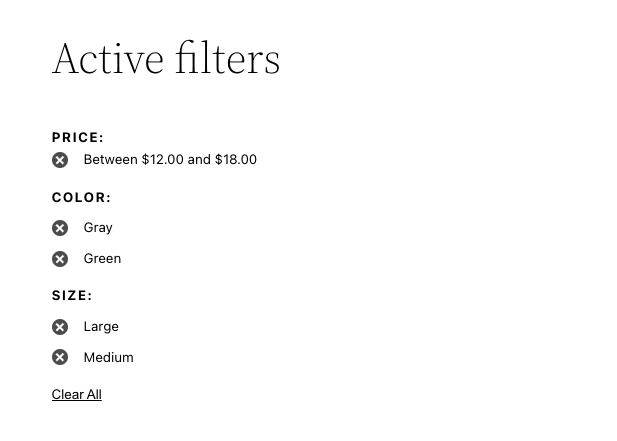 | 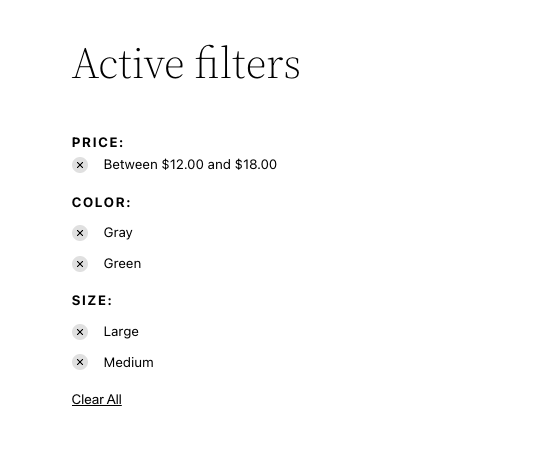 |
-
-### Update `filter by price` skeleton design. ([6997](https://github.com/woocommerce/woocommerce-blocks/pull/6997))
-
-1. Enable TT2 theme. Create a new page with an `All Products` block and a `Filter by price` block. Save the page.
-2. Open the page in the frontend and check that the `Filter by price` block shows like the screenshot while loading.
-3. Try different combinations of settings (show the `Apply` button, make the inputs inline, and make the range price not editable, etc) and make sure the loading state makes sense and there are no regressions.
-4. Repeat steps 1-3 with the Storefront theme.
-
-| Block | Loading |
-| ------ | ----- |
-| <img width="670" alt="Screenshot 2022-08-29 at 15 00 51" src="https://user-images.githubusercontent.com/186112/187207187-86434277-0048-4793-b6ad-b7ed1d9abfc8.png">| <img width="665" alt="Screenshot 2022-08-29 at 15 00 55" src="https://user-images.githubusercontent.com/186112/187207213-8164795e-8063-4a53-b200-ac0f65429044.png">|
-| <img width="663" alt="Screenshot 2022-08-29 at 15 01 15" src="https://user-images.githubusercontent.com/186112/187207298-53927b22-74fe-441a-ac1d-ebc4e88149c2.png">| <img width="677" alt="Screenshot 2022-08-29 at 15 01 28" src="https://user-images.githubusercontent.com/186112/187207314-fea1187e-d96c-44ec-83be-e84b865e1412.png">|
-
-### Update `filter by attribute` skeleton design. ([6990](https://github.com/woocommerce/woocommerce-blocks/pull/6990))
-
-1. Enable TT2 theme. Create a new page with an `All Products` block and a `Filter by attribute` block. Save the page.
-2. Open the page in the frontend and check that the `Filter by attribute` block shows like the screenshot while loading.
-3. Try different combinations of the block settings (dropdown, show apply button, etc) and make sure the loading state makes sense and there are no regressions.
-4. Repeat steps 1-3 with the Storefront theme.
-
-| Block | Loading |
-| ------ | ----- |
-| <img width="682" alt="Screenshot 2022-08-29 at 15 18 17" src="https://user-images.githubusercontent.com/186112/187210552-47ba68e8-bd6e-486b-b9fb-086bbf8660ae.png">| <img width="679" alt="Screenshot 2022-09-02 at 15 50 16" src="https://user-images.githubusercontent.com/186112/188160921-9221c2af-6ab6-4783-bae0-ecf2460fb09e.png">|
-
-### Fix checkbox label when count is zero. ([7073](https://github.com/woocommerce/woocommerce-blocks/pull/7073))
-
-1. Make sure you don't have any product with `On backorder` status.
-2. Create a page with an `All products` block and a `Filter by stock` block.
-3. Save it, go to the page and append this param to the URL `?filter_stock_status=onbackorder`.
-4. Check that the on backorder label shows `On backorder (0)`.
-
-| Before | After |
-| ------ | ----- |
-| <img width="247" alt="Screenshot 2022-09-06 at 14 45 21" src="https://user-images.githubusercontent.com/186112/188638630-dc30364c-6be3-4edf-9573-ba73841c3110.png"> | <img width="246" alt="Screenshot 2022-09-06 at 14 45 04" src="https://user-images.githubusercontent.com/186112/188638635-77a9d6cf-cc52-46e1-91ae-e4de09966f19.png"> |
-
-### Fix incompatible Classic Template block notice in the Editor for Woo specific templates. ([7033](https://github.com/woocommerce/woocommerce-blocks/pull/7033))
-
-1. Activate Gutenberg plugin.
-2. Go to Appearance > Editor > Add New to add a new template.
-3. Click "Single Item: Product" template and create a product specific template
-4. The block should render the placeholder for the Single Product.
-5. Make changes to this template, and save them. Make sure these are represented on the frontend. Then clear the customizations and do the same.
-6. Complete steps 3-5 again but instead create Product Category and Product Tag templates.
-
-### Update - remove __experimentalDuotone from Featured Product and Featured Category blocks. ([7000](https://github.com/woocommerce/woocommerce-blocks/pull/7000))
-
-1. Install a block theme (e.g., Twenty Twenty Two).
-2. Open Appearance > Editor (beta).
-3. Add a Featured Product and a Featured Category block.
-4. Customize the global styles for those blocks (click on the Styles button on the top toolbar and then the Blocks section towards the bottom - _see screenshots below_).
-5. Add some style adjustments and confirm they are reflected in the editor.
-6. Save your changes and view a page driven by the modified Template on the front-end.
-7. Confirm the adjusted styles are rendered to the front-end, as expected.
-
-| Global Styles Panel | Blocks Settings |
-| ------ | ----- |
-| 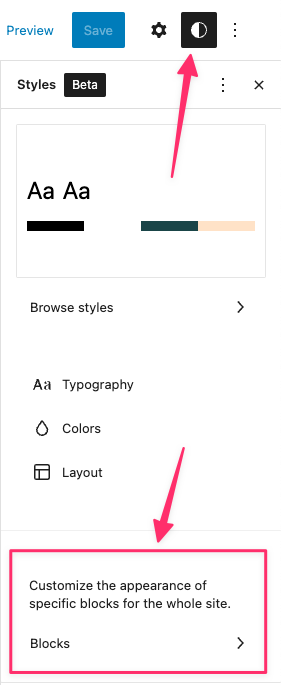 | 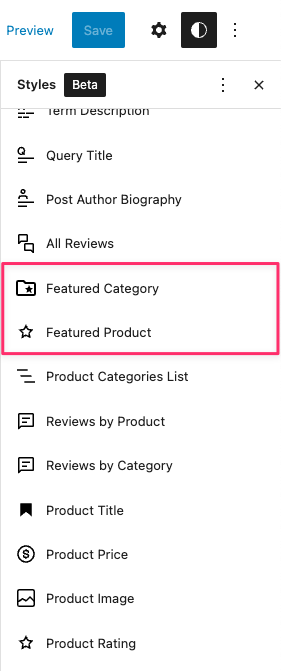 |
-
-_**Note:** the text color settings for this block are driven by inline styles that are added based on the Overlay and Color setting defaults. I imagine we want to keep those defaults in place so. To adjust this in the Editor, edit/remove those default settings on the block directly._
-
-
-### Add Apply button placeholders to filters and adjust title margins. ([7077](https://github.com/woocommerce/woocommerce-blocks/pull/7077))
-
-1. Create a page with the filter blocks and the `All Products` block. Make sure to enable the `Show Apply filter button` setting on all of them.
-2. Save and open the page on the front-end and make sure the placeholders show the apply button while loading and they look like the screenshot.
-
-| Before | After |
-| ------ | ----- |
-| <img width="363" alt="Screenshot 2022-09-09 at 11 00 23" src="https://user-images.githubusercontent.com/186112/189313767-6a8e7ac1-2855-4312-85f9-f96e0f3e139f.png"> | <img width="366" alt="Screenshot 2022-09-09 at 11 00 03" src="https://user-images.githubusercontent.com/186112/189313776-ce1fc0fa-a7fc-42a9-8af4-c32c3f1bfb0a.png"> |
-
-### Fix pills in the Filter by Attribute block dropdown overlapping with the chevron. ([7039](https://github.com/woocommerce/woocommerce-blocks/pull/7039))
-
-1. Add the `Filter by Attribute` block and the `All Products` block to a page.
-2. Set the `Filter by Attribute` block display to dropdown and allow selecting multiple options.
-3. Play around with the window size and the options you select, and make sure the pills inside the input don't overlap the chevron.
-
-| Before | After |
-| ------ | ----- |
-| <img width="422" alt="Screenshot 2022-09-01 at 12 16 45" src="https://user-images.githubusercontent.com/186112/187891036-a44ab3d0-0205-436f-adc7-8b739b52de94.png">| <img width="407" alt="Screenshot 2022-09-01 at 12 17 05" src="https://user-images.githubusercontent.com/186112/187891040-423d587b-db3f-4f9f-a20c-67df416143be.png">|
-
-### Fix stock filter placeholder. ([7009](https://github.com/woocommerce/woocommerce-blocks/pull/7009))
-
-1. Create a new page with a 30/70 columns block, insert the `Filter by stock` block in the 30% column and the `All Products` block in the 70% columns. Save the page.
-2. Open the page in the frontend and check that the `Filter by stock` block shows like the screenshot above while loading.
-3. Remove all products in the store and refresh the page you created in step 1. Check that `Filter by stock` placeholder disappears if there are no products.
-
-| Before | After |
-| ------ | ----- |
-| <img width="1034" alt="Screenshot 2022-08-30 at 14 40 43" src="https://user-images.githubusercontent.com/186112/187439097-33ff39cc-1f24-44f1-a371-94919490b5d6.png"> |<img width="1024" alt="Screenshot 2022-08-30 at 14 40 24" src="https://user-images.githubusercontent.com/186112/187439079-954c1362-d3e6-4260-af8b-75d80963b450.png">|
-| 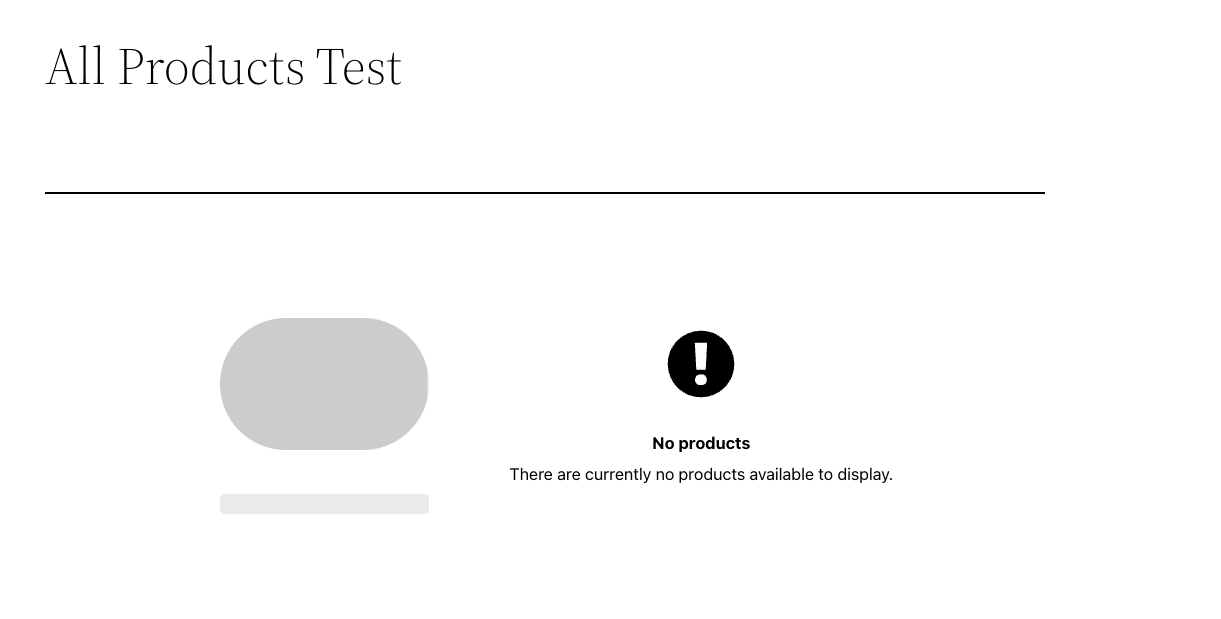| <img width="1023" alt="Screenshot 2022-08-30 at 14 38 54" src="https://user-images.githubusercontent.com/186112/187438666-35ac4298-0c06-442a-9ea5-fc741ee7edc5.png">|
diff --git a/plugins/woocommerce/client/blocks/docs/internal-developers/testing/releases/851.md b/plugins/woocommerce/client/blocks/docs/internal-developers/testing/releases/851.md
deleted file mode 100644
index 7f2033325fc..00000000000
--- a/plugins/woocommerce/client/blocks/docs/internal-developers/testing/releases/851.md
+++ /dev/null
@@ -1,12 +0,0 @@
-# Testing notes and ZIP for release 8.5.1
-
-Zip file for testing: [woocommerce-gutenberg-products-block.zip](https://github.com/woocommerce/woocommerce-blocks/files/9633294/woocommerce-gutenberg-products-block.zip)
-
-## Feature plugin and package inclusion in WooCommerce
-
-### Fix a bug in which resource hinting was breaking cart in subfolder installs. ([7211](https://github.com/woocommerce/woocommerce-blocks/pull/7211))
-
-1. Make sure Gutenberg is disabled.
-2. Add an item to cart.
-3. Go to any frontend page, and view the page source.
-4. In that source page, search for scripts starting with `/wp-includes`, you shouldn't see any relative links in them, e.g. /wp-includes/js/dist/vendor/lodash.min.js, but that everything starts with a full link, e.g. <https://example.com/wp-includes/js/dist/vendor/lodash.min.js>.
diff --git a/plugins/woocommerce/client/blocks/docs/internal-developers/testing/releases/852.md b/plugins/woocommerce/client/blocks/docs/internal-developers/testing/releases/852.md
deleted file mode 100644
index bbb47de288e..00000000000
--- a/plugins/woocommerce/client/blocks/docs/internal-developers/testing/releases/852.md
+++ /dev/null
@@ -1,80 +0,0 @@
-# Testing notes and ZIP for release 8.5.2
-
-Zip file for testing: [woocommerce-gutenberg-products-block.zip](https://github.com/woocommerce/woocommerce-blocks/files/9901527/woocommerce-gutenberg-products-block.zip)
-
-## Feature plugin and package inclusion in WooCommerce
-
-### Fix Mini Cart Global Styles. [7515](https://github.com/woocommerce/woocommerce-blocks/pull/7515)
-
-
-1. Enable TT3 theme.
-2. Go to Appearance > Site Editor and replace the header with `WooCommerce Essential Header | Light` pattern.
-3. Save and visit the frontend.
-4. Hover over the Mini Cart and be sure that the font size doesn't change.
-5. Edit some settings related to the Mini Cart Global Styles.
-6. Be sure that the settings are reflected correctly on the editor and frontend side.
-
-### Fix inconsistent button styling with TT3. ([7516](https://github.com/woocommerce/woocommerce-blocks/pull/7516))
-
-
-| Before | After |
-| ------ | ----- |
-|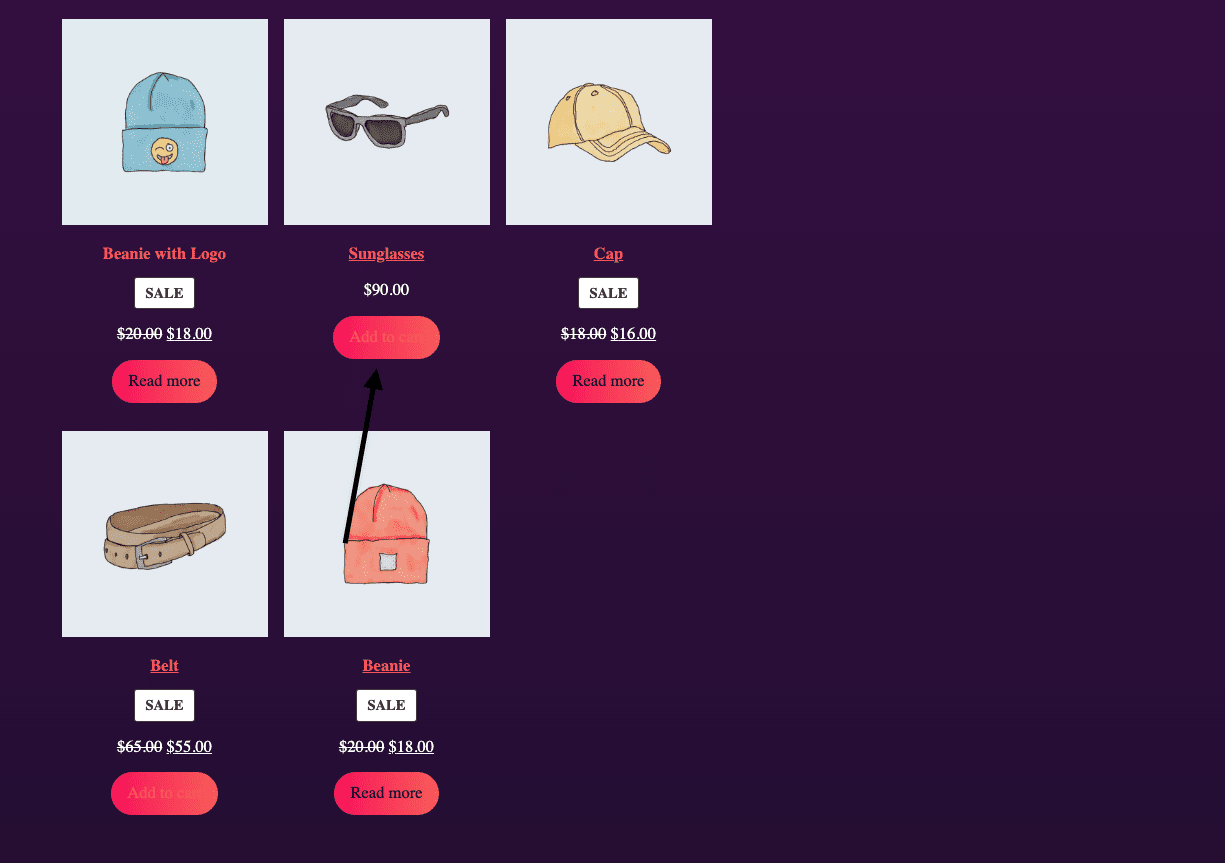|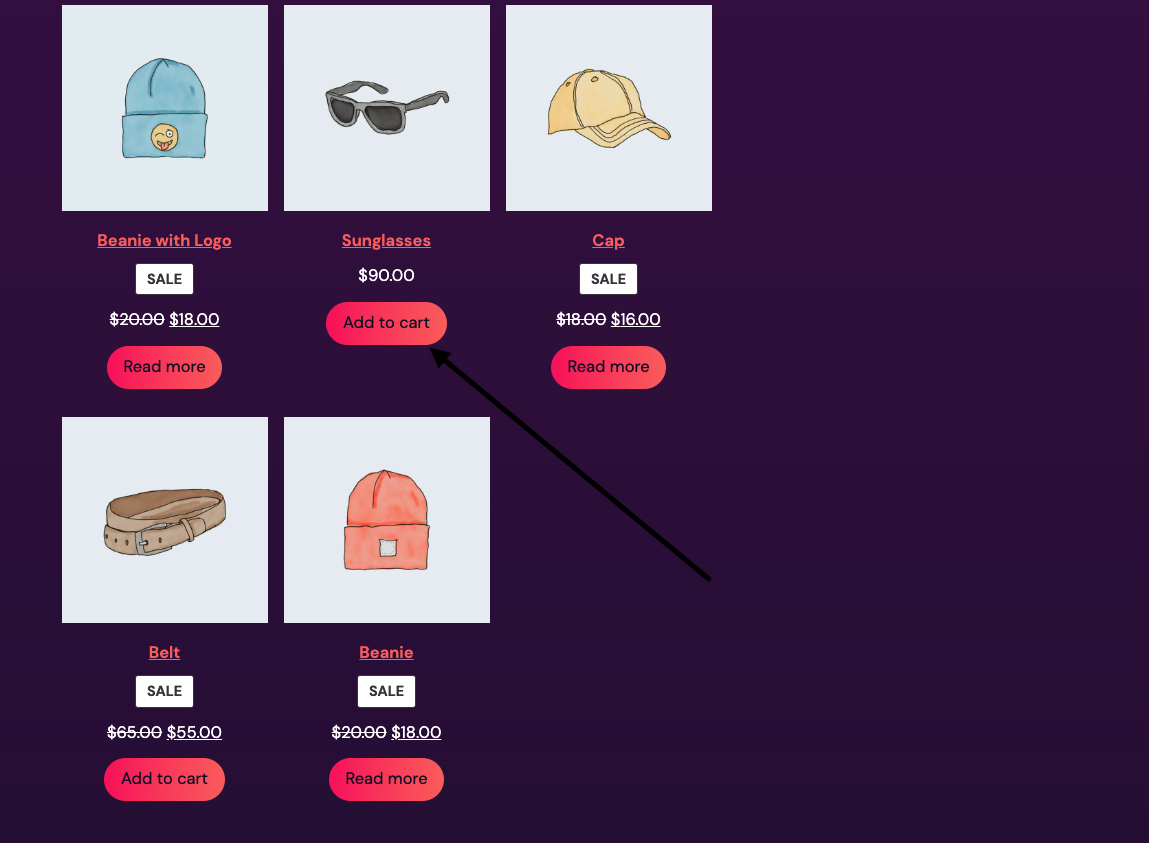|
-
-1. Enable TT3.
-2. Create a new post/page and add the `All Product` block and the `Product Categories` block.
-3. Save.
-4. Visit the post/page via incognito mode and be sure that all the buttons have the same style.
-
-### Make the Filter by Price block range color dependent of the theme color. [7525](https://github.com/woocommerce/woocommerce-blocks/pull/7525)
-
-| Theme | Before | After |
-| --- | ------ | ----- |
-| Storefront |  |  |
-| TT2 (dark) |  |  |
-| Bricksy | 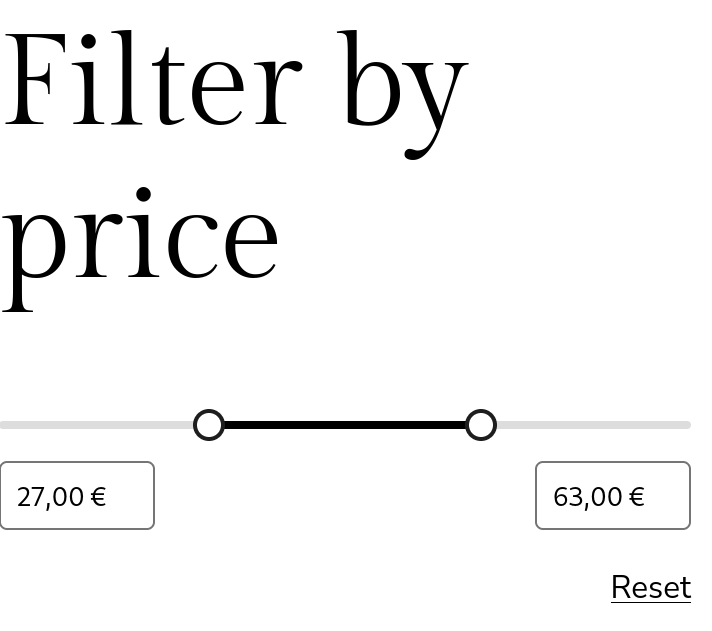 | 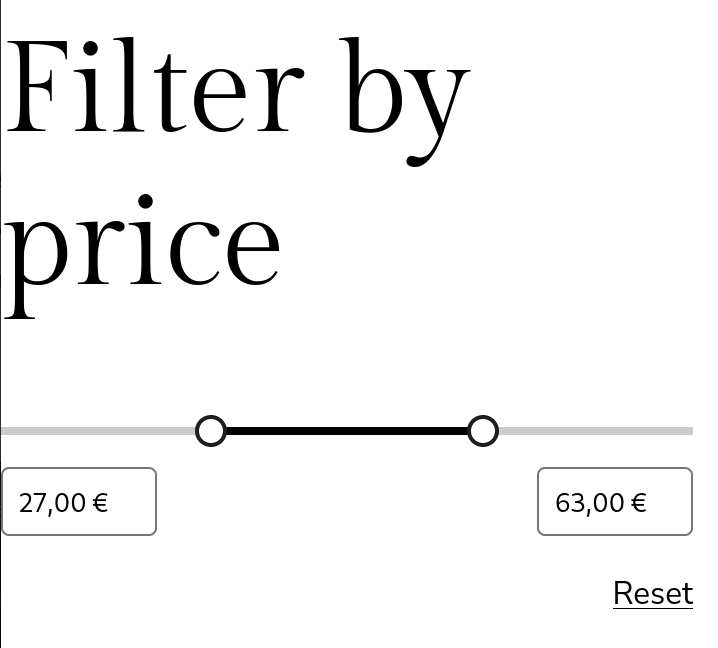 |
-| TT3 (default) | 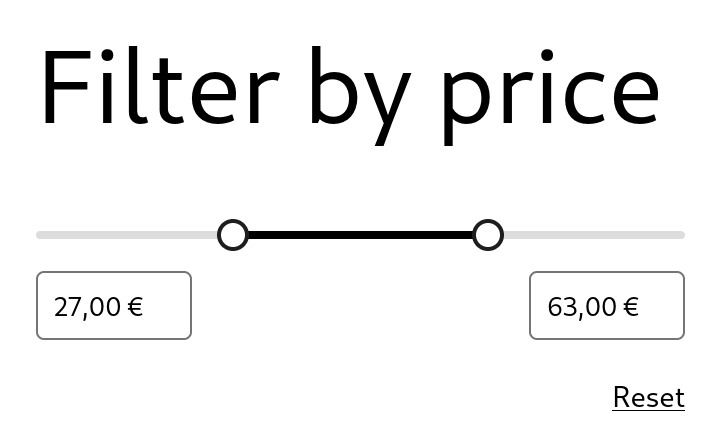 | 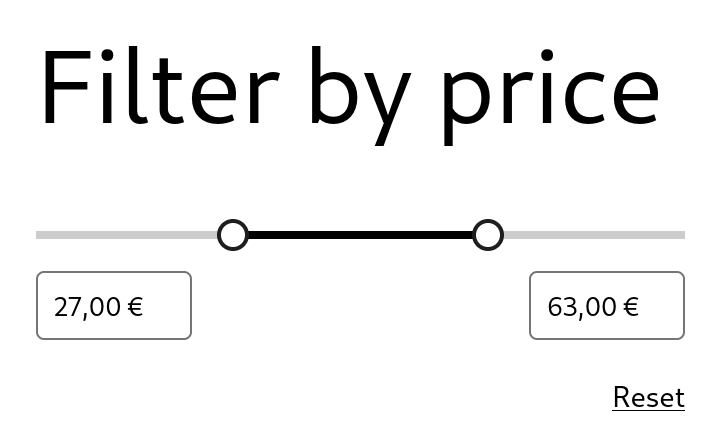 |
-| TT3 (Pilgrimage) | 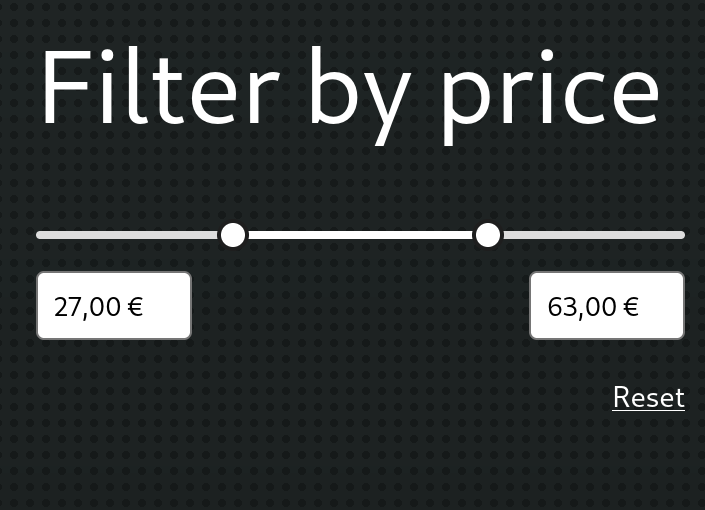 | 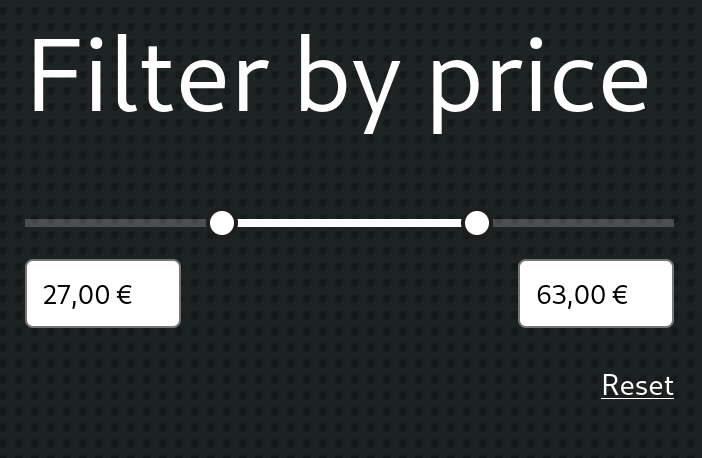 |
-
-1. Add the Filter by Price and the All Products blocks in the same page.
-2. Visit the page in the frontend and move the price slider thumbs.
-3. Verify there is enough contrast between the "active" part of the slider and the "inactive" one (see screenshots above).
-
-
-### Filter by Price block: fix price slider visibility on dark themes. [7527](https://github.com/woocommerce/woocommerce-blocks/pull/7527)
-
-| | With dark background | With light background |
-|----------------|----------------------|-----------------------|
-| Before this PR |||
-| With this PR |||
-
-
-1. Enable TT2.
-2. Add the Filter by Price and All Products blocks inside a Columns block into a post or page.
-3. Change the background color of the Filter by Price column to a dark color. Change the text color to a light color.
-4. Notice the price slider is visible.
-
-### Update the Mini Cart block drawer to honor the theme's background. [7510](https://github.com/woocommerce/woocommerce-blocks/pull/7510)
-
-1. Download and activate [TT3](https://github.com/WordPress/twentytwentythree) select the Pilgrimage style variation (see screenshot below).
-2. Add the Mini Cart block to a post or page.
-3. In the frontend, click on the Mini Cart button to open the drawer.
-4. Verify the background is dark and text can be read properly.
-5. Back in the editor, select the Mini Cart block and press on `Edit Mini Cart template part` in the sidebar. That will open the template editor.
-6. Verify text is legible there as well:
-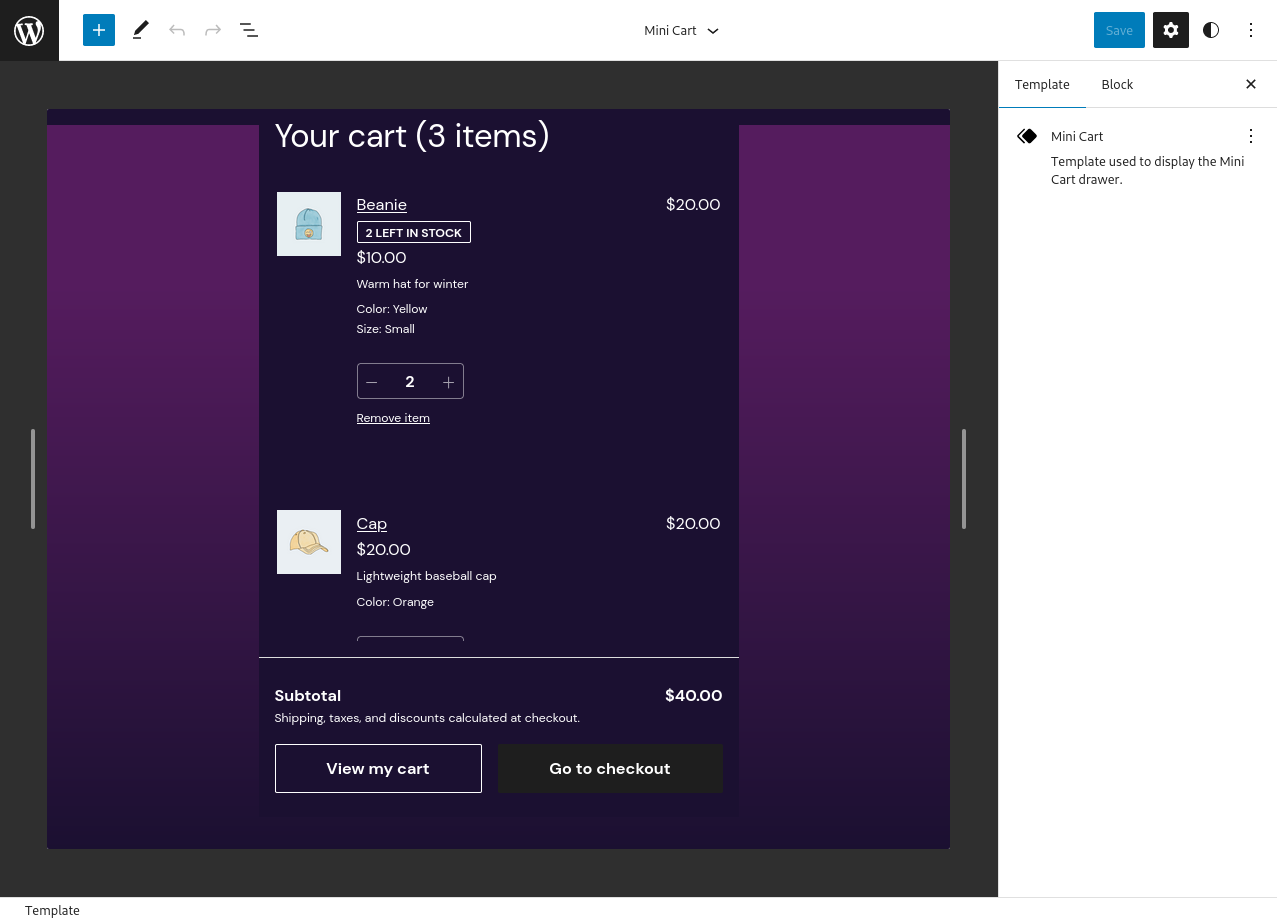
-7. Try with all other TT3 theme variations and verify text can be properly read in all of them.
-8. Repeat all steps above with TT2.
-
-### Add white background to Filter by Attribute block dropdown so text is legible in dark backgrounds. [7506](https://github.com/woocommerce/woocommerce-blocks/pull/7506)
-
-| Before | After |
-| ------ | ----- |
-| 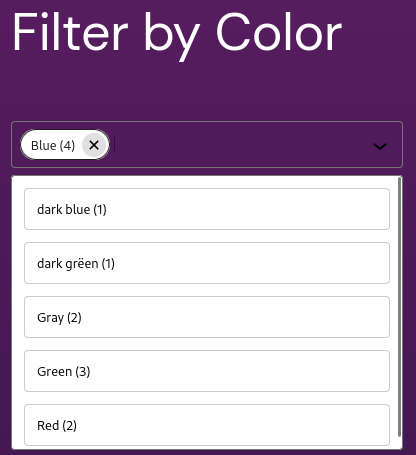 | 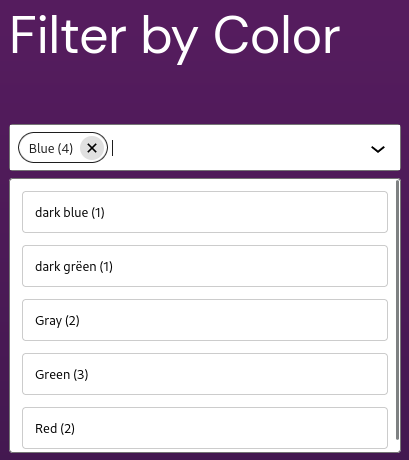 |
-| 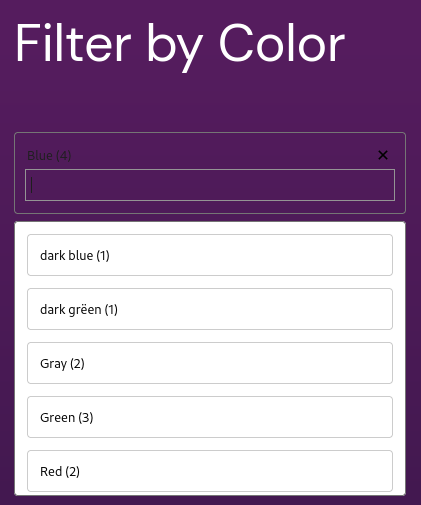 | 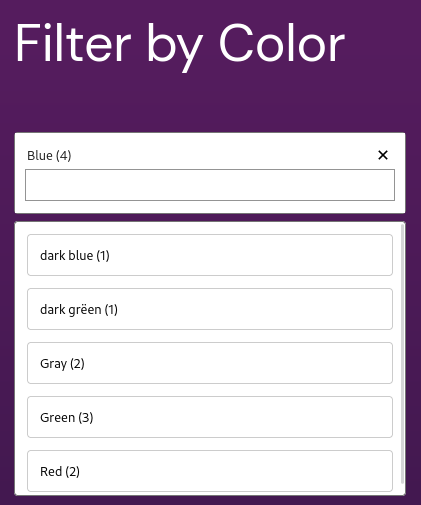 |
-
-
-1. Download and activate [TT3](https://github.com/WordPress/twentytwentythree).
-2. Add the All Products block with the Filter by Attribute block next to it in a post or page.
-2. Visit the post or page and interact with the Filter by Attribute block.
-3. Verify the background of the input has white background, so text is legible.
diff --git a/plugins/woocommerce/client/blocks/docs/internal-developers/testing/releases/860.md b/plugins/woocommerce/client/blocks/docs/internal-developers/testing/releases/860.md
deleted file mode 100644
index 75fda88120a..00000000000
--- a/plugins/woocommerce/client/blocks/docs/internal-developers/testing/releases/860.md
+++ /dev/null
@@ -1,141 +0,0 @@
-# Testing notes and ZIP for release 8.6.0
-
-Zip file for testing: [woocommerce-gutenberg-products-block.zip](https://github.com/woocommerce/woocommerce-blocks/files/9648129/woocommerce-gutenberg-products-block.zip)
-
-## Feature plugin and package inclusion in WooCommerce
-
-### Allow rendering HTML in shipping package names [7147](https://github.com/woocommerce/woocommerce-blocks/pull/7147)
-
-#### Test HTML rendering in shipping package names
-
-1. Install the [Multiple Packages for WooCommerce](https://wordpress.org/plugins/multiple-packages-for-woocommerce/) plugin.
-2. Go to `/wp-admin/admin.php?page=wc-settings&tab=multiple_packages`, enable the Multiple Packages for Shipping plugin and select `Product (individual)` for the option `Group By`.
-3. Install the [Code Snippets](https://wordpress.org/plugins/code-snippets/) plugin.
-4. Add the following code snippet to the site:
-
-```php
-add_filter( 'woocommerce_shipping_package_name', 'test_package_name', 1, 3 );
-function test_package_name( $title, $index, $package ) {
- return $title . '<br/>test<br/>test2';
-}
-```
-
-5. Ensure to have one page with the Cart block and one page with the Checkout block.
-6. Add two products to the cart.
-7. Verify that the page with the Cart block shows the shipping package name with line breaks instead of showing `Shipping method<br/>test<br/>test2`.
-8. Verify that the page with the Checkout block shows the shipping package name with line breaks instead of showing `Shipping method<br/>test<br/>test2`.
-9. Replace the previous code snippet with the following one:
-
-```php
-add_filter( 'woocommerce_shipping_package_name', 'test_xss', 1, 3 );
-function test_xss( $title, $index, $package ) {
- return $title . '<br><a href="https://woocommerce.com/" target="_blank">WooCommerce.com<img src=x onerror="javascript:alert('XSS')"></a>';
-}
-```
-
-10. Verify that the page with the Cart block and the page with the Checkout block:
-
-- do not show an XSS alert.
-- do show the package name and the URL [WooCommerce.com](https://woocommerce.com/) in the next line and that the URL opens in a new tab when being clicked.
-
-#### Test reusable sanitise util (only for developer testing)
-
-1. Open `assets/js/base/components/cart-checkout/shipping-rates-control-package/index.tsx` and change
-
-```tsx
-<div
- className="wc-block-components-shipping-rates-control__package-title"
- dangerouslySetInnerHTML={ sanitizeHTML( packageData.name ) }
-/>
-```
-
-to
-
-```tsx
-<div
- className="wc-block-components-shipping-rates-control__package-title"
- dangerouslySetInnerHTML={ sanitizeHTML( packageData.name, {
- tags: [ 'a' ],
- } ) }
-/>
-```
-
-2. Run `npm run build` to build the extension again.
-3. Look up the page with the Cart or the Checkout block from the previous test case.
-4. Verify that the URL [WooCommerce.com](https://woocommerce.com/) is still visible, but that it no longer appears in the next line but in the same line.
-
-### Revert "Add static class name for product-details (#6914)" [7191](https://github.com/woocommerce/woocommerce-blocks/pull/7191)
-
-1. Add an item to your cart that has multiple variants. E.g. Hoodie (Blue, Logo)
-2. Go to the Cart Block
-3. Inspect the text for one of the variants (e.g. Colour: Blue)
-4. Make sure there is a class called `wc-block-components-product-details__{name of your variant}`
-
-### Prevent Express Checkout block from being cut off [7152](https://github.com/woocommerce/woocommerce-blocks/pull/7152)
-
-1. Install the [WooCommerce Stripe Payment Gateway](https://wordpress.org/plugins/woocommerce-gateway-stripe/) plugin.
-2. Go to `/wp-admin/admin.php?page=wc-settings&tab=checkout` and activate the payment method `Stripe` so that the Express Payment block becomes visible.
-3. Create a page and add the Checkout block to it.
-4. Select the Checkout block and verify that the Express Payment block is no longer cut off.
-
-### Make chevron clickable in Filter by Product block input [7139](https://github.com/woocommerce/woocommerce-blocks/pull/7139)
-
-1. Add the `Filter by Attribute` block and the `All Products` block to a page.
-2. Set the `Filter by Attribute` block display to dropdown and allow selecting multiple options.
-3. Play around with the window size and the options you select, and make sure the pills inside the input don't overlap the chevron.
-4. Verify that when you click on the chevron, the options dropdown appear.
-
-### Fix: Inner blocks control position for Cart Block [6973](https://github.com/woocommerce/woocommerce-blocks/pull/6973)
-
-1. Go to the Cart Block
-2. Click on the fee inner block
-3. Confirm that the controls appear on the correct side
-
-### Create Cross-Sells product list [6645](https://github.com/woocommerce/woocommerce-blocks/pull/6645)
-
-#### Test editor behaviour when adding Cart block
-
-1. Create a test page and add the Cart block to it.
-2. Verify that the Cart block contains the Cart Cross-Sells inner block.
-3. Verify that the Cart Cross-Sells inner block contains the Heading and Cart Cross-Sells products inner blocks.
-4. Select the Cart Cross-Sells products inner block and verify that the number of visible Cross-Sells products can be adjusted in the editor.
-
-#### Test editor behaviour after removing Cross-Sells block
-
-1. Create a test page and add the Cart block to it.
-2. Verify that the Cart block contains the Cart Cross-Sells inner block.
-3. Delete the Cart Cross-Sells inner block.
-4. Verify that the Cart Cross-Sells inner block can be reinserted.
-
-#### Test frontend behaviour if cart items does not have Cross-Sells products
-
-1. Visit the frontend.
-2. Add a product to the cart that does not Cross-Sells products.
-3. Go to the Cart page.
-4. Verify that the Cross-Sells product block is not visible.
-
-#### Test frontend behaviour if cart items have Cross-Sells products
-
-1. Visit the frontend.
-2. Add a product to the cart that has Cross-Sells products.
-3. Go to the Cart page.
-4. Verify that the Cross-Sells product block is visible.
-5. Add one of the Cross-Sells products, which also has Cross-Sells products, to the cart.
-6. Verify that the added Cross-Sells product had been added to the cart and is no longer visible as a Cross-Sells product.
-7. Verify that the Cross-Sells products, of the product that had been added to the cart in step 6., are visible in the Cross-Sells block.
-
-#### Test frontend behaviour if cart items have a Cross-Sells product that is out of stock
-
-1. Visit the frontend.
-2. Add a product to the cart that has a Cross-Sells product which is out of stock.
-3. Go to the Cart page.
-4. Verify that the Cross-Sells product block is visible.
-5. Verify that the Cross-Sells product, which is out of stock, does not show an `Add to Cart` button, but a `Read More` button, that links to the corresponding product page.
-
-#### Test number of visible Cross-Sells products in the frontend
-
-1. Ensure that you have one test product which has more than 6 Cross-Sells products.
-2. Open the cart page in the editor and set the number of visible Cross-Sells items to 1.
-3. Go to the frontend and add the test product from step 1 to the cart.
-4. Go to the cart and verify that only 1 Cross-Sells product is visible.
-5. Repeat steps 2 until 4 and set the number of visible Cross-Sells items to 2, 3, 4, 5 & 6.
diff --git a/plugins/woocommerce/client/blocks/docs/internal-developers/testing/releases/870.md b/plugins/woocommerce/client/blocks/docs/internal-developers/testing/releases/870.md
deleted file mode 100644
index 4c0a1856543..00000000000
--- a/plugins/woocommerce/client/blocks/docs/internal-developers/testing/releases/870.md
+++ /dev/null
@@ -1,401 +0,0 @@
-# Testing notes and ZIP for release 8.7.0
-
-Zip file for
-testing: [woocommerce-gutenberg-products-block.zip](https://github.com/woocommerce/woocommerce-blocks/files/9758323/woocommerce-gutenberg-products-block.zip)
-
-## Feature plugin and package inclusion in WooCommerce
-
-### Improve visual consistency between block links ([7340](https://github.com/woocommerce/woocommerce-blocks/pull/7340))
-
-#### Screenshots
-
-| Before | After |
-| ------ | ----- |
-| <img width="299" alt="CleanShot 2022-10-07 at 16 02 20@2x" src="https://user-images.githubusercontent.com/20469356/194635589-3c7f80a8-22d2-487d-b800-9b51f586d34e.png"> | <img width="289" alt="CleanShot 2022-10-07 at 16 04 34@2x" src="https://user-images.githubusercontent.com/20469356/194635923-b8cdf40c-60be-4168-ba85-0a21a5dd593d.png"> |
-
-#### User Facing Testing
-
-1. Create a regular page (Pages > Add New) and add the All Product block to it;
-2. Add the Active Filters block;
-3. Add the Filter By Attribute block;
-4. Select an attribute from the Filter By Attribute block and apply it;
-5. When the page reloads, check if the "Clear All" button (in the Active Filters block) and the "Reset" button (in
- Filter By Attribute block) have the following properties:
-
-> Font size: 14px
-> Font weight: normal
-> Text decoration: underlined
-
-6. Hover the mouse over the "Clear All" button and the "Reset" button and make sure the text decoration is changed
- to `none` (no underline) while the other properties remain the same:
-
-> Font size: 14px
-> Font weight: normal
-> Text decoration: none
-
-### Update the titles of some inner blocks of the Cart block and remove the lock of the Cross-Sells parent block ([7232](https://github.com/woocommerce/woocommerce-blocks/pull/7232))
-
-#### Screenshots
-
-<table>
-<tr>
-<td>Before:
-<br><br>
-
-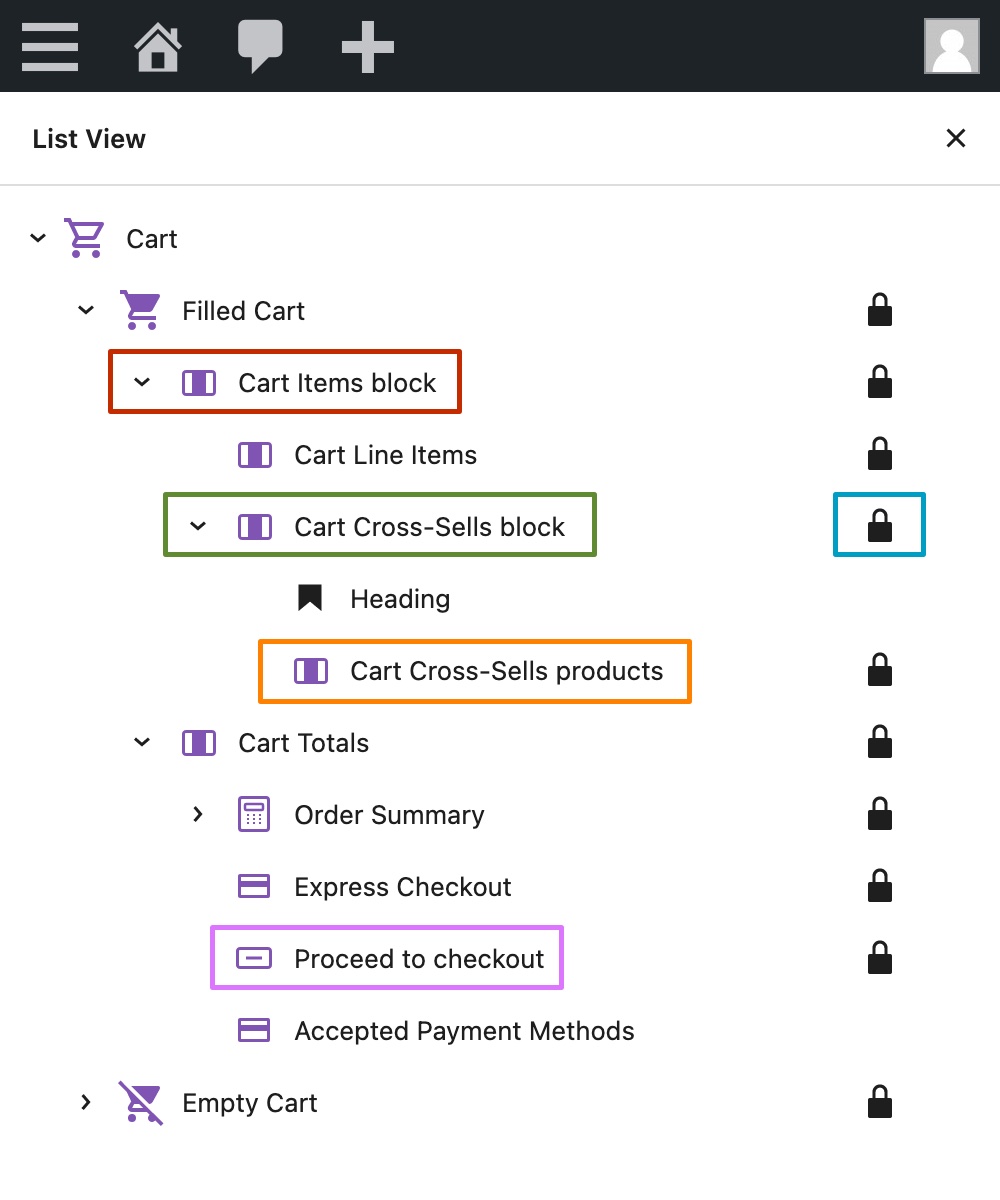
-</td>
-<td>After:
-<br><br>
-
-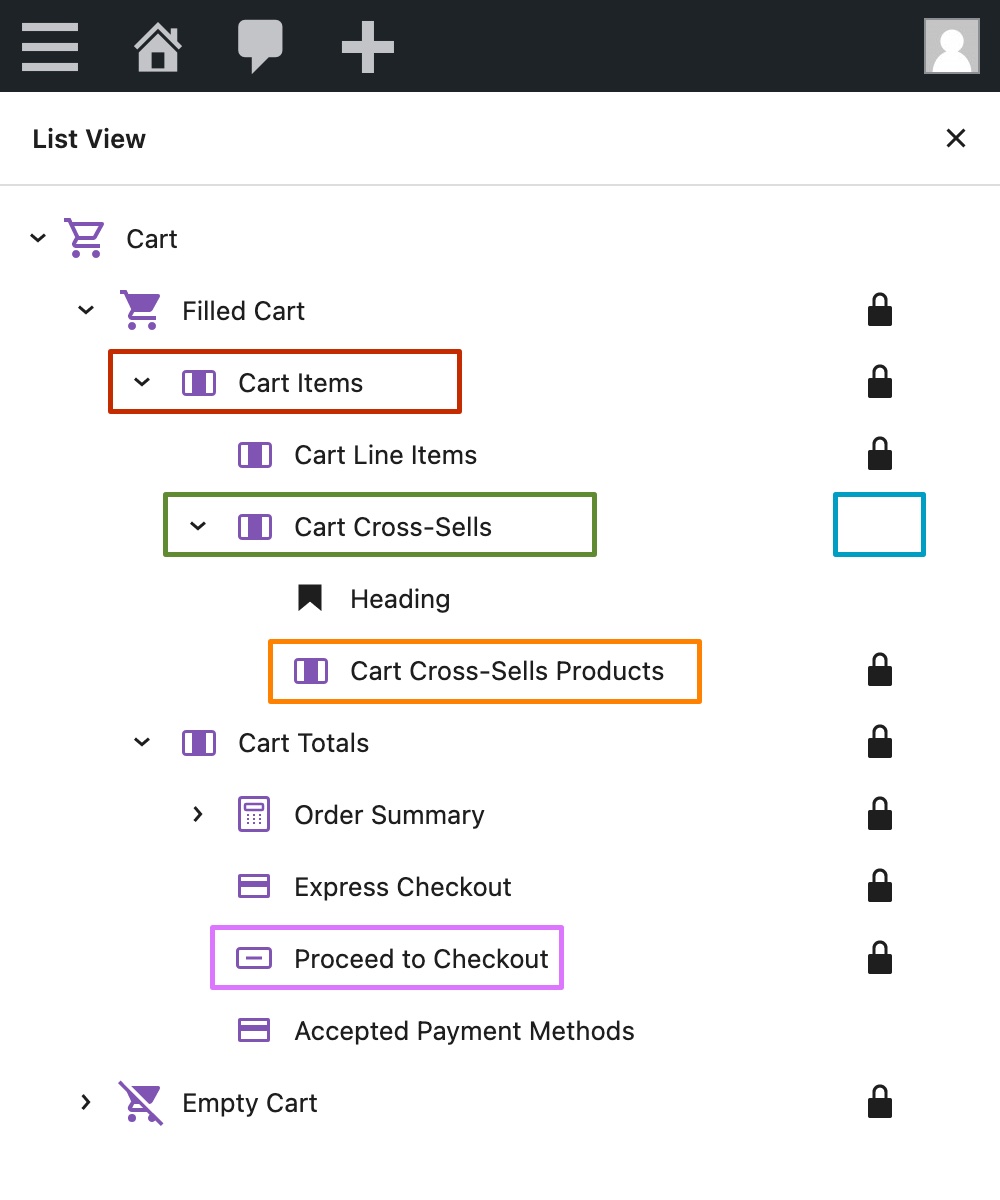
-</td>
-</tr>
-</table>
-
-### Testing
-
-#### User Facing Testing
-
-1. Create a test page.
-2. Add the Cart block.
-3. [Open the List View](https://wordpress.com/go/tutorials/how-to-use-the-list-view-in-the-wordpress-block-editor/).
-4. Verify that the following titles are visible:
- - Cart Cross-Sells
- - Cart Items
- - Cart Cross-Sells Products
- - Proceed to Checkout
-5. Verify that the Cross-Sells parent block does not show a lock.
-
-### Add filter for place order button label ([7154](https://github.com/woocommerce/woocommerce-blocks/pull/7154))
-
-#### User Facing Testing
-
-##### Verify that label filter works
-
-<table>
-<tr>
-<td valign="top" width="300">
-
-1. Create a test page and add the Checkout block to it.
-2. Install and activate the [Simple Custom CSS and JS](https://wordpress.org/plugins/custom-css-js/) plugin.
-3. Head over to `/wp-admin/edit.php?post_type=custom-css-js` and add the following JS code snippet:
-
-```js
-const label = () => 'Pay now';
-const {__experimentalRegisterCheckoutFilters} = window.wc.blocksCheckout;
-__experimentalRegisterCheckoutFilters('custom-place-order-button-label', {
- placeOrderButtonLabel: label,
-});
-```
-
-4. Head over to the frontend, add a product to the cart and open the page with the Checkout block.
-5. Verify that the button label says `Pay now`.
-
-</td>
-<td valign="top" width="250">
-
-<img width="391" alt="Screenshot 2022-09-16 at 10 58 50" src="https://user-images.githubusercontent.com/3323310/190553693-e7404e18-8c84-4a78-8110-654ee27effcd.png">
-</td>
-</tr>
-</table>
-
-##### Verify that payment method label still works
-
-<table>
-<tr>
-<td valign="top" width="500">
-
-1. Make sure that the code snippet from the previous test is deactivated.
-2. Install and activate the [Code Snippets](https://wordpress.org/plugins/code-snippets/) plugin.
-3. Head over to `/wp-admin/admin.php?page=snippets` and add the following PHP code snippet:
-
-```php
-add_filter( 'woocommerce_should_load_paypal_standard', '__return_true' );
-```
-
-4. Head over to `/wp-admin/admin.php?page=wc-settings&tab=checkout§ion=paypal` and select the
- options `Enable PayPal Standard` and ` Enable PayPal sandbox`.
-5. Head over to the frontend, add a product to the cart and open the page with the Checkout block.
-6. Select the payment method `PayPal`.
-7. Verify that the button label says `Proceed to PayPal`.
-
-</td>
-<td valign="top" width="250">
-
-<img width="391" alt="Screenshot 2022-09-16 at 11 01 29" src="https://user-images.githubusercontent.com/3323310/190554024-714e1b8e-bea2-4867-a487-7cca8ff1e324.png">
-</td>
-</tr>
-</table>
-
-##### Verify that default label still works
-
-<table>
-<tr>
-<td valign="top" width="650">
-
-1. Make sure that the code snippet from the first test is still deactivated.
-2. Head over to the frontend, add a product to the cart and open the page with the Checkout block.
-3. Select a payment method apart from `PayPal`, e.g. `Credit Card (Stripe)`.
-4. Verify that the button label says `Place Order`.
-
-</td>
-<td valign="top" width="250">
-
-<img width="391" alt="Screenshot 2022-09-16 at 11 07 51" src="https://user-images.githubusercontent.com/3323310/190554666-83d9b85a-53b8-4864-97d3-135fff87a4cd.png">
-</td>
-</tr>
-</table>
-
-#### Verify that i18n of the default label still works
-
-<table>
-<tr>
-<td valign="top" width="650">
-
-1. Make sure that the code snippet from the first test is still deactivated.
-2. Head over to `/wp-admin/options-general.php` and select `German` as the `Site Language`.
-3. Head over to `/wp-admin/update-core.php?force-check=1` and fetch translations.
-4. Head over to the frontend, add a product to the cart and open the page with the Checkout block.
-5. Select a payment method apart from `PayPal`, e.g. `Credit Card (Stripe)`.
-6. Verify that the button label says `Kostenpflichtig bestellen`.
-
-</td>
-<td valign="top" width="250">
-
-<img width="394" alt="Screenshot 2022-09-16 at 11 17 21" src="https://user-images.githubusercontent.com/3323310/190555655-05376284-a4f7-429b-872e-4c203009d3c9.png">
-
-</td>
-</tr>
-</table>
-
-### Exposed data related to the checkout through wordpress/data stores ([6612](https://github.com/woocommerce/woocommerce-blocks/pull/6612))
-
-#### User Facing Testing
-
-The full instructions for testing this PR can be
-found [here](https://github.com/woocommerce/woocommerce-blocks/blob/trunk/docs/internal-developers/testing/cart-checkout/data-stores.md)
-. At a minimum, we will need to smoke test by trying the
-different [stripe failure](https://github.com/woocommerce/woocommerce-blocks/blob/trunk/docs/internal-developers/testing/cart-checkout/data-stores.md#stripe-failures)
-modes
-
-### Add simple, large & two menus footer patterns. ([7306](https://github.com/woocommerce/woocommerce-blocks/pull/7306))
-
-#### User Facing Testing
-
-1. In a new page or a template, go to the patterns tab and make sure all 6 patterns appear under the WooCommerce
- category dropdown.
-2. Insert each one of the footer patterns, save and make sure they all look as expected on the GH discussions.
-
-### Add minimal, large, and essential header patterns ([7292](https://github.com/woocommerce/woocommerce-blocks/pull/7292))
-
-#### User Facing Testing
-
-1. In a new page or a template, go to the patterns tab and make sure all 6 patterns appear under the WooCommerce
- category dropdown.
-2. Insert each one of the header patterns, save and make sure they all look as expected on the GH discussions.
-
-### Add `showRemoveItemLink` as a new checkout filter to allow extensions to toggle the visibility of the `Remove item` button under each cart line item. ([7242](https://github.com/woocommerce/woocommerce-blocks/pull/7242))
-
-#### User Facing Testing
-
-1. Install [this test plugin](https://github.com/woocommerce/woocommerce-blocks/files/9665640/some-extension-name.zip)
- to your site and activate it. It contains a filter to prevent the `Remove item` button showing up for a product
- called `Beanie`
-2. Add a product named Beanie to your cart.
-3. Go to the Cart block.
-4. Ensure you cannot see a button to remove it from your cart.
-5. View the `docs/third-party-developers/extensibility/checkout-block/available-filters.md` file and ensure it is good,
- and the new text we added to describe the filter makes sense.
-
-### Add support for a GT tracking ID for Google Analytics ([7213](https://github.com/woocommerce/woocommerce-blocks/pull/7213))
-
-#### User Facing Testing
-
-1. Install
- the [Google Analytics Integration Extension](https://github.com/woocommerce/woocommerce-google-analytics-integration)
-2. Set up the extension with a GT-X type ID from your Google Analytics account. Google Analytics account is required to
- test this. This can be retrieved by going to the [analytics dashboard](https://analytics.google.com/) and going to a
- data stream > Configure Tag Settings, see full
- instructions [here](https://support.google.com/tagmanager/answer/12002338#zippy=%2Cset-up-your-google-tag-from-google-analytics-instructions)
- 
-3. Install [Google Analytics Debugger](https://chrome.google.com/webstore/detail/google-analytics-debugger/jnkmfdileelhofjcijamephohjechhna?hl=en) browser extension. It needs to be installed, but do not click it (debug mode should be off).
-
-4. Go to the store and trigger some events using the All Products Block and Cart block. For example an add to cart
- event.
-5. Google Analytics Debugger should indicate that an event was fired.
-6. Instead of the Google Analytics Debugger we can also check the Browser Dev Tools > Network and confirm we see
- requests being sent to a URL similar to: `https://region1.google-analytics.com/g/collect` (region could vary)
-
-### Separate filter titles and filter controls by converting filter blocks to use Inner Blocks ([6978](https://github.com/woocommerce/woocommerce-blocks/pull/6978))
-
-#### User Facing Testing
-
-##### Insert new blocks
-
-1. Check out this PR, built.
-2. Add a new page, add All Products, Active Filters, Filter by Price, Filter by Attribute, and Filter by Stock blocks to
- the page.
-3. Check the newly inserted filter blocks, for each block, a wrapper block containing the heading and filter control
- blocks were inserted.
-4. Try changing block settings and style, and see if they're updated on the front end.
-5. See filter blocks work as expected.
-
-##### Upgrade existing blocks
-
-1. Check out `trunk`.
-2. Add a new page, add All Products, Active Filters, Filter by Price, Filter by Attribute, and Filter by Stock blocks to
- the page.
-3. Try changing block settings and style.
-4. Check out this PR and build.
-5. Edit the page created in step 2nd above.
-6. See the upgrade notices for filter blocks as shown
- in [this comment](https://github.com/woocommerce/woocommerce-blocks/pull/6978#issuecomment-1252087654).
-7. Click the upgrade button, see:
-
-- The block is replaced by a filter wrapper block contain the heading and the filter block control blocks.
-- The modified title remains.
-
-8. Save the page, see all filter blocks continue functioning as expected on the front end.
-
-### StoreApi requests will return a `Cart-Token` header that can be used to retrieve the cart from the corresponding session via **GET** `/wc/store/v1/cart`. ([5953](https://github.com/woocommerce/woocommerce-blocks/pull/5953))
-
-#### User Facing Testing
-
-1. Using a REST API client
-2. Disabling basic auth
-3. Adding something to the cart via POST `/wc/store/v1/cart/add-item`. Note down the value of the `Cart-Token` header.
-4. Deleting or disabling cookies before requesting GET `/wc/store/v1/cart`
-5. No items
-6. Repeat this request with a header called `Cart-Token` and the value you noted earlier.
-7. Cart response has items!
-
-### Fixed HTML rendering in description of active payment integrations ([7313](https://github.com/woocommerce/woocommerce-blocks/pull/7313))
-
-#### Screenshots
-
-<table>
-<tr>
-<td>Before:
-<br><br>
-
-
-</td>
-<td>After:
-<br><br>
-
-
-</td>
-</tr>
-</table>
-
-#### User Facing Testing
-
-1. Install the [WooCommerce Stripe Payment Gateway](https://wordpress.org/plugins/woocommerce-gateway-stripe/).
-2. Head over to `/wp-admin/admin.php?page=wc-settings&tab=checkout`.
-3. Activate various Stripe payment methods, e.g. Stripe SEPA Direct Debit.
-4. Head over to the Checkout block in the editor.
-5. Click on the Payments Options inner block.
-6. Verify that all descriptions of active payment integrations render HTML.
-
-### Hide the shipping address form from the Checkout when the "Force shipping to the customer billing address" is enabled ([7268](https://github.com/woocommerce/woocommerce-blocks/pull/7268))
-
-| Before | After |
-| ------ | ----- |
-|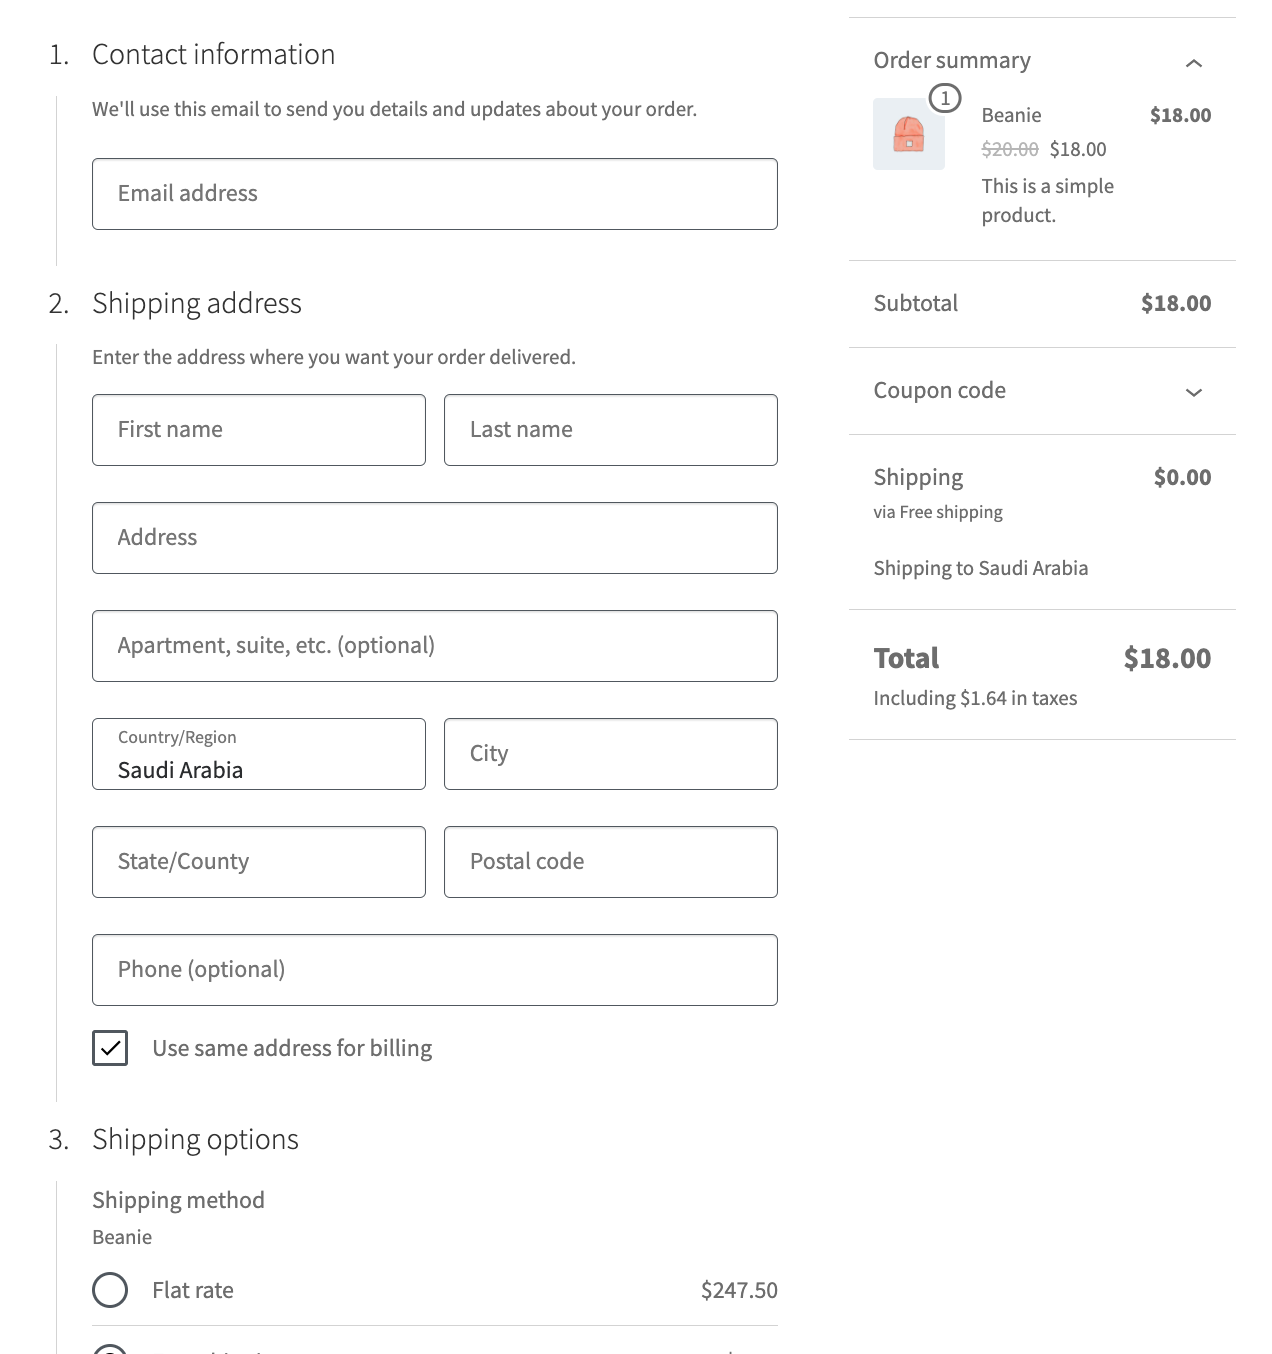|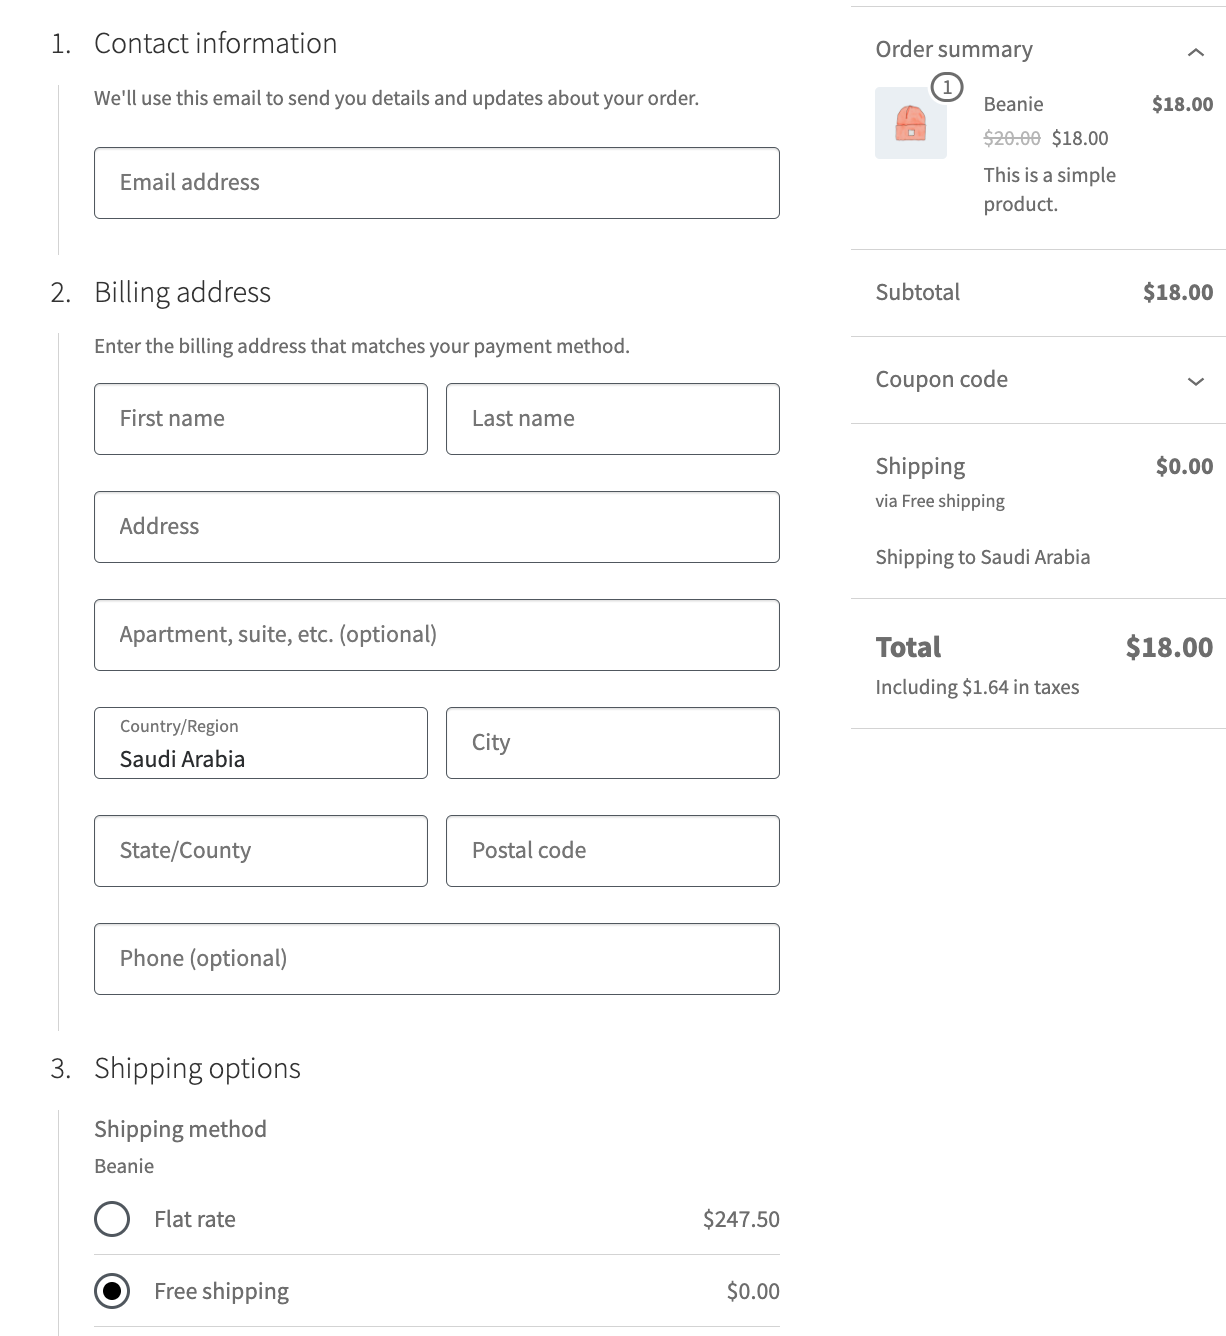|
-
-#### User Facing Testing
-
-1. Go to `wp-admin/admin.php?page=wc-settings&tab=shipping§ion=options` page.
-2. Enable the `Force shipping to the customer billing address` option and save the changes.
-3. Go Checkout block, and confirm shipping address form is not visible.
-4. Change the billing address, confirm the shipping address in the order summary gets changed and shipping methods are
- updated.
-
-### Fixed an error where adding new pages would cause an infinite loop and large amounts of memory use in redux ([7256](https://github.com/woocommerce/woocommerce-blocks/pull/7256))
-
-#### User Facing Testing
-
-1. Open the editor on any page/create a new page.
-2. View the console and ensure no errors about `RangeError: Maximum call stack size exceeded` or similar appear.
-3. Add the Checkout Block, ensure the editor works and the block is displayed correctly
-4. Make a new page and add the Cart block, ensure the editor works and the block is displayed correctly.
-5. Do a test order using the Cart and Checkout blocks.
-
-### Ensure error messages containing HTML are shown correctly in the Cart and Checkout blocks ([7231](https://github.com/woocommerce/woocommerce-blocks/pull/7231))
-
-| Before | After |
-| ------ | ----- |
-|<img width="1006" alt="Screen Shot 2022-09-26 at 12 17 39 PM" src="https://user-images.githubusercontent.com/56378160/192390815-3672e229-1491-4eed-bf71-2deaa3c7e0f8.png">|<img width="763" alt="Screen Shot 2022-09-26 at 12 34 36 PM" src="https://user-images.githubusercontent.com/56378160/192390876-271535a3-502b-4bca-b858-0ca8b56bc641.png">|
-
-#### User Facing Testing
-
-1. Check out branch 1287-gh-Automattic/woopay
- 2Update the code:
- In src/Checkout/PaymentsHandler.php, comment or remove the if around the exception:
-
-```php
- // if ( empty( $customer_id ) ) {
- $session_data = WooPaySession::UNSANITIZED_get_data();
- $blog_checkout_url = esc_url( add_query_arg( 'skip_platform_checkout', 'true', $session_data['store_data']
- ['blog_checkout_url'] ) );
- /* translators: %1$s opening anchor tag with url, %2$s closing anchor tag */
- $error_message = __( 'we were unable to process your payment. Please %1$s go back to the merchant store %2$s and
- log into WooPay again.', 'woopay' );
- $open_tag = '<a href="' . $blog_checkout_url . '">';
- $close_tag = '</a>';
- throw new InvalidSessionException(
- sprintf( $error_message, $open_tag, $close_tag ),
- );
-// }
-```
-
-3. Get a valid checkout_session by checking out with a valid email and filling in the OTP code.
-4. Place an order and see the error message
-
-### Prevent locked inner blocks from sometimes displaying twice ([6676](https://github.com/woocommerce/woocommerce-blocks/pull/6676))
-
-| Before | After |
-| ------ | ----- |
-| <img width="470" alt="image" src="https://user-images.githubusercontent.com/5656702/178464536-972f2ce2-4679-4e7e-9222-1408713154d2.png"> | <img width="479" alt="image" src="https://user-images.githubusercontent.com/5656702/178462926-506778e6-6576-4c7d-b32e-84fbebf6795e.png"> |
-
-#### User Facing Testing
-
-1. Install the [newsletter-test](https://github.com/woocommerce/newsletter-test) plugin to your site
-2. Go to the Checkout block in your editor
-3. Observe the `I want to receive updates about products and promotions.` checkbox in the customer information block. Ensure it only displays once.
-4. Save the page and ensure the newsletter signup block is still only shown once.
-5. Visit the block on the front-end and ensure the newsletter signup block only shows once.
-
-### Improve visual consistency between block links. ([7357](https://github.com/woocommerce/woocommerce-blocks/pull/7357))
-
-| Before | After |
-| ------ | ----- |
-| <img width="299" alt="CleanShot 2022-10-07 at 16 02 20@2x" src="https://user-images.githubusercontent.com/20469356/194635589-3c7f80a8-22d2-487d-b800-9b51f586d34e.png"> | <img width="289" alt="CleanShot 2022-10-07 at 16 04 34@2x" src="https://user-images.githubusercontent.com/20469356/194635923-b8cdf40c-60be-4168-ba85-0a21a5dd593d.png"> |
-
-#### User Facing Testing
-
-1. Create a regular page (Pages > Add New) and add the All Product block to it;
-2. Add the Active Filters block;
-3. Add the Filter By Attribute block;
-4. Select an attribute from the Filter By Attribute block and apply it;
-5. When the page reloads, check if the "Clear All" button (in the Active Filters block) and the "Reset" button (in Filter By Attribute block) have the following properties:
-
-> Font size: 14px
-> Font weight: normal
-> Text decoration: underlined
-
-6. Hover the mouse over the "Clear All" button and the "Reset" button and make sure the text decoration is changed to `none` (no underline) while the other properties remain the same:
-
-> Font size: 14px
-> Font weight: normal
-> Text decoration: none
-
-### Fix a problem that causes an infinite loop when inserting Cart block in wordpress.com ([7367](https://github.com/woocommerce/woocommerce-blocks/pull/7367))
-
-#### User Facing Testing
-
-1. Get a zip of this plugin (from below) and upload it to a wordpress.com website.
-2. Go to the editor and try to insert Cart, it should work.
-3. Make sure no block is missing.
-
-<img width="1279" alt="image" src="https://user-images.githubusercontent.com/14235870/195155762-297acdd8-6180-4231-ba9a-5fac07092cc4.png">
diff --git a/plugins/woocommerce/client/blocks/docs/internal-developers/testing/releases/871.md b/plugins/woocommerce/client/blocks/docs/internal-developers/testing/releases/871.md
deleted file mode 100644
index 544980b31fa..00000000000
--- a/plugins/woocommerce/client/blocks/docs/internal-developers/testing/releases/871.md
+++ /dev/null
@@ -1,15 +0,0 @@
-# Testing notes and ZIP for release 8.7.1
-
-Zip file for testing: [woocommerce-gutenberg-products-block.zip](https://github.com/woocommerce/woocommerce-blocks/files/9766268/woocommerce-gutenberg-products-block.zip)
-
-## Feature plugin and package inclusion in WooCommerce
-
-### Fixed an issue where JavaScript errors would occur when more than one extension tried to filter specific payment methods in the Cart and Checkout blocks ([7377](https://github.com/woocommerce/woocommerce-blocks/pull/7377))
-
-#### User Facing Testing
-
-1. Install and activate [some-extension-name.zip](https://github.com/woocommerce/woocommerce-blocks/files/9764404/some-extension-name.zip) and [WooCommerce Conditional Shipping and Payments](https://woocommerce.com/products/conditional-shipping-and-payments/).
-2. Activate the Cash on Delivery payment method.
-3. Go to the Cart block and view the JS console. Ensure you don't see any errors such as `Error when executing callback for cheque in some-extension-name TypeError: namespacedCallbacks[namespace] is not a function`.
-4. Go to the Checkout block and check that no similar errors appear.
-5. Change your city to `Denver` and ensure the Cash on Delivery method is not available.
diff --git a/plugins/woocommerce/client/blocks/docs/internal-developers/testing/releases/872.md b/plugins/woocommerce/client/blocks/docs/internal-developers/testing/releases/872.md
deleted file mode 100644
index 82ba499435b..00000000000
--- a/plugins/woocommerce/client/blocks/docs/internal-developers/testing/releases/872.md
+++ /dev/null
@@ -1,22 +0,0 @@
-# Testing notes and ZIP for release 8.7.2
-
-Zip file for testing: [woocommerce-gutenberg-products-block.zip](https://github.com/woocommerce/woocommerce-blocks/files/9785242/woocommerce-gutenberg-products-block.zip)
-
-## Feature plugin and package inclusion in WooCommerce
-
-### Fixed a problem where Custom Order Tables compatibility declaration could fail due to the unpredictable plugin order load ([7395](https://github.com/woocommerce/woocommerce-blocks/pull/7395))
-
-#### User Facing Testing
-
-1. Refer to [High Performance Order Storage Upgrade Recipe Book](https://github.com/woocommerce/woocommerce/wiki/High-Performance-Order-Storage-Upgrade-Recipe-Book) on how to enable HPOS
-2. Ensure no incompatibility warnings are displayed regarding the Blocks plugin
-
-### Refactor useCheckoutAddress hook to enable "Use same address for billing" option in Editor ([7393](https://github.com/woocommerce/woocommerce-blocks/pull/7393))
-
-#### User Facing Testing
-
-1. Go to `wp-admin/admin.php?page=wc-settings&tab=shipping§ion=options` page.
-2. Enable the `Force shipping to the customer billing address` option and save the changes.
-3. Go to Checkout block Editor, and confirm `Use same address for billing` toggle is working as expected.
-4. Go to the Checkout block front-end, and confirm shipping address form is not visible.
-5. Change the billing address, confirm the shipping address in the order summary gets changed, and shipping methods are updated.
diff --git a/plugins/woocommerce/client/blocks/docs/internal-developers/testing/releases/873.md b/plugins/woocommerce/client/blocks/docs/internal-developers/testing/releases/873.md
deleted file mode 100644
index ede5b310030..00000000000
--- a/plugins/woocommerce/client/blocks/docs/internal-developers/testing/releases/873.md
+++ /dev/null
@@ -1,14 +0,0 @@
-# Testing notes and ZIP for release 8.7.3
-
-Zip file for testing: [woocommerce-gutenberg-products-block.zip](https://github.com/woocommerce/woocommerce-blocks/files/9831749/woocommerce-gutenberg-products-block.zip)
-
-## Feature plugin and package inclusion in WooCommerce
-
-### Fix wrong keys being sent in canMakePayment and customer data showing in the Checkout block in the editor ([7434](https://github.com/woocommerce/woocommerce-blocks/pull/7434))
-
-#### User Facing Testing
-
-1. Ensure you can check out using Stripe. Please also try various other payment gateways.
-2. If you can, please check out with an express payment method.
-3. Open the Checkout block in the editor. Ensure your customer details are not there.
-4. Upload this extension [extension-for-testing.zip](https://github.com/woocommerce/woocommerce-blocks/files/9828874/extension-for-testing.zip) to your site and activate it. Ensure you see a payment method called `some-extension-name payment method` on your checkout.
diff --git a/plugins/woocommerce/client/blocks/docs/internal-developers/testing/releases/874.md b/plugins/woocommerce/client/blocks/docs/internal-developers/testing/releases/874.md
deleted file mode 100644
index 118d4593e3f..00000000000
--- a/plugins/woocommerce/client/blocks/docs/internal-developers/testing/releases/874.md
+++ /dev/null
@@ -1,13 +0,0 @@
-# Testing notes and ZIP for release 8.7.4
-
-Zip file for testing: [woocommerce-gutenberg-products-block.zip](https://github.com/woocommerce/woocommerce-blocks/files/9840267/woocommerce-gutenberg-products-block.zip)
-
-## Feature plugin and package inclusion in WooCommerce
-
-### Compatibility fix for Cart and Checkout inner blocks for WordPress 6.1. ([7447](https://github.com/woocommerce/woocommerce-blocks/pull/7447))
-
-#### User Facing Testing
-
-1. Install latest Gutenberg plugin or WordPress 6.1.
-2. Install WooCommerce Gift Cards, or grab this plugin: [extension-for-testing.zip](https://github.com/woocommerce/woocommerce-blocks/files/9839394/extension-for-testing.1.zip)
-3. Add a new page. Add the Checkout block. Ensure the `Contact information` section loads, and ensure you do not see any errors where blocks should appear, both on the editor and the published checkout page.
diff --git a/plugins/woocommerce/client/blocks/docs/internal-developers/testing/releases/875.md b/plugins/woocommerce/client/blocks/docs/internal-developers/testing/releases/875.md
deleted file mode 100644
index e687f737bb4..00000000000
--- a/plugins/woocommerce/client/blocks/docs/internal-developers/testing/releases/875.md
+++ /dev/null
@@ -1,80 +0,0 @@
-# Testing notes and ZIP for release 8.7.5
-
-Zip file for testing: [woocommerce-gutenberg-products-block.zip](https://github.com/woocommerce/woocommerce-blocks/files/9902031/woocommerce-gutenberg-products-block.zip)
-
-## Feature plugin and package inclusion in WooCommerce
-
-### Fix Mini Cart Global Styles. [7515](https://github.com/woocommerce/woocommerce-blocks/pull/7515)
-
-
-1. Enable TT3 theme.
-2. Go to Appearance > Site Editor and replace the header with `WooCommerce Essential Header | Light` pattern.
-3. Save and visit the frontend.
-4. Hover over the Mini Cart and be sure that the font size doesn't change.
-5. Edit some settings related to the Mini Cart Global Styles.
-6. Be sure that the settings are reflected correctly on the editor and frontend side.
-
-### Fix inconsistent button styling with TT3. ([7516](https://github.com/woocommerce/woocommerce-blocks/pull/7516))
-
-
-| Before | After |
-| ------ | ----- |
-|||
-
-1. Enable TT3.
-2. Create a new post/page and add the `All Product` block and the `Product Categories` block.
-3. Save.
-4. Visit the post/page via incognito mode and be sure that all the buttons have the same style.
-
-### Make the Filter by Price block range color dependent of the theme color. [7525](https://github.com/woocommerce/woocommerce-blocks/pull/7525)
-
-| Theme | Before | After |
-| --- | ------ | ----- |
-| Storefront |  |  |
-| TT2 (dark) |  |  |
-| Bricksy |  |  |
-| TT3 (default) |  |  |
-| TT3 (Pilgrimage) |  |  |
-
-1. Add the Filter by Price and the All Products blocks in the same page.
-2. Visit the page in the frontend and move the price slider thumbs.
-3. Verify there is enough contrast between the "active" part of the slider and the "inactive" one (see screenshots above).
-
-
-### Filter by Price block: fix price slider visibility on dark themes. [7527](https://github.com/woocommerce/woocommerce-blocks/pull/7527)
-
-| | With dark background | With light background |
-|----------------|----------------------|-----------------------|
-| Before this PR |||
-| With this PR |||
-
-
-1. Enable TT2.
-2. Add the Filter by Price and All Products blocks inside a Columns block into a post or page.
-3. Change the background color of the Filter by Price column to a dark color. Change the text color to a light color.
-4. Notice the price slider is visible.
-
-### Update the Mini Cart block drawer to honor the theme's background. [7510](https://github.com/woocommerce/woocommerce-blocks/pull/7510)
-
-1. Download and activate [TT3](https://github.com/WordPress/twentytwentythree) select the Pilgrimage style variation (see screenshot below).
-2. Add the Mini Cart block to a post or page.
-3. In the frontend, click on the Mini Cart button to open the drawer.
-4. Verify the background is dark and text can be read properly.
-5. Back in the editor, select the Mini Cart block and press on `Edit Mini Cart template part` in the sidebar. That will open the template editor.
-6. Verify text is legible there as well:
-
-7. Try with all other TT3 theme variations and verify text can be properly read in all of them.
-8. Repeat all steps above with TT2.
-
-### Add white background to Filter by Attribute block dropdown so text is legible in dark backgrounds. [7506](https://github.com/woocommerce/woocommerce-blocks/pull/7506)
-
-| Before | After |
-| ------ | ----- |
-|  |  |
-|  |  |
-
-
-1. Download and activate [TT3](https://github.com/WordPress/twentytwentythree).
-2. Add the All Products block with the Filter by Attribute block next to it in a post or page.
-2. Visit the post or page and interact with the Filter by Attribute block.
-3. Verify the background of the input has white background, so text is legible.
diff --git a/plugins/woocommerce/client/blocks/docs/internal-developers/testing/releases/876.md b/plugins/woocommerce/client/blocks/docs/internal-developers/testing/releases/876.md
deleted file mode 100644
index 067a53eab5e..00000000000
--- a/plugins/woocommerce/client/blocks/docs/internal-developers/testing/releases/876.md
+++ /dev/null
@@ -1,15 +0,0 @@
-# Testing notes and ZIP for release 8.7.6
-
-Zip file for testing: [woocommerce-gutenberg-products-block.zip](https://github.com/woocommerce/woocommerce-blocks/files/10134947/woocommerce-gutenberg-products-block.zip)
-
-## Feature plugin and package inclusion in WooCommerce
-
-### Mini Cart block: fix compatibility with Page Optimize and Product Bundles plugins [#7794](https://github.com/woocommerce/woocommerce-blocks/pull/7794) [#7813](https://github.com/woocommerce/woocommerce-blocks/pull/7813)
-
-1. Install [Page Optimize](https://wordpress.org/plugins/page-optimize/) and [Product Bundles](https://woocommerce.com/products/product-bundles/).
-2. Enable a block theme.
-3. Customize the block theme and add the Mini Cart block in the header via Site Editor.
-4. Save the changes.
-5. In the frontend, lick on the Mini Cart. The drawer should open and show the "empty cart" message.
-6. Go to the shop page and add a product to your cart.
-7. Click on the Mini Cart. The drawer should open and show the product you just added.
diff --git a/plugins/woocommerce/client/blocks/docs/internal-developers/testing/releases/880.md b/plugins/woocommerce/client/blocks/docs/internal-developers/testing/releases/880.md
deleted file mode 100644
index 7bd8a8ad082..00000000000
--- a/plugins/woocommerce/client/blocks/docs/internal-developers/testing/releases/880.md
+++ /dev/null
@@ -1,18 +0,0 @@
-# Testing notes and ZIP for release 8.8.0
-
-Zip file for testing: [woocommerce-gutenberg-products-block.zip](https://github.com/woocommerce/woocommerce-blocks/files/9859850/woocommerce-gutenberg-products-block.zip)
-
-## Feature plugin and package inclusion in WooCommerce
-
-### Fix mini cart items alignment issues in Editor. ([7387](https://github.com/woocommerce/woocommerce-blocks/pull/7387))
-
-1. Add a mini cart to a new post
-2. Select mini cart block and click on `Edit mini cart template part` from sidebar
- 
-3. Editor UI should be the same as the frontend UI.
-
-### Fixes a fatal error with Cart Block usage in specific site configurations with multiple shipping countries. ([6896](https://github.com/woocommerce/woocommerce-blocks/pull/6896))
-
-1. Configure multiple shipping countries.
-2. Setup the cart block for use on the site.
-3. Verify there are no errors when displaying the cart in the editor or on the frontend (especially around any shipping options).
diff --git a/plugins/woocommerce/client/blocks/docs/internal-developers/testing/releases/881.md b/plugins/woocommerce/client/blocks/docs/internal-developers/testing/releases/881.md
deleted file mode 100644
index b4cf49cd475..00000000000
--- a/plugins/woocommerce/client/blocks/docs/internal-developers/testing/releases/881.md
+++ /dev/null
@@ -1,16 +0,0 @@
-# Testing notes and ZIP for release 8.8.1
-
-Zip file for testing: [woocommerce-gutenberg-products-block.zip](https://github.com/woocommerce/woocommerce-blocks/files/9880626/woocommerce-gutenberg-products-block.zip)
-
-## Feature plugin and package inclusion in WooCommerce
-
-### Calculate cart totals after running extensions ([#7490](https://github.com/woocommerce/woocommerce-blocks/pull/7490))
-
-1. Install [WooCommerce Gift Cards](https://woocommerce.com/products/gift-cards/).
-2. Create [a new gift card](https://woocommerce.com/document/gift-cards/store-owners-guide/#creating-gift-card-products) Simple Product and buy it.
-3. Mark the order as 'Completed'.
-4. Navigate to **Marketing > Gift Cards** and copy the generated gift card code.
-5. Add a non-gift card product to the cart.
-6. Navigate to the cart block.
-7. Apply the gift card you previously copied. You should see: 1) an indication that the gift card was applied, 2) a bullet bubble with the gift card number in this format `XXXX-XXX-XXX-XXX` and 3) updated cart totals that include the gift card discount.
-8. Remove the gift card. You should see that the cart totals are restored.
diff --git a/plugins/woocommerce/client/blocks/docs/internal-developers/testing/releases/882.md b/plugins/woocommerce/client/blocks/docs/internal-developers/testing/releases/882.md
deleted file mode 100644
index 061d289d027..00000000000
--- a/plugins/woocommerce/client/blocks/docs/internal-developers/testing/releases/882.md
+++ /dev/null
@@ -1,80 +0,0 @@
-# Testing notes and ZIP for release 8.8.2
-
-Zip file for testing: [woocommerce-gutenberg-products-block.zip](https://github.com/woocommerce/woocommerce-blocks/files/9902085/woocommerce-gutenberg-products-block.zip)
-
-## Feature plugin and package inclusion in WooCommerce
-
-### Fix Mini Cart Global Styles. [7515](https://github.com/woocommerce/woocommerce-blocks/pull/7515)
-
-
-1. Enable TT3 theme.
-2. Go to Appearance > Site Editor and replace the header with `WooCommerce Essential Header | Light` pattern.
-3. Save and visit the frontend.
-4. Hover over the Mini Cart and be sure that the font size doesn't change.
-5. Edit some settings related to the Mini Cart Global Styles.
-6. Be sure that the settings are reflected correctly on the editor and frontend side.
-
-### Fix inconsistent button styling with TT3. ([7516](https://github.com/woocommerce/woocommerce-blocks/pull/7516))
-
-
-| Before | After |
-| ------ | ----- |
-|||
-
-1. Enable TT3.
-2. Create a new post/page and add the `All Product` block and the `Product Categories` block.
-3. Save.
-4. Visit the post/page via incognito mode and be sure that all the buttons have the same style.
-
-### Make the Filter by Price block range color dependent of the theme color. [7525](https://github.com/woocommerce/woocommerce-blocks/pull/7525)
-
-| Theme | Before | After |
-| --- | ------ | ----- |
-| Storefront |  |  |
-| TT2 (dark) |  |  |
-| Bricksy |  |  |
-| TT3 (default) |  |  |
-| TT3 (Pilgrimage) |  |  |
-
-1. Add the Filter by Price and the All Products blocks in the same page.
-2. Visit the page in the frontend and move the price slider thumbs.
-3. Verify there is enough contrast between the "active" part of the slider and the "inactive" one (see screenshots above).
-
-
-### Filter by Price block: fix price slider visibility on dark themes. [7527](https://github.com/woocommerce/woocommerce-blocks/pull/7527)
-
-| | With dark background | With light background |
-|----------------|----------------------|-----------------------|
-| Before this PR |||
-| With this PR |||
-
-
-1. Enable TT2.
-2. Add the Filter by Price and All Products blocks inside a Columns block into a post or page.
-3. Change the background color of the Filter by Price column to a dark color. Change the text color to a light color.
-4. Notice the price slider is visible.
-
-### Update the Mini Cart block drawer to honor the theme's background. [7510](https://github.com/woocommerce/woocommerce-blocks/pull/7510)
-
-1. Download and activate [TT3](https://github.com/WordPress/twentytwentythree) select the Pilgrimage style variation (see screenshot below).
-2. Add the Mini Cart block to a post or page.
-3. In the frontend, click on the Mini Cart button to open the drawer.
-4. Verify the background is dark and text can be read properly.
-5. Back in the editor, select the Mini Cart block and press on `Edit Mini Cart template part` in the sidebar. That will open the template editor.
-6. Verify text is legible there as well:
-
-7. Try with all other TT3 theme variations and verify text can be properly read in all of them.
-8. Repeat all steps above with TT2.
-
-### Add white background to Filter by Attribute block dropdown so text is legible in dark backgrounds. [7506](https://github.com/woocommerce/woocommerce-blocks/pull/7506)
-
-| Before | After |
-| ------ | ----- |
-|  |  |
-|  |  |
-
-
-1. Download and activate [TT3](https://github.com/WordPress/twentytwentythree).
-2. Add the All Products block with the Filter by Attribute block next to it in a post or page.
-2. Visit the post or page and interact with the Filter by Attribute block.
-3. Verify the background of the input has white background, so text is legible.
diff --git a/plugins/woocommerce/client/blocks/docs/internal-developers/testing/releases/890.md b/plugins/woocommerce/client/blocks/docs/internal-developers/testing/releases/890.md
deleted file mode 100644
index 7cca86de40f..00000000000
--- a/plugins/woocommerce/client/blocks/docs/internal-developers/testing/releases/890.md
+++ /dev/null
@@ -1,115 +0,0 @@
-# Testing notes and ZIP for release 8.9.0
-
-Zip file for testing: [woocommerce-gutenberg-products-block.zip](https://github.com/woocommerce/woocommerce-blocks/files/9952913/woocommerce-gutenberg-products-block.zip)
-
-## Feature plugin and package inclusion in WooCommerce
-
-### Update Express Payment Block text ([7465](https://github.com/woocommerce/woocommerce-blocks/pull/7465))
-
-1. Install the "WooCommerce Stripe" extension
-2. Go to the checkout page in chrome.
-3. When express payments load, check that the "google pay" button is centered and the "in a hurry" text is no longer shown.
-
-### Restore block transform for filter blocks ([7401](https://github.com/woocommerce/woocommerce-blocks/pull/7401))
-
-1. Install WooCommerce 6.5.1 from <https://wordpress.org/plugins/woocommerce/advanced/>.
-2. Deactivate WooCommerce Blocks, activate Storefront.
-3. Go to Appearance > Widgets and add filter widgets to a widget area.
-4. Update WooCommerce to latest version and activate WooCommerce Blocks.
-5. Go to Appearance > Widgets, and open the transform menu for a filter widget. See Filter Block as an option.
-6. Hover on the Filter Block, see the preview of corresponding filter blocks.
-7. Click the Filter Block, see the widget converted to filter blocks.
-
-### Add white background to Filter by Attribute block dropdown so text is legible in dark backgrounds ([7506](https://github.com/woocommerce/woocommerce-blocks/pull/7506))
-
-1. Download and activate [TT3](https://github.com/WordPress/twentytwentythree).
-2. Add the All Products block with the Filter by Attribute block next to it in a post or page.
-3. Visit the post or page and interact with the Filter by Attribute block.
-4. Verify the background of the input has white background, so text is legible.
-
-### Disable apply button when there is no change to selected filters ([7373](https://github.com/woocommerce/woocommerce-blocks/pull/7373))
-
-1. Create a new post with an `All products` & `Filter by Attribute` block. Please make sure that Apply filter button is enabled, as shown in screenshot below:
- 
-2. After saving the post, Frontend should show Apply button as disabled as initially no filter is selected, as shown in screenshot below:
- 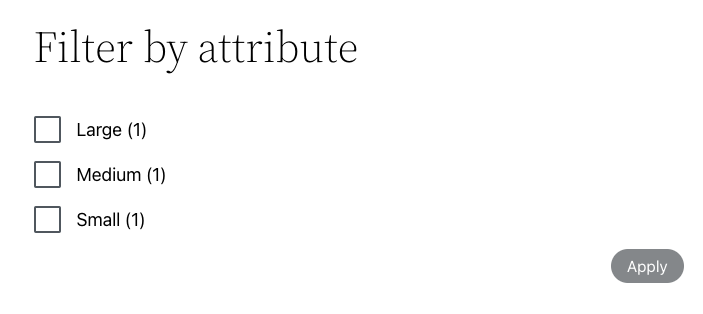
-3. As soon as you check any option, Apply button should become active & clickable.
- 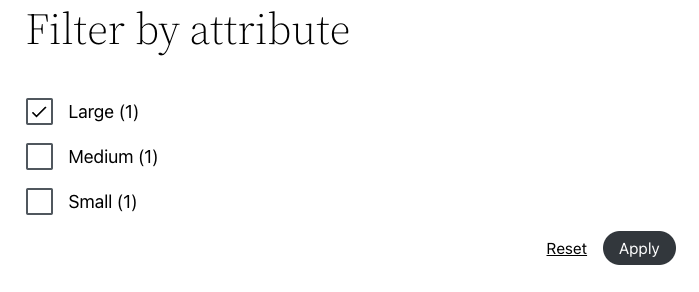
-4. After saving the result using the Apply button, Apply button should become disabled:
- 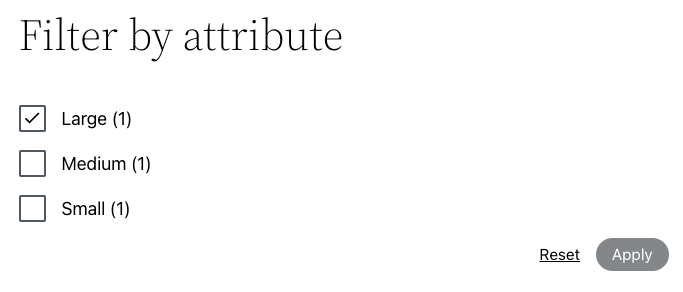
-5. Now refresh the page. Even after refreshing the page, Apply button should remain disabled until you change the selected options.
-6. Perform all the above testing steps for Dropdown display style too as shown in screenshot below
- 
- 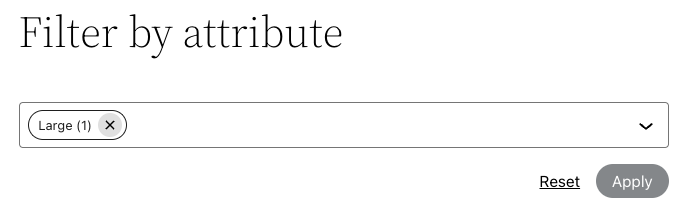
-
-### Use theme's body background color as the mini cart contents default background color ([7510](https://github.com/woocommerce/woocommerce-blocks/pull/7510))
-
-1. Download and activate [TT3](https://github.com/WordPress/twentytwentythree) select the Pilgrimage style variation (see screenshot below).
-2. Add the Mini Cart block to a post or page.
-3. In the frontend, click on the Mini Cart button to open the drawer.
-4. Verify the background is dark and text can be read properly.
-5. Back in the editor, select the Mini Cart block and press on `Edit Mini Cart template part` in the sidebar. That will open the template editor.
-6. Verify text is legible there as well:
- 
-7. Try with all other TT3 theme variations and verify text can be properly read in all of them.
-8. Repeat all steps above with TT2.
-
-### Price Slider: use currentColor for the slider ([7527](https://github.com/woocommerce/woocommerce-blocks/pull/7527))
-
-1. Enable TT2.
-2. Add the Filter by Price and All Products blocks inside a Columns block into a post or page.
-3. Change the background color of the Filter by Price column to a dark color. Change the text color to a light color.
-4. Notice the price slider is visible.
-
-### Make price slider 'inactive' range half transparent so it looks better in dark themes ([7525](https://github.com/woocommerce/woocommerce-blocks/pull/7525))
-
-1. Add the Filter by Price and the All Products blocks in the same page.
-2. Visit the page in the frontend and move the price slider thumbs.
-3. Verify there is enough contrast between the "active" part of the slider and the "inactive" one (see screenshots below).
-
-### Fix inconsistent button styling with TT3 ([7516](https://github.com/woocommerce/woocommerce-blocks/pull/7516))
-
-1. Enable TT3.
-2. Create a new post/page and add the All Product block and the Product Categories block.
-3. Save.
-4. Visit the post/page via incognito mode and be sure that all the buttons have the same style.
-
-### Product button: Fix 'In cart' button localization ([7504](https://github.com/woocommerce/woocommerce-blocks/pull/7504))
-
-1. Add an instance of the All Products Block to the page.
-2. Use a plugin like Loco Translate to translate the text of `%d in cart` within the WooCommerce core plugin language files.
-3. Visit the All Products Block page and add a product to the cart.
-4. Verify the string is being translated.
-
-### Fix Mini Cart Block global styles ([7515](https://github.com/woocommerce/woocommerce-blocks/pull/7515))
-
-1. Enable TT3 theme.
-2. Go to Appearance > Site Editor and replace the header with `WooCommerce Essential Header` pattern.
-3. Save and visit the frontend.
-4. Hover over the Mini Cart and be sure that the font size doesn't change.
-5. Edit some settings related to the Mini Cart Global Styles.
-6. Be sure that the settings are reflected correctly on the editor and frontend side.
-
-### Make the header and footer patterns text visible on all themes ([7524](https://github.com/woocommerce/woocommerce-blocks/pull/7524))
-
-1. Create a new page and insert all the WooCommerce Header and Footer patterns (dark & light, 12 patterns in total)
-2. Save, go to the frontend and check the text and icons are visible.
-3. Change the theme to TT3 and check again. Test with a few more different TT3 theme styles.
-
-### Active Filters: Fix active filter grouping for Ratings and Stock Status ([7577](https://github.com/woocommerce/woocommerce-blocks/pull/7577))
-
-1. Create a new page, add the all filters pattern and the All Products block.
-2. Add some products that contain ratings and various stock statuses.
-3. Filter by rating and stock status.
-4. Confirm that the active filters are grouped under one heading.
-
-### Experiment: Add Rate Limits to Store API ([5962](https://github.com/woocommerce/woocommerce-blocks/pull/5962))
-
-1. Enable Rate Limiting by using the options filter
-2. Try to apply a coupon or access `/wp-json/wc/store/cart` beyond current limits (currently 25 requests under 10 seconds)
-3. Ensure you get presented with an error "_Too many requests. Please wait xx seconds before trying again_."
-
-### Prevent padding from placeholder instructions to be overridden ([7552](https://github.com/woocommerce/woocommerce-blocks/pull/7552))
-
-1. Add a “Filter Products by Attribute” block
-2. Notice that the text "Display a list of filters based on a chosen attribute" is NOT too close to the separator
diff --git a/plugins/woocommerce/client/blocks/docs/internal-developers/testing/releases/891.md b/plugins/woocommerce/client/blocks/docs/internal-developers/testing/releases/891.md
deleted file mode 100644
index b6a456e7600..00000000000
--- a/plugins/woocommerce/client/blocks/docs/internal-developers/testing/releases/891.md
+++ /dev/null
@@ -1,25 +0,0 @@
-# Testing notes and ZIP for release 8.9.1
-
-Zip file for testing: [woocommerce-gutenberg-products-block.zip](https://github.com/woocommerce/woocommerce-blocks/files/10001089/woocommerce-gutenberg-products-block.zip)
-
-## Feature plugin and package inclusion in WooCommerce
-
-### Display correct block template when filtering by attribute. ([7640](https://github.com/woocommerce/woocommerce-blocks/pull/7640))
-
-#### Test that #7604 has been fixed
-
-1. Make sure you have a block theme active (like Twenty Twenty-Three).
-2. Add the “Filter by Attribute” block to the “Products by Category” template (in Appearance > Site Editor).
-3. Go to the front-end for a category (ie: /product-category/clothing/).
-4. Select a filter.
-5. Verify the query params are added to the URL and the URL stays correct.
-6. Verify the loaded template is also correct (instead of rendering the “Product Catalog” template).
-
-#### Test that there are no regressions with #6776
-
-1. Make sure you have a block theme active (like Twenty Twenty-Three).
-2. Navigate to Products > Attributes and edit an existing one or create a new one.
-3. Click the Enable Archives option and save, go back.
-4. Click Configure terms next to your attribute.
-5. Hover over one of the terms and click the View link of one of the attributes.
-6. Verify that the page is rendered with a header, a footer, and using a product grid.
diff --git a/plugins/woocommerce/client/blocks/docs/internal-developers/testing/releases/892.md b/plugins/woocommerce/client/blocks/docs/internal-developers/testing/releases/892.md
deleted file mode 100644
index 1bddef7e669..00000000000
--- a/plugins/woocommerce/client/blocks/docs/internal-developers/testing/releases/892.md
+++ /dev/null
@@ -1,15 +0,0 @@
-# Testing notes and ZIP for release 8.9.2
-
-Zip file for testing: [woocommerce-gutenberg-products-block.zip](https://github.com/woocommerce/woocommerce-blocks/files/10134811/woocommerce-gutenberg-products-block.zip)
-
-## Feature plugin and package inclusion in WooCommerce
-
-### Mini Cart block: fix compatibility with Page Optimize and Product Bundles plugins [#7794](https://github.com/woocommerce/woocommerce-blocks/pull/7794) [#7813](https://github.com/woocommerce/woocommerce-blocks/pull/7813)
-
-1. Install [Page Optimize](https://wordpress.org/plugins/page-optimize/) and [Product Bundles](https://woocommerce.com/products/product-bundles/).
-2. Enable a block theme.
-3. Customize the block theme and add the Mini Cart block in the header via Site Editor.
-4. Save the changes.
-5. In the frontend, lick on the Mini Cart. The drawer should open and show the "empty cart" message.
-6. Go to the shop page and add a product to your cart.
-7. Click on the Mini Cart. The drawer should open and show the product you just added.
diff --git a/plugins/woocommerce/client/blocks/docs/internal-developers/testing/releases/893.md b/plugins/woocommerce/client/blocks/docs/internal-developers/testing/releases/893.md
deleted file mode 100644
index 86e18e4772e..00000000000
--- a/plugins/woocommerce/client/blocks/docs/internal-developers/testing/releases/893.md
+++ /dev/null
@@ -1,11 +0,0 @@
-# Testing notes and ZIP for release 8.9.3
-
-Zip file for testing: [woocommerce-gutenberg-products-block.zip](https://github.com/woocommerce/woocommerce-blocks/files/10332606/woocommerce-gutenberg-products-block.zip)
-
-## Feature plugin and package inclusion in WooCommerce
-
-### Replace additional instance of wp_is_block_theme() with wc_current_theme_is_fse_theme() [#7496](https://github.com/woocommerce/woocommerce-blocks/pull/7496)
-
-0. In WP 5.8.
-1. Create a post or page.
-2. Verify there is no fatal error and you can create the post or page and publish it.
diff --git a/plugins/woocommerce/client/blocks/docs/internal-developers/testing/releases/894.md b/plugins/woocommerce/client/blocks/docs/internal-developers/testing/releases/894.md
deleted file mode 100644
index d877306ab97..00000000000
--- a/plugins/woocommerce/client/blocks/docs/internal-developers/testing/releases/894.md
+++ /dev/null
@@ -1,25 +0,0 @@
-# Testing notes and ZIP for release 8.9.4
-
-Zip file for testing: [woocommerce-gutenberg-products-block.zip](https://github.com/woocommerce/woocommerce-blocks/files/10346588/woocommerce-blocks.zip)
-
-## Feature plugin and package inclusion in WooCommerce
-
-### Refactor Filter Wrapper to remove usage of useInnerBlocksProps [#8095](https://github.com/woocommerce/woocommerce-blocks/pull/8095) and Add back ToggleButtonControl component in WC Blocks 8.9 so it supports WP 5.9 [#8101](https://github.com/woocommerce/woocommerce-blocks/pull/8101)
-
-1. In WP 5.8.
-2. Create a post or page.
-3. Add the Filter by Attribute block.
-4. Select one of the attributes.
-5. Verify the block is added correctly, you can publish the post/page and there is no error.
-6. Play around with the block display settings and verify the block honors them:
-
-<img src="https://user-images.githubusercontent.com/3616980/210577549-fbb8de61-0e1a-4038-9409-735891b5bcd8.png" alt="" width="287" />
-
-7. Test also these blocks (in all of them, interact with the toggles on the sidebar of the editor and verify the block doesn't crash and the settings are applied correctly):
- * Feature Product
- * Featured Category
- * Product Image (you will need to add the All Products block, click on the pencil icon to edit its inner blocks, and select the image)
- * Active Product Filters (you will need to select the Controls inner block)
- * Filter by Price (you will need to select the Controls inner block)
- * Product Categories List
-
diff --git a/plugins/woocommerce/client/blocks/docs/internal-developers/testing/releases/900.md b/plugins/woocommerce/client/blocks/docs/internal-developers/testing/releases/900.md
deleted file mode 100644
index 62317444f16..00000000000
--- a/plugins/woocommerce/client/blocks/docs/internal-developers/testing/releases/900.md
+++ /dev/null
@@ -1,96 +0,0 @@
-# Testing notes and ZIP for release 9.0.0
-
-Zip file for testing: [woocommerce-gutenberg-products-block.zip](https://github.com/woocommerce/woocommerce-blocks/files/10061884/woocommerce-gutenberg-products-block.zip)
-
-## Feature plugin and package inclusion in WooCommerce
-
-### Fix skewed placeholder of a Product Image block. ([7651](https://github.com/woocommerce/woocommerce-blocks/pull/7651))
-
-Prerequisites:
-
-0. Make sure you have a product without a highlighted image (you can create a new product or remove the image from an existing one).
-
-Case 1: image is wider than 500px:
-
-1. Go to Appearance > Site Editor > Templates > Product Catalog.
-2. Remove the legacy placeholder block.
-3. Add blocks that use Product Image placeholder:
-
-- Single Product
-- All Products
-- Product Query
-
-4. ✅ Check on the wide-screen (image should have more than 500px width) if the placeholder image is a square (not skewed)
-
-Case 2: image is narrower than 500px:
-
-1. Add a Columns block.
-2. Inside one of the columns, add the Single Product block, to another one add Product Query block. Columns block limits the available space for a product to display (you should achieve less than 500px width for product image)
-3. ✅ Check if the placeholder image is a square (not skewed)
-
-### Fix missing translations in the inspector (editor mode) for the Cart Cross-Sells Blocks. ([7616](https://github.com/woocommerce/woocommerce-blocks/pull/7616))
-
-1. Change your site language (I tested using the Spanish language — Español). Make sure the translation files are updated (Check Dashboard -> updates).
-2. Go to the `Cart Block` (Editor mode)
-3. Select the `Cart Cross-Sell` and `Cart Cross-Sells products` blocks, and make sure the title & description are translated in the inspector. See the image below:
-
-
-
-### Move paymentResult to the payment store. ([7692](https://github.com/woocommerce/woocommerce-blocks/pull/7692))
-
-1. Checkout successfully using the stripe payment method (4242 4242 4242 4242)
-2. Checkout unsuccessfully using stripe (4000 000 000 0002)
-3. Both should not throw any console errors #and step 2 should display a "Something went wrong" error at the top of the Checkout block and a "Card declined" error in the payment method block.
-
-Make loading placeholder colors match the current font color for the theme. ([7658](https://github.com/woocommerce/woocommerce-blocks/pull/7658))
-
-### Add the `Products by Attribute` template. ([7660](https://github.com/woocommerce/woocommerce-blocks/pull/7660))
-
-1. Make sure you are using a blocks theme.
-2. Go to the site editor and click on `Browse all templates` (or `site-editor.php?postType=wp_template`).
-3. Check that the `Products by Attribute` template shows on the list.
-4. Click on it and make sure it shows the legacy grid block.
-5. Edit the template and add a block on top of it and save.
-6. Go to `Products`>`Attribute` (`/wp-admin/edit.php?post_type=product&page=product_attributes`).
-7. Edit one of the attributes, check the `Enable archives?` checkbox, and save.
-8. Go back to the attributes list and click `Configure terms` on the attribute you just edited it.
-9. Click on `View` on one of the terms to view it in the frontend.
-10. Make sure you see the edits you made on the `Product by Attribute` template.
-
-### Make loading placeholder colors match the current font color for the theme. ([7658](https://github.com/woocommerce/woocommerce-blocks/pull/7658))
-
-1. Change the font color of your theme (via Appearance > Site Editor > Styles) to something that is not black or white (ie: yellow);
-2. Add all filter blocks (Filter by Price, Filter By Attribute, etc) and the All Products block to a post or page;
-3. Visit the page that you added the blocks;
-4. Make sure that the colors for the loading placeholder matches the current font color.
-
-### Add a `clearValidationErrors` action to the `wc/store/validation` data store. ([7601](https://github.com/woocommerce/woocommerce-blocks/pull/7601))
-
-1. Use the Checkout block, enter invalid information in fields and ensure validation errors still show. (e.g. enter an invalid ZIP code for UK by just using numbers)
-6. Leave fields blank and ensure validation shows.
-7. Fix the errors and ensure you can check out.
-
-### Add `ValidatedTextInput` and `ValidationInputError` to the `@woocommerce/blocks-checkout` package. ([7583](https://github.com/woocommerce/woocommerce-blocks/pull/7583))
-
-1. Enter an invalid ZIP code, ensure the error appears.
-2. Leave the First name/Last name fields blank, ensure errors appear under them.
-
-### Add `StoreNoticesContainer` to the `@woocommerce/blocks-checkout` package. ([7558](https://github.com/woocommerce/woocommerce-blocks/pull/7558))
-
-1. Add some items and go to the Cart block.
-2. In a new tab, open edit one of the items in your cart. Set it to out of stock.
-3. Without reloading, go back to the Cart tab, and try to increase the quantity of an item. Ensure you see an error above the Cart block.
-4. Set the item back to in stock, and proceed to the Checkout block.
-5. Enter an invalid ZIP code, ensure a notice appears above the Checkout block.
-6. Using Stripe, enter this card number, it will be declined: `4000 0000 0000 9995` ensure the error appears in the payment methods area.
-
-
-
-### Change action type name for use shipping as billing option. ([7695](https://github.com/woocommerce/woocommerce-blocks/pull/7695))
-
-1. Add a physical product to your basket.
-2. Go to Checkout
-3. Shipping details should be displayed. Enter some details here.
-4. Untick "Use same address for billing"
-5. Enter different billing details
-6. Place the order and check the shipping and billing details are different
diff --git a/plugins/woocommerce/client/blocks/docs/internal-developers/testing/releases/910.md b/plugins/woocommerce/client/blocks/docs/internal-developers/testing/releases/910.md
deleted file mode 100644
index ac535ff6db5..00000000000
--- a/plugins/woocommerce/client/blocks/docs/internal-developers/testing/releases/910.md
+++ /dev/null
@@ -1,268 +0,0 @@
-# Testing notes and ZIP for release 9.1.0
-
-Zip file for testing: [woocommerce-gutenberg-products-block.zip](https://github.com/woocommerce/woocommerce-blocks/files/10165999/woocommerce-gutenberg-products-block.zip)
-
-## Feature plugin and package inclusion in WooCommerce
-
-### Add "Store Info Alternating Image and Text" commerce adjacent pattern ([7827](https://github.com/woocommerce/woocommerce-blocks/pull/7827))
-
-1. Create a new page and edit it.
-2. Browse to the WooCommerce category for Block patterns and look for the "WooCommerce Alternating Image and Text" pattern in the "Explore All Patterns" dialog. Click to insert.
-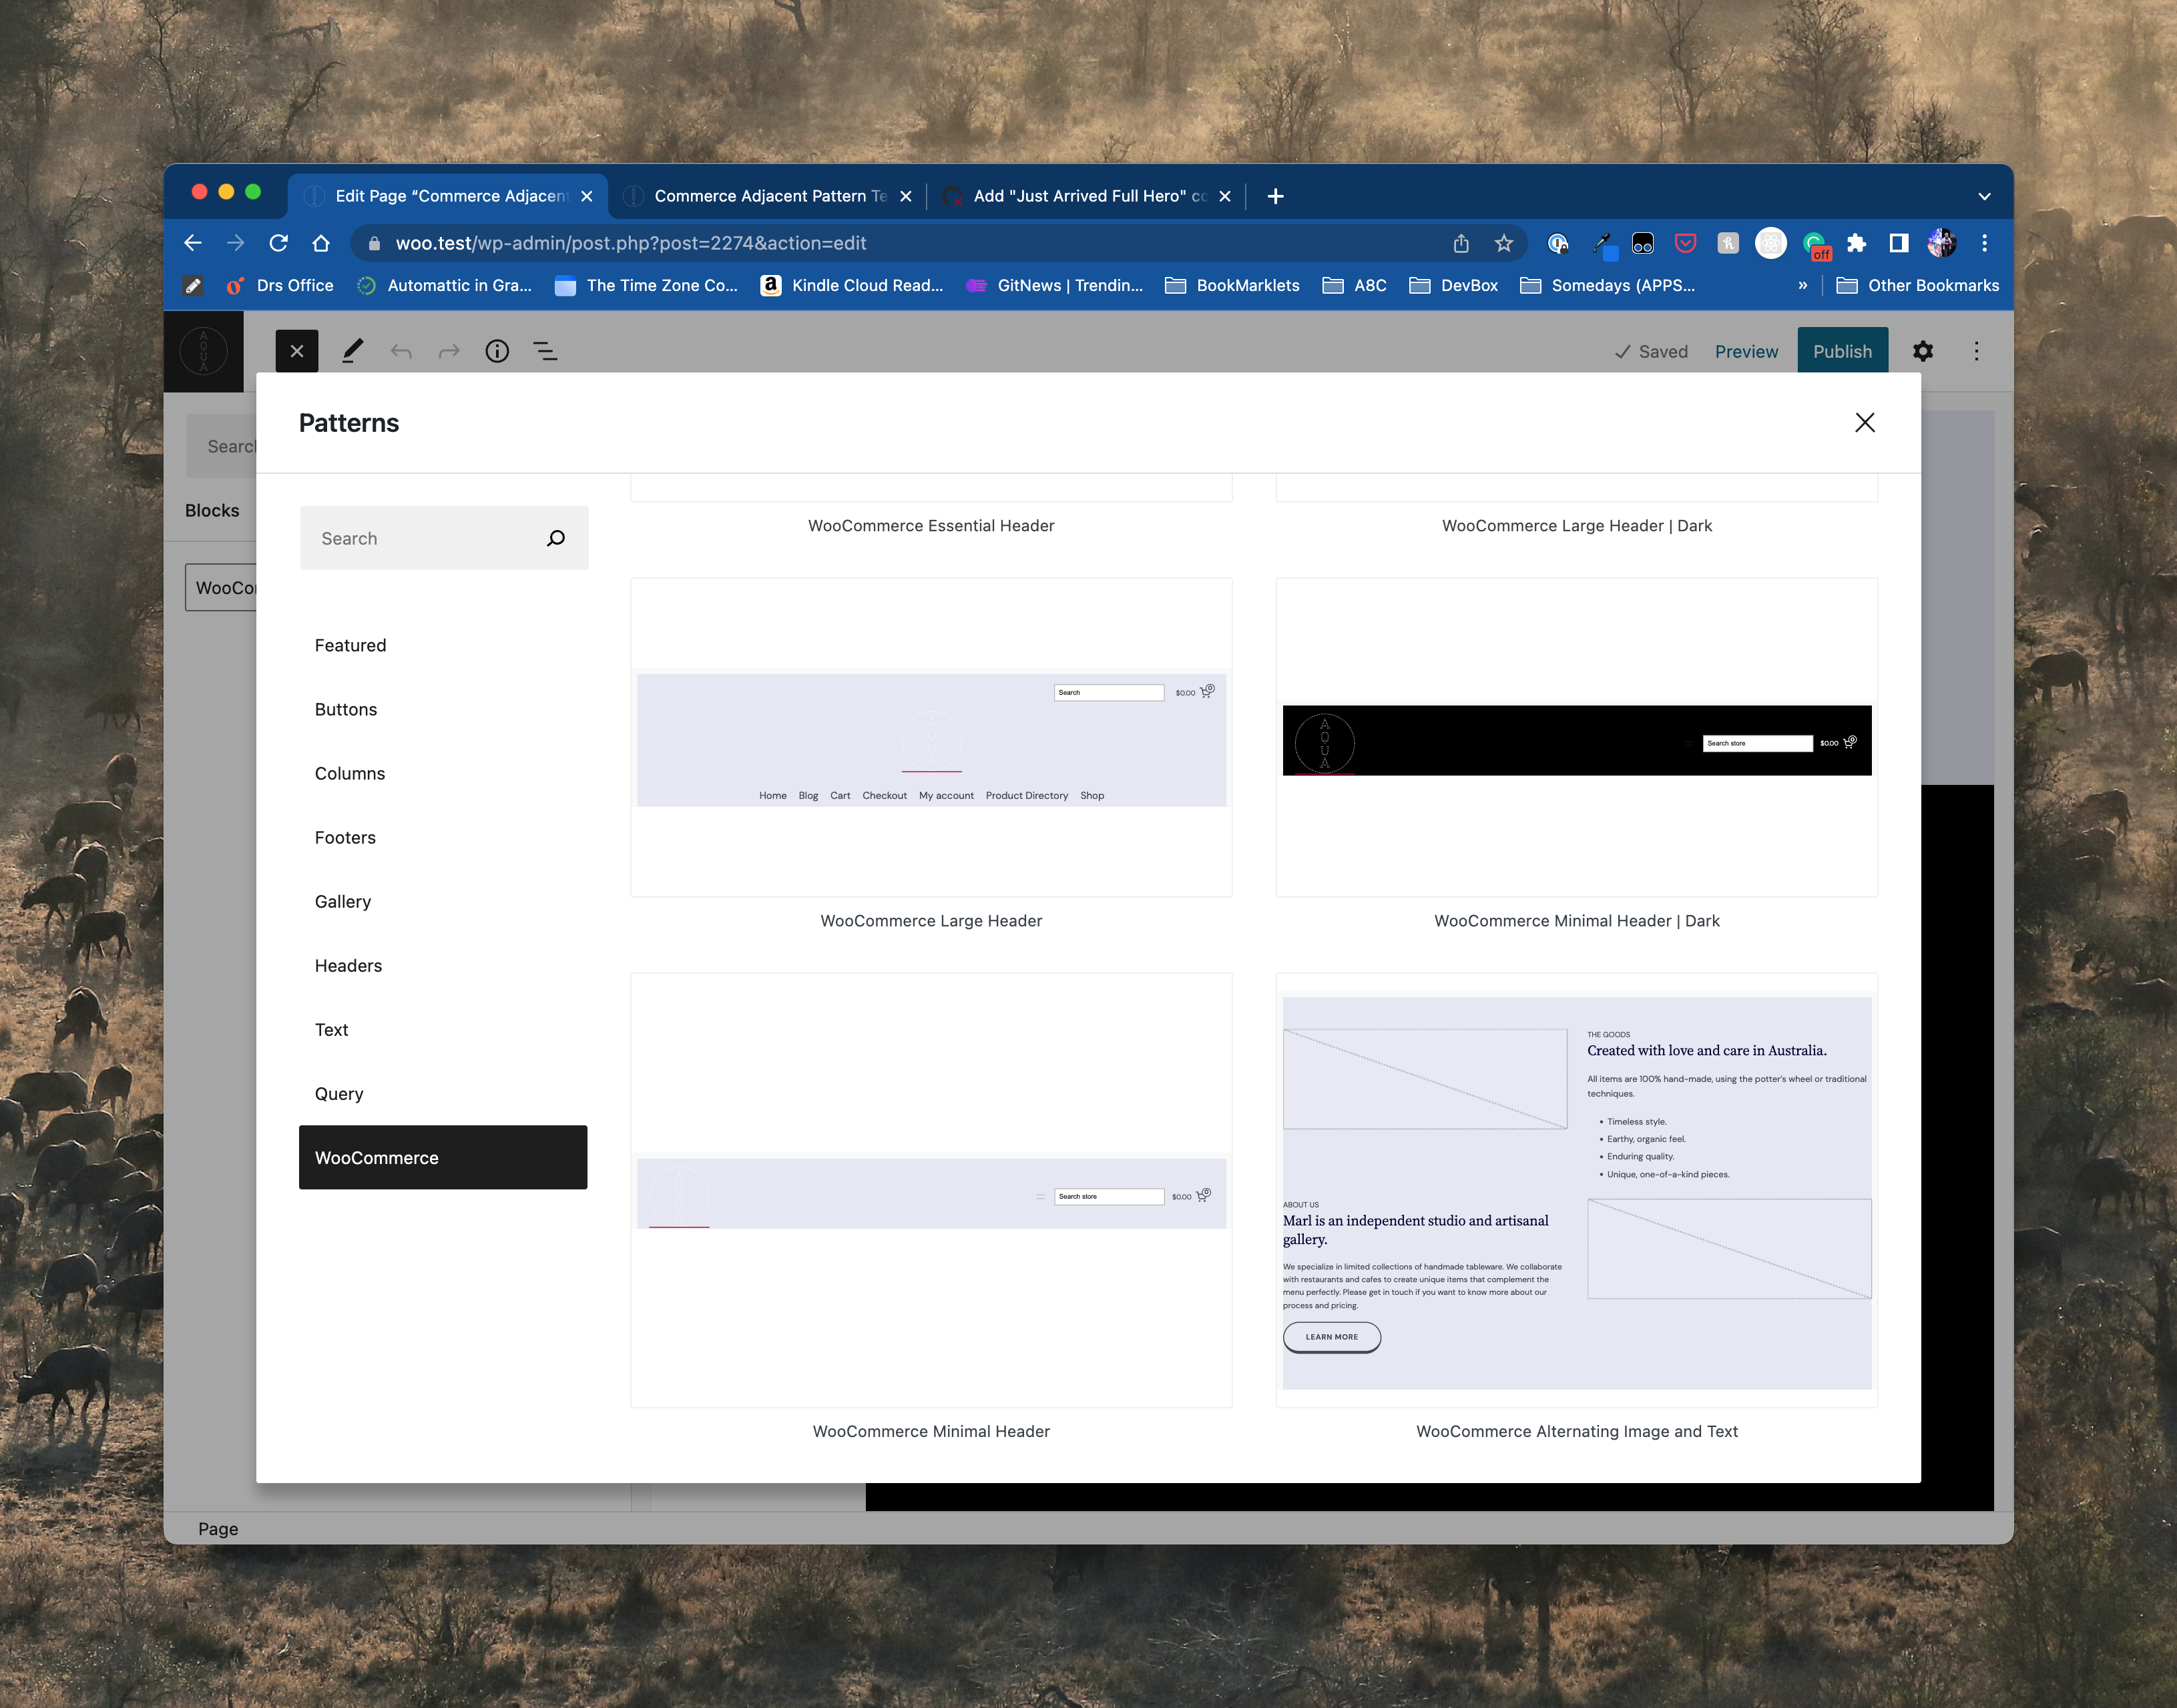
-3. Verify the pattern inserted on the page. It may look different depending on the theme being used with testing.
-
-
-### Add to Cart Button: Add support for the alignment setting. ([7816](https://github.com/woocommerce/woocommerce-blocks/pull/7816))
-
-1. Add the Product (Beta) block to a page.
-2. Add the Add to Cart Button block.
-3. Make sure that you can set the alignment to left, center and right.
-4. Make sure all options work both in the editor and on the page.
-
-### Products block: Make the block available to the users of the feature plugin. ([7815](https://github.com/woocommerce/woocommerce-blocks/pull/7815))
-
-1. Open the inserter in the editor.
-2. Make sure the block appears as “Products (Beta)“ instead of “Product Query” and has a “Stacks” icon instead of “Sparkles” icon. Icon should still be purple.
-3. Add the block and select it.
-4. Make sure the description says: “A block that displays a selection of products in your store.”
-5. Make sure there is a Feedback prompt at the bottom of the inspector with a link going [here](https://href.li/?https://airtable.com/shrFX5FAqmCY6hVYI).
-6. Make sure the default inner blocks are as follows:
-
-- Product Image
-- Post Title
-- Product Price
-- Add to Cart Button
-
-
-### Add "Product Hero 2 Column 2 Row" commerce adjacent pattern. ([7814](https://github.com/woocommerce/woocommerce-blocks/pull/7814))
-
-1. Create a new page and edit it.
-2. Browse to the WooCommerce category for Block patterns and look for the "WooCommerce Product Hero 2 Column 2 Row" pattern in the "Explore All Patterns" dialog. Click to insert.
-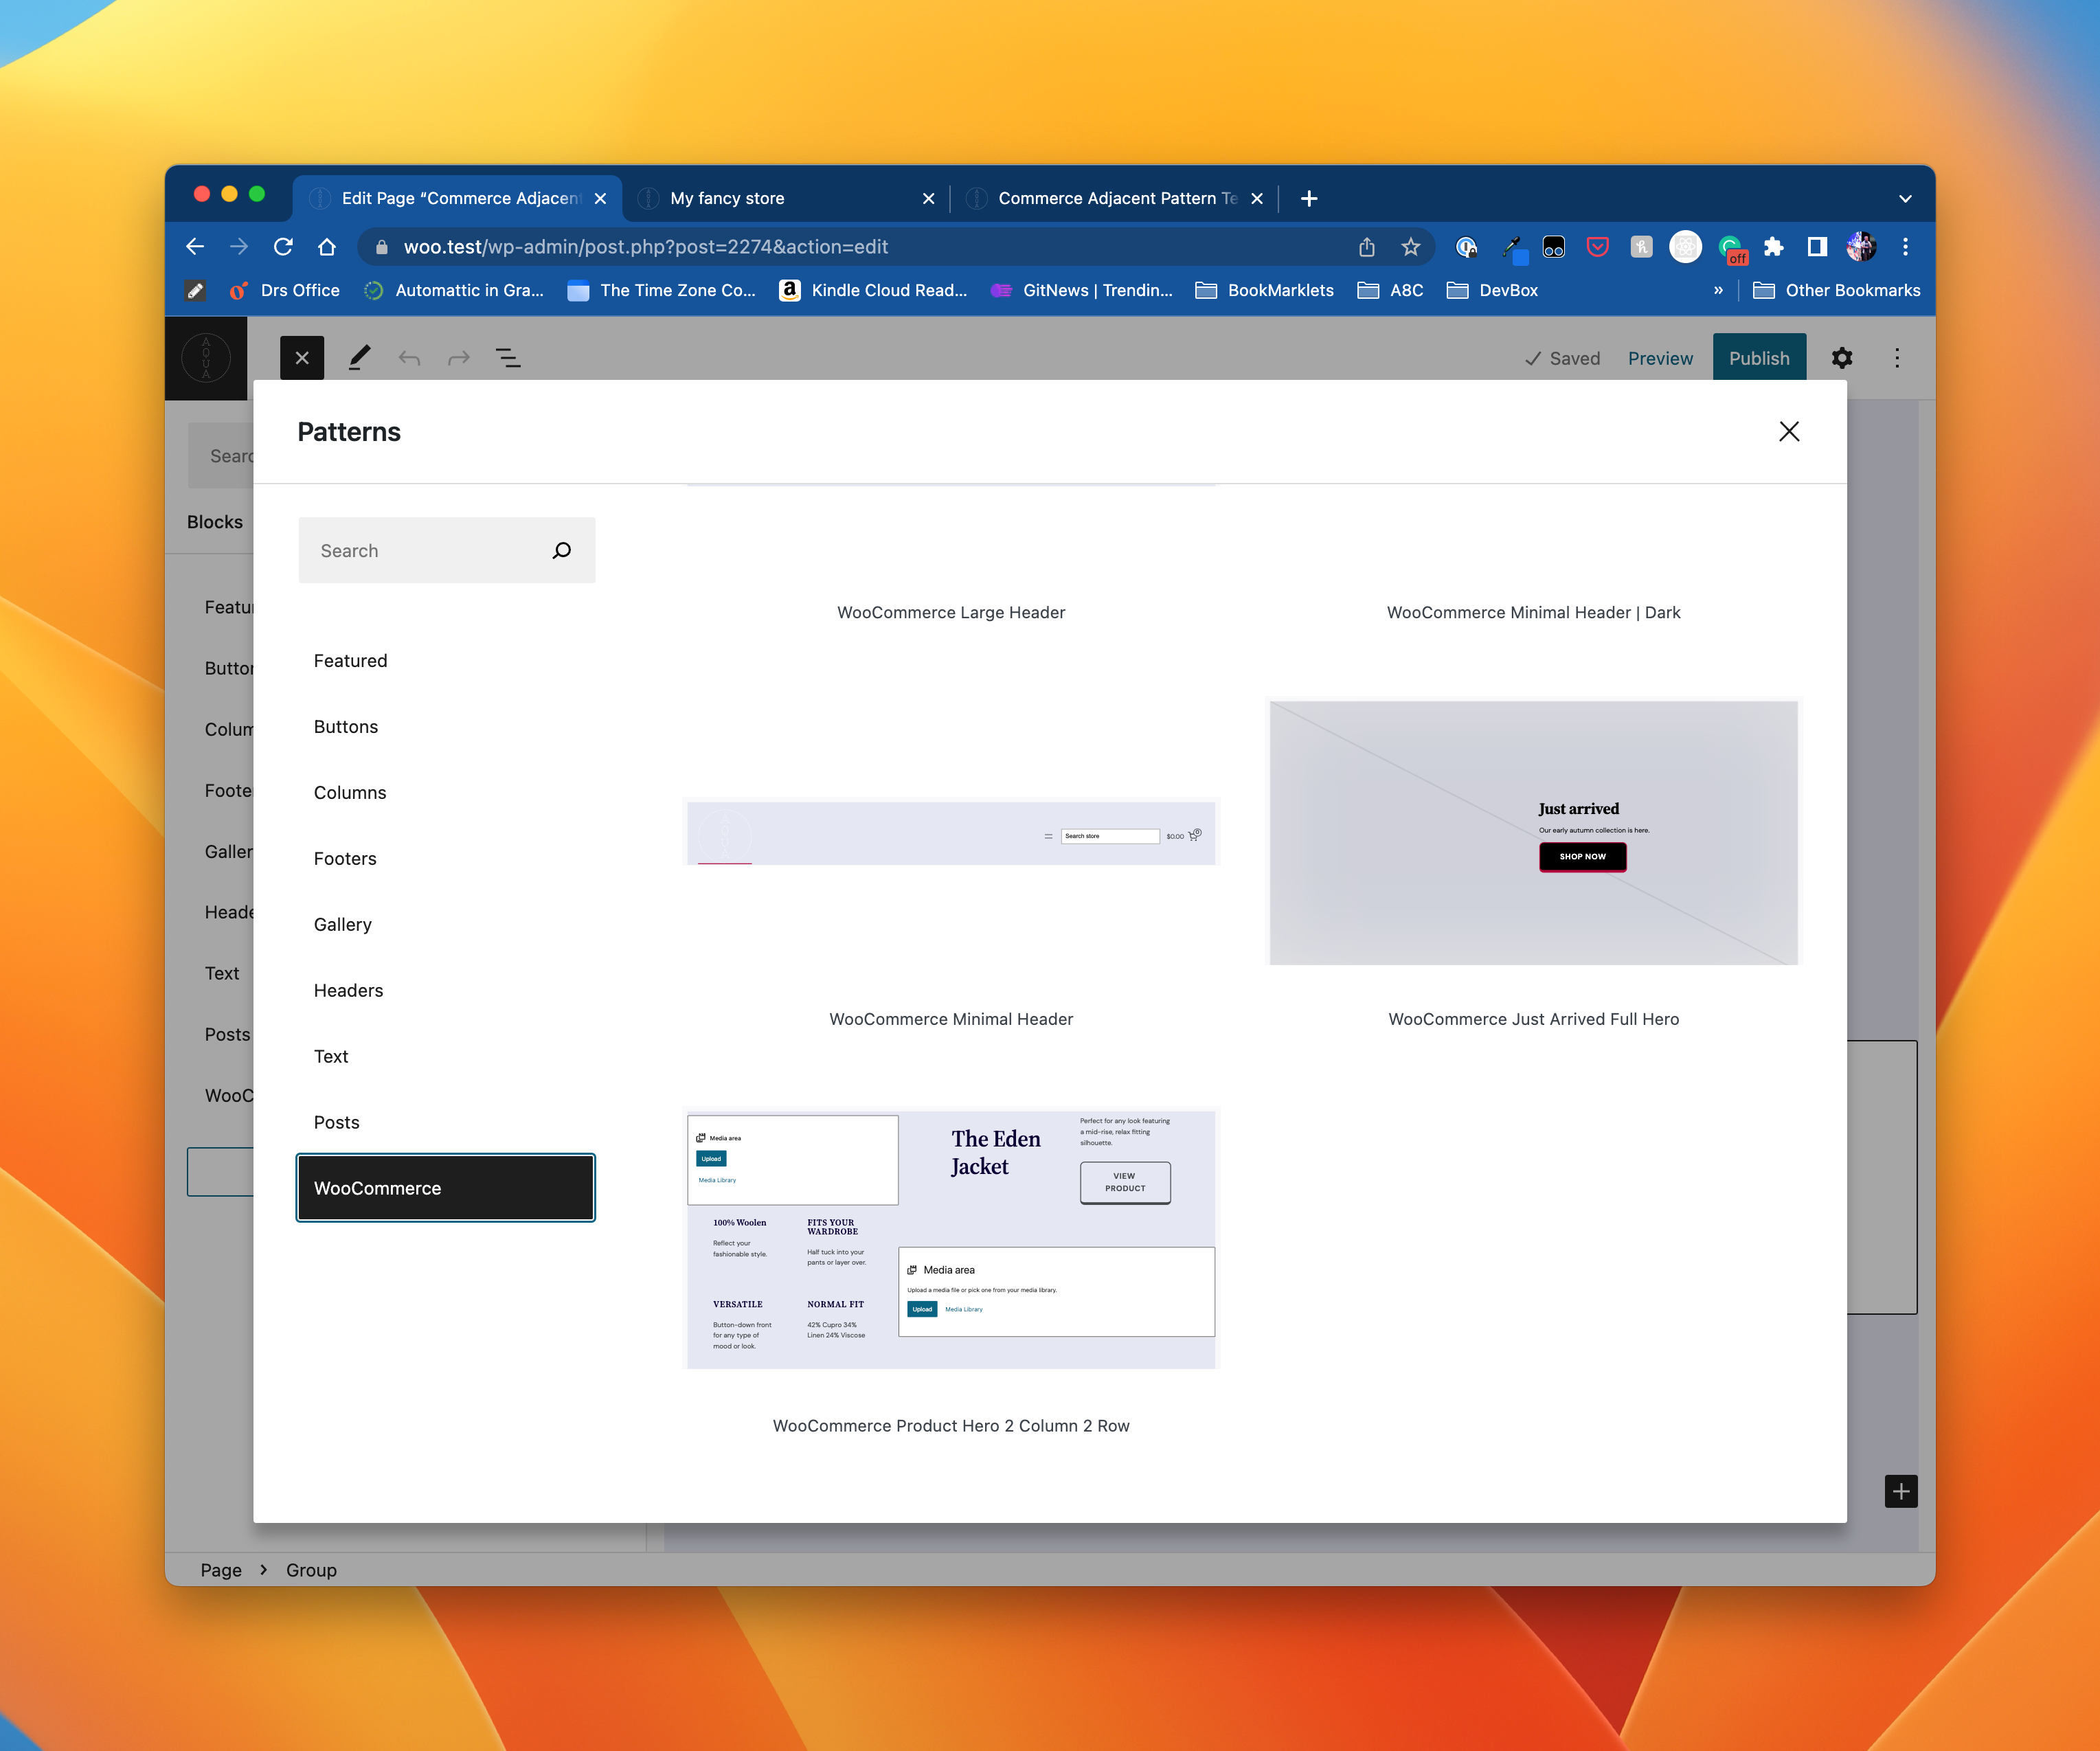
-3. Verify the pattern inserted on the page. It may look different depending on the theme being used with testing.
-
-
-### Add "Just Arrived Full Hero" commerce adjacent pattern. ([7812](https://github.com/woocommerce/woocommerce-blocks/pull/7812))
-
-1. Create a new page and edit it.
-2. Browse to the WooCommerce category for Block patterns and look for the WooCommerce Just Arrived Full Hero pattern in the "Explore All Patterns" dialog. Click to insert.
-<img width="1229" alt="CleanShot 2022-12-01 at 11 58 25@2x" src="https://user-images.githubusercontent.com/1429108/205113567-04310b49-ea2d-40d6-8e73-ed276e81d15c.png">
-3. Verify the pattern inserted on the page. It may look different depending on the theme
-
-### Product Rating: Add support for the alignment setting. ([7790](https://github.com/woocommerce/woocommerce-blocks/pull/7790))
-
-1. Add the Products (Beta) block to a page.
-2. Add the Product Rating block.
-3. Make sure that you can set the alignment to left, center and right.
-4. Make sure all options work both in the editor and on the page.
-
-### Rename Active Product Filters block to Active Filters. ([7753](https://github.com/woocommerce/woocommerce-blocks/pull/7753))
-
-1. Create a post or page and open the block inserter.
-2. Search for active.
-3. Verify there is a block named Active Filters (and there isn't one named Active Product Filters).
-
-### Product Query: Add support for filtering by attributes within the block. ([7743](https://github.com/woocommerce/woocommerce-blocks/pull/7743))
-
-1. Go to the editor and add a “Product (Beta) block.
-2. Ensure a new “Product Attributes” input is accessible via the “Advanced Filters” panel in the inspector controls.
-3. Ensure that the input autocompletes with all the available terms for your store in the format `${Taxonomy}: ${Term}`.
-4. Ensure that when selecting the attributes, the products filter in the editor.
-5. Ensure that when you remove an attribute, the editor preview also gets updated.
-6. Save the post.
-7. Ensure that the block displays correctly in the front-end.
-
-### Align the font-sizes in filters. ([7707](https://github.com/woocommerce/woocommerce-blocks/pull/7707))
-
-1. Enter Site Editor
-2. Insert WooCommerce Product Filters pattern
-3. Check the font-sizes in both, **Editor and the Frontend**, of the following elements in following combinations
-
-- Active filters: list and chips
-- Active filters: "Clear All" button
-- Filter by Price: editable and text
-- Filter by Attribute: list and dropdown (check placeholder, dropdown options and chips)
-- Filter by Rating
-- Filter by Stock
-- For each of the above enable "Apply" button - check it too
-
-4. On the frontend:
-
-- Check "Apply" button
-- Provide any change to filters without applying - check "Reset" button
-
-**Expected:** All of the above have the same font-size:
-
-- Twenty Twenty-Two: 15.75px
-- Twenty Twenty-Three: 14 - 15.75px (depends on the screen width, narrower the screen, smaller the font)
-
-Note: headings are not expected to change!
-
-Check at least briefly other blocks of a WooCommerce that could be influenced by the changes (there may be something I might've missed).
-
-### Mini Cart block: Load `wc-blocks-registry` package at the page's load instead of lazy load it. ([7813](https://github.com/woocommerce/woocommerce-blocks/pull/7813))
-
-1. Install Page Optimize and Product Bundles.
-2. Enable a block theme.
-3. Customize the block theme and add the Mini Cart block in the header via Site Editor.
-4. Save the changes.
-5. In the frontend, lick on the Mini Cart. The drawer should open and show the "empty cart" message.
-6. Go to the shop page and add a product to your cart.
-7. Click on the Mini Cart. The drawer should open and show the product you just added.
-
-### Hide the shipping address form from Checkout Block in Editor and rename the Billing Address label when "Force shipping to the customer billing address" is enabled. ([7800](https://github.com/woocommerce/woocommerce-blocks/pull/7800))
-
-1. Go to `wp-admin/admin.php?page=wc-settings&tab=shipping§ion=options` page.
-2. Enable the `Force shipping to the customer billing address` option and save the changes.
-3. Go to Checkout block Editor, and confirm Shipping Address form is not visible.
-4. Confirm Billing Address form label is `Billing and shipping address` and the description is `Enter the billing and shipping address that matches your payment method.`
-5. Go to the Checkout block front-end, and confirm Shipping Address form is not visible.
-6. Confirm Billing Address form label is `Billing and shipping address` and the description is `Enter the billing and shipping address that matches your payment method.`
-7. Change the billing address, confirm the shipping address in the order summary gets changed, and shipping methods are updated.
-8. Disable the `Force shipping to the customer billing address` option and save the changes.
-9. Confirm Shipping Address form is visible in both the frontend and Editor.
-10. Please test around this issue with multiple use cases.
-
-### Product Price: Fix the alignment setting. ([7795](https://github.com/woocommerce/woocommerce-blocks/pull/7795))
-
-1. Add the Product (Beta) block to a page.
-2. Add the Product Price block.
-3. Make sure that you can set the alignment to left, center and right.
-4. Make sure all options work both in the editor and on the page.
-
-### Fix: Show tax label in Cart and Checkout block. ([7785](https://github.com/woocommerce/woocommerce-blocks/pull/7785))
-
-#### Multiple tax names / Itemized
-
-1. Go to `wp-admin/admin.php?page=wc-settings&tab=tax`.
-2. Ensure the additional tax class `Reduced` exists.
-3. Ensure that `Display prices during cart and checkout` is set to `Including tax`.
-4. Ensure that `Display tax totals` is set to `Itemized`.
-5. Go to `wp-admin/admin.php?page=wc-settings&tab=tax§ion=standard` and add the following tax rate:
- - `Rate %`: `10.000`
- - `Tax name`: `10% Vat`
-6. Go to `wp-admin/admin.php?page=wc-settings&tab=tax§ion=reduced` and add the following tax rate:
- - `Rate %`: `5.000`
- - `Tax name`: `5% Vat`
-7. Create two test products and assign the test products to the tax classes `Standard` and `Reduced`.
-8. Add the test products to the cart.
-9. Go to the cart and verify that the tax labels are visible in the order summary, e.g. `Including € 2.80 10% VAT, € 0.80 5% VAT`.
-10. Go to the checkout and verify that the same tax labels are visible.
-
-<table>
-<tr>
-<td>Cart - before:
-<br><br>
-
-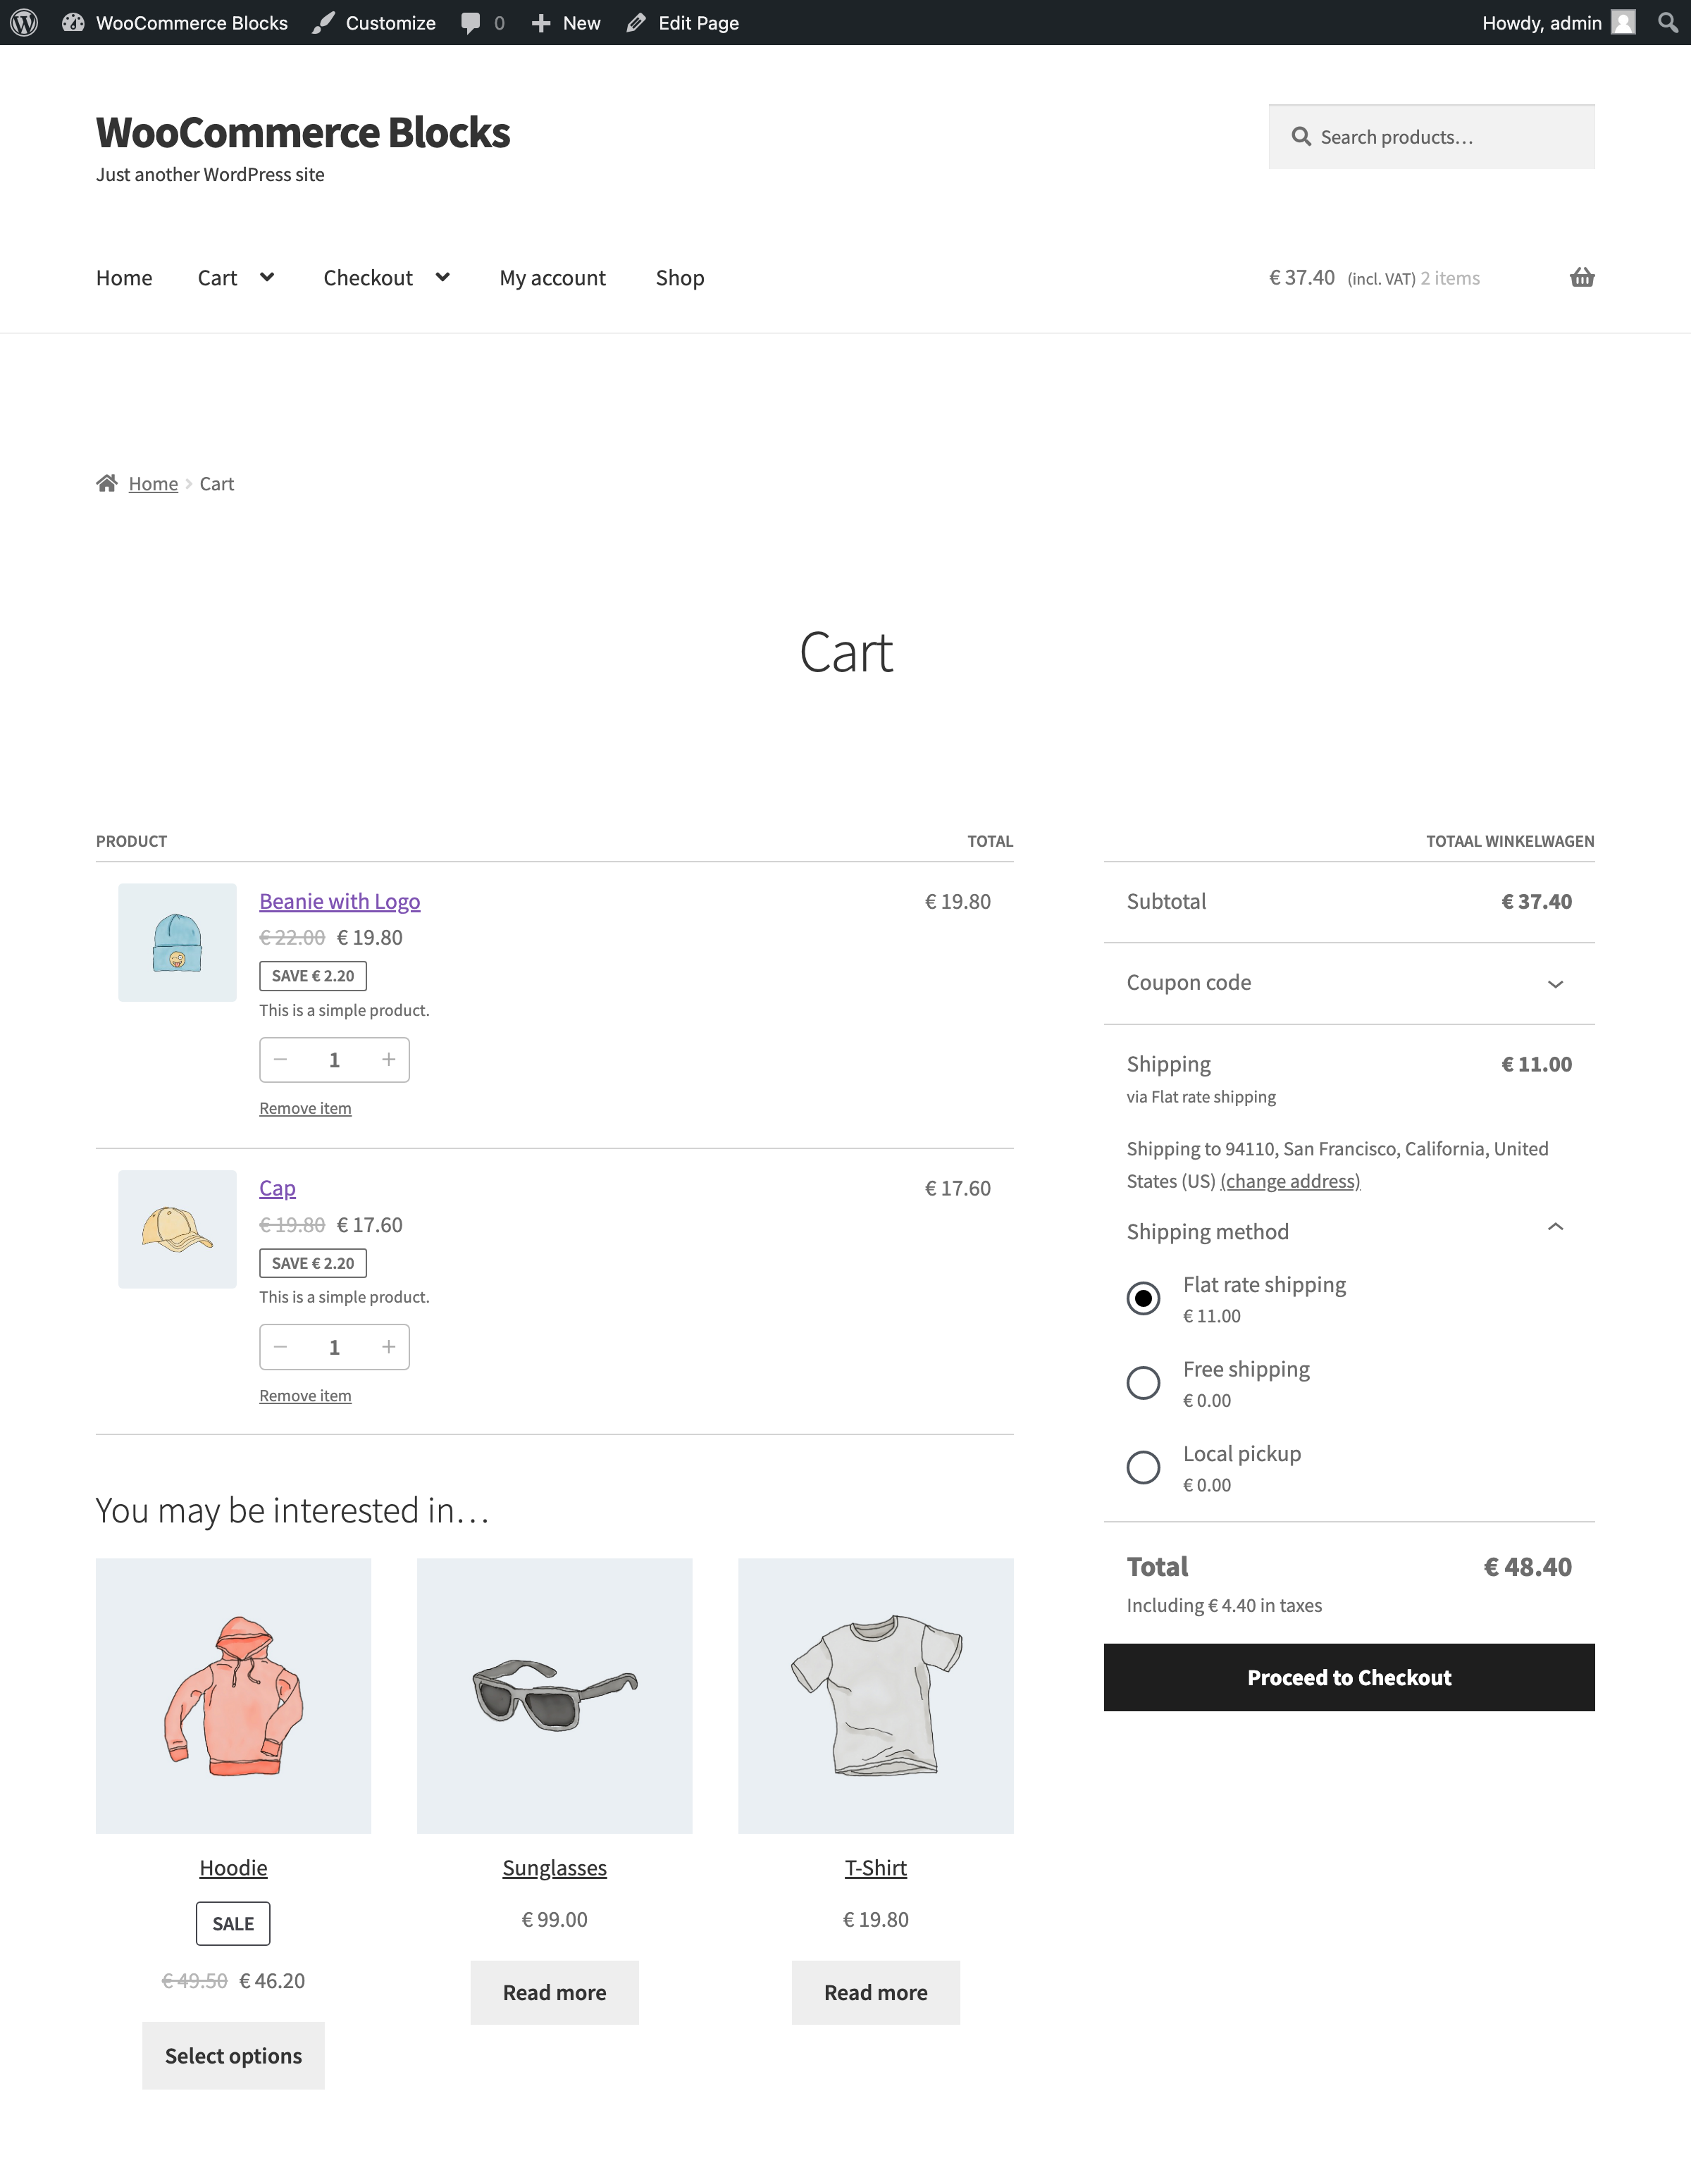
-</td>
-<td>Cart - after:
-<br><br>
-
-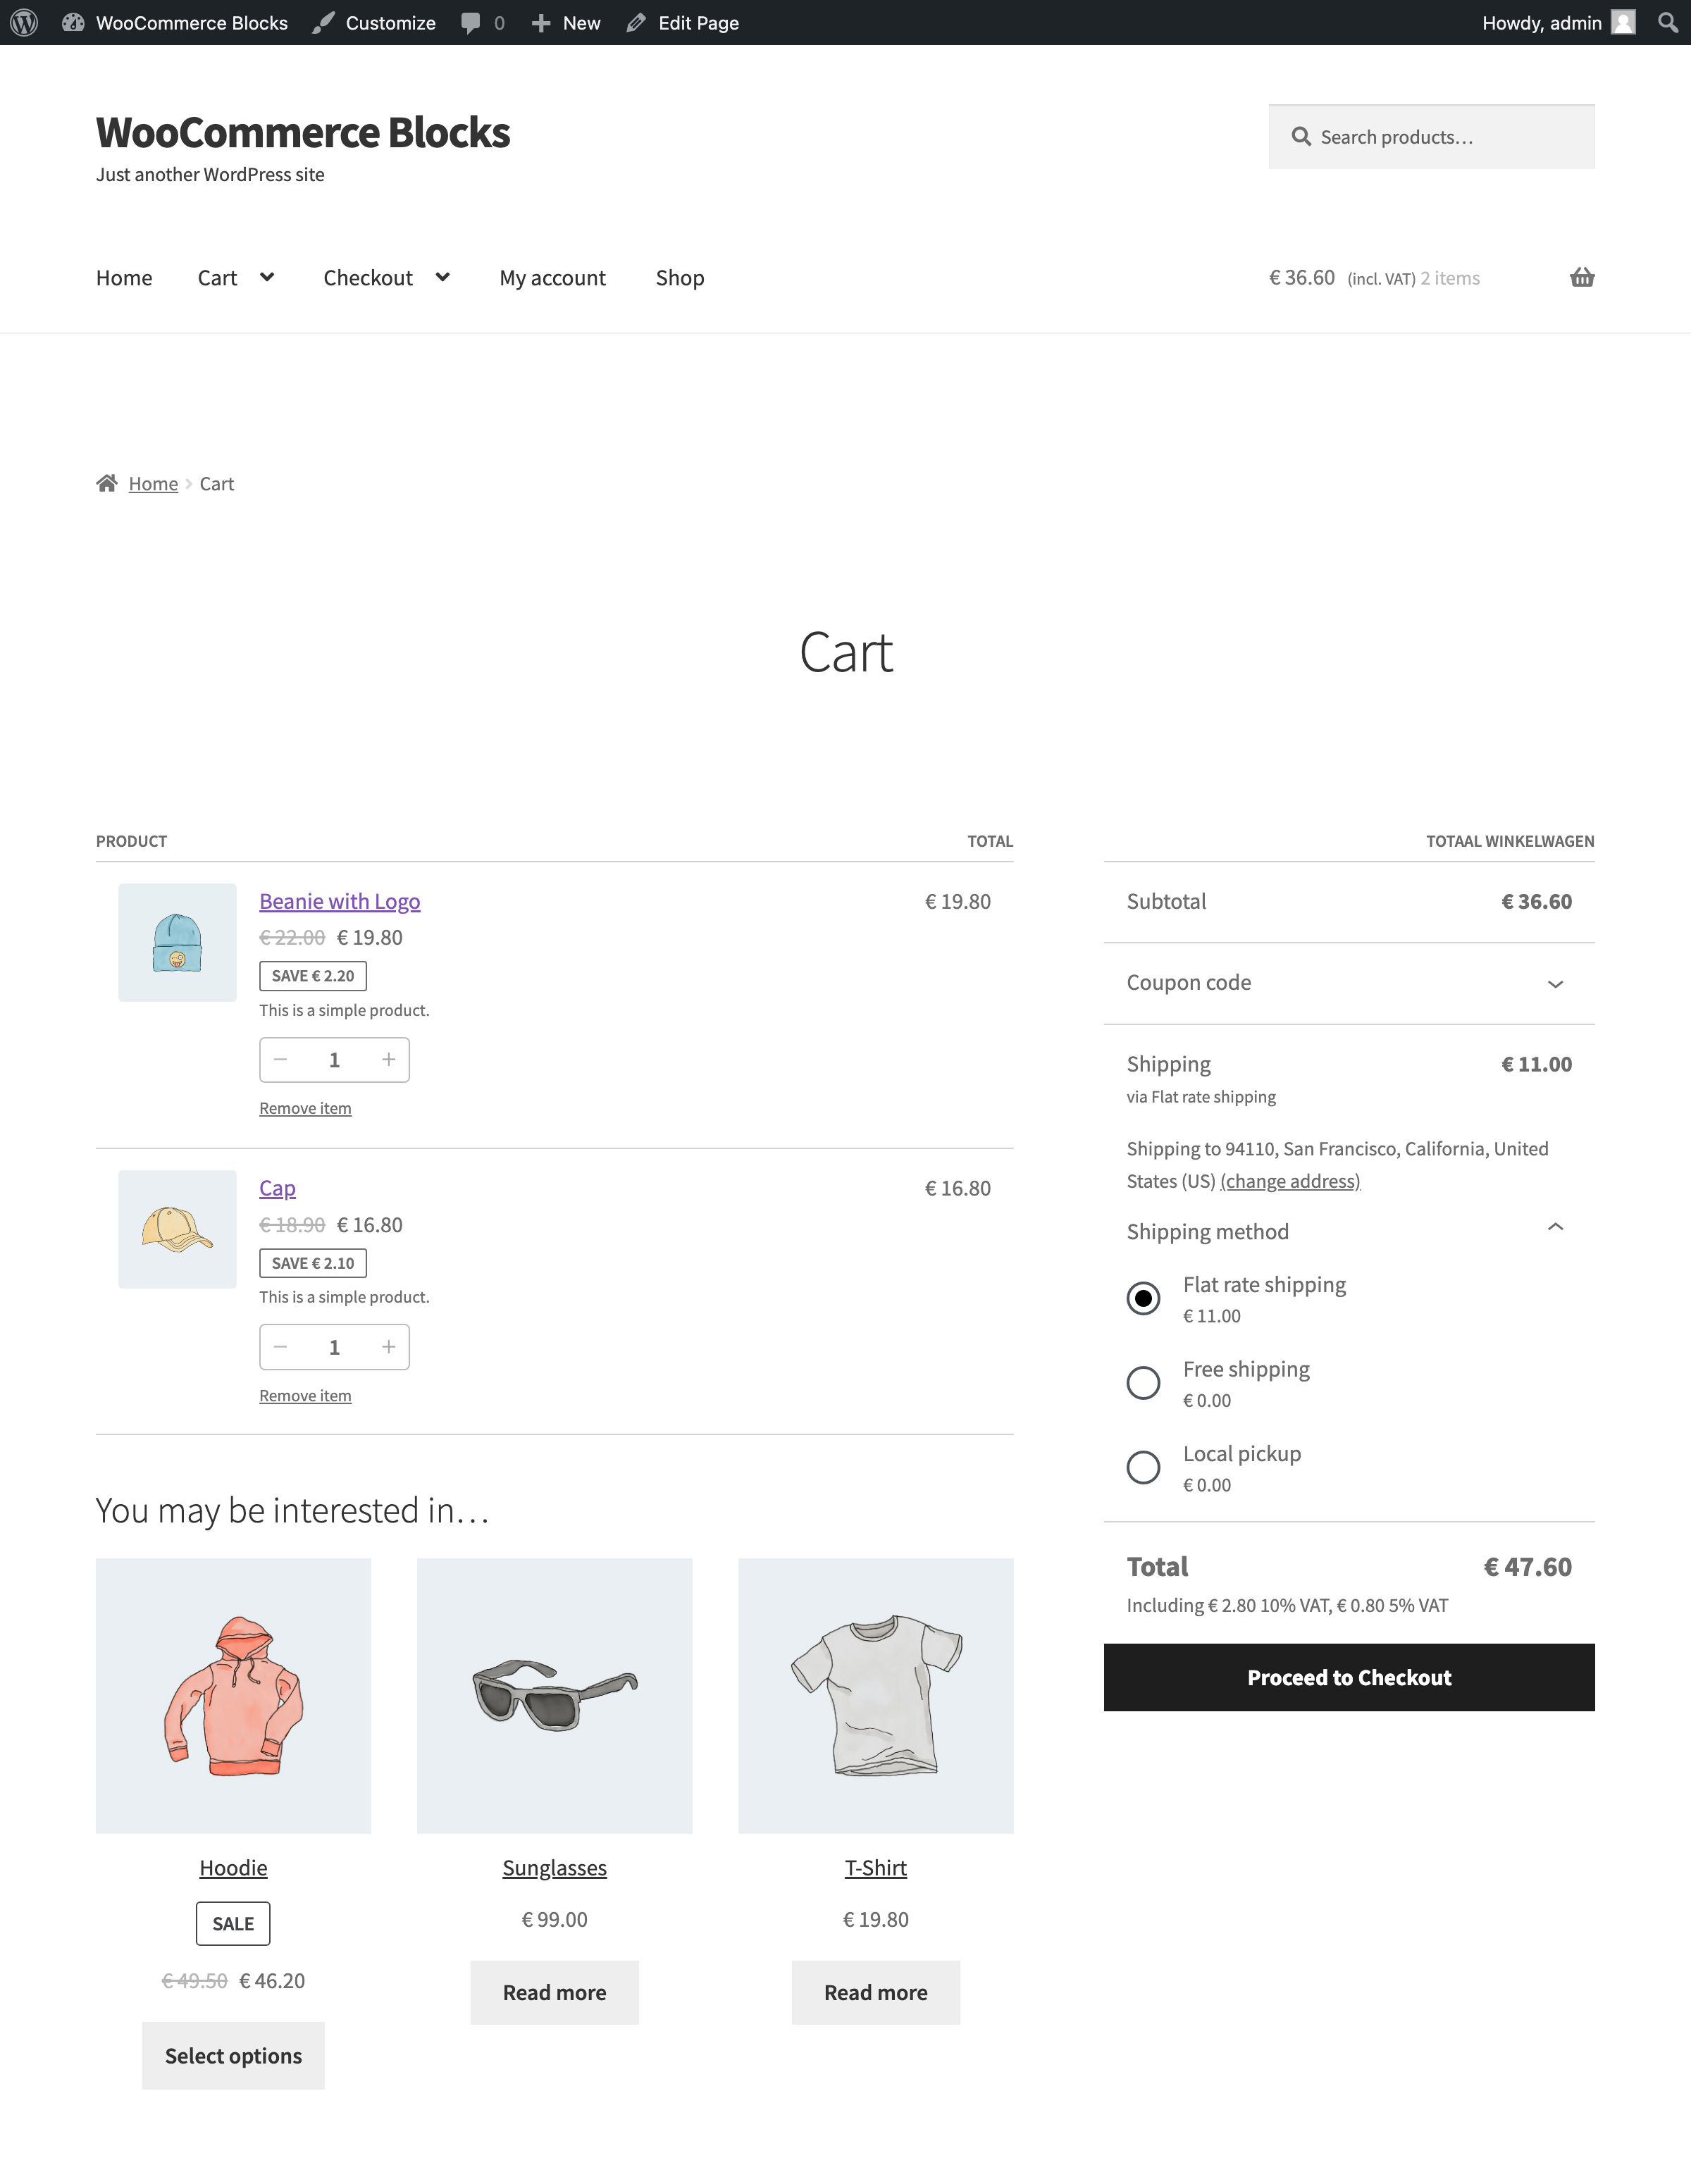
-</td>
-</tr>
-<tr>
-<td>Checkout - before:
-<br><br>
-
-
-</td>
-<td>Checkout - after:
-<br><br>
-
-
-</td>
-</tr>
-</table>
-
-#### Single tax name / Itemized
-
-1. Go back to `wp-admin/admin.php?page=wc-settings&tab=tax§ion=reduced` and change the tax rate as follows:
- - `Rate %`: `5.000` → `10.000`
- - `Tax name`: `5% Vat` → `10% Vat`
-2. Go to the cart and verify that only one tax label is visible in the order summary, e.g. `Including € 4.40 10% VAT`.
-3. Go to the checkout and verify that the same tax label is visible.
-
-<table>
-<tr>
-<td>Cart - before:
-<br><br>
-
-
-</td>
-<td>Cart - after:
-<br><br>
-
-
-</td>
-</tr>
-<tr>
-<td>Checkout - before:
-<br><br>
-
-
-</td>
-<td>Checkout - after:
-<br><br>
-
-
-</td>
-</tr>
-</table>
-
-#### Single total
-
-ℹ I added this test case to check the backwards compatibility.
-
-1. Go to `wp-admin/admin.php?page=wc-settings&tab=tax`.
-2. Ensure that `Display tax totals` is set to `As a single total`.
-3. Go to the cart and verify that the generic tax label is visible in the order summary, e.g. `Including € 4.40 in taxes`.
-4. Go to the checkout and verify that the same tax information is visible.
-
-<table>
-<tr>
-<td valign="top">Cart - before and after:
-<br><br>
-
-
-</td>
-<td valign="top">Checkout - before and after:
-<br><br>
-
-
-</td>
-</tr>
-</table>
-
-### Make Footer and Header patterns available in pattern chooser. ([7699](https://github.com/woocommerce/woocommerce-blocks/pull/7699))
-
-#### Header patterns
-
-1. Go to Site Editor. You can choose any template.
-2. Choose Header Block
-3. Use "Replace" option:
-<img width="520" alt="Screen Shot 2022-11-17 at 10 17 31 AM" src="https://user-images.githubusercontent.com/20098064/202406218-f6a91109-c964-4da7-b60f-3d2c3ae76d44.png">
-4. Type "woocommerce" in a search bar
-**Expected**: There's 6 WooCommerce patterns available
-5. Choose one of them
-**Expected**: Pattern is applied correctly
-
-#### Footer patterns
-
-Repeat the above steps, but for Footer Block
-
-### Fix: Product (Beta) editor preview with Stock Status setting. ([7682](https://github.com/woocommerce/woocommerce-blocks/pull/7682))
-
-1. Add the Product (Beta) block to a new page.
-2. Change the stock status setting.
-3. See the editor preview updates on changing the stock status setting.
-4. Add the Sale status filter, see the editor preview updates on changing on sale setting as well.
-5. See if the block still shows the correct products on the front end as before.
-
-### Clean up unused CSS code. ([7751](https://github.com/woocommerce/woocommerce-blocks/pull/7751))
-
-1. Add all WC Blocks to a post or page (you can use this gist and paste it with Ctrl + V).
-2. Verify there are no visual regressions in the editor. Publish the page and verify there are no visual regressions in the frontend.
-3. In the editor, add one of the blocks that display the SearchListControl component (ie: Filter by Attribute) and verify it's displayed correctly:
-
diff --git a/plugins/woocommerce/client/blocks/docs/internal-developers/testing/releases/911.md b/plugins/woocommerce/client/blocks/docs/internal-developers/testing/releases/911.md
deleted file mode 100644
index 48357f13a35..00000000000
--- a/plugins/woocommerce/client/blocks/docs/internal-developers/testing/releases/911.md
+++ /dev/null
@@ -1,278 +0,0 @@
-# Testing notes and ZIP for release 9.1.1
-
-Zip file for testing: [woocommerce-gutenberg-products-block.zip](https://github.com/woocommerce/woocommerce-blocks/files/10229928/woocommerce-gutenberg-products-block.zip)
-
-## Feature plugin and package inclusion in WooCommerce
-
-### Product Query: Add patterns ([7857](https://github.com/woocommerce/woocommerce-blocks/pull/7857))
-
-1. Create a new page.
-2. Add each pattern and make sure it displays correctly in the editor and frontend.
-
-#### 1. Product gallery
-
-| Figma | Pattern |
-|------ | ----- |
-|||
-
-#### 2. 4-Column Product Row
-
-| Figma | Pattern |
-|------ | ----- |
-| ||
-
-#### 3. 3-Column Product Row
-
-| Figma | Pattern |
-|------ | ----- |
-|||
-
-#### 4. Large Image Product Gallery
-
-| Figma | Pattern |
-|------ | ----- |
-|||
-
-#### 5. Minimal 5-Column Products Row
-
-| Figma | Pattern |
-|------ | ----- |
-|||
-
-#### 6. 1:1 Image 4-Column Products Row
-
-| Figma | Pattern |
-|------ | ----- |
-|||
-
-#### 7. Product list with full product description
-
-| Figma | Pattern |
-|------ | ----- |
-|||
-
-
-#### 8. Product list with 1:1 images
-
-| Figma | Pattern |
-|------ | ----- |
-|||
-
-#### 9. Minimal product list
-
-| Figma | Pattern |
-|------ | ----- |
-|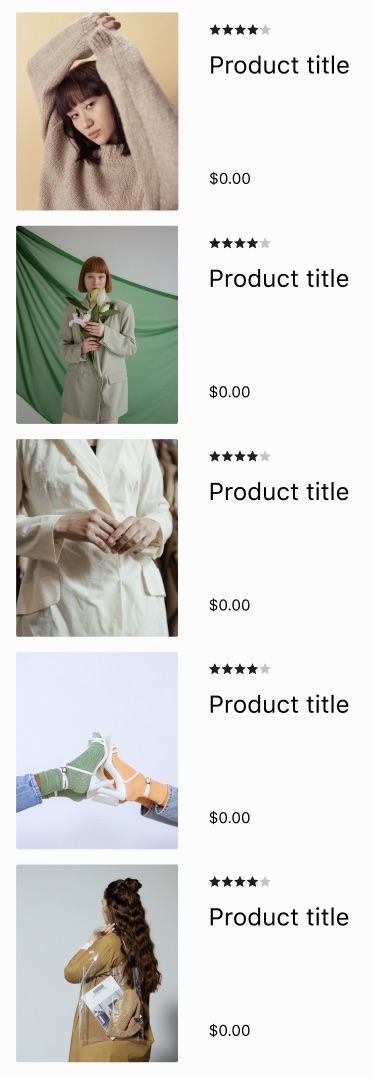|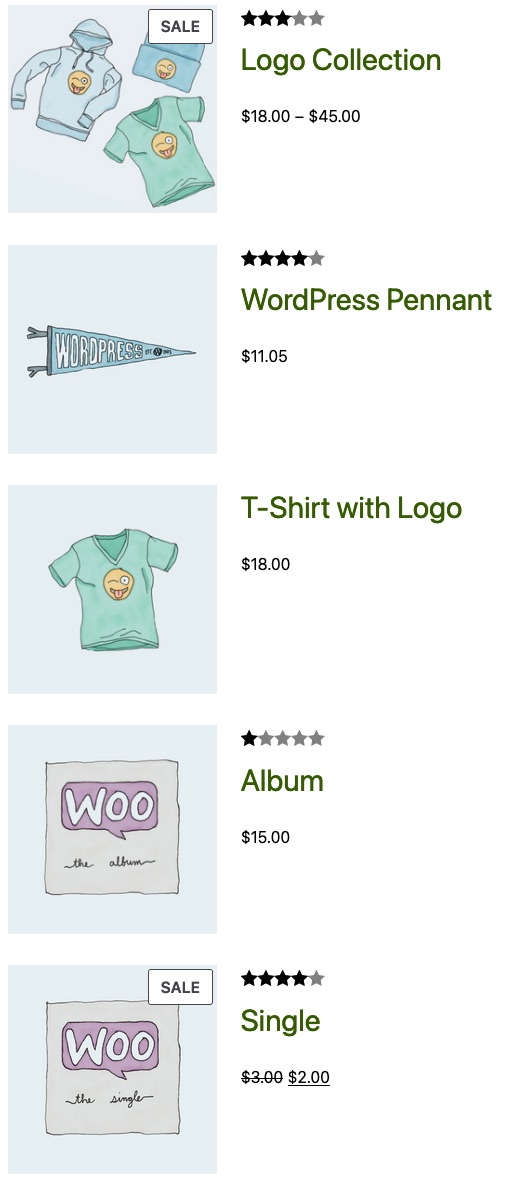|
-
-### Add dropdown version of Filter by Stock Status ([7831](https://github.com/woocommerce/woocommerce-blocks/pull/7831))
-
-Check out [the video above](
-https://user-images.githubusercontent.com/20098064/206128900-2cdb4bfe-c131-48d1-b395-8fa3fc07dafc.mov) which will help you go through the testing instructions
-
-Prerequisites:
-
-1. Have at least few products with different stock status: in stock, out of stock, on backorder
-2. Go to Editor
-3. Add Filters pattern
-4. Add All Products
-
-#### Dropdown component - single
-
-1. Change settings of Filter by Stock to: single / dropdown
-2. Open dropdown
-
-- **Expected**: dropdown has stock status options to choose from
-
-3. Choose one option
-
-- **Expected**: page refreshes, filter is applied: visible in Active Filters and Products are filtered out
-
-4. Choose other option
-
-- **Expected**: previous filter is replaced by the new one, page refreshes, filter is applied: visible in Active Filters and Products are filtered out
-
-##### Dropdown component - multiple
-
-1. Change settings of Filter by Stock to: multiple / dropdown
-2. Open dropdown
-
-- **Expected**: dropdown has stock status options to choose from
-
-3. Choose one option
-
-- **Expected**: page refreshes, filter is applied: visible in Active Filters and Products are filtered out
-
-4. Choose other option
-
-- **Expected**: new filter is added to the new one, page refreshes, both filters ("or") is applied: visible in Active Filters and Products are filtered out
-
-##### List component
-
-1. Change settings of Filter by Stock to: list
-2. Repeat the above for both: single and multiple
-
-##### Apply button
-
-1. In the Editor choose multiple Dropdown again and enable "Show 'Apply filters' button" option
-2. In the frontend choose stock filters
-
-- **Expected**: filters are not applied until "Apply" button is clicked. Once clicked page refreshes and filters are applied
-
-##### Other scenarios
-
-Try to break it! 😉
-
-### Add dropdown version of Filter by Rating ([7771](https://github.com/woocommerce/woocommerce-blocks/pull/7771))
-
-Check out [the video above](https://user-images.githubusercontent.com/20098064/205309205-b0b69334-541a-42bd-881e-455db517b70e.mov) which will help you go through the testing instructions
-
-Prerequisites:
-
-1. Have at least few products with some ratings
-2. Go to Editor
-3. Add Filters pattern
-4. Add All Products
-
-#### Dropdown component - single
-
-1. Change settings of Filter by Rating to: single / dropdown
-2. Open dropdown
-
-- **Expected**: dropdown has rating options to choose from
-
-3. Choose one option
-
-- **Expected**: page refreshes, filter is applied: visible in Active Filters and Products are filtered out
-
-4. Choose other option
-
-- **Expected**: previous filter is replaced by the new one, page refreshes, filter is applied: visible in Active Filters and Products are filtered out
-
-#### Dropdown component - multiple
-
-1. Change settings of Filter by Rating to: multiple / dropdown
-2. Open dropdown
-
-- **Expected**: dropdown has rating options to choose from
-
-3. Choose one option
-
-- **Expected**: page refreshes, filter is applied: visible in Active Filters and Products are filtered out
-
-4. Choose other option
-
-- **Expected**: new filter is added to the new one, page refreshes, both filters ("or") is applied: visible in Active Filters and Products are filtered out
-
-#### List component
-
-1. Change settings of Filter by Rating to: list
-2. Repeat the above for both: single and multiple
-
-#### Apply button
-
-1. In the Editor choose multiple Dropdown again and enable "Show 'Apply filters' button" option
-2. In the frontend choose rating filters
-
-- **Expected**: filters are not applied until "Apply" button is clicked. Once clicked page refreshes and filters are applied
-
-#### Other scenarios
-
-Try to break it! 😉
-
-### Product Query - Enable "Inherit Query from template" option ([7641](https://github.com/woocommerce/woocommerce-blocks/pull/7641))
-
-#### Site Editor
-
-1. Add the Product Query in a template (eg: Product Catalog)
-2. Check that the `Inherit Query from template` option is visible.
-3. Enable it.
-4. Be sure that all the settings that customize the query are hidden.
-5. Save.
-6. Be sure that the result generated by the Product Query is the same as the classic FSE template (there are E2E tests that check this ).
-7. Edit the Product Catalog and disable the `Inherit Query from template` option.
-8. Ensure all the settings that customize the query are visible.
-
-#### Post/Page Editor
-
-1. Add the Product Query in a template (eg: Product Catalog)
-2. Check that the `Inherit Query from template` option isn't visible.
-
-### Fix the incorrect layout of Rating and Price in Classic Template and Products block ([7932](https://github.com/woocommerce/woocommerce-blocks/pull/7932))
-
-Prerequisites:
-
-- make sure you have at least one product _with_ rating
-
-Steps:
-
-1. Go to the Appearance > Editor and edit the Product Catalog template:
-
-- Filter by Rating
-- All Products,
-- Products
-- Classic Template
-
-2. In the frontend check the above blocks
-
-**Expected:**
-
-
-| Case | Before | After |
-| ------ | ----- | ----- |
-| Products block (was: left-aligned Ratings) | <img width="332" alt="image" src="https://user-images.githubusercontent.com/20098064/207349105-62ff7ee4-49d3-4f0e-aa3f-d906f1bf2b3d.png"> | <img width="334" alt="image" src="https://user-images.githubusercontent.com/20098064/207348578-04970b79-cb8d-497d-823b-71d9eaa88bbe.png"> |
-| Classic Template (was: inlined Ratings and Price) | <img width="237" alt="image" src="https://user-images.githubusercontent.com/20098064/207349319-f7020e66-4c77-4ea9-a991-151cabd515ac.png"> | <img width="247" alt="image" src="https://user-images.githubusercontent.com/20098064/207348409-4465be9d-529d-49db-a056-e4c3f844a6e6.png"> |
-
-- The layout of product in Products and Classic Template is as on the screenshots above
-- The layout of the Filter by Rating and All Products doesn't change
-
-### Update MiniCart.php to fix price total amount on page load prices are including tax ([7832](https://github.com/woocommerce/woocommerce-blocks/pull/7832))
-
-1. In WooCommerce > Settings check _Enable tax rates and calculations_.
-2. In the _Tax_ tab that appears go to _Tax options_ and set _Display prices during cart and checkout_ to _Including tax_.
-3. In _Standard rates_, create a tax rate with `Rate %` of `10`.
-4. Create a post or page and add the Mini Cart block.
-5. In the frontend, hover the Mini Cart block with the mouse and notice the price doesn't update ([before](https://user-images.githubusercontent.com/3616980/206694129-c16fcea4-8ac4-4bd7-a72a-221946c3ef08.webm) and [after](https://user-images.githubusercontent.com/3616980/206694060-eee1cccf-1ebd-435d-995d-23caca715918.webm)).
-
-### Product Query: Add `Sorted by title` preset. ([7949](https://github.com/woocommerce/woocommerce-blocks/pull/7949))
-
-1. Add a new page.
-2. Add the Products (Beta) block to the page.
-3. See products are ordered by title.
-4. Open the sidebar setting.
-5. See the Popular Filters setting is expanded by default and the `Sorted by title` is selected.
-
-### Atomic Blocks: fix ancestor definition ([7947](https://github.com/woocommerce/woocommerce-blocks/pull/7947))
-
-1. Go to Editor
-2. Add an All Products block
-3. Enter the "Edit the layout of each product" mode (click on the pencil icon)
-4. Be sure that it is possible to add atomic blocks.
-
-## Feature Plugin
-
-### Product Elements: Fix block settings ([7914](https://github.com/woocommerce/woocommerce-blocks/pull/7914))
-
-1. Create a page and add the **Products (Beta)** block.
-2. Add **Add to Cart Button**, **Price** and **Rating** product elements.
-3. Customize via block settings:
-
-- **Product Price**: `Color > background`, `Color > text ` and `Typography > appearance`.
-- **Product Button**: `Typography > font Weight` and `Dimension > padding`.
-- **Product Rating**: `Typography > font Size`, `Dimension > margin`, `Color > text`.
-
-4. Ensure all customizations display correctly both in the editor and the page (frontend).
-
-### StyleAttributesUtils: Fix PHP notices and invalid CSS output ([7909](https://github.com/woocommerce/woocommerce-blocks/pull/7909))
-
-1. Create a page and add the **Products (Beta)** block.
-2. Add the **Product Image** and **On-Sale Badge** blocks.
-3. Try setting different combinations of the following block settings:
-
-- Border Radius
-- Border Width (test also in conjunction with different Border Radius settings)
-- Margin
-- Padding
-
-Make sure to test in both 'Linked' and 'Unlinked' modes ( one value for all 4 sides, custom values for each side, some sides not set etc. ).
-
-Make sure for any of the scenarios no PHP errors and notices are being generated and the options display correct visual results on the page (frontend).
diff --git a/plugins/woocommerce/client/blocks/docs/internal-developers/testing/releases/912.md b/plugins/woocommerce/client/blocks/docs/internal-developers/testing/releases/912.md
deleted file mode 100644
index 32e39e5e0d0..00000000000
--- a/plugins/woocommerce/client/blocks/docs/internal-developers/testing/releases/912.md
+++ /dev/null
@@ -1,9 +0,0 @@
-# Testing notes and ZIP for release 9.1.2
-
-Zip file for testing: [woocommerce-gutenberg-products-block.zip](https://github.com/woocommerce/woocommerce-blocks/files/10278457/woocommerce-gutenberg-products-block.zip)
-
-## Feature plugin and package inclusion in WooCommerce
-
-### Remove feature flag from Products block ([8001](https://github.com/woocommerce/woocommerce-blocks/pull/8001))
-
-1. Create a post or page and verify the Products (Beta) block is available form the inserter.
diff --git a/plugins/woocommerce/client/blocks/docs/internal-developers/testing/releases/913.md b/plugins/woocommerce/client/blocks/docs/internal-developers/testing/releases/913.md
deleted file mode 100644
index 67d3c278370..00000000000
--- a/plugins/woocommerce/client/blocks/docs/internal-developers/testing/releases/913.md
+++ /dev/null
@@ -1,11 +0,0 @@
-# Testing notes and ZIP for release 9.1.3
-
-Zip file for testing: [woocommerce-gutenberg-products-block.zip](https://github.com/woocommerce/woocommerce-blocks/files/10279222/woocommerce-gutenberg-products-block.zip)
-
-## Feature plugin and package inclusion in WooCommerce
-
-### Enable Product SKU and Product Stock Indicator in Core ([8009](https://github.com/woocommerce/woocommerce-blocks/pull/8009))
-
-1. Create a post or page and add the Products (Beta) block.
-2. Be sure that Product SKU and Product Stock Indicator blocks are visible and can be added.
-
diff --git a/plugins/woocommerce/client/blocks/docs/internal-developers/testing/releases/920.md b/plugins/woocommerce/client/blocks/docs/internal-developers/testing/releases/920.md
deleted file mode 100644
index 81f505c41e0..00000000000
--- a/plugins/woocommerce/client/blocks/docs/internal-developers/testing/releases/920.md
+++ /dev/null
@@ -1,274 +0,0 @@
-# Testing notes and ZIP for release 9.2.0
-
-Zip file for testing: [woocommerce-gutenberg-products-block.zip](https://github.com/woocommerce/woocommerce-blocks/files/10260516/woocommerce-gutenberg-products-block.zip)
-
-## Feature plugin and package inclusion in WooCommerce
-
-### Fix overriding archive-product when saving a fallback template ([7975](https://github.com/woocommerce/woocommerce-blocks/pull/7975))
-
-1. Go to `Products` > `Attribute` (`/wp-admin/edit.php?post_type=product&page=product_attributes`).
-2. Edit one of the attributes (like `color`), check the `Enable archives?` checkbox, and save.
-3. On the `Site Editor` (`/wp-admin/site-editor.php?postType=wp_template`), make sure you have no customizations on any template.
-4. Edit the `Product Catalog` template, add some customization and save.
-5. On the front end, go to `/shop` and make sure you see the customization you just did.
-6. On the front end, go also to a category, a tag, and an attribute page (like `product-category/clothing/`, `/product-tag/music`, `color/red`, depending on your store configuration).
-7. Check that all 3 pages are using the `Product Catalog` template, meaning you see exactly the same customization you did on the `Product Catalog`.
-8. Go back to the `Site Editor`, click on one of the templates using the Catalog fallback (either `Products by Category`, `Products by Tag`, or `Products by Attribute`).
-9. Make some customization and save it.
-10. Go back to the `Site Editor` and make sure `Product Catalog` still has its original customization.
-11. Make sure the other two templates still fall back to `Product Catalog`.
-12. On the front end, go to `/shop` and make sure you see the `Product Catalog` customization.
-13. On the front end, go also to a category, a tag, and an attribute page and make sure you see the expected customizations.
-
-### Fix: Add non-ASCII terms support to Filter by Attribute block. ([7906](https://github.com/woocommerce/woocommerce-blocks/pull/7906))
-
-#### Screenshots
-
-| Before | After |
-| ----------------------------------------------------------------------------------------------------------------------------------------- | ----------------------------------------------------------------------------------------------------------------------------------------- |
-| <img width="2672" alt="image" src="https://user-images.githubusercontent.com/5423135/206627822-4dc56c6f-0728-49e1-afa6-de3d2dab2fae.png"> | <img width="2672" alt="image" src="https://user-images.githubusercontent.com/5423135/206627921-131e132e-98dc-4a8a-a48b-6fffff5d4830.png"> |
-
-#### Testing
-
-1. Add a product attribute named `大きさ`.
-2. Add a term under the attribute above, named `大`
-3. Assign that term to a product.
-4. With a block theme, add a Filter by Attribute block to the Product Catalog template, and configure that block to use the `大きさ` attribute.
-5. On the front end, try filtering the block by `大きさ`, see it the block works and the products is filtered as expected.
-
-### Fix: Ensure that the Checkout block respects the WooCommerce core settings for guest checkout and account creation. ([7883](https://github.com/woocommerce/woocommerce-blocks/pull/7883))
-
-#### Show login prompt when guest checkout and account creation (in core) are disabled
-
-1. Create a test page and add the Checkout block to it.
-2. Head over to `/wp-admin/admin.php?page=wc-settings&tab=account`.
-3. Deactivate the option `Guest checkout` → `Allow customers to place orders without an account`.
-4. Deactivate the option `Account creation` → `Allow customers to create an account during checkout`.
-5. Open the frontend in an incognito window and ensure that you're not accidentally logged in (from a previous test).
-6. Add a product to the cart and go to the test page with the Checkout block.
-7. Verify that the checkout form is not visible.
-8. Verify that the message `You must be logged in to checkout. Click here to log in.`.
-
-#### Show checkout when guest checkout is enabled, but account creation is disabled
-
-1. Create a test page and add the Checkout block to it.
-2. Head over to `/wp-admin/admin.php?page=wc-settings&tab=account`.
-3. Activate the option `Guest checkout` → `Allow customers to place orders without an account`.
-4. Deactivate the option `Account creation` → `Allow customers to create an account during checkout`.
-5. Open the frontend in an incognito window and ensure that you're not accidentally logged in (from a previous test).
-6. Add a product to the cart and go to the test page with the Checkout block.
-7. Verify that the checkout form is visible.
-8. Place a test order and verify that no account had been created. The order details show `Guest` as a `Customer`:
-
-<img width="1011" alt="Screenshot 2022-12-16 at 12 26 59" src="https://user-images.githubusercontent.com/3323310/208028713-15b4438a-9408-4921-b82a-c596d27518f4.png">
-
-#### Show checkout when guest checkout is disabled, but account creation is enabled
-
-1. Create a test page and add the Checkout block to it.
-2. Head over to `/wp-admin/admin.php?page=wc-settings&tab=account`.
-3. Deactivate the option `Guest checkout` → `Allow customers to place orders without an account`.
-4. Activate the option `Account creation` → `Allow customers to create an account during checkout`.
-5. Open the frontend in an incognito window and ensure that you're not accidentally logged in (from a previous test).
-6. Add a product to the cart and go to the test page with the Checkout block.
-7. Verify that the checkout form is visible.
-8. Place a test order and verify that a new account had been created. The order details shows the new account as a `Customer`:
-
-<img width="1014" alt="Screenshot 2022-12-16 at 12 37 07" src="https://user-images.githubusercontent.com/3323310/208029786-0b5d9b1d-f37b-47e7-862c-0c5ff5975ebe.png">
-
-#### Show checkout when guest checkout and account creation are enabled, but don't create account
-
-1. Create a test page and add the Checkout block to it.
-2. Head over to `/wp-admin/admin.php?page=wc-settings&tab=account`.
-3. Activate the option `Guest checkout` → `Allow customers to place orders without an account`.
-4. Activate the option `Account creation` → `Allow customers to create an account during checkout`.
-5. Open the frontend in an incognito window and ensure that you're not accidentally logged in (from a previous test).
-6. Add a product to the cart and go to the test page with the Checkout block.
-7. Verify that the checkout form is visible.
-8. Verify that the checkbox `Create an account?` is not checked.
-9. Place a test order and verify that no account had been created. The order details show `Guest` as a `Customer`.
-
-<img width="1011" alt="Screenshot 2022-12-16 at 12 26 59" src="https://user-images.githubusercontent.com/3323310/208028713-15b4438a-9408-4921-b82a-c596d27518f4.png">
-
-#### Show checkout when guest checkout and account creation are enabled, and create account
-
-1. Create a test page and add the Checkout block to it.
-2. Head over to `/wp-admin/admin.php?page=wc-settings&tab=account`.
-3. Activate the option `Guest checkout` → `Allow customers to place orders without an account`.
-4. Activate the option `Account creation` → `Allow customers to create an account during checkout`.
-5. Open the frontend in an incognito window and ensure that you're not accidentally logged in (from a previous test).
-6. Add a product to the cart and go to the test page with the Checkout block.
-7. Verify that the checkout form is visible.
-8. Verify that the checkbox `Create an account?` is checked.
-9. Place a test order and verify that a new account had been created. The order details shows the new account as a `Customer`:
-
-<img width="1014" alt="Screenshot 2022-12-16 at 12 37 07" src="https://user-images.githubusercontent.com/3323310/208029786-0b5d9b1d-f37b-47e7-862c-0c5ff5975ebe.png">
-
-#### Verify that display logic is in sync
-
-1. Execute the previous test cases again, both with the classic checkout and the Checkout block.
-2. Do not place an order, but verify that the display logic of the login link respectively the checkout form is in sync.
-
-### Filter by Rating Block > Display a notice in the editor if the store has no products with ratings([7763](https://github.com/woocommerce/woocommerce-blocks/pull/7763))
-
-#### Screenshots
-
-| Before | After |
-| --------------------------------------------------------------------------------------------------------------------------------------------------------------------- | --------------------------------------------------------------------------------------------------------------------------------------------------------------------- |
-| <img width="449" alt="Screenshot 2022-11-28 at 09 22 36" src="https://user-images.githubusercontent.com/15730971/204228764-f4d71fed-7690-49ac-9afc-4223beedcab6.png"> | <img width="651" alt="Screenshot 2022-12-08 at 12 55 11" src="https://user-images.githubusercontent.com/15730971/206440623-1e1ca907-ba97-4906-bd48-9cfaecca87ed.png"> |
-
-#### Testing
-
-1. Make sure your store doesn't have any products with ratings.
-2. Open the editor and add a Filter by Rating block.
-3. Make sure a notice is displayed informing there are no products with ratings available, as demonstrated on the screenshot shared here on this PR. Also, ensure the dummy list with default product ratings is displayed below the notice.
-4. Now, add a rating to any product in your store.
-5. Refresh the editor and make sure the notice is replaced with the expected value:
-
-<img width="237" alt="Screenshot 2022-11-28 at 09 41 39" src="https://user-images.githubusercontent.com/15730971/204232281-a4878a90-1ad9-4e45-9af3-3aa5de5fb6fe.png">
-
-6. On the front end, ensure the filter by rating works as expected and without any changes.
-
-### Prevent invalid data being pushed to the server when validating fields on the checkout. ([7755](https://github.com/woocommerce/woocommerce-blocks/pull/7755))
-
-1. Make sure you're logged in so the field is populated with a valid email address e.g. `test@test.com`
-2. Remove the .com part so it's invalid: `test@test`
-3. Wait a few moments—no errors should appear.
-4. Click out of the field. An inline validation error should appear.
-
-### Product Query: Add Product Visibility support. ([7951](https://github.com/woocommerce/woocommerce-blocks/pull/7951))
-
-0. Use the sample product data provided by WooCommerce.
-1. On a new page, add the `Products (Beta)` block and `[recent_products]` shortcode block.
-2. Change the layout of the `Products (Beta)` to 4 products per row x 3 rows.
-3. Change the popular preset to `Newest`.
-4. Save the page and view it in a new tab.
-5. See the products inside the `Products (Beta)` block (the front end and the editor) and the Recent Products shortcode are the same.
-
-### Remove account creation setting from Checkout block. ([7941](https://github.com/woocommerce/woocommerce-blocks/pull/7941))
-
-1. Create a test page and add the Checkout block.
-2. Select the `Contact Information` inner block.
-3. Verify that the `Allow shoppers to sign up for a user account during checkout` setting is no longer visible.
-4. Verify that a notification with a link to the account settings in WooCommerce core is visible in the sidebar.
-5. Go to the frontend and add a product to the cart.
-6. Go to the checkout and place the order.
-7. Verify that the order can be placed, and this PR does not break the Checkout block.
-
-### Enable merchants to adjust the label of the `Place Order` button according to their needs. ([7843](https://github.com/woocommerce/woocommerce-blocks/pull/7843))
-
-#### Filter and merchant value
-
-> This test should verify that the filter value overwrites the merchant value.
-
-1. Create a test page and add the Checkout block to it.
-2. Install and activate the [Simple Custom CSS and JS](https://wordpress.org/plugins/custom-css-js/) plugin.
-3. Head over to `/wp-admin/edit.php?post_type=custom-css-js` and add the following JS code snippet:
-
-```js
-const label = () => 'Pay now';
-const { __experimentalRegisterCheckoutFilters } = window.wc.blocksCheckout;
-__experimentalRegisterCheckoutFilters( 'custom-place-order-button-label', {
- placeOrderButtonLabel: label,
-} );
-```
-
-4. Head over to the Checkout block and change the label of the `Place Order` button to `Place Order Now`.
-5. Head over to the frontend, add a product to the cart and open the page with the Checkout block.
-6. Verify that the button label says `Pay now`.
-
-#### Payment method and merchant value
-
-> This test should verify that the payment method value overwrites the merchant value for the corresponding payment method, but that the merchant value is visible for other payment methods.
-
-1. Head over to `/wp-admin/edit.php?post_type=custom-css-js` and deactivate the JS code snippet of the previous test.
-2. Install and activate the [Code Snippets](https://wordpress.org/plugins/code-snippets/) plugin.
-3. Head over to `/wp-admin/admin.php?page=snippets` and add the following PHP code snippet:
-
-```php
-add_filter( 'woocommerce_should_load_paypal_standard', '__return_true' );
-```
-
-4. Head over to `/wp-admin/admin.php?page=wc-settings&tab=checkout§ion=paypal` and select the options `Enable PayPal Standard` and ` Enable PayPal sandbox`.
-5. Head over to the Checkout block and verify that the label of the `Place Order` button still says `Place Order Now`.
-6. Head over to the frontend, add a product to the cart and open the page with the Checkout block.
-7. Select the payment method `PayPal`.
-8. Verify that the button label says `Proceed to PayPal`.
-9. Select a payment method apart from `PayPal`.
-10. Verify that the button label says `Place Order Now`.
-
-#### Only merchant value
-
-> This test should verify that the merchant value is visible.
-
-1. Head over to `/wp-admin/admin.php?page=wc-settings&tab=checkout` and deactivate the payment method `PayPal Standard`.
-2. Head over to the Checkout block and verify that the label of the `Place Order` button still says `Place Order Now`.
-3. Head over to the frontend, add a product to the cart and open the page with the Checkout block.
-4. Verify that for any selected payment method the label of the `Place Order` button says `Place Order Now`.
-
-#### Default value
-
-> Test that the default value remains visible in the frontend when no filter, payment method or merchant value is available, and that the button shows the placeholder text `Place Order` in the editor.
-
-1. Head over to the Checkout block, empty the label of the `Place Order` button and save the page.
-2. Verify that the placeholder text `Place Order` is visible.
-3. Head over to the frontend, add a product to the cart and open the page with the Checkout block.
-4. Verify that the label of the `Place Order` buttons says `Place Order` even though the button is empty in the editor.
-
-### Enable merchants to edit the button labels within the Mini Cart block. ([7817](https://github.com/woocommerce/woocommerce-blocks/pull/7817))
-
-1. Activate a FSE theme, e.g. Twenty Twenty-Three.
-2. Go to `/wp-admin/site-editor.php?postType=wp_template_part`
-3. Open the Mini Cart template.
-4. Open the list view.
-5. Navigate to `Mini Cart Contents » Filled Mini Cart view » Mini Cart Footer`.
-6. Adjust the `View my cart` and `Go to checkout` labels.
-7. Navigate to `Empty Mini Cart view » Mini Cart Shopping Button`.
-8. Adjust the `Start shopping` label.
-9. Add the Mini Cart block to one of the other templates, e.g. the header template.
-10. Go to the frontend and open the Mini Cart block.
-11. Verify that the expected `Start shopping` label is visible, when there are no products in the cart.
-12. Verify that the expected `View my cart` and `Go to checkout` labels are visible, when there are products in the cart.
-
-### Fix Mini Cart icon color in Global Styles blocks customizer. ([7762](https://github.com/woocommerce/woocommerce-blocks/pull/7762))
-
-#### Screenshots
-
-| Before | After |
-| ------------------------------------------------------------------------------------------------------------------------------------------- | ------------------------------------------------------------------------------------------------------------------------------------------- |
-| 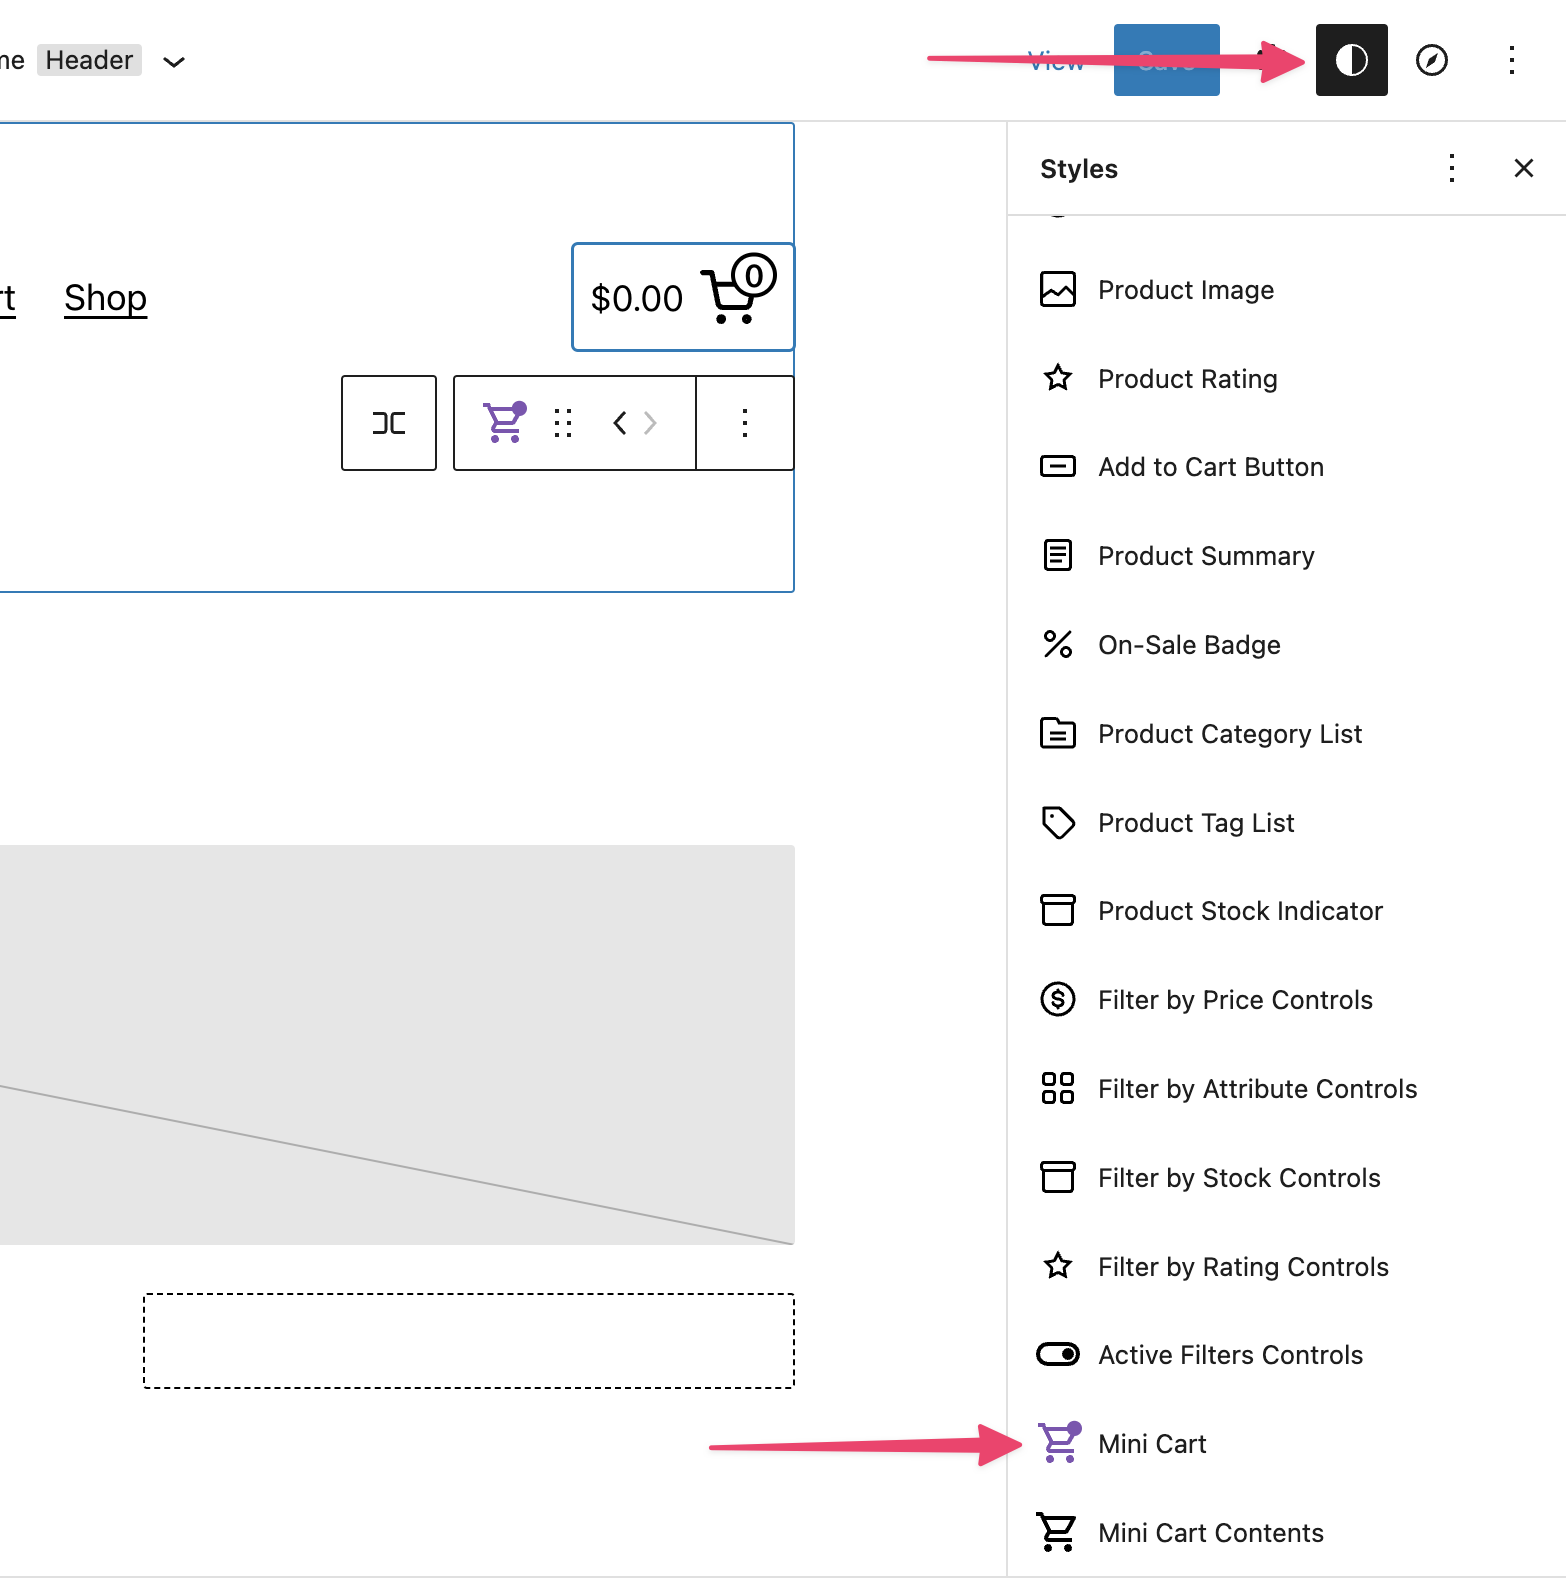 | 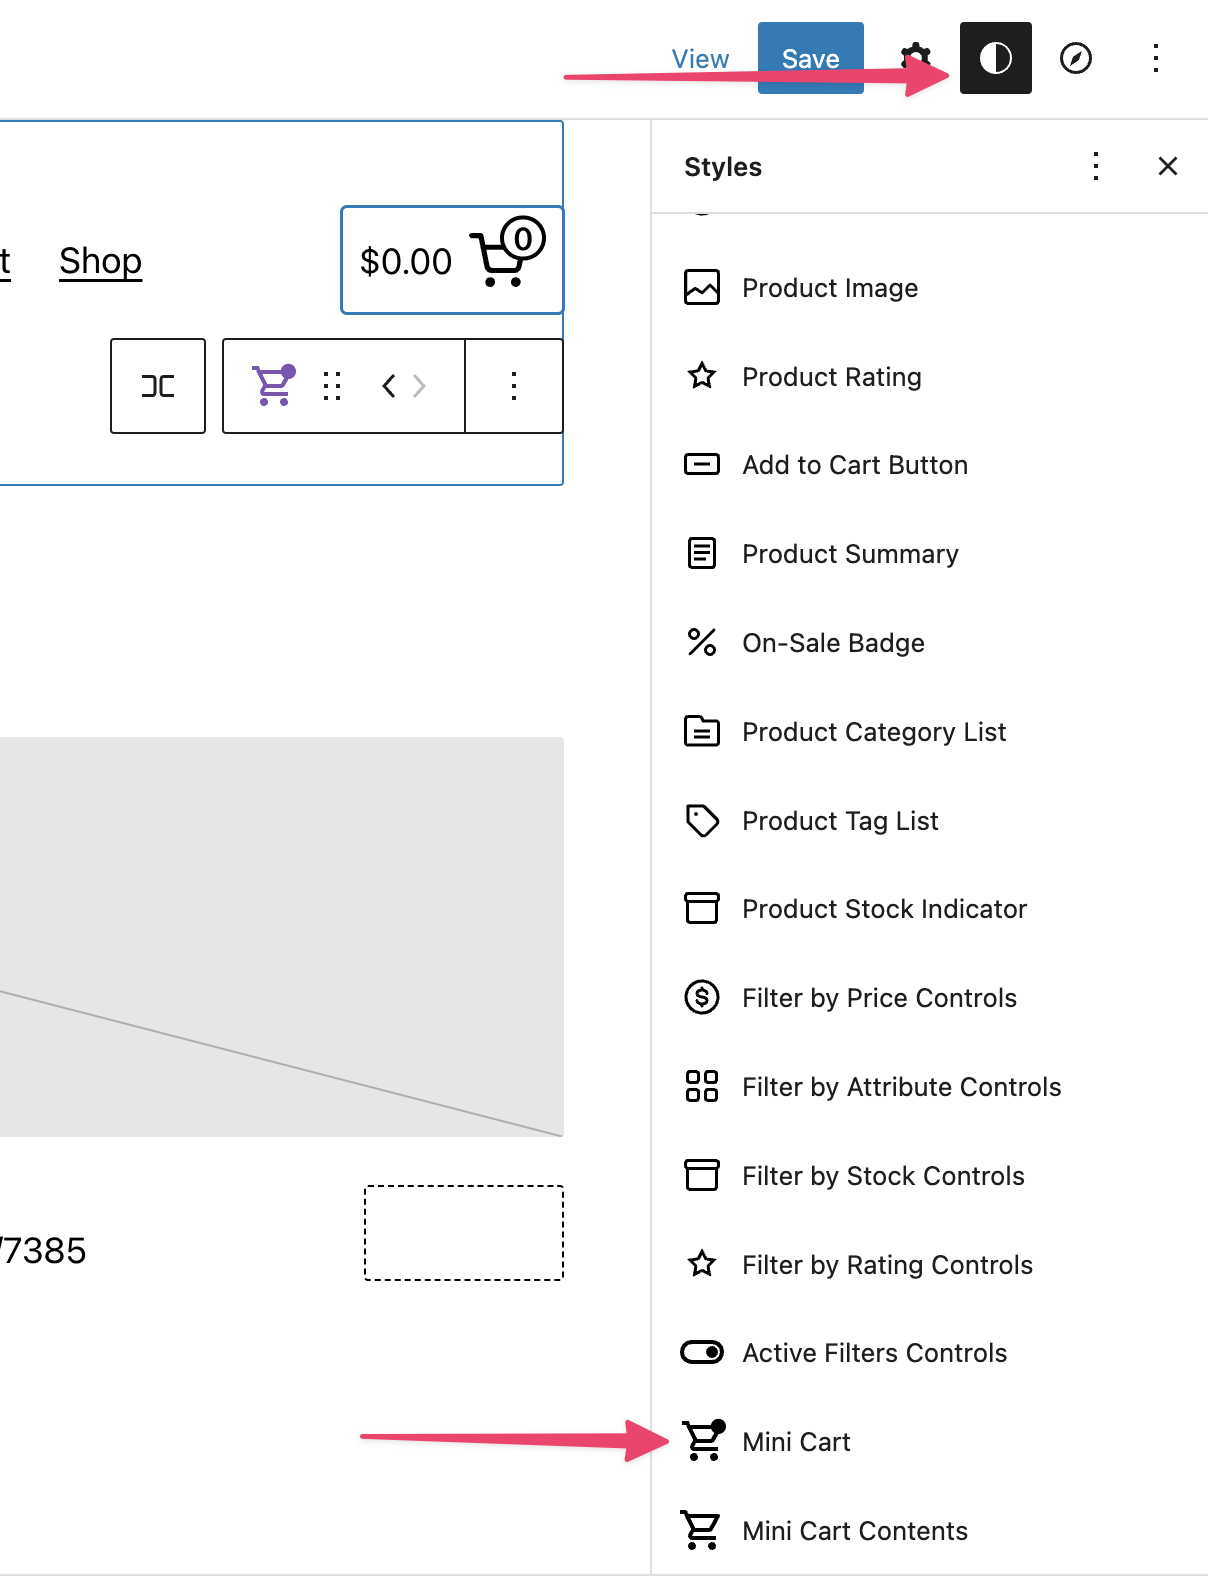 |
-
-#### Testing
-
-1. Make sure you have a blocks theme active (like Twenty Twenty-Two).
-2. Navigate to Appearance > Editor (Beta) and go to the Global Styles customizer (click on the Styles button on the top toolbar and then the Blocks section towards the bottom - see screenshot below).
-3. Scroll down to view the Mini Cart block and confirm the icon color is back like all of the others in the list.
-
-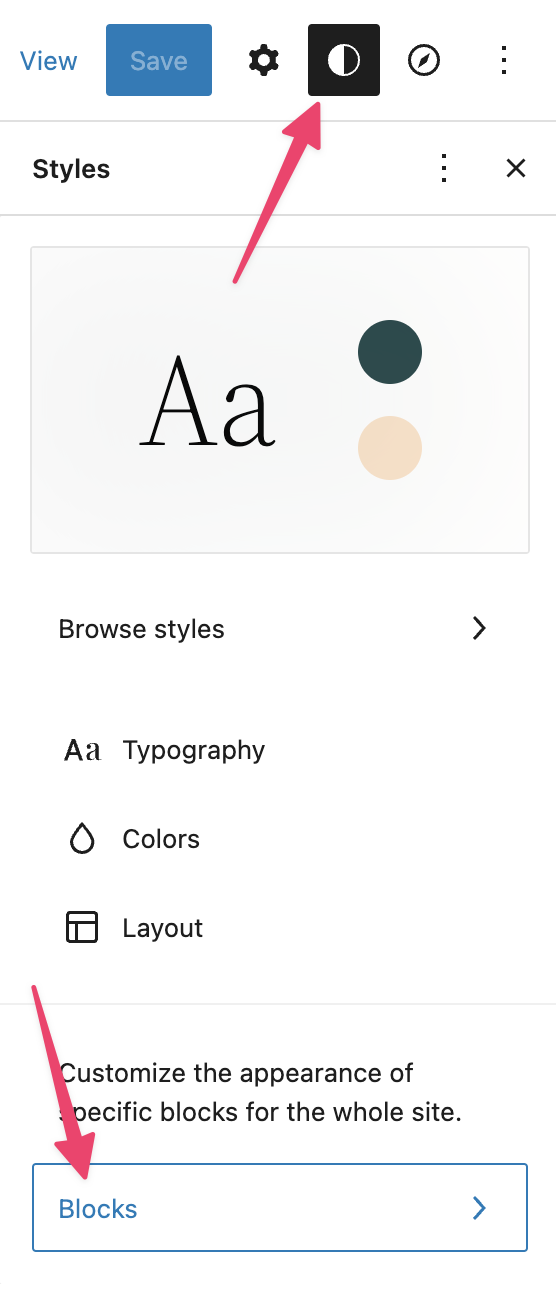
-
-### Enable merchants to adjust the label of the Proceed to Checkout button according to their needs. ([7733](https://github.com/woocommerce/woocommerce-blocks/pull/7733))
-
-1. Open up the Cart page in the editor
-2. Click on the `Proceed to Checkout` button. You should be able to edit the text of this button
-3. Edit the text and press "Update"
-4. Visit the Cart page on the front end and make sure the changes are visible
-
-### Remove hidden autocomplete fields in checkout. ([7953](https://github.com/woocommerce/woocommerce-blocks/pull/7953))
-
-Prerequisite: Browser must have saved addresses that can be used to autocomplete forms. Preferably 2 from different counties.
-
-1. On a new checkout, trigger autocomplete in the name field.
-2. Select the address.
-3. Ensure country and state fields are populated.
-4. State should be a select for countries with states (US), or a text input if not.
-
-### Show notices to the shopper if an item in the cart's quantity is updated automatically. ([7938](https://github.com/woocommerce/woocommerce-blocks/pull/7938))
-
-1. Add a coupon to your store.
-2. Add some items to your cart and go to the Cart block.
-3. Test changing the quantities of some items.
-4. Test applying the coupon, it should work and you should see the discount applied.
-5. Try applying a nonexistent coupon, you should see an error.
-6. Ensure removing an item from your cart works correctly.
-7. Continue to checkout and ensure placing the order works OK.
-8. Edit a page and add the All Products Block. Ensure it loads correctly in the editor and in the front-end.
-9. Try adding products to your cart from the All Products Block.
diff --git a/plugins/woocommerce/client/blocks/docs/internal-developers/testing/releases/930.md b/plugins/woocommerce/client/blocks/docs/internal-developers/testing/releases/930.md
deleted file mode 100644
index a15cceab48f..00000000000
--- a/plugins/woocommerce/client/blocks/docs/internal-developers/testing/releases/930.md
+++ /dev/null
@@ -1,326 +0,0 @@
-# Testing notes and ZIP for release 9.3.0
-
-Zip file for testing: [woocommerce-gutenberg-products-block.zip](https://github.com/woocommerce/woocommerce-blocks/files/10336608/woocommerce-gutenberg-products-block.zip)
-
-
-## load all JSON translation files correctly ([8034](https://github.com/woocommerce/woocommerce-blocks/pull/8034))
-
-1. Switch to Dutch in your website.
-2. Make sure all translation is working fine (in Shipping, summary items, and express payment).
-
-## Disable Rate Limiting when editing Blocks in admin ([7934](https://github.com/woocommerce/woocommerce-blocks/pull/7934))
-
-### Screenshots
-
-<!-- If your change has a visual component, add a screenshot here. A "before" screenshot would also be helpful. -->
-
-| Before | After |
-| ------ | ----- |
-| <img width="654" alt="image" src="https://user-images.githubusercontent.com/14235870/209948677-e2f2c68d-9397-4a4a-8597-491baa91221d.png"> | <img width="731" alt="image" src="https://user-images.githubusercontent.com/14235870/209966171-58b50d33-a814-44c6-b553-e198d07b89cc.png"> |
-
-### Testing
-
-1. Enable the [rate limiting filter for Store API](https://github.com/woocommerce/woocommerce-blocks/blob/trunk/src/StoreApi/docs/rate-limiting.md). You can use the [Code Snippets plugin](https://wordpress.org/plugins/code-snippets/) to add the following PHP script:
-
-```PHP
- add_filter( 'woocommerce_store_api_rate_limit_options', function() {
- return [
- 'enabled' => true, // enables/disables Rate Limiting. Default: false
- 'proxy_support' => false, // enables/disables Proxy support. Default: false
- 'limit' => 1, // limit of request per timeframe. Default: 25
- 'seconds' => 500, // timeframe in seconds. Default: 10
- ];
- } );
-```
-
-2. Create a product related page (e.g., Hand-picked Products)
-3. Update the block to send some requests to the Store API. In the case of the `Hand-picked Products` block, clicking on `Edit selected products` should do the work:
-
-<img width="654" alt="image" src="https://user-images.githubusercontent.com/14235870/209950192-33df0c22-f9ac-4be2-8dc6-886288c531fe.png">
-
-4. Make sure the block is working as expected and you aren't getting any rate-limiting warnings.
-5. Open your store in a new window using your browser's incognito mode. Add a product and go to the Cart Block page
-6. Increase or decrease the product quantity couple of times. You can see failed rate limited request in the browser dev tools under `Network` tab, or you can reload the page to see the last saved product quantity value. See recording:
- <https://user-images.githubusercontent.com/14235870/209964938-36018e19-5a0c-414a-8b8b-14683bf7617c.mov>
-
-7. Repeat step 6 with a customer role account logged in. You should get the same result from step 6.
-
-
-## Ensure filter blocks are not reloaded every time they are selected in the editor ([8002](https://github.com/woocommerce/woocommerce-blocks/pull/8002))
-
-### Screenshots
-
-<!-- If your change has a visual component, add a screenshot here. A "before" screenshot would also be helpful. -->
-| Before | After |
-| ------ | ----- |
-| <img src="https://user-images.githubusercontent.com/15730971/208895281-abd1d784-11cd-497f-9a0d-a701e3dfd9f6.gif" width="380px"/> | <img src="https://user-images.githubusercontent.com/15730971/208894840-5fed09d6-2c5c-4da2-9ee3-370068709309.gif" width="380px"/> |
-
-### Testing
-
-1. Create a new post, add the following blocks: Filter by rating, filter by stock, filter by attribute, filter by price, Products (Beta), and publish it.
-3. Access the post as a regular customer would. Ensure nothing has changed, and all filters are working as expected.
-4. Now edit the post: ensure all components are normally loaded in the editor. When you click on them, ensure that you see the same behavior as demonstrated on [this gif](https://user-images.githubusercontent.com/15730971/208894840-5fed09d6-2c5c-4da2-9ee3-370068709309.gif) shared earlier on this PR (no preloaders should be displayed).
-
-## Product Query: create variation of core/post-template as a Product Query inner block ([7838](https://github.com/woocommerce/woocommerce-blocks/pull/7838))
-
-1. Add a Product Query block.
-2. Ensure that the “Product Template” block shows up in the tree view instead of the “Post Template”.
-
-## Highlight incompatible payment gateways ([7412](https://github.com/woocommerce/woocommerce-blocks/pull/7412))
-
-### Screenshots
-
-#### Highlight incompatible payment gateways using a sidebar notice
-
-<table>
-<tr>
-<td>Before:
-<br><br>
-
-<img width="1294" alt="image" src="https://user-images.githubusercontent.com/14235870/208879962-334b7398-c942-4c7f-9dbb-7997c75ae68e.png">
-</td>
-<td>After:
-<br><br>
-
-<img width="1295" alt="image" src="https://user-images.githubusercontent.com/14235870/209318806-4d3b0e16-bb97-4a51-8818-3529b0559be4.png">
-</td>
-</tr>
-</table>
-
-#### Highlight incompatible payment gateways within the `Payment Options Block`
-
-<table>
-<tr>
-<td>Before:
-<br><br>
-
-<img width="1295" alt="image" src="https://user-images.githubusercontent.com/14235870/208880696-905c1d6a-9332-4450-bce2-7835df2c8071.png">
-</td>
-<td>After:
-<br><br>
-
-<img width="1277" alt="image" src="https://user-images.githubusercontent.com/14235870/208877521-be381930-4933-445b-9aa8-a33c2290b749.png">
-</td>
-</tr>
-</table>
-
-### Testing
-
-#### Highlight incompatible payment gateways using a sidebar notice
-
-1. Add incompatible payment gateways with the C&C Blocks (e.g., Paypal, Klarna Payments). You will need to configure them to be detected and used by WooCommerce.
-2. Create a new page and add the `Checkout Block`
-3. Verify there is a notice in the sidebar displaying the list of incompatible gateways. The `make as default` & `sidebar compatibility` notices should be hidden while the `incompatible gateways` notice is displayed.
-
-<img width="1295" alt="image" src="https://user-images.githubusercontent.com/14235870/209318806-4d3b0e16-bb97-4a51-8818-3529b0559be4.png">
-
-4. Select each inner block in the Checkout Blocks' `List View` to ensure our notice is displayed for each one.
-5. Dismiss the `incompatible gateways` notice by clicking the top right `X` button. The `make as default` & `sidebar compatibility` notices should be visible again.
-
-<img width="1300" alt="image" src="https://user-images.githubusercontent.com/14235870/208722992-6d0237f2-5f6c-4514-83d5-66bbdb2333c0.png">
-
-6. Do the same test from step 2 to 5 using the `Cart Block`
-
-#### Highlight incompatible payment gateways within the `Payment Options Block`
-
-1. If it's not done already, add incompatible payment gateways with the C&C Blocks (e.g., Paypal, Klarna Payments)
-2. Create a new page and add the `Checkout Block`
-3. Select the `Payment Options Block`, and check the list of available payment gateways under `Methods` in the sidebar. The incompatible payment gateways should be highlighted (i.e., `Incompatible with block-based checkout`)
-
-<img width="1277" alt="image" src="https://user-images.githubusercontent.com/14235870/208877521-be381930-4933-445b-9aa8-a33c2290b749.png">
-
-## Display "Add review" link if there's no product rating ([7929](https://github.com/woocommerce/woocommerce-blocks/pull/7929))
-
-### Screenshots
-
-| Case | Before | After |
-| ------ | ----- |----- |
-| Products (Editor) | <img width="592" alt="image" src="https://user-images.githubusercontent.com/20098064/207905785-d89dbc36-7c4f-4f28-819d-0f95b20ecf7d.png"> | <img width="598" alt="image" src="https://user-images.githubusercontent.com/20098064/207904856-f0aafd72-12f4-4e68-9f8a-ae5c967d3bcc.png"> |
-| Products (Frontend) | <img width="705" alt="image" src="https://user-images.githubusercontent.com/20098064/207905847-e7493b7c-9544-4f77-92e6-f49a1ea21070.png"> | <img width="705" alt="image" src="https://user-images.githubusercontent.com/20098064/207905150-ae4ed20a-ac07-466f-a5e1-526b0a213e63.png"> |
-| All Products (Editor) | <img width="611" alt="image" src="https://user-images.githubusercontent.com/20098064/207905913-b8a2c225-c554-4c52-bb65-e0f333d008be.png"> | <img width="601" alt="image" src="https://user-images.githubusercontent.com/20098064/207905315-c9588233-9ab0-48db-8a20-feea35a9816e.png"> |
-| All Products (Frontend) | <img width="705" alt="image" src="https://user-images.githubusercontent.com/20098064/207905998-4d8c4481-278f-47ad-9f30-b8ac610e99cc.png"> | <img width="703" alt="image" src="https://user-images.githubusercontent.com/20098064/207905450-b5d8ad0d-1405-4fe8-a84c-5cc00de3b0bc.png"> |
-
-### Testing
-
-Prerequisites:
-
-- make sure you have at least one product **with** and at least one product **without** rating
-
-### All Products and Products blocks
-
-Steps:
-
-1. Go to Editor and add _All Products_ block
-2. Make sure Rating is included in product layout (Pencil icon > Use inserter > Add "Product Rating" block)
-3. Save the template
-
-**Expected:**
-
-- Both products, _with_ and _without_ rating, have the same layout.
-- Products with no rating have "Add review" link
-- Link is not clickable in Editor
-
-4. Go to the Frontend
-
-**Expected:**
-
-- Both products, _with_ and _without_ rating, have the same layout.
-- Products with no rating have "Add review" link
-- Link is interactive and redirects to Review section of the product
-
-**Repeat the same for the Products block!**
-
-### Regression testing - Product view
-
-1. Go to product page of the product without rating.
-
-**Expected:**
-
-- There's no "Add review" link instead or rating stars
-
-### Regression testing - Rating alignment
-
-1. Check the Alignment settings in both: _Products_ for both: stars and link!
-<img width="300" alt="image" src="https://user-images.githubusercontent.com/20098064/208086484-3241f878-c550-454c-9749-425e4c54e32c.png">
-
-**Expected:**
-
-- Alignment is respected in Editor and Frontend for all: left, center and right alignment
-
-### Regression testing - Filer by Rating
-
-1. Add Filter by Rating block
-2. Save and go to Frontend
-
-**Expected:**
-
-- There's no "loading" placeholder in place of stars in the Filter by Rating
-
-## Don't check for validation on pushChange ([8029](https://github.com/woocommerce/woocommerce-blocks/pull/8029))
-
-1. In Checkout, turn terms and condition block into a checkbox.
-2. Go to Checkout, fill out your address, notice that shipping rates update fine and your request makes it to the server.
-3. Check the terms and condition block.
-4. Back to the form, you should see the same behavior.
-
-## Use Woo Blocks instead Woo core translation within the Checkout order Summary block ([7995](https://github.com/woocommerce/woocommerce-blocks/pull/7995))
-
-### Screenshots
-
-<table>
-<tr>
-<td>Before:
-<br><br>
-
-<img width="461" alt="Screenshot 2022-12-20 at 19 41 01" src="https://user-images.githubusercontent.com/3323310/208670071-3c978be7-31bf-458c-9a38-2a82d4e1c1c8.png">
-</td>
-<td>After:
-<br><br>
-
-<img width="465" alt="Screenshot 2022-12-20 at 19 41 59" src="https://user-images.githubusercontent.com/3323310/208670082-9df5db6a-414b-4c26-89fb-39d869c35d0f.png">
-</td>
-</tr>
-</table>
-
-### Testing
-
-1. Head over to `/wp-admin/options-general.php` and change the site language to Dutch.
-2. Head over to `/wp-admin/update-core.php` and fetch the translations: `Vertalingen → Vertalingen updaten`
-3. Create a test page and add the Checkout block to it.
-4. Head over to the frontend and add a product to the cart.
-5. Head over to the Checkout block and verify that the title of the shipping section shows `Verzending` instead of `Verzendmethoden`.
-
-## Add Customer account to patterns ([7944](https://github.com/woocommerce/woocommerce-blocks/pull/7944))
-
-1. Create a new page and add all the `WooCommerce Header` patterns in their two versions (light and dark).
-2. Save the page and check the `Customer Account` block shows as expected on the designs:
-CdRRBQ50zJiDvnY3AbDiXd-fi-76%3A9726
-4. Repeat for all the `WooCommerce Footer` patterns (light and dark).
-
-## Add 'Customer Account' block ([7876](https://github.com/woocommerce/woocommerce-blocks/pull/7876))
-
-1. Create a new page and add the `Customer Account` block.
-2. Click on the block to open the sidebar settings and make sure there's a link `Manage account settings` that goes to the `Accounts & Privacy` WC admin page.
-3. Check that you see the `Display` section on the settings and that you can change the display style to `Icon-only`, `Text-only` and `Icon and text` and that you can choose between the two icon styles.
-4. Change the display options, save the page, and make sure all these configurations are correctly rendered in the editor and front end.
-
-## Mini Cart block - added notice support ([7234](https://github.com/woocommerce/woocommerce-blocks/pull/7234))
-
-### Screenshots
-
-<!-- If your change has a visual component, add a screenshot here. A "before" screenshot would also be helpful. -->
-
-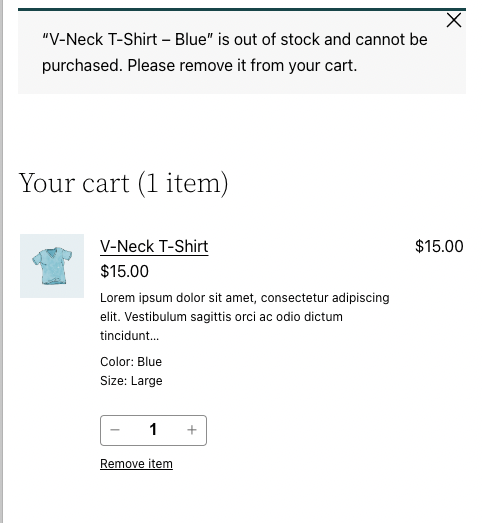
-
-### Testing
-
-1. Open the FSE editor and add the Mini Cart Block in the header. Save.
-2. Go to the frontend and add the product to the Cart. Be sure that on Mini Cart Block any "notice" is visible on top.
-3. On the editor side, edit the product that you added and set it as out of stock. Save.
-4. On the frontend side, refresh the page. Go to the Cart page and see the notice.
-5. Open the Mini Cart block and be sure that the notice is visible.
-
-## Refactor View Switcher to use Block Attributes ([8006](https://github.com/woocommerce/woocommerce-blocks/pull/8006))
-
-1. Go to the page containing the Cart Block
-2. Click the Cart Block/Inner Blocks within the Cart Block
-3. Check that the view switcher is visible
-4. Change to "empty cart" view
-5. View should change and the parent cart block should be selected in the UI
-6. Repeat to switch back to the filled cart view
-
-After testing the cart block, repeat the above tests for the mini cart block. With a block-based theme go here:
-
-```bash
-wp-admin/site-editor.php?postType=wp_template_part&postId=woocommerce%2Fwoocommerce%2F%2Fmini-cart
-```
-
-## Remove opinionated styles from Button component on TT3 and Zaino themes ([7992](https://github.com/woocommerce/woocommerce-blocks/pull/7992))
-
-### Screenshots
-
-Screenshots are from the Mini Cart block, but these changes also impact the Cart and Checkout blocks.
-Theme | Before | After
---- | --- | ---
-Storefront | 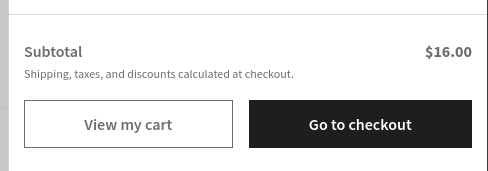 | 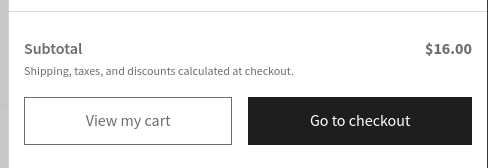
-Twenty Twenty One |  | 
-Twenty Twenty Two |  | 
-Twenty Twenty Three (Canary) |  | 
-Twenty Twenty Three (Pilgrimage) | | 
-Twenty Twenty Three (Whisper) | 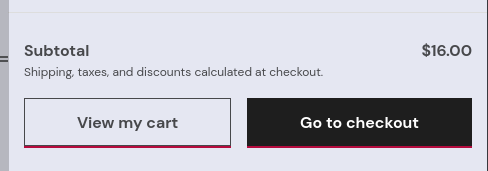 | 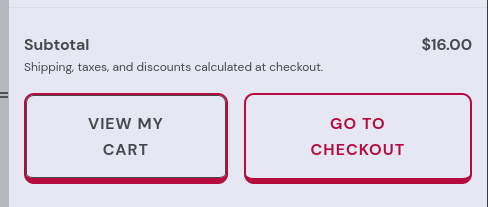
-Zaino | 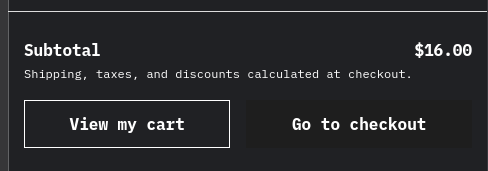| 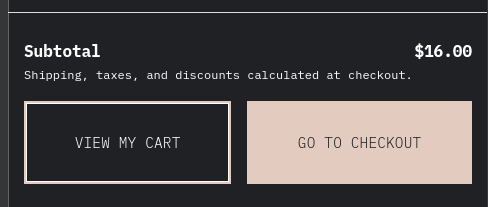
-
-### Testing
-
-**Preparation:**
-
-Create three posts, one with the Mini Cart block, another one with the Cart block and the last one with the Checkout block.
-
-**Test different themes:**
-
-1. Twenty Twenty Three:
- 1.1. Install it from here: <https://wordpress.org/themes/twentytwentythree/>
- 1.2. Go to the pages created in step 1 and verify the Mini Cart, Cart and Checkout buttons **follow** the theme styles.
- 1.3. Go to Appearance > Editor > Styles > Browse Styles and change between style variations. Verify the buttons follow the styles in all of them.
-
-2. Twenty Twenty Two (or another block theme):
- 2.1. Install it from here: <https://wordpress.org/themes/twentytwentytwo/>
- 2.2. Go to the pages created in step 1 and verify the Mini Cart, Cart and Checkout buttons **don't follow** the theme styles. Instead, they have opinionated styles.
-
-3. Storefront (or another classic theme):
- 3.1. Install it from here: <https://wordpress.org/themes/storefront/>
- 3.2. Go to the pages created in step 1 and verify the Mini Cart, Cart and Checkout buttons **don't follow** the theme styles. Instead, they have opinionated styles.
-
-## Cart Block > Ensure no console errors are displayed when an invalid coupon is applied ([7969](https://github.com/woocommerce/woocommerce-blocks/pull/7969))
-
-### Screenshots
-
-| Before | After |
-| ------ | ----- |
-|<img width="1758" alt="Screenshot 2022-12-16 at 14 43 16" src="https://user-images.githubusercontent.com/15730971/208111589-531648b0-4a2f-43e6-a645-3da2caaf9d9f.png"> | <img width="1750" alt="Screenshot 2022-12-16 at 14 41 17" src="https://user-images.githubusercontent.com/15730971/208111618-64e751b4-f583-4f6d-bfd0-bebb61584184.png"> |
-
-### Testing
-
-1. Add the Cart Block to a post/page and access it
-2. Apply a non-existent coupon
-3. Open the JS console on dev-tools and confirm no errors are listed.
diff --git a/plugins/woocommerce/client/blocks/docs/internal-developers/testing/releases/940.md b/plugins/woocommerce/client/blocks/docs/internal-developers/testing/releases/940.md
deleted file mode 100644
index ac0611af06f..00000000000
--- a/plugins/woocommerce/client/blocks/docs/internal-developers/testing/releases/940.md
+++ /dev/null
@@ -1,100 +0,0 @@
-# Testing notes and ZIP for release 9.4.0
-
-Zip file for testing: [woocommerce-gutenberg-products-block.zip](https://github.com/woocommerce/woocommerce-blocks/files/10433162/woocommerce-gutenberg-products-block.zip)
-
-## Feature plugin and package inclusion in WooCommerce
-
-### Update validation messages to reference the name of the invalid field. ([8143](https://github.com/woocommerce/woocommerce-blocks/pull/8143))
-
-1. Go to checkout with items in the cart.
-2. Focus onto a required field, type something, clear the input, then click outside the field.
-3. A validation message should appear, and it should state the name of the field in the message.
-
-### Add Local Pickup shipping method and its blocks. ([7433](https://github.com/woocommerce/woocommerce-blocks/pull/7433))
-
-1. A detailed testing guide exists in [docs/internal-developers/testing/cart-checkout/local-pickup.md](https://github.com/woocommerce/woocommerce-blocks/blob/b49573b91d37cff511c3fb3288e0458dbf0c582f/docs/internal-developers/testing/cart-checkout/local-pickup.md)
-
-### Product Elements: Change the color of product elements (variations of core blocks) icon blocks to match the color of the core blocks. ([8155](https://github.com/woocommerce/woocommerce-blocks/pull/8155))
-
-| Before | After |
-| ------ | ----- |
-|||
-
-1. Add the **Products** block to a page.
-2. Add (or just select if already present) the **Product Title** and **Product Summary** product elements.
-3. Make sure the icon color matches the color of the equivalent core blocks (Post Title and Post Summary).
-
-### Ensure the filter controls are consistently displayed in the editor. ([8079](https://github.com/woocommerce/woocommerce-blocks/pull/8079))
-
-
-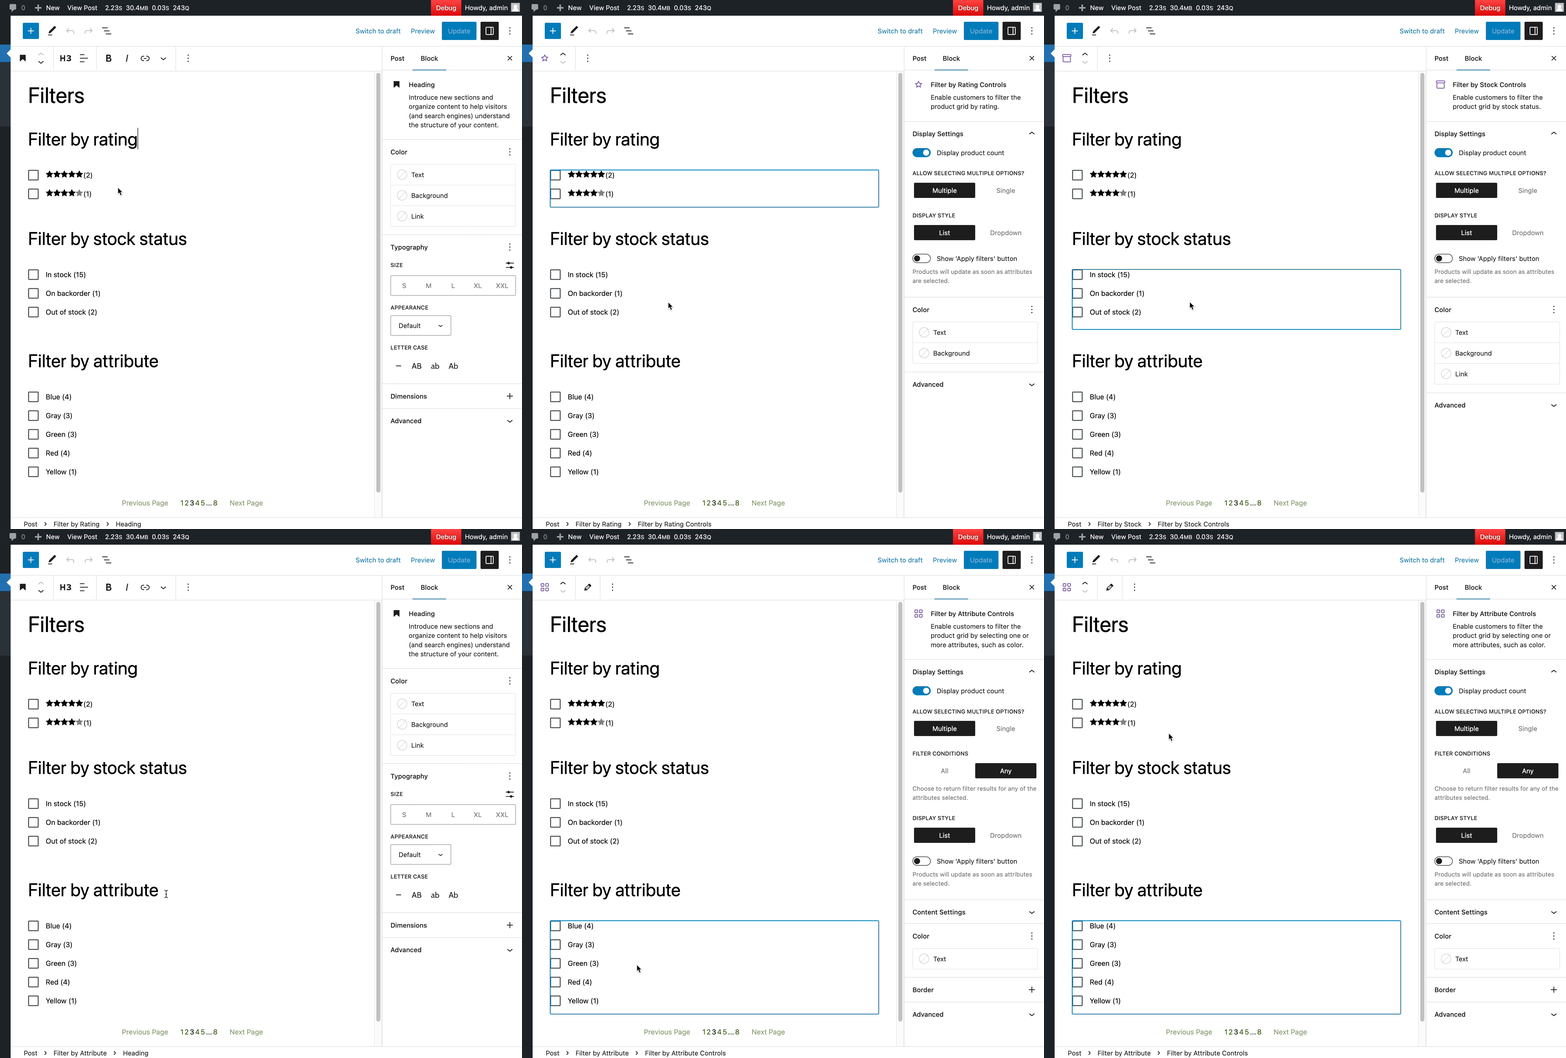
-
-1. Create a new post, add the following blocks: Filter by rating, filter by stock, filter by attribute, filter by price, Products (Beta), and publish it.
-2. Access the post as a regular customer would. Ensure nothing has changed, and all filters are working as expected.
-3. Now edit the post: ensure all components are normally loaded in the editor. When you click on them, ensure that you see the same behavior as demonstrated on this gif (no preloaders should be displayed).
-
-### Added context for aria-label on cart quantity controls. ([8099](https://github.com/woocommerce/woocommerce-blocks/pull/8099))
-
-1. Add some items to the cart.
-2. Using a screen reader, ensure it reads "increase/decrease quantity of " / "remove from your cart" on quantity controls, giving clear instructions on what item the amount on cart is being changed.
-
-### Ensure the Checkout Totals and Checkout Order Summary blocks cannot be removed from the Checkout block. ([7873](https://github.com/woocommerce/woocommerce-blocks/pull/7873))
-
-1. Add the Checkout block to a page and then open the List View in the Gutenberg editor.
-2. From the List View select the Checkout Totals Block, ensure you cannot remove it.
-3. Try to unlock it and remove it, ensure that this is not possible.
-4. Repeat for Checkout Order Summary block.
-
-### Convert sidebar layout component to TypeScript. ([7904](https://github.com/woocommerce/woocommerce-blocks/pull/7904))
-
-1. Add a Cart block to a page, and confirm sidebar is getting displayed properly with different screen sizes.
-2. Add a Checkout block to a page, and confirm sidebar is getting displayed properly with different screen sizes.
-
-### Attribute, Rating and Stock filters: Dropdown indicator icon display fix. ([8080](https://github.com/woocommerce/woocommerce-blocks/pull/8080))
-
-| Before | After |
-| ------ | ----- |
-|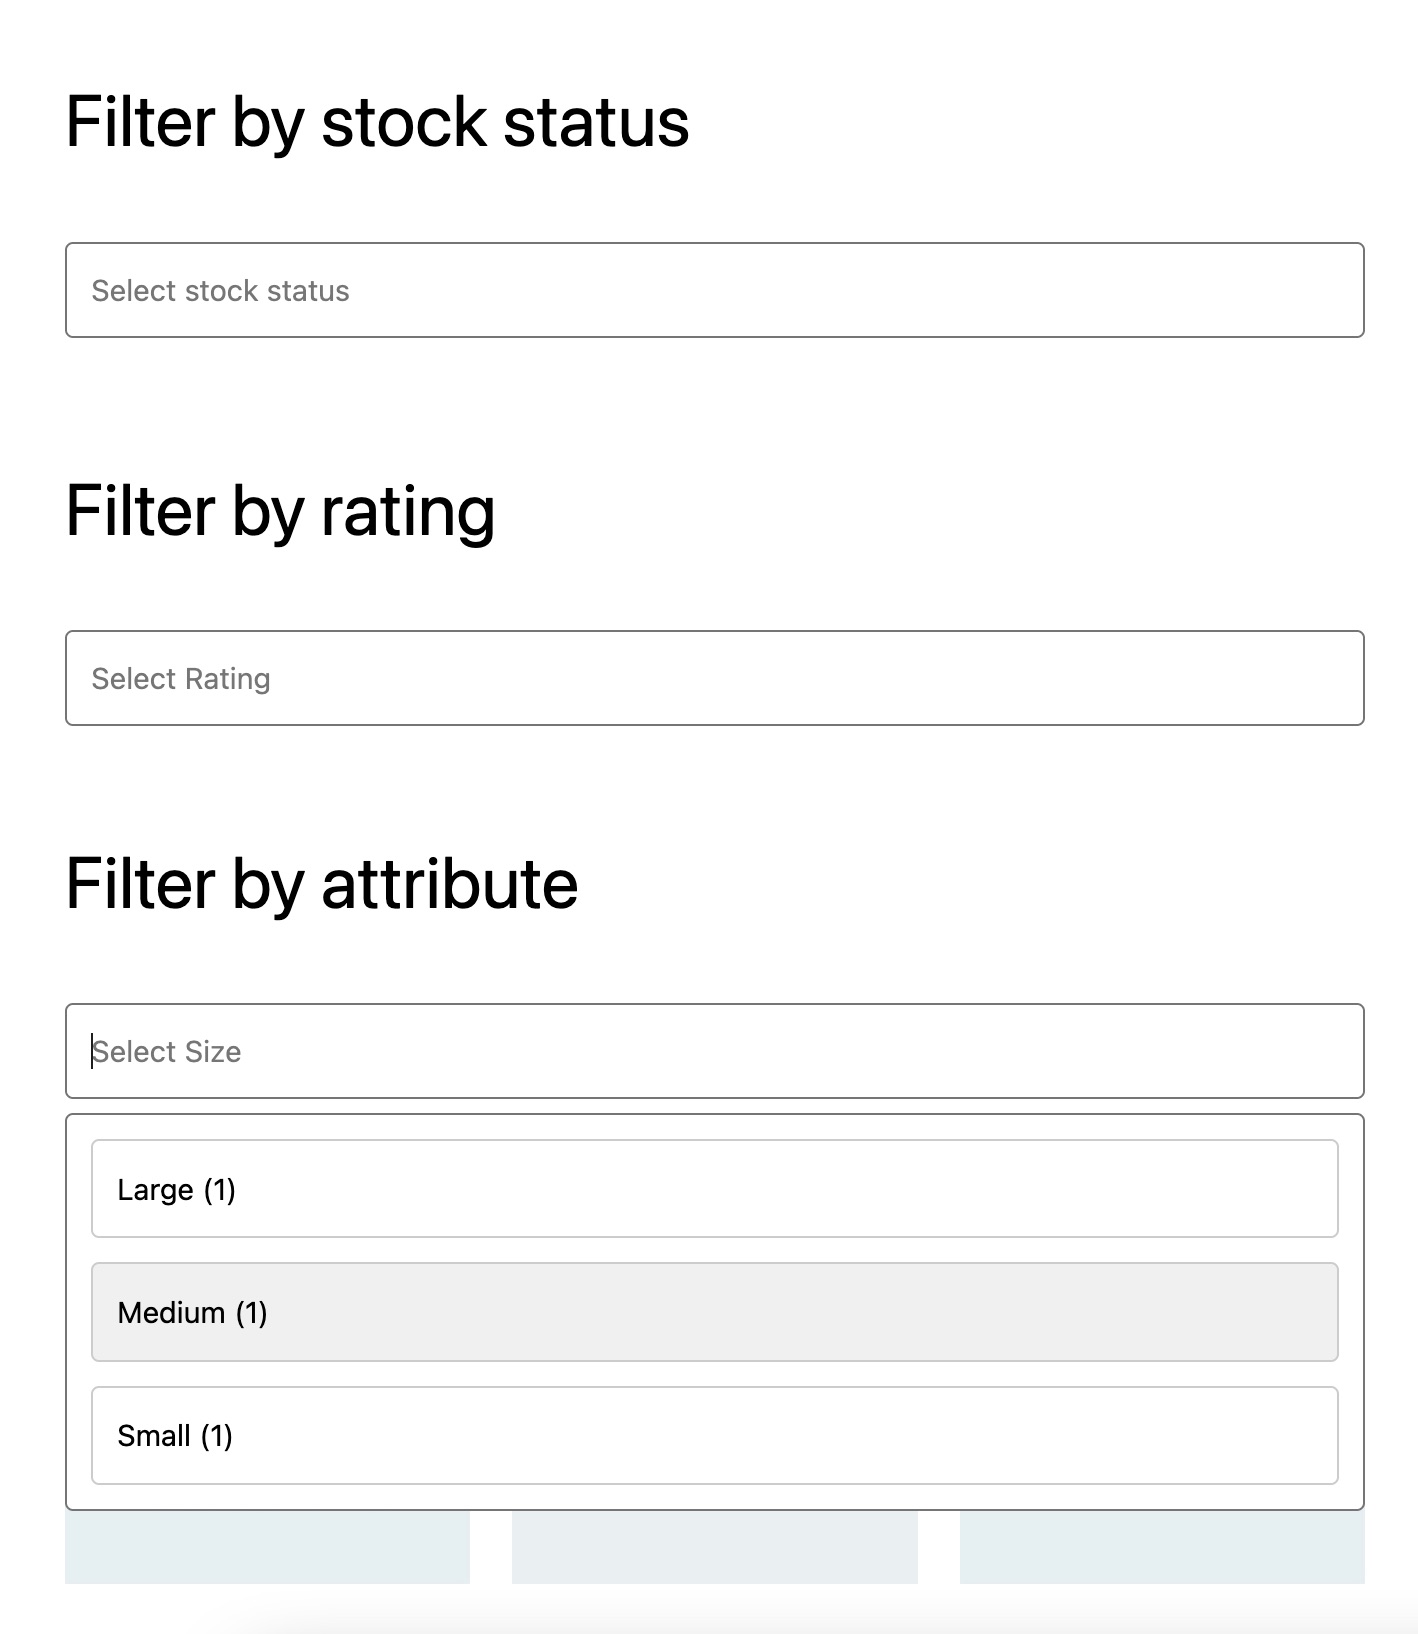||
-
-1. Add the Attribute, Rating and Stock filter blocks.
-2. Set the `Display Style` to `Dropdown` and `Allow selecting multiple options?` to `Single`.
-3. Ensure the dropdown chevron displays correctly both in the editor and the page.
-4. Ensure there's no conflict between the cancel 'x' icon and the chevron when dropdown options are selected.
-5. With the `Allow selecting multiple options?` set to `Multiple` test selecting all of the options and check if the chevron is correctly hidden.
-
-### Correctly detect compatible express payment methods. ([8201](https://github.com/woocommerce/woocommerce-blocks/pull/8201))
-
-#### Highlight incompatible payment gateways using a sidebar notice
-
-1. Add incompatible payment gateways with the C&C Blocks (e.g., Paypal, Klarna Payments). You will need to configure them to be detected and used by WooCommerce.
-2. Create a new page and add the `Checkout Block`
-3. Verify there is a notice in the sidebar displaying the list of incompatible gateways. The `make as default` & `sidebar compatibility` notices should be hidden while the `incompatible gateways` notice is displayed.
-
-<img width="1295" alt="image" src="https://user-images.githubusercontent.com/14235870/209318806-4d3b0e16-bb97-4a51-8818-3529b0559be4.png">
-
-4. Select each inner block in the Checkout Blocks' `List View` to ensure our notice is displayed for each one.
-5. Dismiss the `incompatible gateways` notice by clicking the top right `X` button. The `make as default` & `sidebar compatibility` notices should be visible again.
-
-<img width="1300" alt="image" src="https://user-images.githubusercontent.com/14235870/208722992-6d0237f2-5f6c-4514-83d5-66bbdb2333c0.png">
-
-6. Do the same test from step 2 to 5 using the `Cart Block`
-
-#### Detect compatible express payment gateways correctly
-
-1. Install the [Payment Plugins for Stripe WooCommerce plugin](https://wordpress.org/plugins/woo-stripe-payment/)
-2. Setup test mode in this plugin
-3. Enable Google Pay & Apple Pay in this plugin
-4. Create a new page and add the `Checkout Block`
-5. Verify that Google and Apple Pay express payment methods aren't listed in the incompatible payment methods notice.
-
-<img width="1025" alt="image" src="https://user-images.githubusercontent.com/14235870/212752494-3572b27b-9cde-4e2b-a4f6-2d4af3885c3e.png">
-
-#### Highlight incompatible payment gateways within the `Payment Options Block`
-
-1. If it's not done already, add incompatible payment gateways with the C&C Blocks (e.g., Paypal, Klarna Payments)
-6. Create a new page and add the `Checkout Block`
-7. Select the `Payment Options Block`, and check the list of available payment gateways under `Methods` in the sidebar. The incompatible payment gateways should be highlighted (i.e., `Incompatible with block-based checkout`)
-
-<img width="1277" alt="image" src="https://user-images.githubusercontent.com/14235870/208877521-be381930-4933-445b-9aa8-a33c2290b749.png">
-
-
diff --git a/plugins/woocommerce/client/blocks/docs/internal-developers/testing/releases/941.md b/plugins/woocommerce/client/blocks/docs/internal-developers/testing/releases/941.md
deleted file mode 100644
index 08bcb9263ad..00000000000
--- a/plugins/woocommerce/client/blocks/docs/internal-developers/testing/releases/941.md
+++ /dev/null
@@ -1,15 +0,0 @@
-# Testing notes and ZIP for release 9.4.1
-
-Zip file for testing: [woocommerce-gutenberg-products-block.zip](https://github.com/woocommerce/woocommerce-blocks/files/10478793/woocommerce-gutenberg-products-block.zip)
-
-## Feature plugin and package inclusion in WooCommerce
-
-### Prevent Cart and Checkout notices from disappearing immediately after adding. ([8253](https://github.com/woocommerce/woocommerce-blocks/pull/8253))
-
-1. Add an item to your cart. Open the same item in the editor.
-2. In a new tab go to the Cart block.
-3. In the editor set the item to be out of stock.
-4. In the Cart block, update the item's quantity, ensure you see a notice.
-5. Open the console. Type: `wp.data.dispatch( 'core/notices' ).createNotice( 'error', 'error from console', { context: 'wc/cart', } );`
-6. Ensure your error appears alongside the out of stock notice.
-7. Repeat for the mini-cart.
diff --git a/plugins/woocommerce/client/blocks/docs/internal-developers/testing/releases/942.md b/plugins/woocommerce/client/blocks/docs/internal-developers/testing/releases/942.md
deleted file mode 100644
index 79b0c6f5ffc..00000000000
--- a/plugins/woocommerce/client/blocks/docs/internal-developers/testing/releases/942.md
+++ /dev/null
@@ -1,13 +0,0 @@
-# Testing notes and ZIP for release 9.4.2
-
-Zip file for testing: [woocommerce-gutenberg-products-block.zip](https://github.com/woocommerce/woocommerce-blocks/files/10509889/woocommerce-gutenberg-products-block.zip)
-
-## Feature plugin and package inclusion in WooCommerce
-
-### Product Elements: remove feature plugin flag from Product Title, Product Summary and Product Template block. ([8297](https://github.com/woocommerce/woocommerce-blocks/pull/8297))
-
-
-
-
-1. Add the "Products (Beta)" in a post/page.
-2. Be sure that has the inner blocks: "Product Template, "Product Image", "Product Title", "Product Price", "Add to Cart Button" as the image above.
diff --git a/plugins/woocommerce/client/blocks/docs/internal-developers/testing/releases/943.md b/plugins/woocommerce/client/blocks/docs/internal-developers/testing/releases/943.md
deleted file mode 100644
index 9d19c20a3b8..00000000000
--- a/plugins/woocommerce/client/blocks/docs/internal-developers/testing/releases/943.md
+++ /dev/null
@@ -1,18 +0,0 @@
-# Testing notes and ZIP for release 9.4.3
-
-Zip file for testing: [woocommerce-gutenberg-products-block.zip](https://github.com/woocommerce/woocommerce-blocks/files/10567326/woocommerce-gutenberg-products-block.zip)
-
-## Feature plugin and package inclusion in WooCommerce
-
-### Mini Cart block - Fix the drawer content height to allow checkout button to show. ([8351](https://github.com/woocommerce/woocommerce-blocks/pull/8351))
-
-1. Set up the Mini Cart in your global navigation, if you don't have it already.
-2. View the front end of your site from a mobile device (or Xcode Simulator).
-3. Add a product to your cart.
-4. Open the Mini Cart drawer.
-5. Confirm the checkout button is fully visible (see after screenshots above).
-
-### Fix a bug in WordPress 5.9 in which changing quantity doesn't work inside Cart and Mini Cart blocks. ([8356](https://github.com/woocommerce/woocommerce-blocks/pull/8356))
-
-1. In WordPress 5.9.x, go to Cart block.
-2. Try increasing the quantity, it should work.
diff --git a/plugins/woocommerce/client/blocks/docs/internal-developers/testing/releases/944.md b/plugins/woocommerce/client/blocks/docs/internal-developers/testing/releases/944.md
deleted file mode 100644
index 0762cb88ec9..00000000000
--- a/plugins/woocommerce/client/blocks/docs/internal-developers/testing/releases/944.md
+++ /dev/null
@@ -1,15 +0,0 @@
-# Testing notes and ZIP for release 9.4.4
-
-Zip file for testing: [woocommerce-gutenberg-products-block.zip](https://github.com/woocommerce/woocommerce-blocks/files/10841444/woocommerce-gutenberg-products-block.zip)
-
-## Feature plugin and package inclusion in WooCommerce
-
-### Check if session is set before returning updated customer address. ([8537](https://github.com/woocommerce/woocommerce-blocks/pull/8537))
-
-1. Install [AvaTax](https://woocommerce.com/products/woocommerce-avatax/) (credentials in secret 7715) and set it up so taxes are applied to your orders. I used a store in the USA and used USA addresses.
-2. Install WooCommerce Subscriptions
-3. Create a Subscription product and add it to your cart. Then check out.
-4. Open the **subscription** in the WP dashboard and from the subscription actions box choose "Process renewal"
-5. <img width="319" alt="image" src="https://user-images.githubusercontent.com/5656702/219742801-c2d87718-ddad-4622-a2b2-b9f7eb3befdf.png">
-6. There is no error and the sum is correct.
-
diff --git a/plugins/woocommerce/client/blocks/docs/internal-developers/testing/releases/950.md b/plugins/woocommerce/client/blocks/docs/internal-developers/testing/releases/950.md
deleted file mode 100644
index 19453c30474..00000000000
--- a/plugins/woocommerce/client/blocks/docs/internal-developers/testing/releases/950.md
+++ /dev/null
@@ -1,368 +0,0 @@
-# Testing notes and ZIP for release 9.5.0
-
-Zip file for testing: [woocommerce-gutenberg-products-block.zip](https://github.com/woocommerce/woocommerce-blocks/files/10557868/woocommerce-gutenberg-products-block.zip)
-
-## WooCommerce Core
-
-### Style Book: Fix Featured Product and Featured Category Blocks preview ([8313](https://github.com/woocommerce/woocommerce-gutenberg-products-block/pull/8313))
-
-1. With Gutenberg installed and a block theme like [Twenty Twenty-Three](https://wordpress.org/themes/twentytwentythree/) enabled.
-2. Go to `Appearance » Editor` and edit a template.
-3. In the toolbar, select Styles (black and white circle) and then, Open Style Book (eye icon).
-4. Go to the WooCommerce tab.
-5. Be sure that the _Featured Product_ and _Featured Category_ are displayed like the image below.
-
-<table>
-<tr>
-<td valign="top">Before:
-<br><br>
-<img alt="image" src="https://user-images.githubusercontent.com/4463174/215080944-efc48225-8308-4654-a97f-aaa7066e03a7.png">
-</td>
-<td valign="top">After:
-<br><br>
-<img alt="image" src="https://user-images.githubusercontent.com/4463174/215081020-49dac42a-0dca-4d21-9e65-1a3aabb05cad.png">
-</td>
-</tr>
-</table>
-
-### Style Book: Hide Filter blocks and Product Search block ([8309](https://github.com/woocommerce/woocommerce-gutenberg-products-block/pull/8309))
-
-1. With Gutenberg installed and a block theme like [Twenty Twenty-Three](https://wordpress.org/themes/twentytwentythree/) enabled.
-2. Go to `Appearance » Editor` and edit a template.
-3. In the toolbar, select Styles (black and white circle) and then, Open Style Book (eye icon).
-4. Go to the WooCommerce tab.
-5. Be sure that the `Attribute Filter`, `Stock Filter`, `Price Filter`, `Rating filter`, and `Product Search` blocks aren't visible.
-
-### Style Book: Fix useForcedLayout to prevent breaking style book ([8243](https://github.com/woocommerce/woocommerce-gutenberg-products-block/pull/8243))
-
-1. With Gutenberg installed and a block theme like [Twenty Twenty-Three](https://wordpress.org/themes/twentytwentythree/) enabled.
-2. Go to `Appearance » Editor` and edit a template.
-3. In the toolbar, select Styles (black and white circle) and then, Open Style Book (eye icon).
-4. Go to the WooCommerce tab.
-5. Ensure the Mini Cart block load correctly.
-
-### Add border attributes to featured items block to show border styles in editor ([8304](https://github.com/woocommerce/woocommerce-gutenberg-products-block/pull/8304))
-
-1. Go to `wp-admin` dashboard and to your shop page.
-2. Add a _Featured Product_ block to the page.
-3. Try adding a border color and border width to the product.
-4. Ensure you're seeing the preview of the border styles while editing.
-5. Repeat steps 2-4 for the _Featured Category_ block.
-
-<table>
-<tr>
-<td valign="top">Before:
-<br><br>
-<img alt="image" src="https://user-images.githubusercontent.com/2132595/214867504-ad63ecff-6038-494b-a58e-156fb60af000.png">
-</td>
-<td valign="top">After:
-<br><br>
-<img alt="image" src="https://user-images.githubusercontent.com/2132595/214867656-29a61d71-bec3-4b6c-a7ab-26b555d56113.png">
-</td>
-</tr>
-</table>
-
-### Fix for wrong shipping schema in checkout ([8291](https://github.com/woocommerce/woocommerce-gutenberg-products-block/pull/8291))
-
-1. Create and place an order with shipping address different from billing.
-2. Verify on checkout that both display correctly.
-
-### Adjust return to cart arrow ([8289](https://github.com/woocommerce/woocommerce-gutenberg-products-block/pull/8289))
-
-1. Select a dark theme, e.g. the [Twenty Twenty-Three](https://wordpress.org/themes/twentytwentythree/) and use a dark style.
-2. Add a product to the cart and go to the checkout page.
-3. Verify that the arrow of the `Return to Cart` button as the same color as the text.
-4. Go to <https://store.test/wp-admin/options-general.php> and switch to an RTL-language.
-5. Go to the checkout page again and verify that the arrow of the `Return to Cart` button points in the other direction.
-
-<table>
-<tr>
-<td>Before LTR:
-<br><br>
-
-<img width="660" alt="Screenshot 2023-01-25 at 17 30 32" src="https://user-images.githubusercontent.com/3323310/214540423-65a7739f-b1de-41a4-998a-e8d74758484a.png">
-</td>
-<td>After LTR:
-<br><br>
-
-<img width="658" alt="Screenshot 2023-01-25 at 17 29 52" src="https://user-images.githubusercontent.com/3323310/214540285-e6fc8dae-b7c0-4c3f-88f0-661d6ee82372.png">
-</td>
-</tr>
-</table>
-
-<table>
-<tr>
-<td>Before RTL:
-<br><br>
-
-<img width="661" alt="Screenshot 2023-01-25 at 17 32 44" src="https://user-images.githubusercontent.com/3323310/214540903-65065644-8bc0-4e4f-bebb-d466a80e9f0a.png">
-</td>
-<td>After RTL:
-<br><br>
-
-<img width="651" alt="Screenshot 2023-01-25 at 17 12 12" src="https://user-images.githubusercontent.com/3323310/214536494-07fe6428-15d8-4204-804f-82aef60a742e.png">
-</td>
-</tr>
-</table>
-
-### Add reset button in the editor for product attributer filter ([8285](https://github.com/woocommerce/woocommerce-gutenberg-products-block/pull/8285))
-
-1. Go to your `wp-admin` dashboard and `Shop` page.
-2. Add the `Filter by Attribute` Product block.
-3. Choose an attribute which has a product linked to it.
-4. Ensure you see the `Reset` button at the bottom right.
-5. Go to your `Shop` page and select an attribute.
-6. Ensure you see the `Reset` button and clicking on it works as expected.
-7. Back in the wp-admin `Shop` page. Edit the block and now try choosing an attribute which has no products link to it.
-8. Ensure you no longer see the `Reset` button at the bottom right.
-
-<table>
-<tr>
-<td valign="top">Before:
-<br><br>
-<img alt="image" src="https://user-images.githubusercontent.com/2132595/214326853-0b82a71e-d40b-47b7-ba6d-63800c871523.png">
-</td>
-<td valign="top">After:
-<br><br>
-<img alt="image" src="https://user-images.githubusercontent.com/2132595/214326983-e22dfa0f-6008-4159-886e-d790afed36fe.png">
-</td>
-</tr>
-</table>
-
-### Make `Notice` component legible in dark themes ([8278](https://github.com/woocommerce/woocommerce-gutenberg-products-block/pull/8278))
-
-1. Install a theme with a dark background (ie: theme TT3 with Aubergine style or theme Zaino).
-2. Go to `Appearance » Editor` and edit the Product Catalog template.
-3. Add the `Store Notices` block.
-4. Make sure the notice text is black and legible.
-
-<table>
-<tr>
-<td valign="top">Before:
-<br><br>
-<img alt="image" src="https://user-images.githubusercontent.com/186112/214251529-7d6d0dad-7073-4c22-9682-b4ae2accc042.png">
-</td>
-<td valign="top">After:
-<br><br>
-<img alt="image" src="https://user-images.githubusercontent.com/186112/214251537-bb0557c3-5d60-43c0-86ab-a106b562396a.png">
-</td>
-</tr>
-</table>
-
-### Set inherit setting to true when is inserted in the archive product template ([8251](https://github.com/woocommerce/woocommerce-gutenberg-products-block/pull/8251))
-
-1. Make sure you are using a block theme.
-2. Go to the `Product Catalog` template on the `Site Editor` (`wp-admin/site-editor.php?postType=wp_template&postId=woocommerce%2Fwoocommerce%2F%2Farchive-product`).
-3. Insert the `Products (Beta)` block.
-4. Make sure the `Inherit query from template` is enabled by default.
-
-### Avoid changing the markup of all ratings when the Product Rating block is present in the page ([8247](https://github.com/woocommerce/woocommerce-gutenberg-products-block/pull/8247))
-
-1. Make sure a product has an average rating of 4 or less.
-2. With the [Twenty Twenty-Three](https://wordpress.org/themes/twentytwentythree/) theme installed, go to `Appearance » Editor`.
-3. Edit the Product Catalog template, adding the Products block above the WooCommerce Product Grid Block:
-
-<table>
-<tr>
-<td><img alt="image" src="https://user-images.githubusercontent.com/3616980/213691713-5649be46-1c3c-4e2b-a54b-be501bc1c787.png" />
-</td>
-</tr>
-</table>
-
-4. You might want to add a title above each of those blocks to help you distinguish them in the frontend.
-5. Go to the frontend and verify the rating markup of the WooCommerce Product Grid block is not filtered. To verify it, scroll down to the WooCommerce Product Grid block and check that the "empty" star in the rating is outlined instead of dimmed:
-
-<table>
-<tr>
-<td valign="top">Before:
-<br><br>
-<img alt="image" src="https://user-images.githubusercontent.com/3616980/213691993-b96360a0-4afb-4e0d-b8be-46f9f9bbf710.png">
-</td>
-<td valign="top">After:
-<br><br>
-<img alt="image" src="https://user-images.githubusercontent.com/3616980/213691932-cac4ccb7-c272-4909-abf1-93fbf89e8ce9.png">
-</td>
-</tr>
-</table>
-
-> Note: The _Products_ block is expected to have dimmed stars instead of outlined ones. This testing steps refers to the WooCommerce Product Grid block.
-
-### Update Local Pickup price display when price is 0 and multiple packages are used ([8241](https://github.com/woocommerce/woocommerce-gutenberg-products-block/pull/8241))
-
-1. Enable the [Multiple Packages for WooCommerce](https://wordpress.org/plugins/multiple-packages-for-woocommerce/) extension and set a price for local pickup.
-2. Add multiple products to cart. Confirm you have multiple shipping packages and the `price x quantity` is shown when choosing local pickup.
-3. Go to settings and make local pickup free.
-4. Go back to checkout and confirm prices for pickup is shown as "FREE".
-
-<table>
-<tr>
-<td valign="top">Show as "Free" instead of "0 x 3 packages":
-<br><br>
-<img alt="image" src="https://user-images.githubusercontent.com/90977/213485625-01b04533-be8d-412c-880d-f8c9fde395a0.png">
-</td>
-<td valign="top">Existing logic preserved for pickup with prices:
-<br><br>
-<img alt="image" src="https://user-images.githubusercontent.com/90977/213485629-2094404f-22af-4699-ac33-4027ec92b28b.png">
-</td>
-</tr>
-</table>
-
-### Product Price: Transition from using CSS margin to Global Styles ([8269](https://github.com/woocommerce/woocommerce-gutenberg-products-block/pull/8269))
-
-1. Add a _Products_ block on a new page.
-2. Ensure the _Product Price_ `margin` is displaying correctly (and is present in the `Dimensions » Margin` setting).
-3. Now add an _All Products_ block on another page.
-4. Click on the pencil icon to edit the layout and change the _Product Price_ block margin.
-5. Verify the margin is applied in the editor. Save the layout, save the page and check the changes in the frontend, verify the margin is applied there as well.
-
-### Product Button: Transition from using CSS margin to Global Styles ([8239](https://github.com/woocommerce/woocommerce-gutenberg-products-block/pull/8239))
-
-1. Add a _Products_ block on a new page.
-2. Ensure the _Product Button_ `margin` is displaying correctly (and is present in the `Dimensions » Margin` setting).
-3. Iterate over each _Products_ block pattern (which includes the _Product Button_ block). Make sure the `margin` is correct.
-
-### Product Rating: Transition from using CSS margin to Global Styles ([8202](https://github.com/woocommerce/woocommerce-gutenberg-products-block/pull/8202))
-
-1. Add a _Products_ block on a new page and add the _Product Rating_ block inside of it.
-2. Ensure the _Product Rating_ `margin` is displaying correctly (and is present in the `Dimensions » Margin` setting).
-3. Iterate over each _Products_ block pattern (which includes the _Rating_ block). Make sure the `margin` is correct.
-4. Make sure the alignment setting works (for _Product Rating_) correctly in the editor and frontend.
-
-### Add Store Breadcrumbs block ([8222](https://github.com/woocommerce/woocommerce-gutenberg-products-block/pull/8222))
-
-1. Make sure you are using a block theme.
-2. Edit any template on the Site Editor e.g. the `Single Product Template` (`wp-admin/site-editor.php?postType=wp_template&postId=woocommerce%2Fwoocommerce%2F%2Fsingle-product&canvas=edit&sidebar=%2Ftemplates`).
-3. Insert the new _Store Breadcrumbs_ block.
-4. Style the breadcrumbs (update the colors for the link and text and typography) and ensure the changes are also visible on the FrontEnd.
-
-<table>
-<tr>
-<td valign="top">Editor Preview:
-<br><br>
-<img alt="image" src="https://user-images.githubusercontent.com/15730971/214267725-92fbeba9-8891-43a1-ae41-e12b88228045.png">
-</td>
-<td valign="top">FrontEnd:
-<br><br>
-<img alt="image" src="https://user-images.githubusercontent.com/15730971/214267814-d5c337d8-cf92-475f-a65d-95315baf4285.png">
-</td>
-</tr>
-</table>
-
-<table>
-<tr>
-<td valign="top">Editor sidebar:
-<br><br>
-<img alt="image" src="https://user-images.githubusercontent.com/15730971/214271492-d9f2e592-524c-4a5b-a327-eab8b4c74658.png">
-</td>
-<td valign="top">Block inserter:
-<br><br>
-<img alt="image" src="https://user-images.githubusercontent.com/15730971/214271883-b09bb1e0-b91a-4aeb-8340-19d3ab31dd32.png">
-</td>
-</tr>
-</table>
-
-### Add Catalog Sorting filter block ([8122](https://github.com/woocommerce/woocommerce-gutenberg-products-block/pull/8122))
-
-1. Enable a blocks theme and go to the `Site Editor » Browse all templates` and open the `Product Catalog` template.
-2. Insert the `Catalog Sorting` block.
-3. Insert the `Products (Beta)` block and enable the `Inherit query from template`.
-4. Check the `Catalog Sorting` block renders on the editor.
-5. Save and go to the `shop` on the front end, make sure it renders the `Products (Beta)` block with the `Catalog Sorting` dropdown.
-6. Change the dropdown value and make sure the products are ordered in the expected order.
-
-<table>
-<tr>
-<td>
-<img alt="image" src="https://user-images.githubusercontent.com/186112/211323401-90ded17c-7ae2-48c3-b8e7-7c2eae58c0e9.png">
-</td>
-</tr>
-</table>
-
-### Add Results Count block ([8078](https://github.com/woocommerce/woocommerce-gutenberg-products-block/pull/8078))
-
-1. Create new post/page
-2. Try to add "Product Results Count" \
- **Expected:** Product Results Count block is not available there
-
----
-
-1. Edit Product Catalog template
-2. Add "Product Results Count" \
- **Expected:** It displays "Showing 1-X of X results".
-3. Remove `Classic Template` and add `Products` block
-4. Make sure `Products` block has `Inherit query from template` setting enabled (!)
-5. Save the template and go to Frontend \
- **Expected:** It displays "Showing 1-16 of 17 results". - depends on number of products your store has, numbers may differ, but it displays correct number of product that shows up in `Products` block
-6. Go to the next page of `Products` \
- **Expected:** It displays "Showing 17-17 of 17 results". - depends on number of products your store has, numbers may differ, but it displays correct number of product that shows up in `Products` block
-
-<table>
-<tr>
-<td valign="top">Editor sidebar:
-<br><br>
-<img alt="image" src="https://user-images.githubusercontent.com/20098064/212304507-38dfbbf3-01a0-4233-b677-d25e28695db6.png">
-</td>
-<td valign="top">Block inserter:
-<br><br>
-<img alt="image" src="https://user-images.githubusercontent.com/20098064/212304592-710a57dc-2025-43fd-9220-712b5bae5cc8.png">
-</td>
-</tr>
-</table>
-
----
-
-1. Change global styles and make sure styles are applied to the block (in frontend as well)
-2. Change the color/font styles to the block and make sure styles are applied to the block (in frontend as well)
-
-### Add coupon link instead of dropdown in Cart and Checkout blocks ([7993](https://github.com/woocommerce/woocommerce-gutenberg-products-block/pull/7993))
-
-1. Go to the Edit Cart page, remove the Cart block and add it again.
-2. Go to the Edit Checkout page, remove the Checkout block and add it again.
-3. Visit your site front-end and add items to cart
-4. Go to the Cart page, and confirm the `Apply a coupon code` link is visible.
-5. Enter the coupon code, and confirm the coupon is getting applied.
-6. Go to the Checkout page, and confirm the `Apply a coupon code` link is visible.
-7. Enter the coupon code, and confirm the coupon is getting applied.
-8. Test around this issue.
-
-### Checkout/Store API: Push valid changes selectively ([8030](https://github.com/woocommerce/woocommerce-gutenberg-products-block/pull/8030))
-
-1. Go to the checkout page as a logged in user who has checked out before.
-2. Edit a single address field - **it has to be one of the address fields that require a push: city, state, country, postcode, or email**.
-3. Wait a few seconds for the request to finish.
-4. Refresh the checkout page.
-5. Confirm the change you made was persisted.
-
-### Refresh the cart when using the browser back button ([8236](https://github.com/woocommerce/woocommerce-gutenberg-products-block/pull/8236))
-
-#### For the Checkout block
-
-1. Add items to your cart.
-2. Go to the checkout block page.
-3. Place an order.
-4. Press the browser back button.
-5. After a short delay you'll see the empty cart notice.
-
-#### For the Mini Cart block
-
-1. Add mini cart to the theme header.
-2. Add something to your cart.
-3. Visit a page - note the total in mini cart.
-4. Visit the shop page and add another item to the cart. Note the new mini cart total.
-5. Press the browser back button. Without mousing over the mini cart block, confirm the total updates.
-
-<table>
-<tr>
-<td>
-<img alt="image" src="https://user-images.githubusercontent.com/90977/213454433-74ef8b9f-6d92-46e6-a8eb-130d75c32f9e.png">
-</td>
-</tr>
-</table>
-
-## Feature plugin
-
-n/a
-
-## Experimental
-
-n/a
diff --git a/plugins/woocommerce/client/blocks/docs/internal-developers/testing/releases/960.md b/plugins/woocommerce/client/blocks/docs/internal-developers/testing/releases/960.md
deleted file mode 100644
index 6314f02b31c..00000000000
--- a/plugins/woocommerce/client/blocks/docs/internal-developers/testing/releases/960.md
+++ /dev/null
@@ -1,185 +0,0 @@
-# Testing notes and ZIP for release 9.6.0
-
-Zip file for testing: [woocommerce-gutenberg-products-block.zip](https://github.com/woocommerce/woocommerce-blocks/files/10742738/woocommerce-gutenberg-products-block.zip)
-
-## WooCommerce Core
-
-### Improved default headings and styling of the cart block and fixed the display of cart and checkout block editable fields when using dark themes. ([8380](https://github.com/woocommerce/woocommerce-blocks/pull/8380))
-
-1. Edit the cart page
-2. Remove the cart block
-3. Insert the cart block
-4. Switch to the "empty cart" view. Confirm the icon is centered.
-5. In the cart block, confirm the "cart totals" text (editable field) is displayed correctly. If you test with a dark theme, it should be transparent with visible text.
-6. Confirm the cross sells are displayed correctly. The title should be a h2 element.
-
-#### Empty Cart Icons
-
-<table>
-<tr>
-<td valign="top">Before:
-<br><br>
-<img alt="image" src="https://user-images.githubusercontent.com/90977/216625777-d2714b91-a3f1-427b-be9f-10cb17132f9b.png">
-</td>
-<td valign="top">After:
-<br><br>
-<img alt="image" src="https://user-images.githubusercontent.com/90977/216625833-e45ec4ee-d4f5-4a14-b67c-0791575c1617.png">
-</td>
-</tr>
-</table>
-
-#### Editable field styling
-
-<table>
-<tr>
-<td valign="top">Before:
-<br><br>
-<img alt="image" src="https://user-images.githubusercontent.com/90977/216626027-3aa7aae4-ca67-4492-acf0-9fb1a8c4e799.png">
-</td>
-<td valign="top">After:
-<br><br>
-<img alt="image" src="https://user-images.githubusercontent.com/90977/216626094-6415edeb-a7da-4ce8-9be7-03f6f5e5f443.png">
-</td>
-</tr>
-</table>
-
-### Add a reset button for the Filter blocks. ([8366](https://github.com/woocommerce/woocommerce-blocks/pull/8366))
-
-1. Go to your wp-admin dashboard and create a new page. Add the `All products` block.
-2. Then add each of these blocks `Filter by Price`, `Filter by Stock` and `Filter by Rating`.
-3. Ensure you see the Reset button at the bottom right.
-<img width="500" alt="image" src="https://user-images.githubusercontent.com/2132595/216156231-248e509b-33fb-42cb-bd95-5421ade629d1.png">
-1. Go to the frontend and ensure you see the Reset button after interacting with the block (check the checkboxes or move the price slider).
-
-### Update the incompatible gateways notice design. ([8365](https://github.com/woocommerce/woocommerce-blocks/pull/8365))
-
-| Before | After |
-| ------ | ----- |
-|<img width="300" alt="image" src="https://user-images.githubusercontent.com/14235870/213469055-ebf0e16f-46e1-4c65-a3da-81739127ba41.png">|<img width="300" alt="image" src="https://user-images.githubusercontent.com/14235870/213468877-e956e144-4e9a-48d0-a866-8339ea73e52d.png">|
-
-1. Add an incompatible payment gateway with the C&C Blocks (e.g., [Klarna Payments](https://docs.klarna.com/platform-solutions/woocommerce/klarna-checkout/configuring-klarna-checkout-on-woocommerce/) or [Paypal](https://woocommerce.com/document/woocommerce-paypal-payments/#account-setup)). You will need to configure them to be detected and used by WooCommerce.
-2. Create a new page and add the `Checkout` Block
-3. Select any element of the `Checkout` Block. You should see a notice with the list of incompatible gateways in the right sidebar of the editor (i.e., `Settings -> Block`). Ensure the notice's icon has a yellow color, and the list of gateways has bullet points (see image below):
-
-<img width="300" alt="image" src="https://user-images.githubusercontent.com/14235870/213468877-e956e144-4e9a-48d0-a866-8339ea73e52d.png">
-
-### Product Rating: Add support for the Padding setting. ([8347](https://github.com/woocommerce/woocommerce-blocks/pull/8347))
-
-| Before | After |
-| ------ | ----- |
-|||
-
-1. Add the **Products** block (and the **Product Rating** block inside of it).
-2. Set `padding` and make sure it works correctly both in the editor and frontend.
-
-### Update apply button description to be more clear for filter blocks. ([8339](https://github.com/woocommerce/woocommerce-blocks/pull/8339))
-
-1. Go to wp-admin and create a new page.
-3. Add these blocks to the page `stock filter`, `rating filter`, `price filter` and `attributes filter`.
-4. For each one of the block's setting named `Show 'Apply filters' button` in the inspector control, ensure the help description states `Products will update when the button is clicked.` whether the button is enabled or not.
-
-### Allow third party shipping methods to declare compatibility with WC Blocks local pickup. ([8256](https://github.com/woocommerce/woocommerce-blocks/pull/8256))
-
-1. Enable local pickup on your site.
-2. Add items to your cart and go to the Cart block.
-3. Add an address using the Shipping Calculator. Ensure you see the local pickup options you added.
-4. Go to the Checkout page and, **without** selecting local pickup, scroll down to the shipping options area. Ensure you do not see local pickup there.
-8. Select local pickup and ensure the pickup location is shown.
-9. Check out successfully.
-
-### Fix a bug where certain checkout fields were being reset when changing the shipping option. ([8400](https://github.com/woocommerce/woocommerce-blocks/pull/8400))
-
-1. Go to Checkout
-2. For each of these fields (email, first name, last name, address, phone), do the following:
- - Enter an invalid value. Check no network request is made
- - Enter a valid value. Check a request to `update-customer` is made
-3. Fill in the whole shipping address form
-4. Change the shipping option
-5. Make sure no values in the form are overwritten
-
-### Fix bug in which errors would be shown twice in Checkout block. ([8390](https://github.com/woocommerce/woocommerce-blocks/pull/8390))
-
-1. In Checkout, have billing as shipping.
-2. Cause a bug in the zip code for example (wrong zipcode)
-3. See that Checkout block will only show an error once, not in 2 places.
-
-### Filter by Rating: Fix functionality to for resetting filters using the Reset button. ([8374](https://github.com/woocommerce/woocommerce-blocks/pull/8374))
-
-1. Ensure products have ratings
-2. Add Filter by Rating to your page which also uses the All Products block, and enable the Apply button in the filter block settings
-3. On the frontend, apply some filters for this block and then attempt to reset them by clicking the "Reset" button
-4. Go to Appearance > Editor and add the block to the Product Catalog page making sure you again enable the Apply filter button in the block settings.
-5. On the frontend, apply some filters for this block and then attempt to reset them by clicking the "Reset" button (in this scenario the page will refresh).
-
-### Fix a bug in WordPress 5.9 in which changing quantity doesn't work inside Cart and Mini Cart blocks. ([8356](https://github.com/woocommerce/woocommerce-blocks/pull/8356))
-
-1. In WordPress 5.9.x, go to Cart block.
-2. Try increasing the quantity, it should work.
-
-### Fix potential conflict between newsletter extensions on the checkout page. ([8354](https://github.com/woocommerce/woocommerce-blocks/pull/8354))
-
-1. Install and activate MailPoet and AutomateWoo extensions.
-2. Edit the checkout block and ensure `AutomateWoo` newsletter opt-in field is first.
-3. Add something to your cart and go to the checkout.
-4. Do not interact with the opt-in checkboxes, just place the order.
-5. Before this PR you'd see an error notice stating extension data is missing. After this PR the order will go through without error.
-
-### Mini Cart block: Fix the drawer content height to allow the checkout button to be visible. ([8351](https://github.com/woocommerce/woocommerce-blocks/pull/8351))
-
-| Before | After |
-| ------ | ----- |
-| <img width="250" alt="image" src="https://user-images.githubusercontent.com/481776/215877738-4299ed05-12de-4397-a149-a819810d9d5c.PNG"> | <img width="250" alt="image" src="https://user-images.githubusercontent.com/481776/215877742-13af250c-543e-4c7f-b25c-f01b03eefae9.PNG"> |
-| <img width="250" alt="image" src="https://user-images.githubusercontent.com/481776/215877740-121e3da0-fefb-4536-ab1e-ff1253cf77dd.PNG"> | <img width="250" alt="image" src="https://user-images.githubusercontent.com/481776/215877744-973a6670-3fd5-46e6-b3f0-43cd221a3860.PNG"> |
-
-1. Set up the Mini Cart in your global navigation, if you don't have it already.
-2. View the front end of your site from a mobile device (or Xcode Simulator).
-3. Add a product to your cart.
-4. Open the Mini Cart drawer.
-5. Confirm the checkout button is fully visible (see After screenshots above).
-
-### Prevent errors relating to the coupon input disappearing when focusing/blurring the coupon input and the value of the input field remains unchanged. ([8349](https://github.com/woocommerce/woocommerce-blocks/pull/8349))
-
-1. Create a single-use coupon in your Marketing -> Coupons dashboard. The usage limit should be set to 1.
-2. Add items to your cart, apply the coupon and check out.
-3. Once checkout is complete, add a new item to your cart, go to the Cart block and try to reapply the coupon.
-4. Ensure you see the error message. Click into the coupon input again and then click out of it without changing the value.
-5. Ensure the error remains.
-6. Repeat this on the Checkout block.
-
-### Fix console error of `isLoading` for Price filter block. ([8340](https://github.com/woocommerce/woocommerce-blocks/pull/8340))
-
-1. Go to admin dashboard->page and create a new page.
-2. Add the `Filter by Price` block while looking at the console. There shouldn't be any errors seen regarding `isLoading`.
-
-### Add Catalog Sorting filter block ([8122](https://github.com/woocommerce/woocommerce-gutenberg-products-block/pull/8122))
-
-<img width="500" alt="Screenshot 2023-01-31 at 16 34 05" src="https://user-images.githubusercontent.com/186112/215804806-ba20fd4f-e186-4fb4-ba67-91f252b0a62a.png">
-
-1. Enable a blocks theme and go to the `Site Editor > Browse all templates` and open the `Product Catalog` template.
-2. Insert the `Catalog Sorting` block.
-3. Insert the `Products (Beta)` block and enable the `Inherit query from template`.
-4. Check the `Catalog Sorting` block renders on the editor.
-5. Save and go to the `shop` on the front end, make sure it renders the `Products (Beta)` block with the `Catalog Sorting` dropdown.
-6. Change the dropdown value and make sure the products are ordered in the expected order.
-
-### Checkout - Allow partial pushes of address data to work before a country is provided ([8425](https://github.com/woocommerce/woocommerce-blocks/pull/8425))
-
-1. WooCommerce > Settings > General, set "Default customer location" to no address.
-2. Logged out, in a new browser window/incognito mode, add something to the cart and go to checkout.
-3. Enter your email address, a first name, and a last name.
-4. Apply a coupon.
-5. When the coupon has applied, ensure the address fields you entered were not removed.
-6. Successfully place an order.
-
-## Feature plugin
-
-### Fix: The experimental typography styles for the Store Breadcrumbs block are now restricted to the feature plugin. ([8345](https://github.com/woocommerce/woocommerce-blocks/pull/8345))
-
-1. Make sure you are using a block theme.
-2. Edit the Single Product Template ( e.g. wp-admin/site-editor.php?postType=wp_template&postId=woocommerce%2Fwoocommerce%2F%2Fsingle-product&canvas=edit&sidebar=%2Ftemplates).
-3. Insert the new Store Breadcrumbs block.
-4. Style the breadcrumbs (update the colors for the link and text and typography) and ensure the changes are also visible on the FrontEnd.
-
-## Experimental
-
-n/a
diff --git a/plugins/woocommerce/client/blocks/docs/internal-developers/testing/releases/961.md b/plugins/woocommerce/client/blocks/docs/internal-developers/testing/releases/961.md
deleted file mode 100644
index e27796933dc..00000000000
--- a/plugins/woocommerce/client/blocks/docs/internal-developers/testing/releases/961.md
+++ /dev/null
@@ -1,42 +0,0 @@
-# Testing notes and ZIP for release 9.6.1
-
-Zip file for testing: [woocommerce-gutenberg-products-block.zip](https://github.com/woocommerce/woocommerce-blocks/files/10767768/woocommerce-gutenberg-products-block.zip)
-
-## WooCommerce Core
-
-### Make Mini Cart Contents block visible in the Style Book. ([8458](https://github.com/woocommerce/woocommerce-blocks/pull/8458))
-
-1. With Gutenberg installed and a block theme like [Twenty Twenty-Three](https://wordpress.org/themes/twentytwentythree/) enabled.
-2. Go to Appearance > Editor and edit a template.
-3. In the toolbar, select Styles (black and white circle) and then, Open Style Book (eye icon).
-4. Go to the WooCommerce tab.
-5. Ensure the Mini Cart Contents block is visible.
-
-| Before | After |
-| ------ | ----- |
-|  |  |
-
-### Fix Customer account sidebar link incorrect margin in WP 6.2. ([8437](https://github.com/woocommerce/woocommerce-blocks/pull/8437))
-
-1. In WP 6.1 without Gutenberg installed, verify there are no regressions:
- 1. Add the Customer account block to a post or page.
- 2. In the editor, open the sidebar and verify the Manage account settings link is displayed below the product description.
-2. In WP 6.2 or WP 6.1 with Gutenberg installed, verify the link has correct margins:
- 1. Add the Customer account block to a post or page.
- 2. In the editor, open the sidebar and verify the Manage account settings link has correct margins.
-
-· | WP 6.1 without GB enabled | WP 6.1 with GB enabled |
---- | --- | --- |
-Before | 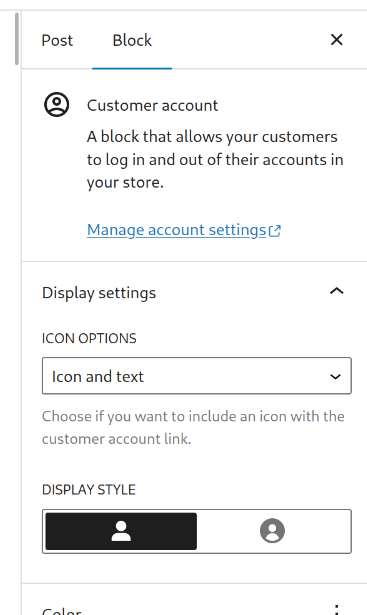 | 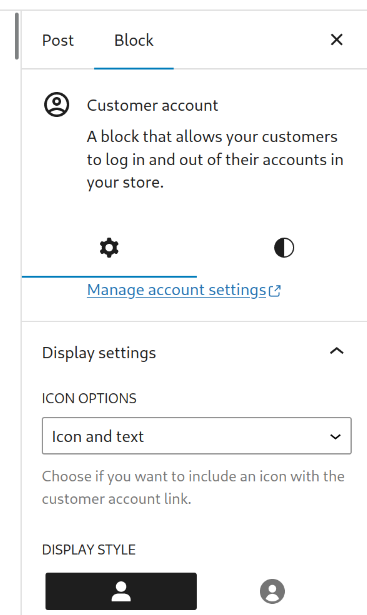 |
-After |  | 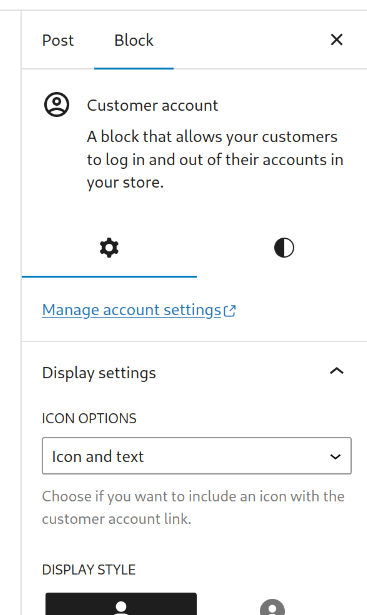 |
-
-### Fix cases in which Checkout would validate customer country against the wrong state. ([8460](https://github.com/woocommerce/woocommerce-blocks/pull/8460))
-
-1. Set US/California as the default shipping destination.
-2. Add a product to the cart.
-3. Go to the checkout page.
-4. Select a different Shipping Country that has states, e.g. Greece.
-5. Fill in the city field.
-6. You should not get a error.
-7. Checkout without setting the state.
-8. In the admin, you should not see California as the state.
diff --git a/plugins/woocommerce/client/blocks/docs/internal-developers/testing/releases/962.md b/plugins/woocommerce/client/blocks/docs/internal-developers/testing/releases/962.md
deleted file mode 100644
index 46897d4dda2..00000000000
--- a/plugins/woocommerce/client/blocks/docs/internal-developers/testing/releases/962.md
+++ /dev/null
@@ -1,13 +0,0 @@
-# Testing notes and ZIP for release 9.6.2
-
-Zip file for testing: [woocommerce-gutenberg-products-block.zip](https://github.com/woocommerce/woocommerce-blocks/files/10804236/woocommerce-gutenberg-products-block.zip)
-
-
-## WooCommerce Core
-
-### Disable compatibility layer. ([8507](https://github.com/woocommerce/woocommerce-blocks/pull/8507))
-
-1. With the [Twenty Twenty-Three](https://wordpress.org/themes/twentytwentythree/) theme installed, go to `Appearance » Editor`.
-2. Edit the Product Catalog template, adding the Products block above the WooCommerce Product Grid Block.
-3. Save.
-4. Go to the front end and verify that the `WooCommerce Product Grid Block` is visible.
diff --git a/plugins/woocommerce/client/blocks/docs/internal-developers/testing/releases/963.md b/plugins/woocommerce/client/blocks/docs/internal-developers/testing/releases/963.md
deleted file mode 100644
index 275477353bb..00000000000
--- a/plugins/woocommerce/client/blocks/docs/internal-developers/testing/releases/963.md
+++ /dev/null
@@ -1,22 +0,0 @@
-# Testing notes and ZIP for release 9.6.3
-
-Zip file for testing: [woocommerce-gutenberg-products-block.zip](https://github.com/woocommerce/woocommerce-blocks/files/10841107/woocommerce-gutenberg-products-block.zip)
-
-
-## WooCommerce Core
-
-### Fix the Checkout Blocks "Payment Options" settings crash in the editor. ([8535](https://github.com/woocommerce/woocommerce-blocks/pull/8535))
-
-1. Install and enable an incompatible payment gateway plugin with the `Cart` & `Checkout` Blocks. (e.g., [IDPay Payment Gateway for WooCommerce](https://wordpress.org/plugins/woo-idpay-gateway/))
-2. Create a new page and add the `Checkout` Block
-3. Select the Checkout Block or any of its Inner Blocks (except for the `Payment Options` Inner Block). Ensure our incompatible payment gateway (e.g., IDPay) is listed under the incompatible gateways notice:
-
-
-
-1. Select the `Payment Options` Inner Block. Ensure its settings are correctly displayed, the incompatible gateways notice is showing and our incompatible payment Gateway is highlighted under `Settings -> Block -> Methods`
-
-
-
-| Before | After |
-| --- | --- |
-|  |  |
diff --git a/plugins/woocommerce/client/blocks/docs/internal-developers/testing/releases/964.md b/plugins/woocommerce/client/blocks/docs/internal-developers/testing/releases/964.md
deleted file mode 100644
index f1e5b9f78df..00000000000
--- a/plugins/woocommerce/client/blocks/docs/internal-developers/testing/releases/964.md
+++ /dev/null
@@ -1,3 +0,0 @@
-# Testing notes and ZIP for release 9.6.4
-
-No User Facing Testing required with this patch release.
diff --git a/plugins/woocommerce/client/blocks/docs/internal-developers/testing/releases/965.md b/plugins/woocommerce/client/blocks/docs/internal-developers/testing/releases/965.md
deleted file mode 100644
index bbaf048d576..00000000000
--- a/plugins/woocommerce/client/blocks/docs/internal-developers/testing/releases/965.md
+++ /dev/null
@@ -1,13 +0,0 @@
-# Testing notes and ZIP for release 9.6.5
-
-Zip file for testing: [woocommerce-gutenberg-products-block.zip](https://github.com/woocommerce/woocommerce-blocks/files/10899628/woocommerce-gutenberg-products-block.zip)
-
-
-## WooCommerce Core
-
-### Checkout: Fix state validation after changing shipping country. ([8633](https://github.com/woocommerce/woocommerce-blocks/pull/8633)
-
-1. With a default valid US shipping address set, add an item to the cart and proceed to checkout.
-2. Change the shipping address country to India. You will see an error about the incorrect postcode.
-3. Select an India state from the dropdown. You will see an error about the incorrect postcode.
-4. Enter a valid postcode `411014`. All errors should go away.
diff --git a/plugins/woocommerce/client/blocks/docs/internal-developers/testing/releases/966.md b/plugins/woocommerce/client/blocks/docs/internal-developers/testing/releases/966.md
deleted file mode 100644
index 28287b4ff63..00000000000
--- a/plugins/woocommerce/client/blocks/docs/internal-developers/testing/releases/966.md
+++ /dev/null
@@ -1,11 +0,0 @@
-# Testing notes and ZIP for release 9.6.6
-
-Zip file for testing: [woocommerce-gutenberg-products-block.zip](https://github.com/woocommerce/woocommerce-blocks/files/11003055/woocommerce-gutenberg-products-block.zip)
-
-
-## WooCommerce Core
-
-### Product Image Gallery: fix 404 error. ([8445](https://github.com/woocommerce/woocommerce-blocks/pull/8445))
-
-1. Add a new post or page.
-2. Check the console and see that any 404 error is visible.
diff --git a/plugins/woocommerce/client/blocks/docs/internal-developers/testing/releases/970.md b/plugins/woocommerce/client/blocks/docs/internal-developers/testing/releases/970.md
deleted file mode 100644
index 322aead3503..00000000000
--- a/plugins/woocommerce/client/blocks/docs/internal-developers/testing/releases/970.md
+++ /dev/null
@@ -1,662 +0,0 @@
-# Testing notes and ZIP for release 9.7.0
-
-Zip file for testing: [woocommerce-gutenberg-products-block.zip](https://github.com/woocommerce/woocommerce-blocks/files/10859627/woocommerce-gutenberg-products-block.zip)
-
-## WooCommerce Core
-
-### Set inherit default to true when products is inserted on archive product templates ([8375](https://github.com/woocommerce/woocommerce-blocks/pull/8375))
-
-1. Make sure you are using a block theme.
-2. Go to the `Products by Category` template on the `Site Editor`.
-3. Insert the `Products (Beta)` block.
-4. Make sure the `Inherit query from template` is **enabled** by default.
-5. Repeat for the `Products by Tag`, `Products by Attribute`, `Product Search Results`, and `Product Catalog` templates.
-6. Go to any other template (like `Single Product` or `Page`), insert the `Products (Beta)` block, and make sure the `Inherit query from template` is **disabled** by default.
-7. Create a new page or post and make sure you can insert the `Products (Beta)` block.
-
-### Fixes CSS spacing and availability issues for breadcrumb, catalog sort, and result count blocks. ([8391](https://github.com/woocommerce/woocommerce-blocks/pull/8391))
-
-The issues are primarily visible with the Twenty Twenty Two theme. However, testing should be done against some other themes to make sure this doesn't introduce significant issues with those themes. In theory, it _shouldn't_ because the CSS for the blocks should appropriately inherit what the theme provides for default margins and spacing in the container around the blocks.
-
-1. Go to the "Product Catalog" Template in the Site Editor (`Appearance` -> `Editor`).
-2. Paste the following after the header in the template:
-
-```html
-<!-- wp:group {"layout":{"type":"flex","flexWrap":"nowrap"}} -->
-<div class="wp-block-group">
- <!-- wp:woocommerce/breadcrumbs {"textColor":"pale-pink","style":{"elements":{"link":{"color":{"text":"var:preset|color|light-green-cyan"}}}}} /-->
-
- <!-- wp:woocommerce/catalog-sorting /-->
-
- <!-- wp:woocommerce/product-results-count {"textColor":"vivid-green-cyan"} /-->
-</div>
-<!-- /wp:group -->
-```
-
-3. Make sure that in the editor view the alignment for the blocks appears as in the above screenshots.
-4. Make sure that the shop catalog on the frontend (default is `sitedomain.com/shop` on most WP installs) shows all blocks aligned as in the above screenshots.
-
-#### Store Breadcrumbs
-
-##### Misaligned Margin
-
-| Before | After |
-| ----------------------------------------------------------------------------------------------------------------------------------------------------------------------- | ----------------------------------------------------------------------------------------------------------------------------------------------------------------------- |
-| <img width="1372" alt="CleanShot 2023-02-07 at 07 57 57@2x" src="https://user-images.githubusercontent.com/1429108/217170772-cc744548-3a4e-4dc0-9572-26a7bbbb57e3.png"> | <img width="1359" alt="CleanShot 2023-02-07 at 07 58 58@2x" src="https://user-images.githubusercontent.com/1429108/217170974-ce17659b-95aa-49a6-9211-4b7d26f12cb5.png"> |
-
-##### Breadcrumbs not even displaying for shop page
-
-While it appears okay when editing the Product Catalog template, it is not shown on the frontend for certain themes. It surfaced with Twenty Twenty Two (or derivatives of that theme) for me.
-
-| Before | After |
-| ----------------------------------------------------------------------------------------------------------------------------------------------------------------------- | ----------------------------------------------------------------------------------------------------------------------------------------------------------------------- |
-| <img width="1362" alt="CleanShot 2023-02-07 at 08 01 49@2x" src="https://user-images.githubusercontent.com/1429108/217171425-48704f27-e0ec-47f7-ab50-b30745a13701.png"> | <img width="1339" alt="CleanShot 2023-02-07 at 08 02 29@2x" src="https://user-images.githubusercontent.com/1429108/217171552-c9f18564-6266-4aa8-92e9-11b0b9eaf05d.png"> |
-
-#### Catalog Sorting Block
-
-| Before | After |
-| ----------------------------------------------------------------------------------------------------------------------------------------------------------------------- | ----------------------------------------------------------------------------------------------------------------------------------------------------------------------- |
-| <img width="1358" alt="CleanShot 2023-02-07 at 08 03 42@2x" src="https://user-images.githubusercontent.com/1429108/217171772-e8cadea6-2398-4a6b-809b-ae8996dd1521.png"> | <img width="1360" alt="CleanShot 2023-02-07 at 08 04 20@2x" src="https://user-images.githubusercontent.com/1429108/217171870-60940c0d-b484-4ea3-a187-040879eb234f.png"> |
-
-#### Product Results Count
-
-| Before | After |
-| ----------------------------------------------------------------------------------------------------------------------------------------------------------------------- | ----------------------------------------------------------------------------------------------------------------------------------------------------------------------- |
-| <img width="1359" alt="CleanShot 2023-02-07 at 08 05 19@2x" src="https://user-images.githubusercontent.com/1429108/217172067-5304961f-b515-489c-bb2a-232faaec15ce.png"> | <img width="1365" alt="CleanShot 2023-02-07 at 08 05 54@2x" src="https://user-images.githubusercontent.com/1429108/217172178-7b4e1664-1fd0-4a00-99e7-5478db86ba84.png"> |
-
-### Add Product Image Gallery ([8235](https://github.com/woocommerce/woocommerce-blocks/pull/8235))
-
-1. Via Site Editor, edit the Single Product Template.
-2. Add the `Product Image Gallery`. Save it.
-3. On the frontend side, open a product page, check that the Product Image Gallery is loaded, and show the right images.
-4. Check that the block can be added only on the Single Product Template
-
-| Block Details | Preview Editor Side | Frontend |
-| -------------------------------------------------------------------------------------------------------------- | -------------------------------------------------------------------------------------------------------------- | -------------------------------------------------------------------------------------------------------------- |
-| 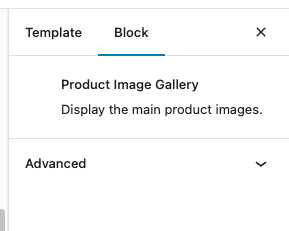 |  |  |
-
-### Add Single Product Details block ([8225](https://github.com/woocommerce/woocommerce-blocks/pull/8225))
-
-1. Enable a blocked theme in your WordPress installation (go to Appearance > Themes, and select one of the blocked themes options, such as: Twenty-Twenty Three);
-2. Once the theme is enabled, go to Appearance > Editor (Beta);
-3. On the left side menu, click on Templates;
-4. Select the Single Product template, and click Edit;
-5. Select the WooCommerce Single Product Block that comes by default with the template, remove it, and Save;
-6. Using the Block Inserter, type: Single Product Details. Add it to the Editor and position the block as you want.
-7. Make sure the Single Product Details block is being displayed and contains the tabs: Description, Additional Information and Reviews;
-8. Save the changes. Access your website and click on a product;
-9. Make sure the Single Product Details block appears and contains the product description (Description tab), product attributes (Additional Information tab) and the product reviews (Reviews tab).
-
-| Before | After |
-| ------------------------------------------------------------------------------------------------------------------------------------------ | ------------------------------------------------------------------------------------------------------------------------------------------ |
-| <img width="4112" alt="image" src="https://user-images.githubusercontent.com/20469356/215553992-62a8c7e9-af1a-43e4-9845-700a0327d441.png"> | <img width="4118" alt="image" src="https://user-images.githubusercontent.com/20469356/215556988-a14e9fa2-c523-44f6-8bf5-84ba98818a1c.png"> |
-
-### Create the Add to Cart Form Block ([8284](https://github.com/woocommerce/woocommerce-blocks/pull/8284))
-
-1. Make sure you are using a block theme.
-2. Make sure you have the following product types created in your store: Simple, Variable, Grouped and External.
-3. Edit the Single Product template on the Site Editor ( e.g. path > wp-admin/site-editor.php?postType=wp_template&postId=woocommerce%2Fwoocommerce%2F%2Fsingle-product&canvas=edit&sidebar=%2Ftemplates).
-4. Insert the new **Add to Cart Form** block and save.
-5. Make sure in the editor you see a placeholder block and it matches the following:
-
-<img width="414" alt="Screenshot 2023-02-28 at 12 27 55" src="https://user-images.githubusercontent.com/15730971/221840837-689bae27-e952-4a9c-9d55-a3ea10cf4cf2.png">
-
-6. Access a single product page for a Simple product and ensure the content matches the one displayed on the screenshot shared here on this PR.
-7. Access a single product page for a Variable product and ensure the content matches the one displayed on the screenshot shared here on this PR.
-8. Access a single product page for a Grouped product and ensure the content matches the one displayed on the screenshot shared here on this PR.
-9. Access a single product page for an External product and ensure the content matches the one displayed on the screenshot shared here on this PR.
-
-#### Editor Preview
-
-The editor preview is just a placeholder in this initial moment: the style will change a bit later on as @vivialice and I had a convo today, and she is actively working on a design for it. Here's the current implementation:
-
-<img width="414" alt="Screenshot 2023-02-28 at 12 27 55" src="https://user-images.githubusercontent.com/15730971/221840837-689bae27-e952-4a9c-9d55-a3ea10cf4cf2.png">
-
-We discussed adding placeholders (gray boxes) for the additional content that may or may not be visible depending on the product type last week. As this approach was implemented, the end result was a bit polluted, so I defaulted to relying exclusively on the notice instead.
-
-#### Editor Sidebar
-
-<img width="285" alt="Screenshot 2023-01-30 at 20 30 26" src="https://user-images.githubusercontent.com/15730971/215576964-37331401-af66-414b-a15a-515a8d9b723d.png">
-
-PS: The icon for this block also needs design review/approval cc: @vivialice .
-
-#### Frontend
-
-The content displayed on the frontend is dynamically changed depending on the product type:
-
-##### Simple Product
-
-<img width="253" alt="Screenshot 2023-01-30 at 20 06 48" src="https://user-images.githubusercontent.com/15730971/215571279-3a580e4e-caa1-4ba0-991b-75392ebe8868.png">
-
-##### Grouped Product
-
-<img width="463" alt="Screenshot 2023-01-30 at 20 05 45" src="https://user-images.githubusercontent.com/15730971/215571065-070f425f-02fc-4593-866f-e885d3fde661.png">
-
-##### Variable Product
-
-<img width="259" alt="Screenshot 2023-01-30 at 20 03 51" src="https://user-images.githubusercontent.com/15730971/215570697-de9a7b5d-3c67-4ec8-8d0e-1e8b3716d065.png">
-
-<img width="551" alt="Screenshot 2023-01-30 at 20 04 53" src="https://user-images.githubusercontent.com/15730971/215570883-3dbc08b5-4d1e-41ac-a488-f75876f62875.png">
-
-##### External Product
-
-<img width="169" alt="Screenshot 2023-01-30 at 20 07 33" src="https://user-images.githubusercontent.com/15730971/215571424-43e8d529-1dc8-4221-a30e-2b2392ce2185.png">
-
-### Rename the checkout events ([8381](https://github.com/woocommerce/woocommerce-blocks/pull/8381))
-
-1. Install and activate the Stripe Payment Gateway plugin
-2. Add something to your cart and checkout with a bad card (4000 0000 0000 0002).
-3. You should see a "Your card was declined" message in the payment options section
-4. Add something to your cart again and checkout with a valid card (4242 4242 4242 4242)
-5. You should be redirected to the order summary page and you should see the order in wp-admin.
-
-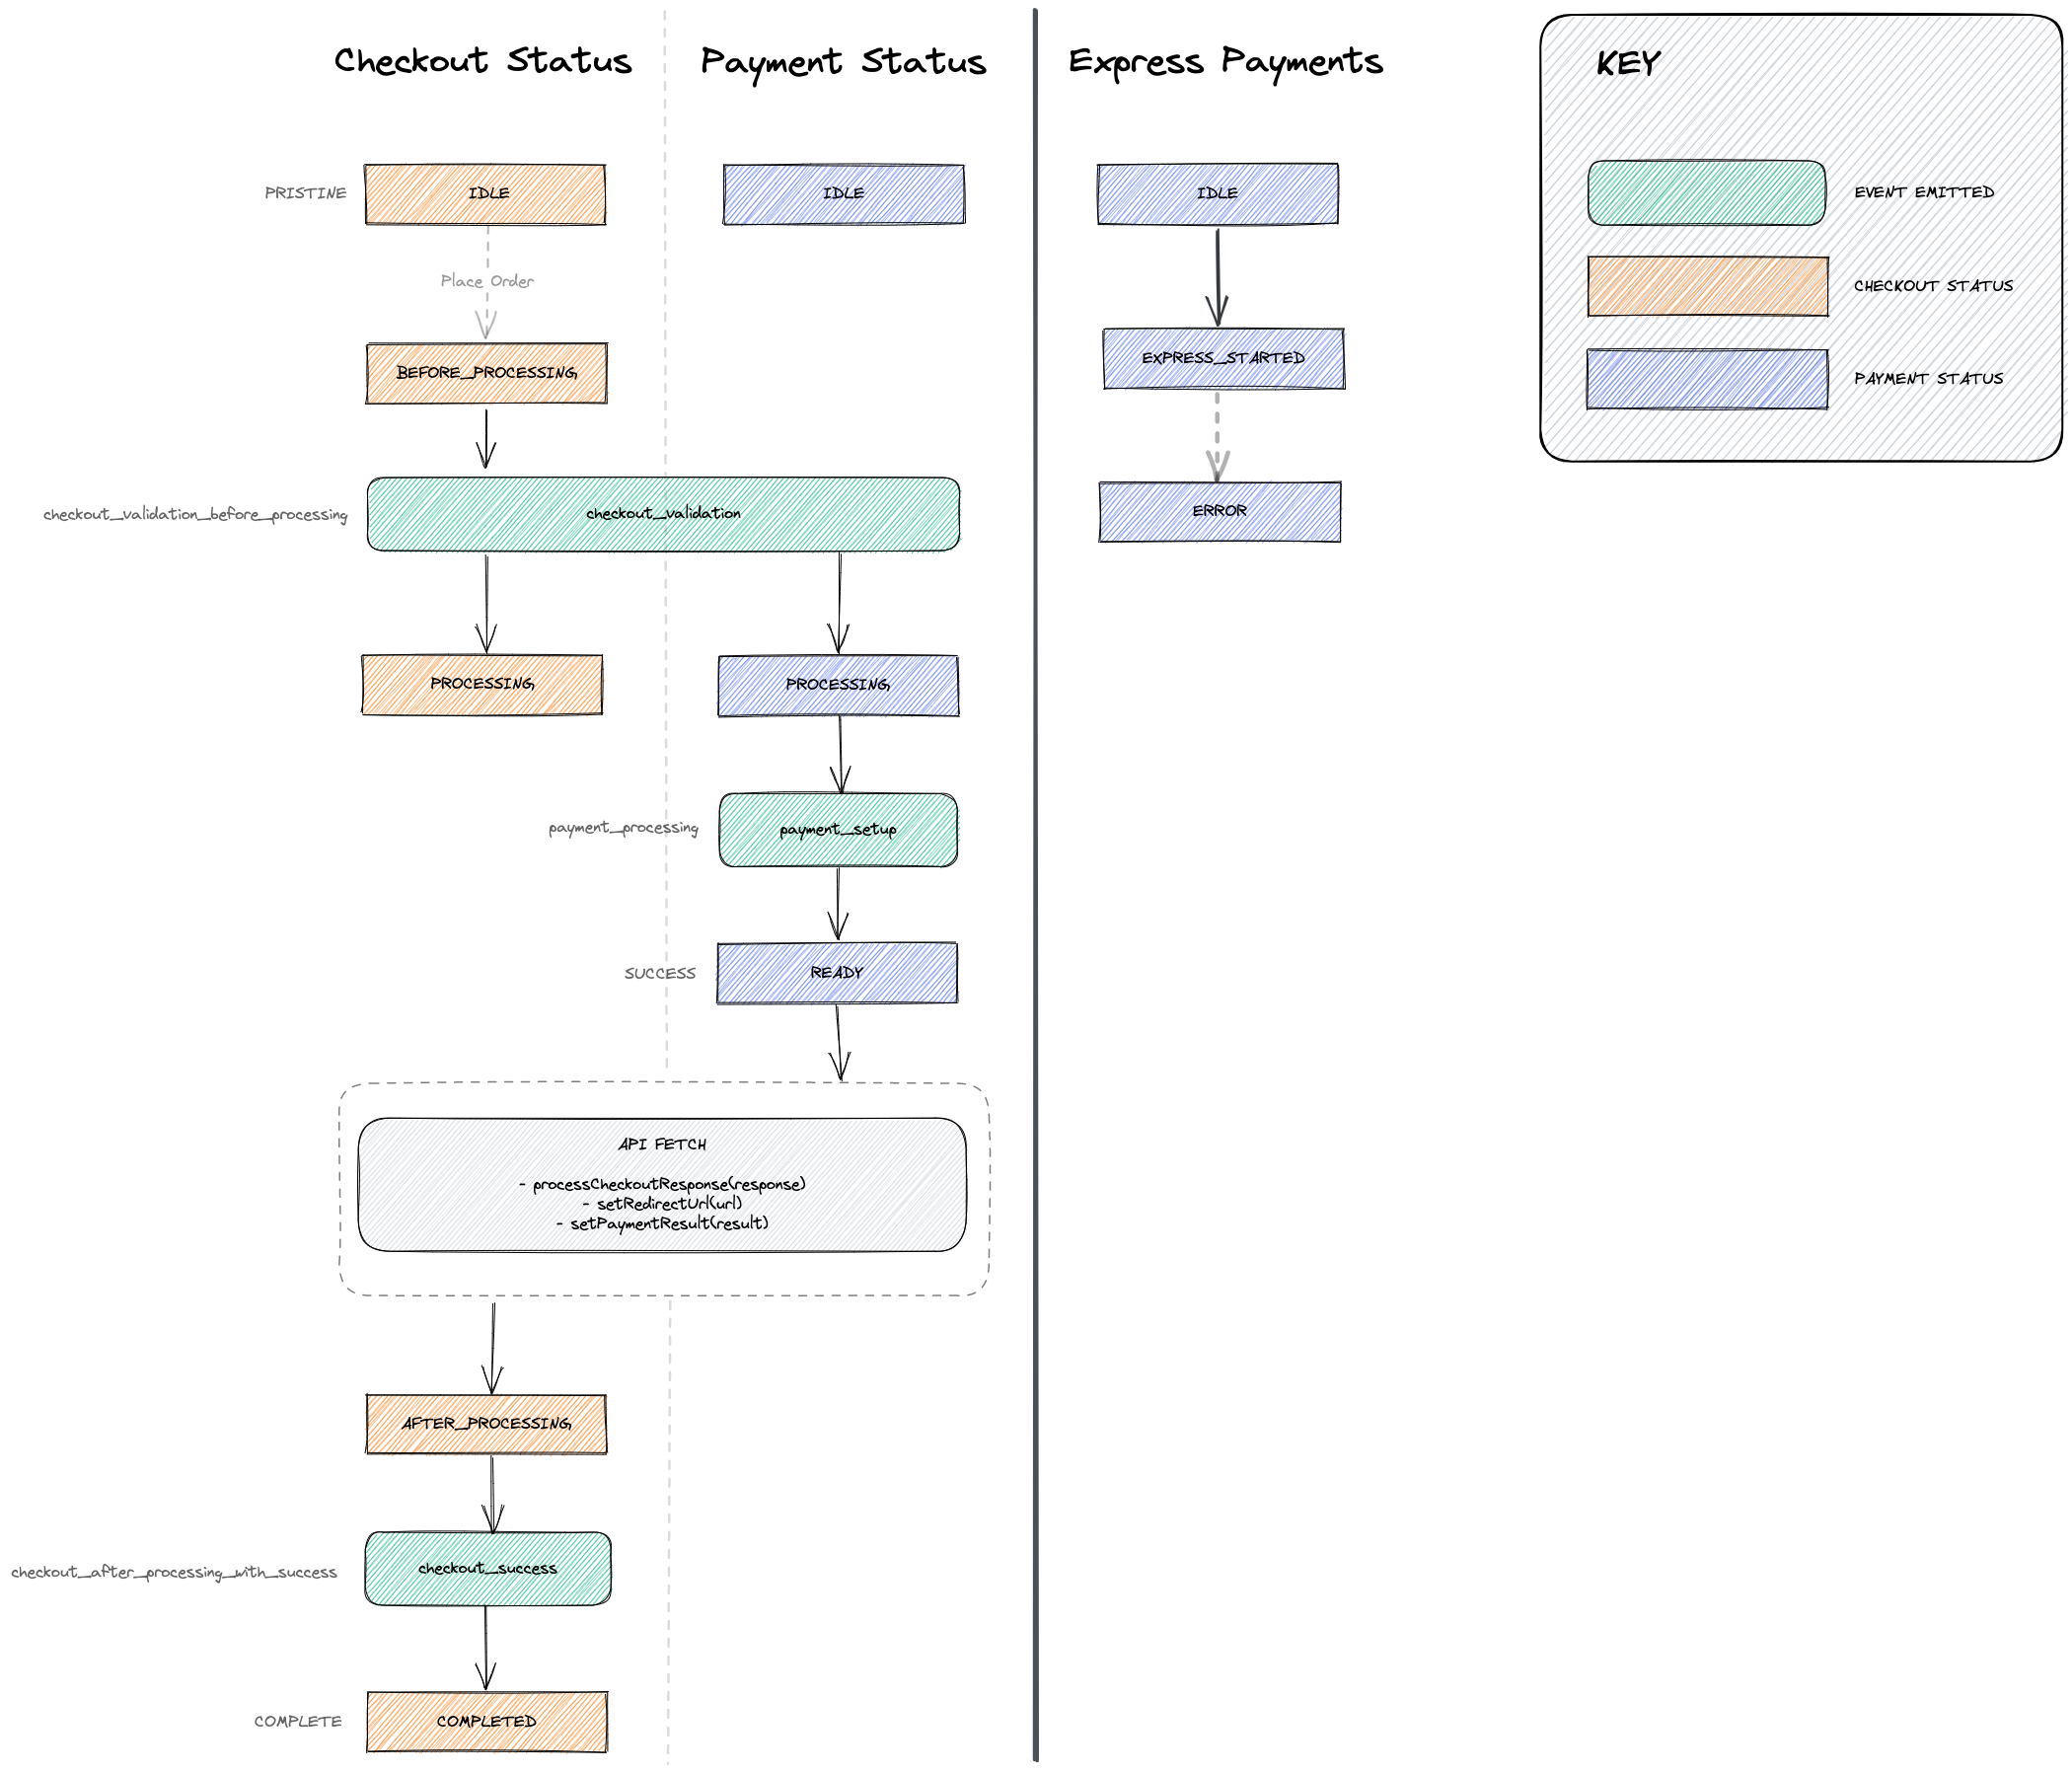
-
-### Use the @wordpress/components instead of wordpress-components while in editor ([8432](https://github.com/woocommerce/woocommerce-blocks/pull/8432))
-
-Prerequisites:
-
-- Make sure you don't have any "Express Payment Methods".
-
-1. Create a new post
-2. Add Cart block
-3. Still in Editor - find an "Express Checkout" section. Expected:
- - Icon, "Express Checkout" heading and Button looks like on a screenshots attached
- - Click button - you should be redirected to `wp-admin/admin.php?page=wc-settings&tab=checkout` page.
-
-| Case | Before | After |
-| ------------------------ | ----------------------------------------------------------------------------------------------------------------------------------------- | ----------------------------------------------------------------------------------------------------------------------------------------- |
-| Cart Express Payment | <img width="685" alt="image" src="https://user-images.githubusercontent.com/20098064/218985278-3a5ea338-3992-462f-b9df-2e609b01dd04.png"> | <img width="679" alt="image" src="https://user-images.githubusercontent.com/20098064/218985966-6a2e925c-307c-4941-bf69-7f5deeb3eb84.png"> |
-| Checkout Express Payment | <img width="663" alt="image" src="https://user-images.githubusercontent.com/20098064/218985353-44ec9b81-0eec-47e0-9d53-69948732884e.png"> | <img width="660" alt="image" src="https://user-images.githubusercontent.com/20098064/218985769-a9b75e08-0ed9-4730-8481-bce1c42bfb9a.png"> |
-
-### Check for wc-blocks script registration before checking payment method script dependencies ([8428](https://github.com/woocommerce/woocommerce-blocks/pull/8428))
-
-1. Install WooCommerce 7.1+ and Elementor 3.9.0+
-2. Navigate to the WordPress Admin > Posts > Add New
-3. Open the JS console and on the post page, click the "Edit With Elementor" button. Ensure no errors relating to payment method script dependencies appear in the console.
-4. Ensure payment methods work in the Checkout block correctly.
-
-### Move the usage of Notices from @wordpress/components from frontend to editor (Filter by Attribute) ([8457](https://github.com/woocommerce/woocommerce-blocks/pull/8457))
-
-1. Go to Editor and create new post
-2. Add a Filter by Attribute block.
-3. Don't choose any attribute and click "Done"
-
-**Expected:** Notice is displayed
-<img width="649" alt="image" src="https://user-images.githubusercontent.com/20098064/219357733-83bb4627-43b7-4b8b-9dd9-3f596659dbbc.png">
-
-4. Save the post and go to frontend
-
-**Expected:** There's no Filter by Attribute and no Notice.
-
----
-
-1. Create an attribute that no product is assigned to (Go to: `/wp-admin/edit.php?post_type=product&page=product_attributes` and create an attribute)
-2. Go to Editor and create new post
-3. Add a Filter by Attribute block.
-4. Choose the attribute that has no products assigned to
-
-**Expected:** Notice is displayed
-<img width="650" alt="image" src="https://user-images.githubusercontent.com/20098064/219358439-372690b3-ecb7-45a7-9ae6-b387ed2ecfd4.png">
-
-4. Save the post and go to frontend
-
-**Expected:** There's no Filter by Attribute and no Notice (although filter may be displayed for a glance while loading)
-
-### Add parsed border props to featured items ([8472](https://github.com/woocommerce/woocommerce-blocks/pull/8472))
-
-1. Add a Featured Item (Featured Category or Featured Product) block to a page or post.
-2. Select the border controls and add a border style. Add a color and give it some width.
-3. You should see the border you set dynamically display on the featured item.
-4. Now click on the `Unlink` button on the border controls and try setting different values for color and width for each of the border sides (top,right,bottom,left).
-5. Ensure this is working by visually seeing the changes to the featured item.
-6. Save and make sure this is also displaying correctly on the frontend.
-7. Test both `Featured Category` and `Featured Product` blocks.
-
-### Fix Product categories, Product Tags & Keyword filter not working in Products block ([8377](https://github.com/woocommerce/woocommerce-blocks/pull/8377))
-
-1. Create a new post
-2. Add Products block inside Editor
-3. Add Product categories and/or Product Tags and/or Keyword to Filters(see screenshot below)
-
-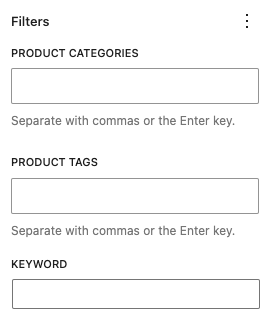
-
-4. Check the front-end. Only products with added categories, tags, or keywords are showing.
-
-### Move the usage of Notices from @wordpress/components from frontend to editor (Filter by Rating) ([8444](https://github.com/woocommerce/woocommerce-blocks/pull/8444))
-
-1. Make sure you have no products with ratings. You can achieve that by going to `wp-admin/edit.php?post_type=product&page=product-reviews`, mark all the reviews and Bulk Actions -> Move to Trash -> Apply (it can be reverted\*)
-2. Go to Editor and create new post
-3. Add a Filter by Rating block. See the notice is displayed
- <img width="969" alt="image" src="https://user-images.githubusercontent.com/20098064/219360523-410ddbb4-19cc-4dad-9c5a-ba9d1e89c094.png">
-4. Save the post and go to frontend. Confirm there's no Filter by Rating and no Notice.
-
-Note: to revert moving the reviews to trash go to `http://store.local/wp-admin/edit.php?post_type=product&page=product-reviews&comment_status=trash&paged=1`, mark all the reviews and Bulk Actions -> Restore -> Apply
-
-### Fix Catalog Sorting default color in dark backgrounds ([8483](https://github.com/woocommerce/woocommerce-blocks/pull/8483))
-
-1. Install a theme with a dark background (ie: theme TT3 with Auberginie style).
-2. Go to Appearance > Editor and edit the Product Catalog template.
-3. Add the `Catalog Sorting` block and save the template.
-4. Make sure it's legible in the editor and the frontend.
-5. Change the text color of the `Catalog Sorting` block.
-6. Verify the color is correctly set in the editor and the frontend.
-
-| Before | After |
-| ------------------------------------------------------------------------------------------------------------------------------------- | ------------------------------------------------------------------------------------------------------------------------------------- |
-| <img src="https://user-images.githubusercontent.com/3616980/220139289-8821dbc6-e76b-4aef-8664-dc9055880f5e.png" alt="" width="252" /> | <img src="https://user-images.githubusercontent.com/3616980/220139210-7400a6a7-0066-4d00-a85f-052705091d5a.png" alt="" width="252" /> |
-
-### Remove opinionated styles from Button component on block themes that define button styles ([8478](https://github.com/woocommerce/woocommerce-blocks/pull/8478))
-
-0. Create three posts, one with the Mini Cart block, another one with the Cart block and the last one with the Checkout block.
-
-#### Test different themes
-
-1. Twenty Twenty Three:
-
- 1.1. Install it from [here](https://wordpress.org/themes/twentytwentythree/).
-
- 1.2. Go to the pages created in step 0 and verify the Mini Cart, Cart and Checkout buttons **follow** the theme styles.
-
- 1.3. Go to Appearance > Editor > Styles > Browse Styles and change between style variations. Verify the buttons follow the styles in all of them.
-
-2. Pixl or another block theme with custom button styles but which is not TT3 or Zaino:
-
- 2.1. Install it from [here](https://wordpress.org/themes/pixl/).
-
- 2.2. Go to the pages created in step 0 and verify the Mini Cart, Cart and Checkout buttons **follow** the theme styles.
-
-| Before | After |
-| --------------------------------------------------------------------------------------------------------------- | --------------------------------------------------------------------------------------------------------------- |
-| 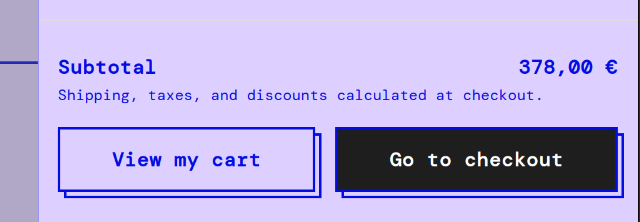 | 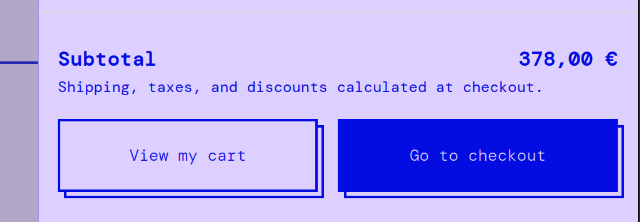 |
-
-3. Storefront or another classic theme (test that this PR doesn't introduce any regression):
- 3.1. Install it from [here](https://wordpress.org/themes/storefront/).
- 3.2. Go to the pages created in step 0 and verify the Mini Cart, Cart and Checkout buttons **don't follow** the theme styles. Instead, they have opinionated styles.
-
-### Update Product Details block so it inherits more styles from the theme ([8494](https://github.com/woocommerce/woocommerce-blocks/pull/8494))
-
-Repeat these testing steps with at least three themes: [TT2](https://wordpress.org/themes/twentytwentytwo/), [TT3](https://wordpress.org/themes/twentytwentythree/) and any other block theme which is not a child theme of TT2/TT3 (ie, [Pixl](https://wordpress.org/themes/pixl/)).
-
-1. Open the Single Product template in the frontend, look at how the _Description_, _Reviews_, etc. tabs are rendered.
-2. Go to Appearance > Editor and edit the Single Product template.
-3. Add the Product Details block and remove the Classic Template block.
-4. Go to the frontend and verify the styling of the tabs of the Product Details block looks the same as the ones of the Classic Template block in Step 1.
-5. Go back to the editor and clear the template customizations so the Classic Template block is added back.
-
-Note: the screenshots below display the Product Details block in the same template as the Classic Template block. Because of a recent change, adding both to the same template will cause different styling, so you will need to test with only one of them in the same template at the same time.
-
-| Theme | Before | After |
-| ---------------- | --------------------------------------------------------------------------------------------------------------- | --------------------------------------------------------------------------------------------------------------- |
-| TT2 |  |  |
-| TT3 (Auberginie) |  |  |
-| TT3 (Whisper) |  |  |
-| Pixl |  |  |
-
-**Testing the editor view:**
-
-With [TT2](https://wordpress.org/themes/twentytwentytwo/) and [TT3](https://wordpress.org/themes/twentytwentythree/):
-
-1. Go to Appearance > Editor and edit the Single Product template.
-2. Add the Product Details block after the Classic Template block.
-3. Verify the styling of the tabs of the Classic Template and Single Product block look the same in the editor.
-
-### Show Cart and Checkout blocks in Style Book ([8489](https://github.com/woocommerce/woocommerce-blocks/pull/8489))
-
-1. Ensure that a block theme is installed, e.g. [TT3](https://wordpress.org/themes/twentytwentythree/) and install [Gutenberg v15.1.0](https://github.com/WordPress/gutenberg/releases/download/v15.1.0/gutenberg.zip)
-2. Go to `WP Admin » Appearance » Editor`.
-3. Click the blue `Edit` button and then click the `Styles` icon in the upper-right corner.
- <img width="273" alt="Screenshot 2023-02-21 at 13 23 00" src="https://user-images.githubusercontent.com/3323310/220263914-44b7013d-c98a-4008-b3ab-a00330d73d22.png">
-4. Click on the `Open Style Book` icon (the one that looks like an eye)
- <img width="282" alt="Screenshot 2023-02-21 at 13 23 24" src="https://user-images.githubusercontent.com/3323310/220263978-e0f6e679-a3b4-43be-93a0-c8521b9dea9a.png">
-5. Verify that both the Cart and the Checkout blocks are visible.
-
-Kindly note that the Cart and the Checkout blocks will not appear in the blocks sidebar, as they do not support Global Styles yet:
-<img width="279" alt="Screenshot 2023-02-21 at 13 24 58" src="https://user-images.githubusercontent.com/3323310/220264263-3ce8a9f2-8302-4b0c-9e3b-6851453ca573.png">
-
-### Make a product titles in Products block a link ([8519](https://github.com/woocommerce/woocommerce-blocks/pull/8519))
-
-1. Go to the Editor
-2. Add a _Products_ block
-3. Focus on the Product Title block
-
-Expected: "Make title a link" in Link Settings is enabled by default
-
- <img width="400" alt="image" src="https://user-images.githubusercontent.com/20098064/220889702-e0e5ae96-ff29-46f7-be60-f46c0b24e278.png">
-
-| Before | After |
-| ----------------------------------------------------------------------------------------------------------------------------------------- | ----------------------------------------------------------------------------------------------------------------------------------------- |
-| <img width="683" alt="image" src="https://user-images.githubusercontent.com/20098064/220889529-1d791b2d-7648-471d-a598-2f0a0878ff93.png"> | <img width="689" alt="image" src="https://user-images.githubusercontent.com/20098064/220889702-e0e5ae96-ff29-46f7-be60-f46c0b24e278.png"> |
-
-### Fix noticeContext declaration in the Shipping calculator ([8495](https://github.com/woocommerce/woocommerce-blocks/pull/8495))
-
-1.Add a product to the cart. 2. Go to the Cart block page. 3. Open the shipping calculator. 4. Enter any address with an invalid zip code. 5. Confirm the error notice is getting displayed in the calculator. 6. Confirm there are no errors in the browser console.
-
-| Before | After |
-| ------------------------------------------------------------------------------------------------------------------------------------------ | ----------------------------------------------------------------------------------------------------------------------------------------- |
-| <img width="1460" alt="image" src="https://user-images.githubusercontent.com/11503784/220375868-807057f0-dd30-4a4b-9912-e45e51f91f34.png"> | <img width="772" alt="image" src="https://user-images.githubusercontent.com/11503784/220375271-3f6b076b-eef1-4e07-96ec-e0d116d289dd.png"> |
-
-### Fix Product Price and Product Rating alignment ([8526](https://github.com/woocommerce/woocommerce-blocks/pull/8526))
-
-1. Create a post or page.
-2. Add a Products block.
-3. Confirm the Product Price is centered by default in the editor.
-4. Save and go to the frontend.
-5. Confirm the Product Price is centered there.
-6. Go back to the editor and add another Product Price and a Product Rating block.
-7. Toggle their alignment (left, center, right) and verify whatever setting you choose is applied in the editor and the frontend.
-
-### Improve the dismissal behavior of the incompatible gateways notice ([8299](https://github.com/woocommerce/woocommerce-blocks/pull/8299))
-
-1. Add at least two incompatible payment gateways with the C&C Blocks. You can find them in our [list of incompatible plugins with the Cart & Checkout Blocks](https://github.com/woocommerce/woocommerce-blocks/issues?q=is%3Aopen+is%3Aissue+label%3A%22plugin+incompatibility%22) (e.g., [Paypal](https://woocommerce.com/document/woocommerce-paypal-payments/#account-setup)). You will need to configure them to be detected and used by WooCommerce. [Klarna Payments](https://docs.klarna.com/platform-solutions/woocommerce/klarna-checkout/configuring-klarna-checkout-on-woocommerce/) is compatible with the Cart & Checkout Block since v3.0.0. To use it in this test you can [rollback](https://wordpress.org/plugins/wp-rollback/) to a previous version (e.g. Klarna v2.12.1)
-2. Create a new page and add the `Checkout` Block
-3. Select any element of the `Checkout` Block. You should see a notice with the list of incompatible gateways in the right sidebar of the editor (i.e., `Settings -> Block`)
-
-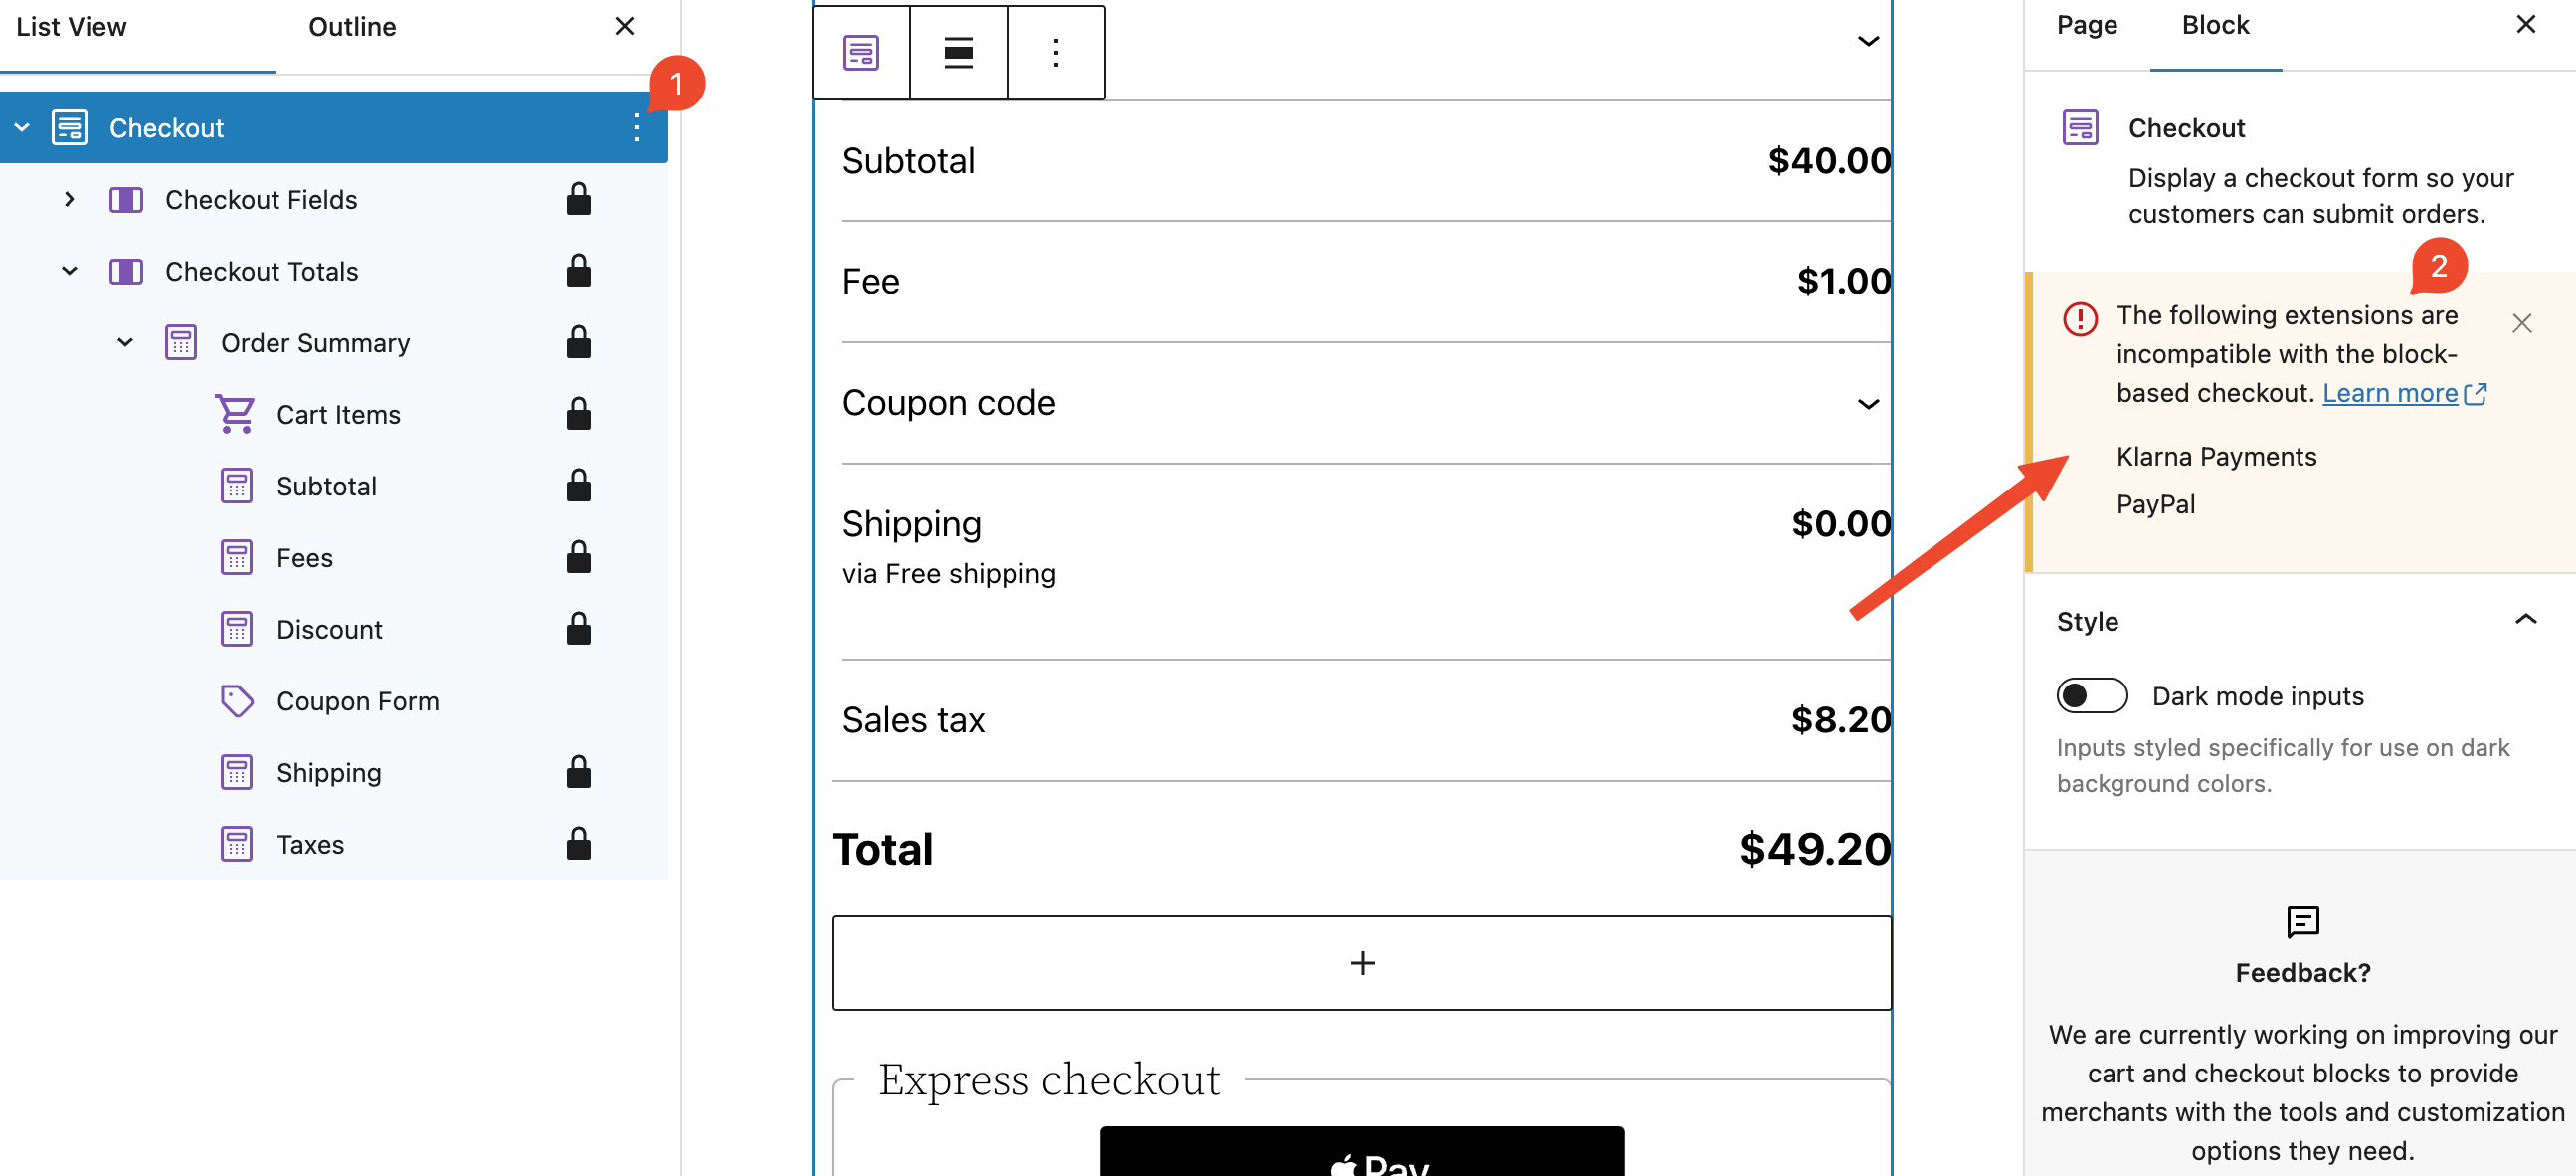
-
-4. Dismiss the `incompatible gateways` notice by clicking on the `X` button on its right top side:
-
-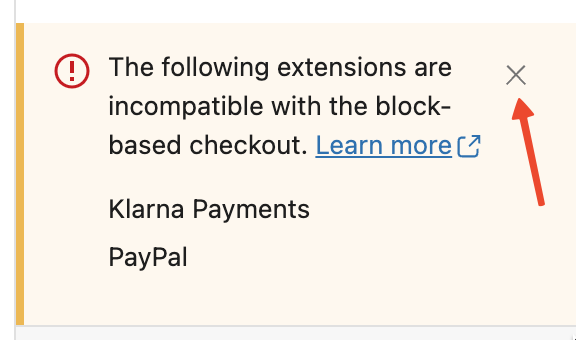
-
-5. The notice should be removed, and The `make as default` & `sidebar compatibility notices` should be visible instead. Select another Checkout Inner Block. Make sure the `incompatible gateways` notice is still dismissed.
-6. Refresh the page. Make sure the `incompatible gateways` notice is still dismissed.
-7. Do the same test from step 2 to 6 using the `Cart` Block
-8. Disable an incompatible payment gateway (`Plugins -> [Plugin_name] -> Deactivate` or `WooCommerce -> Settings -> Payments`, find the payment gateway and toggle it off)
-9. Go to `Checkout` Block page, and select any element of it. You should see the notice again with the list **of only the enabled incompatible gateways** in the right sidebar of the editor (i.e., `Settings -> Block`)
-
-<img width="946" alt="image" src="https://user-images.githubusercontent.com/14235870/215831257-c6b57c6d-b183-492b-94c9-0f3f8474cd3f.png">
-
-10. Dismiss the notice (see step 4). Go through the steps 5 & 6 again.
-11. Do the same test in step 9 & 10 in the `Cart` Block page
-12. Enable the previously disabled incompatible payment gateway from step 8. Ensure we have the correct behavior when going through the steps 9 to 11.
-
-### Add Related Products block ([8522](https://github.com/woocommerce/woocommerce-blocks/pull/8522))
-
-1. Edit the Single Product Template.
-2. Below the `WooCommerce Single Product Block`, add the `Related Products block`.
-3. Be sure that above the block, you see a notice (like the image below).
-4. Check that the hierarchy in the list view is the same as the image below.
-5. Save the template.
-6. On the frontend side, click on a product.
-7. Be sure that the products inside the `Related Products block` are the same as the row generated by the `WooCommerce Single Product Block`.
-
-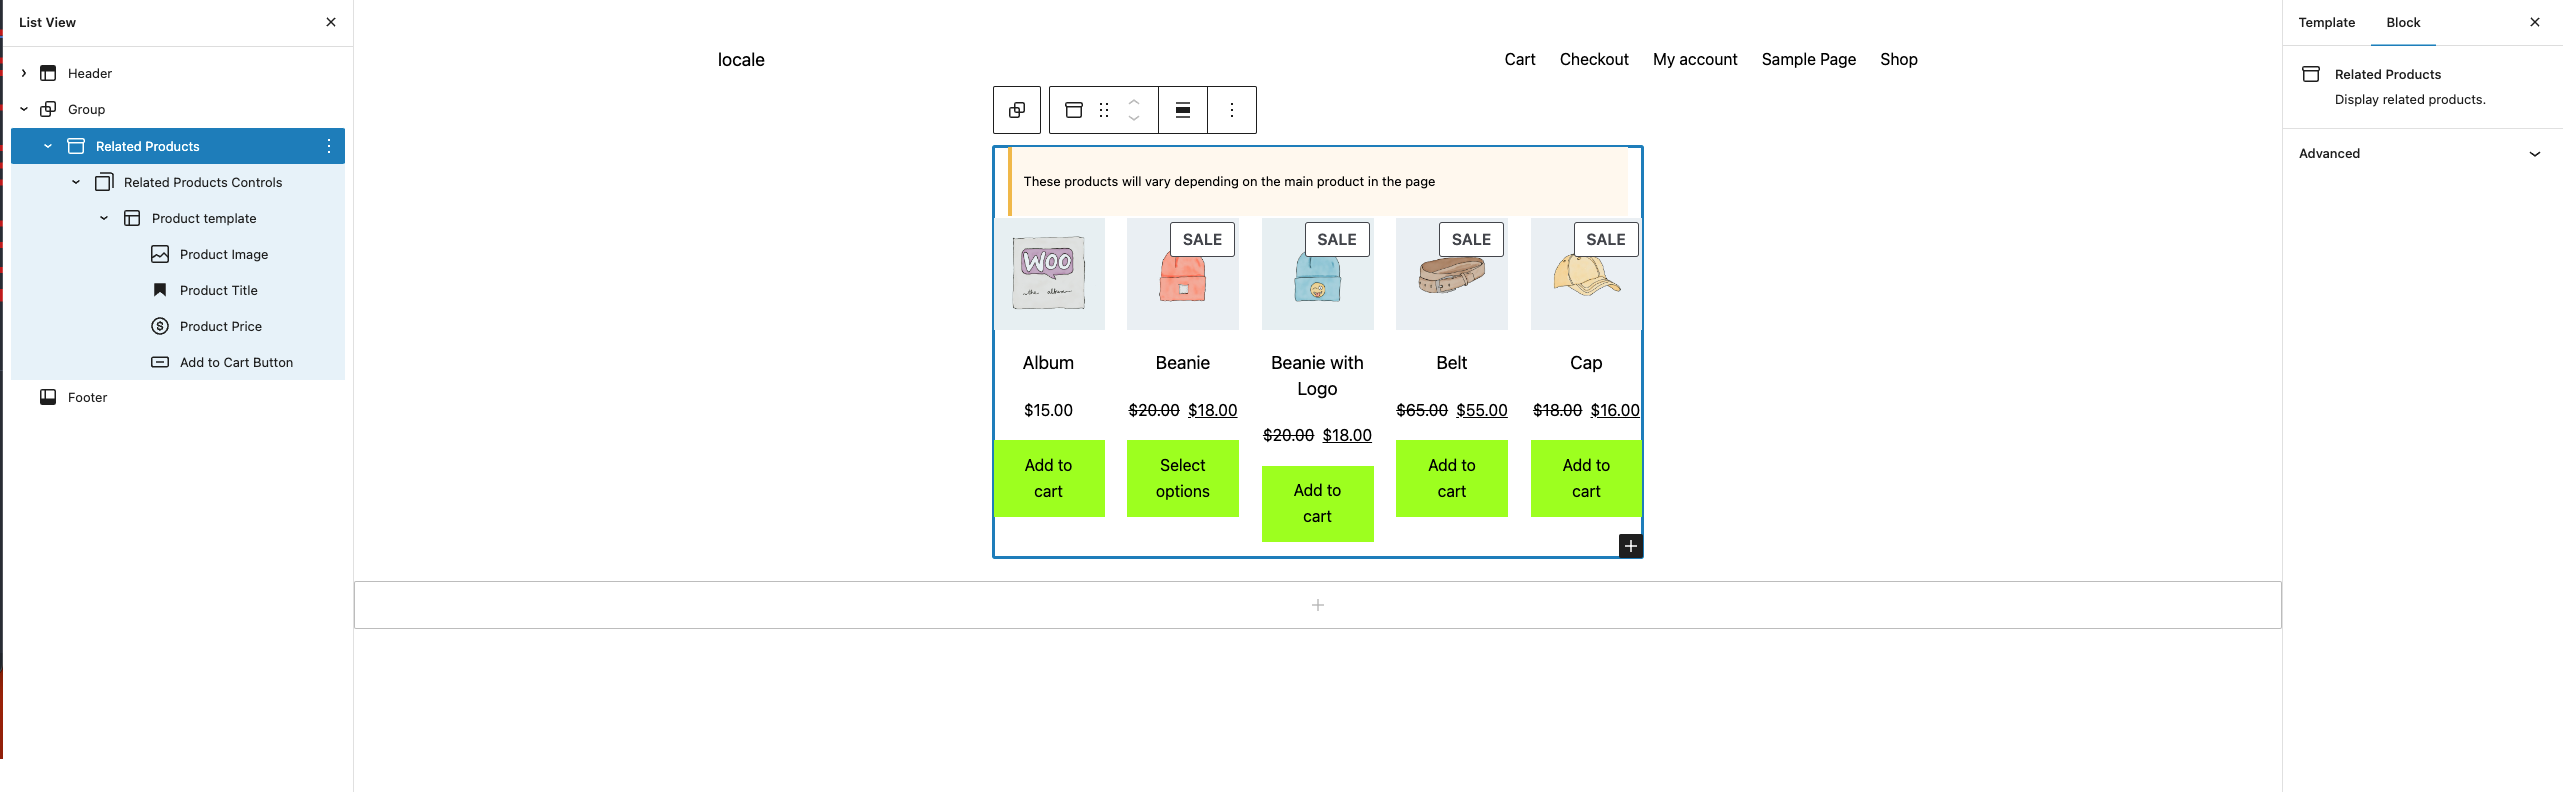
-
-### Move usage of wordpress-components to editor and replace with @wordpr… ([8463](https://github.com/woocommerce/woocommerce-blocks/pull/8463))
-
-1. Make sure you didn't setup any shipping methods. It can be checked in here: `wp-admin/admin.php?page=wc-settings&tab=shipping§ion`
-2. Create new post
-3. Add a Checkout block.
-
-**Expected:** Placeholder is displayed in a Shipping Options section
-<img width="676" alt="image" src="https://user-images.githubusercontent.com/20098064/219406566-7ce32980-a758-401f-b976-dab3ee28ceea.png">
-
-4. Save the post and go to frontend
-
-**Expected:** Shipping options are not displayed
-
-5. Add a shipping option (`wp-admin/admin.php?page=wc-settings&tab=shipping§ion`, Add Shipping Zone -> Go through the form)
-6. Go back to the post in editor
-
-**Expected:** There's no Placeholder in Shipping Options
-<img width="710" alt="image" src="https://user-images.githubusercontent.com/20098064/219407408-2195abee-0467-44a6-8d1c-749a68038a39.png">
-
-7. Go to the frontend
-
-**Expected:** Shipping options are there
-
-### Prevent double triggering select shipping on the same rate ([8497](https://github.com/woocommerce/woocommerce-blocks/pull/8497))
-
-1. Set your default country to something like US/CA
-2. Enable Local Pickup and add 2 locations to it.
-3. In your Shipping zones, set shipping for Greece
-4. Open Checkout, it should load on Local Pickup selected.
-5. Change to regular shipping
-6. Change country to Greece and set a city
-7. Your City value should persist
-8. Switch back to local pickup, it should be selected.
-9. Switch back to regular shipping, it should work.
-
-### Do not mount the coupon form until toggled visible ([8525](https://github.com/woocommerce/woocommerce-blocks/pull/8525))
-
-1. Add something to your cart and visit the cart block page.
-2. Click the "add a coupon" link
-3. The input should focus
-
-### Filter out saved payment methods for payment gateways that are not enabled ([8461](https://github.com/woocommerce/woocommerce-blocks/pull/8461))
-
-1. Install Stripe, enable it, and checkout (save your card to the account)
-2. Checkout another order but this time confirm the method you saved in step 1 is displayed as an option.
-3. Go to Payment settings and uncheck the "enabled" checkbox for stripe. Do not disable the actual plugin.
-4. Checkout again. Confirm the saved card is not visible.
-
-### Disable compatibility layer via hook ([8550](https://github.com/woocommerce/woocommerce-blocks/pull/8550))
-
-1. With the [Twenty Twenty-Three](https://wordpress.org/themes/twentytwentythree/) theme installed, go to `Appearance » Editor`.
-2. Edit the Product Catalog template, adding the Products block above the WooCommerce Product Grid Block.
-3. Save.
-4. Go to the front end and verify that the `WooCommerce Product Grid Block` is visible.
-
-### [Blockifying Product Archive Templates]: Implement the blockified template conversion for the Classic Template Block. ([8248](https://github.com/woocommerce/woocommerce-blocks/pull/8248))
-
-#### Conversion is not yet possible (hidden behind feature flag)
-
-##### Prerequisites
-
-- WordPress: >=6.1
-- Make sure Single Product template is cleared out to the default state. To achieve that:
- 1. Go to (`/wp-admin/site-editor.php?postType=wp_template`)
- 2. Click three dots next to template and click "Clear customizations"
-
-##### Steps
-
-1. Enter the Single Product template
-2. Check that placeholder description says "This block serves as a placeholder for your WooCommerce Single Product Block. It will display the actual product image, title, price in your store. You can move this placeholder around and add more blocks around to customize the template."
-3. "Upgrade to Products block" button is not visible.
-
-Repeat for Product Catalog, Products by Category and Product Search Results templates. The placeholder description may vary slightly.
-
-## Feature plugin
-
-### Product Price: Fix typography styles in the editor ([8398](https://github.com/woocommerce/woocommerce-blocks/pull/8398))
-
-1. Add a new page with the **Products** block.
-2. Make sure you have a product with a regular and sale price.
-3. Set a custom `Size` and `Appearance` for the Product Price block.
-4. Notice that the change displays fine in the editor and frontend both for regular and sale prices.
-
-| Before | After |
-| ---------------------------------------------------------------------------------------------------------------- | --------------------------------------------------------------------------------------------------------------- |
-| 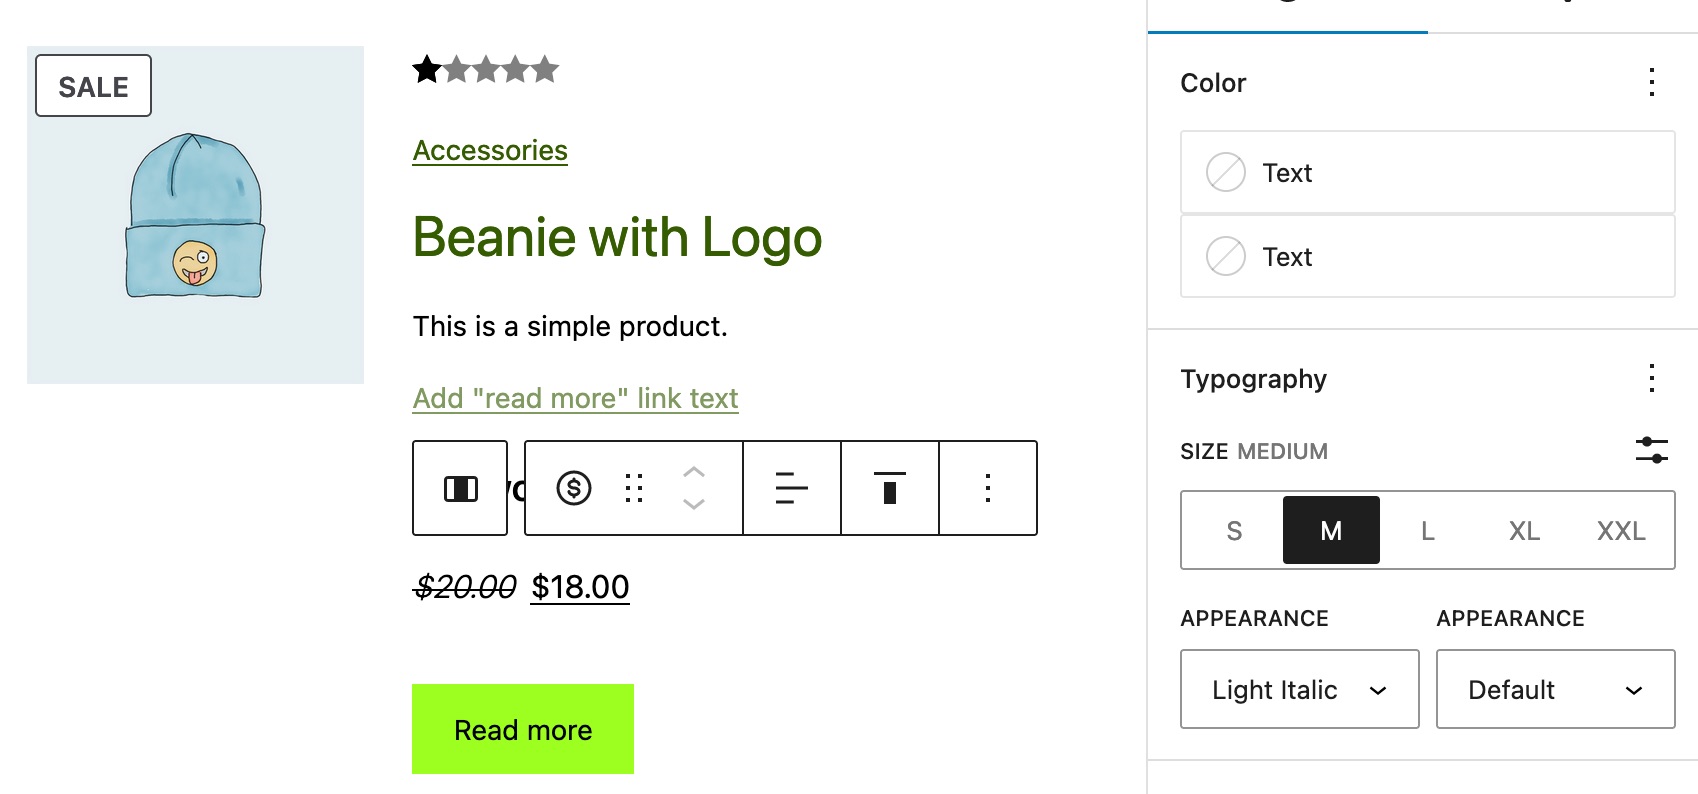 | 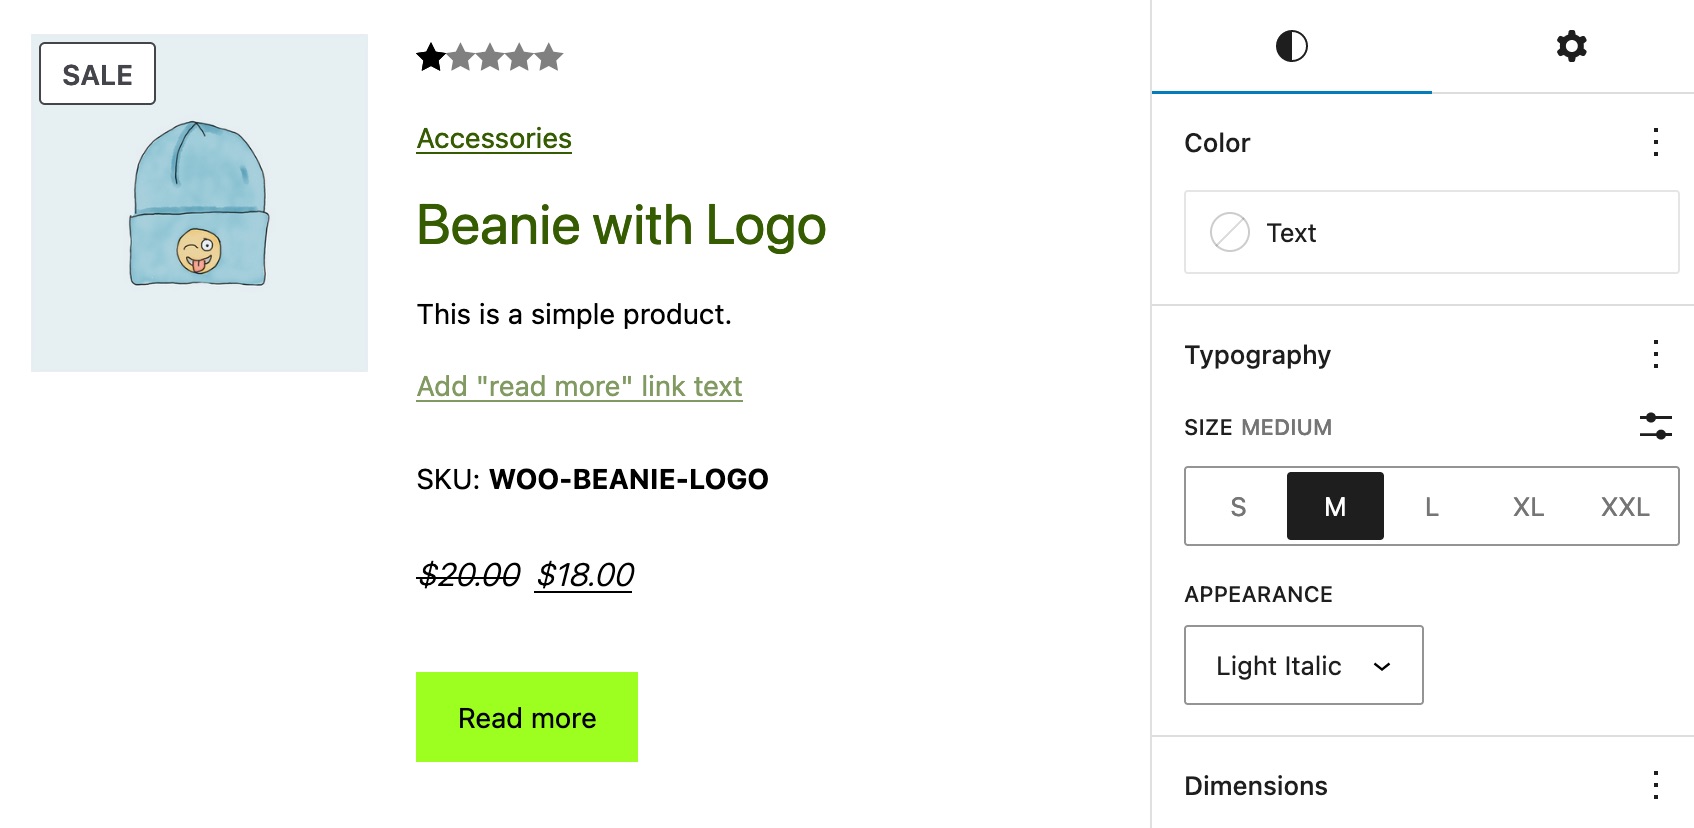 |
-
-## Experimental
-
-### [Blockifying Product Archive Templates]: Implement the blockified template conversion for the Classic Template Block. ([8248](https://github.com/woocommerce/woocommerce-blocks/pull/8248))
-
-#### Conversion is not possible on WP lower than 6.1
-
-##### Prerequisites
-
-WordPress: <6.1
-Make sure Product Catalog and Products by Category templates are cleared out to the default state. To achieve that:
-
-1. Go to (`/wp-admin/site-editor.php?postType=wp_template`)
-2. Click three dots next to template and click "Clear customizations"
-
-##### Steps
-
-1. Edit the Product Catalog template
-2. Check that placeholder description says "This block serves as a placeholder for your WooCommerce Product Grid Block. It will display the actual product image, title, price in your store. You can move this placeholder around and add more blocks around to customize the template. Don't worry, you can always revert back."
-3. "Upgrade to Products block" button is not visible.
-
----
-
-#### Convert classic templates on Product Archive templates
-
-##### Prerequisites
-
-- WordPress: >=6.1
-- Make sure Product Catalog/Products by Category/Products by Attribute/Products by Tag/Product Search Results templates are cleared out to the default state. To achieve that:
- 1. Go to (`/wp-admin/site-editor.php?postType=wp_template`)
- 2. Click three dots next to template and click "Clear customizations"
-
-##### Steps
-
-1. Enter the Product Catalog template
-2. Check that placeholder description says "This block serves as a placeholder for your WooCommerce Product Grid Block. We recommend upgrading to the Products block for more features to edit your products visually. Don't worry, you can always revert back."
-3. Open List View of the blocks
-4. Click "Upgrade to Products block" button
-
-<img width="902" alt="Screen Shot 2023-01-25 at 11 27 32 AM" src="https://user-images.githubusercontent.com/20098064/214540490-839d351d-c837-4db5-b991-f8293b8a924b.png">
-
-WooCommerce Product Grid Block is replaced with blocks:
-
-- Products (Beta)
- - Store Breadcrumbs (video was recorded before Breadcrumbs were added)
- - Archive Title
- - Term Description (only in _Products By \*_ templates)
- - Store Notices
- - Row
- - Product Results Count
- - Catalog Sorting
- - Product Template
- - Pagination
- - No Results
-
-<img width="377" alt="image" src="https://user-images.githubusercontent.com/20098064/220606297-868820be-7d91-4d44-b359-22e988ec9e26.png">
-
-5. Go to "Products (beta)" block settings
-6. Make sure "Inherit query from template" is ENABLED! It should be by default.
-7. Save the template
-8. Go to frontend (`/shop`) and check it the blocks are displayed correctly. You should expect the view like this:
-
-<img width="1791" alt="image" src="https://user-images.githubusercontent.com/20098064/216027859-eab87a5a-b0e9-4312-bcd0-a0e36a73d6f5.png">
-
-- Check the Product Results Count displays proper numbers, e.g. go to the page 2 (it should say "Showing 17–17 of 17 results" if you're using "standard" products set).
-- Check the Catalog Sorting sorts the products correctly, e.g. by price.
-
-Repeat the steps above for:
-
-- Products by Category (to check frontend, go to `/product-category/clothing/`)
-- Expected view contains Breadcrums
- <img width="1698" alt="image" src="https://user-images.githubusercontent.com/20098064/216028890-a36151d9-f61d-4d28-9254-f99fe841db21.png">
-
----
-
-#### Convert classic templates on Product Search Results
-
-##### Prerequisites
-
-- WordPress: >=6.1
-- Make sure Product Search Results template is cleared out to the default state. To achieve that:
- 1. Go to (`/wp-admin/site-editor.php?postType=wp_template`)
- 2. Click three dots next to template and click "Clear customizations"
-
-##### Steps
-
-1. Enter the Product Search Results template
-2. Check that placeholder description says "This block serves as a placeholder for your WooCommerce Product Search Results Block. We recommend upgrading to the Products block for more features to edit your products visually. Don't worry, you can always revert back."
-3. Open List View of the blocks
-4. Click "Upgrade to Products block" button
- <img width="902" alt="Screen Shot 2023-01-25 at 11 27 32 AM" src="https://user-images.githubusercontent.com/20098064/214540490-839d351d-c837-4db5-b991-f8293b8a924b.png">
-
-WooCommerce Product Grid Block is replaced with blocks:
-
-- Products (Beta) - Search Results Title - Store Notices - Row - Product Results Count - Catalog Sorting - Product Template - Pagination - No Results - Paragraph (content: "No products were found matching your selection.") - Product Search
- <img width="353" alt="image" src="https://user-images.githubusercontent.com/20098064/220606824-b69d0ed1-d7d0-4ed9-8d6a-33a4d2279390.png">
-
-5. Go to "Products (beta)" block settings
-6. Make sure "Inherit query from template" is ENABLED! It should be by default.
-7. Add a Product Search block to the Header template
-8. Save the template
-9. Go to frontend (e.g. `/shop`)
-10. Use Product Search in the template
-11. Enter a phrase that would cover some product names like: `t shirt` or `beanie`. You should expect the product list
- <img width="1689" alt="image" src="https://user-images.githubusercontent.com/20098064/216032029-c7b53c21-0f90-4eeb-8785-f91e4847ed84.png">
-12. Enter a random phrase like `blah blah` or `cars`. You should expect the "No results" page with information and Product Search bar:
- <img width="1688" alt="image" src="https://user-images.githubusercontent.com/20098064/216032232-787b4cd9-8a8e-4854-9983-8e31d6f5e57a.png">
-
----
-
-#### Align attribute is preserved
-
-##### Prerequisites
-
-WordPress: >=6.1
-Make sure Product Catalog template is cleared out to the default state. To achieve that:
-
-1. Go to (`/wp-admin/site-editor.php?postType=wp_template`)
-2. Click three dots next to template and click "Clear customizations"
-
-##### Steps
-
-1. Enter the Product Catalog template
-2. Change the `align` setting of the Classic Template block to either "None" or "Full width"
- <img width="509" alt="image" src="https://user-images.githubusercontent.com/20098064/216032869-0dc71774-7a58-4e88-87cb-aa8be28f780a.png">
-3. Click "Upgrade to Products block" button: Blocks keeps the same `align` setting in Editor:
- - Store Breadcrumbs
- - Archive Title
- - Store Notices
- - Row
- - Products
-4. Save the template
-5. Go to frontend (`/shop`): Blocks keeps the same width (expected to be 650px wide in case of "None" and full available width in case of "Full width" option)
-
-#### Product Archive - side by side comparison (editor)
-
-| Classic Template | Blockified Template |
-| -------------------------------------------------------------------------------------------------------------------------------------------- | ------------------------------------------------------------------------------------------------------------------------------------------ |
-| . <img width="1452" alt="image" src="https://user-images.githubusercontent.com/20098064/214842888-86fdf879-1a47-4c4c-882a-df28101a5da6.png"> | <img width="1407" alt="image" src="https://user-images.githubusercontent.com/20098064/214842960-4ec491b4-4f16-4b64-a234-ecb33501d061.png"> |
-
-#### Product Archive - side by side comparison (frontend)
-
-| Classic Template | Blockified Template |
-| -------------------------------------------------------------------------------------------------------------------------------------------- | ------------------------------------------------------------------------------------------------------------------------------------------ |
-| . <img width="1755" alt="image" src="https://user-images.githubusercontent.com/20098064/214839214-5939fdc6-282d-4fbd-8255-a37d7978f635.png"> | <img width="1989" alt="image" src="https://user-images.githubusercontent.com/20098064/214839357-1e504761-c980-4a4e-843d-414af8c0c1de.png"> |
-
-#### Product Archive - copy update (editor)
-
-| Before | After |
-| ------------------------------------------------------------------------------------------------------------------------------------------- | ------------------------------------------------------------------------------------------------------------------------------------------ |
-| .<img width="1071" alt="image" src="https://user-images.githubusercontent.com/20098064/214840855-2b708b27-b38d-4d45-93d6-a59986bdcad3.png"> | <img width="1106" alt="image" src="https://user-images.githubusercontent.com/20098064/214840974-1abee34c-6f6f-4474-a423-0d8d12ca5896.png"> |
-
-#### Single product - copy update (editor)
-
-| Before | After |
-| ------------------------------------------------------------------------------------------------------------------------------------------- | ------------------------------------------------------------------------------------------------------------------------------------------ |
-| .<img width="1078" alt="image" src="https://user-images.githubusercontent.com/20098064/214840396-ea8a3a0d-2aeb-4a01-9b87-3e2459a9d406.png"> | <img width="1055" alt="image" src="https://user-images.githubusercontent.com/20098064/214840017-dceb997a-0d03-448c-8f37-23a11f4e7b6a.png"> |
-
-Video presents the replacement of a Classic Template on two templates: Product Catalog and Products by Category
-
-<video src="https://user-images.githubusercontent.com/20098064/214537418-51c74d39-7e00-4e26-9c2c-fe2e0f245390.mov"></video>
-
-### Simplify unused Add to Cart button form placeholder for grouped product ([8438](https://github.com/woocommerce/woocommerce-blocks/pull/8438))
-
-1. Go to Editor
-2. Edit the Product Catalog template
-3. Add All Products block
-4. Enter the "edit" mode of All Products block by clicking a pencil button
-5. Remove "Add to Cart Button" block
-6. Add "Add to Cart" block - THESE ARE TWO SEPARATE BLOCKS. IT'S ABOUT "ADD TO CART" BLOCK!
-7. By default the "Display form elements" toggle should be disabled
- **Expected**: Button looks like on a pictures above
-8. Save the changes and check the frontend as well
-
-9. Enter the edit mode of "Add to Cart" button (there's a [bug that block cannot be clicked](https://github.com/woocommerce/woocommerce-blocks/issues/8439). To enter the edit mode, please open a "list view" of blocks and choose "Add to Cart" from there)
-10. Enable "Display form elements" toggle
- **Expected**: Button looks like on a pictures above (while it changes to form for other types of products: simple, variable)
-11. Save the changes and check the frontend as well
-
-#### Editor - Grouped product is the middle one on each image. Other products are included for comparison
-
-| Case | Before | After |
-| ------------------------------- | ----------------------------------------------------------------------------------------------------------------------------------------- | ----------------------------------------------------------------------------------------------------------------------------------------- |
-| Display form elements: disabled | <img width="620" alt="image" src="https://user-images.githubusercontent.com/20098064/219035374-59f7e3d5-cf88-4450-8052-b1e7bcde275b.png"> | <img width="637" alt="image" src="https://user-images.githubusercontent.com/20098064/219033902-bc991786-e9cc-41c6-9ae8-1f33cda4378c.png"> |
-| Display form elements: enabled | <img width="630" alt="image" src="https://user-images.githubusercontent.com/20098064/219035240-8e943b7d-5422-4acf-9cda-f610be2f3fb8.png"> | <img width="628" alt="image" src="https://user-images.githubusercontent.com/20098064/219034539-606de553-f664-4e45-b252-a903001a455b.png"> |
-
-#### Frontend - Grouped product is the middle one on each image. Other products are included for comparison
-
-| Case | Before | After |
-| ------------------------------- | ----------------------------------------------------------------------------------------------------------------------------------------- | ----------------------------------------------------------------------------------------------------------------------------------------- |
-| Display form elements: disabled | <img width="671" alt="image" src="https://user-images.githubusercontent.com/20098064/219035426-a0032999-2d10-4389-9945-0ba2fb7accc7.png"> | <img width="658" alt="image" src="https://user-images.githubusercontent.com/20098064/219034371-c2ab137a-1c38-4907-91c3-a5c69db8fed3.png"> |
-| Display form elements: enabled | <img width="665" alt="image" src="https://user-images.githubusercontent.com/20098064/219035271-97621392-9299-4cde-9628-fa750f805faf.png"> | <img width="659" alt="image" src="https://user-images.githubusercontent.com/20098064/219034622-44db616a-5a7e-4359-bac7-537c404f1add.png"> |
diff --git a/plugins/woocommerce/client/blocks/docs/internal-developers/testing/releases/971.md b/plugins/woocommerce/client/blocks/docs/internal-developers/testing/releases/971.md
deleted file mode 100644
index 6344f844c33..00000000000
--- a/plugins/woocommerce/client/blocks/docs/internal-developers/testing/releases/971.md
+++ /dev/null
@@ -1,3 +0,0 @@
-# Testing notes and ZIP for release 9.7.1
-
-No User Facing Testing required with this patch release.
diff --git a/plugins/woocommerce/client/blocks/docs/internal-developers/testing/releases/972.md b/plugins/woocommerce/client/blocks/docs/internal-developers/testing/releases/972.md
deleted file mode 100644
index 1c7ff08def6..00000000000
--- a/plugins/woocommerce/client/blocks/docs/internal-developers/testing/releases/972.md
+++ /dev/null
@@ -1,7 +0,0 @@
-# Testing notes and ZIP for release 9.7.2
-
-Zip file for testing: [woocommerce-gutenberg-products-block.zip](https://github.com/woocommerce/woocommerce-blocks/files/10881589/woocommerce-gutenberg-products-block.zip)
-
-## WooCommerce Core
-
-Install WC Blocks in a site with WP 6.1.1 and Gutenberg disabled and verify there is no PHP fatal error.
diff --git a/plugins/woocommerce/client/blocks/docs/internal-developers/testing/releases/980.md b/plugins/woocommerce/client/blocks/docs/internal-developers/testing/releases/980.md
deleted file mode 100644
index c39ff999378..00000000000
--- a/plugins/woocommerce/client/blocks/docs/internal-developers/testing/releases/980.md
+++ /dev/null
@@ -1,306 +0,0 @@
-# Testing notes and ZIP for release 9.8.0
-
-Zip file for testing: [woocommerce-gutenberg-products-block.zip](https://github.com/woocommerce/woocommerce-blocks/files/10966635/woocommerce-gutenberg-products-block.zip)
-
-## WooCommerce Core
-
-### Cart and Checkout blocks
-
-#### Add filter to change proceed to checkout button text and URL [#8613](https://github.com/woocommerce/woocommerce-blocks/pull/8613)
-
-1. Add items to your cart, go to the Cart block and ensure the button to proceed to checkout works and looks normal.
-
-#### Fix / Return associative array for woocommerce_order_get_tax_location filter [#8681](https://github.com/woocommerce/woocommerce-blocks/pull/8681)
-
-1. Enable taxes, and create multiple shipping methods
-2. Add an item to cart and proceed to checkout
-3. Change between shipping methods and verify no errors are displayed, and the correct taxes are applied to the order.
-
-#### Add LocalPickupSelect component [#8634](https://github.com/woocommerce/woocommerce-blocks/pull/8634)
-
-1. Go to WooCommerce -> Settings -> Shipping -> Local Pickup and activate Local Pickup. Ensure you have added a couple of locations.
-2. Add an item to your cart and go to the Checkout block.
-3. Select Local Pickup and ensure the options you set up in step 1 are visible.
-
-#### Allow view switcher to toggle view when using Gutenberg list view [#8429](https://github.com/woocommerce/woocommerce-blocks/pull/8429)
-
-1. Edit the Cart Block page
-2. Toggle the view between empty cart/filled cart using the switcher - focus on the block to see the toggle.
-3. Open list view:
-
-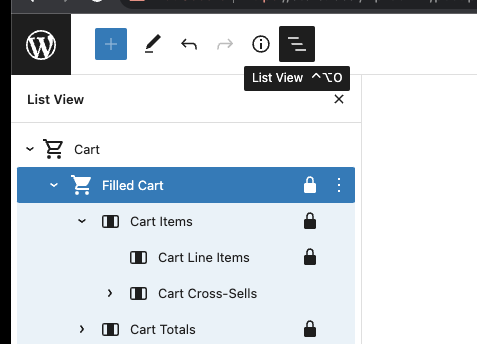
-
-4. Click on "empty cart" in the list view. The view should change.
-5. Click back to "filled cart" in the list view. The view should change.
-6. Select a child of empty cart. Again, the view should change.
-
-#### Revert "Show Cart and Checkout blocks in Style Book" [#8602](https://github.com/woocommerce/woocommerce-blocks/pull/8602)
-
-1. Create a new page or post and open the [block inserter](https://wordpress.org/documentation/article/adding-a-new-block/).
-2. Hover over the Cart and Checkout blocks.
-3. Verify that the editor no longer freezes.
-
-#### Add Debounce to Shipping Calculation selection [#8498](https://github.com/woocommerce/woocommerce-blocks/pull/8498)
-
-1. Add the Cart block to a page and make sure you have at least two shipping options added and the shipping calculator enabled
-2. Add products to the cart and go to the Cart block
-3. Quickly click through all the shipping options multiple times
-4. Expect the total to change only after the final selection is made.
-
-#### Ignore shipping address from server when updating shipping methods [#8718](https://github.com/woocommerce/woocommerce-blocks/pull/8718)
-
-1. In the Checkout page with the Checkout block, fill out your shipping address. Wait a few moments for it to persist to server.
-2. Clear the first name field. There will be a validation error.
-3. Select a different shipping method.
-4. When the totals are updated, confirm the first name field is still empty.
-
-### Mini Cart block
-
-#### Remove wc-blocks-registry from Mini Cart block dependencies so more scripts can be lazy-loaded [#8657](https://github.com/woocommerce/woocommerce-blocks/pull/8657)
-
-1. Install [Page Optimize](https://wordpress.org/plugins/page-optimize/) and [Product Bundles](https://woocommerce.com/products/product-bundles/).
-2. Enable a block theme, like [TT3](https://github.com/WordPress/twentytwentythree/).
-3. Go to Appearance > Editor and add the Mini Cart block to the store header.
-4. Save the changes.
-5. In the frontend, click on the Mini Cart. The drawer should open and show the "empty cart" message.
-6. Go to the shop page and add a product to your cart.
-7. Click on the Mini Cart. The drawer should open and show the product you just added.
-8. Disable the plugins to installed in step 1.
-
-#### Remove wc-settings from Mini Cart block dependencies [#8703](https://github.com/woocommerce/woocommerce-blocks/pull/8703), Preload Mini Cart inner blocks frontend scripts [#8653](https://github.com/woocommerce/woocommerce-blocks/pull/8653)
-
-1. Add the Mini Cart block to the header of your store.
-2. In the frontend, open the _Network_ tab of your browser devtools and verify the Mini Cart inner blocks are being preloaded (you can search for `empty-cart-frontend` or `filled-cart-frontend` scripts).
-3. Also in the frontend, verify you can open the Mini Cart, interact with its inner blocks (ie: change the quantity of a product, remove a product, etc.).
-
-#### Only print wp.apiFetch.createPreloadingMiddleware() when needed [#8647](https://github.com/woocommerce/woocommerce-blocks/pull/8647)
-
-1. Add the Mini Cart block to the header of your store.
-2. Create a post or page with the Cart block and another one with the Checkout block.
-3. In the frontend, add some products to your cart and open the Mini Cart. Verify you can change the quantity of products and you can remove them.
-4. Go to the Cart page and check that there are no extra `fetch` requests to `wc/store/cart` in the _Network_ tab of your browser devtools (you can open them with <kbd>F12</kbd>).
-5. Go to the Checkout page and make sure there is no error and you can place an order (checkout works as normal).
-
-#### Mini Cart drawer close button: inherit text color and improve alignment [#8605](https://github.com/woocommerce/woocommerce-blocks/pull/8605)
-
-0. Switch to a dark theme (ie: [TT3](https://github.com/WordPress/twentytwentythree/)) and set a dark styling (ie: Appearance > Editor > edit a template > Style > Browse styles > Pilgrimage).
-1. Add the Mini Cart block to the header of a template.
-2. In the frontend, click on it so it opens the drawer.
-3. Verify the close button inherits the text color and on the right it's aligned with the product prices below.
-
-Before | After
-----------------------------------------------------------------------------------------------------------------|----------------------------------------------------------------------------------------------------------------
-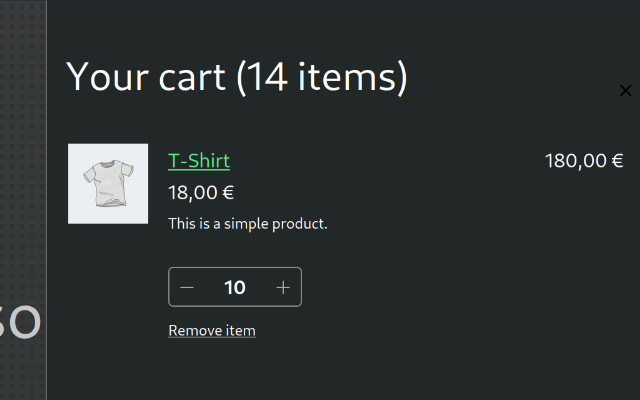 | 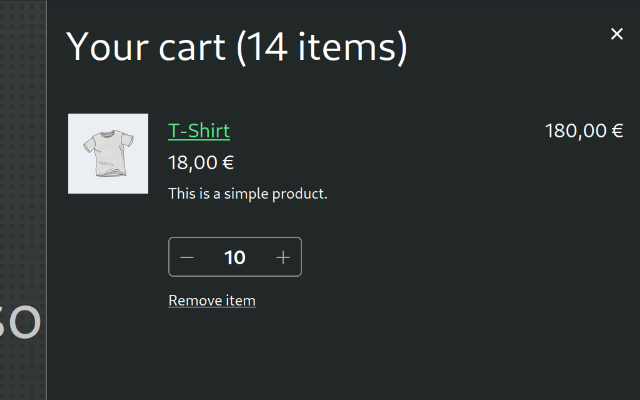
-
-4. Now, to verify the layout still works if there are notices, edit one of the products you have in the cart and set it out of stock.
-5. Go back to the frontend, open the drawer and verify the close button is still visible.
-
-Before | After
-----------------------------------------------------------------------------------------------------------------|----------------------------------------------------------------------------------------------------------------
-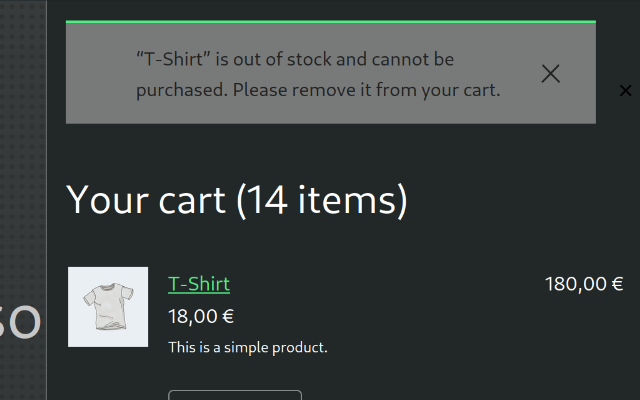 | 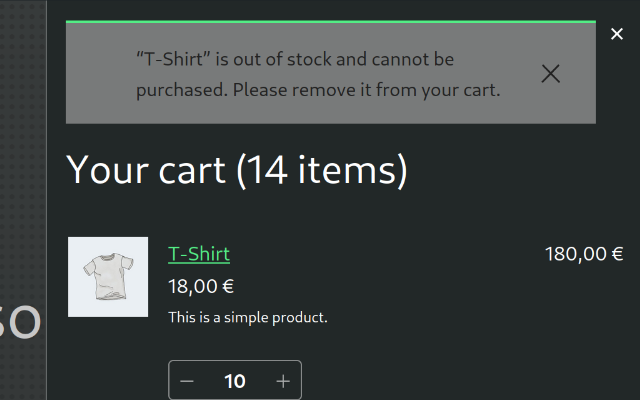
-
-#### Fix Mini Cart missing translations [#8591](https://github.com/woocommerce/woocommerce-blocks/pull/8591)
-
-1. Set your store language to a language with WC Blocks translations, ie: Spanish (_Español_).
-2. With a block theme (ie: TT3), go to Appearance > Editor > Template Parts and edit the Mini Cart block template part.
-3. Open the sidebar list view and navigate to the `Tabla de productos del mini carrito` block. Verify the block name is correctly translated.
-
-Before | After
---- | ---
-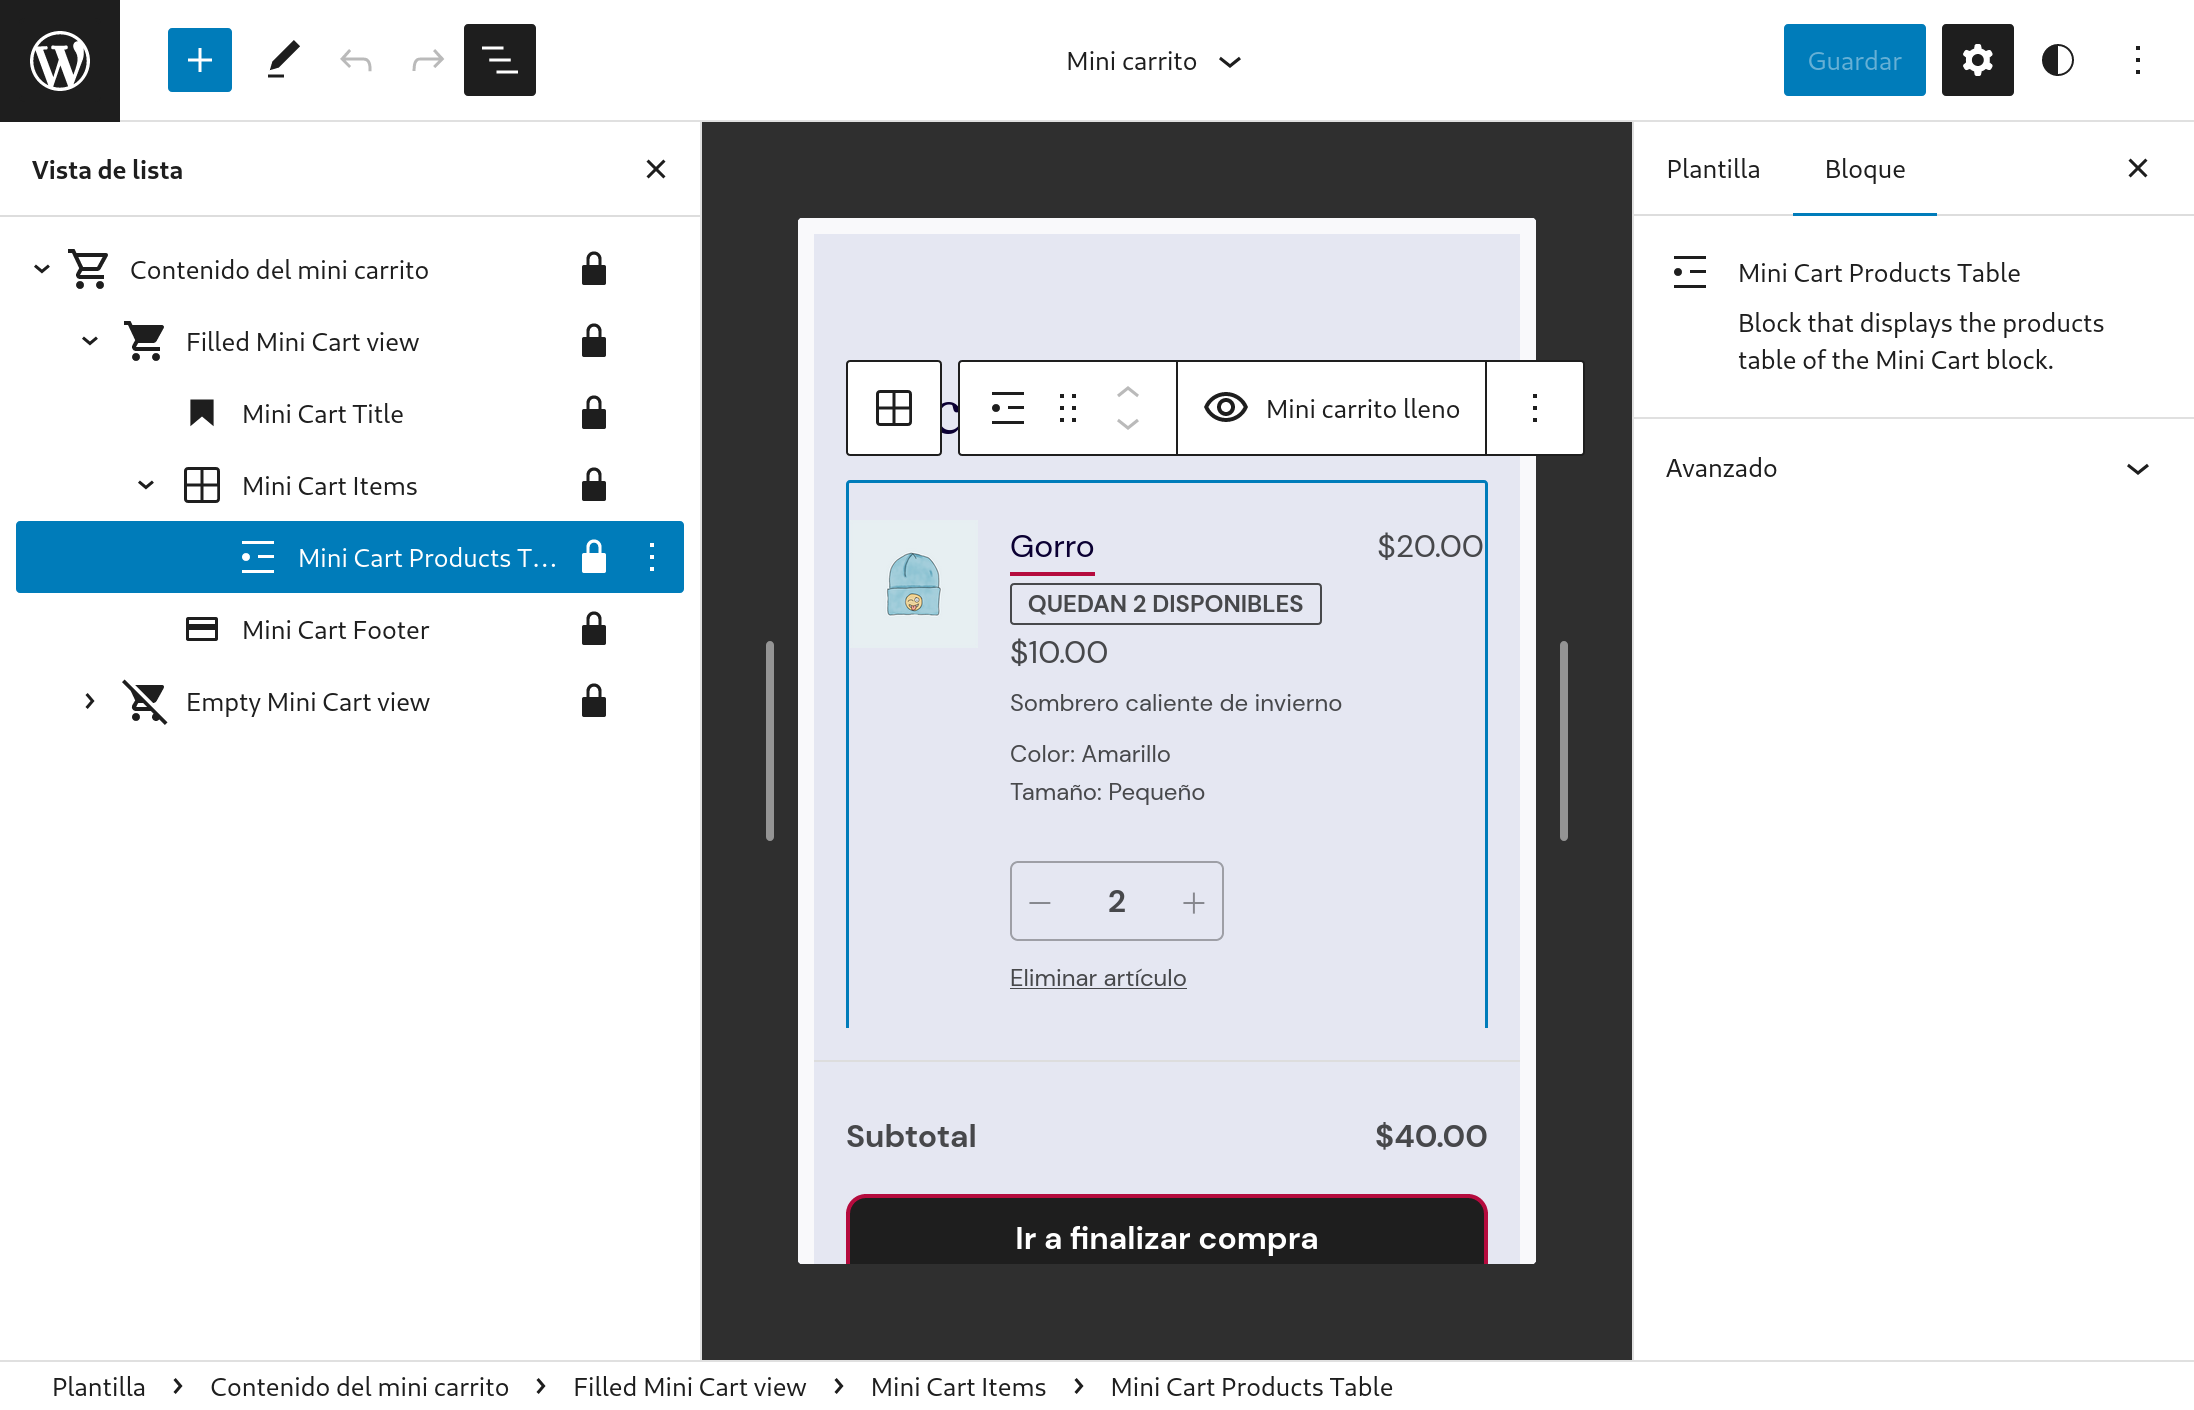 | 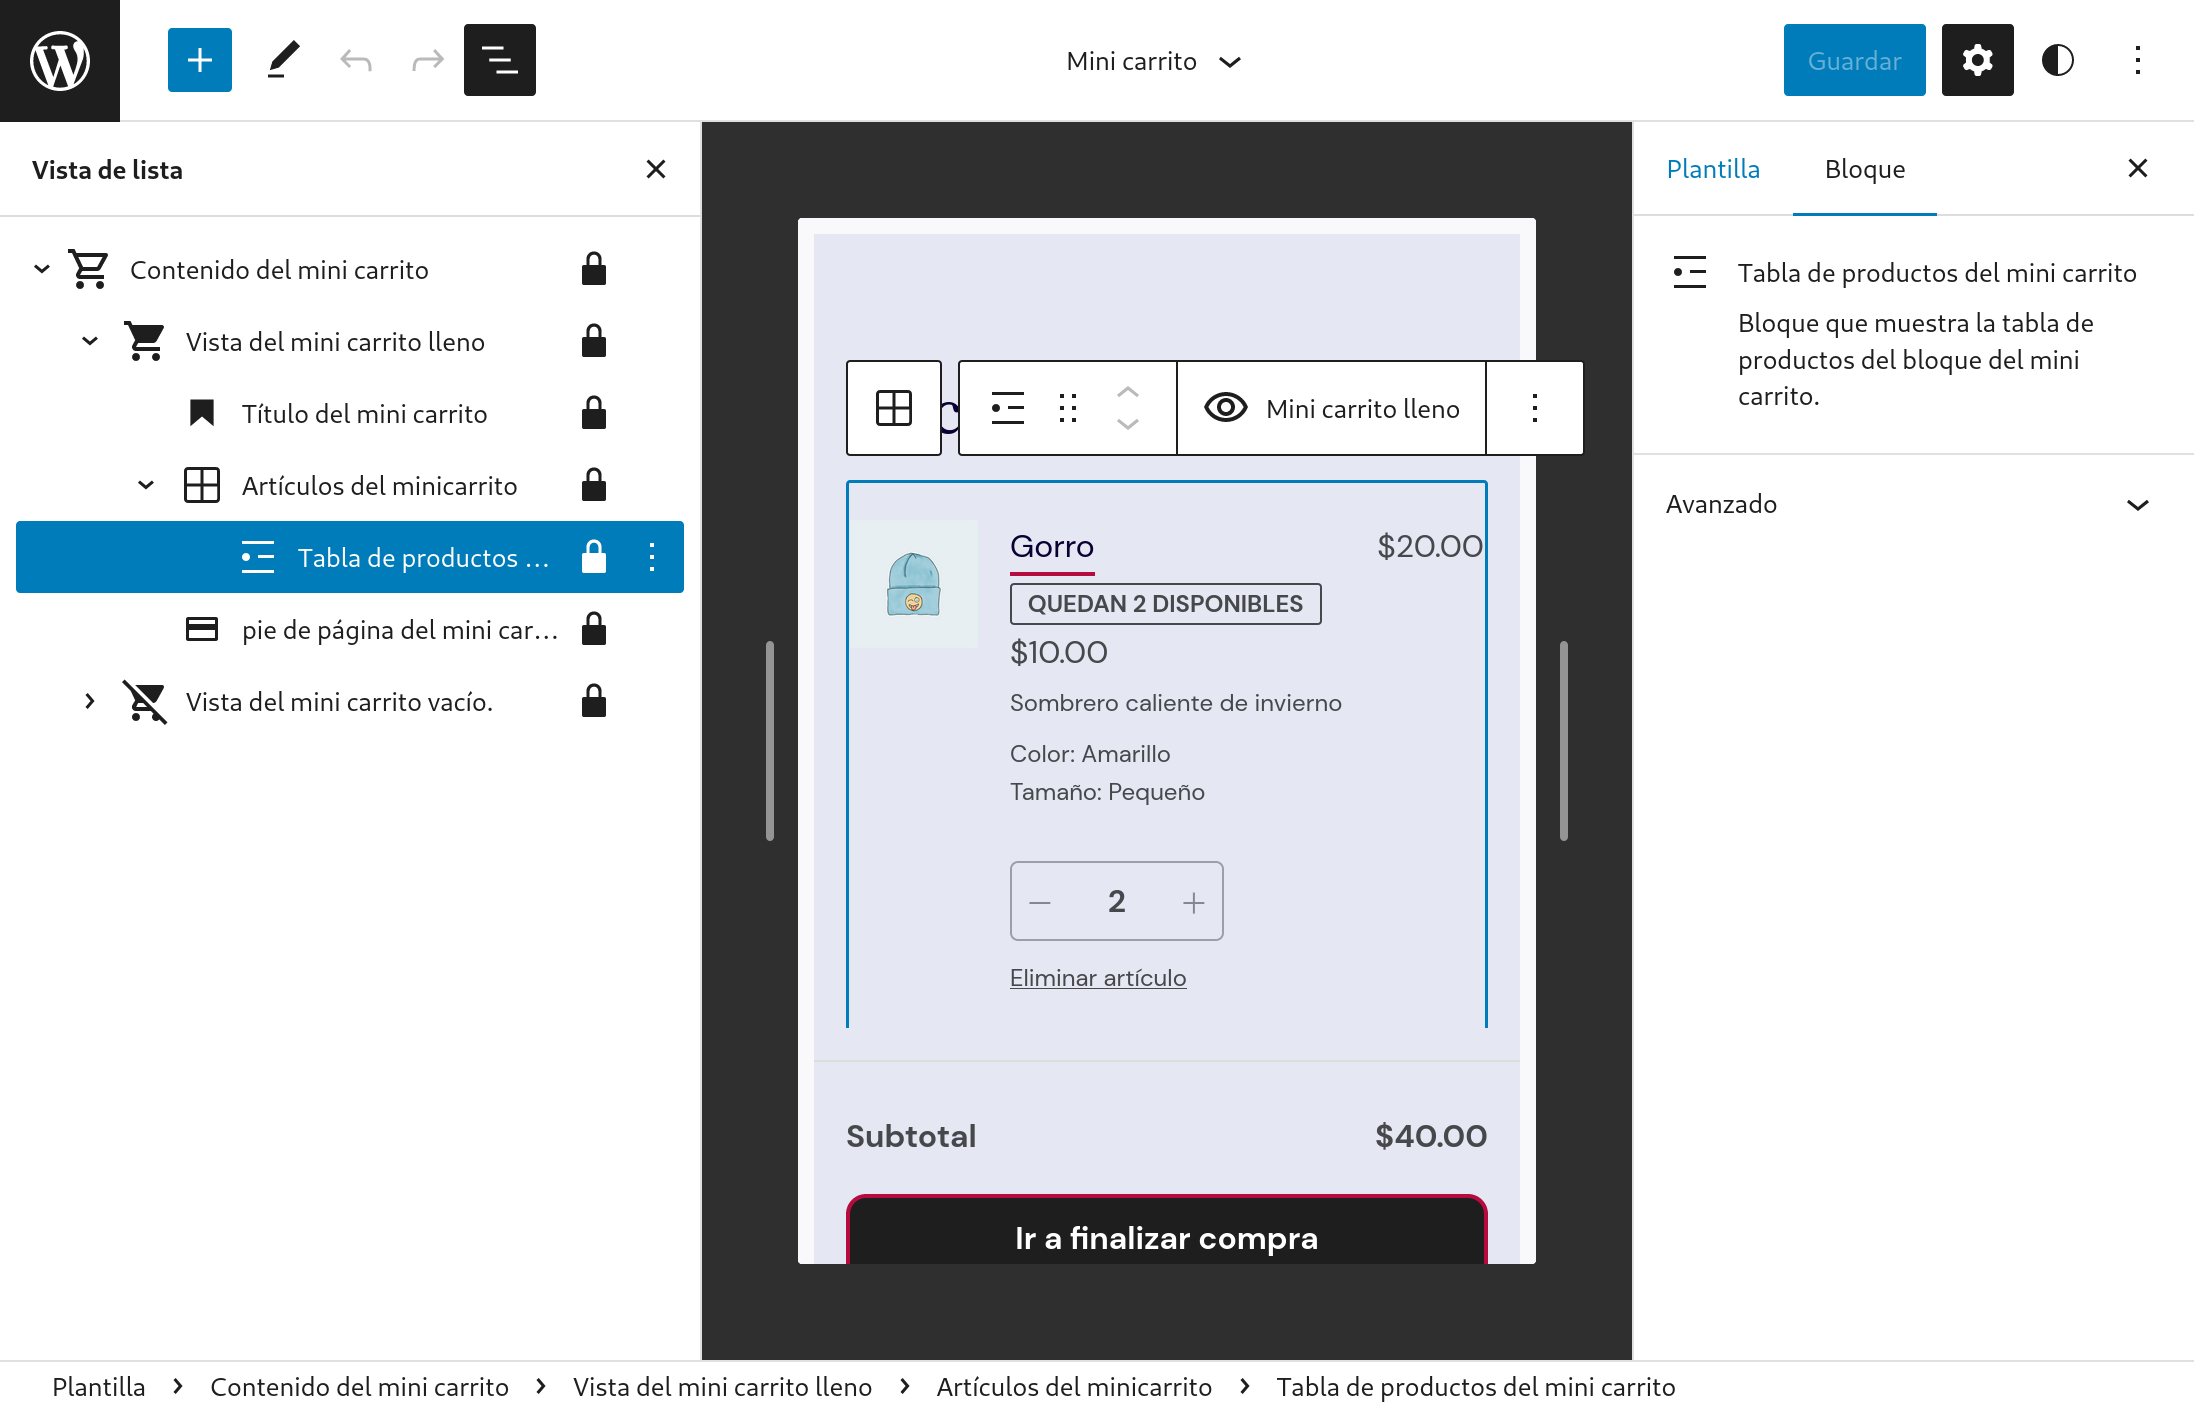
-
-#### Make the customer account icon bigger to match the mini-cart one [#8594](https://github.com/woocommerce/woocommerce-blocks/pull/8594)
-
-##### Check the icon size
-
-1. Go to the Site Editor and edit the Header template.
-2. Insert the `Customer account` and `Mini-cart` blocks next to the menu, to look like this 👇
-<img width="359" alt="Screenshot 2023-03-01 at 14 16 48" src="https://user-images.githubusercontent.com/186112/222149887-f19ffb9a-3015-4878-aa8e-33ddcf1eb8ac.png">
-
-3. Check the `Customer account` icon is bigger than before and matches the `Mini cart` icon size.
-
-| Before | After |
-| ------ | ----- |
-| <img width="312" alt="Screenshot 2023-03-01 at 14 20 35" src="https://user-images.githubusercontent.com/186112/222150649-0974f54b-5bb5-43da-a7e1-5870a860094a.png"> |<img width="311" alt="Screenshot 2023-03-01 at 14 21 42" src="https://user-images.githubusercontent.com/186112/222150932-223dacae-5365-43d8-8831-cd39fc27e247.png"> |
-
-4. Modify the font size on both blocks to M, L, and XL and check the icon sizes also match.
-
-##### Check the icon size of existing blocks does not change
-
-1. Disable WC Blocks (if testing WC core, install WC 7.5 and disable WC Blocks if you have it enabled).
-2. Create a new page/post, add a `Customer account` block, and save.
-3. Enable WC Blocks (if testing WC core, install WC 7.6).
-4. Reload the page from step 2.
-5. Insert another `Customer account` block and save.
-6. Check in the editor that the block icon inserted in step 1 keeps its size and the one inserted in step 5 is bigger.
-7. Check the same in the frontend.
-
-#### Make the start shopping button show the theme style [#8567](https://github.com/woocommerce/woocommerce-blocks/pull/8567)
-
-1. Switch to the TT3 theme (aubergine style on the screenshots above).
-2. Go to the Site Editor, add the mini-cart block to the header and save.
-3. Go to the frontend, click on the mini-cart icon to open it. Empty the cart if it has items.
-4. Check that the `Start shopping` button follows the styles of the theme.
-
-| Before | After |
-| ------ | ----- |
-| <img width="295" alt="Screenshot 2023-02-28 at 10 33 14" src="https://user-images.githubusercontent.com/186112/221811870-a0801f4e-81ac-498a-9788-12efd47648c6.png"> | <img width="328" alt="Screenshot 2023-02-28 at 10 33 01" src="https://user-images.githubusercontent.com/186112/221811956-42668397-ec7a-490f-977e-d258d01deac7.png"> |
-
-#### Switch Select by Toggle for the 'Add-to-Cart behaviour' [#8558](https://github.com/woocommerce/woocommerce-blocks/pull/8558)
-
-1. Create a new page and add the `Mini cart` block.
-2. Open the settings and make sure the `Add-to-Cart behaviour` selector is using a toggle button, not a select dropdown.
-3. Make sure both options can be saved, and keep working as expected (there are no regressions).
-
-| Before | After |
-| ------ | ----- |
-| <img width="274" alt="Screenshot 2023-02-27 at 16 42 20" src="https://user-images.githubusercontent.com/186112/221609853-a601293c-f369-4164-930e-5a04aee2395c.png"> | <img width="269" alt="Screenshot 2023-02-27 at 16 42 00" src="https://user-images.githubusercontent.com/186112/221609927-926d55c1-2034-4197-8b97-209dea74d883.png"> |
-
-#### Remove colorClassName and style from QuantityBadge [#8557](https://github.com/woocommerce/woocommerce-blocks/pull/8557)
-
-1. Create a new page and add the `Mini cart` block.
-2. Go to the frontend and with your browser devtools (<kbd>F12</kbd>) check the `undefined` class is no longer showing next to the `wc-block-mini-cart__badge` class.
-
-#### Fix 'Edit Mini Cart template part' link in WP 6.2 [#8574](https://github.com/woocommerce/woocommerce-blocks/pull/8574)
-
-0. Make sure you use a block theme, like TT3, and install the latest version of Gutenberg.
-1. Create a post or page and add the Mini Cart block.
-2. In the sidebar, click on the "Edit Mini Cart template part" link.
-3. Verify the Site Editor open in a new tab and the Mini Cart template part is opened by default.
-4. Repeat the testing steps but having Gutenberg disabled and verify the link keeps working. (This step is to verify no regressions were introduced)
-
-#### Add explicit CSS styling to mini-cart block amount in inserter preview [#8516](https://github.com/woocommerce/woocommerce-blocks/pull/8516)
-
-1. Create a new page.
-2. Click on the `inserter` plus icon/button.
-3. In the search bar, search for `mini cart`.
-4. Hover your mouse over the `mini cart` block icon.
-5. Ensure you see the cart dollar amount in the preview.
-
-### Products block
-
-#### Products: Update product element margins in patterns [#8401](https://github.com/woocommerce/woocommerce-blocks/pull/8401)
-
-1. Add the **Products** block to a post or page.
-2. Add WooCommerce Products patterns:
- - WooCommerce 1:1 Image 4-Column Products Row
- - WooCommerce 3-Column Product Row
- - WooCommerce 4-Column Product Row
- - WooCommerce Large Image Product Gallery
- - WooCommerce Minimal 5-Column Products Row
- - WooCommerce Minimal Product List
- - WooCommerce Product Gallery
- - WooCommerce Product list with 1:1 images
- - WooCommerce Product list with full product description
-
-3. Ensure all margins are displaying correctly both in the editor and the frontend.
-
-#### Improve Products block Attributes Filter Inspector Controls [#8583](https://github.com/woocommerce/woocommerce-blocks/pull/8583)
-
-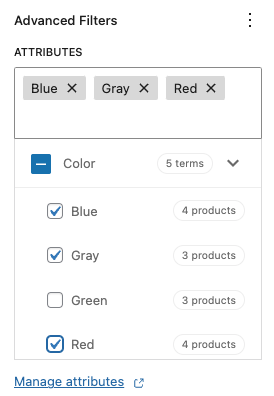
-
-##### Simple happy path
-
-1. Add a Products (Beta) block to your page.
-2. Open the Inspector Controls and add the “Product Attributes” advanced filter.
-3. The Attributes selector component should show up in an uninteractable loading state.
-4. Once loading finishes, the Attributes should appear, collapsed.
-5. Uncollapse a section
-6. Select a few attributes.
-7. Publish your page.
-8. Check on the frontend to see that the correct products are displayed.
-
-##### Checkbox behavior
-
-1. Repeat steps 1–5 above.
-2. Click on some terms checkboxes.
-3. Notice that the parent checkbox will be in the indeterminate state (`[-]`).
-4. Select all the children.
-5. Notice parent checkbox will be checked.
-6. Uncheck the parent checkbox.
-7. All the children should be unchecked.
-8. Check the parent checkbox.
-9. All the children should be checked.
-10. Uncheck a few children.
-11. Check the parent checkbox.
-12. All children should be checked.
-
-##### Token input behavior
-
-1. Repeat steps 1–4 above.
-2. Start typing something within the input.
-3. The checklist should be correctly filtered showing breadcrumbs.
-4. Try the behavior for both collapsed and uncollapsed states.
-5. Every time a checkbox is checked, it should have the corresponding token in the input field and viceversa.
-6. Tokens can be correctly removed from the input field and this will uncheck the corresponding checkbox.
-
-#### Fix Products block Add to Cart button when AJAX on archives is disabled [#8532](https://github.com/woocommerce/woocommerce-blocks/pull/8532)
-
-1. Go to WooCommerce > Settings > Products and disable the _Enable AJAX add to cart buttons on archives_ checkbox.
-2. Add a Products block to a post or page.
-3. In the frontend, verify clicking on “Add to cart” adds the product to the cart with a page refresh.
-4. Optionally, test also the option _Redirect to the cart page after successful addition_, test variable products, out of stock products, etc. and verify they can (or cannot) be added to the cart as you would expect.
-
-#### [Products]: Fix attributes filters that do not update the editor preview correctly [#8611](https://github.com/woocommerce/woocommerce-blocks/pull/8611)
-
-1. Create new post
-2. Add _Products_ block
-3. Add “Product Attributes” filter from “Advanced Filters” in the inspector controls.
-4. Add some attributes filter
-5. **Expected**: Preview changes according to the applied attribute
-
-### Single Product
-
-#### Add Product Meta Block [#8484](https://github.com/woocommerce/woocommerce-blocks/pull/8484)
-
-1. Edit the Single Product Template.
-2. Add the `Product Meta` block.
-3. Be sure that the blocks look like the image above.
-4. Save the template.
-5. On the front end, visit a Single Product page. Be sure that the blocks render the right data.
-
-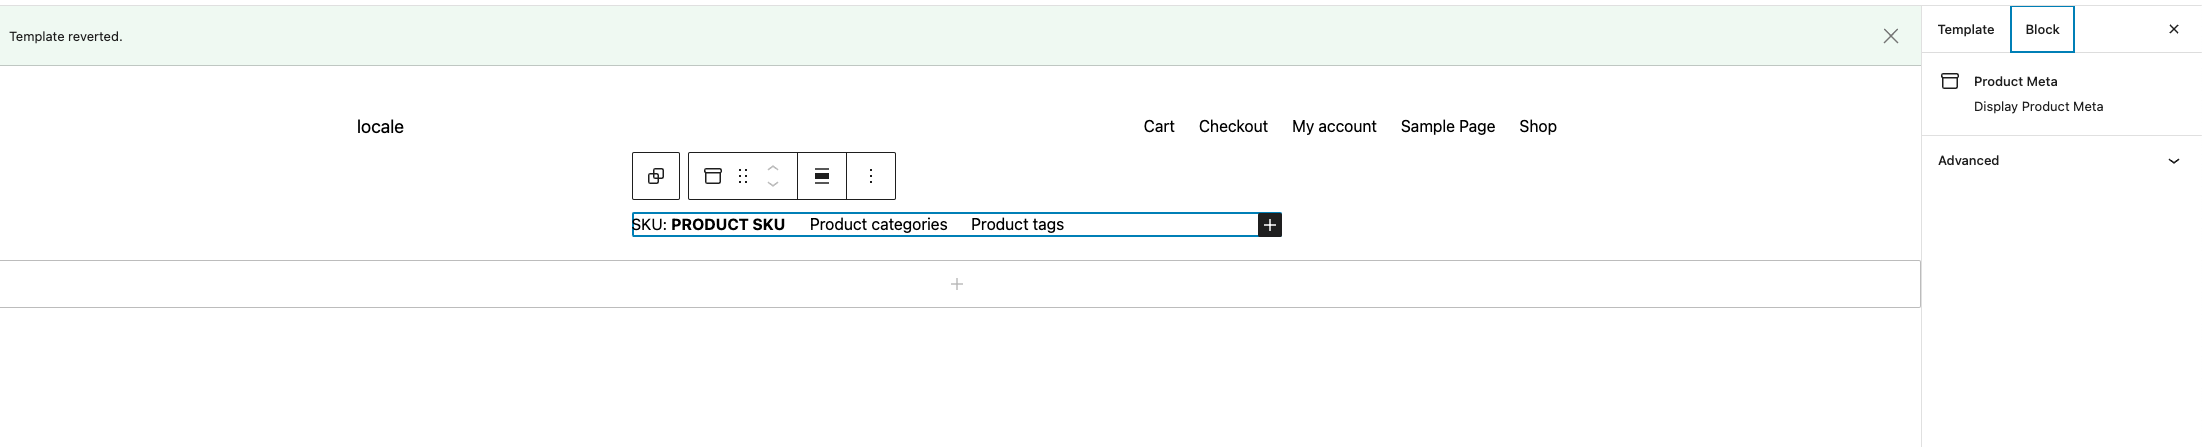
-
-#### Product Price block: add support to the Single Product Template [#8609](https://github.com/woocommerce/woocommerce-blocks/pull/8609)
-
-1. Switch to the TT3 theme.
-2. Go to the Site Editor, and edit the Single Product Template.
-3. Add the Product Price. It should have a price of 50.00 with the currency set in WC options. Save.
-4. On the front end, click a product and check that the block shows the right price.
-
-#### Enable the compatibility layer when Product Meta, Product Price and Breadcrumbs blocks are added [#8719](https://github.com/woocommerce/woocommerce-blocks/pull/8719)
-
-1. Switch to the TT3 theme.
-2. Go to the Site Editor, and edit the Single Product Template.
-3. Add the Product Meta, Product Price and Breadcrumbs blocks **inside** the group block.
-4. Add the Product Meta, Product Price and Breadcrumbs blocks **outside** the group block.
-5. Save.
-6. Go to the frontend and check that all the blocks are visible.
-
-### Product Catalog
-
-#### Product Result Count block: Add support for global styles [#8517](https://github.com/woocommerce/woocommerce-blocks/pull/8517)
-
-1. Go to the `Site Editor » Browse all templates` and edit the `Product Catalog` template.
-2. Add the `Product Results Count` block.
-3. In the toolbar, select Styles (black and white circle) and click Blocks options.
-4. Search `Product Results Count` block and select it.
-5. Change the color/font styles to the block and make sure styles are applied to the block in editor.
-6. Save, go to frontend, and check that the styles are correctly applied as well.
-
-## Feature plugin
-
-### Add border support to mini cart contents [#8654](https://github.com/woocommerce/woocommerce-blocks/pull/8654)
-
-1. Enable a blocks theme, go to Site Editor, and add the `Mini Cart` block to the header.
-2. Go to Template Parts and open the `Mini Cart` template.
-3. Open the List View, select the `Mini Cart contents` block and check that in the settings sidebar you can see the `Border` controls.
-4. Click the `+` button and add a border and save the template.
-5. Go to the frontend, click on the `Mini Cart` button, and check you see the same border in the editor and in the frontend.
-6. Check that all the buttons in the mini cart modal are correctly displayed.
-7. Double check in different browsers and logged in/out of the admin.
-
-| Before | After |
-|---------------------------------------------------------------------------------------------------------------------------------------------------------------------|---------------------------------------------------------------------------------------------------------------------------------------------------------------------|
-| <img width="291" alt="Screenshot 2023-03-08 at 15 41 35" src="https://user-images.githubusercontent.com/186112/223743115-6f21efd3-d268-4086-ae52-ca94975af484.png"> | <img width="288" alt="Screenshot 2023-03-08 at 15 41 09" src="https://user-images.githubusercontent.com/186112/223743151-03acaf76-d09d-4e83-b900-5b444f908bcf.png"> |
-| <img width="509" alt="Screenshot 2023-03-08 at 15 40 26" src="https://user-images.githubusercontent.com/186112/223742677-dfc6d5d9-4a18-4fc0-abf8-ba134207feaa.png"> | <img width="509" alt="Screenshot 2023-03-08 at 15 40 14" src="https://user-images.githubusercontent.com/186112/223742736-d6453711-a93b-4806-a173-7ef4af28799a.png"> |
diff --git a/plugins/woocommerce/client/blocks/docs/internal-developers/testing/releases/981.md b/plugins/woocommerce/client/blocks/docs/internal-developers/testing/releases/981.md
deleted file mode 100644
index 8c020bdbbd8..00000000000
--- a/plugins/woocommerce/client/blocks/docs/internal-developers/testing/releases/981.md
+++ /dev/null
@@ -1,41 +0,0 @@
-# Testing notes and ZIP for release 9.8.1
-
-Zip file for testing: [woocommerce-gutenberg-products-block.zip](https://github.com/woocommerce/woocommerce-blocks/files/10979797/woocommerce-gutenberg-products-block.zip)
-
-## WooCommerce Core
-
-### fix: disable compatibility layer for block themes that have a default block template [#8758](https://github.com/woocommerce/woocommerce-blocks/pull/8758)
-
-1. Active TT3.
-2. Be sure that the Single Product Template has no custom change.
-3. Go on a product and ensure the Single Product Template is loaded.
-4. Active Tsubaki theme (or a theme that has the Single Product Template defined)
-5. Be sure that the Single Product Template has no custom change.
-6. Go on a product and ensure the Single Product Template is loaded.
-
-### Change the property name of the attribute slug in Products By Attribute [#8759](https://github.com/woocommerce/woocommerce-blocks/pull/8759)
-
-1. Add new Post
-2. Add Products by Attribute block
-3. Choose some attributes
-4. Click Done
-5. **Expected:** Block renders correctly and preview the products
-6. Publish post and confirm it looks the same in the frontend
-
-### Fix the local pickup price in the shipping type selector and pickup options [#8623](https://github.com/woocommerce/woocommerce-blocks/pull/8623)
-
-0. Make sure your store Checkout page is using the Checkout block.
-1. Go to WooCommerce -> Settings -> Tax (you might need to check _Enable tax rates and calculations_ before).
-2. Under Prices entered with tax, select Yes, I will enter prices inclusive of tax
-3. Under Display prices in the shop and Price display suffix, select Including tax
-4. Save changes
-5. Go to WooCommerce -> Shipping -> Local pickup
-6. Add price for local pickup. You may keep it not taxable.
-7. Add some regular shipping methods, but NOT a free one, assign costs to them.
-8. Add an item to your cart and go to the Checkout block.
-9. Confirm shipping and local pickup price is correct.
-10. Confirm correct price is getting displayed in the pickup options.
-
-| Before | After |
-| ------ | ----- |
-|||
diff --git a/plugins/woocommerce/client/blocks/docs/internal-developers/testing/releases/982.md b/plugins/woocommerce/client/blocks/docs/internal-developers/testing/releases/982.md
deleted file mode 100644
index 8079e6ee88d..00000000000
--- a/plugins/woocommerce/client/blocks/docs/internal-developers/testing/releases/982.md
+++ /dev/null
@@ -1,67 +0,0 @@
-# Testing notes and ZIP for release 9.8.2
-
-Zip file for testing: [woocommerce-gutenberg-products-block.zip](https://github.com/woocommerce/woocommerce-blocks/files/11039374/woocommerce-gutenberg-products-block.zip)
-
-## WooCommerce Core
-
-### Fix issue that prevented spaces being added to Mini Cart, Cart and Checkout buttons [#8777](https://github.com/woocommerce/woocommerce-blocks/pull/8777)
-
-1. With Firefox, add the Cart block to a post or page.
-2. In the editor, press the _Proceed to Checkout_ button to edit the text to something like: _Go to payment_ (or any string containing spaces).
-3. Verify the text is updated correctly and spaces are added as expected.
-4. Preview the page in the frontend and verify the button text is correct as well.
-5. Repeat steps 1-4 with the Checkout and Mini Cart blocks. (For the Mini Cart, you will need to edit its template part)
-
-### Fix Customer Account block doing a 404 request in the frontend [#8798](https://github.com/woocommerce/woocommerce-blocks/pull/8798)
-
-1. With a block theme like [TT3](https://wordpress.org/themes/twentytwentythree/), add the Customer Account block to the header of your site.
-2. Go to the frontend and open the _Network_ tab in the browser devtools (<kbd>F12</kbd>).
-3. Verify there is no request to `build/customer-account-frontend.js` which returns 404.
-
-### Display the link to add the shipping address when shipping address is not available [#8141](https://github.com/woocommerce/woocommerce-blocks/pull/8141)
-
-#### Case 1 (with no default shipping rates)
-
-<img width="1429" alt="image" src="https://user-images.githubusercontent.com/11503784/214127269-1cb4d478-88b7-4343-b841-96c35300fd6d.png">
-
-1. Go to the WooCommerce settings page: `wp-admin/admin.php?page=wc-settings`.
-2. Change 'Default customer location' to `No location by default`.
-3. Make sure you have at least one shipping zone with a shipping method available.
-4. Remove any default (fallback) shipping rates.
-5. Open your site in a private session (incognito mode).
-6. Add some products to the cart.
-7. Go to the cart page, and confirm the "Add an address for shipping rates" link is present in the shipping calculator.
-8. Click on the link, and confirm it is working as expected.
-9. Open your site in a regular session where you're already logged in and have placed an order before.
-10. Add some products to the cart.
-11. Go to the cart page, confirm the shipping address, and "change address" link present in the shipping calculator.
-12. Click on the link, and confirm it is working as expected.
-
-#### Case 2 (with default shipping rates)
-
-<img width="1286" alt="image" src="https://user-images.githubusercontent.com/11503784/214127480-f8387749-d45b-41fe-b0d5-db29665eb759.png">
-
-1. Go to the WooCommerce settings page: `wp-admin/admin.php?page=wc-settings`.
-2. Change 'Default customer location' to `No location by default`.
-3. Make sure you have at least one shipping zone with a shipping method available.
-4. Add a default (fallback) shipping rate (don't select any Zone region when creating it).
-5. Open your site in a private session (incognito mode).
-6. Add some products to the cart.
-7. Go to the cart page, and confirm the shipping calculator is hidden and default shipping rates are visible
-8. Open your site in a regular session where you're already logged in and have placed an order before.
-9. Add some products to the cart.
-10. Go to the cart page, confirm the shipping address, and "change address" link present in the shipping calculator.
-11. Click on the link, and confirm it is working as expected.
-
-#### Case 3 (Error Notice)
-
-1. Go to the WooCommerce settings page: `wp-admin/admin.php?page=wc-settings`.
-2. Change 'Default customer location' to `No location by default`.
-3. Make sure you have at least one shipping zone with a shipping method available.
-4. Remove any default (fallback) shipping rates.
-5. Open your site in a private session (incognito mode).
-6. Add some products to the cart.
-7. Go to the cart page, and confirm the "Add an address for shipping rates" link is present in the shipping calculator.
-8. Click on the link, and change the address to a location where shipping rates are unavailable.
-9. Confirm that `There are no shipping options available. Please check your shipping address.` error is visible in the text form.
-10. Proceed to the Checkout block page, and confirm the `There are no shipping options available. Please check your shipping address` error is visible in the text form under Shipping options.
diff --git a/plugins/woocommerce/client/blocks/docs/internal-developers/testing/releases/983.md b/plugins/woocommerce/client/blocks/docs/internal-developers/testing/releases/983.md
deleted file mode 100644
index 3f08e98bf9b..00000000000
--- a/plugins/woocommerce/client/blocks/docs/internal-developers/testing/releases/983.md
+++ /dev/null
@@ -1,30 +0,0 @@
-# Testing notes and ZIP for release 9.8.3
-
-Zip file for testing: [woocommerce-gutenberg-products-block.zip](https://github.com/woocommerce/woocommerce-blocks/files/11088586/woocommerce-gutenberg-products-block.zip)
-
-## WooCommerce Core
-
-### Fix "Save changes" default behavior bug in the Firefox browser [#8754](https://github.com/woocommerce/woocommerce-blocks/pull/8754)
-
-You should use the Firefox browser for this test.
-
-1. Go to `WooCommerce/Shipping/Local pickup`
-2. Click on the `Save changes` button. Ensure you are not redirected to another page, and the notice `Local Pickup settings have been saved.` is displayed
-<img width="1018" alt="image" src="https://user-images.githubusercontent.com/14235870/225263783-6455a4c6-3200-4e93-8e92-74bdf2a83952.png">
-
-3. Make some changes (e.g., enable/disable local pickup, add/edit a pickup location, etc.)
-4. Click on the `Save changes` button. Ensure you have the same results in step 2
-5. Refresh the page. Ensure your changes are being saved
-
-### Fix border styles not visible in the editor in Featured Product and Featured Category blocks [#8838](https://github.com/woocommerce/woocommerce-blocks/pull/8838)
-
-Note: this can't be tested directly in WC Blocks. You should only test it in the WC core build.
-
-0. Enable a block theme in your site (like [TT3](https://wordpress.org/themes/twentytwentythree/)).
-1. Add a Featured Item (Featured Category or Featured Product) block to a page or post.
-2. Select the border controls and add a border style. Add a color and give it some width.
-3. You should see the border you set dynamically display on the featured item.
-4. Now click on the `Unlink` button on the border controls and try setting different values for color and width for each of the border sides (top,right,bottom,left).
-5. Ensure this is working by visually seeing the changes to the featured item.
-6. Save and make sure this is also displaying correctly on the frontend.
-7. Test both `Featured Category` and `Featured Product` blocks.
diff --git a/plugins/woocommerce/client/blocks/docs/internal-developers/testing/releases/984.md b/plugins/woocommerce/client/blocks/docs/internal-developers/testing/releases/984.md
deleted file mode 100644
index 26525685a31..00000000000
--- a/plugins/woocommerce/client/blocks/docs/internal-developers/testing/releases/984.md
+++ /dev/null
@@ -1,20 +0,0 @@
-# Testing notes and ZIP for release 9.8.4
-
-Zip file for testing: [woocommerce-gutenberg-products-block.zip](https://github.com/woocommerce/woocommerce-blocks/files/11100007/woocommerce-gutenberg-products-block.zip)
-
-## WooCommerce Core
-
-### Fix unlinked border widths in WP 6.2 [#8893](https://github.com/woocommerce/woocommerce-blocks/pull/8893)
-
-0. With WP 6.2.
-1. Add a Featured Item (Featured Category or Featured Product) block to a page or post.
-2. Select the border controls and add a border style. Add a color and give it some width.
-3. You should see the border you set dynamically display on the featured item.
-4. Now click on the `Unlink` button on the border controls and try setting different values for color and width for each of the border sides (top,right,bottom,left).
-5. Ensure this is working by visually seeing the changes to the featured item.
-6. Save and make sure this is also displaying correctly on the frontend.
-7. Test both `Featured Category` and `Featured Product` blocks.
-
-Before | After
----------------------------------------------------------------------------------------------------------------|---------------------------------------------------------------------------------------------------------------
- | 
diff --git a/plugins/woocommerce/client/blocks/docs/internal-developers/testing/releases/985.md b/plugins/woocommerce/client/blocks/docs/internal-developers/testing/releases/985.md
deleted file mode 100644
index 1eab36a4622..00000000000
--- a/plugins/woocommerce/client/blocks/docs/internal-developers/testing/releases/985.md
+++ /dev/null
@@ -1,16 +0,0 @@
-# Testing notes and ZIP for release 9.8.5
-
-Zip file for testing: [woocommerce-gutenberg-products-block.zip](https://github.com/woocommerce/woocommerce-blocks/files/11287747/woocommerce-gutenberg-products-block.zip)
-
-## WooCommerce Core
-
-### Fix image editor in Featured Product/Category blocks on WP 6.2 [#9142](https://github.com/woocommerce/woocommerce-blocks/pull/9142)
-
-0. With WP 6.2:
-1. Create a post and add the Featured Category block.
-2. Click on the button to edit the image (note: this button is only available if the category has an image, if you don't have any categories with images, go to `wp-admin` > Products > Categories and edit a category to add an image):
-
-3. Make some changes (rotate, zoom, change aspect ratio, etc.) and apply them.
-4. Verify the changes are applied and there are no errors in the browser devtools console (you can open it with <kbd>F12</kbd>).
-5. Repeat all the steps above with the Featured Product block.
-6. Repeat all steps above with WP 6.1 (you can use [WP Downgrade](https://wordpress.org/plugins/wp-downgrade/)).
diff --git a/plugins/woocommerce/client/blocks/docs/internal-developers/testing/releases/990.md b/plugins/woocommerce/client/blocks/docs/internal-developers/testing/releases/990.md
deleted file mode 100644
index 1045272aaae..00000000000
--- a/plugins/woocommerce/client/blocks/docs/internal-developers/testing/releases/990.md
+++ /dev/null
@@ -1,304 +0,0 @@
-# Testing notes and ZIP for release 9.9.0
-
-Zip file for testing: [woocommerce-gutenberg-products-block.zip](https://github.com/woocommerce/woocommerce-blocks/files/11113569/woocommerce-gutenberg-products-block.zip)
-
-## WooCommerce Core
-
-
-### Move Related Products's notice component to the Inspector Control section. ([8843](https://github.com/woocommerce/woocommerce-blocks/pull/8843))
-
-1. Go to Appearance > Themes and activate a Blockfied theme, such as: Twenty-twenty Three;
-2. After the theme is activated, go to Appearance > Editor (Beta);
-3. Inside the Design section, click on Templates;
-4. Select the Single Product template;
-5. On the top left of the page, click on the Edit button;
-6. Using the Block Inserter, type: Related Products, and add the block to the Site Editor;
-7. Click on the Save button;
-8. Check that the Skeleton component appears above the Add To Cart button.
-
-| Before | After |
-| ------ | ----- |
-| <img width="1644" alt="image" src="https://user-images.githubusercontent.com/20469356/227358037-a753a748-7033-4d30-878b-9d218157156b.png"> | <img width="1647" alt="image" src="https://user-images.githubusercontent.com/20469356/227357464-4720cf26-bfc8-42a2-8db7-7b1979e2518f.png"> |
-
-### Product SKU Block: Don't render the prefix when the SKU isn't defined. ([8837](https://github.com/woocommerce/woocommerce-blocks/pull/8837))
-
-1. Create a post/page.
-2. Add the `Products` block.
-3. Inside the `Products` block, add the Product SKU block.
-4. Save the post/page.
-5. Edit a Product that will be visible in `Products` block.
-6. Scroll down until you see the “Inventory” section. In that section, it is visible a field labeled “SKU.” Remove the SKU in that field, and then click on the “Update” button at the bottom of the page.
-7. On the front end, visit the saved post/page and check the `Products` block.
-8. Ensure that the edited product doesn't have the SKU prefix visible.
-
-| Before | After |
-|--------|--------|
-|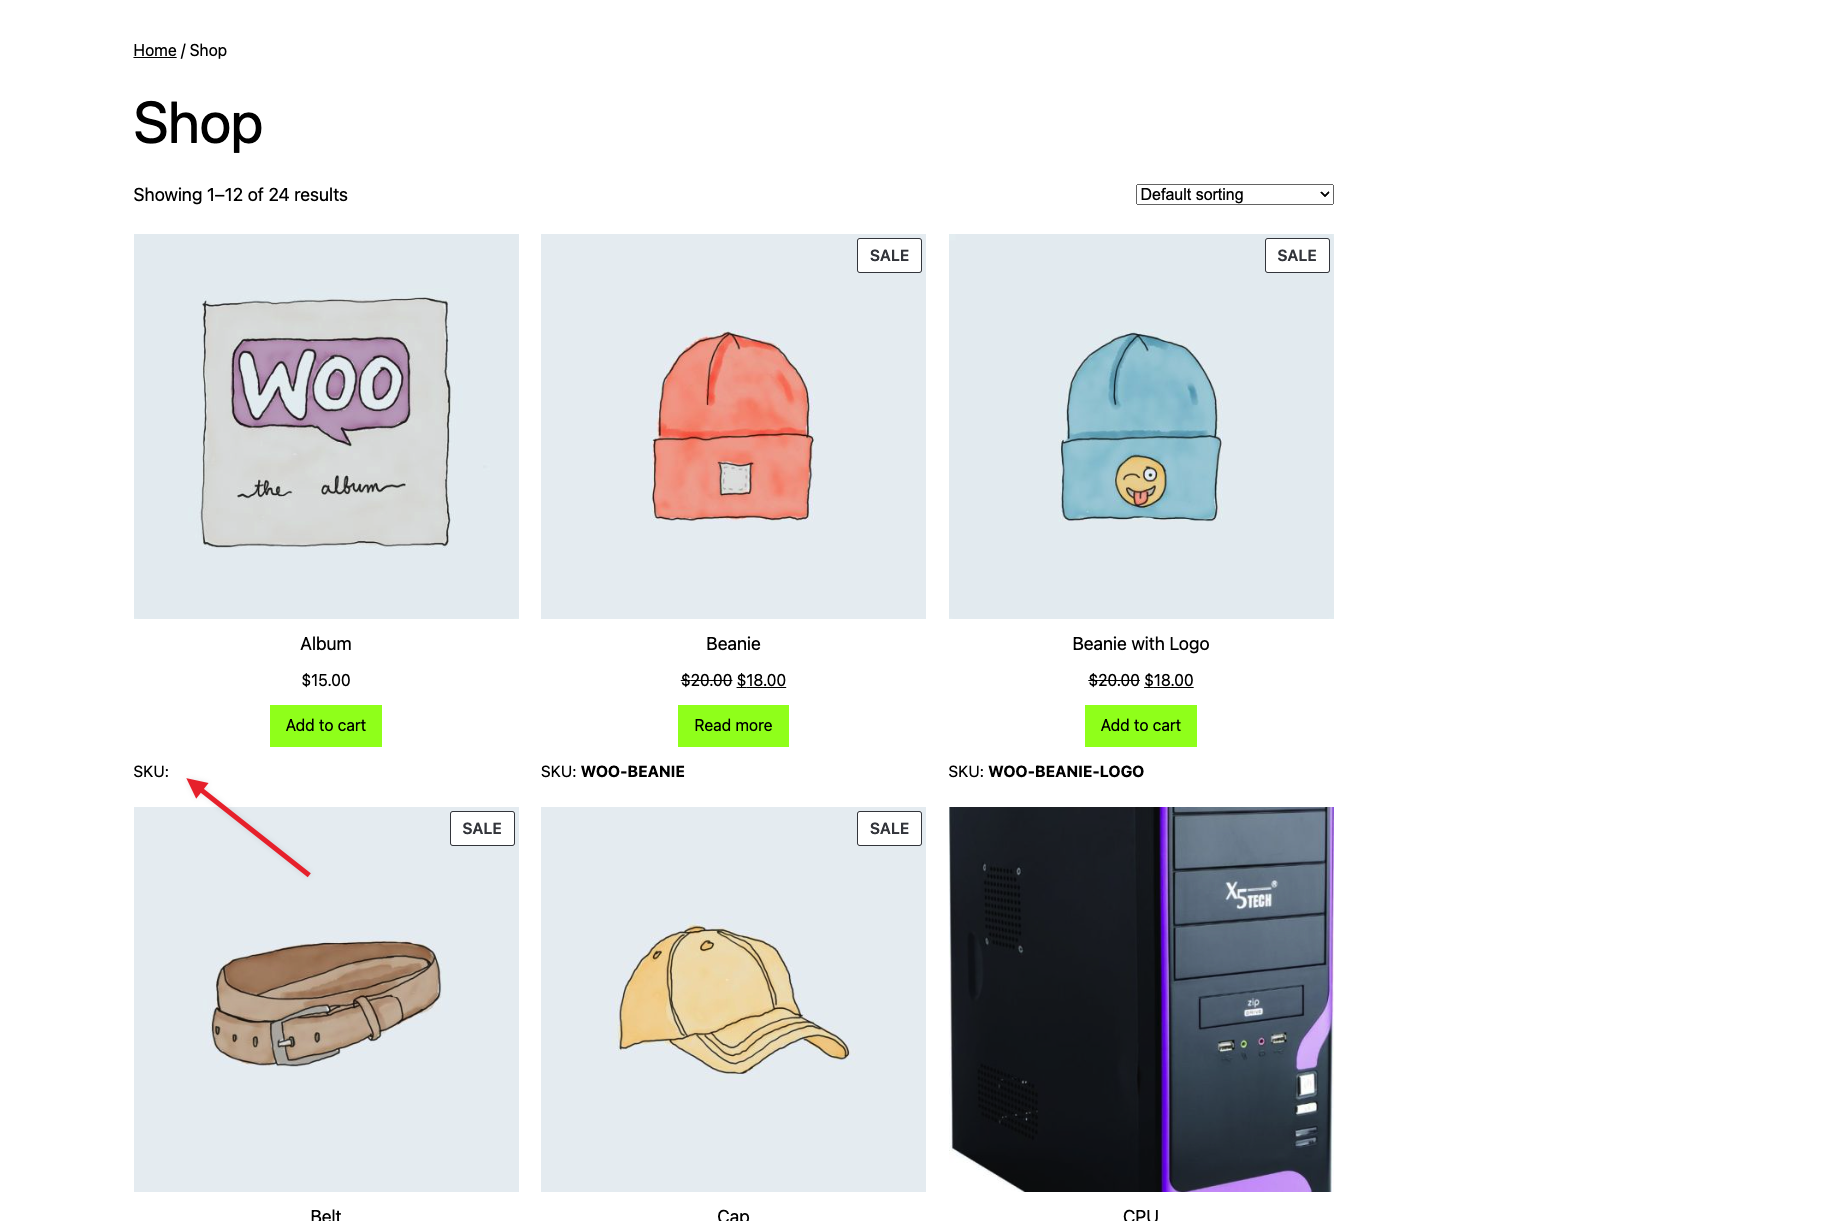|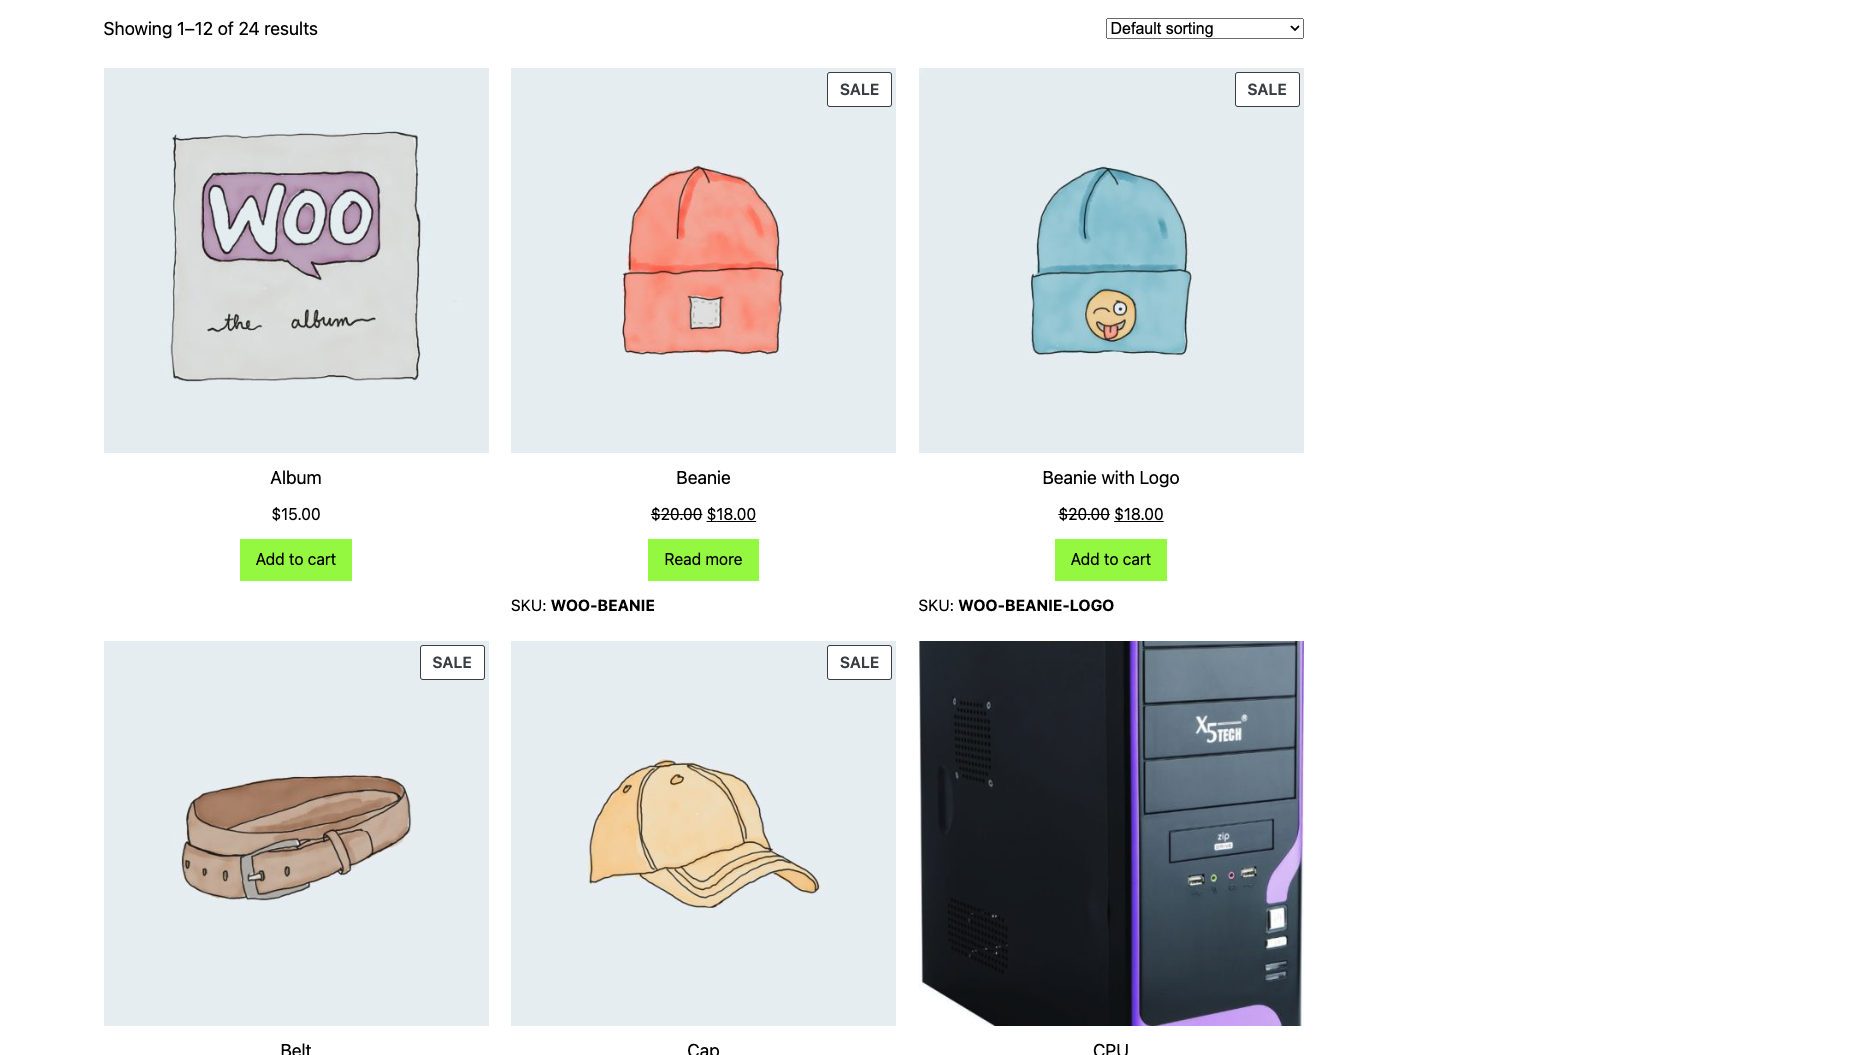|
-
-### Mini-cart: Add the option to change the style between 'Outline' and 'Fill' in all the buttons. ([8835](https://github.com/woocommerce/woocommerce-blocks/pull/8835))
-
-1. Add the `Mini cart` block to the header template of your site.
-2. Go to the `Site Editor` and edit the `Mini cart` template part.
-3. Open the `List view` and select the `Empty Mini Cart view`.
-4. Click on the `Start shopping` button, check that you can change the button style between `Default` and `Outline` in the sidebar settings and change it from the default and save.
-6. Go to the frontend and check the button has the style you just picked on the Site editor.
-7. Repeat the same steps for the `Filled Mini Cart view` and the `View my cart` and the `Go to checkout` buttons.
-
-### Product SKU: Make the block focusable in editor. ([8804](https://github.com/woocommerce/woocommerce-blocks/pull/8804))
-
-1. Create a new post
-2. Add Products block
-3. Add Product SKU block to Products
-4. Hover and click on the product
-5. **Expected:** Product SKU can be focused on and contextual menu is displayed. Block can be moved up and down to switch places with other blocks.
-
-| Before | After |
-| ------ | ----- |
-| <img width="260" alt="image" src="https://user-images.githubusercontent.com/20098064/226637287-abbb037f-72a4-4a9a-ab22-c373a1b6444c.png"> | <img width="293" alt="image" src="https://user-images.githubusercontent.com/20098064/226637459-81aa5e5e-dbb1-4f07-9005-0c6df80b3058.png"> |
-
-
-### Add style to the `Mini Cart` buttons. ([8776](https://github.com/woocommerce/woocommerce-blocks/pull/8776))
-
-1. Add the `Mini cart` block to the header template of your site.
-2. Go to the `Site Editor` and edit the `Mini cart` template part.
-3. Open the `List view` and select the `Filled Mini Cart view`.
-4. Click on the `View my cart` button and check that you can change the background and text colors of the button.
-5. Click on the `Go to checkout` button and check that you can change the background and text colors of the button.
-7. Save, go to the frontend, and check the buttons have the colors you just picked on the Site editor.
-
-### Add the ability to change the background and text colors of the Mini Cart block "Start shopping" button. ([8766](https://github.com/woocommerce/woocommerce-blocks/pull/8766))
-
-1. Add the `Mini cart` block to the header template of your site.
-2. Go to the `Site Editor` and edit the `Mini cart` template part.
-3. Open the `List view` and select the `Empty Mini Cart view`.
-4. Click on the `Start shopping` button and check that you can change the background and text colors of the button.
-5. Change both of them and save.
-6. Go to the frontend and check the button has the colors you just picked on the Site editor.
-
-### Mini-cart: Add setting to not render the block on the cart & checkout pages. ([8700](https://github.com/woocommerce/woocommerce-blocks/pull/8700))
-
-#### Site Editor
-
-1. Go to the Site Editor > Template parts and edit the header template to add the `Mini Cart` block. Save.
-2. Edit the block and make sure you see the new setting:
-
-<img width="282" alt="Screenshot 2023-03-13 at 16 27 26" src="https://user-images.githubusercontent.com/186112/224748404-6c02b9ef-2112-405b-9ab5-69abe857a03c.png">
-
-3. Make sure the default option is `Hide`.
-4. In the store, go to the Cart page and make sure the `Mini Cart` is rendered but invisible. Repeat but for the Checkout page.
-5. Go back to the Site Editor, change the `Mini Cart` setting to `Remove`, and save.
-6. In the store, go to the Cart page and make sure the `Mini Cart` markup is not rendered at all. Repeat but for the Checkout page.
-
-
-#### Post/page
-
-1. Create a new post or page.
-2. Insert the `Mini Cart`.
-3. Make sure the new `Mini Cart in cart and checkout pages` setting does not appear.
-
-
-### Ensure shipping rates do not show in the Checkout block if the "Hide shipping costs until an address is entered option is selected". ([8682](https://github.com/woocommerce/woocommerce-blocks/pull/8682))
-
-
-1. Go to `WooCommerce -> Settings -> Shipping -> Local Pickup`, enable Local Pickup and add a location.
-2. Go to the Checkout block in the Page editor, click on the Shipping Options block - in the block sidebar, enable the `Hide shipping costs until an address is entered` option.
-3. In WooCommerce -> Settings -> General change `Default customer location` to `No location by default`.
-4. In an incognito window, add an item to your cart and go to the Checkout block.
-5. Ensure no shipping rates are shown, and ensure the "Shipping" button for method selection says `calculated with an address`
-6. Enter an address (one that you have rates set up for) - as you fill in the address, be sure the rates don't populate until it's completely filled in. (address 1, city, state, country, postcode).
-7. Ensure you can change rates etc.
-8. Disable the `Hide shipping costs until an address is entered` in the Page editor and ensure the rates show as usual as soon as the country/state are entered and the rest of the address is empty. (note you should enter a country that you have rates for!).
-
-
-### Move option to hide shipping costs until an address is entered to the Checkout block. ([8680](https://github.com/woocommerce/woocommerce-blocks/pull/8680))
-
-
-1. Go to WooCommerce -> Settings -> Shipping -> Local Pickup, enable Local Pickup and add a location.
-2. Go to the Checkout block in the Page editor. Select the `Shipping Method` block
-3. See the `Hide shipping costs until an address is entered` option in the block sidebar.
-4. Toggle it and ensure it works. Remember the value you toggled it to.
-5. Select the `Shipping options` block, see the same option. Ensure the value is the same as what it was in step 4.
-6. If the option is `true` then you should see the text `Shipping options will be displayed here after entering your full shipping address.` instead of shipping options.
-7. Toggle the option and ensure the inner block changes to either shipping options or the text.
-8. Go back to the `Shipping Method` block and toggle the option there. View the `Shipping options` block while toggling and ensure it changes.
-
-
-| Before | After |
-| ------ | ----- |
-| <img width="283" alt="image" src="https://user-images.githubusercontent.com/5656702/223886774-2bcbe69f-c01f-48f7-a938-2ccbc5027b70.png"> | <img width="281" alt="image" src="https://user-images.githubusercontent.com/5656702/223886810-e2dcfe67-3a5c-4f02-8775-6ddc6bd9c441.png"> |
-
-
-### Remove certain Shipping settings from WooCommerce -> Settings -> Shipping -> Shipping Options when using the Cart or Checkout blocks, these have been moved to setting on the blocks. ([8679](https://github.com/woocommerce/woocommerce-blocks/pull/8679))
-
-1. Go to `WooCommerce -> Settings -> Advanced` - set the Cart and Checkout pages to pages containing the **shortcode** cart/checkout experience. Save.
-2. Go to `WooCommerce -> Settings -> Shipping -> Shipping Options` - observe the two options, `Hide shipping costs until an address is entered` and `Enable the shipping calculator on the cart page`.
-3. Go to `WooCommerce -> Settings -> Advanced` - set the **Cart** page to one containing the **Cart Block**. Save.
-4. Go to `WooCommerce -> Settings -> Shipping -> Shipping Options` - observe that where the two options were in step 2, only, `Hide shipping costs until an address is entered` remains. Ensure it displays correctly and looks OK.
-5. Go to `WooCommerce -> Settings -> Advanced` - set the **Checkout** page to one containing the **Checkout Block**. Save.
-6. Go to `WooCommerce -> Settings -> Shipping -> Shipping Options` - observe that where the two options were in step 2 nothing appears.
-7. Go to `WooCommerce -> Settings -> Advanced` - set the **Cart** page to one containing the **Shortcode cart**. Save.
-8. Go to `WooCommerce -> Settings -> Shipping -> Shipping Options` - observe that where the two options were in step 2 only `Enable the shipping calculator on the cart page` appears. Ensure it displays correctly.
-
-Expected results
-
-| | Shortcode Cart | Block Cart |
-|-|----------------|------------|
-| **Shortcode Checkout** | <img width="613" alt="image" src="https://user-images.githubusercontent.com/5656702/223882079-ac03e6ef-f1e9-4f7b-b173-65752866030e.png"> | <img width="582" alt="image" src="https://user-images.githubusercontent.com/5656702/223882155-b8dd6916-5213-4be9-9cae-b04e850a4d3f.png"> |
-| **Block Checkout** | <img width="579" alt="image" src="https://user-images.githubusercontent.com/5656702/223882325-87a77a3c-5409-485d-ad5d-e422273f5d66.png"> | <img width="538" alt="image" src="https://user-images.githubusercontent.com/5656702/223882267-d0c27ae2-01e7-4691-9264-7101051ff48c.png"> |
-
-### Add spacing between Mini Cart title and products list when scrolled. ([8676](https://github.com/woocommerce/woocommerce-blocks/pull/8676))
-
-
-1. With a block theme, add the Mini Cart block to the header of your site.
-2. Add many products to your cart.
-3. Click on the Mini Cart button to open the drawer.
-4. Scroll down the list of products in the Mini Cart drawer and verify there is some space between the title and product list.
-5. Go to Appearance > Editor > Template parts and edit the Mini Cart template part.
-6. Change the background color to something different.
-7. Repeat steps 3 and 4 and verify the space between the Mini Cart title and the products list honors that color.
-
-Before | After | After (with custom background color)
---- | --- | ---
-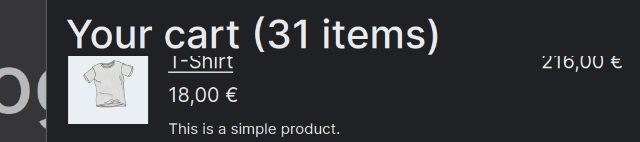 |  | 
-
-
-### Add new ExperimentalOrderLocalPickupPackages Slot/Fill. ([8636](https://github.com/woocommerce/woocommerce-blocks/pull/8636))
-
-
-1. Go to WooCommerce -> Settings -> Shipping -> Local Pickup and activate Local Pickup. Ensure you have added a couple of locations.
-2. Add an item to your cart and go to the Checkout block.
-3. Select Local Pickup and ensure the options you set up in step 1 are visible.
-
-
-### Add client side postcode validation. ([8503](https://github.com/woocommerce/woocommerce-blocks/pull/8503))
-
-1. Add a product to the Cart and go to the Checkout block page.
-2. Select United Kingdom (UK) as country.
-3. Verify that the postcode `AA9A 9AA` passes the validation.
-4. Verify that the postcode `9999 999` fails the validation.
-5. Verify that it's not possible to have spaces before the postcode, .e.g. ` AA9A 9AA`.
-6. Verify that lowercase letters, e.g. `aa9A 9aa`, are automatically converted to uppercase letters, e.g. `AA9A 9AA`.
-
-
-### Display pickup location details in order confirmations. ([8727](https://github.com/woocommerce/woocommerce-blocks/pull/8727))
-
-1. Place an order using the Checkout block, selecting Local Pickup as your shipping method.
-2. Check the order confirmation page shows pickup details.
-3. Confirm the order confirmation page hides the "shipping address".
-4. Check the order email confirmation shows the same pickup details.
-
-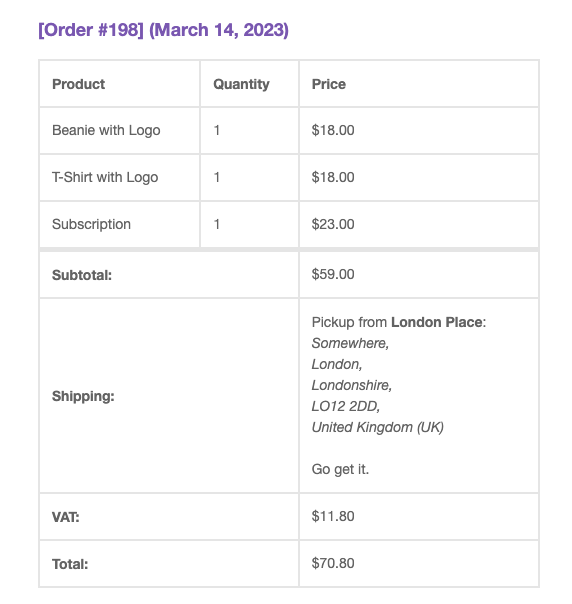
-
-### Local Pickup: Merge country and state into same field in location modal. ([8408](https://github.com/woocommerce/woocommerce-blocks/pull/8408))
-
-
-1. `Enable local pickup` in `WooCommerce -> Settings -> Shipping -> Local pickup -> General`.
-2. Under `Pickup locations`, click on `Add pickup location`. The `Pickup location` modal should open
-3. Choose a country with a state. Ensure it's displayed in one field
-4. Fill in the other fields of the modal form, click on `done`, then save changes
-5. Go to your store, add a product to the cart, then go to the Checkout Block page
-6. Under the `Shipping method` section, select `Local Pickup`
-7. Ensure the correct country and state you previously selected are correctly showing under `Pickup options`
-8. Go back to the local pickup settings from step 1. Follow the same steps from 2 to 7, but in step 3, choose a country without a state (e.g., Cameroon) and ensure that the `State` text field is displayed. Fill in the form and continue with the rest of the instructions.
-
-| Before | After |
-| ------ | ----- |
-| <img width="772" alt="image" src="https://user-images.githubusercontent.com/14235870/218823036-fe2570cf-fefe-4fc1-be56-4ea628f1bdd5.png"> | <img width="791" alt="image" src="https://user-images.githubusercontent.com/14235870/218822843-84e82d4c-835d-4076-9125-ec74d1ea9817.png"> |
-
-
-### Enable users to migrate to the blockified Single Product template. ([8324](https://github.com/woocommerce/woocommerce-blocks/pull/8324))
-
-1. Enter the `Single Product` template.
-2. Check that the placeholder description says "This block serves as a placeholder for your WooCommerce Single Product Block. We recommend upgrading to the Single Products block for more features to edit your products visually. Don't worry, you can always revert back.".
-3. Click the `Upgrade to Blockified Single Product Template` button.
-4. See new templates work in the Site Editor and on the front end.
-
-| Before | After |
-| ------ | ----- |
-| <img width="1043" alt="Screenshot 2023-01-30 at 12 41 58" src="https://user-images.githubusercontent.com/186112/215467611-b77d7564-920f-4c05-87af-32e9ed5e6a9b.png"> |<video src=https://user-images.githubusercontent.com/4463174/227149851-235b6685-0955-48e8-91d5-37f2ad7f9b87.mp4/>|
-
-
-### Fix border styles not visible in the editor in Featured Product and Featured Category blocks. ([8838](https://github.com/woocommerce/woocommerce-blocks/pull/8838))
-
-1. Add a Featured Item (Featured Category or Featured Product) block to a page or post.
-2. Select the border controls and add a border style. Add a color and give it some width.
-3. You should see the border you set dynamically display on the featured item.
-4. Now click on the `Unlink` button on the border controls and try setting different values for color and width for each of the border sides (top,right,bottom,left).
-5. Ensure this is working by visually seeing the changes to the featured item.
-6. Save and make sure this is also displaying correctly on the frontend.
-7. Test both `Featured Category` and `Featured Product` blocks.
-
-### Add decoding to product names titles that are in HTML entities. ([8824](https://github.com/woocommerce/woocommerce-blocks/pull/8824))
-
-1. Create a product with special characters in its name (ie: Hat & sticker or Shirt - Green).
-2. In the Page editor, add a Featured Product, Hand-Picked Products or Reviews by Product block.
-3. Notice in the selector the names of the products with special characters looks correct and not in the HTML entity form.
-
-
-### Fix react 18 error in the Site editor when using cart/checkout blocks. ([8820](https://github.com/woocommerce/woocommerce-blocks/pull/8820))
-
-- Install and activate WordPress Beta Tester plugin.
-- Go to wp-admin -> Tools -> Beta testing.
-- Select `Bleeding edge` radio option under `Select the update channel you would like this website to use`.
-- Select ` Release Candidates Only` radio option under `Select one of the stream options below`.
-- Save the changes.
-- Go to wp-admin -> Dashboard -> Updates.
-- Update to WP 6.2 latest release candidate.
-- Install [WooCommerce 7.4.1](https://href.li/?https://github.com/woocommerce/woocommerce/releases/tag/7.4.1)
-- Activate any FSE theme.
-- Go to Appearance -> Editor
-- Add Cart block to the template.
-- Open the browser console and select the Cart block on the Site editor.
-
-### Filter by Stock and Filter by Rating: Fix the potential endless redirection loop when used on a search results page. ([8784](https://github.com/woocommerce/woocommerce-blocks/pull/8784))
-
-1. Enable TT1 theme
-2. Go to Appearance -> Widgets
-3. Add there Filter by Stock, Filter by Rating, Active Filters and Product Search blocks
-4. Save and go to your store's shop
-5. Your blocks should be available in the footer
-6. Input in the search term: `'` and then some other random terms including letters, numbers, white space, special characters
-7. **Expected:** there's no endless redirections
-8. Click on some filters to Filter by Stock and Filter by Rating and confirm there's no redirection loop
-
-
-### Fix "Save changes" default behavior bug in the Firefox browser. ([8754](https://github.com/woocommerce/woocommerce-blocks/pull/8754))
-
-1. Go to `WooCommerce/Shipping/Local pickup`
-2. Click on the `Save changes` button. Ensure you are not redirected to another page, and the notice `Local Pickup settings have been saved.` is displayed
-<img width="1018" alt="image" src="https://user-images.githubusercontent.com/14235870/225263783-6455a4c6-3200-4e93-8e92-74bdf2a83952.png">
-
-3. Make some changes (e.g., enable/disable local pickup, add/edit a pickup location, etc.)
-4. Click on the `Save changes` button. Ensure you have the same results in step 2
-5. Refresh the page. Ensure your changes are being saved
-
-
-
-### Add validation error to prevent checkout when there is no shipping method available. ([8384](https://github.com/woocommerce/woocommerce-blocks/pull/8384))
-
-1. Enable local pickup with pickup price.
-2. Remove the shipping methods from the WC settings.
-3. Go to the Checkout block and select the shipping option.
-4. Confirm error notice is being displayed at the top.
-5. Confirm you're not able to place the order.
-6. Select local pickup.
-7. Confirm you're able to place an order
-
-| Before | After |
-| ------ | ----- |
-|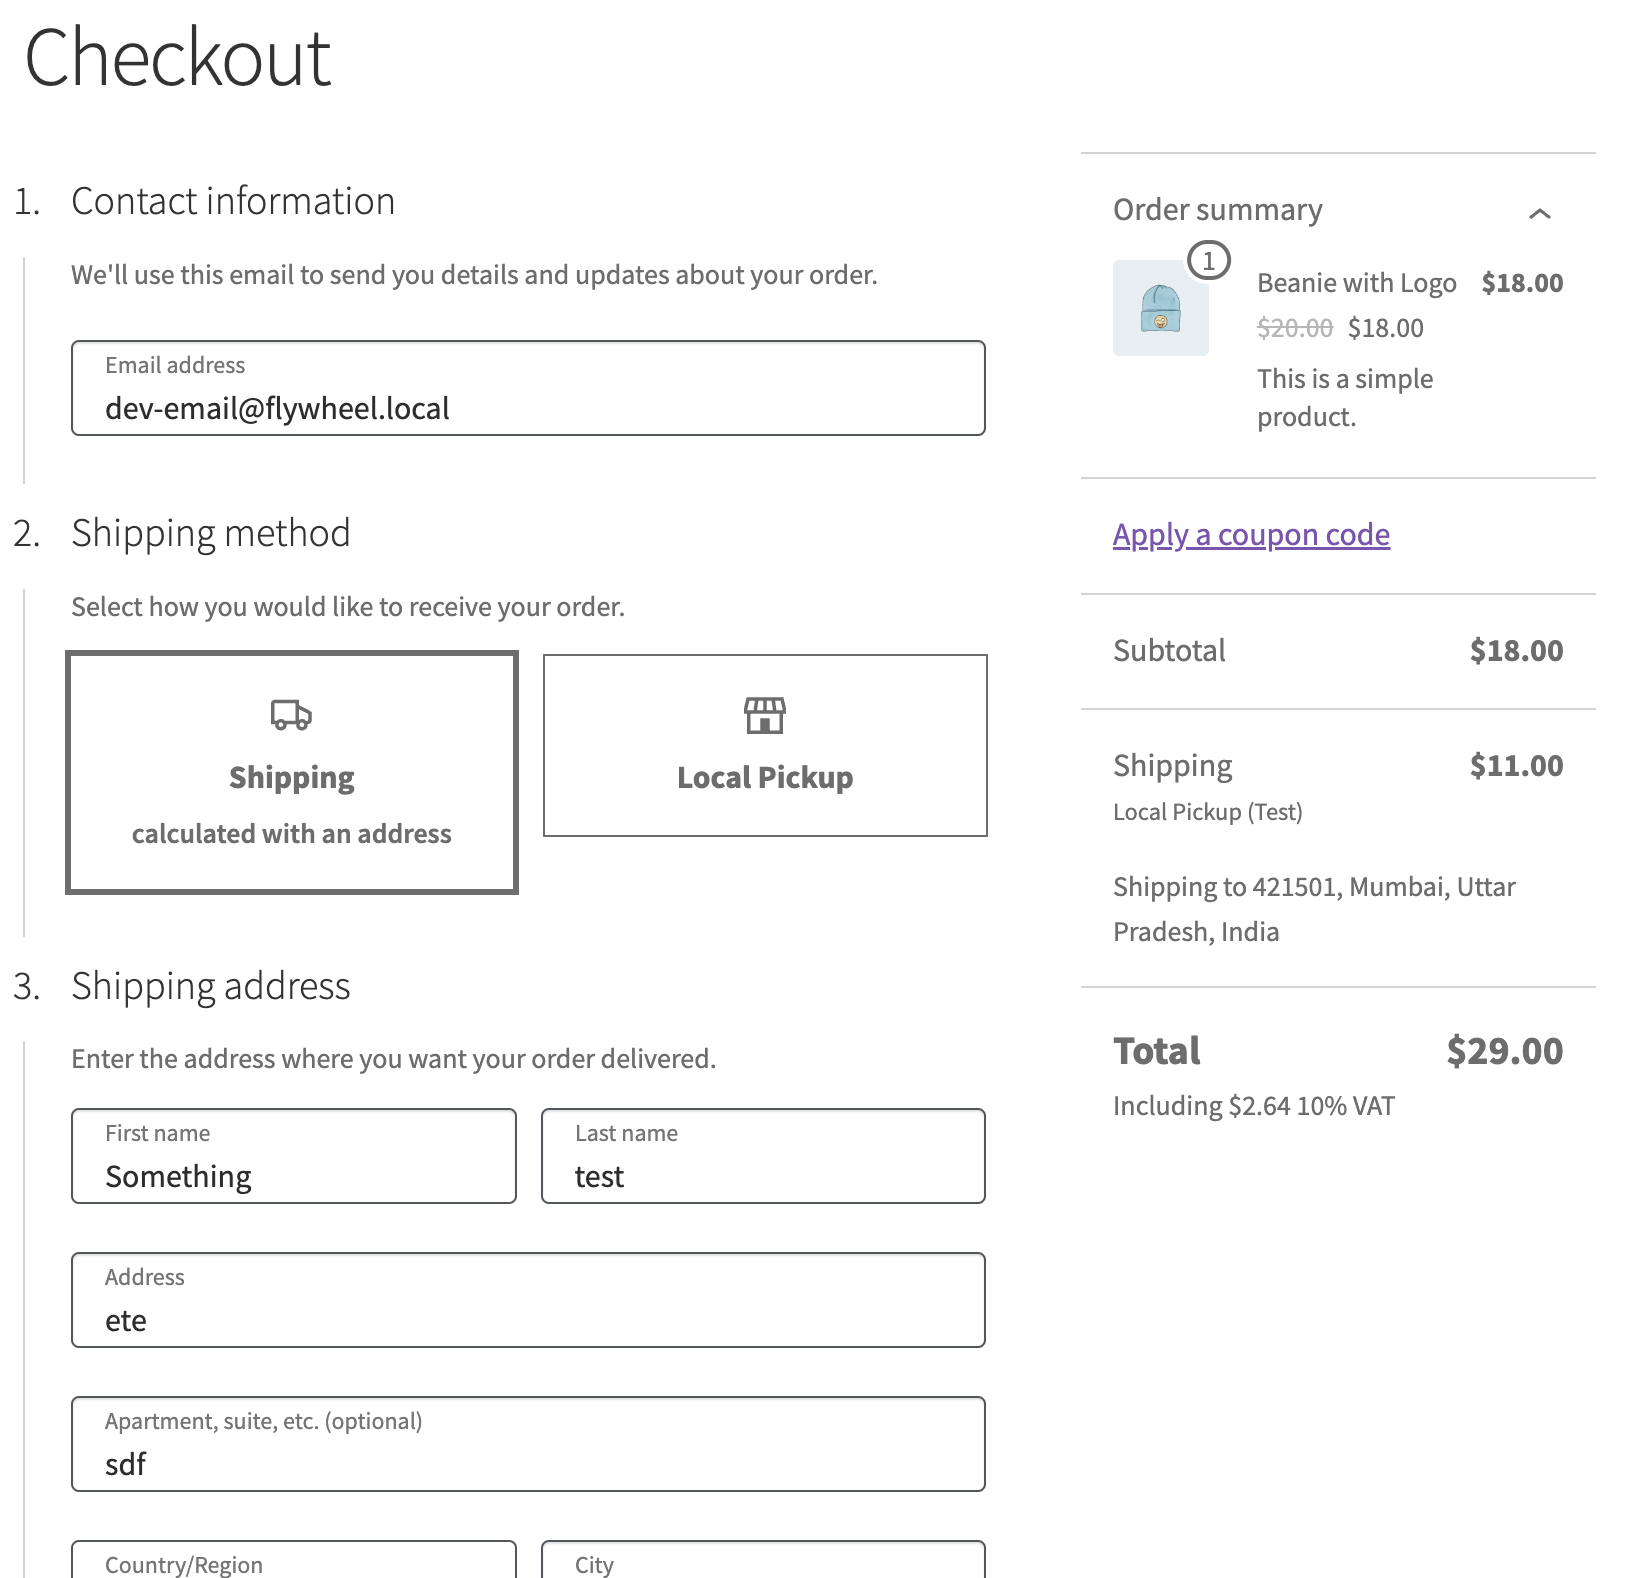|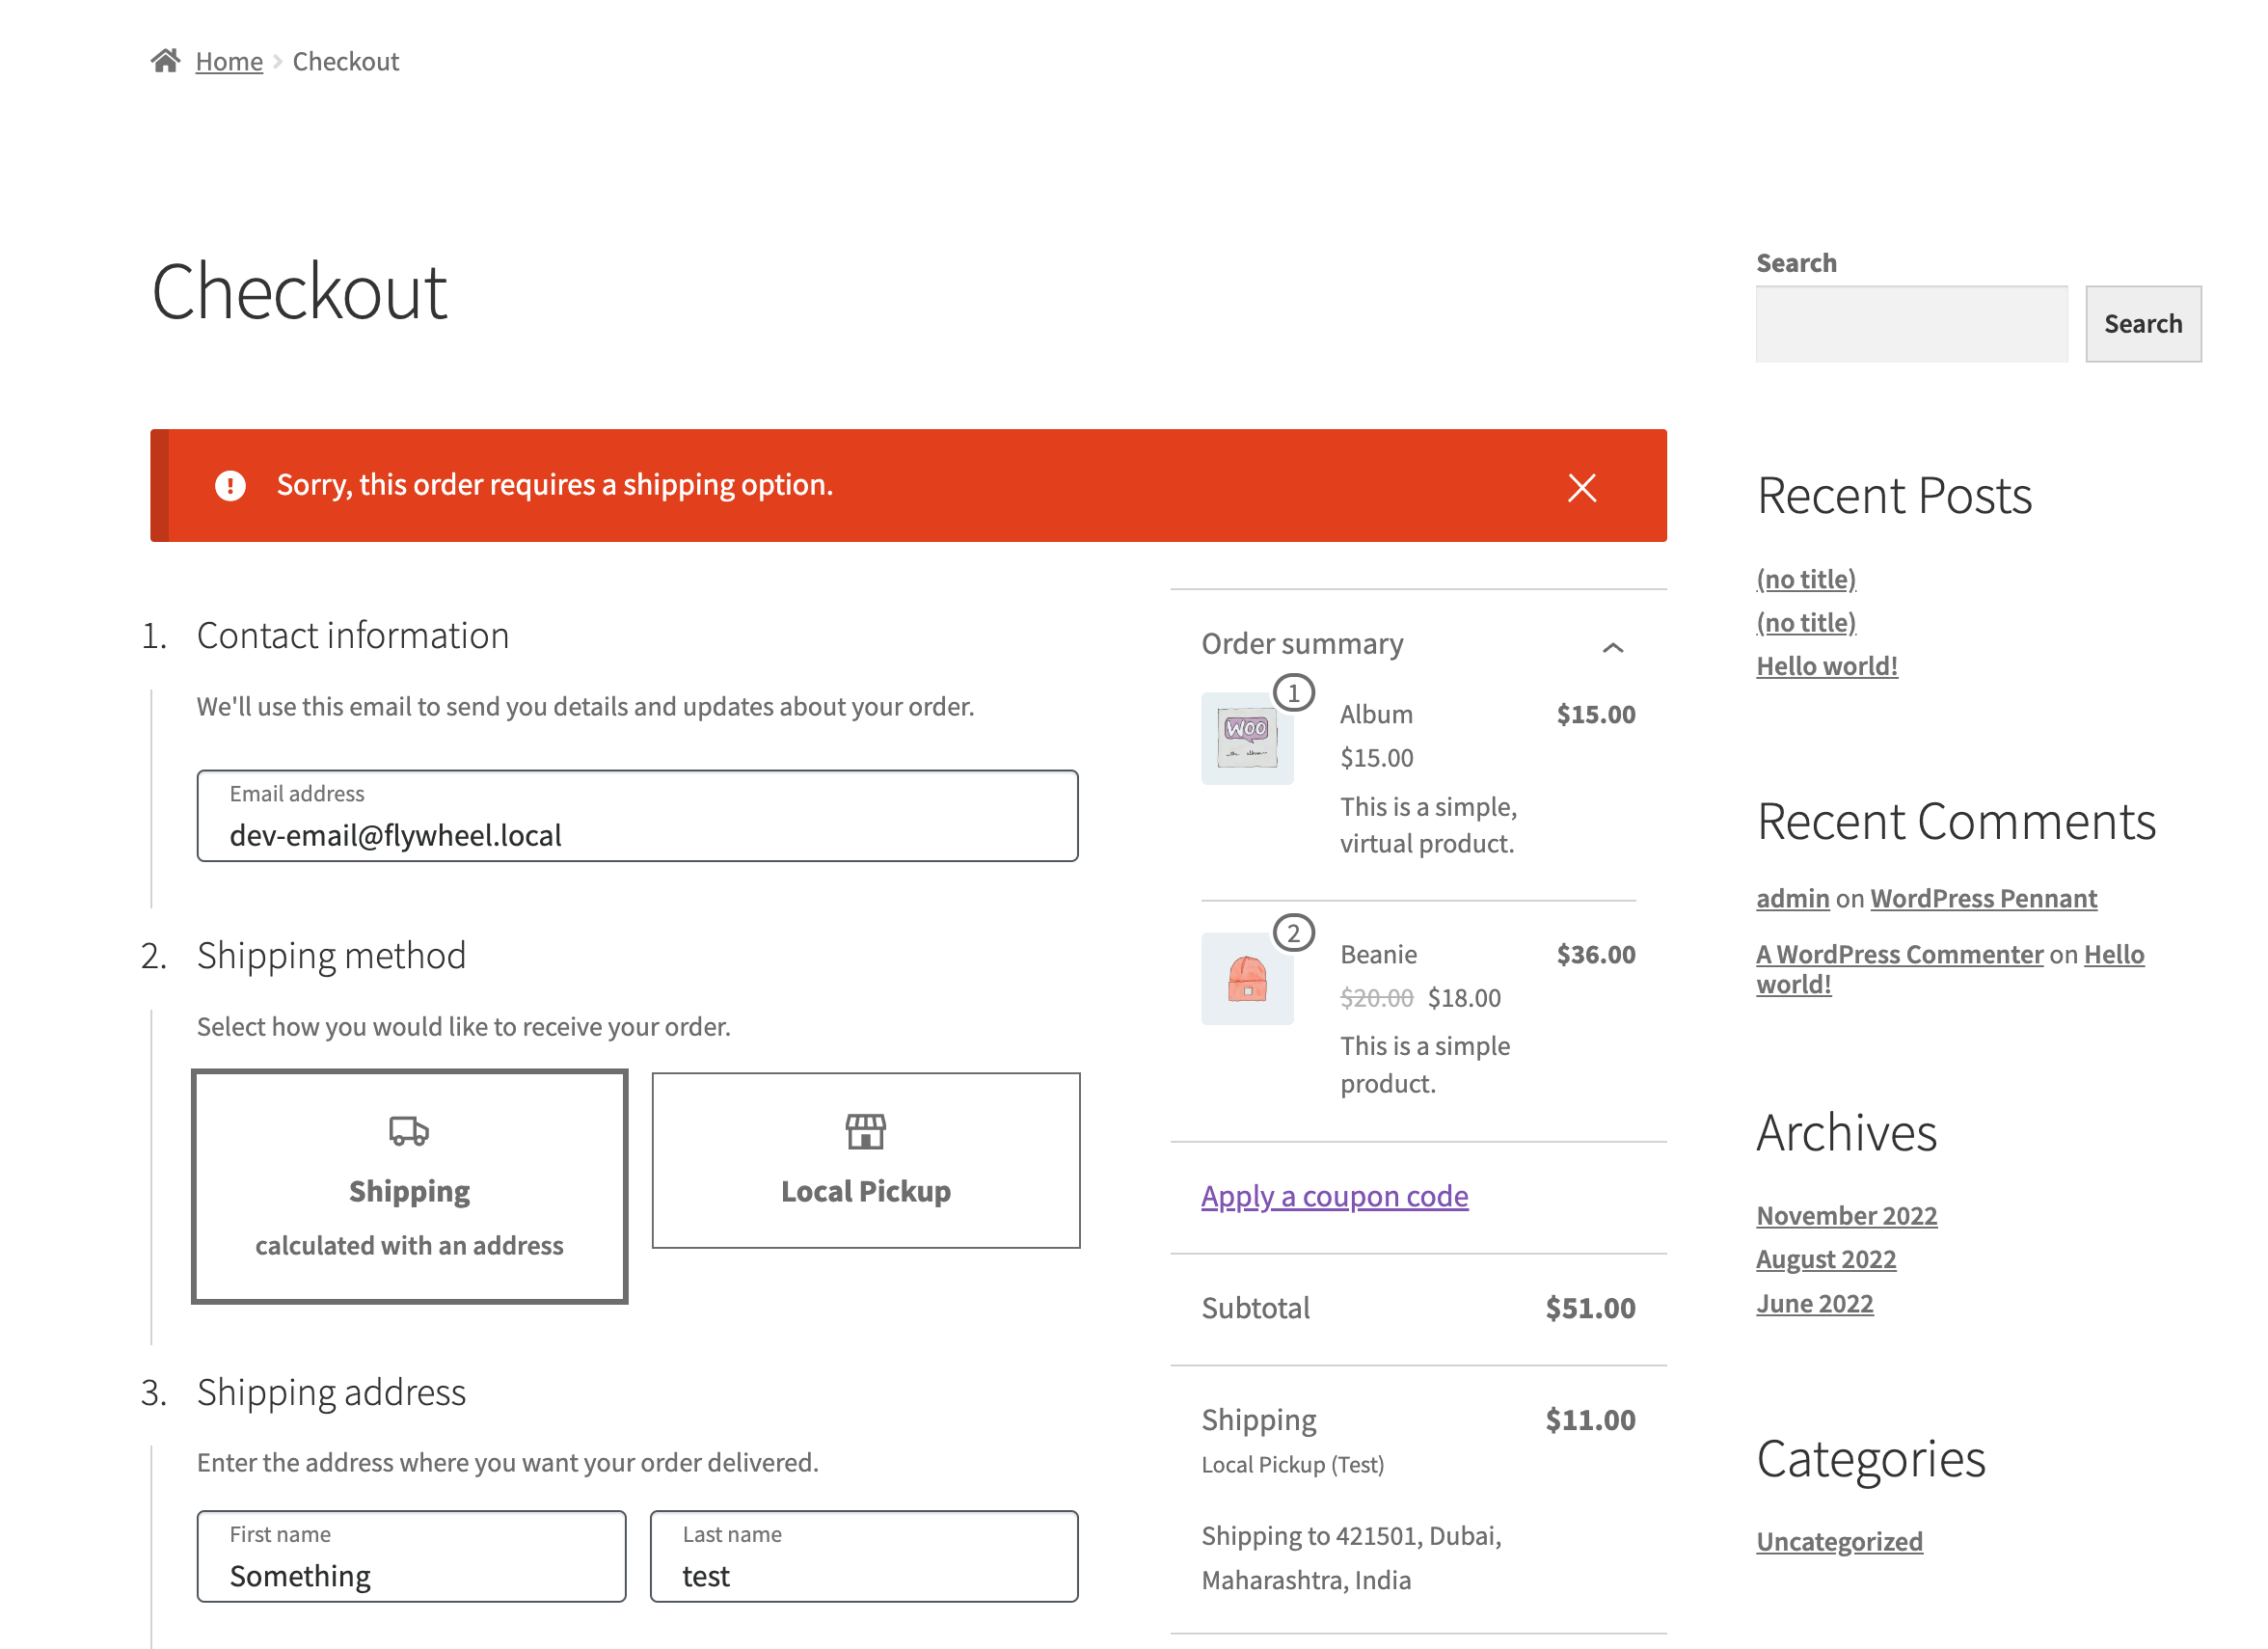|
-
-
-## Feature plugin
-
-### Add Fill & Outline styles, width settings & new typography controls for Product(Add to cart) button block. ([8781](https://github.com/woocommerce/woocommerce-blocks/pull/8781))
-
-- Add `Products block` to a page/post.
-- Select `Add to cart` inner block.
-- In the sidebar, confirm newly added controls work as expected:
- - Styles: Default & Outline ( Feature plugin )
- - Width Settings ( Feature Plugin + WooCommerce Core )
- - Typography controls ( Feature plugin )
-- Confirm `Add to cart` works for cross-sells as well.
-
-<img width="277" alt="image" src="https://user-images.githubusercontent.com/16707866/226090467-d0f7457f-fd56-4dba-a5bc-607ae179f9e5.png">
diff --git a/plugins/woocommerce/client/blocks/docs/internal-developers/testing/releases/README.md b/plugins/woocommerce/client/blocks/docs/internal-developers/testing/releases/README.md
deleted file mode 100644
index 1701ac7c708..00000000000
--- a/plugins/woocommerce/client/blocks/docs/internal-developers/testing/releases/README.md
+++ /dev/null
@@ -1,201 +0,0 @@
-# Releases
-
-Every release includes specific testing instructions for new features and bug fixes (if applicable). This is a list of the available release testing instruction docs:
-
-- [2.6.0](./260.md)
- - [2.6.1](./261.md)
-- [2.7.0](./270.md)
- - [2.7.1](./271.md)
-- [2.8.0](./280.md)
-- [2.9.0](./290.md)
-- [3.0.0](./300.md)
-- [3.1.0](./310.md)
-- [3.2.0](./320.md)
-- [3.3.0](./330.md)
-- [3.4.0](./340.md)
-- [3.5.0](./350.md)
-- [3.6.0](./360.md)
-- [3.7.0](./370.md)
- - [3.7.1](./371.md)
-- [3.8.0](./380.md)
-- [3.9.0](./390.md)
-- [4.0.0](./400.md)
-- [4.1.0](./410.md)
-- [4.2.0](./420.md)
-- [4.3.0](./430.md)
-- [4.4.0](./440.md)
-- [4.5.0](./450.md)
- - [4.5.2](./452.md)
-- [4.6.0](./460.md)
-- [4.7.0](./470.md)
-- [4.8.0](./480.md)
-- [4.9.0](./490.md)
- - [4.9.1](./491.md)
-- [5.0.0](./500.md)
-- [5.1.0](./510.md)
-- [5.2.0](./520.md)
-- [5.3.0](./530.md)
- - [5.3.1](./531.md)
- - [5.3.2](./532.md)
-- [5.4.0](./540.md)
-- [5.5.0](./550.md)
-- [5.6.0](./560.md)
-- [5.7.0](./570.md)
- - [5.7.1](./571.md)
- - [5.7.2](./572.md)
-- [5.8.0](./580.md)
-- [5.9.0](./590.md)
- - [5.9.1](./591.md)
-- [6.0.0](./600.md)
-- [6.1.0](./610.md)
-- [6.2.0](./620.md)
-- [6.3.0](./630.md)
- - [6.3.1](./631.md)
- - [6.3.2](./632.md)
- - [6.3.3](./633.md)
-- [6.4.0](./640.md)
-- [6.5.0](./650.md)
-- [6.6.0](./660.md)
-- [6.7.0](./670.md)
- - [6.7.1](./671.md)
- - [6.7.2](./672.md)
- - [6.7.3](./673.md)
-- [6.8.0](./680.md)
-- [6.9.0](./690.md)
-- [7.0.0](./700.md)
-- [7.1.0](./710.md)
-- [7.2.0](./720.md)
- - [7.2.1](./721.md)
- - [7.2.2](./722.md)
-- [7.3.0](./730.md)
-- [7.4.0](./740.md)
- - [7.4.1](./741.md)
- - [7.4.2](./742.md)
-- [7.5.0](./750.md)
-- [7.6.0](./760.md)
- - [7.6.1](./761.md)
- - [7.6.2](./762.md)
-- [7.7.0](./770.md)
-- [7.8.0](./780.md)
- - [7.8.1](./781.md)
- - [7.8.2](./782.md)
- - [7.8.3](./783.md)
-- [7.9.0](./790.md)
-- [8.0.0](./800.md)
-- [8.1.0](./810.md)
-- [8.2.0](./820.md)
- - [8.2.1](./821.md)
-- [8.3.0](./830.md)
- - [8.3.1](./831.md)
-- [8.4.0](./840.md)
-- [8.5.0](./850.md)
- - [8.5.1](./851.md)
- - [8.5.2](./852.md)
-- [8.6.0](./860.md)
-- [8.7.0](./870.md)
- - [8.7.1](./871.md)
- - [8.7.2](./872.md)
- - [8.7.3](./873.md)
- - [8.7.4](./874.md)
- - [8.7.5](./875.md)
- - [8.7.6](./876.md)
-- [8.8.0](./880.md)
- - [8.8.1](./881.md)
- - [8.8.2](./882.md)
-- [8.9.0](./890.md)
- - [8.9.1](./891.md)
- - [8.9.2](./892.md)
- - [8.9.3](./893.md)
- - [8.9.4](./894.md)
-- [9.0.0](./900.md)
-- [9.1.0](./910.md)
- - [9.1.1](./911.md)
- - [9.1.2](./912.md)
- - [9.1.3](./913.md)
-- [9.2.0](./920.md)
-- [9.3.0](./930.md)
-- [9.4.0](./940.md)
- - [9.4.1](./941.md)
- - [9.4.2](./942.md)
- - [9.4.3](./943.md)
- - [9.4.4](./944.md)
-- [9.5.0](./950.md)
-- [9.6.0](./960.md)
- - [9.6.1](./961.md)
- - [9.6.2](./962.md)
- - [9.6.3](./963.md)
- - [9.6.4](./964.md)
- - [9.6.5](./965.md)
- - [9.6.6](./965.md)
-- [9.7.0](./970.md)
- - [9.7.1](./971.md)
- - [9.7.2](./972.md)
-- [9.8.0](./980.md)
- - [9.8.1](./981.md)
- - [9.8.2](./982.md)
- - [9.8.3](./983.md)
- - [9.8.4](./984.md)
- - [9.8.5](./985.md)
-- [9.9.0](./990.md)
-- [10.0.0](./1000.md)
- - [10.0.1](./1001.md)
- - [10.0.2](./1002.md)
- - [10.0.3](./1003.md)
- - [10.0.4](./1004.md)
- - [10.0.5](./1005.md)
- - [10.0.6](./1006.md)
-- [10.1.0](./1010.md)
-- [10.2.0](./1020.md)
- - [10.2.1](./1021.md)
- - [10.2.2](./1022.md)
- - [10.2.3](./1023.md)
- - [10.2.4](./1024.md)
-- [10.3.0](./1030.md)
-- [10.4.0](./1040.md)
- - [10.4.2](./1042.md)
- - [10.4.3](./1043.md)
- - [10.4.4](./1044.md)
- - [10.4.5](./1045.md)
- - [10.4.6](./1046.md)
-- [10.5.0](./1050.md)
-- [10.6.0](./1060.md)
- - [10.6.1](./1061.md)
- - [10.6.2](./1062.md)
- - [10.6.3](./1063.md)
- - [10.6.4](./1064.md)
- - [10.6.5](./1065.md)
- - [10.6.6](./1066.md)
-- [10.7.0](./1070.md)
-- [10.8.0](./1080.md)
- - [10.8.1](./1081.md)
- - [10.8.2](./1082.md)
- - [10.8.3](./1083.md)
-- [10.9.0](./1090.md)
- - [10.9.1](./1091.md)
- - [10.9.2](./1092.md)
- - [10.9.3](./1093.md)
-- [11.0.0](./1100.md)
-- [11.1.0](./1110.md)
- - [11.1.1](./1111.md)
- - [11.1.2](./1112.md)
- - [11.1.3](./1113.md)
-- [11.2.0](./1120.md)
-- [11.3.0](./1130.md)
- - [11.3.1](./1131.md)
-- [11.4.0](./1140.md)
- - [11.4.1](./1141.md)
- - [11.4.2](./1142.md)
- - [11.4.3](./1143.md)
- - [11.4.4](./1144.md)
- - [11.4.5](./1145.md)
- - [11.4.6](./1146.md)
- - [11.4.7](./1147.md)
- - [11.4.8](./1148.md)
- - [11.4.9](./1149.md)
-- [11.5.0](./1150.md)
- - [11.5.1](./1151.md)
- - [11.5.4](./1154.md)
-- [11.6.0](./1160.md)
- - [11.6.1](./1161.md)
- - [11.6.2](./1162.md)
-- [11.7.0](./1170.md)